
7 Design Tips for Creating Handmade Cards That Inspire Curiosity, Smiles & Lasting Memories
“The best cards for children aren’t just beautiful—they invite little hands to explore.”
Christmas cards for kids are different from the cards we create for adults.
Children don’t just admire handmade cards—they explore them. They touch them, spin them, and discover every little surprise.

Adults often notice the techniques, appreciate the color palette, and admire the tiny details that make a card special.
Children notice something entirely different.
They touch.
They point.
They laugh.
They spin.
They discover.
Ever since my granddaughter Jackie arrived, I’ve discovered that creating cards for children has changed the way I think about cardmaking.
Instead of asking myself,
“Is this beautiful?”
I now find myself asking something much more interesting…
“Will this make a child curious?”
That one question has completely changed the way I design children’s cards.
A Card They’ll Remember
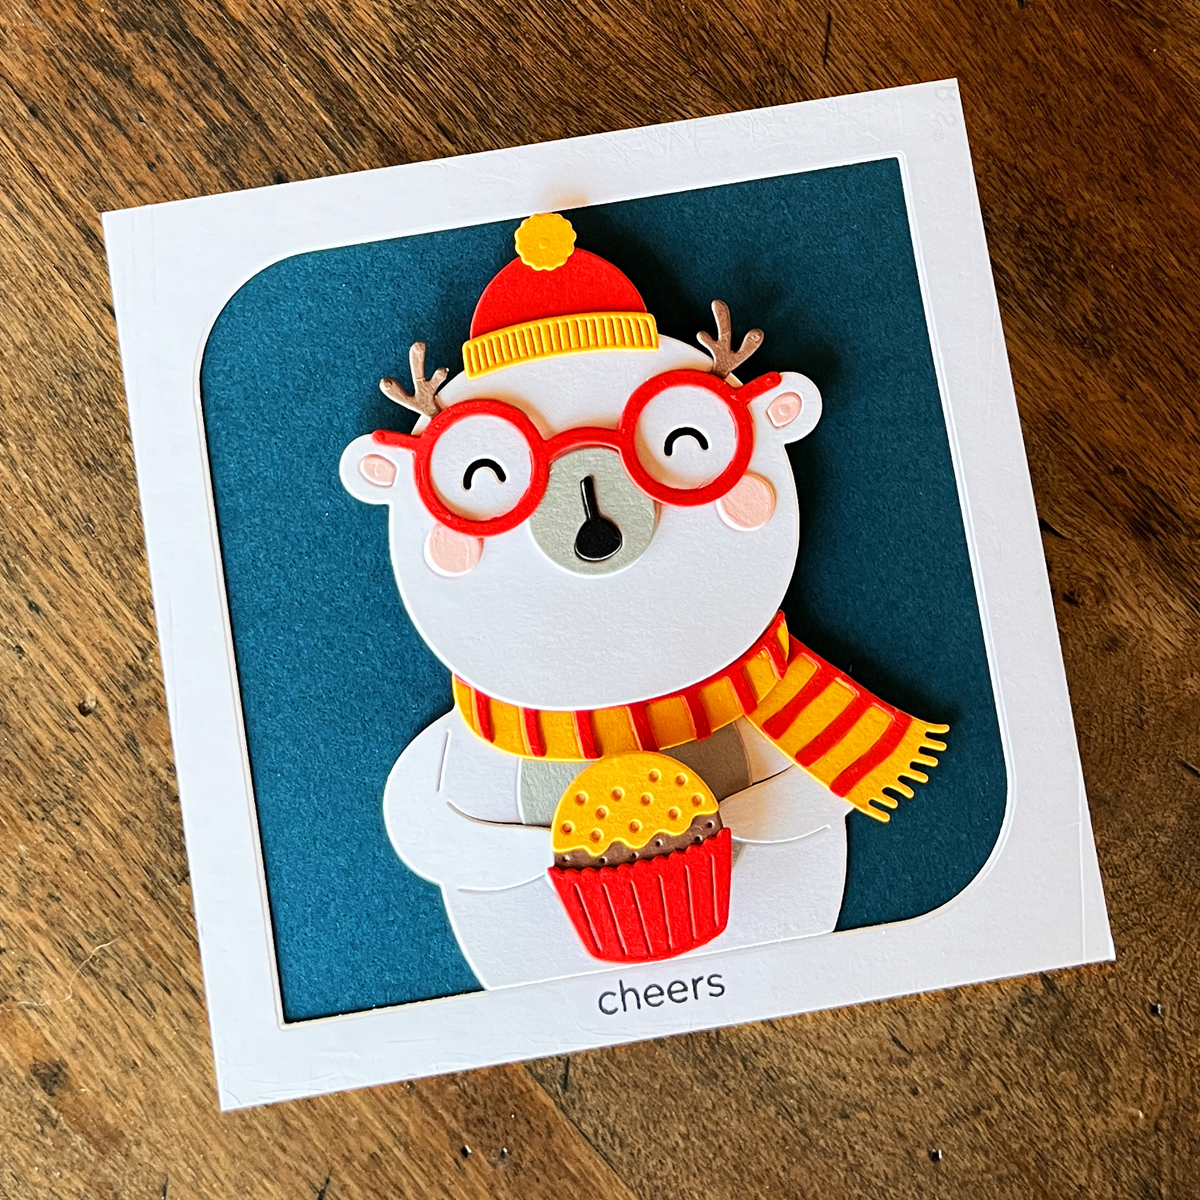
Today’s project, created with the Spectacular Christmas Collection, became the perfect example. It combines an adorable polar bear with one delightful interactive surprise that practically invites little fingers to play.
But this article is really about something bigger.
It’s about creating handmade cards that children will remember long after Christmas morning.
You might also enjoy my Halloween Card for Kids and longtime favorite Peeking Polar Bear card.

Designing Handmade Cards That Delight Children
🏷️ Card for Kids
What You’ll Learn
In today’s workshop, we’ll explore:
- How to design cards that children naturally want to interact with
- Seven design ideas that make children’s cards more memorable
- Why simple interactive elements create lasting impressions
- My favorite color strategy for kids’ cards
- How I created today’s spinner card
- Additional ideas for using the Spectacular Christmas Collection

Design for Curiosity
One of the biggest lessons I’ve learned over the years is this:
Adults admire. Children explore.
Adults appreciate craftsmanship.
Children are naturally curious.
They want to discover what moves.
What spins.
What surprises them.
When I’m designing for children, I try to include one delightful surprise that transforms the card from something they simply look at into something they experience.
That surprise doesn’t have to be elaborate.
Sometimes it’s as simple as a tiny spinning cupcake.
Those little discoveries are often what children remember long after the card is opened.

Why Christmas Cards for Kids Are Different
Designing for children isn’t simply about choosing cute images.
It’s about designing an experience.
Children naturally notice:
- Friendly characters
- Animals
- Bright contrast
- Movement
- Texture
- Simple stories
- Interactive surprises
Adults often appreciate intricate techniques.
Children appreciate discovery.
That’s why interactive cards have such lasting appeal. They invite children to explore while creating joyful little moments they’ll remember.
As cardmakers, we’re creating much more than paper and ink.
We’re creating experiences.
1. Start with a Character They’ll Love
My 7 Design Tips for Creating Cards Kids Will Treasure
Characters are often the heart of children’s cards.
Animals are especially wonderful because they connect with children of every age.
Today’s cheerful polar bear immediately establishes the personality of the card. He’s friendly, playful, and ready to celebrate.
Whether you choose a bear, puppy, penguin, bunny, dinosaur, or snowman, begin with a character that makes children smile.
The Takeaway: Great children’s cards almost always begin with a memorable character.
2. Give Them Something to Discover
One of the easiest ways to create a memorable card is to include one interactive element.
Today’s polar bear is happily holding a cupcake that spins with the touch of a finger.
Originally, I considered making the entire polar bear spin, but the image was simply too large. Instead, I attached only the cupcake to the spinner mechanism. The smaller element spins effortlessly and creates one delightful surprise children immediately want to try again.
Sometimes simplifying an idea actually creates a stronger design.
See It Spin!
Sometimes a quick video explains a technique better than a dozen photographs. Tap the cupcake and watch how smoothly it spins.
💡 Design Insight
Interactive cards don’t have to be complicated.
One thoughtfully placed moving element often creates more delight than an elaborate mechanism with lots of moving parts.
Simple almost always wins.
3. Tell One Simple Story
One of the reasons I enjoy scene cards so much is that they quietly tell a story.
Children don’t need complicated scenes filled with dozens of elements.
One happy moment is enough.
Today’s card tells a wonderfully simple story.
A cheerful polar bear proudly holds a cupcake that’s almost too exciting to sit still.
That tiny story invites children to imagine what happens next.
Simple storytelling leaves room for imagination.
That’s part of the magic.
The Takeaway: A single joyful moment often tells a stronger story than a crowded scene.
4. Let Color Guide the Eye
When designing for children, I like bold contrast.
For today’s project, I intentionally kept the palette simple.
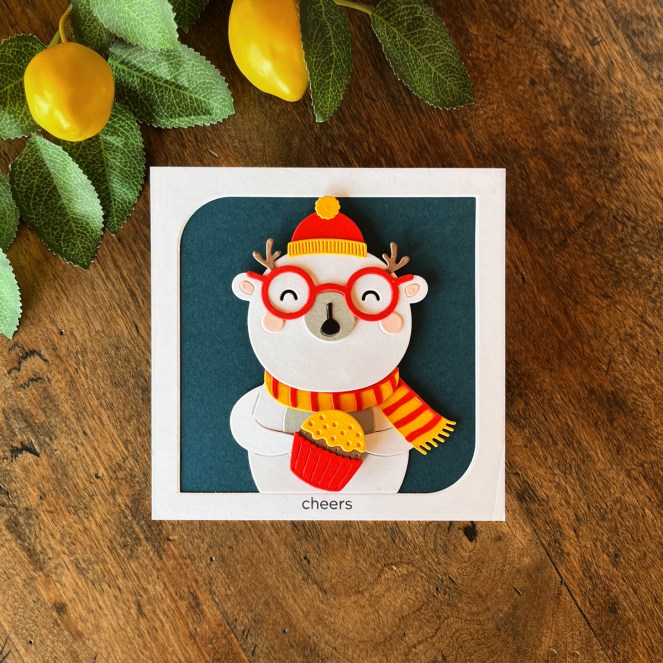
The dramatic Oceanside ColorWheel Cardstock background immediately draws attention to the crisp white polar bear.
Then I added cheerful pops of red and yellow that naturally guide the eye toward the playful details—and of course, the spinning cupcake.
The result feels energetic without becoming overwhelming.
🎨 Color Thought
One of my favorite design strategies is using three colors plus neutrals.
The dramatic Oceanside background creates beautiful contrast against the white polar bear, while the festive pops of red and yellow naturally guide your eye to the interactive elements.
Limiting the palette keeps the design feeling calm—not chaotic—allowing the story to become the star.
5. Less Clutter Creates More Impact
One of the hardest lessons for many cardmakers—including me—is knowing when to stop adding.
Children don’t need cards filled with dozens of embellishments.
They respond to clear focal points and simple stories.
For today’s design, I intentionally kept the background clean so the polar bear and spinning cupcake could become the stars.
Every layer has a purpose.
Nothing competes for attention.
Sometimes removing one embellishment makes the entire card stronger.
The Takeaway: Add layers that support your story—not distractions that compete with it.
6. Personalize the Experience
One of the greatest advantages of handmade cards is how easily they become personal.
With just a few small changes, today’s design could celebrate almost any child.
Try personalizing your card with:
- Their favorite colors
- Their favorite animal
- Their name or age
- A different treat instead of the cupcake
- A special sentiment just for them
Those little details tell the recipient,
“I made this just for you.”
And that’s one of the greatest gifts a handmade card can give.
7. Leave Them Smiling
When someone remembers your card months from now, they probably won’t remember how many dies you used.
They’ll remember how the card made them feel.
Children especially remember moments of surprise.
A spinning cupcake.
A funny character.
A bright pop of color.
One delightful little detail.
If today’s card makes a child smile before they’ve even read the sentiment, I consider it a success.
The Takeaway: Design for joy first. Everything else simply supports that goal.

Today’s Project
Today’s spinner card from the Spellbinders Spectacular Christmas Collection became the perfect example of everything we’ve talked about so far.
Rather than creating an elaborate winter scene, I intentionally kept the design clean and focused so the adorable polar bear and spinning cupcake could become the stars.
One of my favorite finishing touches is the thin white frame created with the Hero Arts Rounded Jewel Infinity Frame Dies.
It quietly separates the dramatic Oceanside background from the focal image, giving your eye a place to rest before naturally moving toward the bear.
Small details like this often make a surprisingly big difference.
💡 Design Insight
Sometimes framing your focal point is just as important as creating it.
That thin white border adds breathing room and makes the entire design feel more polished.
How I Created Today’s Card
The assembly itself came together surprisingly quickly.
Step 1 – Create the Background
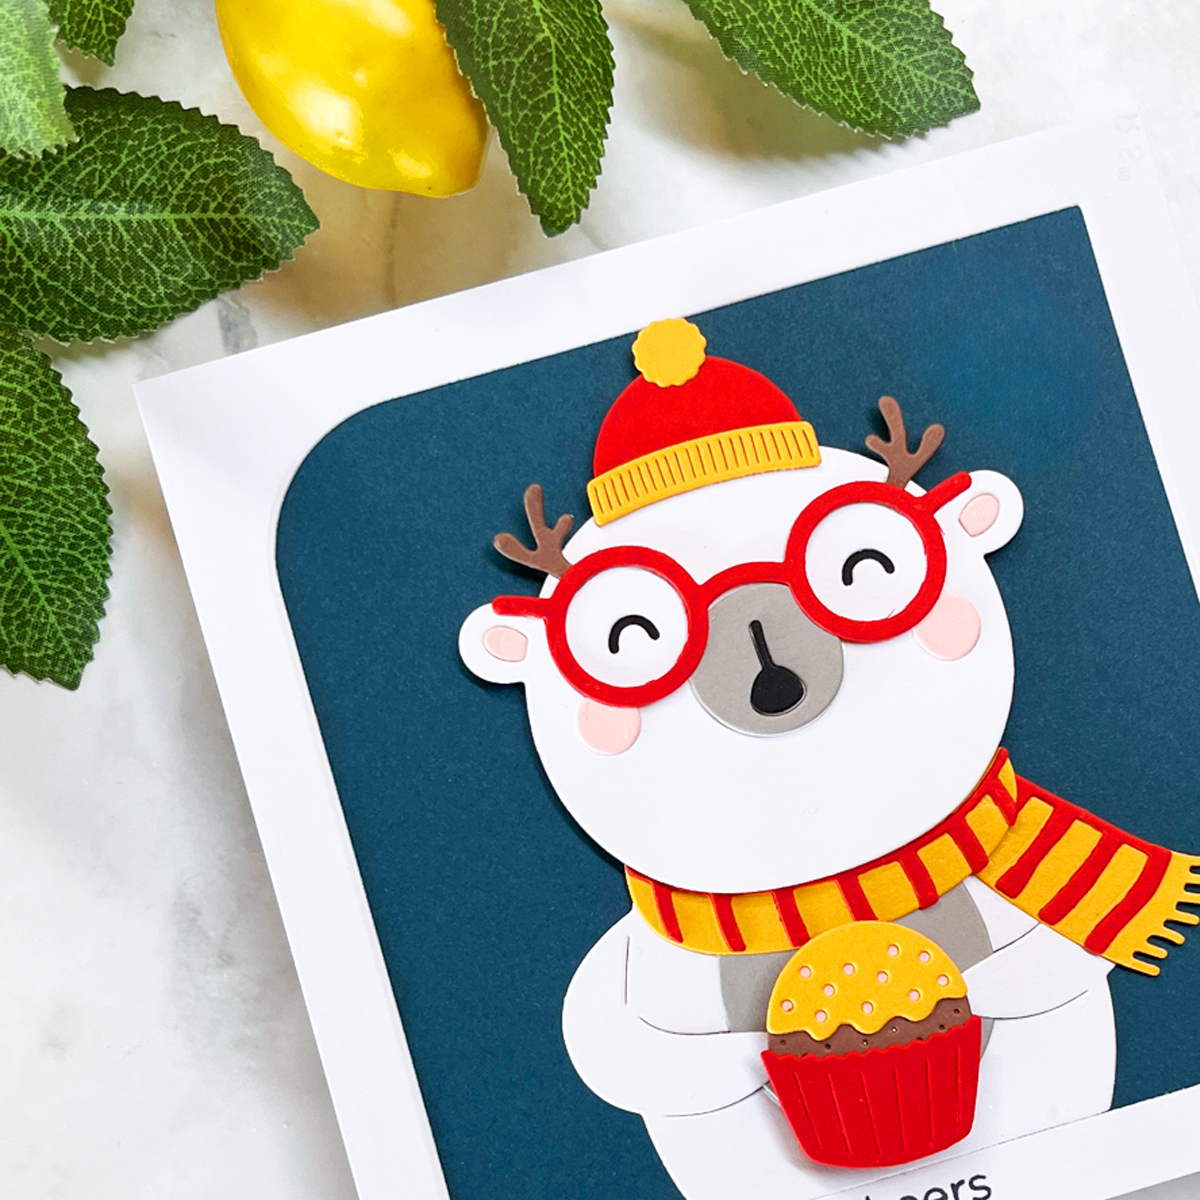
I began with an Oceanside ColorWheel Cardstock card panel and added the white frame.
The bold blue immediately established a winter feel while providing beautiful contrast against the white bear.
Step 2 – Assemble the Polar Bear
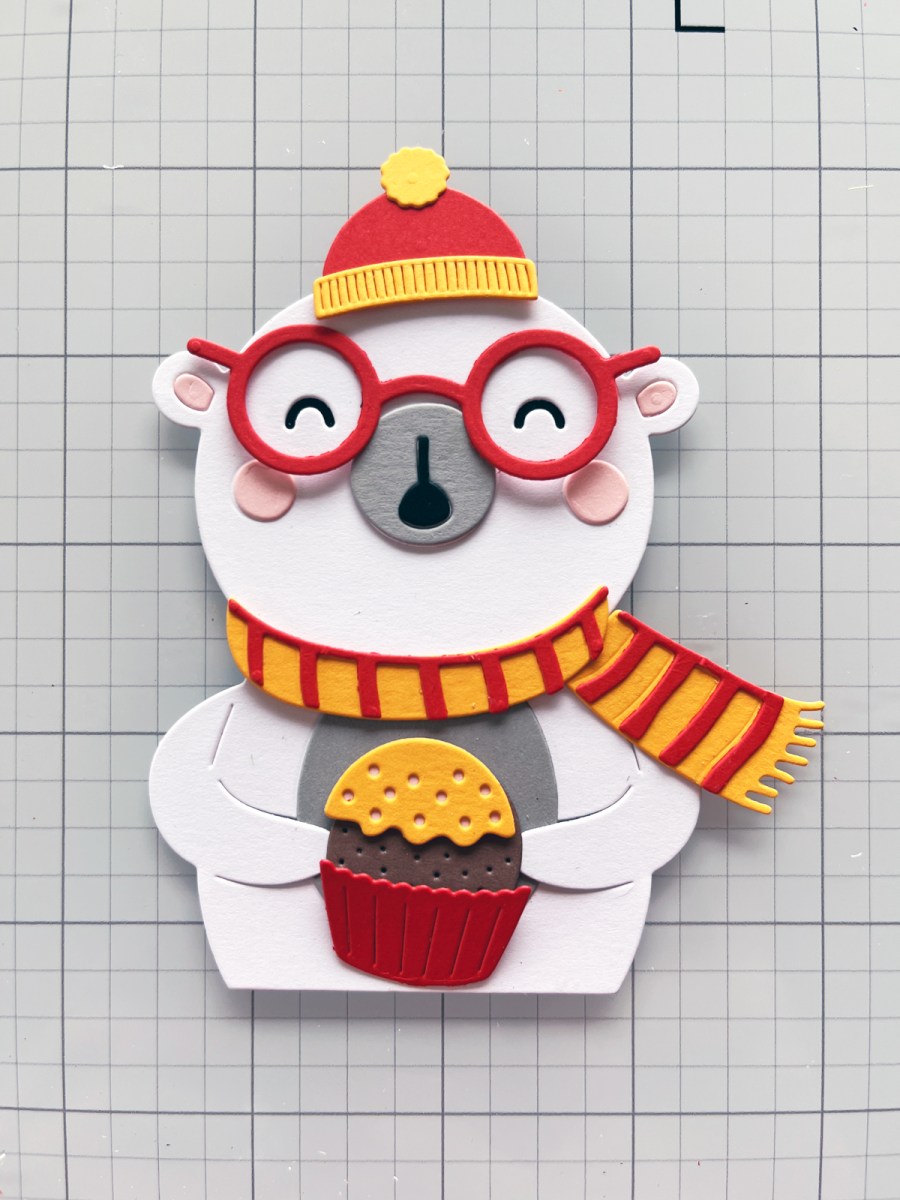
Next, I die cut and assembled the adorable Spectacular Bear.
One of the things I enjoy most about this collection is how expressive the characters are without requiring any stamping or coloring.
The layered die cuts do all the work for you.
Step 3 – Add the Spinner
The spinner mechanism was much easier than I expected.
- Assemble your polar bear.
- Add a generous dab of glue where you’d like the cupcake to spin and attach the spinner according to the package directions. I used the larger spinner size.
- Allow the adhesive to dry completely.
- Gently tap the edge of the cupcake…
…and enjoy the spinning action!
My cupcake has bright yellow frosting with a vivid red cupcake wrapper, so when it spins you see a cheerful swirl of holiday color.
It’s wonderfully smooth—and yes, I probably spun it half a dozen times while photographing the card! 😊
Step 4 – Finish the Scene
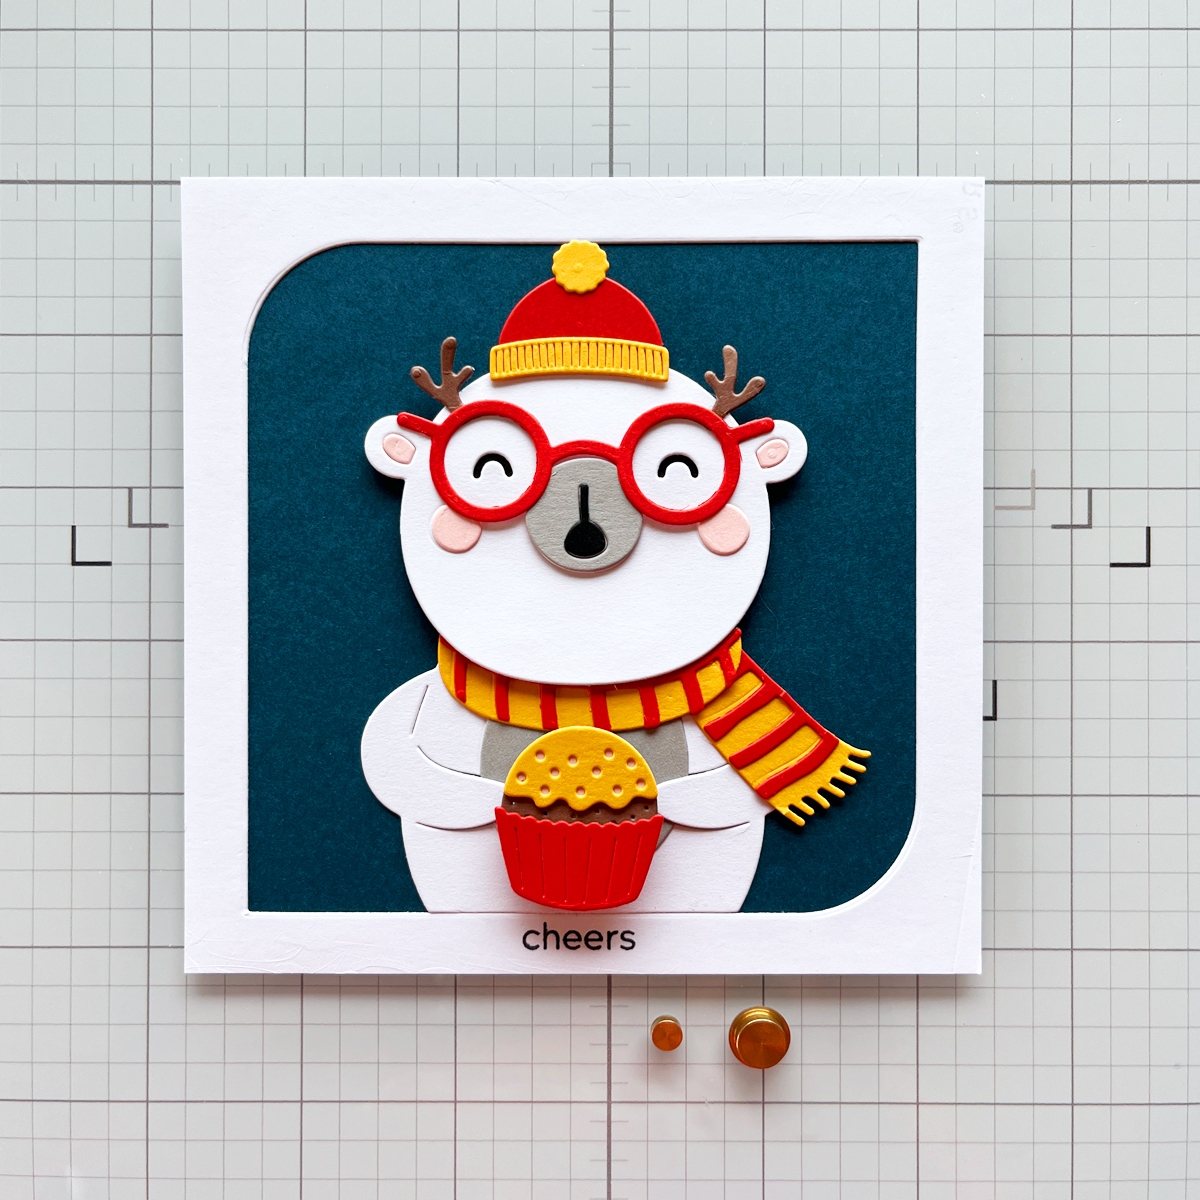
Finally, I adhered the completed bear to the background using foam squares.
The added dimension helps separate the character from the background while allowing the spinning cupcake to remain the interactive focal point.
I always recommend laying out your die cuts before reaching for the glue.
Playing with placement is one of the most enjoyable parts of the creative process—and often leads to even better design decisions.
👉 Looking for the right Spellbinders Club? If you’re considering joining the monthly clubs, be sure to visit my Best Cardmaking Subscription Kits for 2026 guide where I compare each option and share which clubs I think offer the best value for different types of cardmakers.
Why This Design Works
When I finish a card, I like to ask myself one simple question:
“Why does this design feel successful?”
Answering that question helps me become a better designer with every project.
Today’s card succeeds because every design decision supports one simple goal:
Create delight.
- A lovable polar bear immediately captures attention.
- A spinning cupcake rewards curiosity.
- A limited color palette keeps the design calm and focused.
- A clean layout allows the interactive element to become the star.
Sometimes the simplest designs create the biggest smiles.
Why I Love Making Cards for Children
Creating children’s cards has reminded me of something I think adults sometimes forget.
Children aren’t impressed by complicated techniques.
They’re impressed by wonder.
A spinning cupcake.
A funny polar bear.
A bright pop of color.
A tiny surprise they discover all by themselves.
As cardmakers, we sometimes spend so much time perfecting our ink blending or die cutting that we forget our real purpose:
Creating a connection with another person.
Children have a wonderful way of reminding us that joy is often found in the simplest moments.
More Card Ideas Using the Spectacular Christmas Collection
One of my favorite things about this collection is how versatile it is.
Here are a few ideas I’d love to try next:
- Create a birthday spinner by replacing the cupcake with a balloon or wrapped gift.
- Personalize the card with a child’s name or age.
- Build a winter scene featuring several characters from the Spectacular Christmas Collection.
- Turn the bear into an oversized gift tag.
- Create coordinating gift packaging using the same adorable characters.
- Make a holiday card using the bear without the spinner for a clean and simple design.
One collection.
Lots of possibilities.
Toolbox
Featured Products
- Spellbinders Spectacular Bear
- Spellbinders Spectacular Christmas Collection
- Spellbinders Spinner Assortment Pack
- Hero Arts Rounded Jewel Infinity Frame Dies
Cardstock
- Spellbinders ColorWheel Cardstock
Favorite Tools
- Spellbinders Platinum 6
- Crystal Ninja Pick-Up Tool
- Fine Detail Tweezers
- Foam Squares
- Precision Liquid Glue
The Crystal Ninja tool was especially helpful for positioning the smaller die-cut pieces, while my tweezers made placing the long, narrow die cuts quick and easy.
Related Resources
If you enjoyed today’s workshop, you might also like these reader favorites.
📦 Best Cardmaking Subscription Kits for 2026
Not sure which kit is right for you? I compare all of the current clubs and share which subscriptions I think offer the best value.
🏡 How to Create the Best Scene Cards
Learn how backgrounds, foregrounds, and focal points work together to tell a story.
✂️ 14 Best Cardmaking Supplies & Products
A collection of the tools I reach for again and again in my own craft room.
🌱 Beginner Cardmaking Supplies
Just getting started? These are the supplies I recommend most often to new cardmakers.
Trying to decide between these two popular systems? This guide explains the differences and helps you choose the right one for your crafting style.
🧰 My Go-To Cardmaking Supplies
A continually updated list of my favorite everyday tools, adhesives, inks, papers, and die-cutting essentials.
📌 Pin This Post for Later
Planning your Christmas cards for grandchildren, nieces, nephews, or the special children in your life?
Save this tutorial to your Christmas Cardmaking or Interactive Cards Pinterest board so it’s easy to find when you’re ready to start creating.
💙 Karen’s Creative Challenge
The next time you create a card for a child, pause before reaching for another embellishment and ask yourself one simple question:
“What will they do first?”
Will they spin it?
Touch it?
Point to the character?
Laugh?
That single question often changes my design decisions.
And more often than not…
It leads to cards children treasure long after the holidays are over.
Final Thoughts
One of the greatest gifts of handmade cards is that they create moments people remember.
When I finished today’s project, I realized the spinner wasn’t really the point.
The point was creating a little moment of wonder.
A child reaches out.
Their finger taps the cupcake.
It begins to spin.
They smile.
Sometimes that’s all it takes.
I hope today’s project inspires you to create a Christmas card that sparks curiosity, celebrates imagination, and brings a little extra joy to someone special this holiday season.
Because while adults may admire handmade cards…
Children explore them.
And I can’t think of a better compliment than that.
One Final Design Thought: The cards children remember aren’t always the fanciest ones. They’re the ones that invited them to smile, touch, explore, and wonder.
Thank you so much for stopping by today. I always love to see you.

6 thoughts on “Interactive Cards Made Simple | How to Make Cards for Kids”