
Sometimes a card starts with a die or an idea. This one started with a piece of paper.
I received a tube of beautiful handmade Lokta paper as a gift, and the moment I saw the rich green, plum, gold and blue, I wanted to make something with it. I had just received Spellbinders’ October Large Die of the Month, and suddenly I had my Christmas tree.
The only question was: how do you die-cut, glue and design with a beautiful fibrous handmade paper without losing everything that makes it special?
So I experimented.
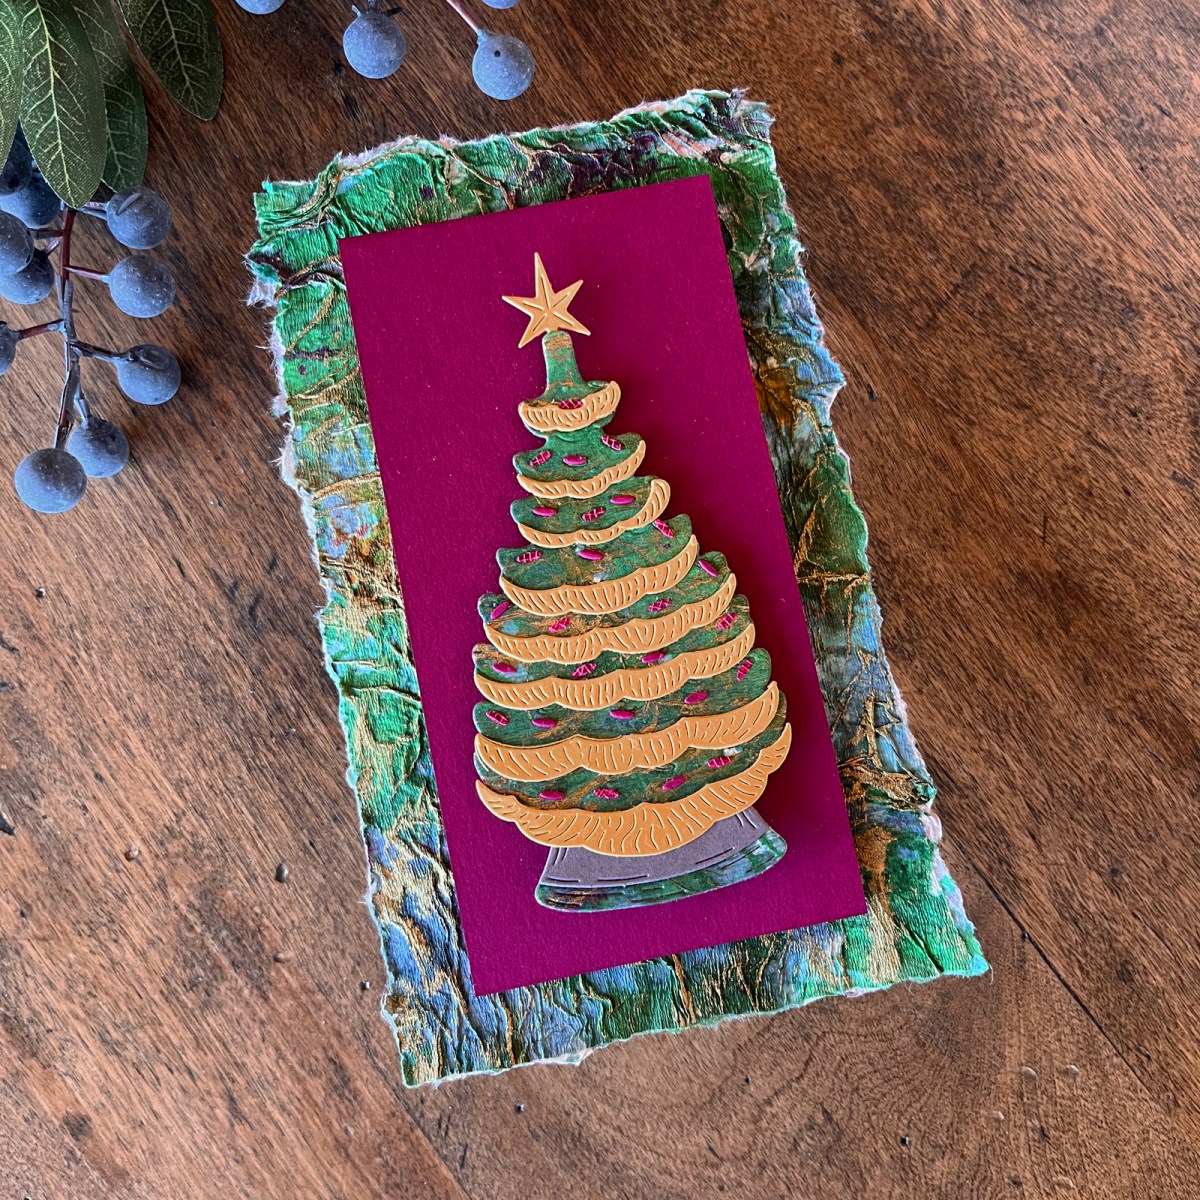
And that is really what this card—and this post—is about. If you have a beautiful piece of handmade or specialty paper tucked away because you aren’t quite sure what to do with it, I hope these ideas encourage you to pull it out and use it.
What You’ll Learn in This Post
- How to add stability to handmade paper before die-cutting
- A few tricks I used to successfully die-cut fibrous paper
- How to create a deckled edge with a simple metal ruler
- How layering can showcase handmade paper without covering its beautiful texture
- Why specialty paper can sometimes be the inspiration for the entire card
What Is Lokta Paper?
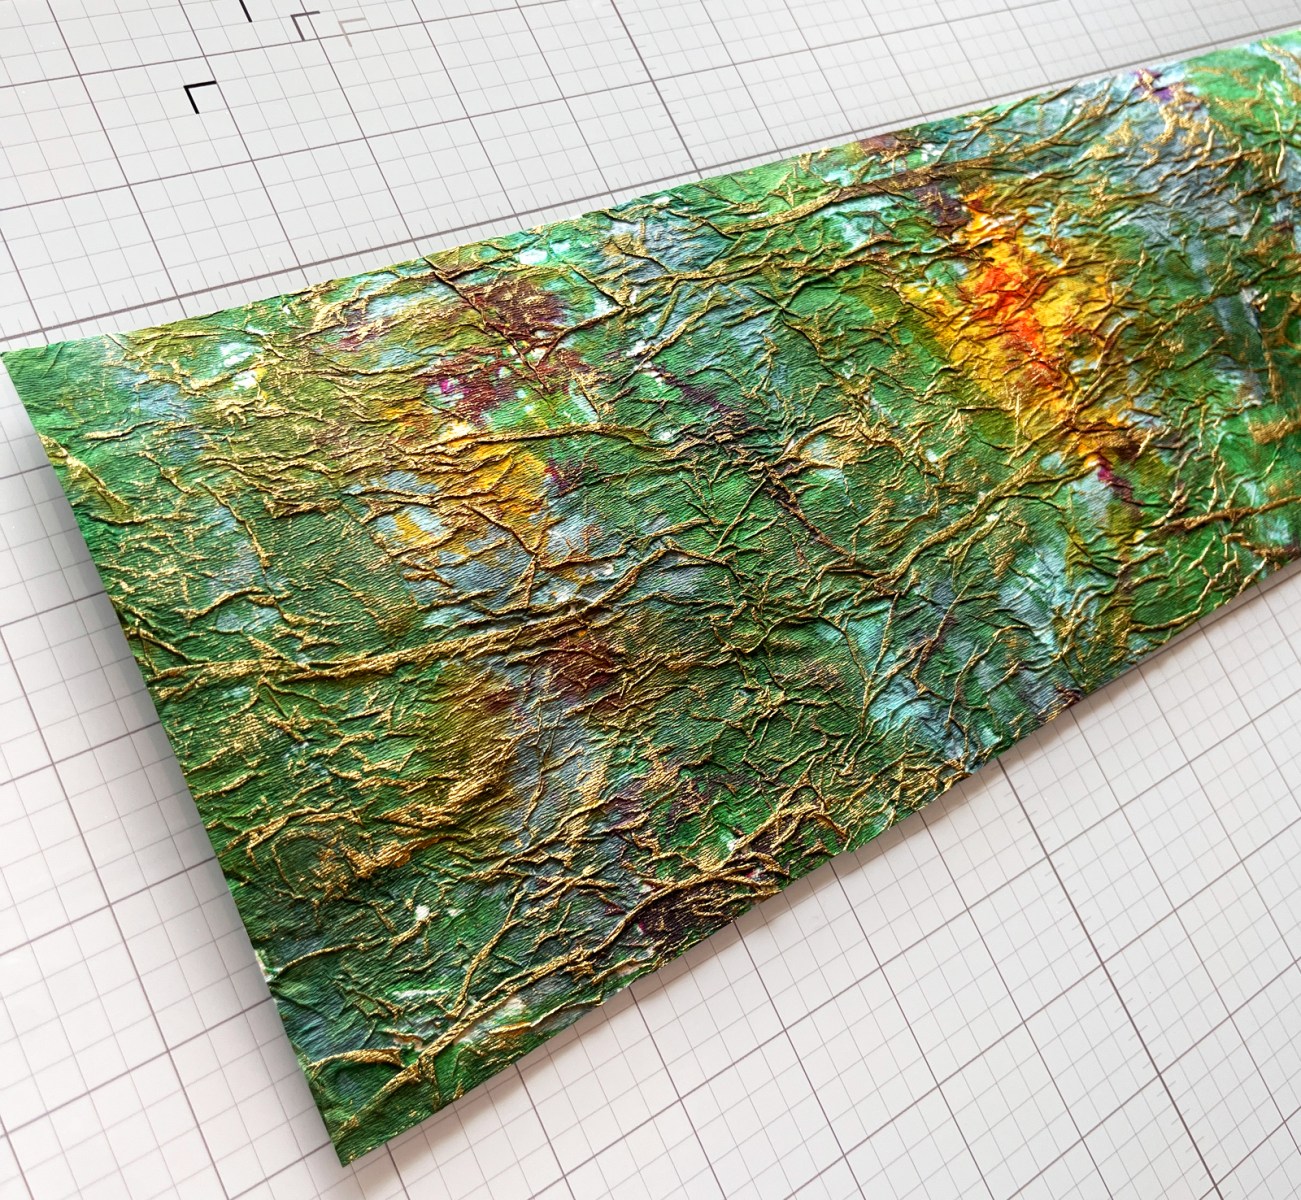
The paper that inspired this card is Lokta paper, a handmade artisan paper traditionally made in Nepal from the fibrous inner bark of the Lokta bush.
What first caught my attention, though, wasn’t its history. It was its texture and color.
My paper is slightly wrinkled and wonderfully tactile, with saturated shades of green, plum, gold and blue. It feels natural and organic, but it is also surprisingly strong and flexible.
I immediately thought the green would make a beautiful Christmas card.
And because this paper was a gift—and I really didn’t want to waste any of it—I was a little more cautious than usual about cutting into it!
Some of my favorite craft supplies are the ones I might not have chosen for myself—which is one reason I love including creative supplies in my Best Gifts for Cardmakers guide.
Tip 1: Back Handmade Paper With Cardstock Before Die-Cutting
My first concern was structure.
The Lokta paper was strong, but it was also thin and fibrous. I wanted to use it for the Christmas tree die, so I decided to give it a little more stability first.
I brushed matte medium onto a piece of plum cardstock and adhered the Lokta paper on top. I added pressure with a brayer to help fuse the two papers together.
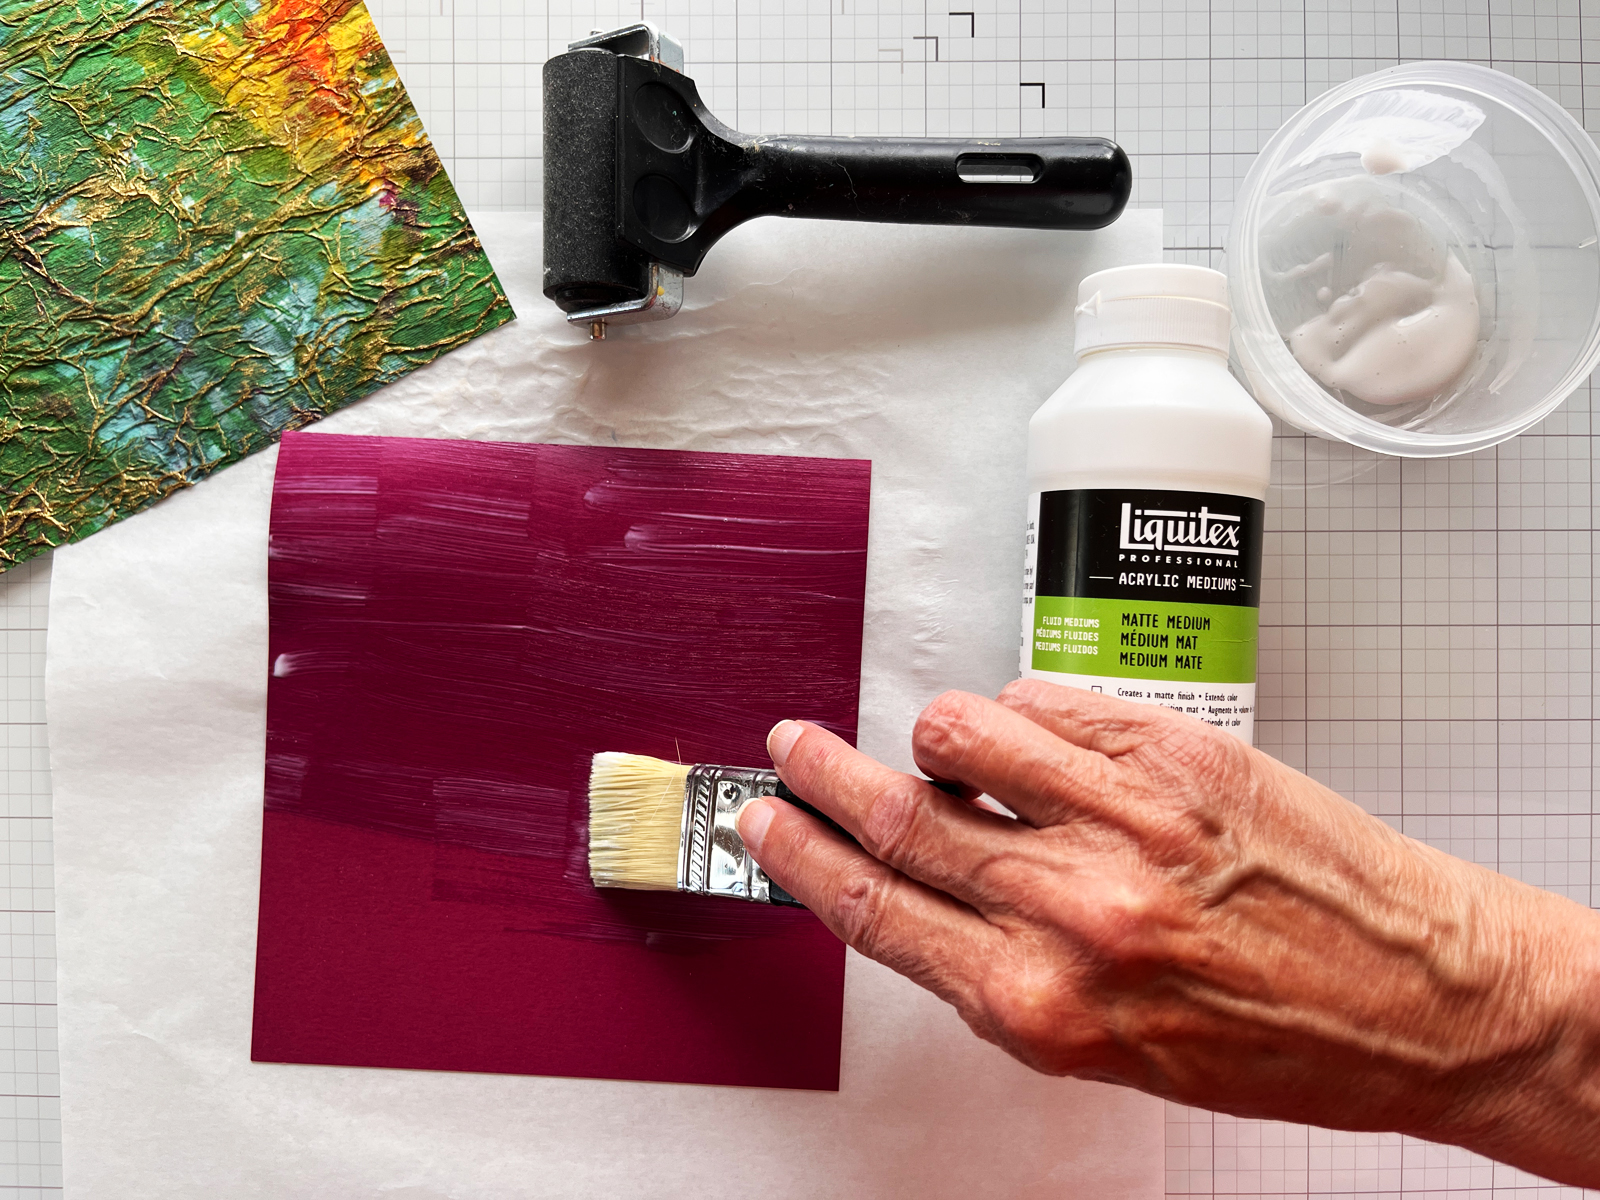
Because wet adhesive can cause paper to curl or warp, I placed the layered papers under a heavy book while they dried. Once dry, I had a much sturdier piece that still retained most of the wonderful surface texture of the handmade paper.
This turned out to be a great solution. The cardstock gave the paper enough body for die-cutting without changing the appearance of the Lokta paper on the front.

Karen’s Craft Table Tip: If you are working with a handmade paper that feels too delicate or flexible for a detailed die, try backing it with cardstock first. Just test your adhesive on a scrap if you can—handmade papers can vary quite a bit.
Tip 2: Take a Little Extra Care When Die-Cutting Fibrous Paper
Once my backed paper was completely dry, it was time for the part I was most nervous about: die-cutting my Christmas tree.
I used the tree from the Spellbinders October Large Die of the Month Kit.
I added a piece of wax paper between the Lokta paper and the die, hoping it would help with the fibrous paper. I also positioned the tree at an angle on my die-cutting platform rather than running the straight edge of the die parallel to the rollers.
Did I need to do both of those things?
Maybe not!
But this paper was too pretty to sacrifice in the name of experimentation, so I decided to give myself every advantage I could.
And the good news is that it worked perfectly.
The tree cut beautifully, including the detailed areas.
If you’ve ever struggled with intricate dies, I have more tips in my 13 Die Cutting Tips I’ve Learned After Making Thousands of Cards and my Best Die-Cutting Ideas & Tools guide.
Let Beautiful Paper Do Some of the Design Work
Once I had successfully cut my tree, I didn’t want to cover it with too many additional elements.
The Lokta paper was already giving me color variation, texture and pattern.
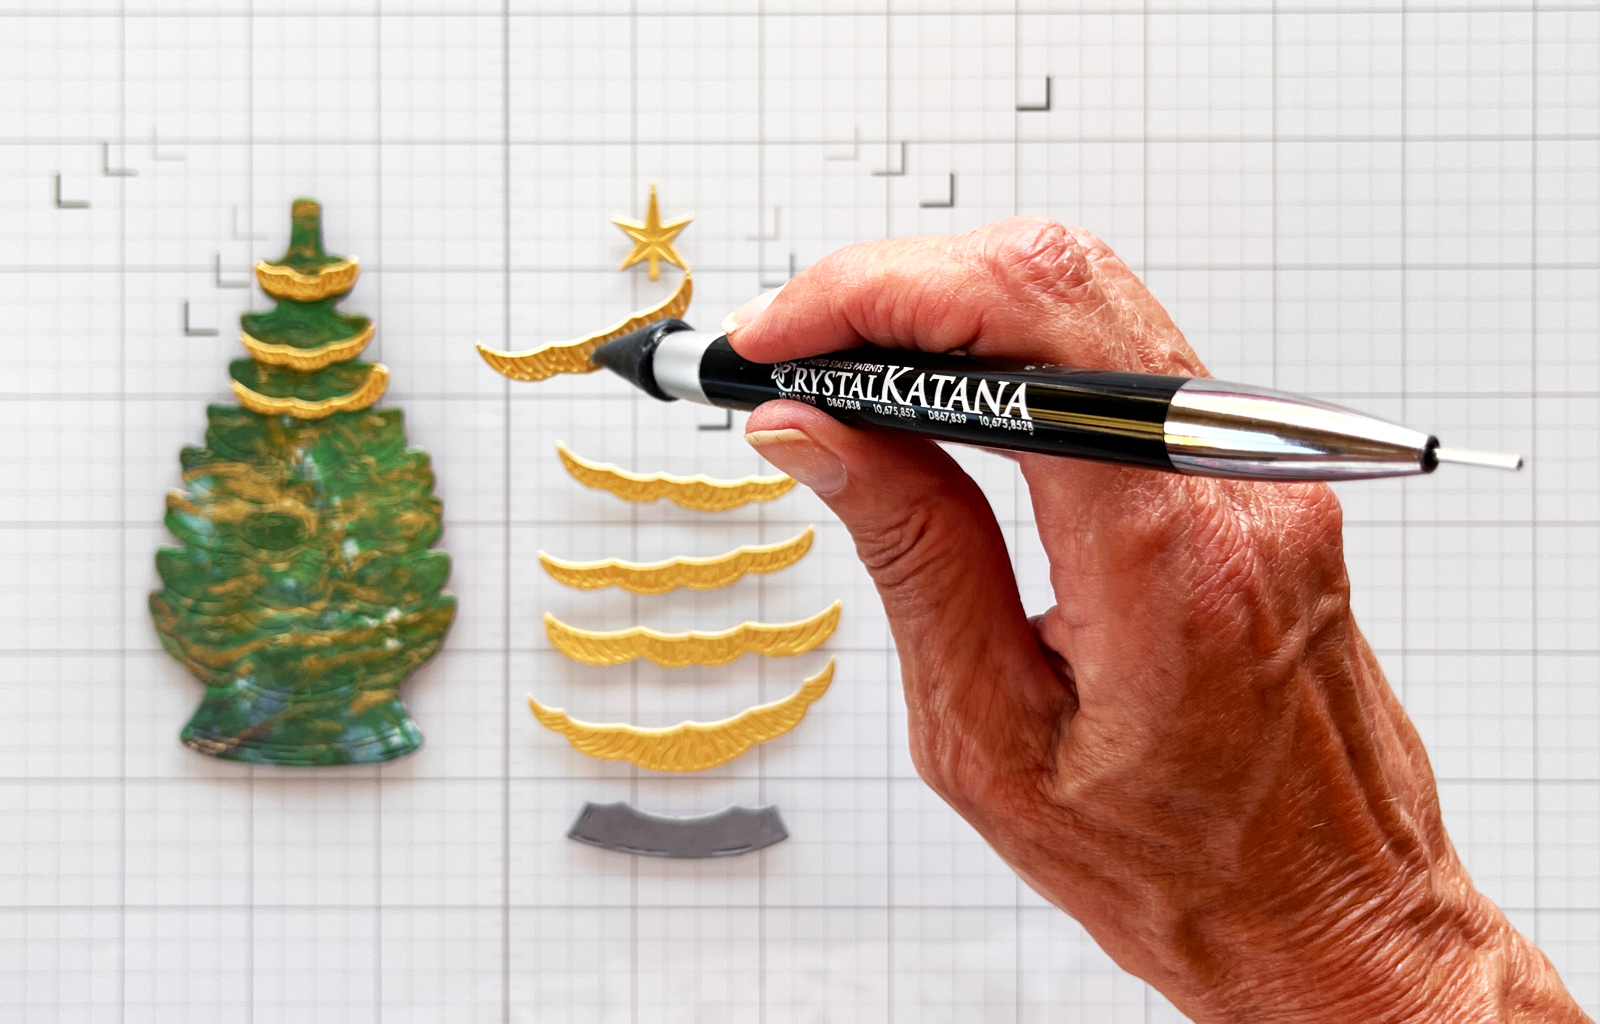
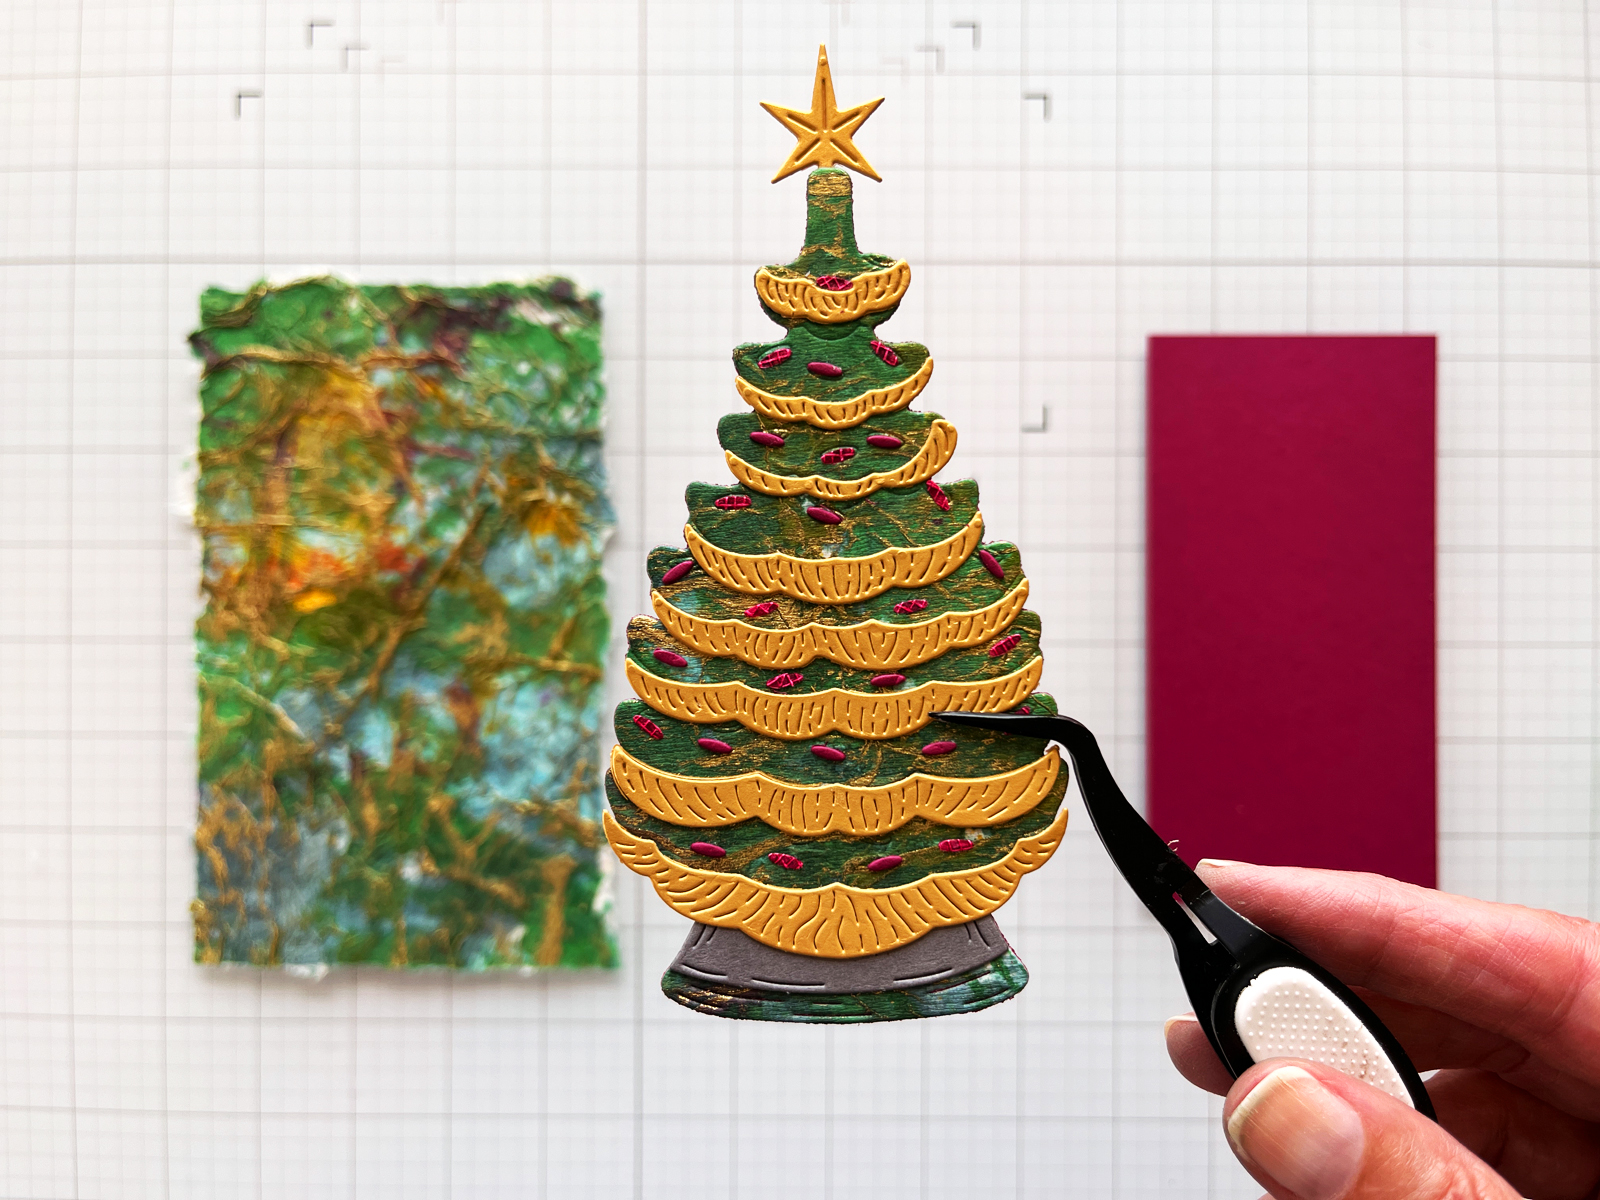
I die-cut the garlands from matte gold cardstock and the small ornaments from a combination of plum cardstock and plum Lokta paper. Then I assembled the tree with my Crystal Katana pick-up tool and layered it onto a plum cardstock mat panel.
The gold and plum picked up colors already present in the handmade paper, which helped everything feel cohesive.
Before gluing everything down, I auditioned the tree over the plum mat and Lokta background to make sure I had enough contrast between all those rich colors and textures.
This is one of my favorite things about using specialty paper in cardmaking: the paper can do some of the creative work for you.
Instead of asking, “What else can I add?” sometimes the better question is, “How can I let this beautiful paper show?”
How to Create a Torn Deckled Edge on Handmade Paper
For the background, I returned to the same green Lokta paper—but this time I wanted to preserve even more of its handmade character.
A clean, straight cut just didn’t feel right.
I wanted an irregular torn deckled edge.
A deckled edge is simply an uneven, feathered edge rather than a perfectly straight machine-cut edge. Handmade papers can have naturally deckled edges, and that slightly imperfect look was exactly what I wanted for this card.
Fortunately, you don’t need a special deckle-edge ruler to create something similar.
I lightly marked the size I wanted for my background with a pencil. Then I placed a metal ruler along one of those lines and held it firmly with my non-dominant hand.
With my other hand, I slowly pulled the paper up against the edge of the ruler, allowing the fibers to tear naturally.
Then I repeated the process on the remaining three sides.

Don’t aim for perfection.
That is the point.
The ruler gives you enough control to keep the overall size and shape you want, while the paper fibers create an irregular edge that looks much more organic than a cut edge.
I gave my Lokta background a nice generous border below the mat…a little more than 1/2″.
In fact, I think this technique works especially well with handmade paper because the torn edge becomes part of the design rather than something you need to hide.
Tip 3: Use Layers to Showcase Texture
With all of my pieces finished, assembly was simple.
I added foam behind the Christmas tree and adhered it to the plum cardstock mat panel. Then I added another layer of foam behind the plum panel before adhering everything to my deckled-edge Lokta background.

Those layers do two things.
They create dimension, but they also visually separate the different textures. The plum cardstock gives your eye a quiet place to rest between the patterned tree and the textured handmade-paper background.
That little bit of separation helps the Lokta paper remain the star without overwhelming the design.
Handmade Paper Makes a Card Feel One of a Kind
The finished card has such a different personality from one made entirely with traditional cardstock.
The rich colors, visible fibers and slightly irregular surface of the Lokta paper give it a wonderful old-world, almost vintage quality. There is something about it that reminds me of paper goods from a much earlier time—when the paper itself was part of the craftsmanship.
The torn deckled edges reinforce that feeling. They aren’t perfectly uniform, and I wouldn’t want them to be.
Then the precise die-cutting provides a lovely contrast: a recognizable Christmas tree, clean layers and tiny decorative details against that wonderfully organic paper.
It is tactile. It is colorful. And it looks unmistakably handmade.
You might also like to read my 11 Best Die-Cutting Staples Every Cardmaker Needs.

Don’t Save the Beautiful Paper Forever
I think most of us have at least a few beautiful papers in our craft rooms that we hesitate to use.
Maybe they were expensive. Maybe they were a gift. Maybe they’re handmade, vintage or simply too pretty to cut.
But this card reminded me that special supplies become even more special when we actually make something with them.
You don’t need to use the entire sheet. You don’t need an elaborate design. And you don’t need to know exactly how the experiment will turn out before you begin.
Back the paper if it needs more strength. Test your adhesive. Give yourself a little extra insurance when die-cutting. Tear an edge instead of cutting it.
And then let the paper be beautiful.
Because sometimes the best card idea really does start with a piece of paper.

4 thoughts on “How to Use Handmade Paper in Cardmaking: Tips for Die-Cutting, Layering & Deckled Edges”