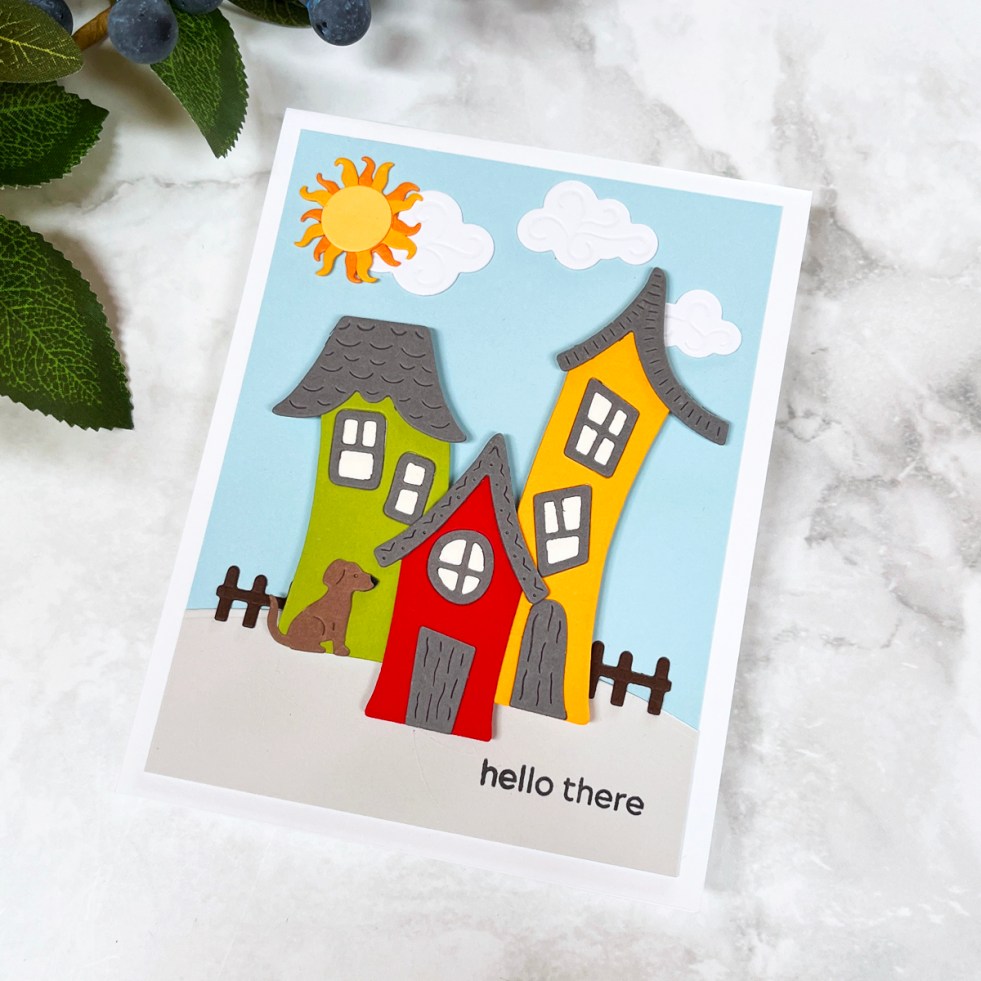
Learn how to create a charming whimsical die cut village scene card using playful storytelling elements, bold color combinations, and dimensional layering techniques. This easy handmade card tutorial includes assembly tips, color inspiration, and creative ways to customize your village scene.
Tag: Spellbinders
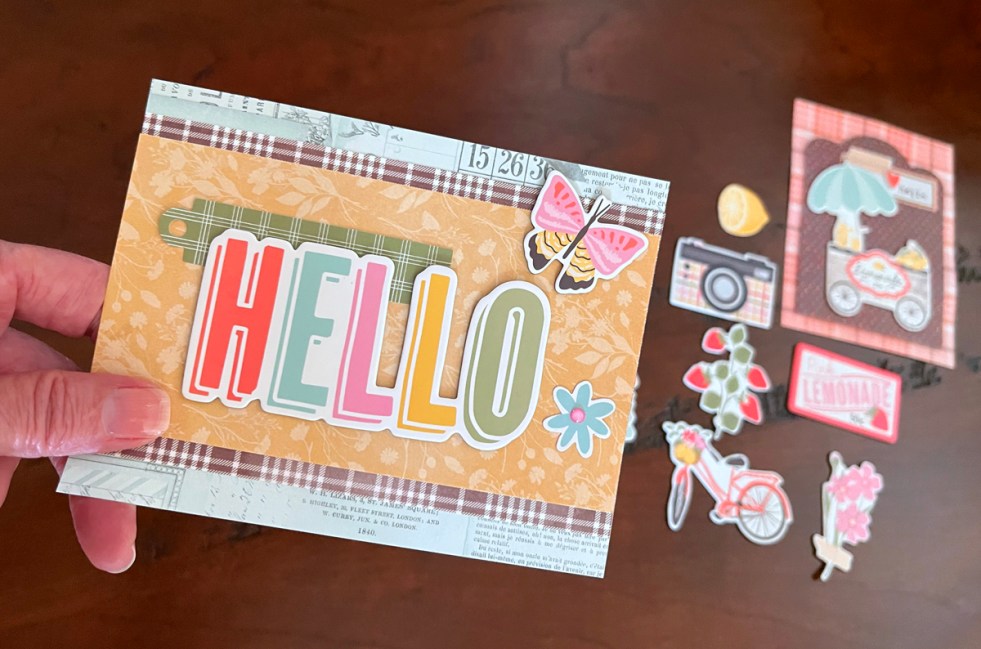
Easy Beginner Cardmaking Ideas | 2 Bright Cards Using Pre-Printed Supplies
Create quick and cheerful handmade cards using pre-printed supplies from the Pink Lemonade collection. This beginner-friendly cardmaking tutorial shows how to design bright layered cards with minimal tools and simple layouts.
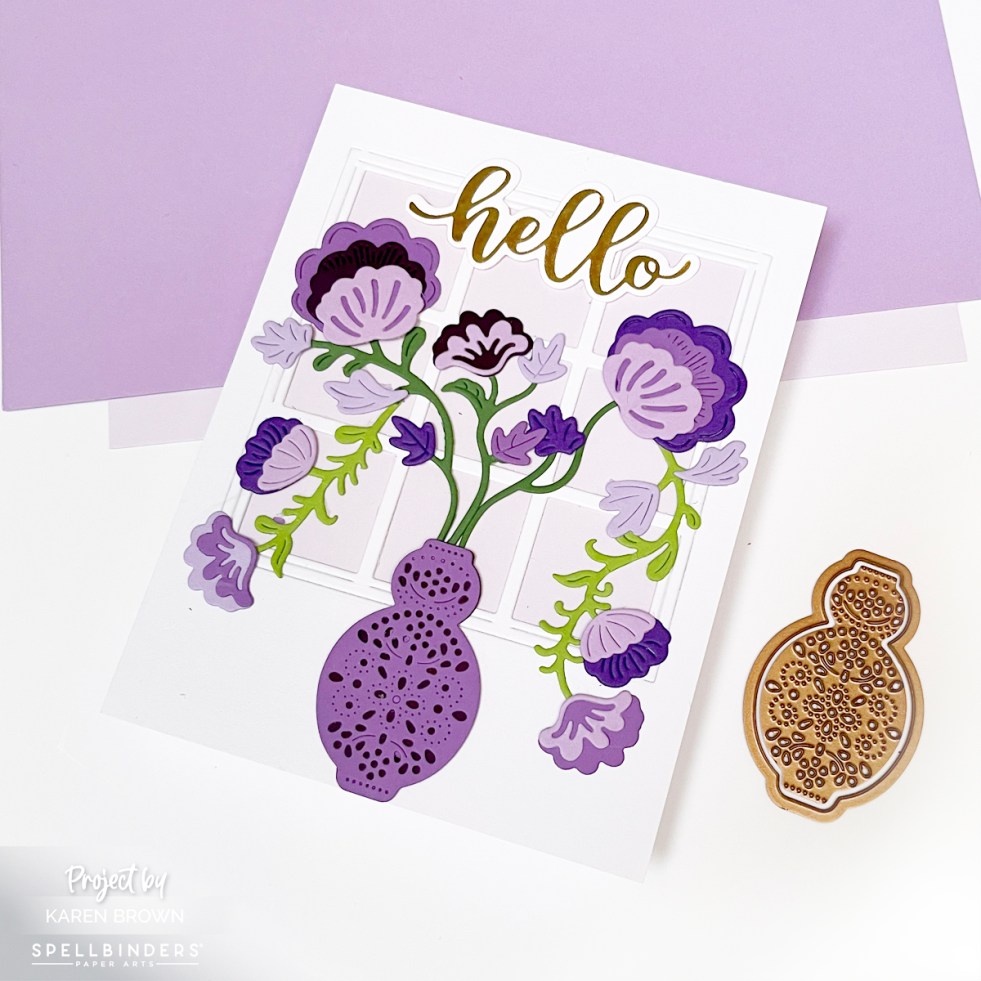
How to Design a Stunning Handmade Card | Process and Inspiration
I created a handmade die cut floral card using the Spellbinders Regal Blooms die set (S4-1465), featuring elegant purple flowers in a vase set against a sunlit window backdrop. This classic, feminine design is perfect for Mother’s Day, birthdays, or get-well cards.
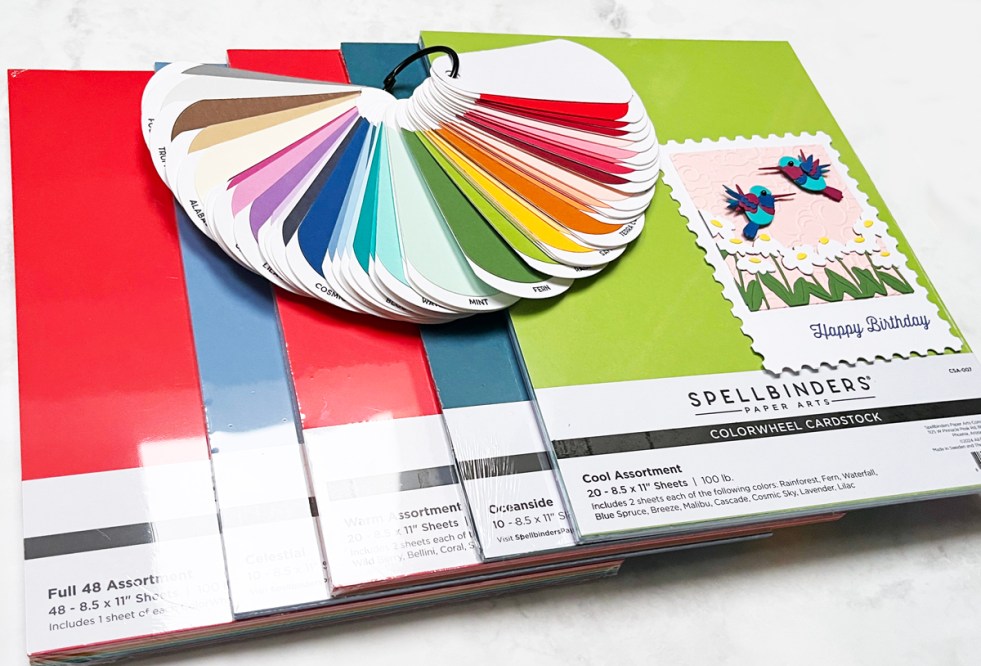
14 Best Cardmaking Products & Supplies for 2026 (Must-Have Craft Room Staples)
Looking ahead to a creative 2026, I’m sharing the 14 cardmaking tools and supplies I use most — from favorite subscription kits and die-cutting machines to cardstock, inks, organization tools, and texture essentials. These are tried-and-true favorites that truly earn their place in my craft room and are perfect for cardmakers looking to stock up wisely this year.

Spellbinders December 2025 Die of the Month | Gel Press Print Card Ideas
Today I’m sharing a simple mixed media Valentine using the Spellbinders December 2025 Die of the Month – Better Together. I combined one of the adorable owls with a Polaroid-style frame, a rub-on “love” sentiment, and two of my favorite Gel Press prints for a soft, artistic look full of layered texture and color.

Cute Coffee Theme Thank You Card Featuring House Mouse
Today I’m sharing a cute and easy House Mouse thank you card using the Brew-tiful Day rubber stamp from Spellbinders. I colored everything with Copic markers and used a fun coffee-themed sentiment—because who doesn’t love a latte pun? House Mouse cards always make people smile and this one is quick to create!

Girly Spa-Themed Die Cut Card | Wrapped in Care – December 2025 Club Kit
The Spellbinders December 2025 Die of the Month – Wrapped in Care creates an adorable spa-day themed girl perfect for feminine cards. I customized mine for my daughter with coordinated pastels from the ColorWheel cardstock range, an embossed spa-inspired background, a simple chipboard sentiment, and included a process photo using my favorite Spellbinders tools.
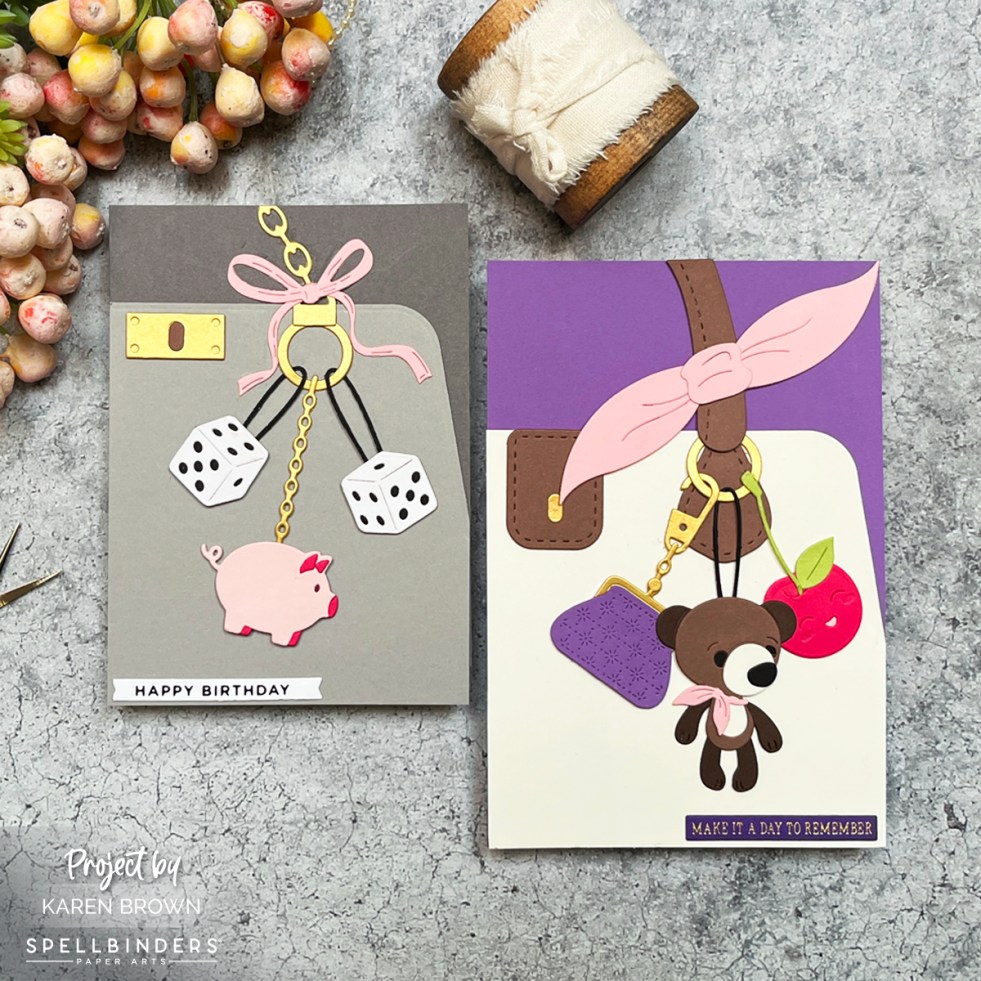
Spellbinders November 2025 Large Die of the Month – Charmed to Know You
Today I’m sharing two darling purse-themed cards using the Spellbinders November 2025 Large Die of the Month Kit – Charmed to Know You. This set is pure cuteness with so many ways to personalize your bag design. Think mini luxury handbag boutique… but in cardstock form! This die kit creates a fabulous purse with dangling… Continue reading Spellbinders November 2025 Large Die of the Month – Charmed to Know You
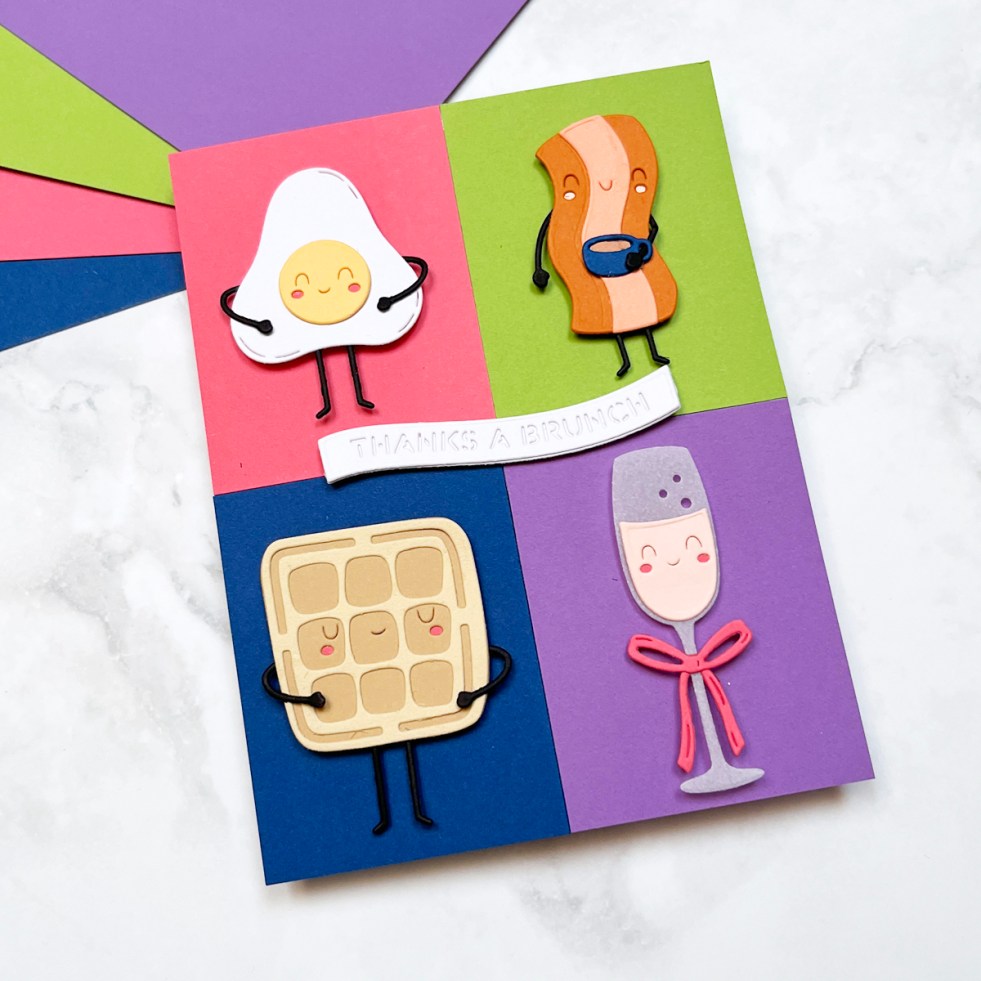
Bold Color Block Brunch Theme Card | Spellbinders November Kit
Spellbinders November 2025 Die of the Month — Let’s Do Brunch — is packed with adorable food elements perfect for playful cards! I created a bold color-block background and added a smiling egg, dancing bacon, bubbly champagne glass, and waffle, complete with tiny stick arms and legs. This graphic brunch-themed thank-you card is cheerful, fun, and perfect for foodie friends.
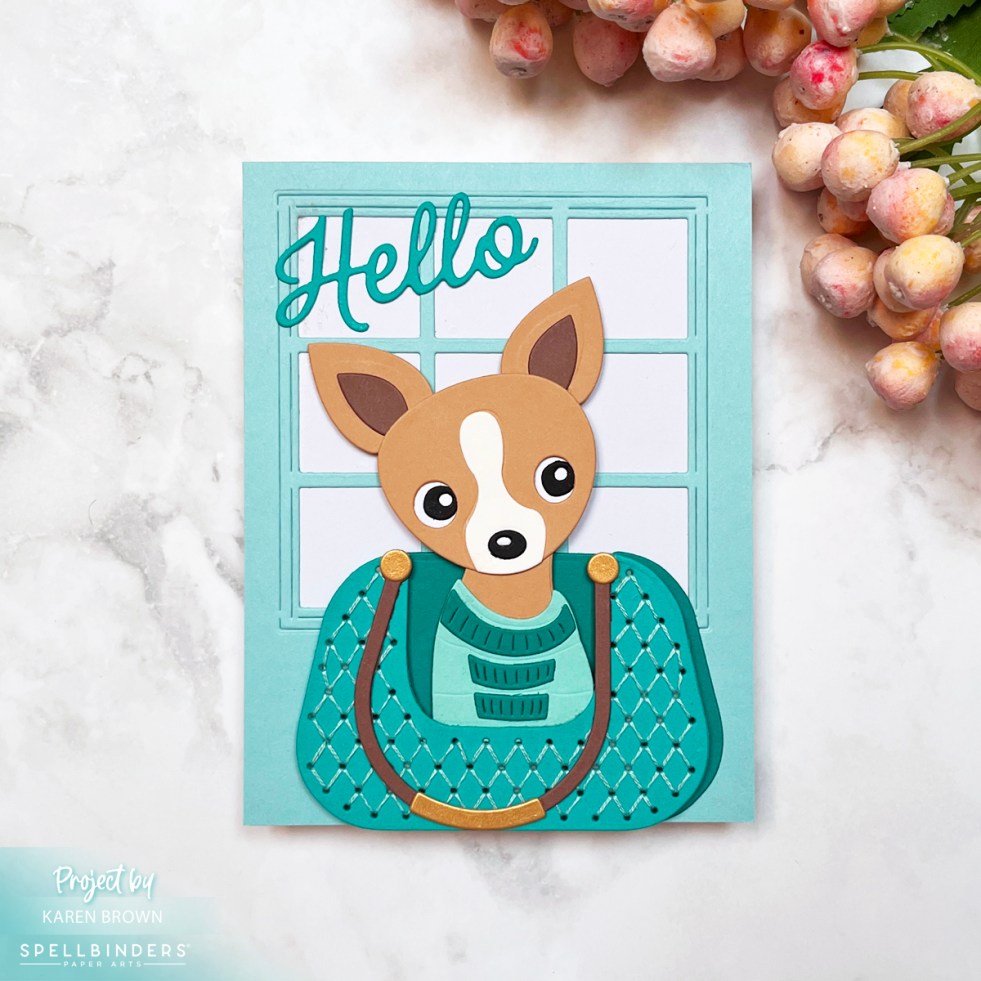
My Favorite Stitching Kit Yet! | Spellbinders November 2025 Stitching Die of the Month
The November 2025 Spellbinders Stitching Die of the Month is pure charm — a sweet Chihuahua in a stitched handbag! I stitched my purse with aqua floss and paired it with soothing neutral browns from the ColorWheel cardstock pack. A “Hello” sentiment and a windowpane background complete the look. Dog lovers, you’ll adore this one!
