
An easy-to-make birthday card with a large die-cut focal point, simple texture and plenty of ways to make it your own.
Birthday cards are some of the cards I make most often. There is always another birthday coming up—friends, family, co-workers—and I like having a few good birthday card ideas ready to go.
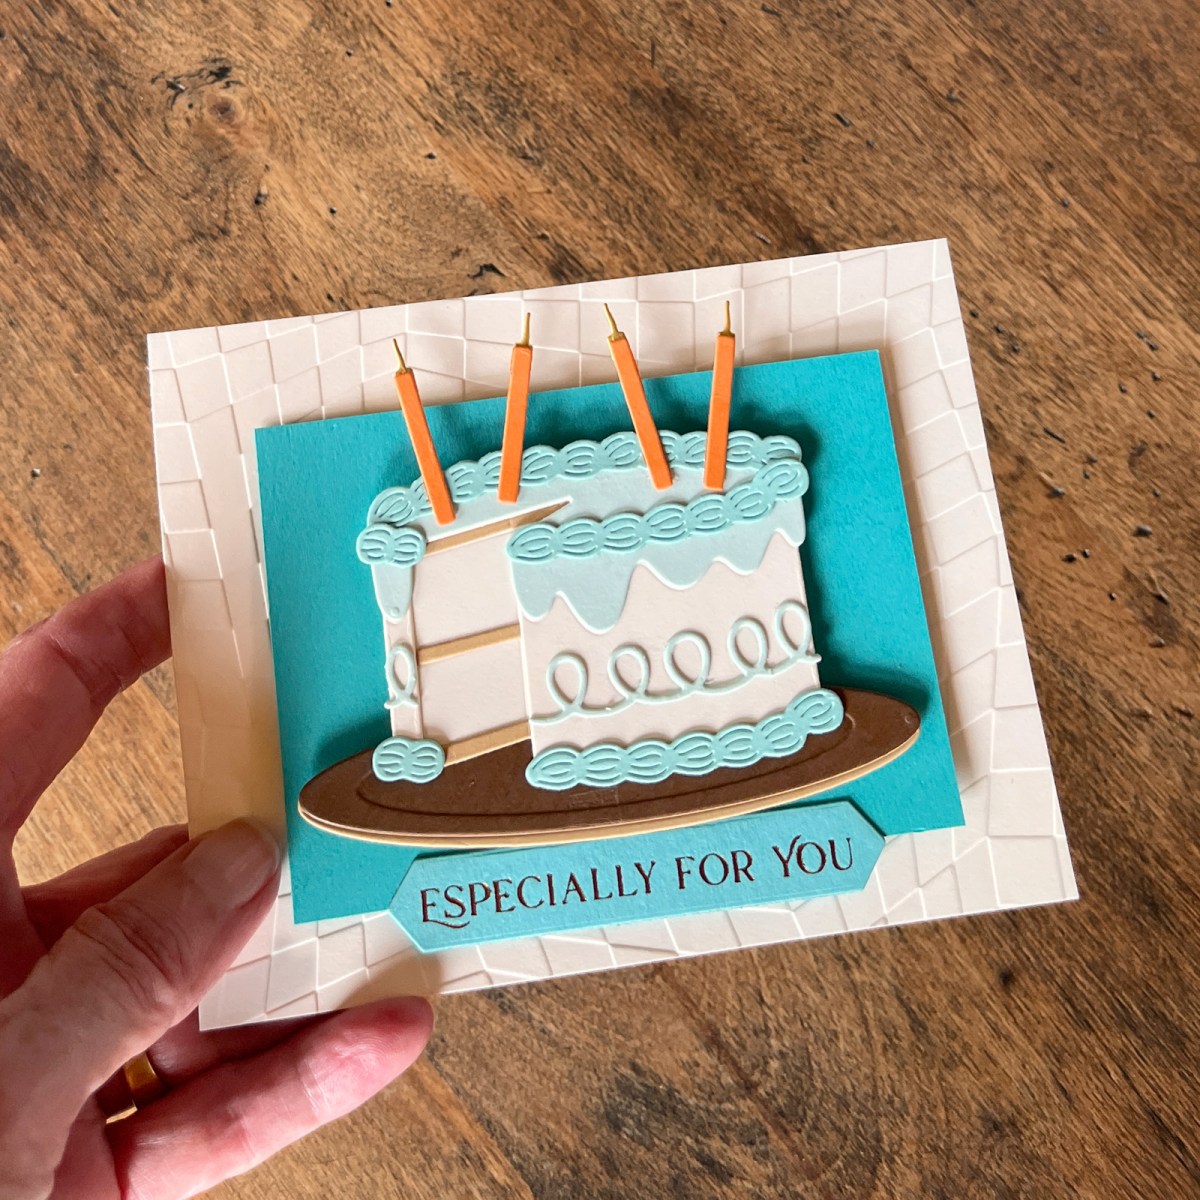
If you’re looking for die-cut birthday card ideas, starting with one large focal-point die is one of my favorite ways to create a card that looks special without making the design complicated.
For this card, I used the One Hot Birthday Large Die of the Month and Embossing Folder of the Month from Spellbinders to create a big layered birthday cake. The cake does most of the work, so the rest of the design could stay relatively simple.
Both of these products are part of Spellbinders’ monthly clubs. If you’re curious about how the different clubs compare, take a look at my Best Cardmaking Subscription Kits guide.
And one of the things I like best about this particular birthday cake? It’s incredibly easy to personalize.

What You’ll Learn in This Post
- How to use one large die-cut focal point to simplify your card design
- Why a limited color palette can make a layered die cut feel more cohesive
- How to add embossed texture without competing with your focal point
- How one small contrasting color can add interest
- Easy ways to personalize a birthday cake card for different recipients
Start With One Strong Die-Cut Focal Point
Die-cut focal points are some of my absolute favorite things to create, and this birthday cake was especially fun.
It’s large enough to carry the card design almost by itself, but it is still quick and easy to assemble. That combination makes it perfect for an easy-to-make birthday card when you want something that looks more involved than it really is.
I started by laying the dies over my ColorWheel Cardstock swatches and planning the cake colors before cutting anything.
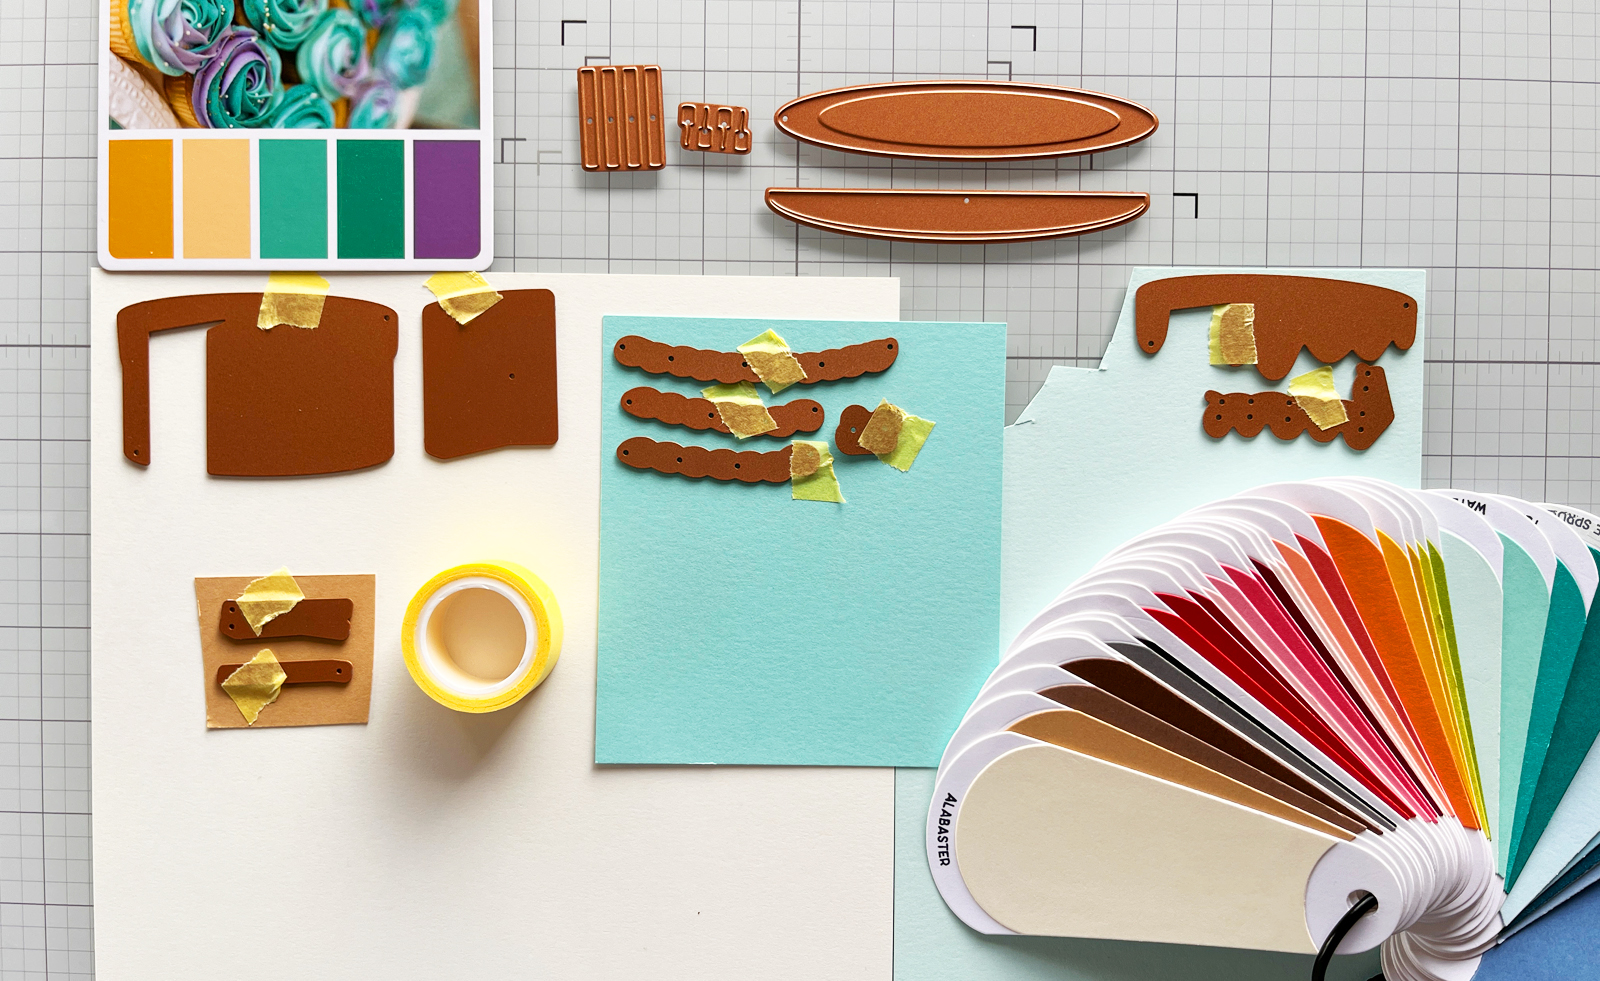
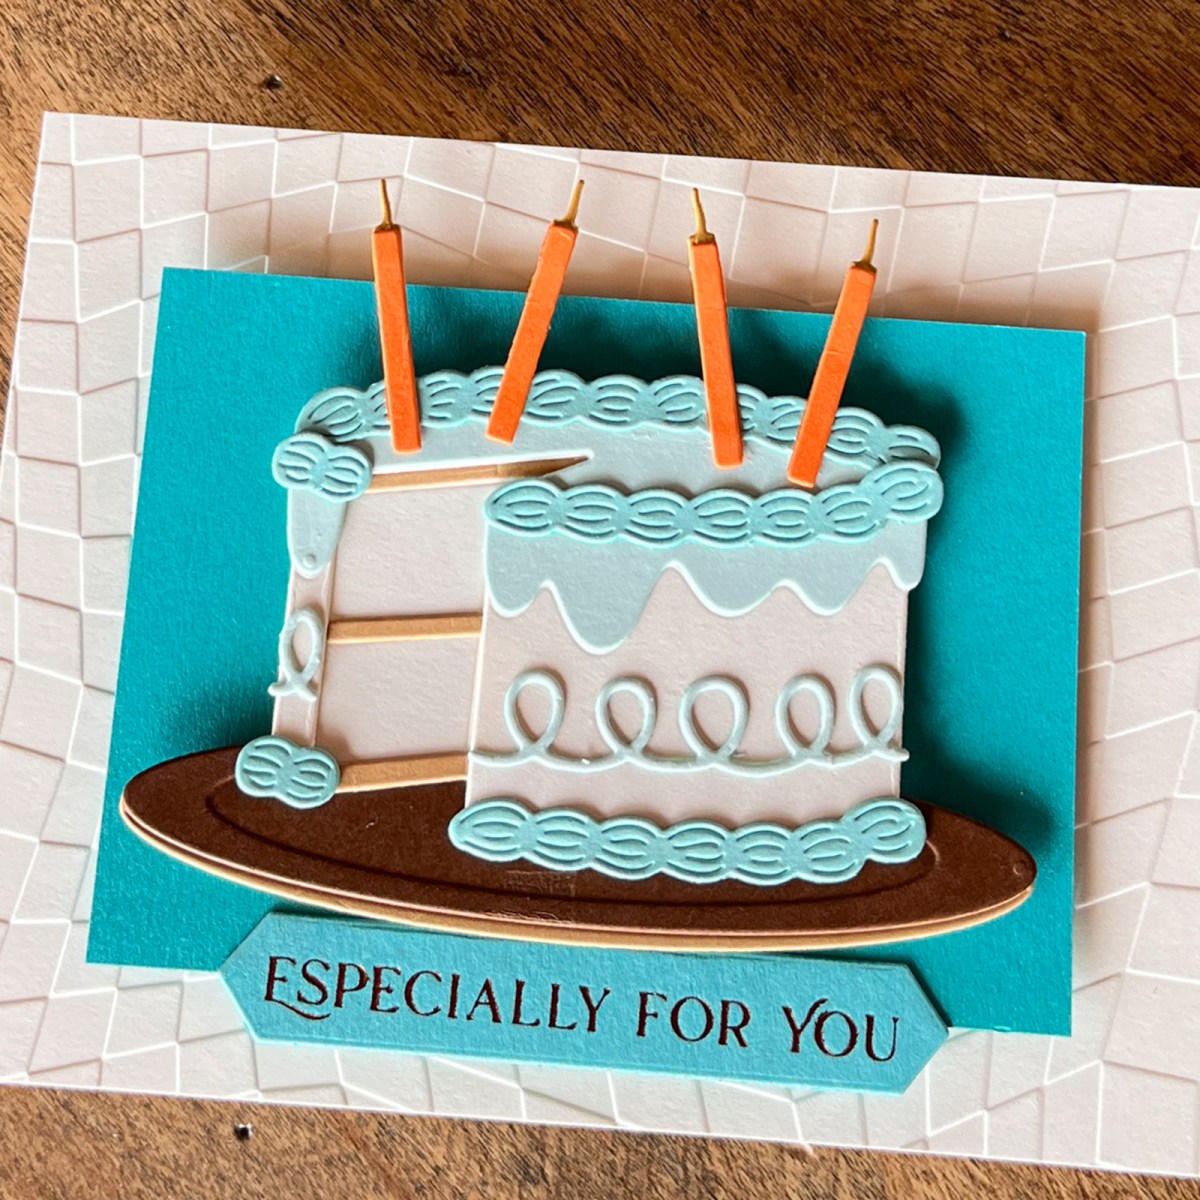
For the cake itself, I chose Alabaster with Fawn filling, then used two shades of aqua—Waterfall and Seaside—for the frosting and decorative piping. Truffle grounds the cake plate, while a small pop of Carrot adds contrast in the candles.
The result is a limited palette of aqua, cream, tan and brown with just a touch of orange.
ColorWheel Cardstock Colors Used
- Cake and card base — Alabaster
- Cake filling — Fawn
- Piping — Waterfall
- Decorative icing — Seaside
- Cake plate — Truffle
- Candles — Carrot
- Mat — Teal Topaz
If you’d like cleaner, more consistent results from your dies, I’ve gathered my favorite techniques in 13 Die-Cutting Tips for Better Results.
Add Texture Without Competing With Your Focal Point
I love embossing folders because they’re such an inexpensive and easy way to add texture to a handmade card.

For this card, I used the Wonky Check Embossing Folder of the Month. My original plan was to emboss teal cardstock for the background—and that’s actually what you’ll see in my process photo.
Once I started putting the card together, though, I changed my mind.
The layered cake already had quite a bit of detail, and the teal embossed background competed with it more than I wanted. I switched to Alabaster cardstock for the embossed panel instead.
But I didn’t abandon the teal completely.
Instead, I placed a smaller Teal Topaz mat immediately behind the cake. That gave me the color I wanted while also creating a smooth, non-textured buffer between the detailed die-cut cake and the geometric embossed background.
Sometimes the best design decision isn’t adding something—it’s deciding where the eye needs a little rest.
And don’t worry about that embossed teal panel. I’ll save it for another card!
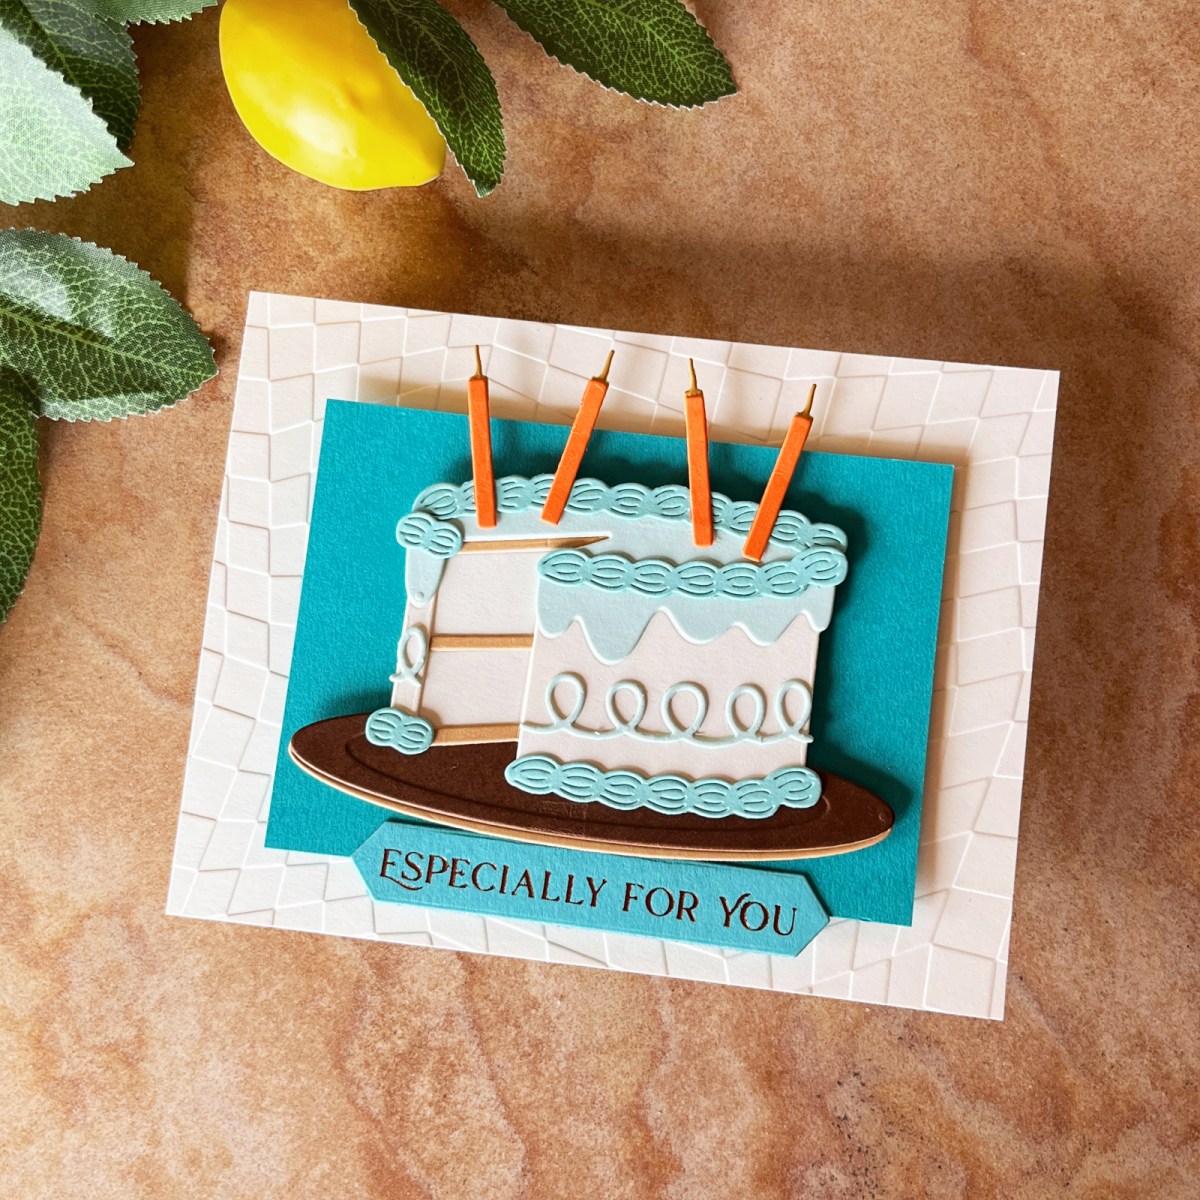
Use a Small Pop of Contrasting Color
I die-cut a couple of candle-color options before deciding on Carrot.
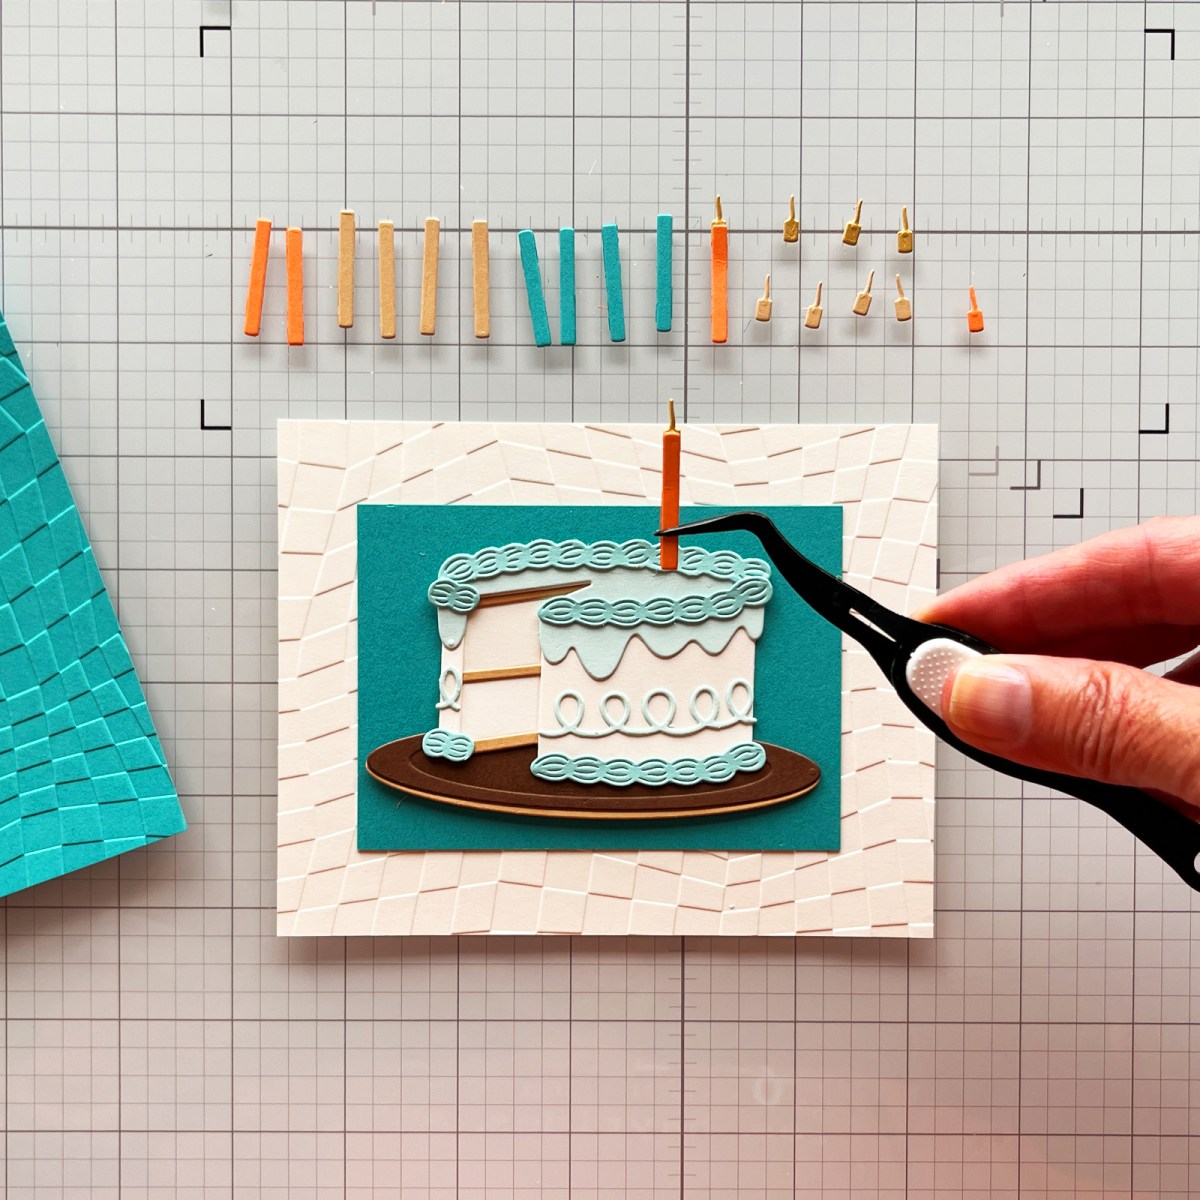
The orange is a tiny part of the finished card, but because it contrasts with the aqua frosting, it immediately draws your eye toward the candles and the top of the cake.
This is one of my favorite ways to use a brighter color: you don’t necessarily need very much of it.
I used tweezers to position the small candle pieces and Bearly Art Glue with its fine nozzle for the more intricate decorative icing. Both make assembling little die-cut details much easier.
You can also visit my Die-Cutting Ideas & Tools guide for more projects, techniques and the tools I use most often.

Make Your Birthday Cake Personal
One reason I think this die set is so versatile is that changing the colors can completely change the personality of the cake.
I chose minty aqua frosting for my brother’s birthday card, but there are so many possibilities.
Make a chocolate cake with rich brown frosting. Try pink or strawberry colors. Create a coconut cake in creamy whites. Use someone’s favorite color for the icing. You could even turn the design into an elegant wedding cake.
And for a milestone birthday with a sense of humor?
Add lots of candles.
The set includes large flame dies, so you could create a cake with so many candles that it looks as though the whole thing is practically on fire!
That’s what I like about versatile dies. One basic design can become very different cards depending on the recipient.
An Easy Birthday Card You Can Make Your Own
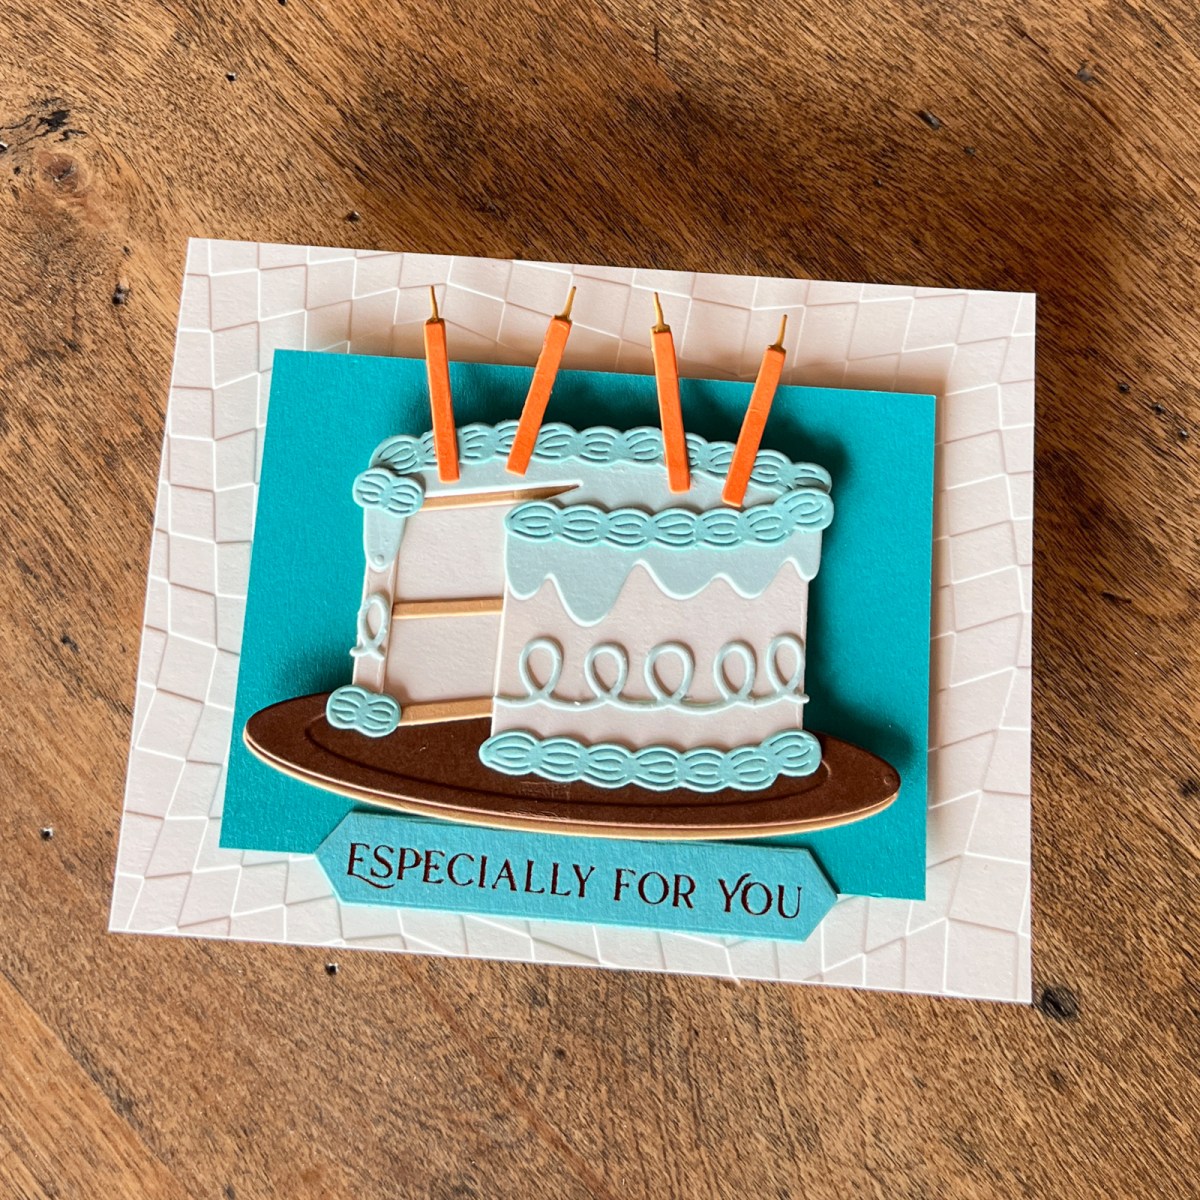
This card is a good example of why I enjoy working with large die-cut focal points. The cake provides the detail and personality, while a limited color palette, an embossed background and one contrasting accent color help pull everything together.
It’s an easy design to recreate, but it doesn’t have to look the same every time.
Change the cake flavor. Change the frosting. Add a ridiculous number of candles. Make it elegant enough for a wedding.
Products Used
Here are the main supplies I used to create this easy die-cut birthday card:
- Spellbinders One Hot Birthday — November Large Die of the Month
- Spellbinders Wonky Check — November Embossing Folder of the Month
- Spellbinders ColorWheel Cardstock
- Spellbinders Platinum 6 Die Cutting & Embossing Machine
- Bearly Art Precision Craft Glue
- Tweezers
Some of the links in this post may be affiliate links. If you purchase through one of my links, I may earn a small commission at no additional cost to you. Thank you for supporting Kenny’s Cards.
Final Thoughts
One of the things I love about die-cutting is that you don’t need a complicated design to make a card feel special. A strong focal point, a little texture and a few thoughtful color choices can do most of the work.
For this birthday card, the layered cake is definitely the star, while the Wonky Check embossed background adds interest without competing for attention. Keeping most of the palette soft and neutral also gave that tiny orange candle just enough contrast to stand out.
And because the cake can easily be changed with different colors, candles and embellishments, this is the kind of design you can personalize again and again.
I hope this gives you a few ideas for using the dies and embossing folders you already own to create easy birthday cards that still feel polished and personal.
Do you have a favorite way to personalize your handmade birthday cards? I’d love to hear about it in the comments.

2 thoughts on “Die-Cut Birthday Card Idea: An Easy Cake Card You Can Personalize”