
Simple habits, helpful tools, and smart choices that make die cutting easier and more successful.
There is no such thing as a perfect card. I’ve never made one. Not once.
And honestly, perfection isn’t what I’m trying to achieve.

For me, successful cardmaking does two things. It satisfies my need for creative expression, and it gives me a thoughtful, personal way to connect with someone I care about. I love that a handmade card can say I was thinking about you in a way that feels a little more special. Sometimes it even becomes a keepsake.
And cardmaking is good for me, too. The entire process—from choosing colors to cutting tiny pieces to putting that final detail in place—recharges my battery in a healthy, positive way.
But I also love learning. After making thousands of cards, I’m still refining techniques and finding little ways to make the creative process easier.
Die cutting is a perfect example.
Some of the things that make the biggest difference aren’t complicated techniques at all. They’re simple habits I’ve picked up over time, tools I reach for constantly, and a few lessons I’ve learned—sometimes the hard way!
So today I’m sharing 13 of my favorite die cutting tips for cardmaking. These are the things that consistently make my die cutting easier, more reliable, and more successful.

What You’ll Learn in This Post
- How to build a reliable foundation for cleaner, more consistent die cuts
- Simple die cutting habits that help prevent frustrating mistakes
- Small tools I use regularly to make cutting and assembly easier
- How I plan colors and organize my die cutting before assembly
- How to build a useful die collection without buying every new release
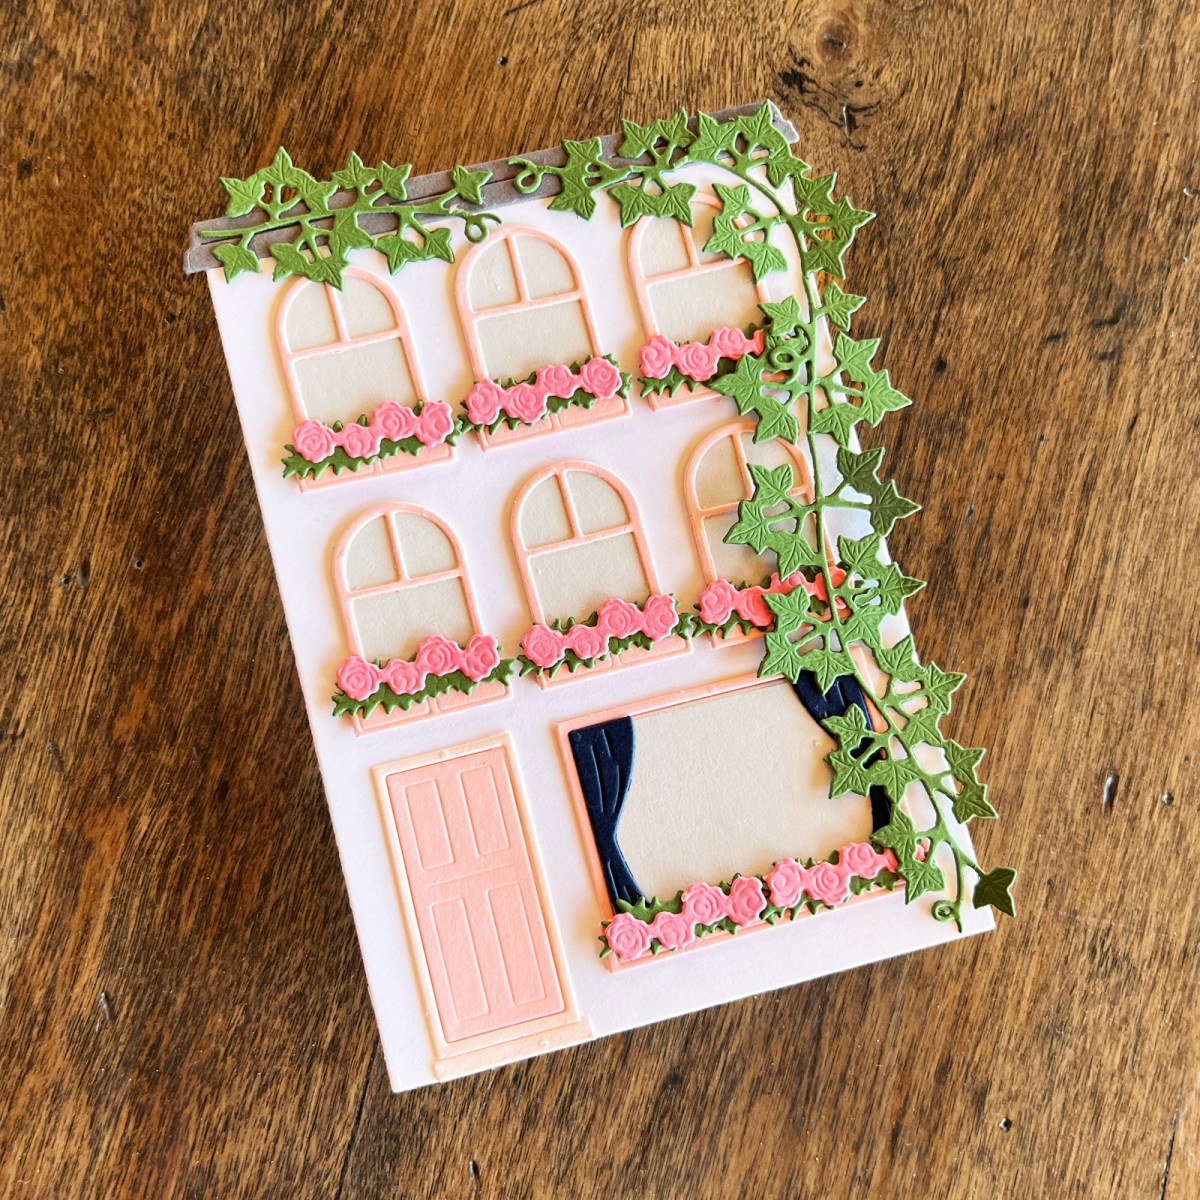
And along the way, I’ll show you how I used many of these tips while creating this dimensional City Holiday townhouse.
Start With a Good Die-Cutting Foundation
Before we get to the little tricks, let’s start with the basics. Good tools and materials won’t make every cut perfect, but they can certainly make the entire process easier.
1. Invest in a Quality Die-Cutting Machine
If you enjoy die cutting, I think a good machine is one of the best investments you can make in your craft room.
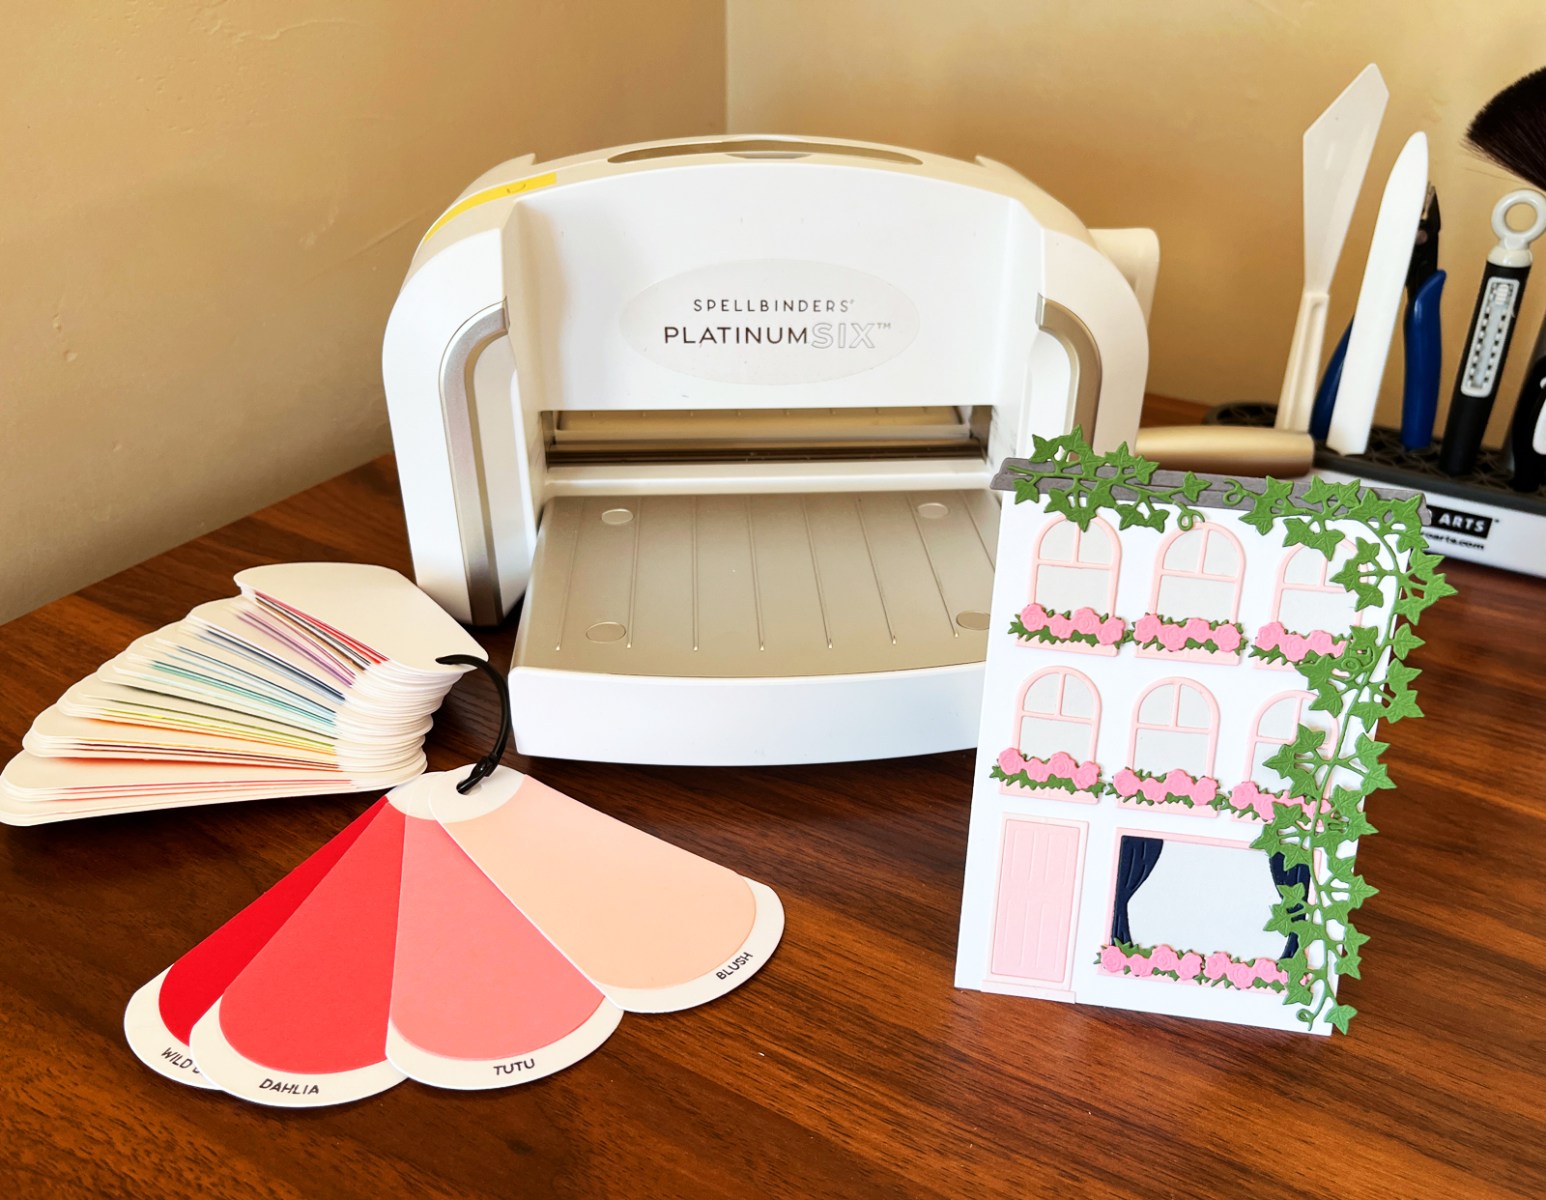
I own several die-cutting machines, but my Spellbinders Platinum 6 is my everyday workhorse. In fact, I can’t think of anything in my craft room that gets used more often. I own two of them!
A quality machine gives me consistent pressure and handles everything from small sentiments to large dies like the townhouse base I used for today’s card.
You don’t necessarily need the machine I use. The important thing is finding a dependable machine that works with the types of dies you use most often.
2. Use Good-Quality Cardstock
Cardstock makes a difference.
ColorWheel Cardstock has become my most-used cardstock for die cutting. I love the weight, and the 48-color range gives me plenty of options when I’m planning a card.
Good cardstock tends to cut cleanly and holds its shape well, especially when you’re working with small or detailed pieces.
For this townhouse, I started with a fresh white house and added green ivy, soft pink accents and two neutral grays. Having coordinating cardstock available made planning—and cutting—the entire project much easier.
3. Replace Worn Cutting Plates
I rotate and flip my plates to help them wear more evenly, but cutting plates eventually need to be replaced.
And sometimes the problem isn’t whether the die will cut through the paper.
Deep scratches and heavily etched plates can leave unwanted impressions or lines on your cardstock. If you’re suddenly wondering where those mysterious marks on an otherwise beautiful die cut came from, take a look at your plates.
I use mine hard, but when they begin affecting the quality of my die cuts, it’s time for a fresh set.
4. Add a Shim When You Need One
Sometimes an intricate die simply needs a little extra pressure.
If part of a die isn’t cutting completely, I’ll add a paper or cardstock shim to the cutting sandwich and run it through again. This can be especially helpful with detailed dies.
The key is not to assume that one sandwich works perfectly for every die. Learn how your particular machine feels and adjust when necessary.
5. Consider a Small Machine for Small Jobs
This certainly isn’t a necessity, but I’ve found a compact die-cutting machine surprisingly useful.
My Spellbinders Scout has a small footprint, so it’s easy to keep nearby when I’m cutting small dies. It’s also convenient for classes, retreats and vacations when I don’t want to haul a full-size machine with me.
Sometimes the easiest tool is simply the one sitting within arm’s reach!
Die Cutting Tips and Habits That Prevent Frustrating Mistakes
The next four tips cost very little—or nothing at all—but they can prevent some of the most frustrating die-cutting mishaps.
6. Tape Your Dies in Place
If I could give you only one die cutting tip, this might be it:
Tape your die to your cardstock before cutting.
A tiny piece of tape can prevent a die from shifting as it moves through the machine. It’s especially helpful when placement matters or when you’ve carefully lined up several dies.
My favorite is Best Ever Craft Tape. I currently own three rolls, which probably tells you how much I use it! It holds dies securely but removes cleanly without tearing my die cuts.
It takes only a few seconds and can save you from having to cut the same piece twice.
7. Run Larger Dies Through at an Angle
Instead of sending a large die through the machine perfectly straight, try turning it slightly so it enters the rollers at an angle.

This allows the rollers to apply pressure gradually rather than hitting the entire cutting edge at once.
I used this trick with the large City Holiday townhouse base. It’s a simple habit, but I find that larger dies often cut more easily and precisely when they go through the machine at a slight angle.
8. Rotate and Flip Your Cutting Plates
Cutting plates take a beating. That’s their job.
To help prevent excessive bowing, I regularly rotate and flip mine instead of always running them through the machine in exactly the same direction.
They will still wear out eventually—mine certainly do—but rotating and flipping helps distribute the wear more evenly.
9. Check Intricate Die Cuts Before Removing the Die
This one can save so much frustration.
When I’m using an intricate die, I check the back of the cardstock before I remove the die.
If an area hasn’t cut completely, everything is still lined up exactly where it needs to be. I can add a shim if necessary and run the entire sandwich through the machine again.
Once you remove the cardstock from an intricate die, getting everything lined up perfectly for a second pass can be much harder.
Check first. Remove second.
The Small Tools That Make Die Cutting Easier

A die-cutting machine may do the actual cutting, but some of the smallest tools on my craft table make the biggest difference during assembly.
I used all of these while making today’s townhouse.

Crystal Ninja Pickup Tool
Tiny die cuts have a remarkable ability to stick to your fingers, jump onto the floor or disappear completely.
A pickup tool makes placing those tiny pieces much easier. My Crystal Ninja is one of those tools I didn’t know I needed until I had one—and now I use it constantly.
Reverse Tweezers
Tweezers give me much more control when I’m positioning small die cuts. Reverse tweezers are especially handy because they hold an element without requiring me to continually squeeze the handles.
Fine-Nozzle Glue
When the die cut is tiny, the glue needs to be tiny too.
I like Bearly Art Glue because the fine nozzle lets me add very small amounts of adhesive exactly where I need them.
Craft Stax
Craft Stax have become one of my favorite organizational tools.
When I’m batch cutting lots of small pieces, I place them in the trays until I’m ready to assemble the card. That keeps my work surface organized and prevents a tiny flower, window or leaf from disappearing underneath something else.
I also use Craft Stax to protect finished cards and card elements during storage and transportation.
Magnetic Die Storage Pockets
Magnetic Storage Pockets are my favorite way to store and organize my dies. The magnetic sheet keeps all my dies from a collection in place and then I slip this in the storage pocket and file.
Craft Pick or Pokey Tool
A simple craft pick is invaluable for removing little paper bits left inside detailed die cuts.
Soft Brush
Die cutting can leave behind what I call “cutting dust”—tiny paper bits scattered across the work surface. A small soft brush lets me sweep them away without disturbing all the pieces I’ve carefully organized.
Good Scissors
I keep both small scissors and my larger 9-inch Pro Craft Shears nearby. Even in a die-cutting project, there always seems to be something that needs a quick trim.
None of these tools is glamorous. But collectively, they make the process noticeably easier.
Plan Before You Cut
A little planning at the beginning can prevent a lot of unnecessary cutting later.

10. Choose Your Color Palette Before You Start Cutting
Color selection is usually one of my first planning steps.
Before I start running dies through the machine, I pull out my cardstock swatches and choose a palette. I often start with two or three focal colors and then add neutrals as needed.
For my City Holiday townhouse, I chose ColorWheel Cardstock in Fern, Tutu, Blush, Chiffon, Anchor and Fog.
The fresh white house gave me a clean foundation. Green ivy became a strong focal element, while the soft pinks added warmth and the grays grounded everything.
Choosing the colors first means I’m not stopping halfway through the cutting process wondering what color the next little piece should be.
RELATED LINK: My Swatching Adventure
11. Do Your Die Cutting in Batches
When a project has lots of pieces, I prefer to do most—or all—of my die cutting before I begin assembly.
For the townhouse, I first looked at all the dies I planned to use and organized them by cardstock color. Then I could cut several green elements, several pink elements and so on without constantly switching papers.
I also taped coordinating dies together when it made sense—for example, window-frame and pane pieces that could go through the machine in the same pass.
As pieces were cut, they went into my Craft Stax until I was ready to assemble.
This keeps me from bouncing back and forth between cutting and gluing and helps me see whether I have everything I need before the glue comes out.

Buy Dies You’ll Actually Use
I love new craft supplies as much as the next cardmaker. But after years of cardmaking, I’ve become much more thoughtful about what earns a place in my craft room.
12. Build Your Die Collection Around Themes You Love
There is no universal list of dies every cardmaker needs.
I gravitate toward houses and villages, lemons, coffee, florals and birthdays because those are themes I genuinely enjoy using.
Your list might look completely different.
The important thing is to notice what you reach for repeatedly and build your collection around your style of cardmaking.
That makes your supplies more useful—and your craft room more personal.
13. Invest in Versatile Dies You Can Use Again and Again
Some of my favorite purchases are dies that can become something completely different depending on the colors, accessories and occasion.
Infinity dies and frame dies are wonderful examples because they work across so many styles of cards.
Foundational scene dies can be equally versatile.
The City Holiday townhouse is a perfect example. I’ve already used the same basic house to create two very different cards simply by changing the colors and accessories.
And that brings me to one of my strongest opinions about buying craft supplies:
You do not need every new release. Buy what you will use.
Sometimes a subscription kit is a fun and economical way to add coordinated products to your collection. But whether I’m considering a kit, a new die collection or a single die set, I try to think about how likely I am to use it again.
Versatility matters.
RELATED LINKS:
Putting These Die Cutting Tips Into Practice: My City Holiday Townhouse
Now for the pretty example!
I created this shaped stand-up townhouse using the City Holiday Collection along with accessories from Wrapped Up City Holiday and Everyday City Holiday.
The City Holiday base creates the house itself, while the accessory collections let me change its personality. For this version, I especially loved adding the ivy, along with the flower boxes and curtains.
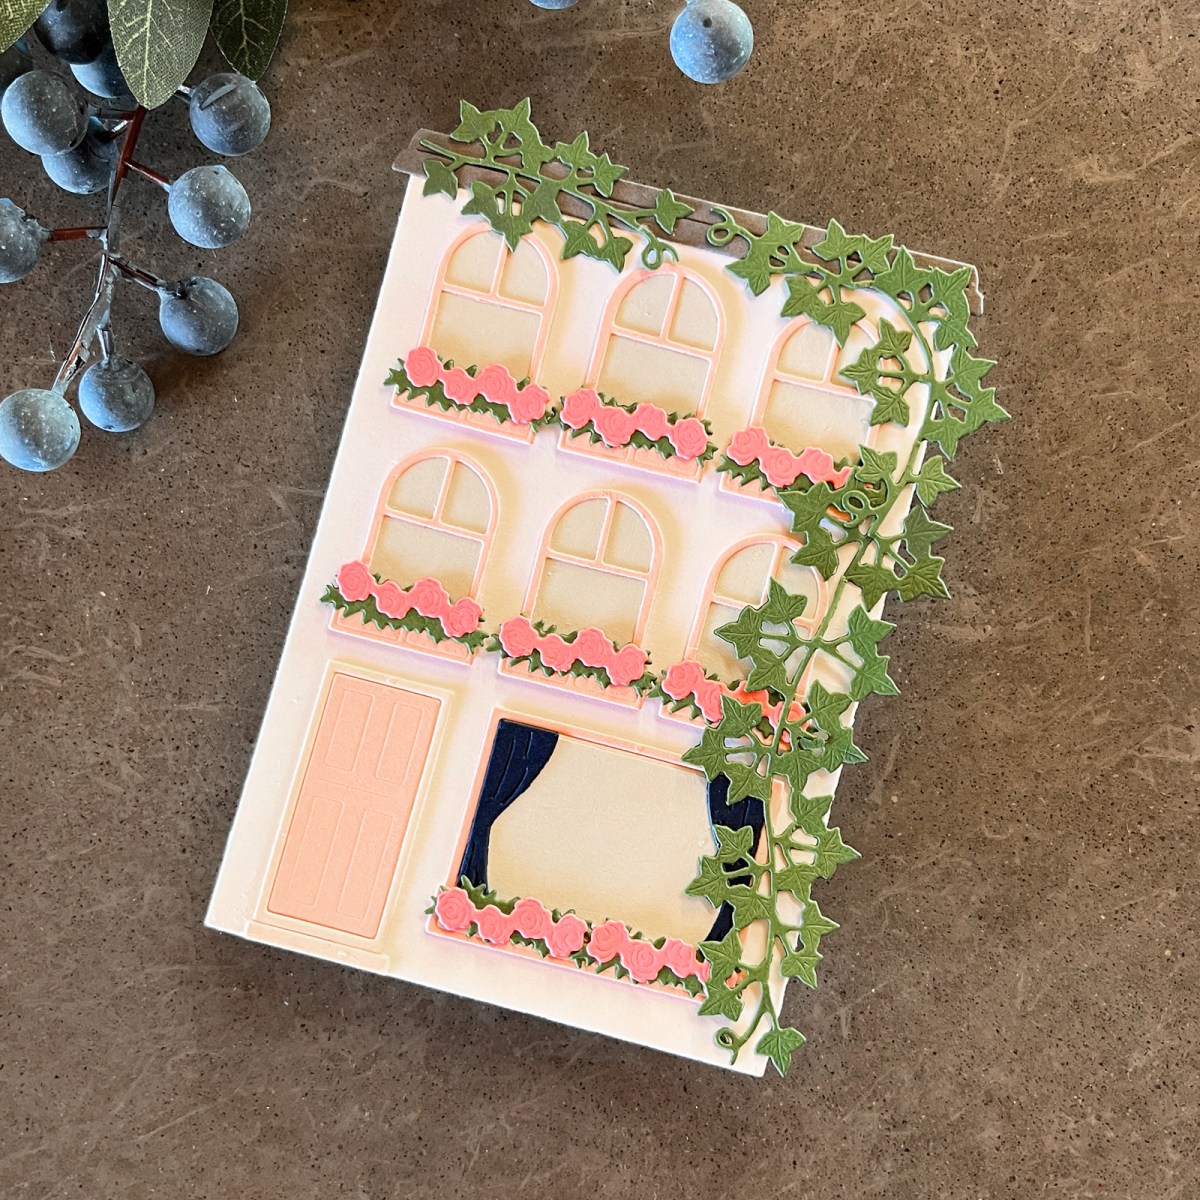
I started with a white top-fold card base and positioned the top edge of the townhouse die just above the fold. That allowed the fold to remain intact when I ran the card through my Platinum 6, creating a hinged house-shaped card that can stand on a counter, desk or table.
The die also impressed the locations for the windows and doors, giving me a roadmap for assembly.
From there, I followed the same process I described above:
I chose my colors first, organized the dies by cardstock color, taped dies in place, ran the large house die through at an angle, batch cut the smaller elements, kept all those tiny pieces organized in Craft Stax and assembled everything after the cutting was complete.
In other words, the townhouse isn’t a special project that required a completely different approach.
It’s simply a pretty example of the everyday die-cutting habits I use over and over again.
One Foundational Die, Two Completely Different Cards
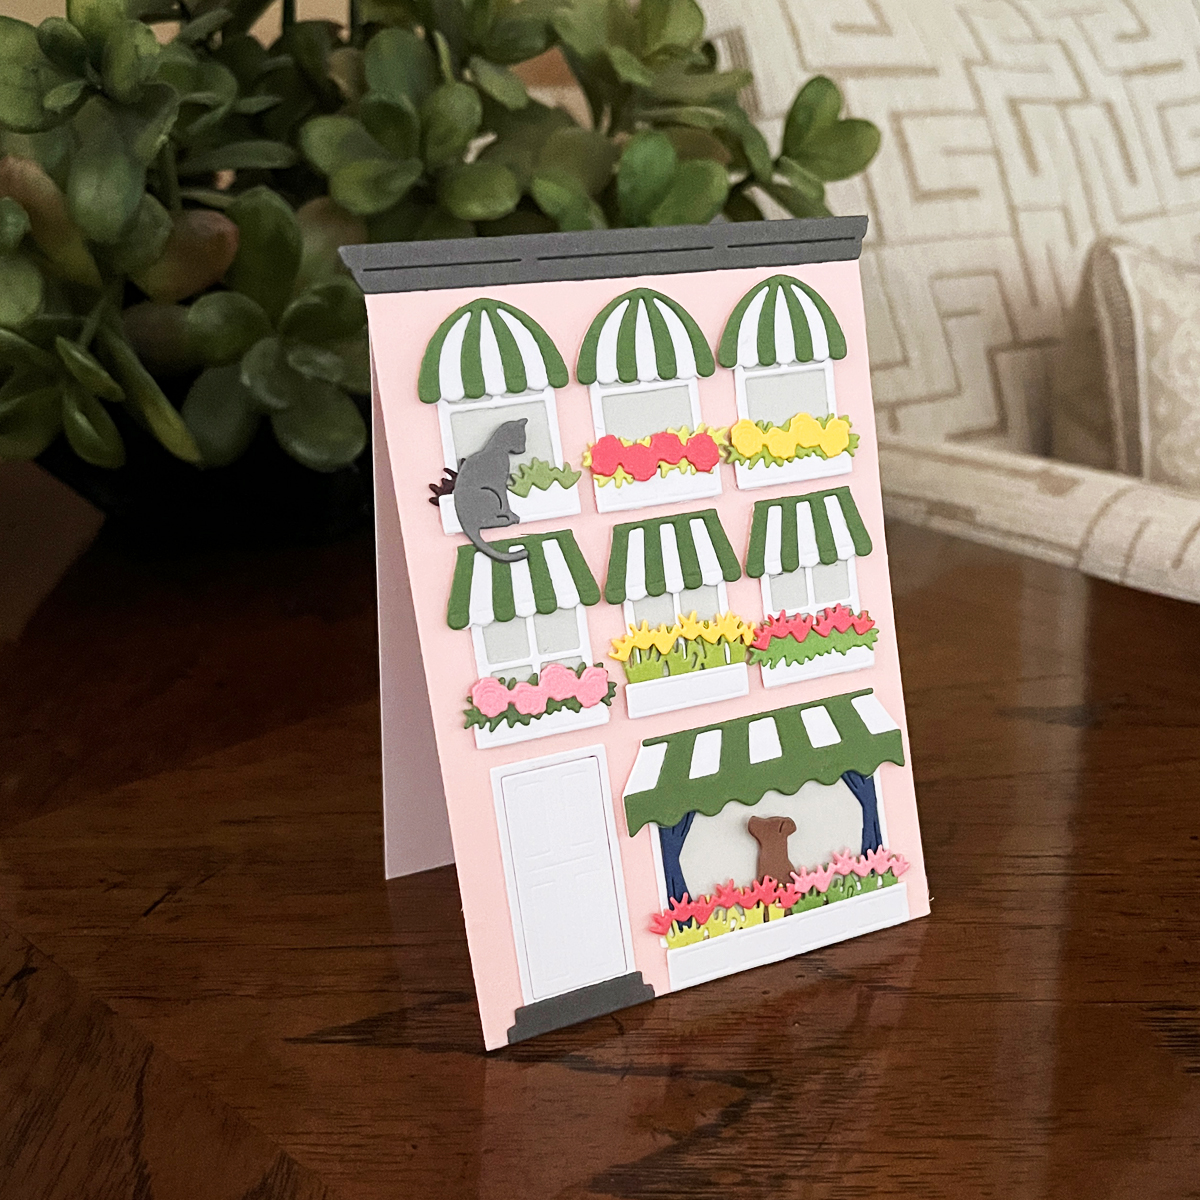
This is one of the reasons I enjoy the City Holiday collection so much.
The foundational house is the same, but changing the cardstock colors and accessory dies gives each version a completely different look.
Same foundational die set. Different accessories. Completely different personality.
That is exactly the kind of versatility I look for when deciding which dies are worth adding to my collection.
RELATED LINK: How to Create a Cozy Die Cut Scene Card
Better, Not Perfect
I started this article by telling you that I’ve never made a perfect card.
I don’t expect that to change.
There will always be a tiny piece that isn’t quite where I intended, a cutting plate that should probably have been replaced two cards ago, or an idea that works a little differently on paper than it did in my head.
But that’s part of creating.
What thousands of cards have taught me is that little things add up.
Taping a die in place. Turning a large die at an angle. Checking an intricate cut before pulling it from the die. Choosing colors before cutting. Keeping tiny pieces organized. Buying supplies I know I’ll actually use.
None of these die cutting tips is complicated.
Together, though, they make my creative process easier, more enjoyable and more successful.
And that leaves me with more time and energy for the part of cardmaking I love most—creating something beautiful and using it to make a personal connection with someone I care about.
So don’t worry about making the perfect card.
Keep learning. Keep experimenting. Find the tools and habits that make the process work better for you.
And then make something beautiful.
More Die-Cutting Resources
RELATED POSTS:
- Best Die-Cutting Ideas & Tools: Tips, Techniques & Card Designs That Work Every Time
- 14 Best Cardmaking Products and Supplies
- 9 Tips and Tricks for Creating Die-Cut Scene Cards
MORE STAND-UP CARD INSPIRATION: Stand-Up Chalkboard Easel Card
Products Used
Dies
- City Holiday Collection
- City Holiday Base Die Set
- Wrapped Up City Holiday
- Everyday City Holiday
- Color Swatch Dies
Cardstock
Tools
- Best Ever Craft Tape
- Crystal Ninja Pickup Tool
- Reverse Tweezers
- Bearly Art Glue
- Craft Stax
- Magnetic Sheets and Organizer Pockets: Regular – 5 x 7″ Small – 4 x 5″
- Color Swatches
- 9-inch Pro Craft Shears
- Small Scissors

6 thoughts on “13 Die Cutting Tips I’ve Learned After Making Thousands of Cards”