
A Beginner-Friendly Tutorial Featuring a Cozy Front Door Scene, Effortless Ink Blending, and a Stunning Die-Cut Wreath
Layering stencils are one of my favorite ways to create beautiful Christmas cards. There is something so satisfying about ink blending. It’s calming and centering while also feeding your creative soul.
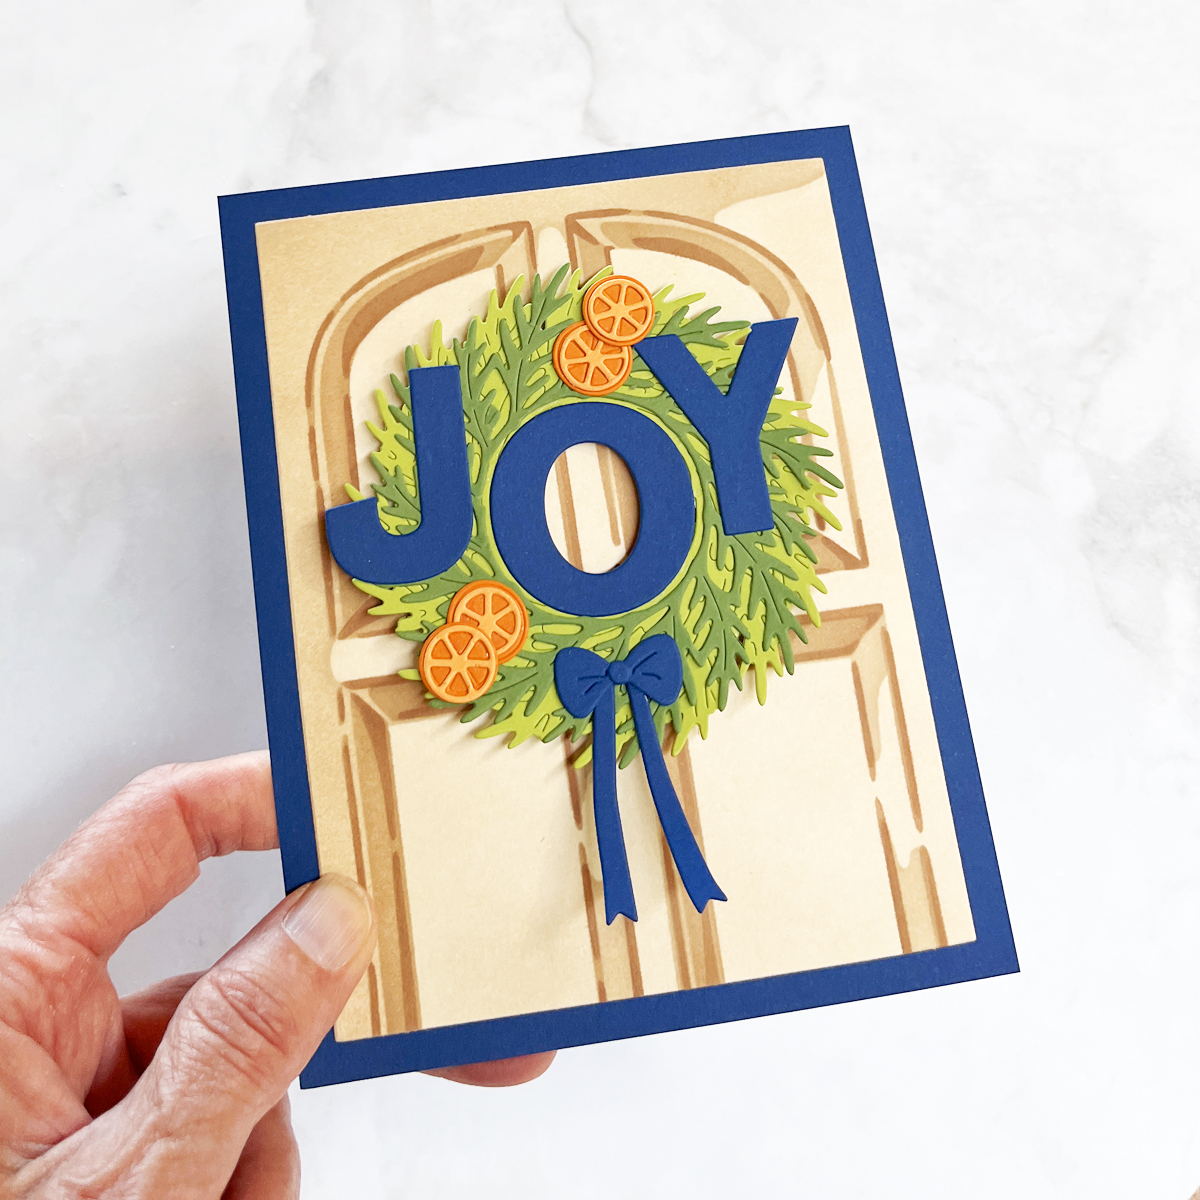
For me, it’s one of the most relaxing parts of cardmaking. The gentle circular motion of the blending brush, watching the colors gradually deepen, and seeing a design slowly come to life is both calming and incredibly rewarding.
Today’s Christmas card combines two of my favorite techniques—layered stenciling and die cutting—to create a warm and welcoming front door scene. While the finished card looks detailed, the process is surprisingly beginner friendly.
If you’ve been curious about layering stencils or want to improve your ink blending, I’ll walk you through exactly how I created today’s card and share a few tips I’ve learned along the way.
🩷 Scene Card Series
Create cards that tell a story.

In this series, we explore the design ideas behind scene cards—from composition and storytelling to color, backgrounds, and those little finishing touches that bring a project to life.
If you enjoy scene cards, you may also like my Best Scene Card Ideas collection where I share more projects designed to tell a story or my system for Batch Making Christmas Cards.

What You’ll Learn
- How to create a cozy Christmas front door scene
- Beginner tips for using layering stencils
- Best practices for smooth ink blending
- Why layering stencils are one of my favorite cardmaking tools
- Why this color palette works so well
- Additional ideas for using these products
Product Spotlight
Today’s project combines two coordinating Hero Arts products from the Home for the Holidays Collection:
One of my favorite things about this release is that the stencils and dies work beautifully together, but they also work wonderfully on their own.
The front door makes a lovely focal point for countless occasions, while the wreath can become the star of many different holiday cards.
It’s a collection filled with possibilities.
Why I Love Layering Stencils
Layering stencils continue to be one of my favorite cardmaking techniques.

Here’s why:
- Beginner friendly. No artistic drawing skills required.
- Beautiful shading. Each stencil layer naturally builds realistic depth.
- Affordable. Stencils are budget friendly and easy to store.
- Relaxing. Ink blending is wonderfully calming.
- Perfect for batch cardmaking. Once your inks are out, it’s easy to make several cards.
If you’re just beginning your cardmaking journey, layering stencils are one of the easiest techniques to master while still producing impressive results.
Let’s Talk Color
Originally, I envisioned a charming pink front door.
After I finished blending all four stencil layers, however, something didn’t feel quite right. While the pink was pretty, it competed with the wreath instead of allowing it to become the focal point.
So…back to the craft table!
I switched to warm neutral tans and soft browns for the door, and the entire design immediately came together.

The neutral door grounds the scene while allowing the vibrant green wreath and bold Cosmic Blue JOY sentiment to shine.
To add just a bit of energy, I decorated the wreath with tiny orange accents that provide cheerful pops of complementary color without overwhelming the design.
The finished palette consists of:
- Warm neutral tans
- Fresh greens
- Cosmic Blue
- Small orange accents
I generally like working with three primary colors plus neutrals because the finished card feels cohesive, calm, and intentional rather than busy.
Sometimes the best design decision is simply trying another color.
Step-by-Step Tutorial
Step 1 – Choose Your Cardstock
Since I planned a tone-on-tone design, I stenciled directly onto light ivory cardstock.
If you prefer starting with white cardstock, I recommend using a smooth blending cardstock for seamless ink application.
Step 2 – Secure Your Stencils
Place your cardstock onto a grip mat and secure the stencil with low-tack tape.
✨ Tip: Orientation matters!
Look for:
- Hero Arts logo in the lower right
- Stencil number in the lower left
Each stencil is clearly numbered 1–4.
Step 3 – Use the Alignment Squares
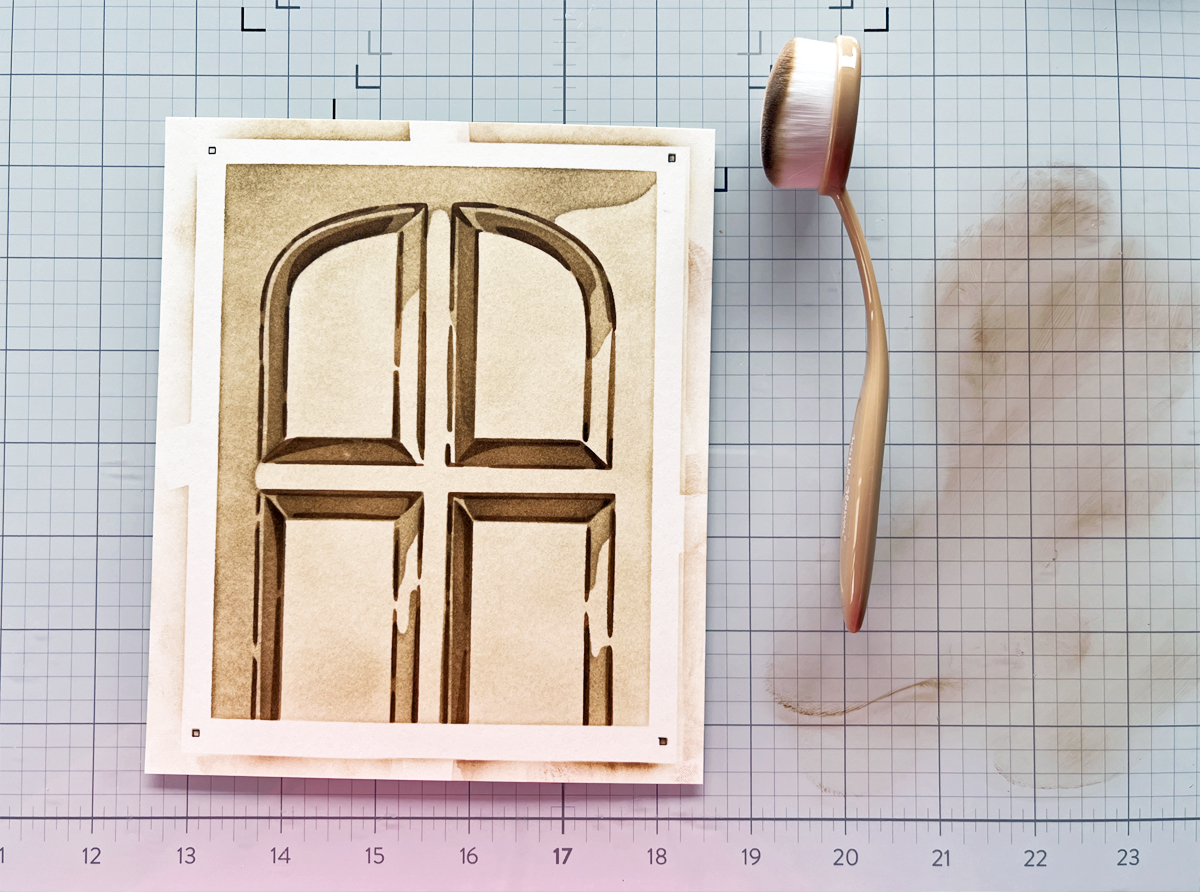
Before blending, lightly mark the alignment squares with a pencil.
These tiny guides make positioning each stencil layer incredibly easy and ensure perfect registration throughout the project.
I included a process photo showing this setup.

If you’d like to see this technique in action, check out my Easy & Fun Card Idea video where I demonstrate the alignment process step by step.
Step 4 – Blend the First Layer
Begin with your lightest ink.
Load your blending brush, tap off excess ink onto your craft mat or scrap paper, and blend using gentle circular motions.
I like rotating my panel while blending and alternating clockwise and counter-clockwise circles for especially smooth coverage.
✨ Tip: Tapping off excess ink first helps prevent blobs and creates softer, more even transitions.
Step 5 – Continue Building the Layers
Repeat the process for the remaining three stencil layers, gradually moving to darker shades with each stencil.
Watching the design slowly appear is one of my favorite parts of layering stenciling.
Step 6 – Assemble the Wreath
Next, die cut and assemble the wreath.
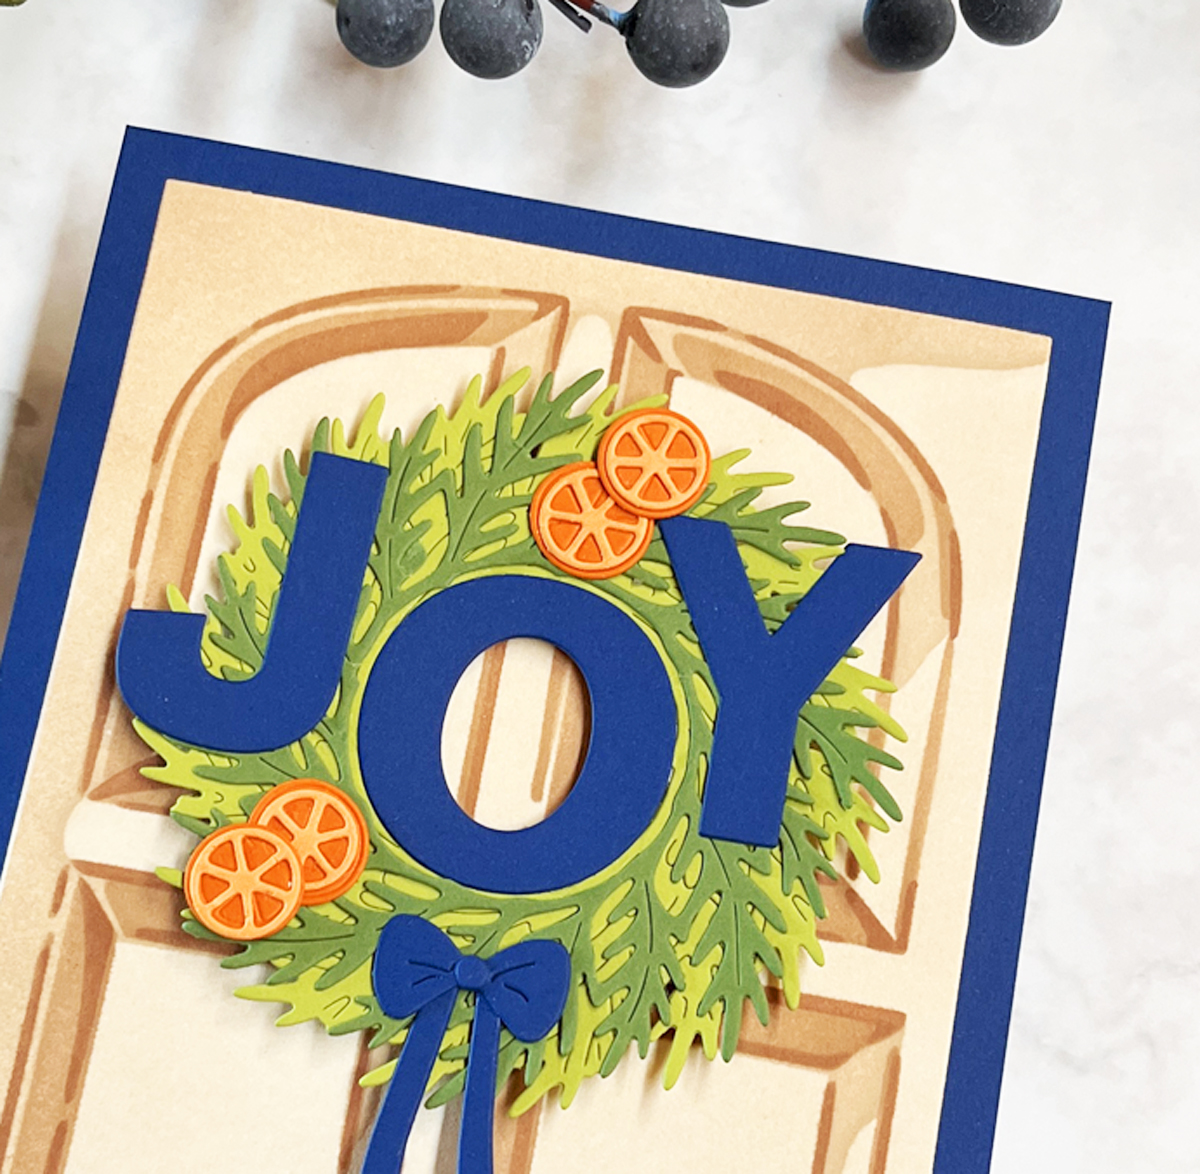
One clever design detail I especially enjoyed is how the opening in the wreath perfectly frames the “O” in the die-cut JOY sentiment.
I raised the J and Y slightly while allowing the “O” to nest naturally inside the wreath.
It’s a small detail that creates wonderful dimension.
Common Beginner Mistakes (and How to Avoid Them)
If you’re new to layering stencils, here are three simple tips that make a big difference:
Using too much ink
Always tap off excess ink before blending.
Skipping the alignment guides
Those little registration squares are your best friend.
Starting with dark ink
Always work from light to dark for the smoothest gradients.
Why This Card Feels So Warm and Welcoming
I think this design works because it combines several comforting elements.
Front doors naturally symbolize hospitality and home.
Christmas wreaths instantly evoke warmth, tradition, and celebration.
The neutral wood tones create a calming foundation while the rich greens and vivid blue sentiment provide fresh contrast.
Those tiny orange accents add just enough energy to keep the design lively.
Everything works together to create a cozy holiday welcome.

More Cards You Can Make with These Products
One thing I love about this collection is its versatility.
Here are a few additional ideas:
- Welcome Home cards
- Easter front doors with spring wreaths
- Valentine’s Day wreaths
- Fall harvest wreaths
- Use only the wreath for a clean and simple Christmas card
- Decorate the wreath with the adorable miniature houses from the accessory set
- Use the smaller wreath as the “O” in JOY
There are so many ways to stretch these products beyond today’s project.
Toolbox
Products Featured
- Home for the Holiday Bundle
- Front Door Layering Stencils
- Winter Wreath Die Set
- Winter Wreath Accessories
Inks
Cardstock
Favorite Tools
If you’re curious about the supplies I reach for most often, visit my Go-To Cardmaking Supplies Page.
You may also enjoy:
- 2 Easy Stenciled Masculine Cards
- 3 Completely Different Cards From One My Monthly Hero Kit
- Crafting with Color Video
- Custom Plaid Two Ways
📌 Save This Post for Later
Planning your Christmas cards? Save this tutorial so you’ll have these layering stencil tips handy when you’re ready to create.
Final Thoughts
I hope today’s project inspires you to pull out your blending brushes and give layering stencils a try.
They’re relaxing, beginner friendly, and one of the easiest ways to create beautifully shaded handmade cards.
And now I’d love to hear from you…
Have you tried layering stencils yet, or are you thinking about giving them a try?
Thanks so much for stopping by today. I always love to see you. 💙

6 thoughts on “How to Use Layering Stencils to Create Beautiful Christmas Cards”