Mixed media is my creative escape—and this simple three-step recipe can help it become yours, too.
Sometimes I walk into my craft room with a plan.
I have a new stamp set to try, products to photograph, or a card design already taking shape in my mind.
But sometimes…
I just want to play.
No rules. No expectations. No pressure to make everything perfect. Just the freedom to experiment, try something new, and see where the creative process takes me.

That’s exactly why I love mixed media.
Mixed media has become my creative escape. Every project is different, every background tells its own story, and the best part is that there really aren’t any mistakes. If something doesn’t turn out the way I imagined, I simply add another layer. Before long, what looked like a mistake becomes one of my favorite details.
I also love that mixed media encourages me to use supplies in new ways. Scraps of paper, leftover die cuts, old book pages, bits of texture—almost anything can become part of the finished design. There’s something wonderfully satisfying about building a card one thoughtful layer at a time.
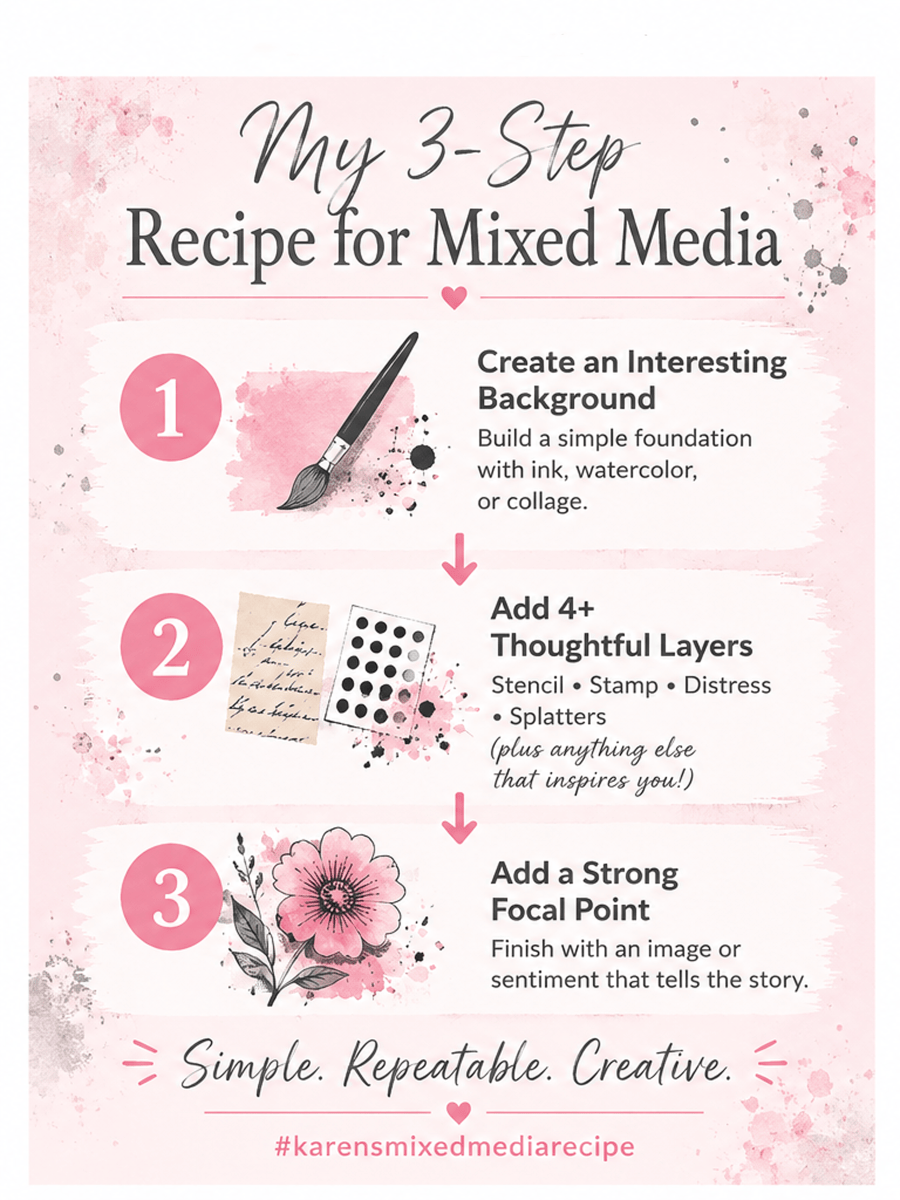
After years of experimenting, I realized I kept coming back to the same simple process. Today I’d love to share that recipe with you. It’s the three-step framework I use to create mixed media cards that feel layered, interesting, and uniquely my own—without ever feeling overwhelming.
Whether you’re brand new to mixed media or simply looking for a fresh approach, I hope this recipe gives you the confidence to relax, experiment, and enjoy the creative journey.
Visit my Mixed Media Cards Made Simple Learning Center for more on my 3-Step Recipe, favorite techniques, supplies, and beginner tutorials.
What You’ll Learn
- My simple 3-Step Mixed Media Recipe
- The “Fab 4” layers I use on almost every project
- How to build a vintage-inspired background one layer at a time
- Why color, texture, and dimension work together
- How to create confidently—even if you’ve never tried mixed media before
The Supplies I Reached For Today
Before investing in new crafting supplies, I always ask myself one question:
Will I still be reaching for these products a year from now?
The products I used for today’s card earned a definite yes.
The Turn the Page Collection immediately caught my attention because each product fills a different role in mixed media—and I can see myself using them again and again.
A bold vintage-inspired portrait paired with expressive word stamps that work beautifully as focal points or layered design elements.
Keepsake Numbers Stamps
Packed with phrases, numbers, grids, and distressed imagery, this stamp set is the kind of “workhorse” you’ll find yourself reaching for on almost every mixed media project.
These quickly became my favorite surprise from the collection. Rather than stealing the spotlight, they quietly add depth, texture, and those wonderful vintage layers that help tell the story behind the focal point.
If you’re looking to add a few mixed media-friendly staples to your craft room, I think this collection is well worth considering. These aren’t one-hit wonders—they’re the kinds of products that become part of your regular creative toolbox.

My 3-Step Recipe in Action
Every mixed media card I create is a little different, but the overall process rarely changes. This simple framework helps me build layers one step at a time without worrying about perfection. Let me show you how I created today’s vintage-inspired card.
Step 1: Create an Interesting Background
Every great mixed media project starts with a background that quietly establishes the mood. At this stage, don’t worry about perfection—you’ll be adding plenty of layers, so some of your earliest work may end up only partially visible. That’s part of the charm of mixed media.
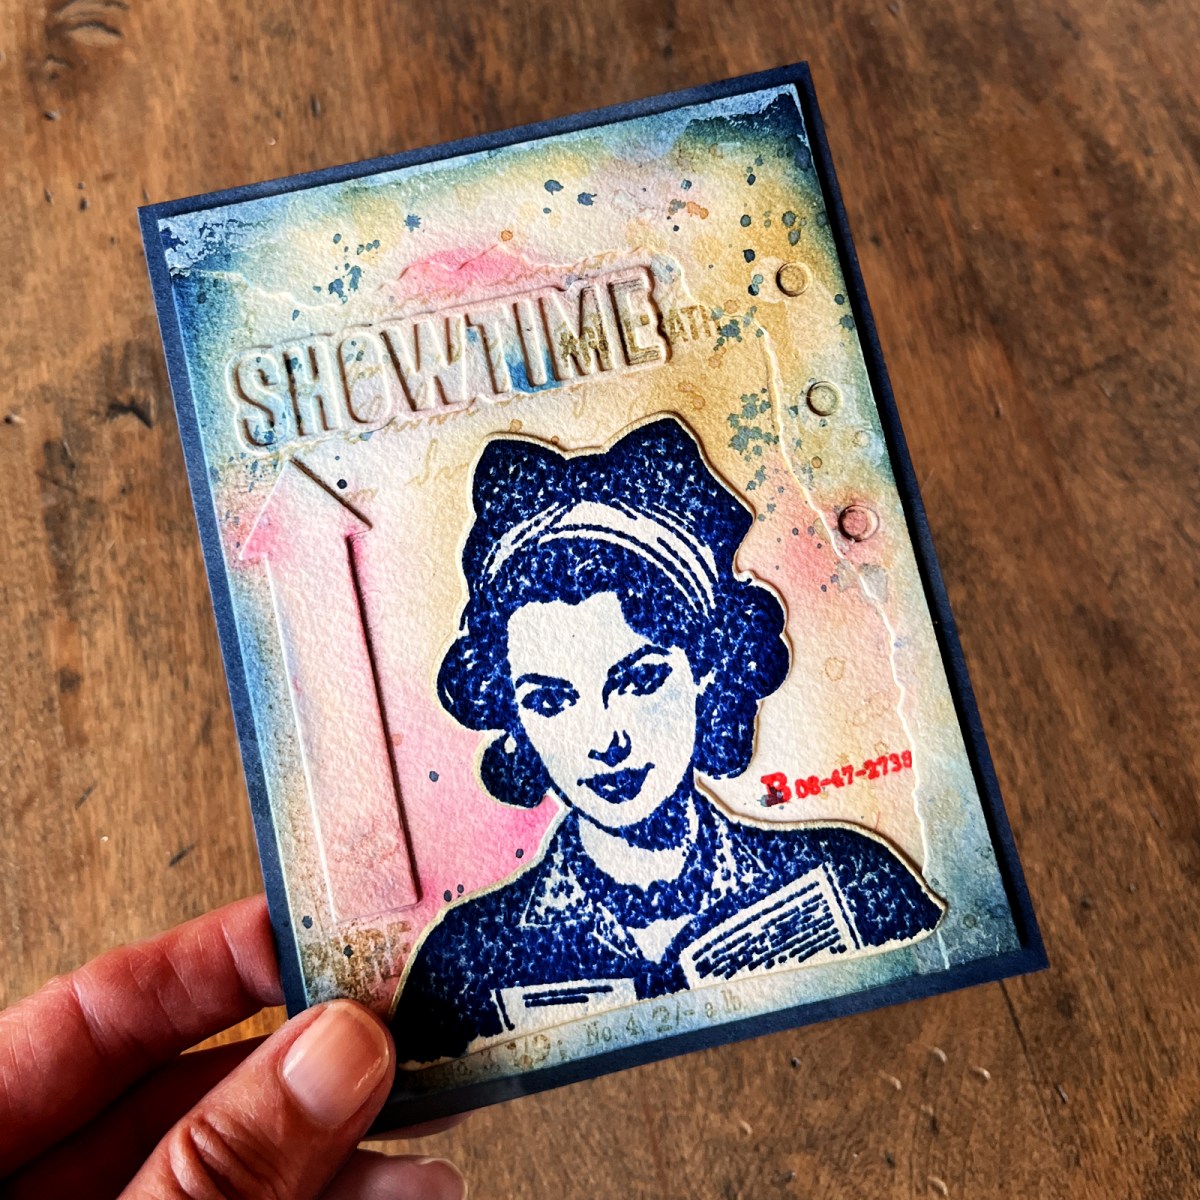
For today’s card, I started with half a sheet of 140 lb. watercolor paper and added soft, random ink blending using pale blue and tan inks.

I like using Distress or Reactive Inks because they remain water-reactive. As more layers are added, I can soften edges, blend colors, and “age” the background to create an authentic vintage look.
The background isn’t meant to steal the show. It quietly supports everything that comes later.
Step 2: Build Thoughtful Layers
This is where mixed media really comes to life.
I often say that thoughtful layers create the most interesting cards. Every layer adds another little piece of the story, and together they create projects filled with personality, texture, and depth.
Most of the techniques I use fall into what I call Karen’s Fab 4—the four foundational techniques I reach for on almost every mixed media project.

These are the four layers I return to again and again…
Layer One: Stenciling
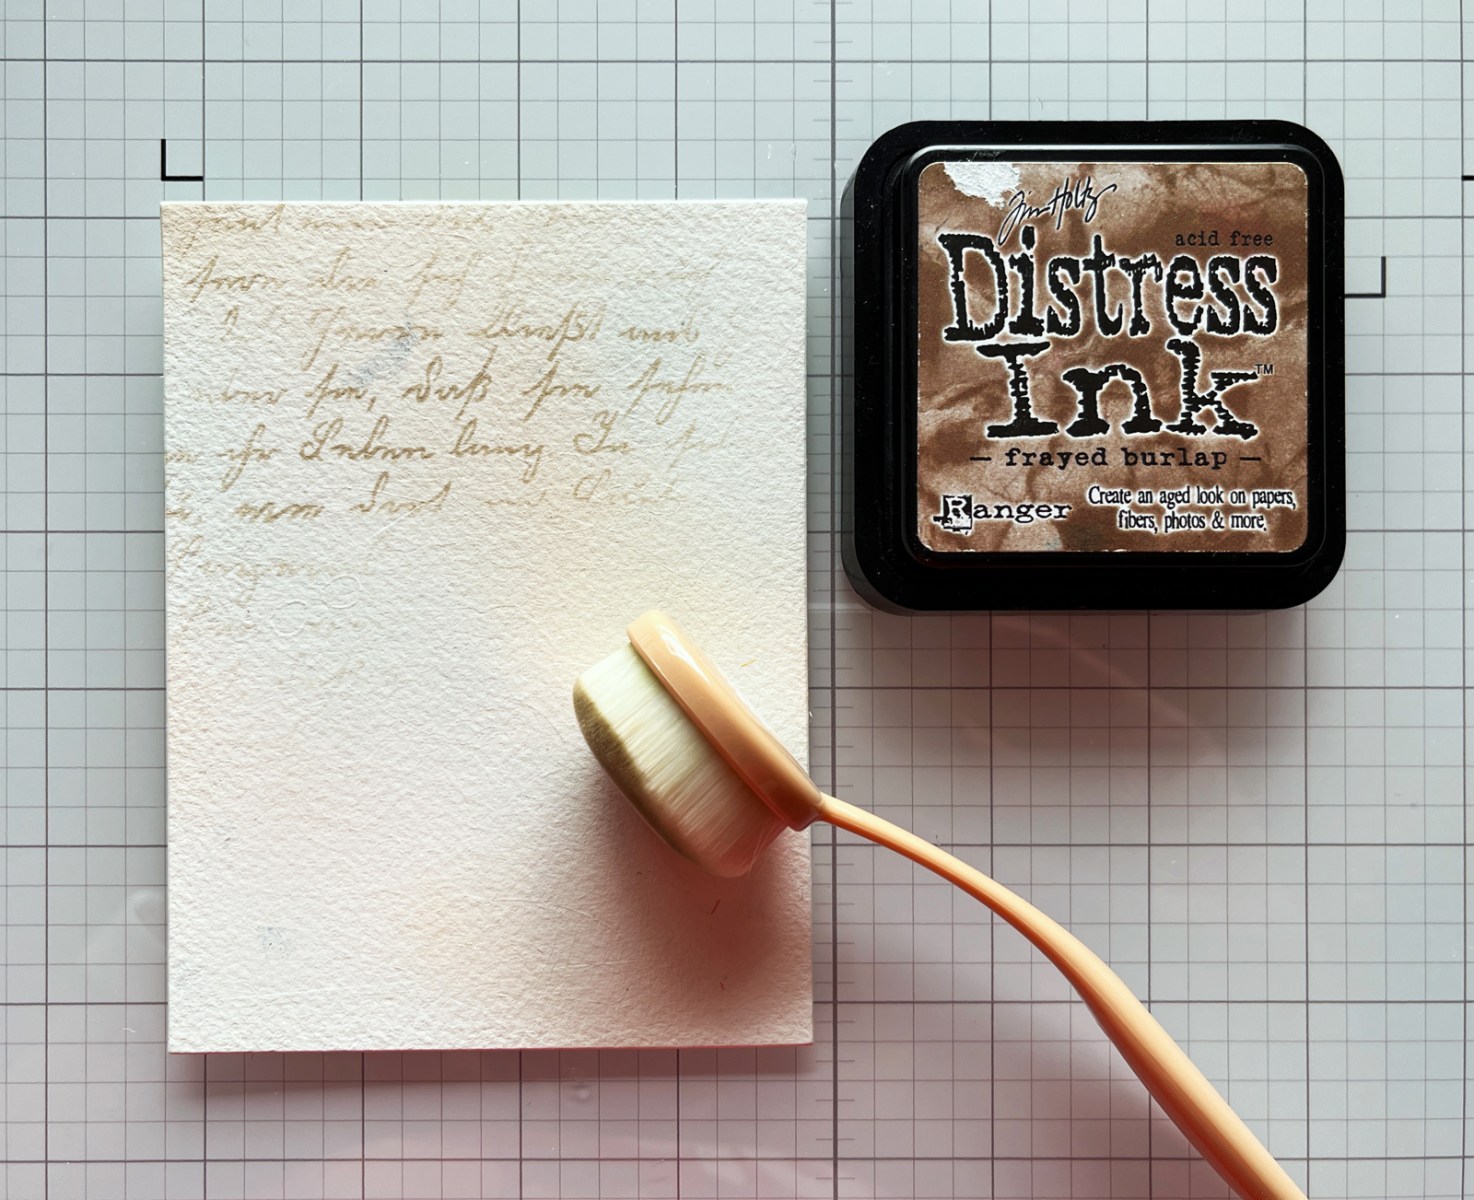
I almost always begin building my layers with stenciling because it adds visual interest without competing with the focal point.
Script stencils are one of my favorites. They quietly fill empty spaces while helping create that well-loved vintage feel. If you don’t own a script stencil, don’t worry—almost any subtle stencil will work beautifully.
Layer Two: Stamping
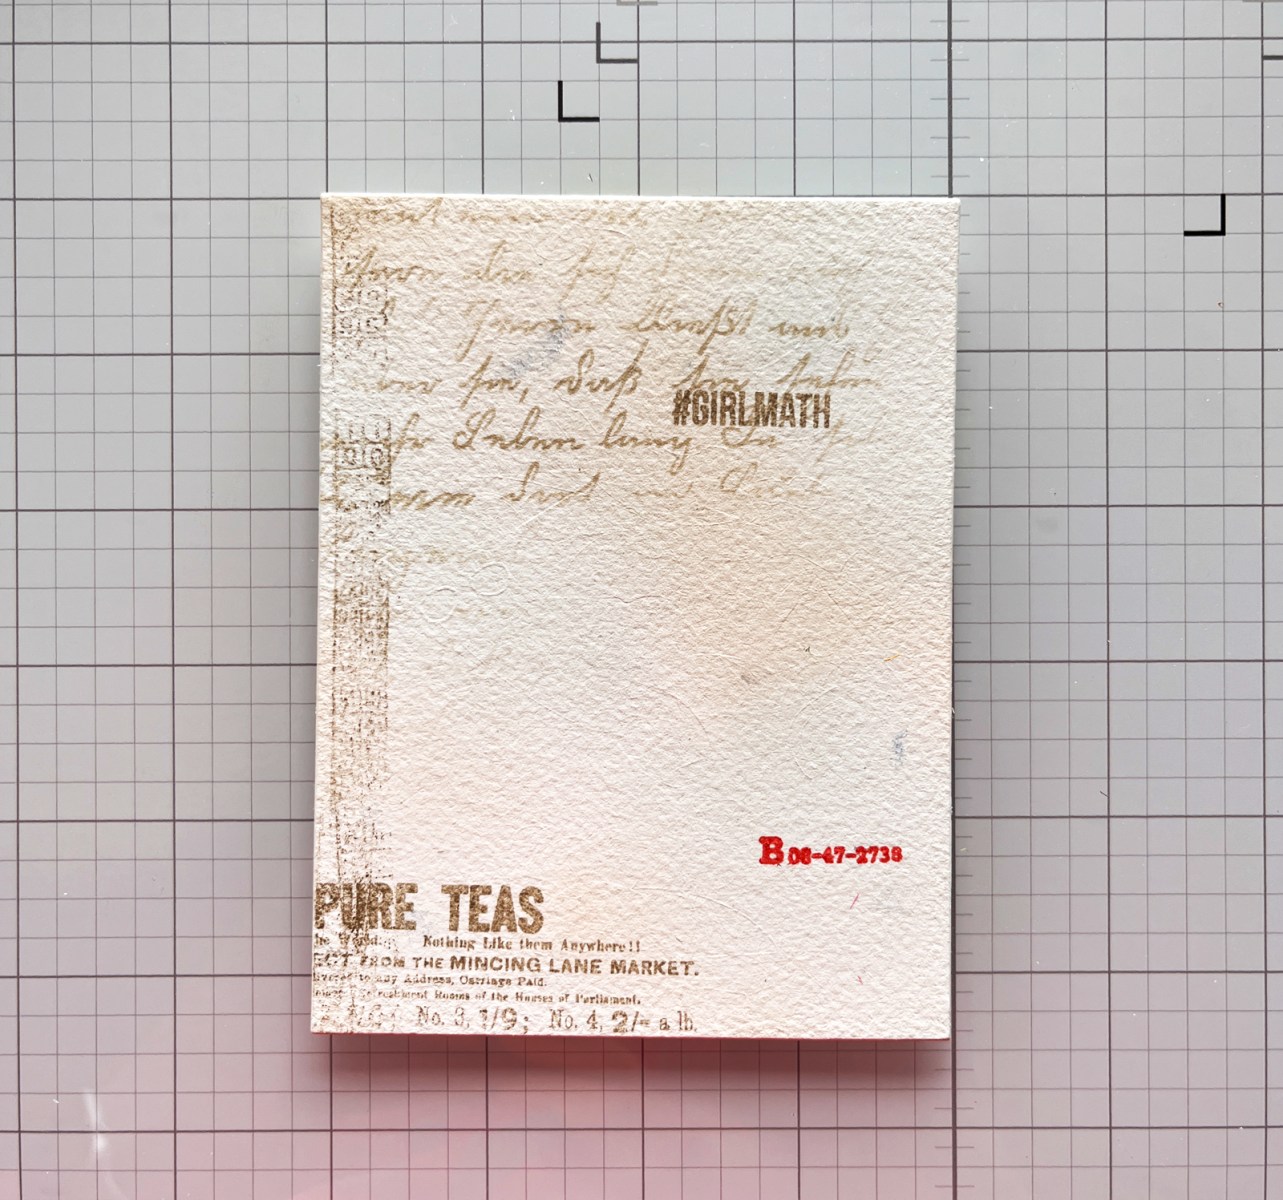
Next, I stamped several images from the Keepsake Numbers stamp set. Most were stamped in brown to maintain the vintage palette, but I added one impression in red for a small pop of color.
Tiny surprises like this help create movement throughout the design.
Layer Three: Build Dimension
Flat backgrounds become much more interesting when you begin adding physical layers.
For this card, I die cut several elements from the Torn Edges Dies, including:
- torn paper edge
- “Showtime” word die-cut
- arrow embellishment
The fun part is that these pieces were die cut from leftovers of my original background, so everything already coordinated beautifully.
If you don’t have these dies, don’t worry. Numbers, letters, circles, tickets, labels, or even scraps of patterned paper all work wonderfully.
I attached everything using Matte Medium.

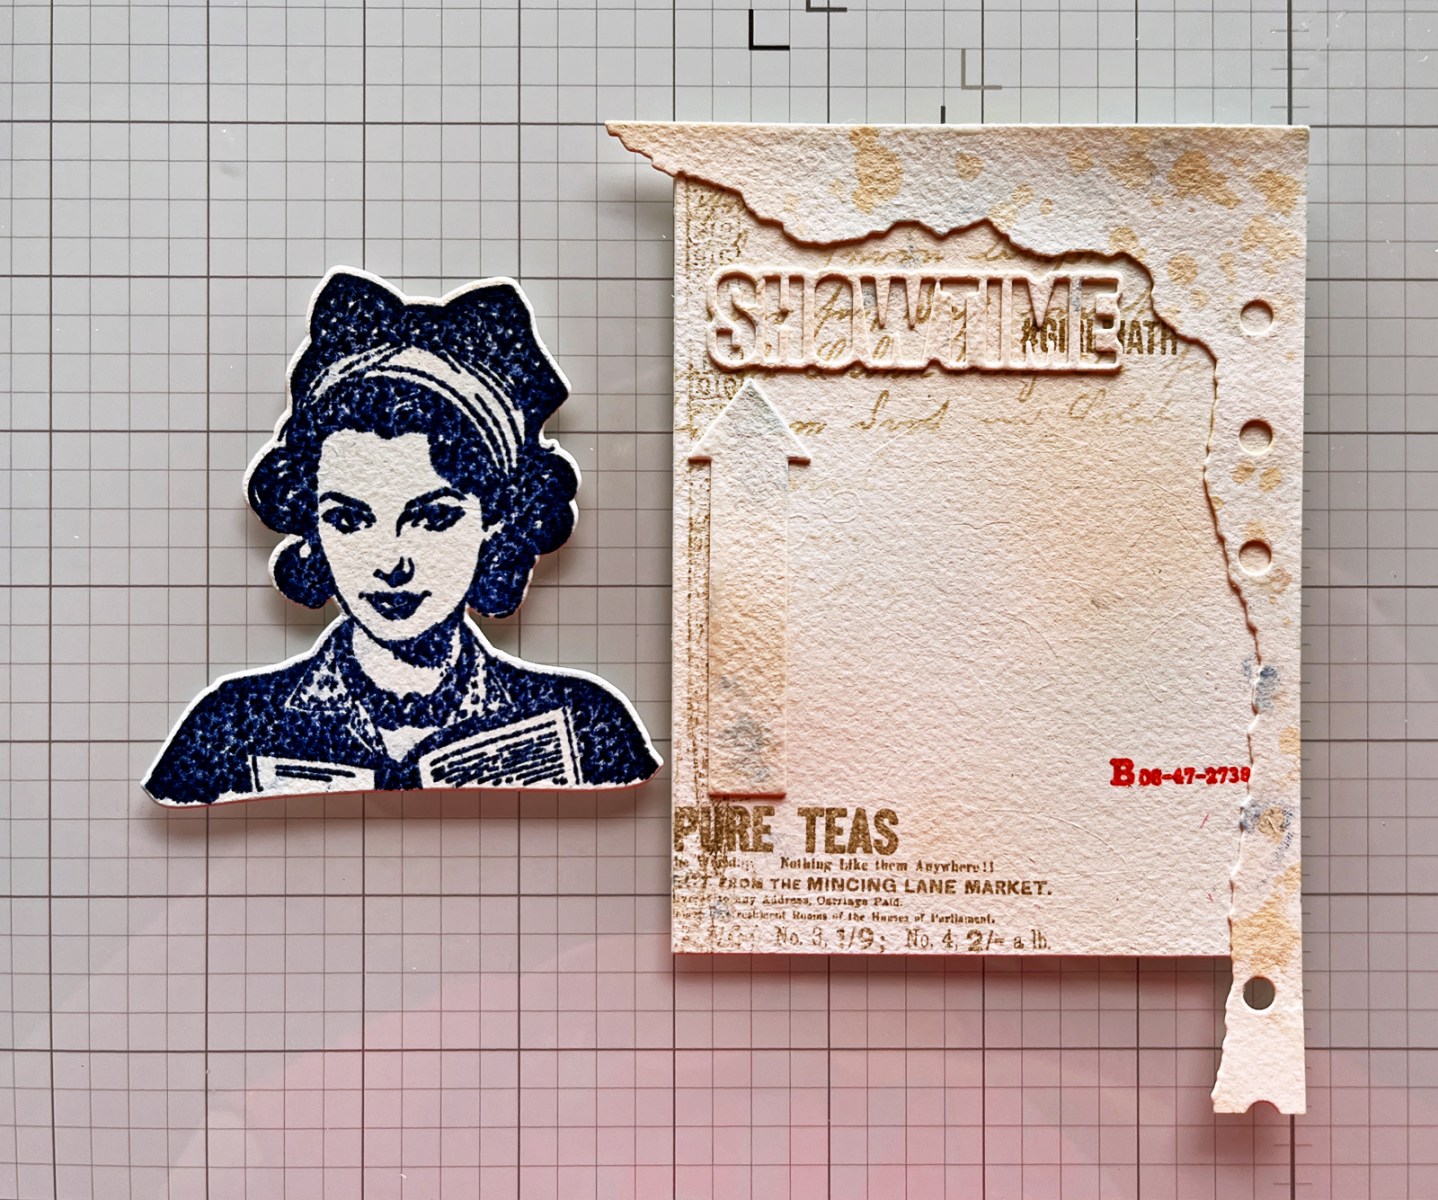
While I was creating, I was in a slightly silly mood and decided to see what tea and coffee splatters would look like on the torn paper die cuts.
I liked them so much they stayed!
Those little experiments are one of the reasons I love mixed media.
Layer Four: Add Depth
Once the layers were in place, I began giving them more dimension.
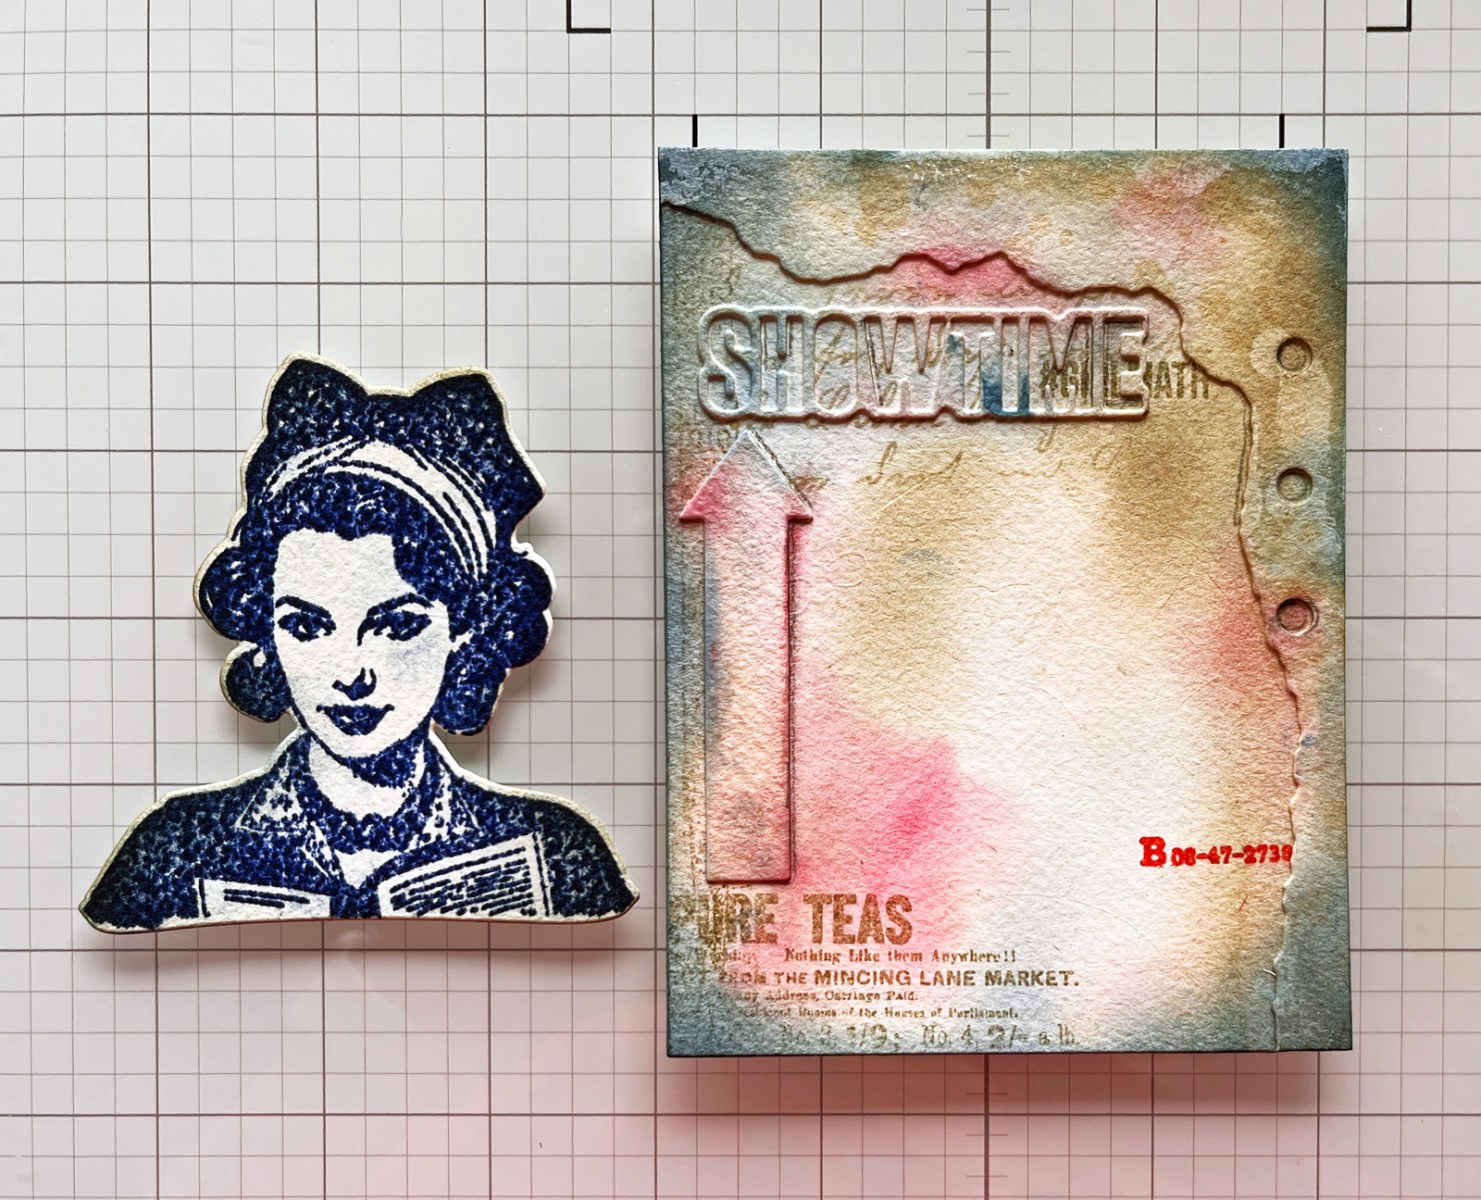
Using a graphite pencil, I added subtle shading along one side of the arrow and around several of the punched paper holes. These tiny shadows help create the illusion that the layers are lifting off the page and add some authenticity to my vintage vibe.
Next, I distressed portions of both the background and die cuts with soft applications of red, tan, and denim blue ink.
Distressing is another member of my Fab 4 because it instantly creates age, depth, and visual interest.
Finally, I ink blended around the outside edges of the panel using brown and denim blue ink to gently frame the composition.
Layer Five: Splatters
No mixed media background feels completely finished until I add a few splatters.
For today’s card, I used denim blue and brown splatters to break up some of the larger open areas and tie all of the colors together.
Sometimes these little details seem almost invisible at first—but if you removed them, you’d immediately notice something was missing. I think mixed media is really about adding lots of tiny, subtle layers. No single layer grabs your attention on its own. Instead, each one quietly contributes to the finished project, creating depth, personality, and that unmistakable mixed media look.
Step 3: Add a Strong Focal Point
Once the background felt complete, it was finally time to introduce the star of the card.
I stamped the beautiful vintage portrait using a combination of Denim Blue and Blueprint Sketch inks before die cutting the image.
To help the portrait blend naturally into the background, I softly shaded portions of the edges with brown ink.
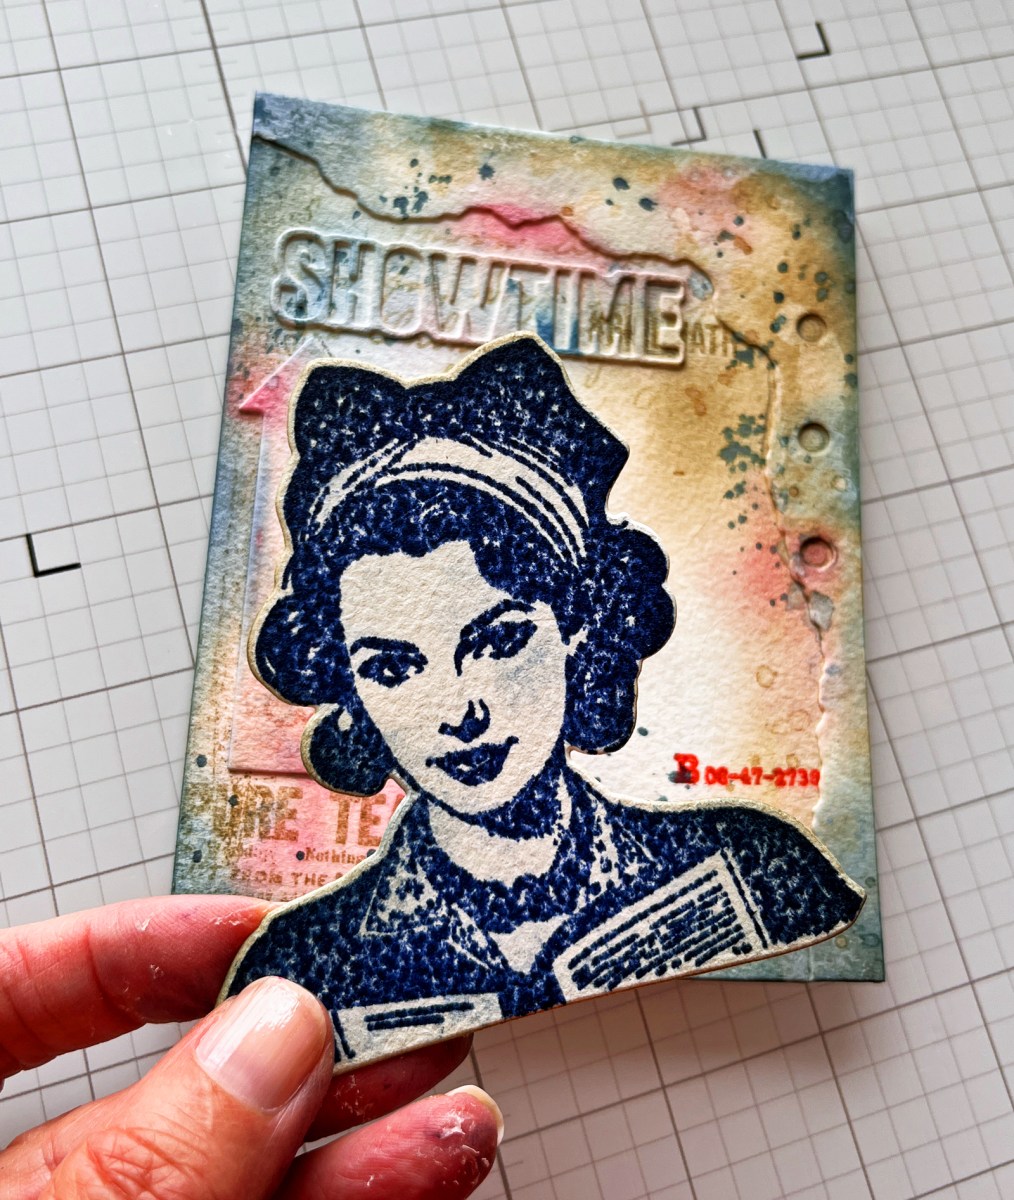
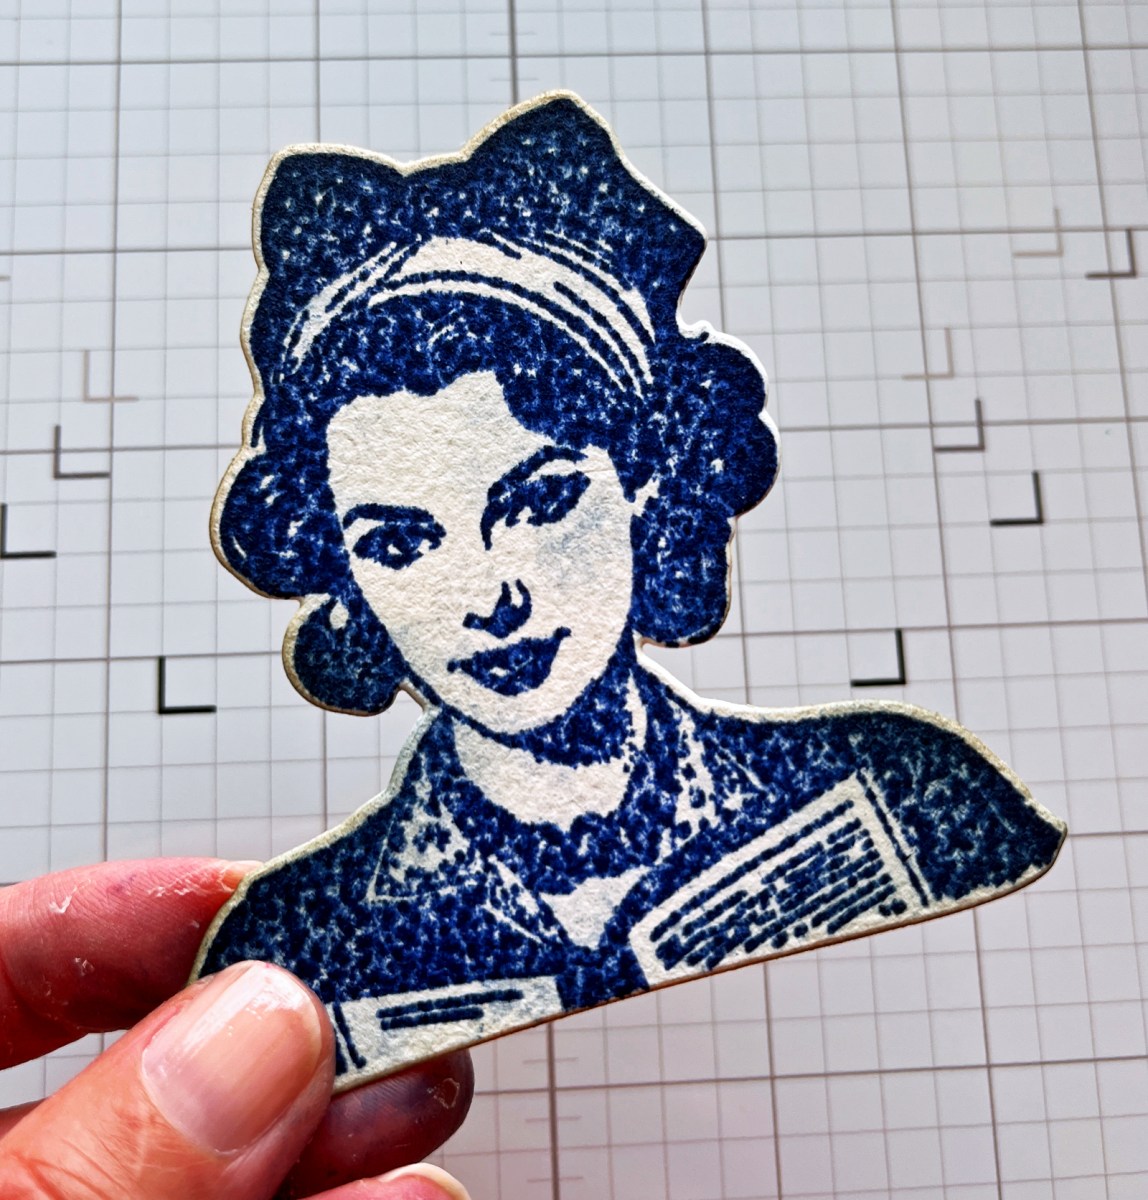
One of my favorite moments during the creative process is hovering the finished focal point over the completed background before committing with glue. That’s usually when the entire design finally comes together.
Bringing It All Together
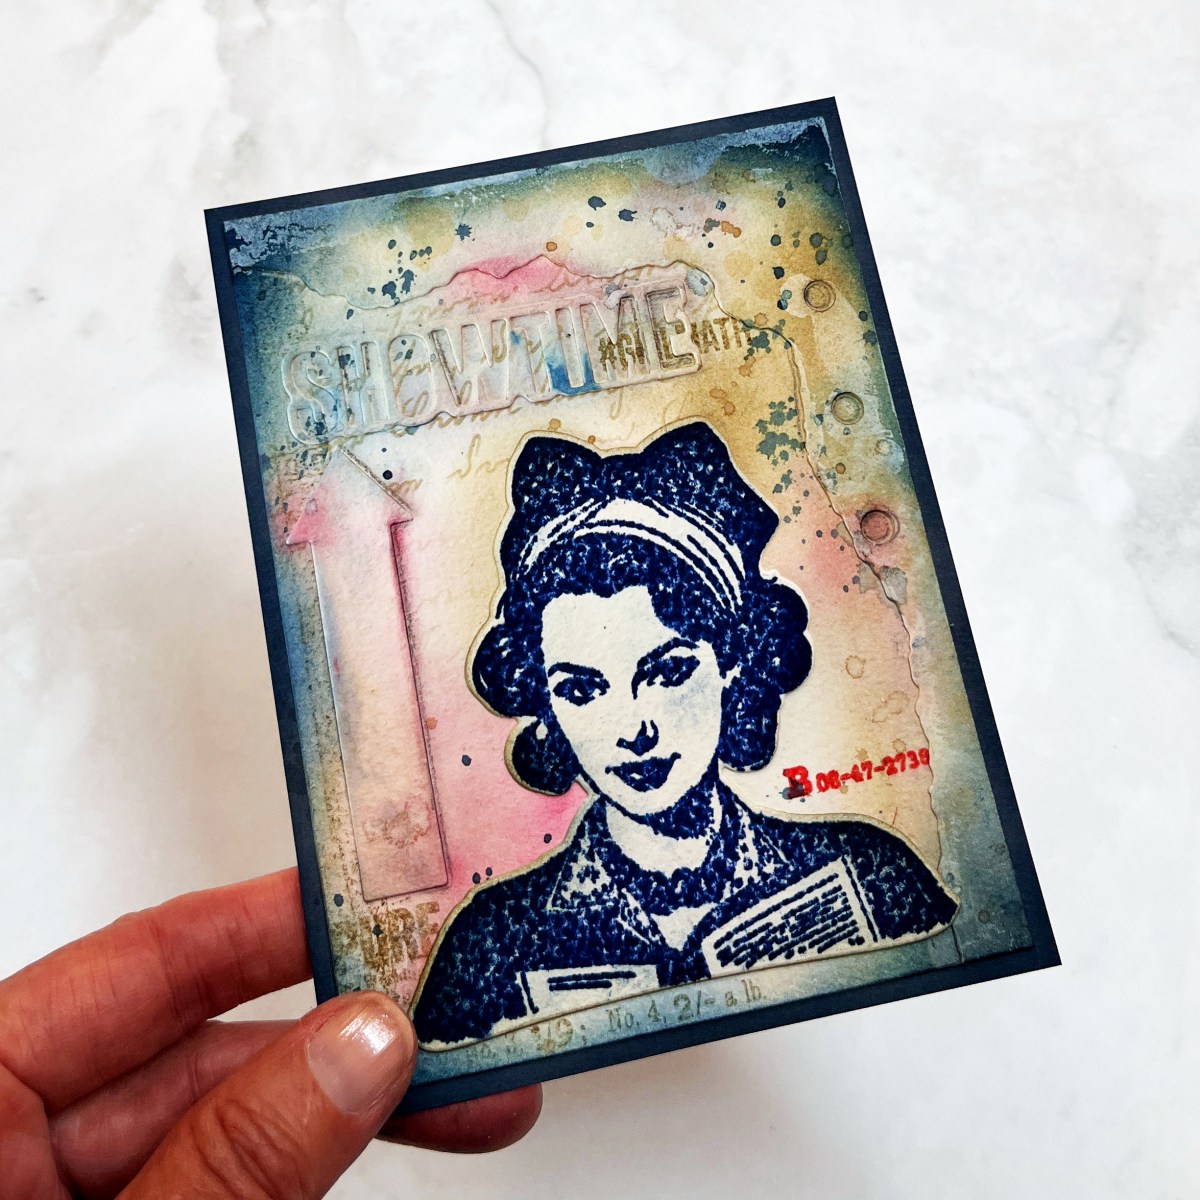
To complement the vintage palette, I mounted the finished panel onto a gray A2 card base and lightly ink blended the edges with Denim ink before adhering everything together.
The cool gray helps reinforce the nostalgic feel while allowing the warm browns and reds to remain the stars of the design.
And adding the gray card base frames our project. We have a subtle ink distressed frame and a more geometric card base frame.
Common Beginner Mistakes
There Really Aren’t Many Mistakes
One of the reasons I love mixed media is that it’s one of the most forgiving styles of cardmaking you’ll ever try.
Unlike techniques where one misplaced stamp can mean starting over, mixed media actually encourages experimentation. If something doesn’t turn out quite the way you imagined, don’t panic. Ask yourself,
“Can this become another layer?”
More often than not, the answer is yes.
Cover part of it with stamping.
Add a stencil.
Glue on another die cut.
Blend a little ink over the top.
Add a few splatters.
Some of my favorite backgrounds started with what I thought were mistakes. Those unexpected moments often become the details that make a project feel unique and full of personality.
That’s one of the reasons mixed media has become my creative escape. It reminds me that creativity isn’t about perfection—it’s about curiosity and enjoying the process.

If you’d like to recreate today’s project—or simply build your own mixed media toolbox—here are the supplies I used most often.
The Supplies I Used Most
Turn the Page Collection
Today’s project features three products from the collection that I expect to become regular staples in my craft room.
- ING Word Stamps & Dies – A beautiful vintage-inspired focal point with expressive word stamps for layering.
- Keepsake Numbers Stamp Set – One of those workhorse sets you’ll reach for again and again when building vintage backgrounds.
- Torn Edges Dies – Perfect for creating layered paper elements that add depth, texture, and visual interest.
The collection includes many other wonderful products, but these were the three that immediately felt like long-term additions to my mixed media toolbox.
A quick supply note: Several products from the Turn the Page Collection sold out very quickly. Spellbinders is working to restock them, but I don’t have a confirmed date yet. The good news is that the mixed media techniques I’m sharing today work beautifully with supplies you already have in your craft room, so don’t be afraid to substitute your favorite stamps, dies, and focal images.
My Favorite Tools
- Waffle Flower Color-Coded Blending Brushes
- Spellbinders Platinum 6 Die-Cutting Machine
- 140 lb. Watercolor Paper (my favorite surface for mixed media techniques)
My Go To Supplies Page includes many of my favorite mixed media staples and supplies.

Don’t worry about buying every new mixed media product.
Instead, invest in a handful of versatile “workhorse” supplies you’ll reach for over and over again. Those staples will serve you far better than a drawer full of products you only use once.
Just Getting Started?
Mixed Media Made Simple – Part 1
A gentle introduction to the basic techniques and supplies you’ll use again and again.
Ready to Build More Layers?
See how a beginner and intermediate version of the same project can produce completely different results.
Try Another Background Technique
One of my favorite ways to create colorful, one-of-a-kind mixed media backgrounds and I share 5 different variations of ink smooshing.
Creativity Over Perfection
One of the reasons mixed media has become my favorite creative escape is that it reminds me to enjoy the journey as much as the finished card.
Every background tells a different story. Every layer adds a little more personality. And sometimes the details I almost covered up become my favorite parts of the project.
If you’re just getting started, don’t worry about making everything perfect. Start with a simple background, build a few thoughtful layers, and finish with a focal point you love. The more you experiment, the more you’ll discover your own style—and that’s where the real magic begins.
I hope my 3-Step Recipe and Karen’s Fab 4 give you the confidence to relax, play, and create something uniquely your own.
Happy crafting!
❤️ Karen

5 thoughts on “My 3-Step Recipe for Beautiful Mixed Media Cards”