Simple layering techniques to add depth, texture, and interest to your mixed media cards—without the overwhelm.
If you love mixed media but feel like your projects need a little more depth, this post is for you.
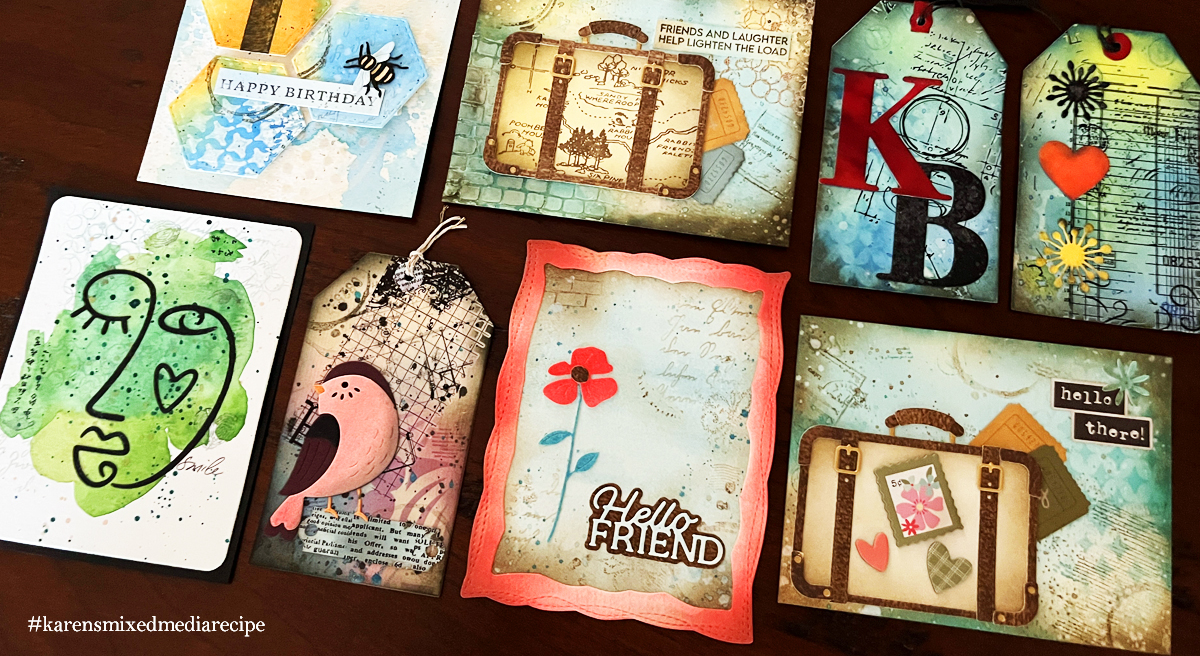
In today’s tutorial, I’m sharing three easy mixed media layering techniques that go beyond the basics—simple additions that create texture, interest, and that “something extra” that makes a card feel finished.

These layers are beginner-friendly, easy to repeat, and surprisingly impactful.
This post is part of my ongoing mixed media series where I create a card or tag using my easy to follow recipe.
After years of experimenting (and plenty of trial and error), I developed a simple 3-step recipe that works on almost every project.
And today, I’m sharing it with you.
This post is part of my Mixed Media Series where I share simple techniques for creating layered, artistic cards using backgrounds, texture, and focal points. You can explore the full series here: Mixed Media Made Simple.
✂️ In This Post, You’ll Learn:
• My 3-Step Mixed Media Recipe
• How to create an easy watercolor background
• How to layer like a pro
• How to create an interesting focal point
Karen’s 3-Step Mixed Media Recipe
Step 1: Create an Interesting Background
Step 2: Add 4+ Layers
Step 3: Add a Strong Focal Point
Simple. Repeatable. And it works on almost every project.
📌 Save this for later so you can come back when you’re ready to try this technique.
If you’re new to this series, start here:
👉 Mixed Media Made Simple: My 3-Step Recipe for Fun & Easy Tags
And if you missed my foundational layering post, you’ll definitely want to read this first:
👉 Mixed Media Layering Made Simple: The 4 Layers I Use on Almost Every Project
Because today…
We’re Building On That Foundation
This post is your next step.
We’re taking the “Fab 4” layers and adding three more techniques to create a richer, more dimensional, slightly more advanced mixed media look—without losing that relaxed, beginner-friendly feel.
And the best part?
We’re using a very similar design (same colors, same focal point, same vibe) so you can clearly see how your work can evolve.
If you try this technique, tag your project with:
👉 #karensmixedmediarecipe — I would truly love to see what you create!
If you are interested in adding a new supply or two to your toolbox, you can check out my Favorite Supplies page.
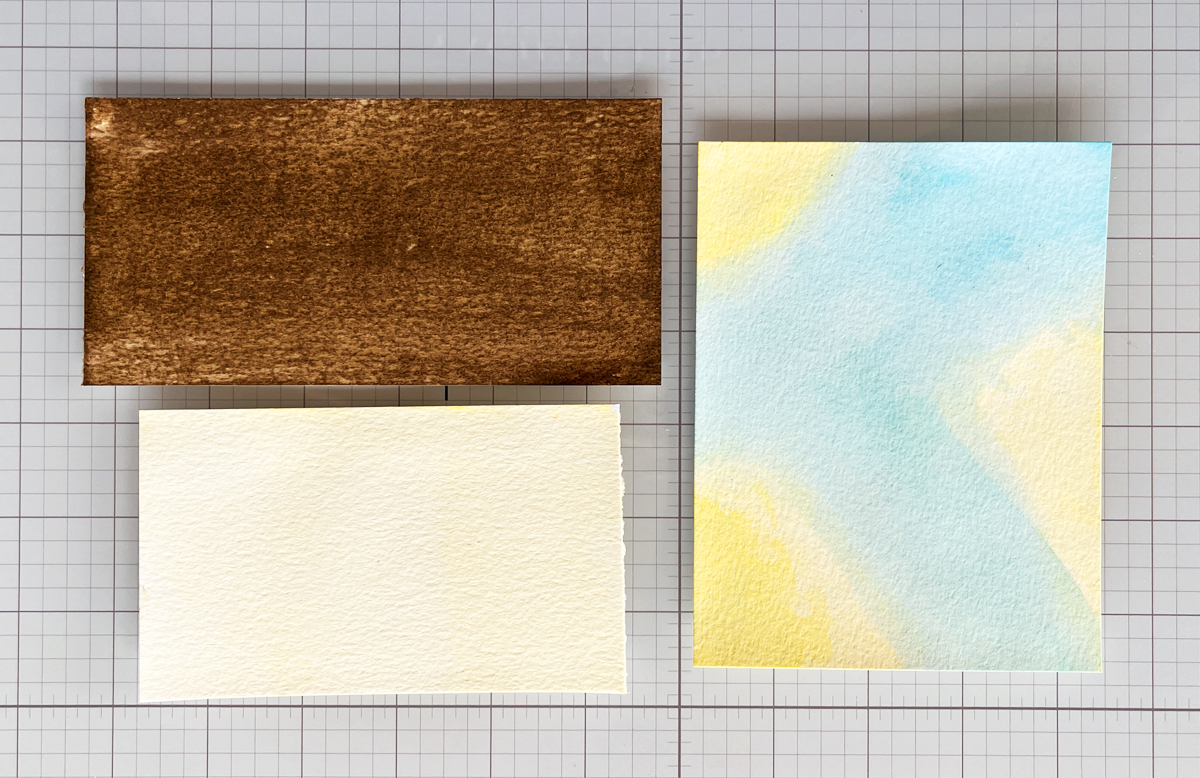
Step 1: Create a Background
Let’s keep this part simple and approachable.
For this card, I created:
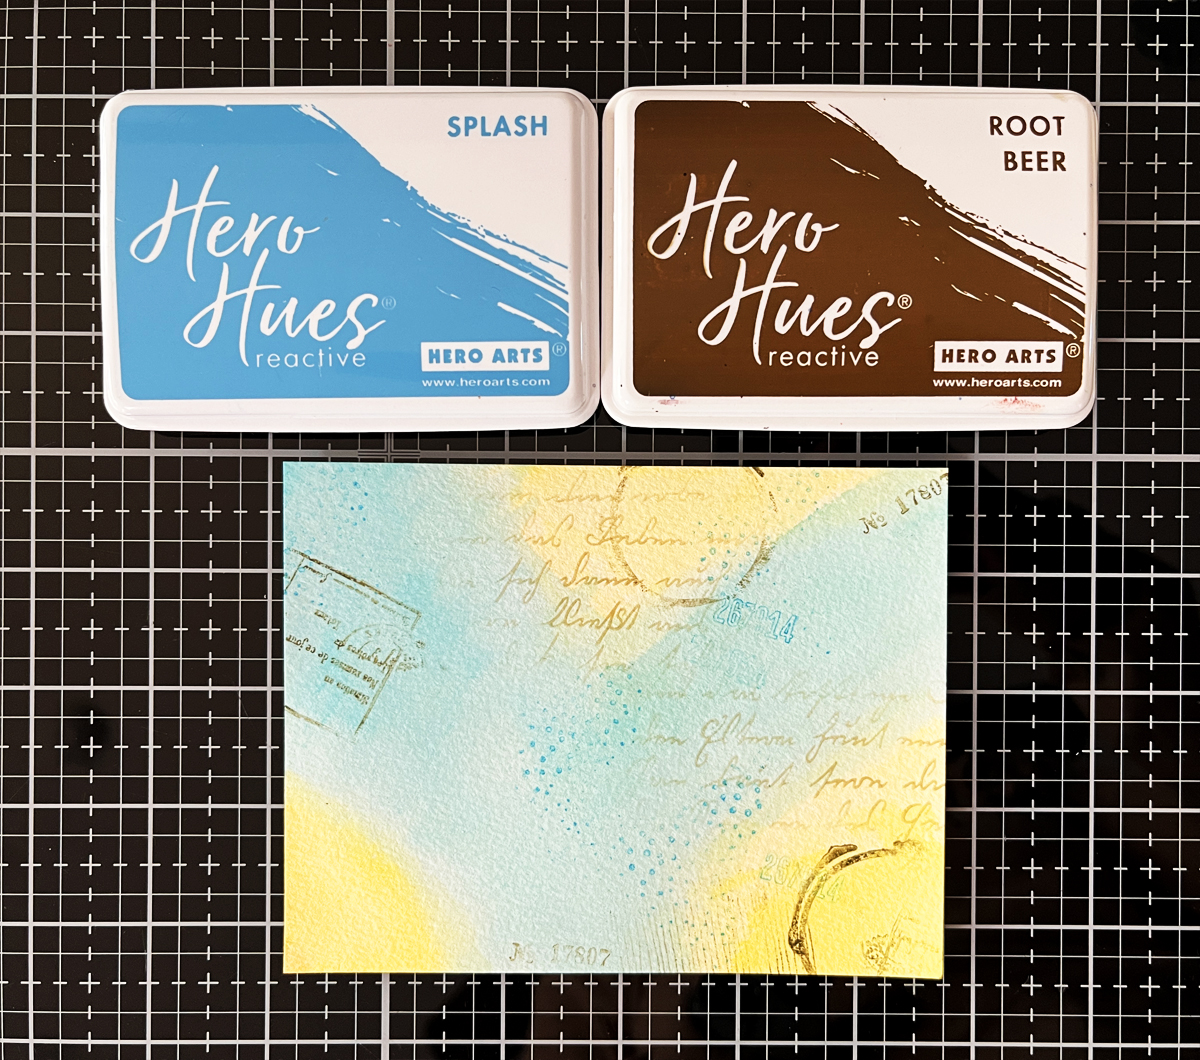
- A two-color watercolor background using a loose, abstract “Y” shape in soft blue
- Filled the remaining space with warm yellow
- A second yellow wash panel for the suitcase focal point
- A third panel using direct-to-paper brown ink + water for a leather-like texture
💡 Tip: Don’t overthink placement—this is about movement, not perfection.
Step 2: Layering — The Fab 4 + 3 More
We’re starting with the Fab 4 (your go-to layers), then building upward.
Think of this as:
👉 easy, relaxed complexity
The Fab 4 (Your Foundation Layers)
1. Stenciling (Pattern)
Add soft script in 1–2 areas using brown ink.
✔ Adds structure
✔ Keeps things grounded
✔ Works on every project
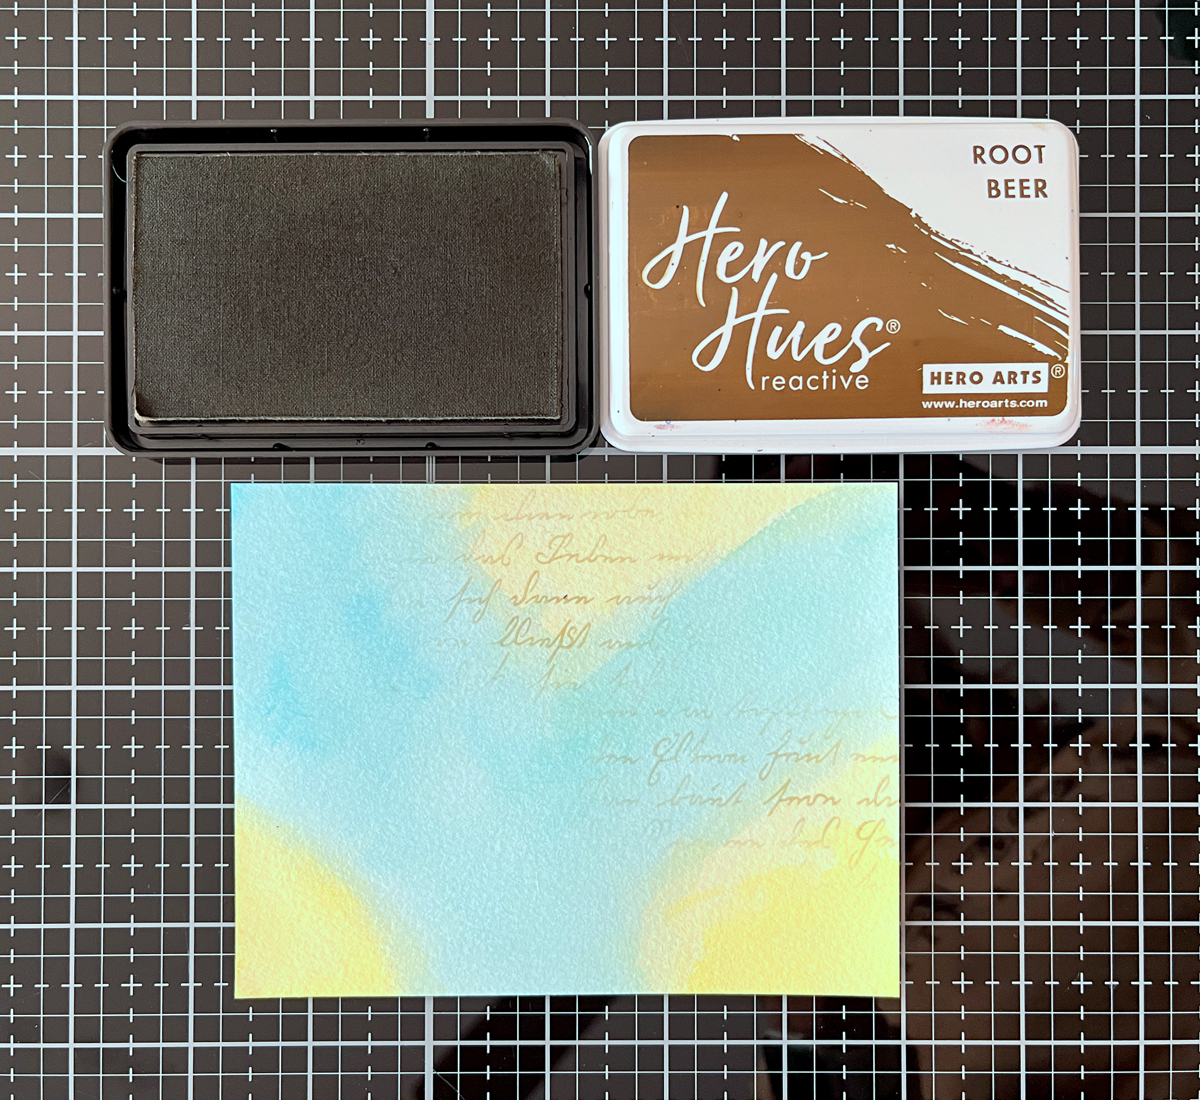
2. Stamping (Personality + Vintage Charm)
Use second-generation stamping (stamp once on scrap, then your panel).
I used:
- Blue + brown inks
- Imperfect shapes, lines, and marks
✔ Keeps everything cohesive
✔ Adds that “collected over time” look
Now Let’s Level Up…
Here are the 3 additional layers that take your project from beginner to beautifully complex:
3. Texture Paste (3D Dimension)
Using a cobblestone stencil, I applied:
- Blue-tinted paste
- Brown-tinted paste
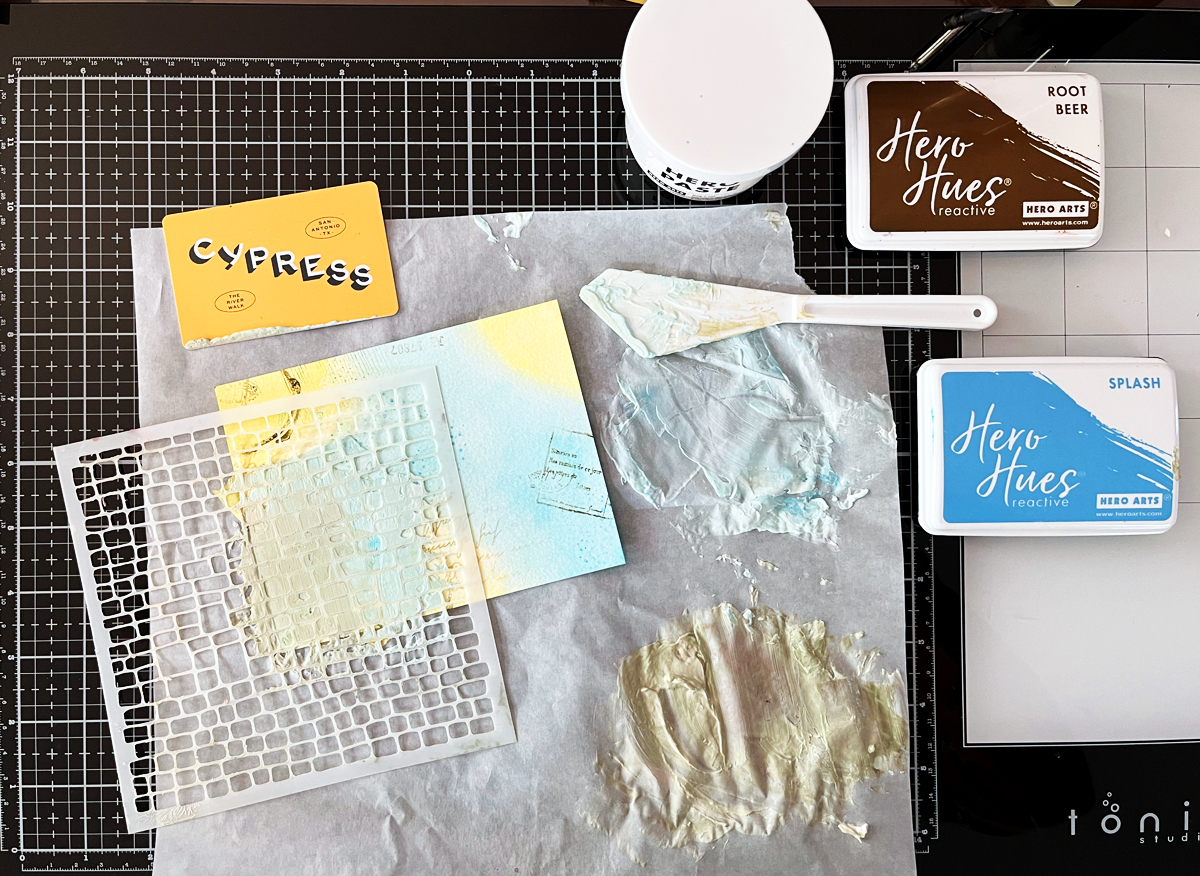
The result? A soft, two-tone textured layer.
✔ Adds tactile interest
✔ Creates visual depth
✔ Feels artistic and elevated
I tinted texture paste and applied with a stencil on layer 3 and you can see other layering options on my Go-To Cardmaking Supplies page.
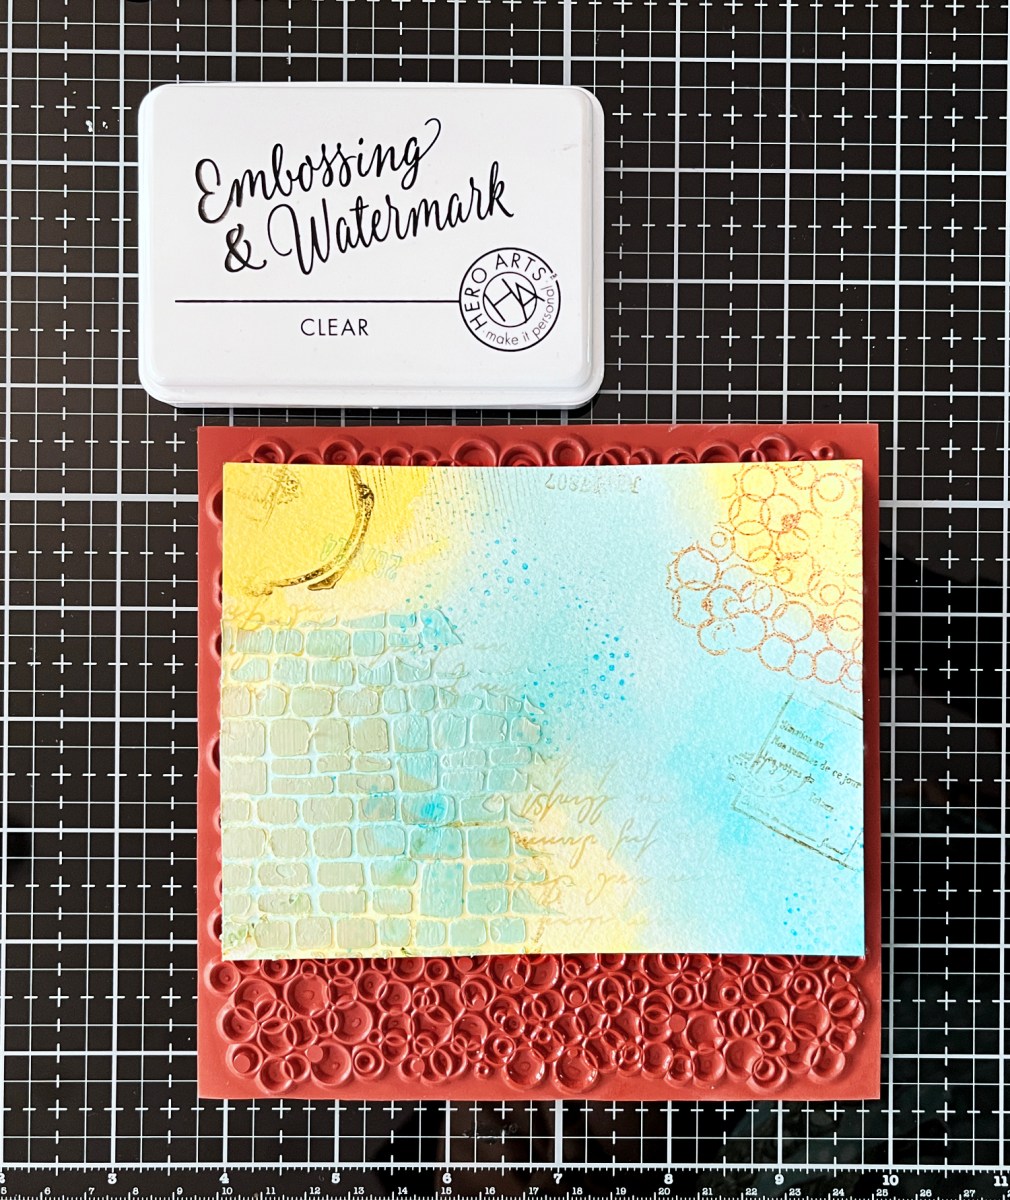
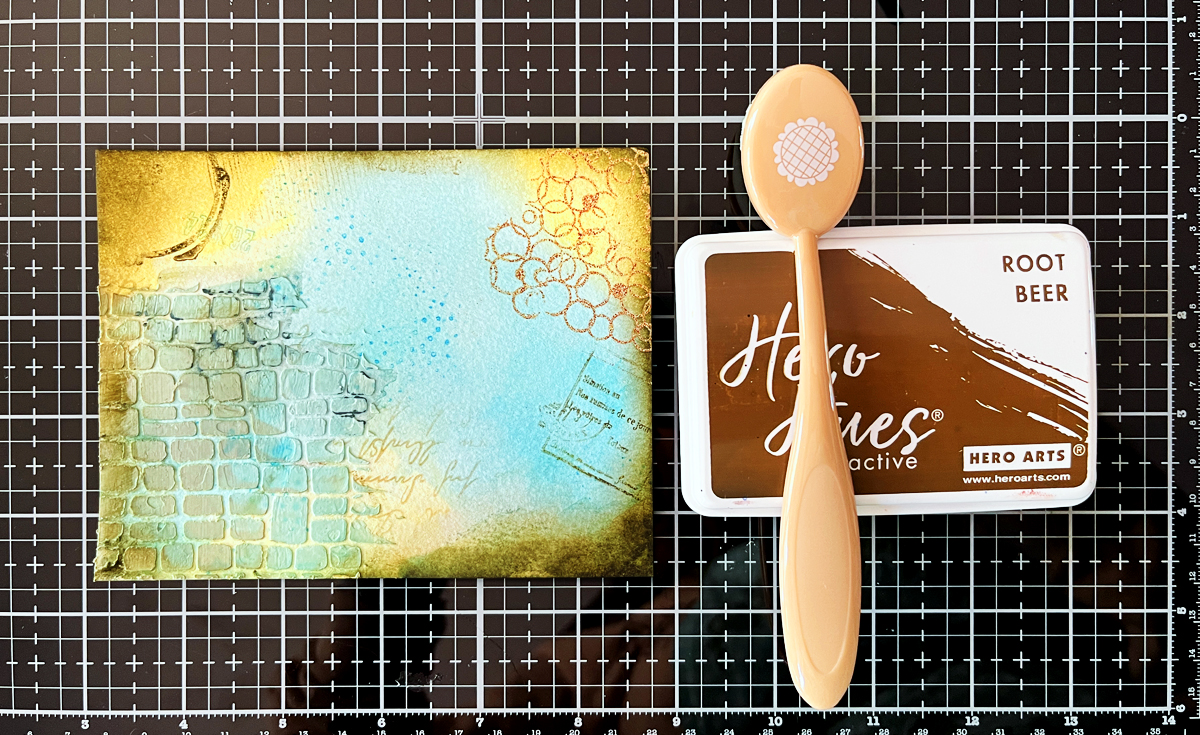
4. Heat Embossing (Controlled Drama)
I partially stamped a Bubble Celebration background stamp using pigment ink, then heat embossed.
✔ Adds texture and contrast
✔ Keeps things imperfect and organic
✔ Creates a subtle focal texture
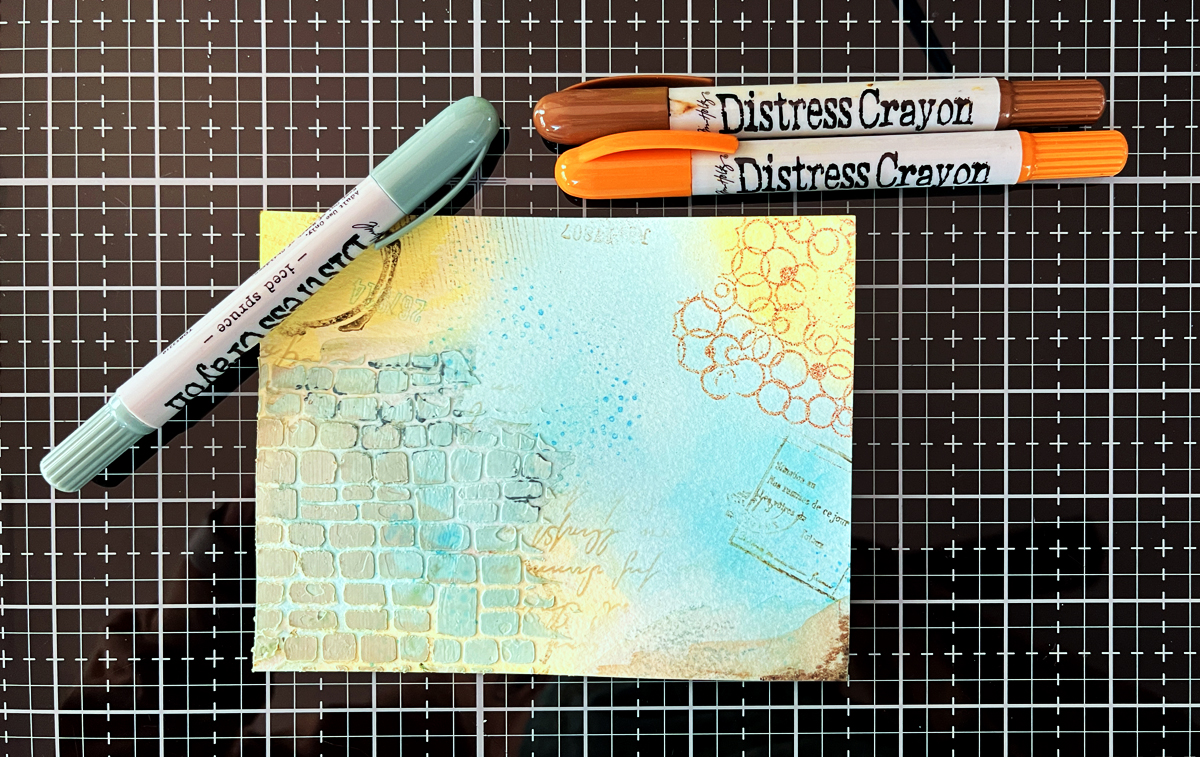
5. Distress Crayons (Soft Aging Effect)
Add scribbles… then activate with water.
✔ Blends into previous layers
✔ Adds softness and movement
✔ Creates that “aged over time” feel
Finish the Fab 4
6. Distress the Edges
Frame your design with brown ink.
✔ Instantly adds depth
✔ Gives a vintage finish
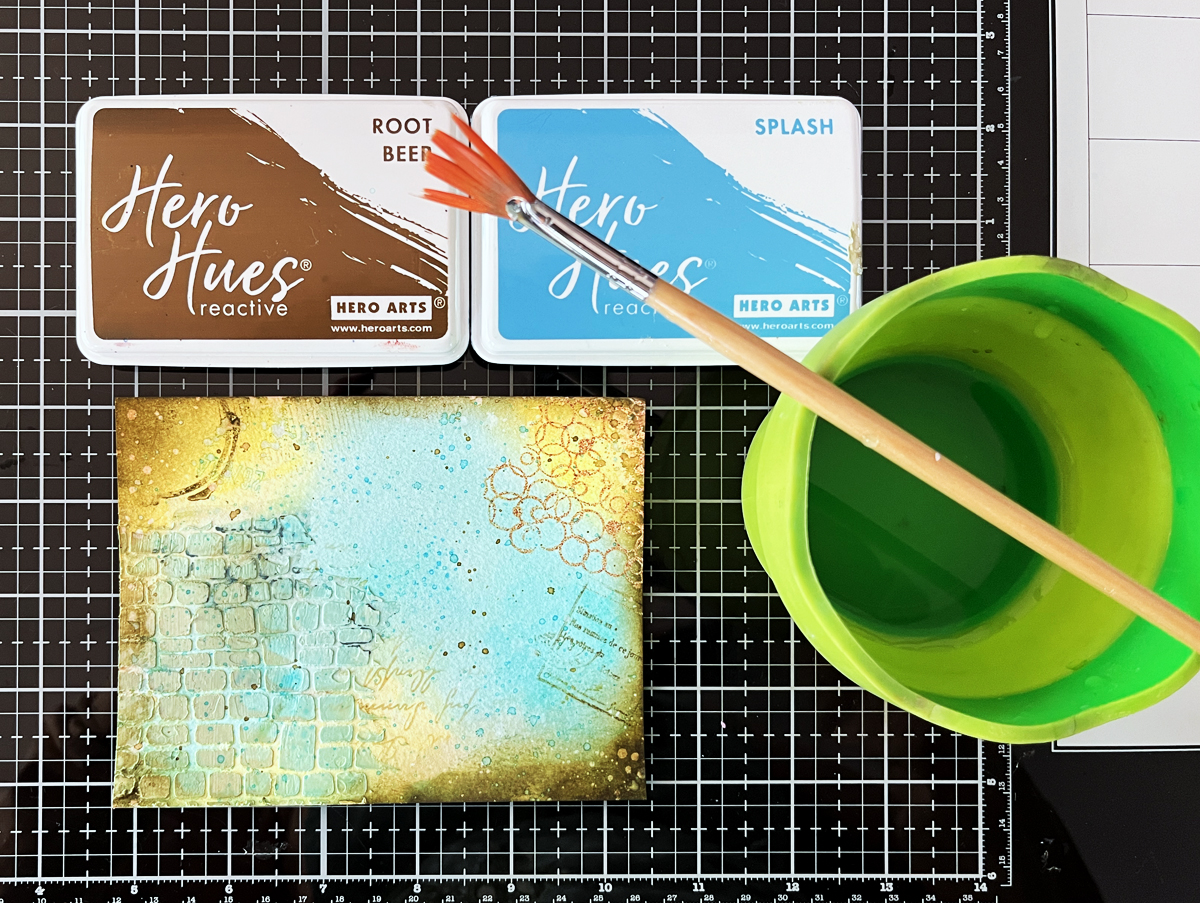
7. Splatters (Movement + Cohesion)
- Water splatters (blotted)
- Blue + brown splatters
✔ Pull everything together
✔ Add energy and life
How Do You Know When to Stop?
- Let it sit for an hour (or overnight)
- Take a photo
- Ask: Does this feel balanced—or busy?
Today’s card: 7 layers total
I also use these layering techniques in my Die-Cutting Guide.
If you enjoy layered card designs, you might also like my June All-Clubs Crate feature, where I combine several coordinating kit products to create bright tropical cards.
✨ Why These Layers Work
- Easy to repeat
- Build depth without clutter
- Work with supplies you already have
- Add a polished, finished look
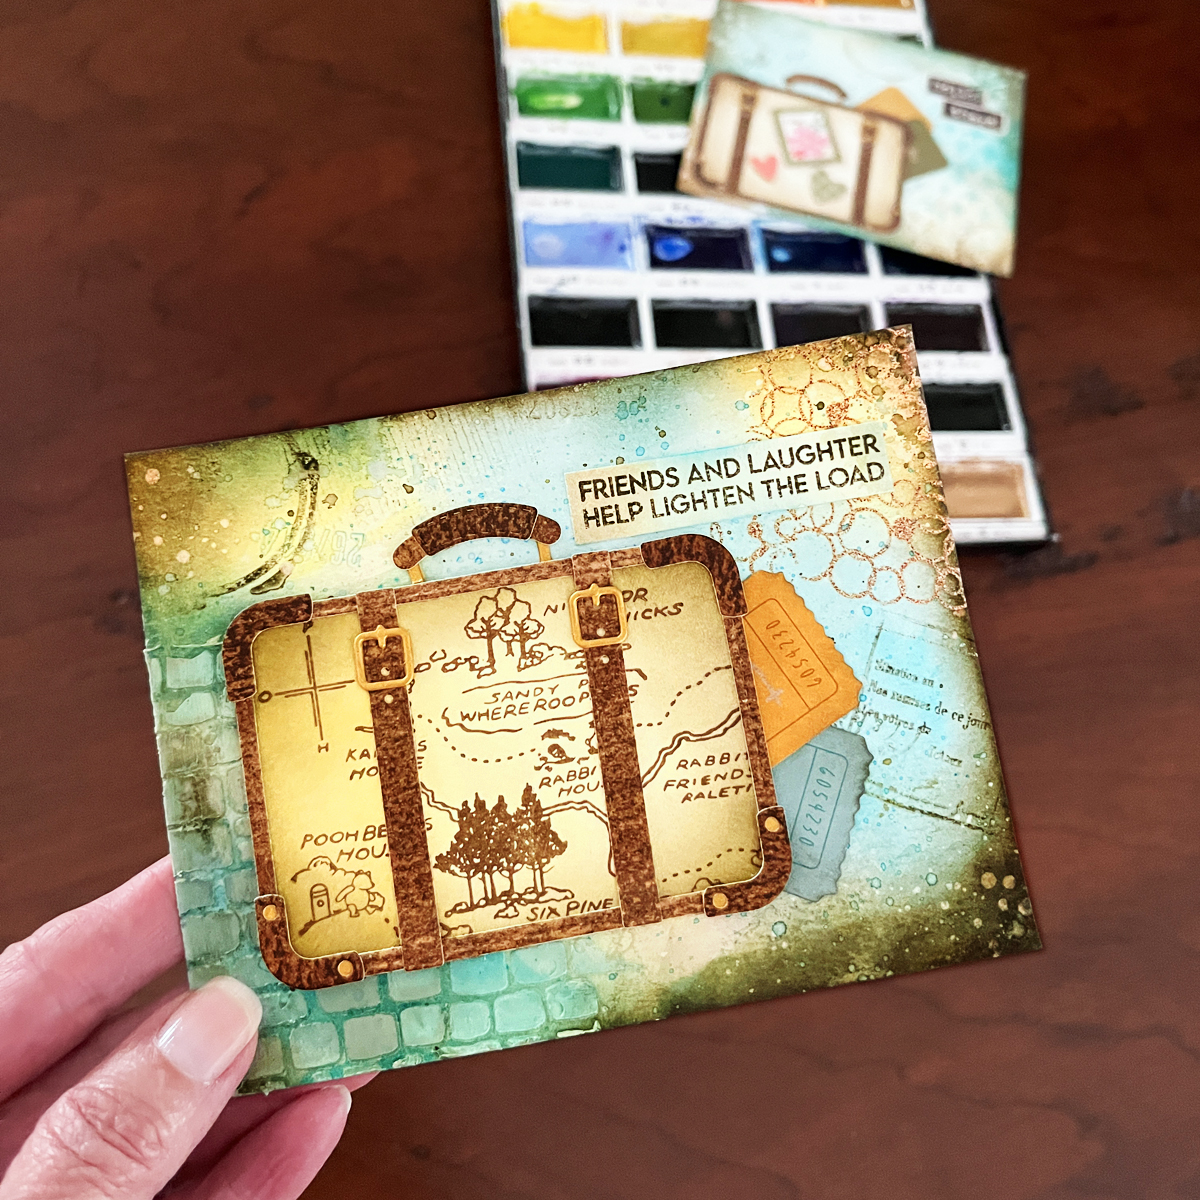
Step 3: Add a Strong Focal Point
Mixed media needs a visual anchor.
Today, I used the Retro Suitcase Die—one of my favorites.
But here’s where we elevate it:
✨ I used a BetterPress map background on the suitcase panel
✨ Lightly distressed the edges
✨ Assembled using layered die cuts
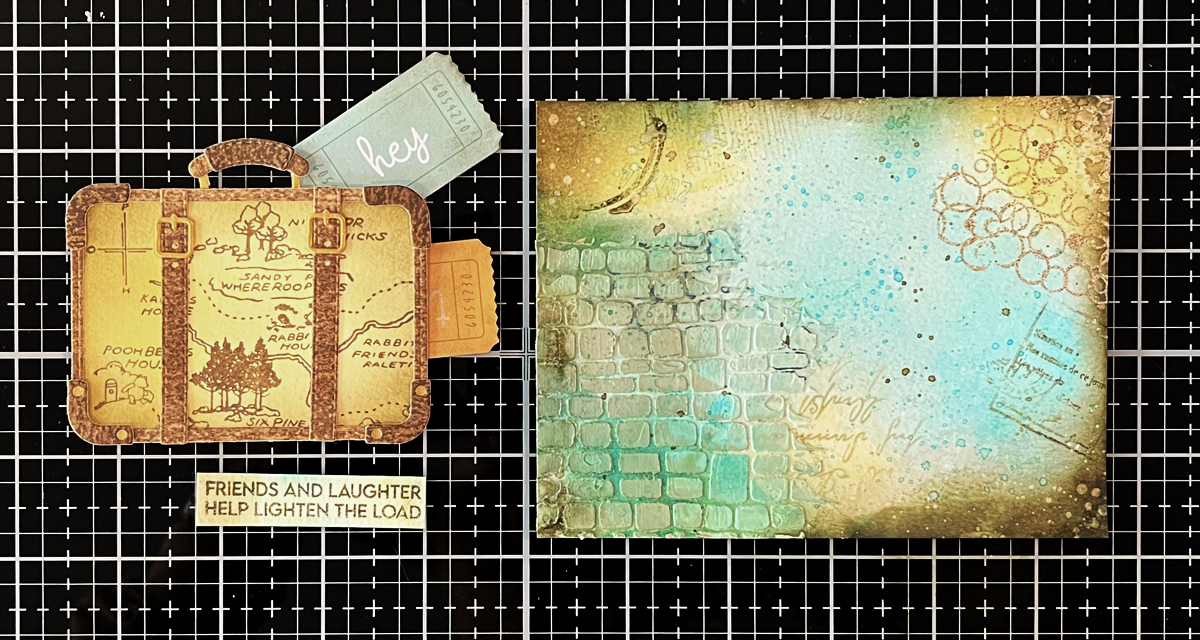
Then added:
- Ephemera tickets (tucked behind)
- A sentiment strip: “Friends and laughter help lighten the load”
✔ Storytelling
✔ Depth
✔ Vintage travel charm
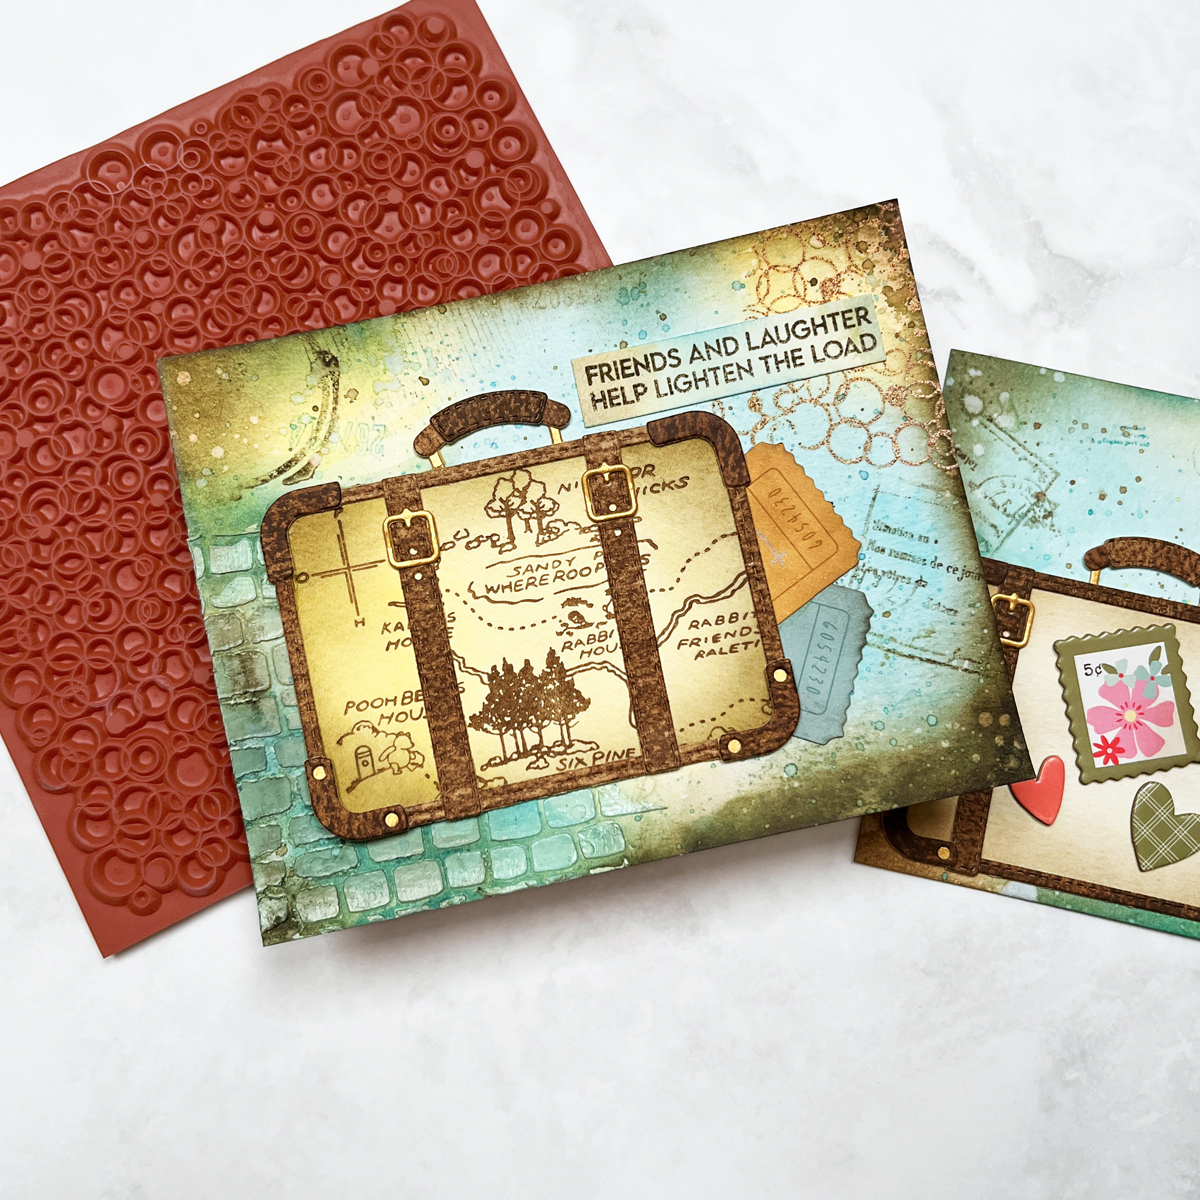
Let’s Talk Color (Why This Works)
We kept it simple:
- Soft blue
- Warm yellow
- Neutral brown
✔ Blue = calm
✔ Yellow = energy
✔ Brown = grounding
And together?
👉 A cohesive, vintage-inspired palette that feels intentional—not chaotic.
Beginner vs. Intermediate — Side-by-Side
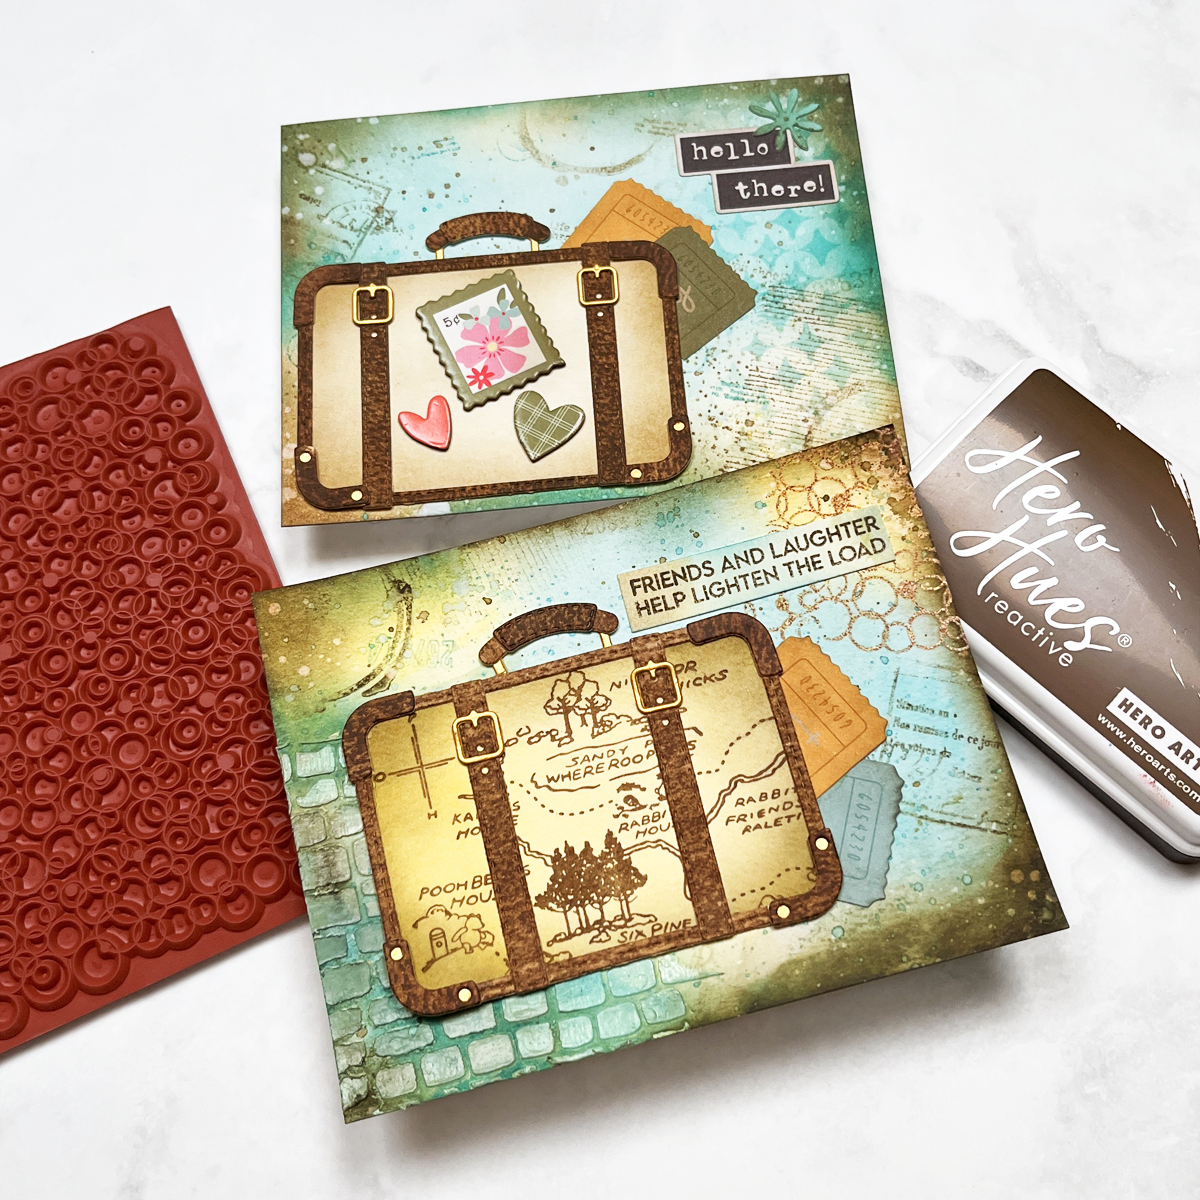
This is where the magic happens.
Fab 4 Card (Top Card) from The 4-Layers I Use on Everything post
- Brighter
- Simpler
- Clean layering
Fab 4 + 3 Card (Bottom Card):
- More texture
- Slightly moodier
- Richer detail
👉 Same foundation… just built up.
Other Posts in This Series
- Mixed Media Made Simple: My 3-Step Recipe for Fun & Easy Tags
- Ink Smooshing 101 — My Favorite Mixed Media Background Starter
- Mixed Media Layering Made Simple: The 4 Layers I Use on Almost Every Project
- Mixed Media Made Simple: Easy Watercolor Background Panels
- Easy Mixed Media Card for Beginners | Line of Being Die
Craft Toolbox
These are the core tools I use when building layered mixed media backgrounds
You might also be interested in my 14 Best Cardmaking Supplies for 2026 post.
Focal Point:
Retro Suitcase Die + BetterPress Map
Inks:
Tools & Layers:
- Background Stamps: Background Builder and Vintage Maps and Ledgers
- Stencils – Cobblestone
- Texture Paste
- Bubble Celebration Background Stamp
- Keep Calm Sentiments
- Embossing Powder
- Ephemera – tickets
- Blending Brushes
Basics:
- Watercolor paper (140 lb.)
- Die cutting machine
- Palette Knife
- Adhesives
Final Thoughts
This is where mixed media really starts to feel magical.
Not because it’s complicated…
But because you’re learning how to layer with intention.
Start with the Fab 4.
Add one or two new techniques.
And let your style evolve naturally.
📌 Save this for later so you can come back when you’re ready to try this recipe.
💬 Which layer was your favorite? I’d love to hear in the comments!

🏆 Proud to be ranked among the Top 75 Cardmaking Blogs by Feedspot

8 thoughts on “3 Mixed Media Layers to Try (Beyond the Basics Techniques That Actually Work)”