Create soft, beautiful backgrounds (no experience required!) + a charming floral focal point
Have you ever looked at a mixed media card and thought:
“That’s gorgeous… but I could never do that.”
I used to think the exact same thing.
Mixed media felt mysterious, a little messy… and honestly, a bit overwhelming.
But I loved the look so much that I kept experimenting—and over time, I discovered something surprising:
👉 Mixed Media doesn’t have to be complicated.
In this tutorial, I’ll show you how to create a simple mixed media card.
This post is part of my Mixed Media Series where I share simple techniques for creating layered, artistic cards using backgrounds, texture, and focal points. You can explore the full series here: Mixed Media Made Simple.
✂️ In This Post, You’ll Learn:
• My 3-step mixed media framework
• How to create quick, easy watercolor panels
• Why simple floral focal points can be so striking
• How to create a custom frame for extra impact
After years of experimenting, I developed what I now call:
💛 Karen’s 3-Step Mixed Media Recipe
🧁 Recipe Recap
Step 1: Create an interesting background
Step 2: Add 4+ layers
Step 3: Add a strong focal point
A simple, repeatable formula that works on almost every project.
📌 Save this for later so you can come back when you’re ready to create.
If you missed the start of this series, you can catch up here:
- Mixed Media Made Simple: My 3-Step Recipe for Fun & Easy Tags
- Ink Smooshing 101 — My Favorite Mixed Media Background Starter
- Mixed Media Made Simple: The 4 Layers I Use on Every Project
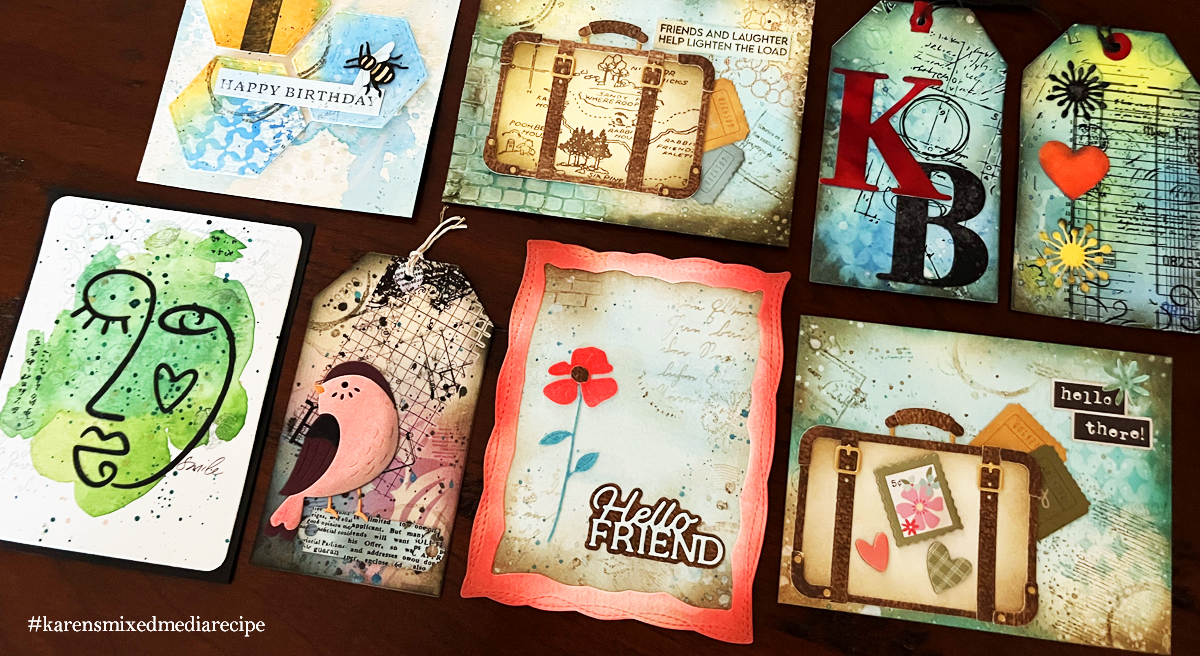
And if you try this technique, I would love to see it—
👉 Tag your projects with #karensmixedmediarecipe
If you are building your craft stash, you can browse all my go-to tools (including mixed media recommendations) on my Favorite Cardmaking Supplies Page.

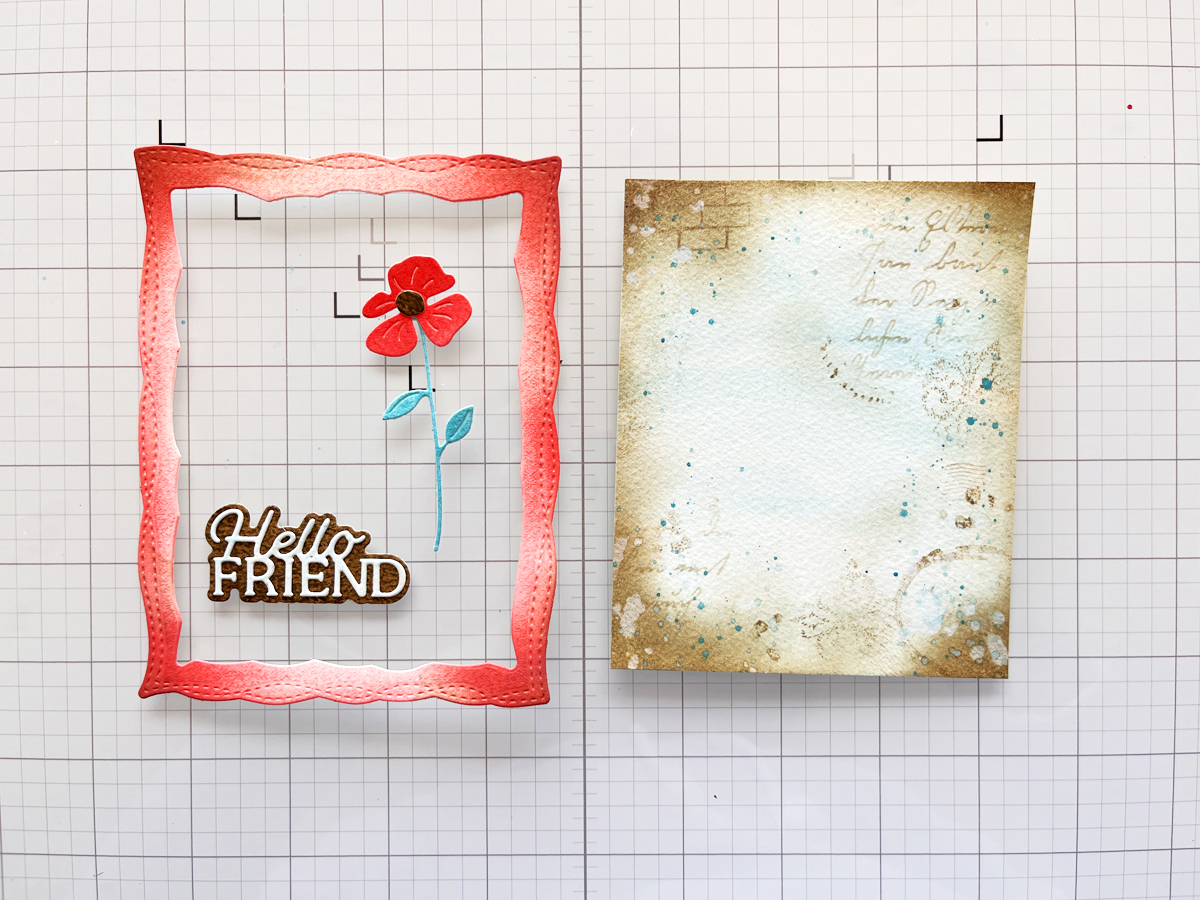
🎨 Step 1: Create an Easy Watercolor Background
Today’s technique is one of the simplest—and most relaxing—ways to create a mixed media background:
👉 Watercolor painting
And when I say easy… I mean it.
You could absolutely use a basic watercolor set—even a kid-friendly one—and still get beautiful results.
✨ The Technique: Wet-on-Wet
I lightly brushed clean water onto my watercolor paper first.
Then I added watercolor directly into the damp surface:
• Soft blues + a touch of gray for the background
• Poppy red for the frame
• Teal blue for the greenery
Instead of over-blending, I let the colors flow naturally, creating soft streaks and organic variation.
That movement? That’s the magic. ✨
💡 Why I Made 3 Panels
Since we’re focusing on backgrounds, I created three separate watercolor panels:
- Background panel (soft sky blues)
- Frame panel (soft poppy red)
- Greenery panel (teal tones)
This gives you extra practice—and ensures everything coordinates beautifully.
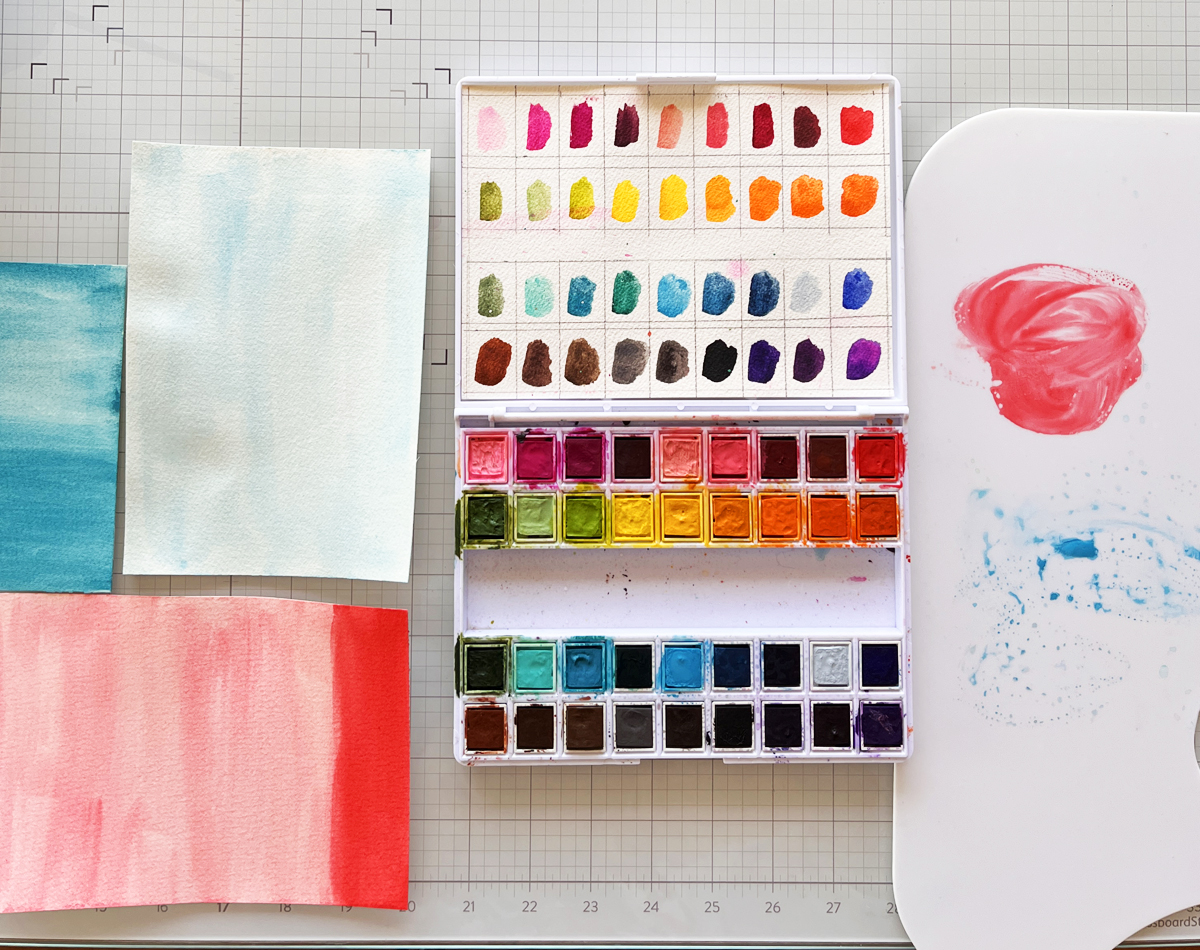
🎨 Let’s Talk Color (Simple + Cohesive)
I kept my palette intentionally simple:
• Blue (calm + airy)
• Red (bold + eye-catching)
• Brown (grounding + vintage feel, added later)
Using just 2–3 main colors keeps everything:
✔ cohesive
✔ balanced
✔ easy to build on
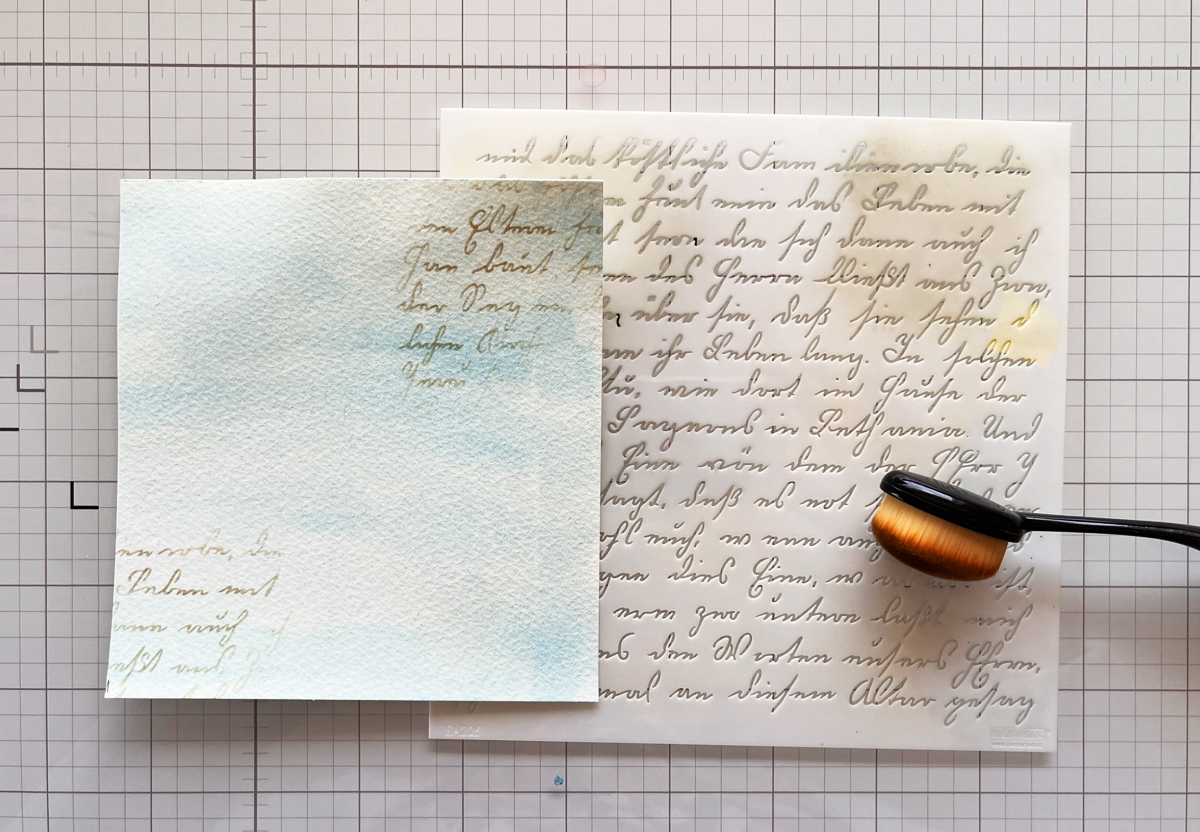
✨ Step 2: Add “The Fab 4” Layers
These are my go-to layers—the ones that work on almost every mixed media project.
💛 The Fab 4 (in order):
A) Stenciling (Adds Pattern)
I used a script stencil with brown ink to add subtle “words” in two small areas.
✔ Keep it light
✔ Keep it partial
✔ Let the background shine through
B) Stamping (Adds Character)
Using Root Beer brown ink and second-generation stamping, I added:
• light textures
• subtle vintage elements
• soft details near the edges
✨ Tip: Stamp once on scrap first for softer impressions.
I kept the center area more open so the focal point has room to shine.
I used my vintage stamps on layer 2, and these are part of my most-used cardmaking tools that I reach for on almost every project.
C) Distress the Edges (Adds Depth)
I blended brown ink around the edges to:
• frame the design
• add age and softness
• create a vintage feel
This step acts almost like a hidden mat under the frame.
D) Splatters (Adds Movement + Magic)
I added:
• water splatters (blotted for texture)
• soft teal blue watercolor splatters
To keep the center clean, I used a scrap paper mask while splattering.
✔ Same color palette
✔ Subtle movement
✔ Beautiful cohesion
🎯 When to Stop?
At this point, pause and look.
👉 Does it feel balanced?
👉 Do you love it?
If yes—stop right here.
You don’t have to add more. I didn’t.
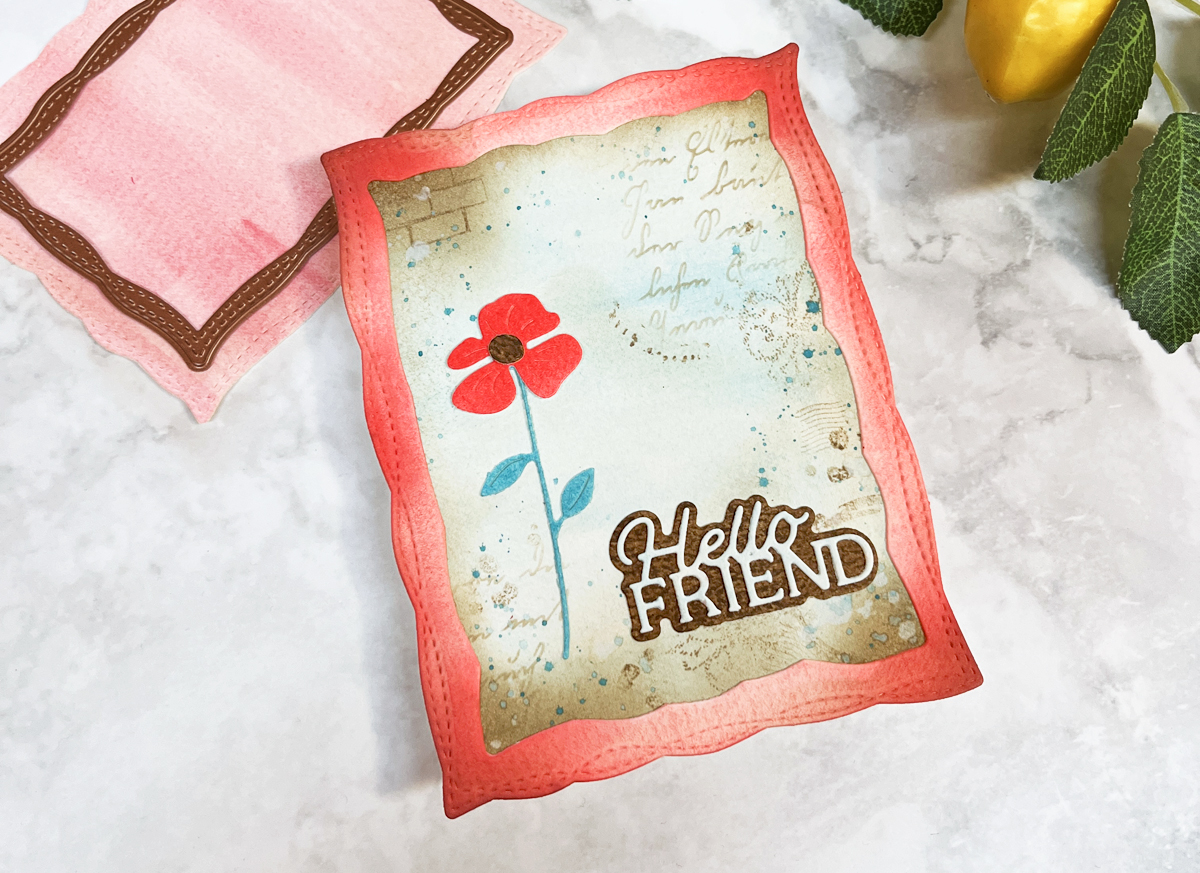
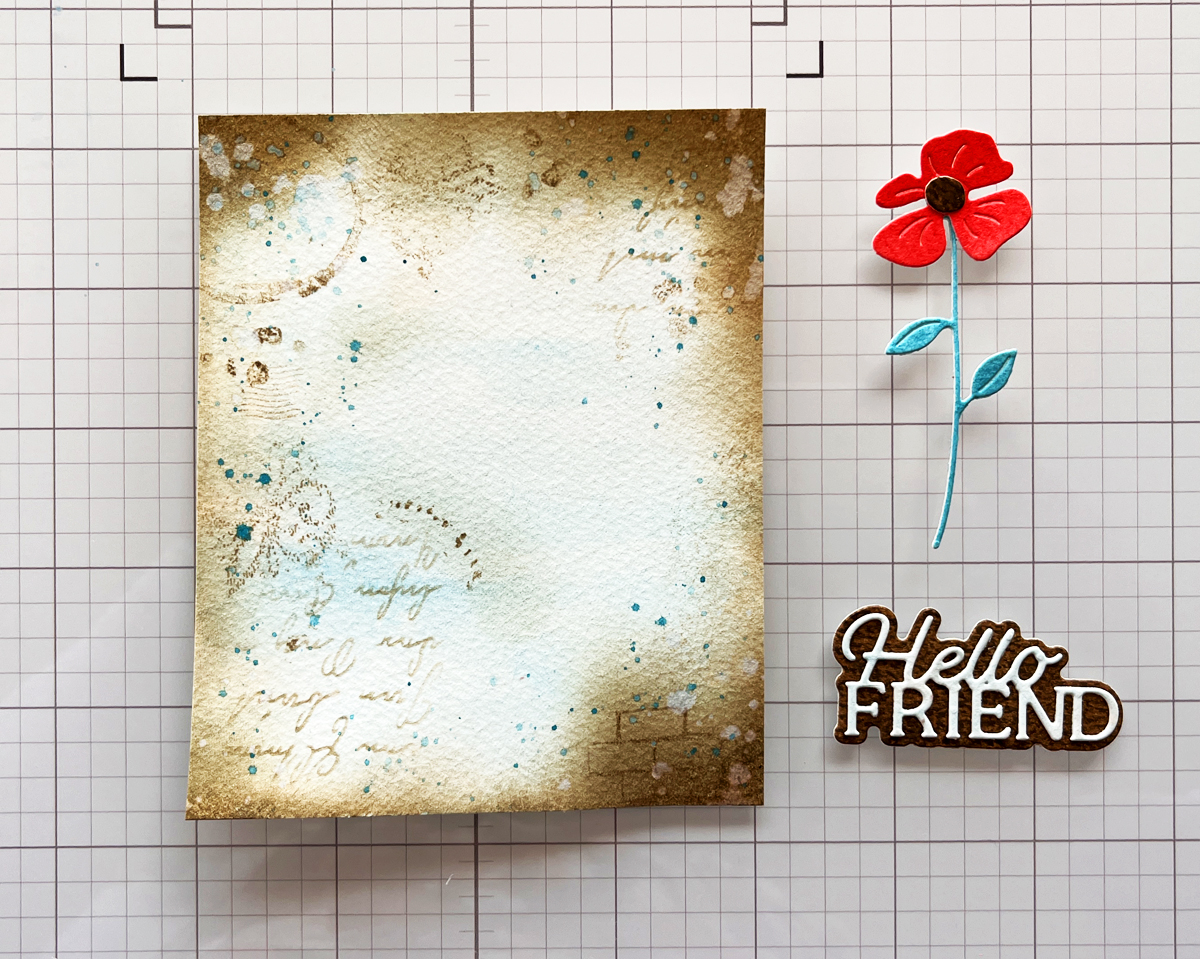
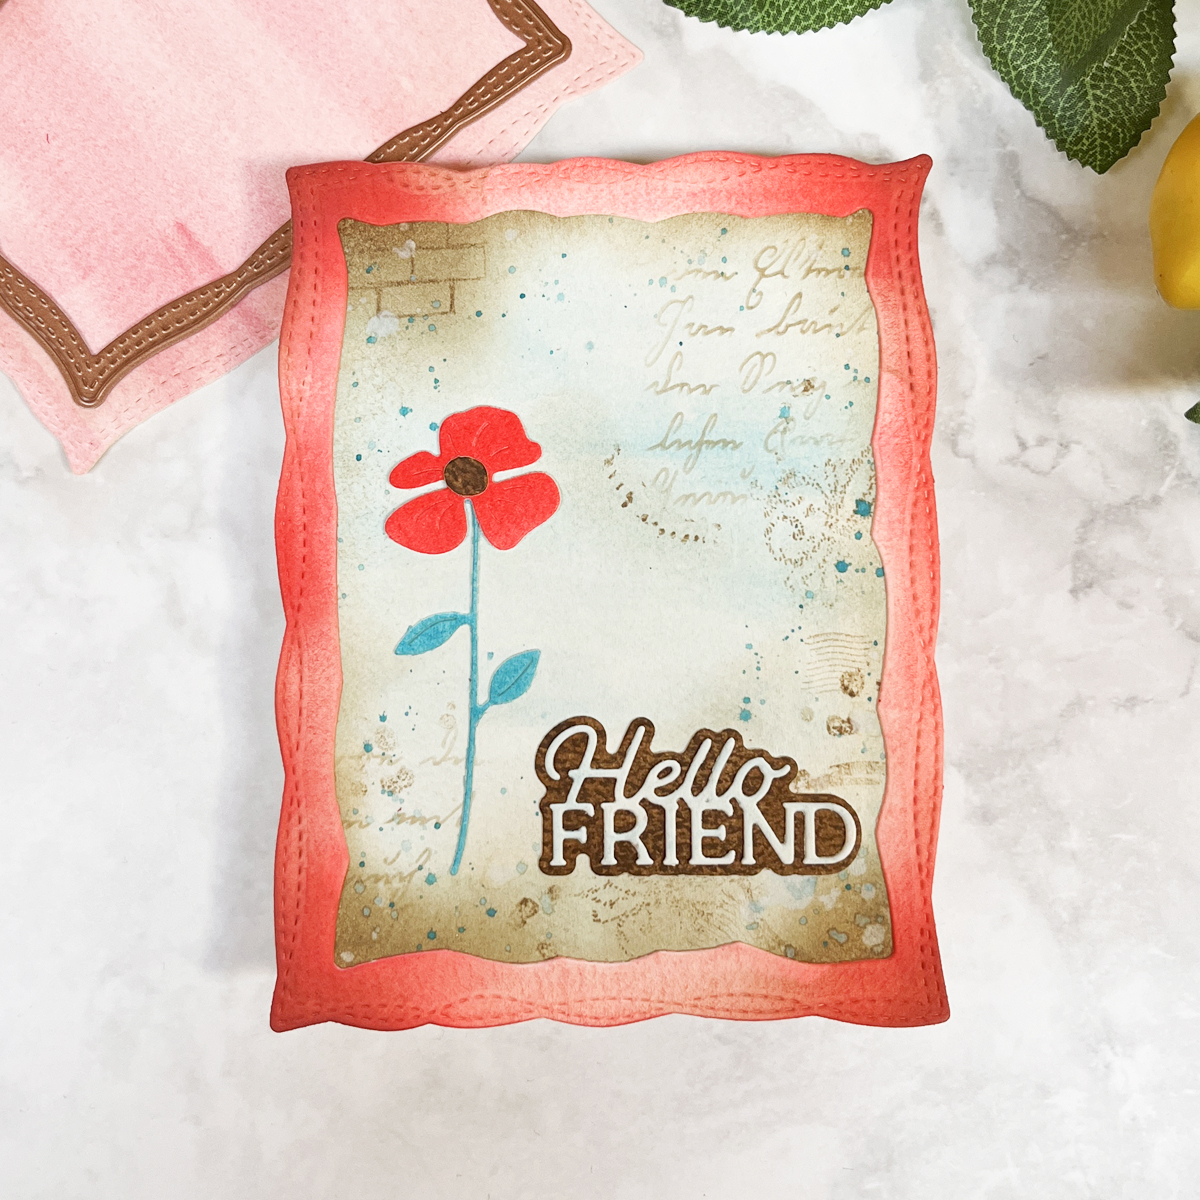
🌸 Step 3: Add a Focal Point
For this card, I created a dual focal point:
• A delicate poppy flower
• A whimsical stitched frame
Together, they create structure and charm.
This reminds me of some of my earlier Altenew floral cards.
✂️ Custom Frame Trick (So Fun!)
I used two nesting stitched rectangle dies and taped them together to create a frame.
✨ Bonus: The leftover inner piece becomes a future background!
🎨 Finishing Details
• Lightly distressed the red frame with brown + red ink
• Die cut and assembled the poppy and greenery
• Added a “hello friend” sentiment
To enhance the design, I placed the frame over the layered background and allowed the brown distressing to peek through.
💡 Pro Tip: Simple Can Be Stunning
This card is a perfect example of:
👉 simple background + simple focal point = high impact
You don’t need complicated elements to create something beautiful.
✨ Why This Card Design Works
- Easy to repeat layers that work everytime
- Depth without clutter
- Work with supplies you already have
- Dual Focal Point
🧰 Toolbox (Supplies Used on This Card)
👉 You might also enjoy: 14 Best Cardmaking Products and Supplies
⭐ Featured Dies:
• Poppy Song Collection
• Leaf and Bloom die set
• Playful Stitched Panels (nesting dies)
• Hello Friend sentiment dies
Inks and Stamps:
• Reactive Ink (Root Beer)
• Vintage-style stamps: Maps and Ledgers, Postmarks and Tickets
Tools:
• Blending brushes
• Die cutting machine
Other Supplies:
• Watercolor paper (140 lb)
• Watercolor paints
📌 Save this for later on Pinterest.
Want to see everything I use in my craft room? Browse my Favorite Cardmaking Supplies & Tools.
💭 Final Thoughts
If mixed media has ever felt intimidating, this is a beautiful place to begin.
Soft watercolor backgrounds + a few simple layers can create something truly special.
And the best part?
Every panel turns out just a little bit different.
📌 Save this for later so you can come back when you’re ready to try this technique.
If you try this technique, tag your project with
👉 #karensmixedmediarecipe:
I would absolutely love to see what you create.
✨ Coming Next
Next in the series, we’re diving deeper into layering—so come back next week. Or, subscribe so you don’t miss the next post.
You’re going to love how everything starts to come together.

🏆 Proud to be ranked among the Top Cardmaking Blogs by Feedspot

4 thoughts on “Mixed Media Made Simple: Easy Watercolor Background Panels”