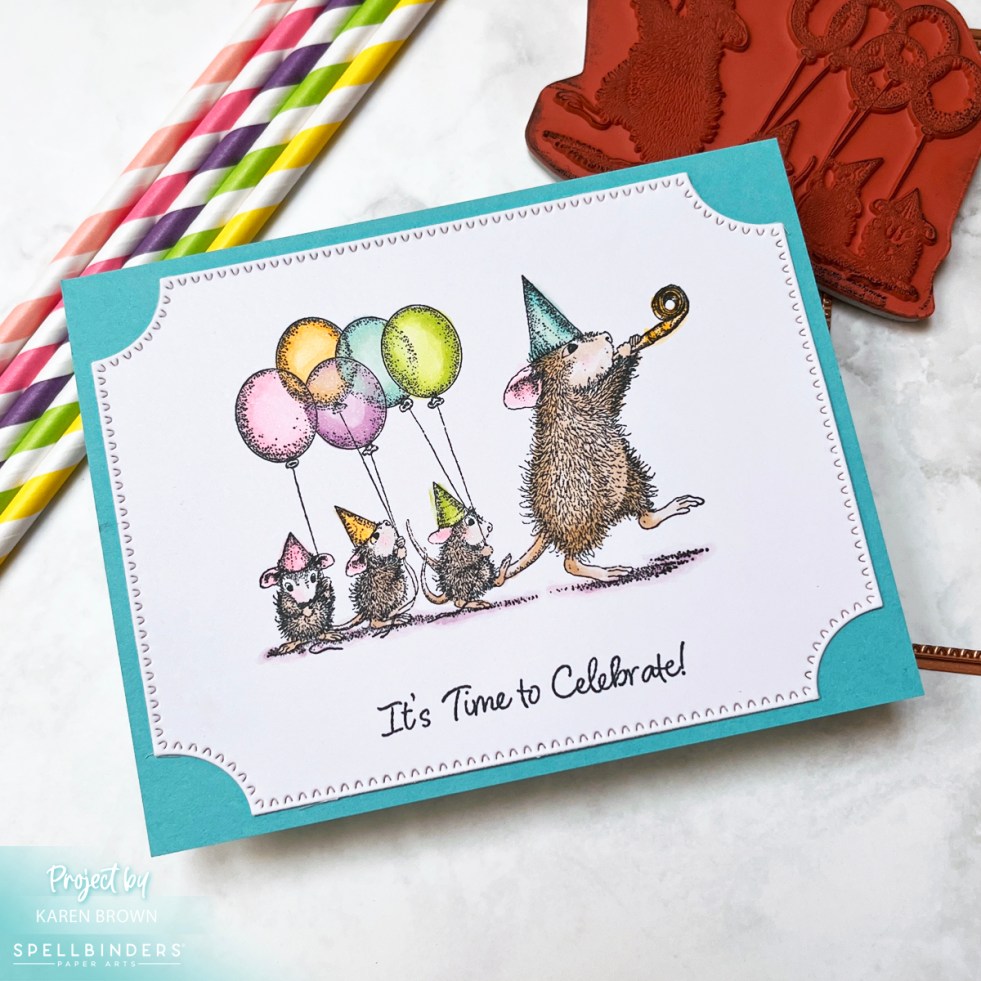
Learn how to create an easy handmade birthday card using the adorable House Mouse Party Parade stamp set. This beginner-friendly card requires minimal supplies and comes together quickly with stamping and simple coloring.
Tag: Copic
Vintage Charm & Soft Elegance: Hero Arts March 2025 Release
The Hero Arts March 2025 Release is here, and I’m bringing you two cards that highlight its versatility! One card features a vintage-inspired suitcase with florals, layered over a textured background of stamped travel elements. The second is a soft pastel circular card with a playful bow pattern, perfect for beginner cardmakers. Whether you love die-cut layering or simple stamping and coloring, this release has something for you!
Sunny Beach Theme Cards | July 2024 Hero Studio Release
Introducing Hero Arts July 2024 Studio Card Kit of the Month + Tropical Fishes stamps and dies and Pebbles and Stones Stencil.
Longtime Favorite Stamp: Capturing Venetian Charm + Copic Marker Magic & IG Reel
The Best of Hero Arts: Venetian Neighborhood background Stamp + Copic Coloring
Spellbinders FransFormer Snowy Friends | Cute Quick Christmas Card | Easy Copic Coloring
Cute creatures + easy Copic coloring makes for an enjoyable afternoon! Spellbinders was kind enough to send me an advance copy of the new Fransformer Snowy Friends by Stupendous cling stamp set and I can't remember the last time I enjoyed creating a card more. FransFormers are flexible clear stamps that you can squish, squeeze,… Continue reading Spellbinders FransFormer Snowy Friends | Cute Quick Christmas Card | Easy Copic Coloring
Spellbinders | House Mouse Designs Collection 3 Ways
House Mouse Designs Collection: Copic, Polychromo and Mixed Media handmade cards. Daisy Mouse RSC-002 and Tea for TwoRCS-005
WWC310 – Marsha\’s Challenge: All About Occasions
Yappy Birthday Card using Mama Elephant’s Playful Pups stamp setHello and welcome! We are making \"Occasions\" cards at Watercooler Wednesday and I made a fun puppy themed birthday card. Marsha is our hostess.Big changes at Watercooler Wednesday! We are going to a bi-weekly format so this challenge will conclude on Monday, March 8th and winners… Continue reading WWC310 – Marsha\’s Challenge: All About Occasions
Altenew Monstera In Vase
Altenew Monstera in Vase Stamp and DieHello and welcome. I just popped in for a quick post about Altenew\'s new mini stamp \"Monstera in Vase\". This set is perfect for quick CAS cards.Thanks for stopping by!Karen
WWC295 – Karen\’s Challenge: All About Occasions
Hello, hello...so glad you stopped by! I am the hostess this week at Watercooler Wednesday and am excited to share this card. I hope to see your card in our gallery.I\'ve admired this stamp set for quite a while, finally ordered it in April and am just now using it for the first time. The flowers… Continue reading WWC295 – Karen\’s Challenge: All About Occasions
WWC290 – Michelle\’s Challenge: All About Occasions
Hello, hello...so glad you stopped by! This week we are making occasion cards at Watercooler Wednesday and I was in the mood to do some fun coloring. This card was very relaxing and therapeutic to make. I\'ve wanted this stamp for a while and finally took the plunge and placed an order at Taylored Expressions. Supplies Used:Taylored Expressions… Continue reading WWC290 – Michelle\’s Challenge: All About Occasions
