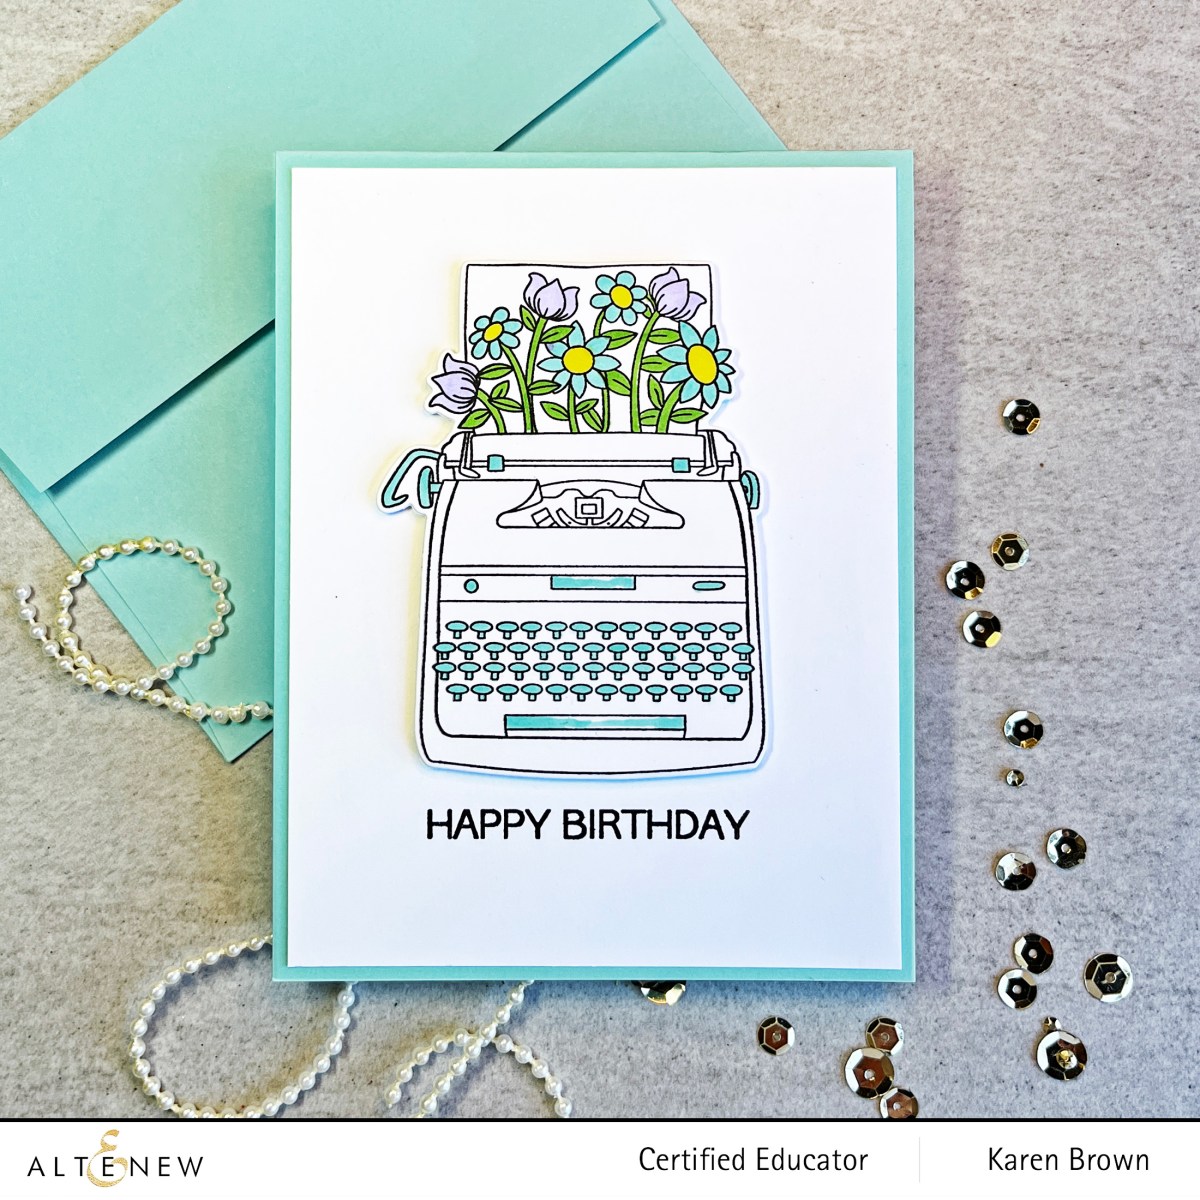
Hello and welcome! I think mini stamps can make such fun cards! This set, called Typewriter Flowers, is my new favorite mini stamp and die set. I wanted to create a clean and simple card and I like how this technique focuses on the whimsical typewriter.
I used my Altenew Artist Alcohol Markers to do some simple coloring. In addition to the regular brush, Altenew markers have a second fine coloring head for small areas. I used the fine nib a lot on this card and it is one of the reasons I usually reach for Altenew markers over other brands.
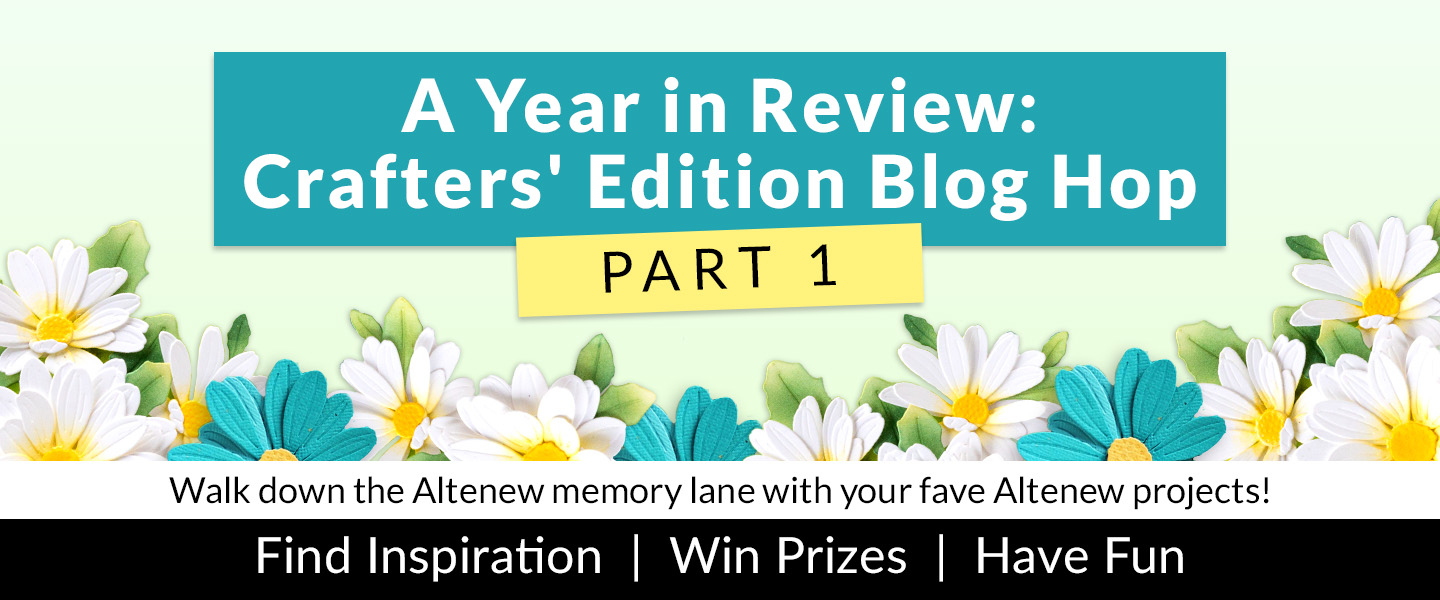
Hello friends! I am so excited to be participating again in Altenew’s A Year In Review! I really enjoyed looking back through my projects and selecting some favorite creations.
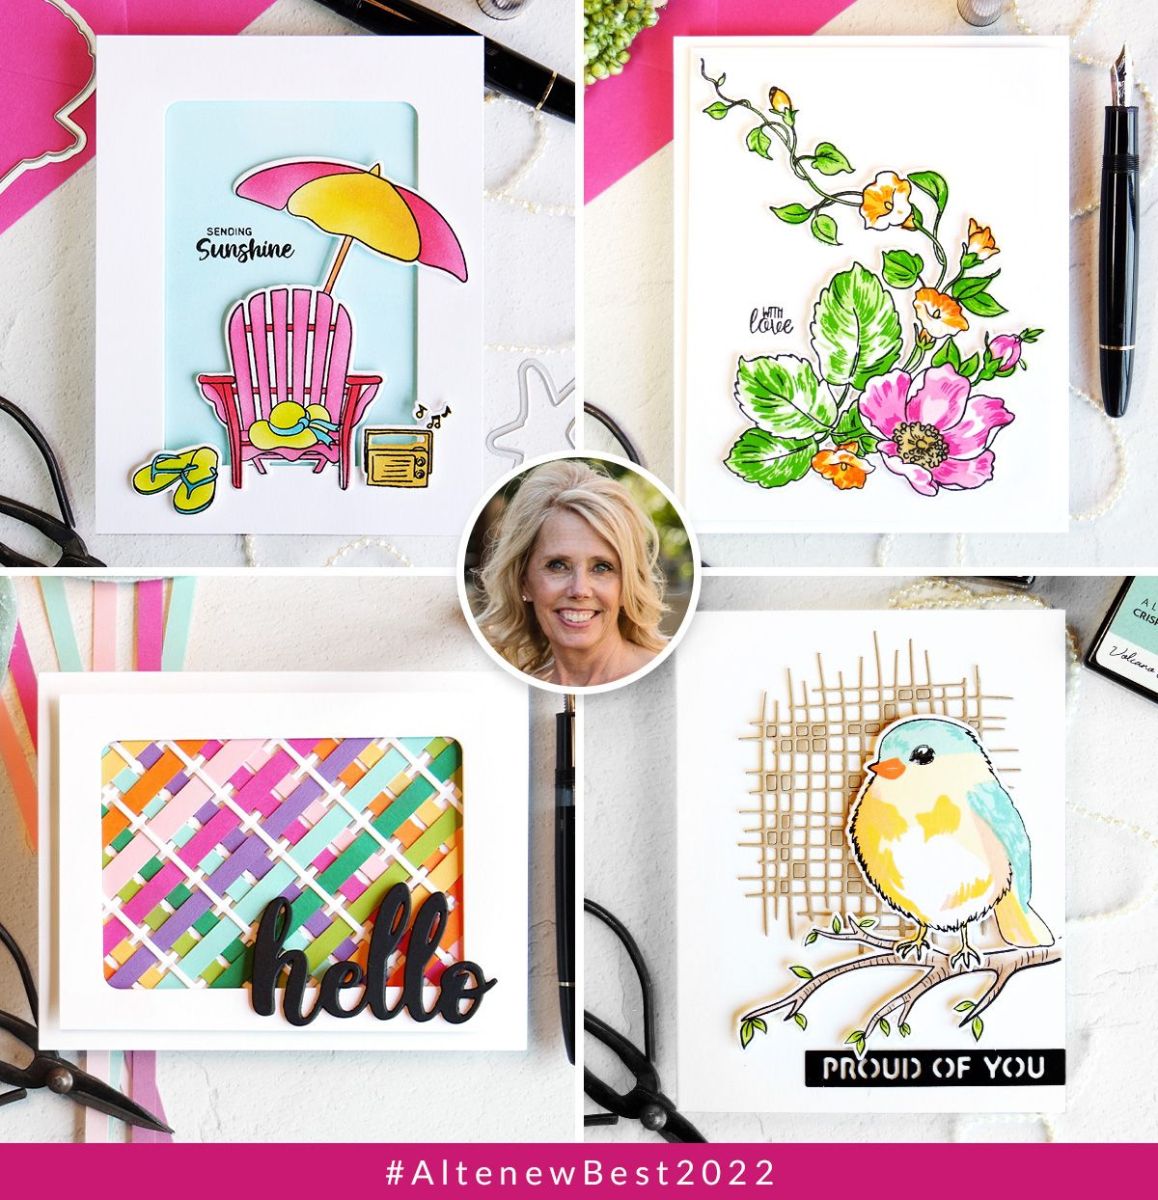
This first card was my most popular Altenew card on Instagram and I detailed how I created my rainbow paper weaving. You can see my original post HERE. I used Altenew’s Garden Trellis Cover Die as the base for my weaving.
I fell in love with the Precious Doodles Bundle…when “doodles” is in the title, I know it is going to be a favorite of mine! This is a darling stamp layering set and you can find my original post HERE.
I love mixed media, and this card was my 2nd most popular post on Instagram. You can see my original post HERE. I got really messy and used tons of fun products to create this masculine birthday card.
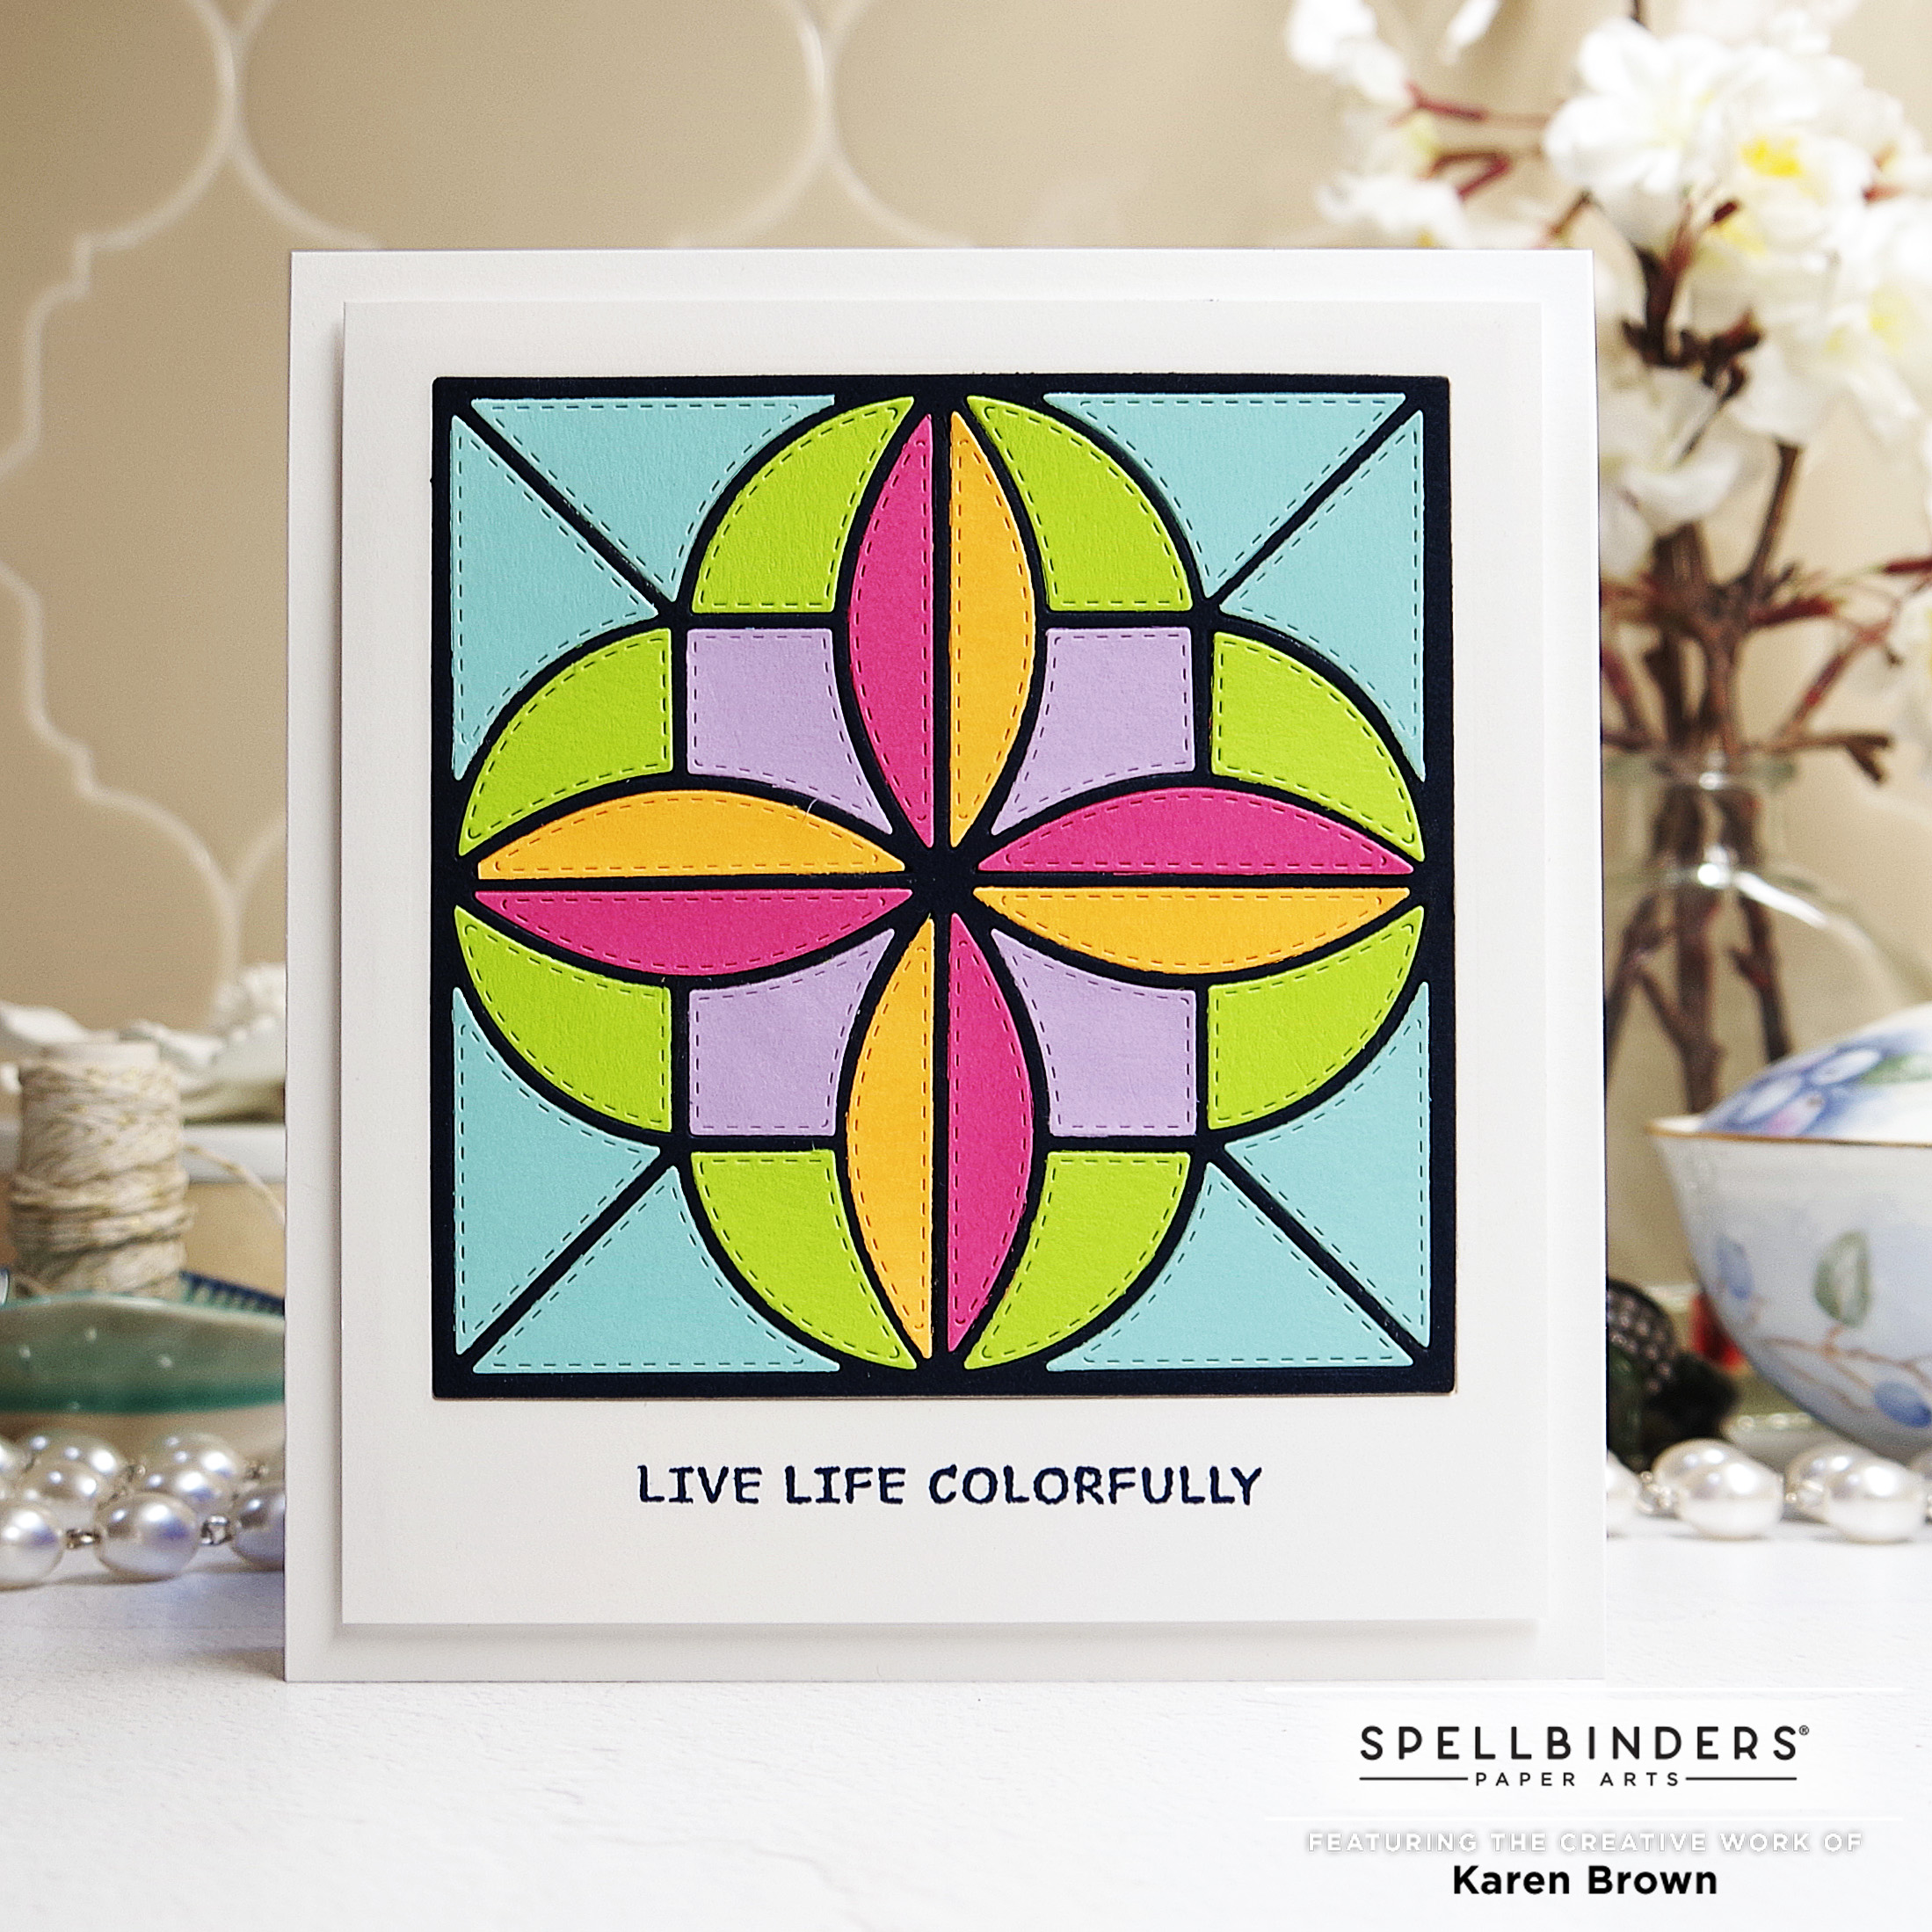
If there is such a thing as CAS Mixed Media, then this is it. I love the clean white contrast with the rainbow colored gel press die cut squares and the giant black Altenew Mega Hello sentiment. You can see my original post HERE.
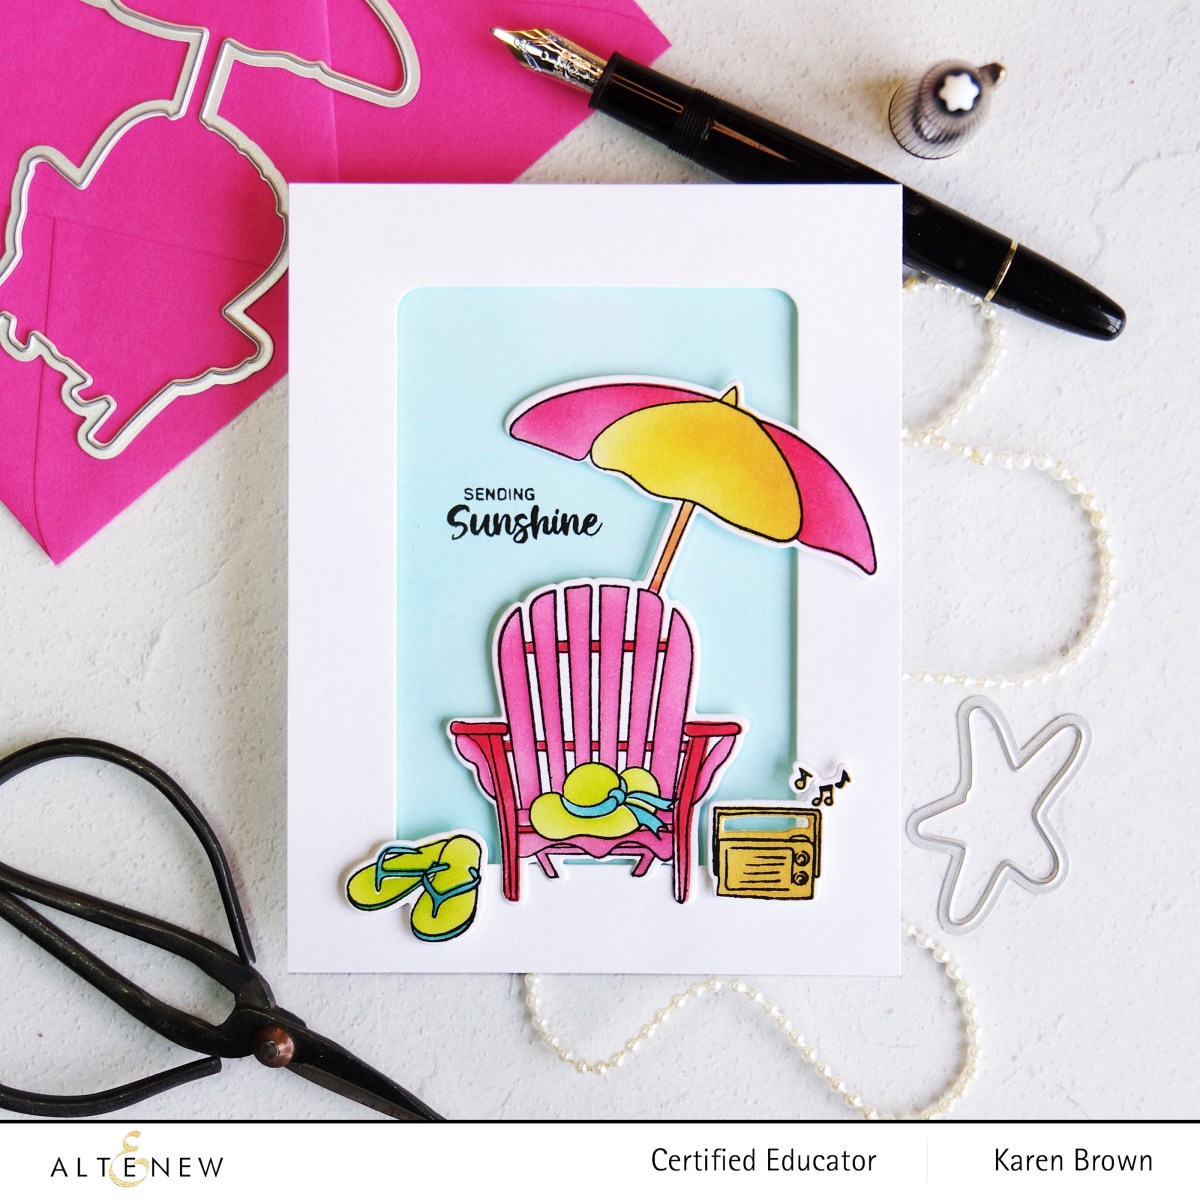
I love all of the Craft Your Life releases but this Always Sunshine Kit was especially popular with my blog readers. You can read my original post HERE: I love coloring with stencils and that is the technique I used on this card.
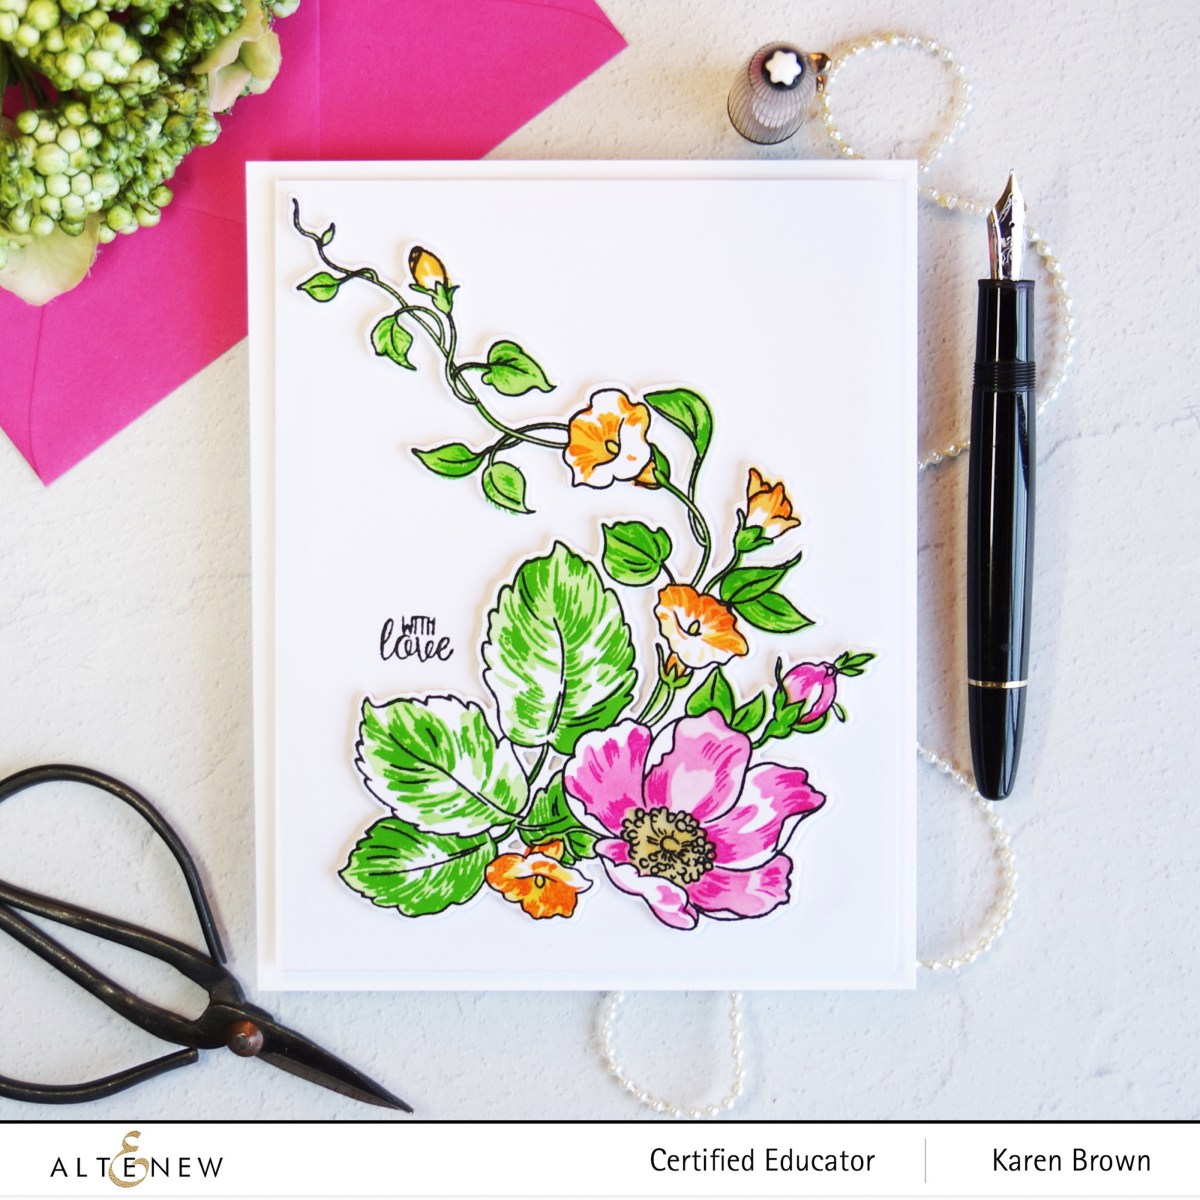
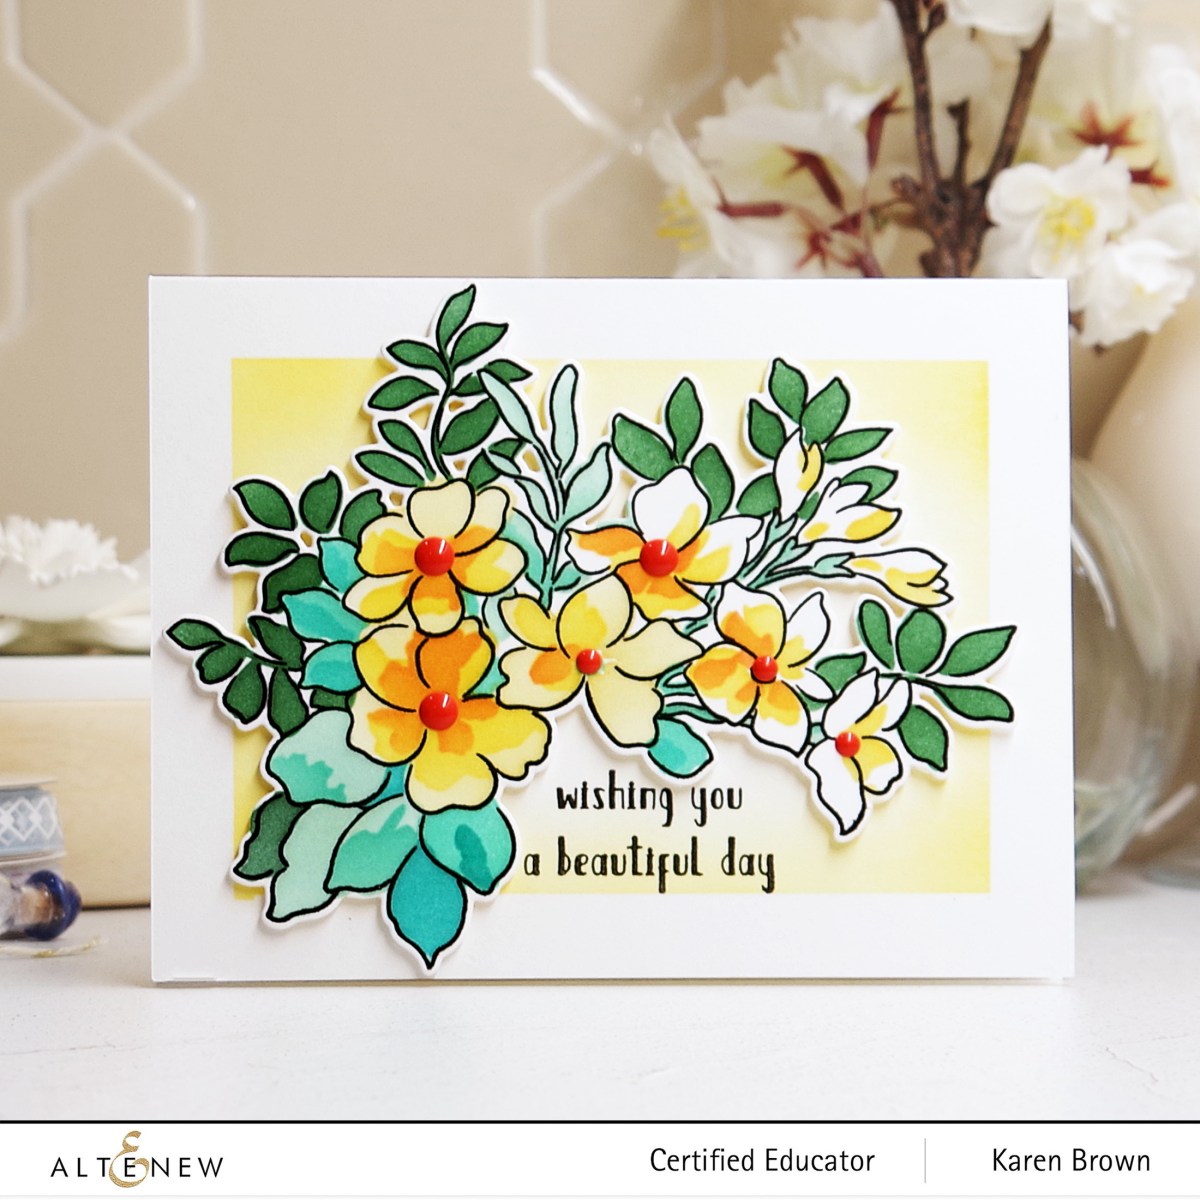
I always love Altenew’s Craft-A-Flower kits and this Open Peony was my favorite Craft-A-Flower in 2022. You can read my original blog post HERE.
Who doessn’t love a floral bouquet? Altenew’s Timeless Tulips premiered in August and I think it is a gorgeous set with two big beautiful floral stamps. You can read my original post HERE.
I will finish with Altenew’s Summer Wishes Bundle which is oh, so fun! I created a cozy little beach scene comprised of an adirondack chair, umbrella, radio and flip flops. This is such a happy card and I know I will pull out this bundle year after year. You can find my original post HERE.
Prizes:
Over $500 in total prizes! Altenew is giving away a $100 gift card to 1 lucky winner, 3 $50 gift cards, and 27 $10 gift cards. Winners will be chosen from both blog hop #1 and blog hop #2. Please leave a comment on the Altenew Card Blog HERE by 12/27/2022 for a chance to win.
Wait, there’s MORE!
We would also LOVE to see YOUR favorite handmade cards, layouts, home decor, etc. featuring Altenew products! Feel free to share them on social media or on your blog using the hashtag #AltenewBest2022. You may also add a link by clicking the blue button below.
FOUR lucky crafters will each win a $15 gift certificate to our store! Winners will be announced on the Altenew Winners Page on 12/29/2022. We are looking forward to seeing your beautiful creations!
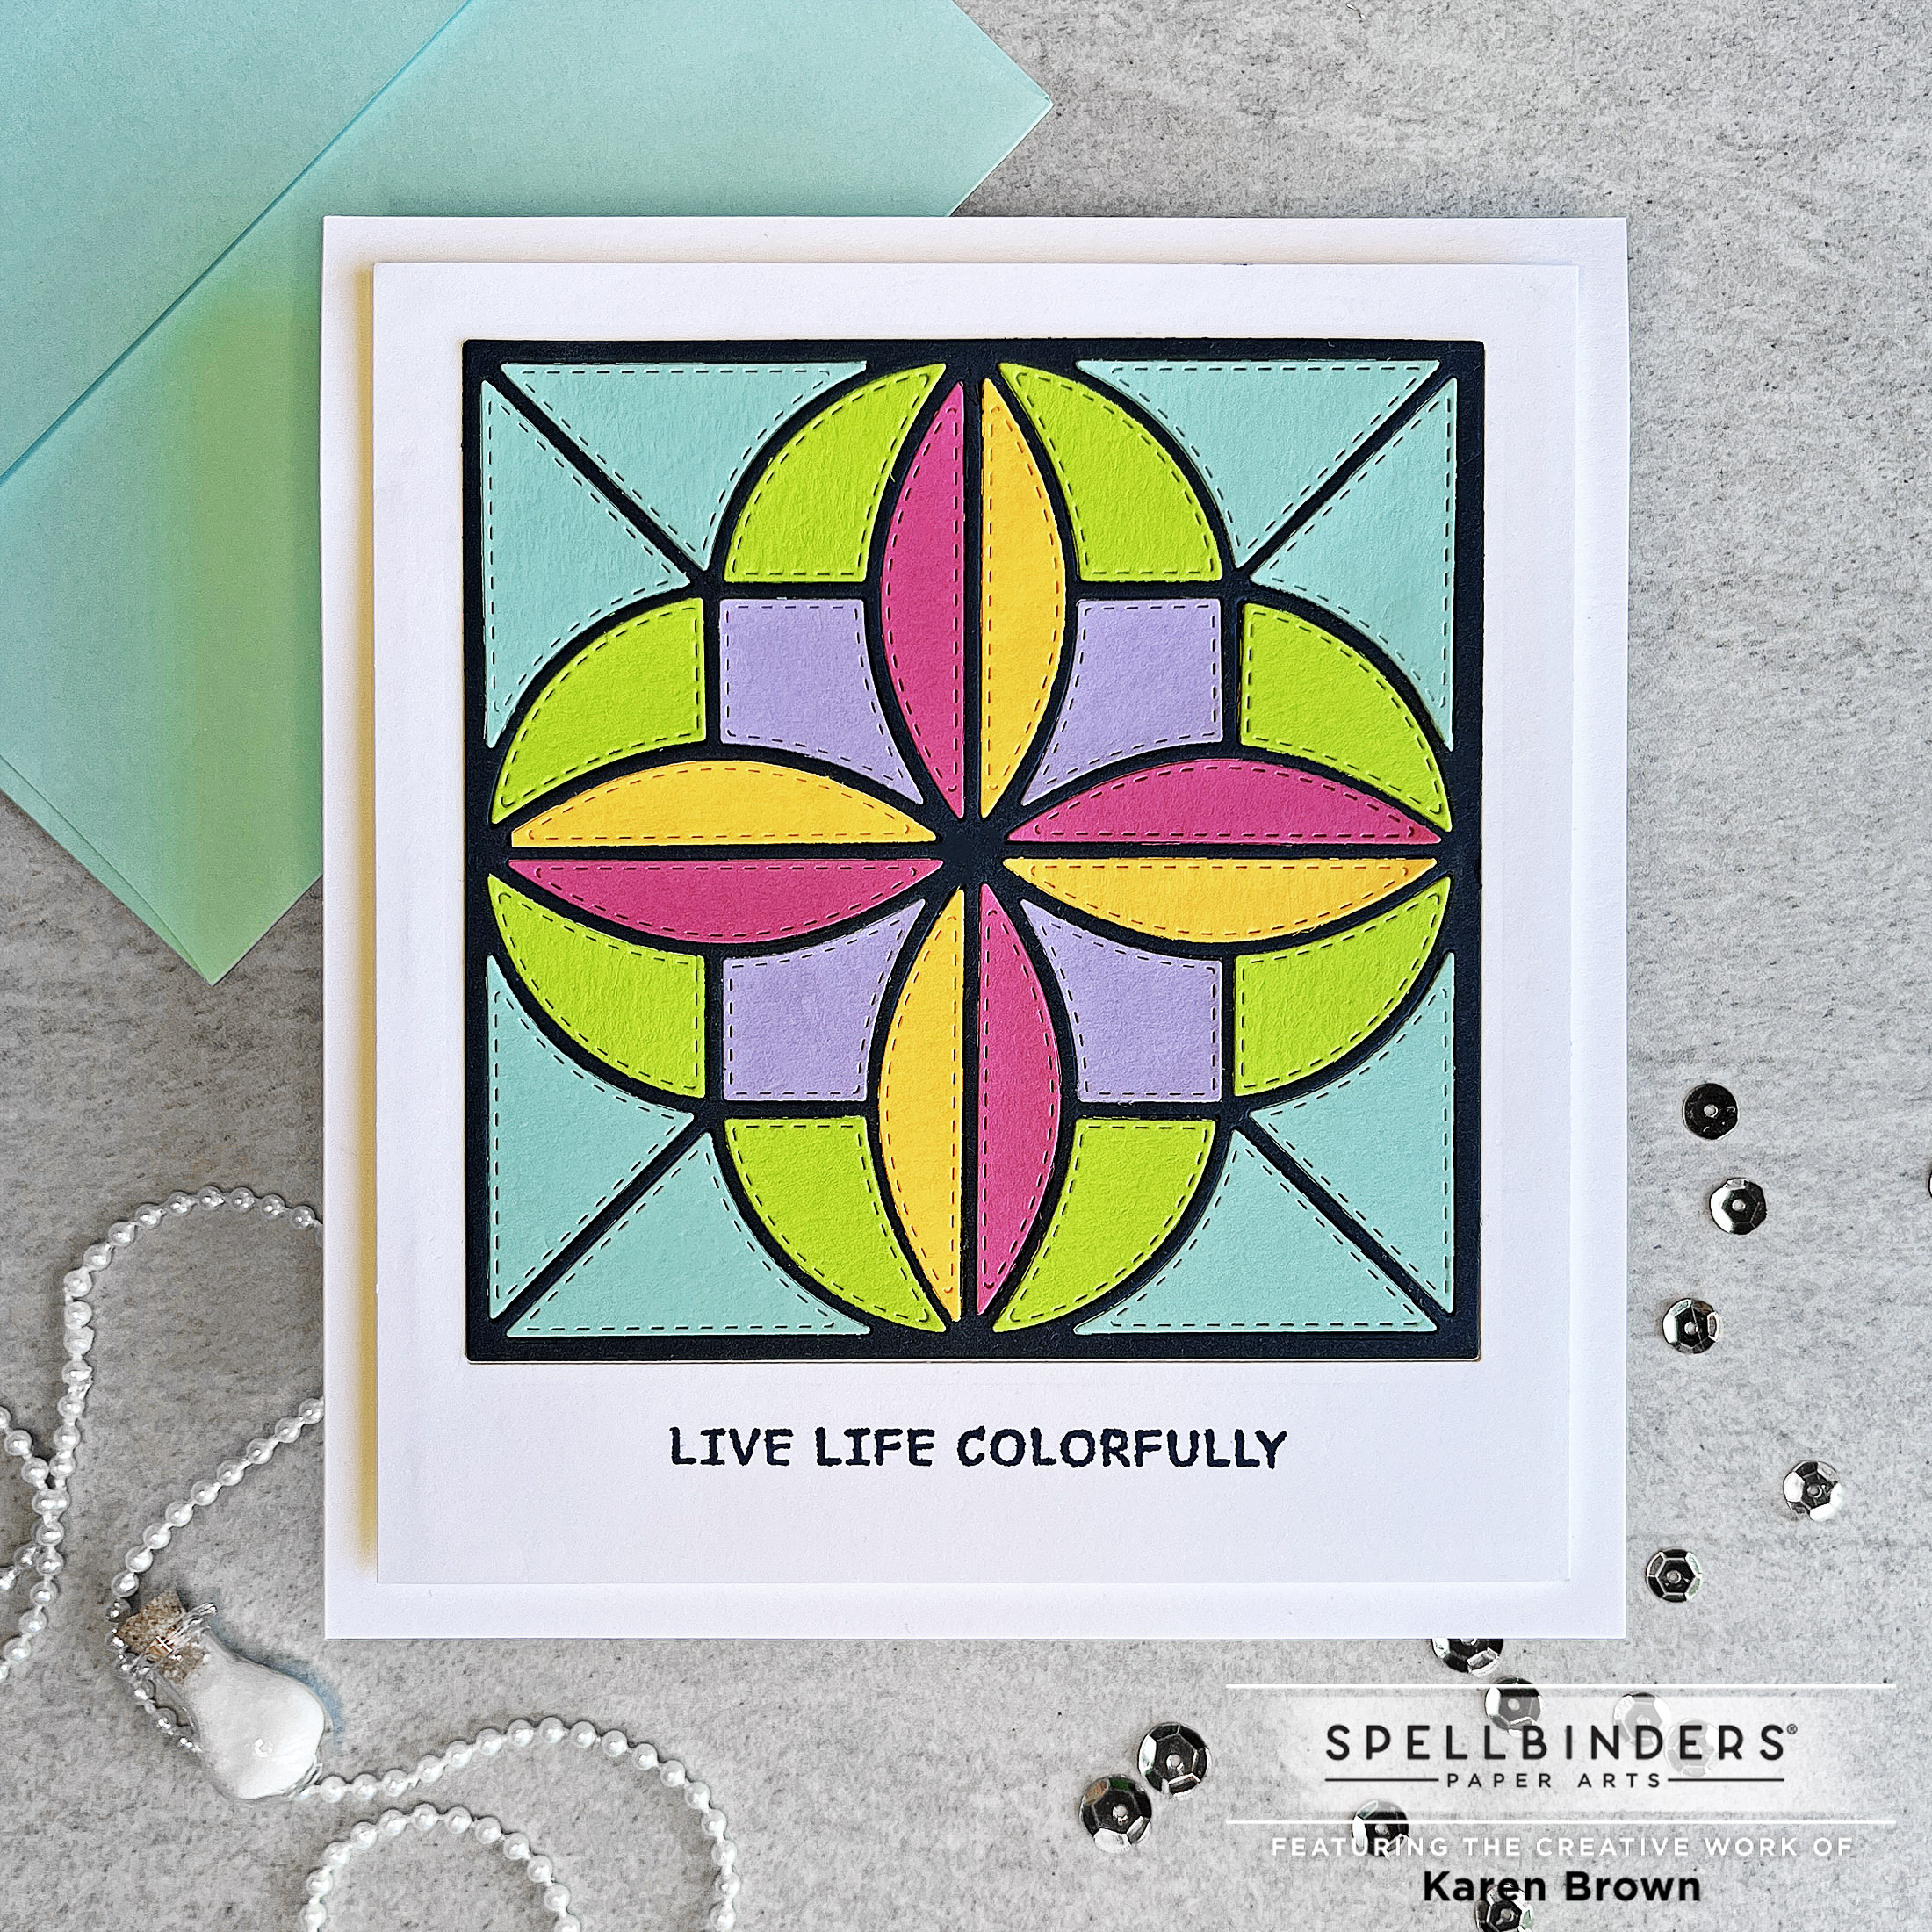
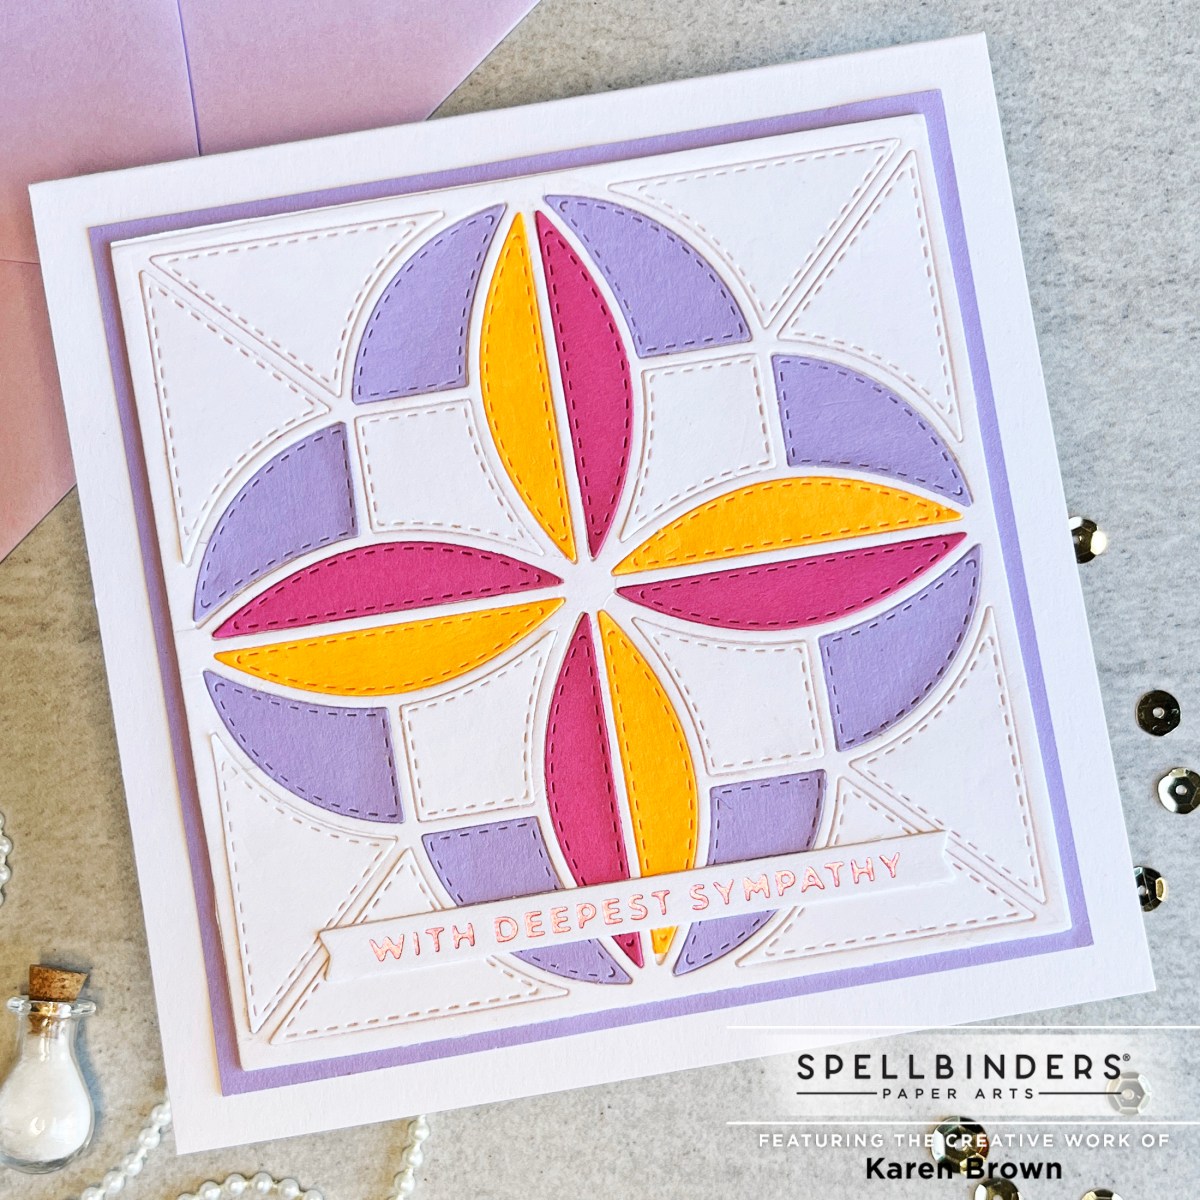
Becca Feeken has done it again with her Home Sweet Quilt Collection! I had so much fun planning and creating these colorful cards.
For my first card, I wanted a stained glass effect so I used the inlaid die cutting technique.
My Stained Glass Inlaid Die Cutting Technique
I started by cutting my Patchwork Petals (S5-537) frame out of navy cardstock and then die cut 5 more colors (aqua, lime, lavender, pink and orange).
I die cut two backgrounds: 5″ x 5 1/2″ and then die cut a square into one of the backgrounds so I could inlay the design.
Stamp your sentiment on the panel with the square opening. I used Ranger Denim ink to stamp my Waffle Flowers Rainbow sentiment. I think the sentiment has been discontinued, but it is a set I still love using.
Glue the background with the square opening and sentiment onto the second background.
Inset/glue the navy frame into the square opening. I used liquid glue.
Inset/glue each piece of the quilt.
Using craft foam, glue your card panel to a 5 1/2″ x 6″ card base.
I had lots of extra pieces left over so I created a bright sympathy card by die cutting a white panel (frame and background) and then using three colors from my leftover pieces.
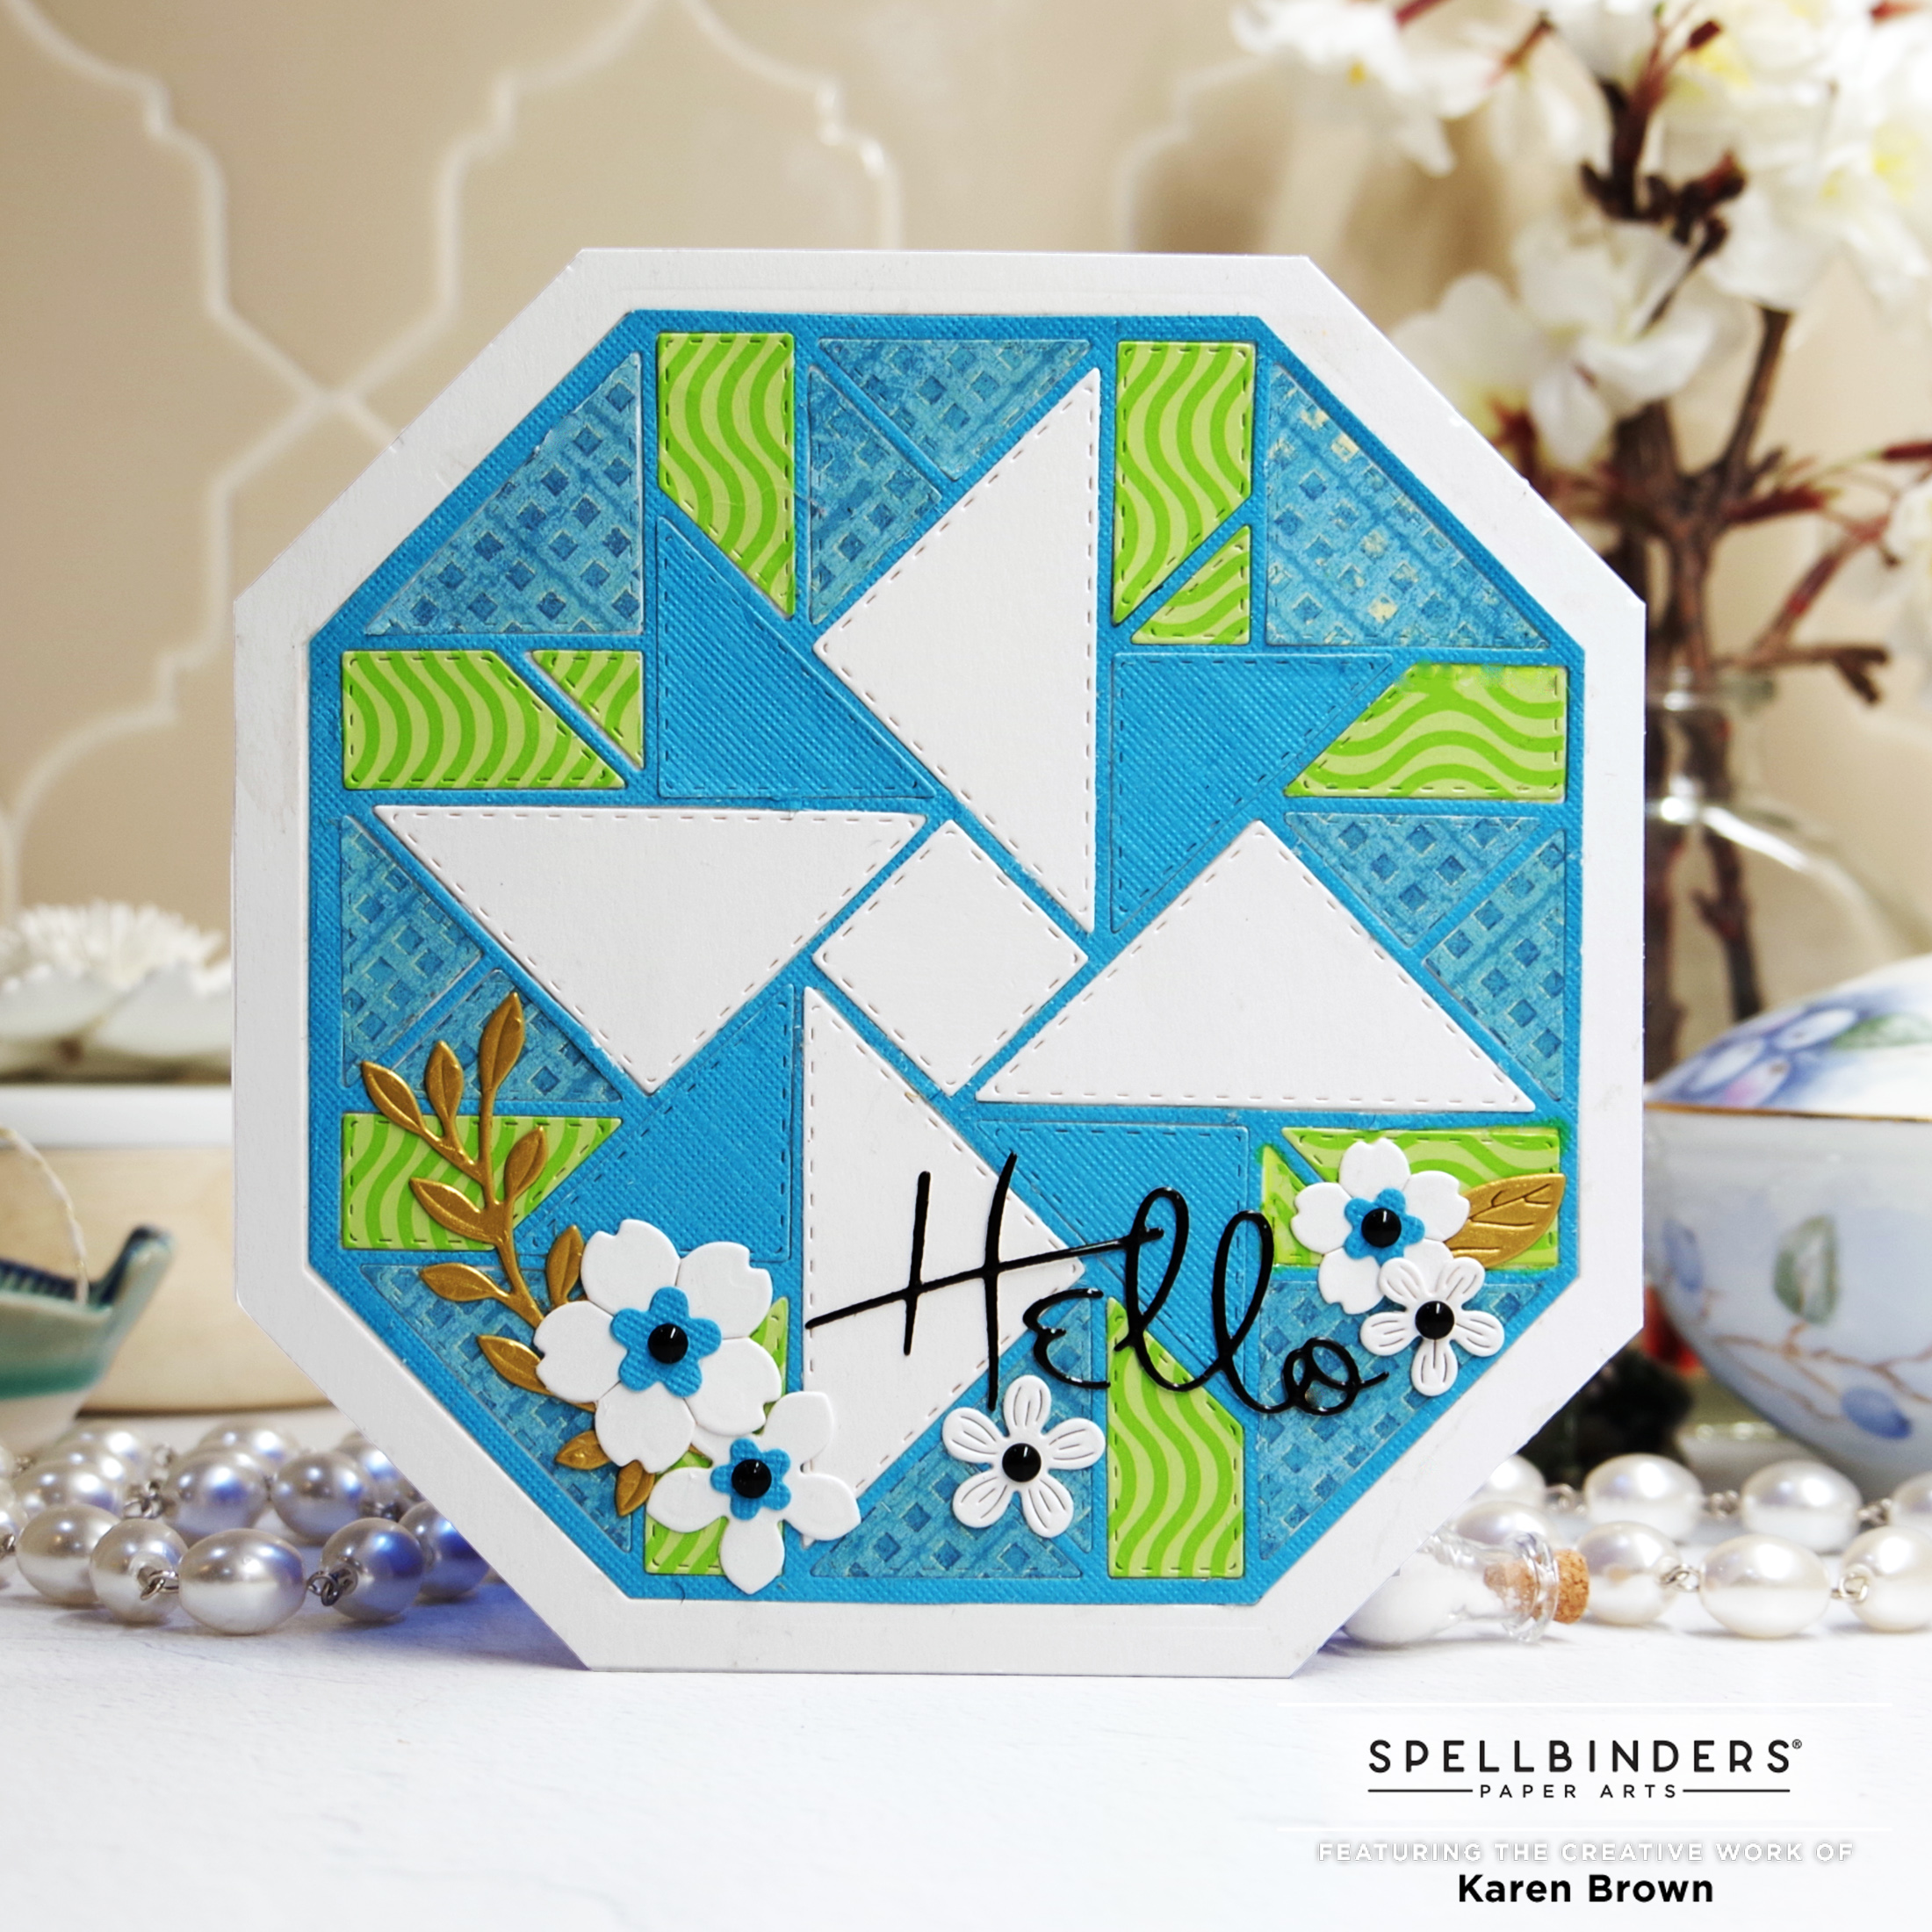
For the Layered Windmill, I created an Octagon shaped card, again with inlaid diecutting. I followed the same process as in Card #1, but then I trimmed the card’s edges with my paper trimmer so that I had a card with 8 sides.
I made two versions, one is white, blue, lime and orange and the other is blue, lime and white.
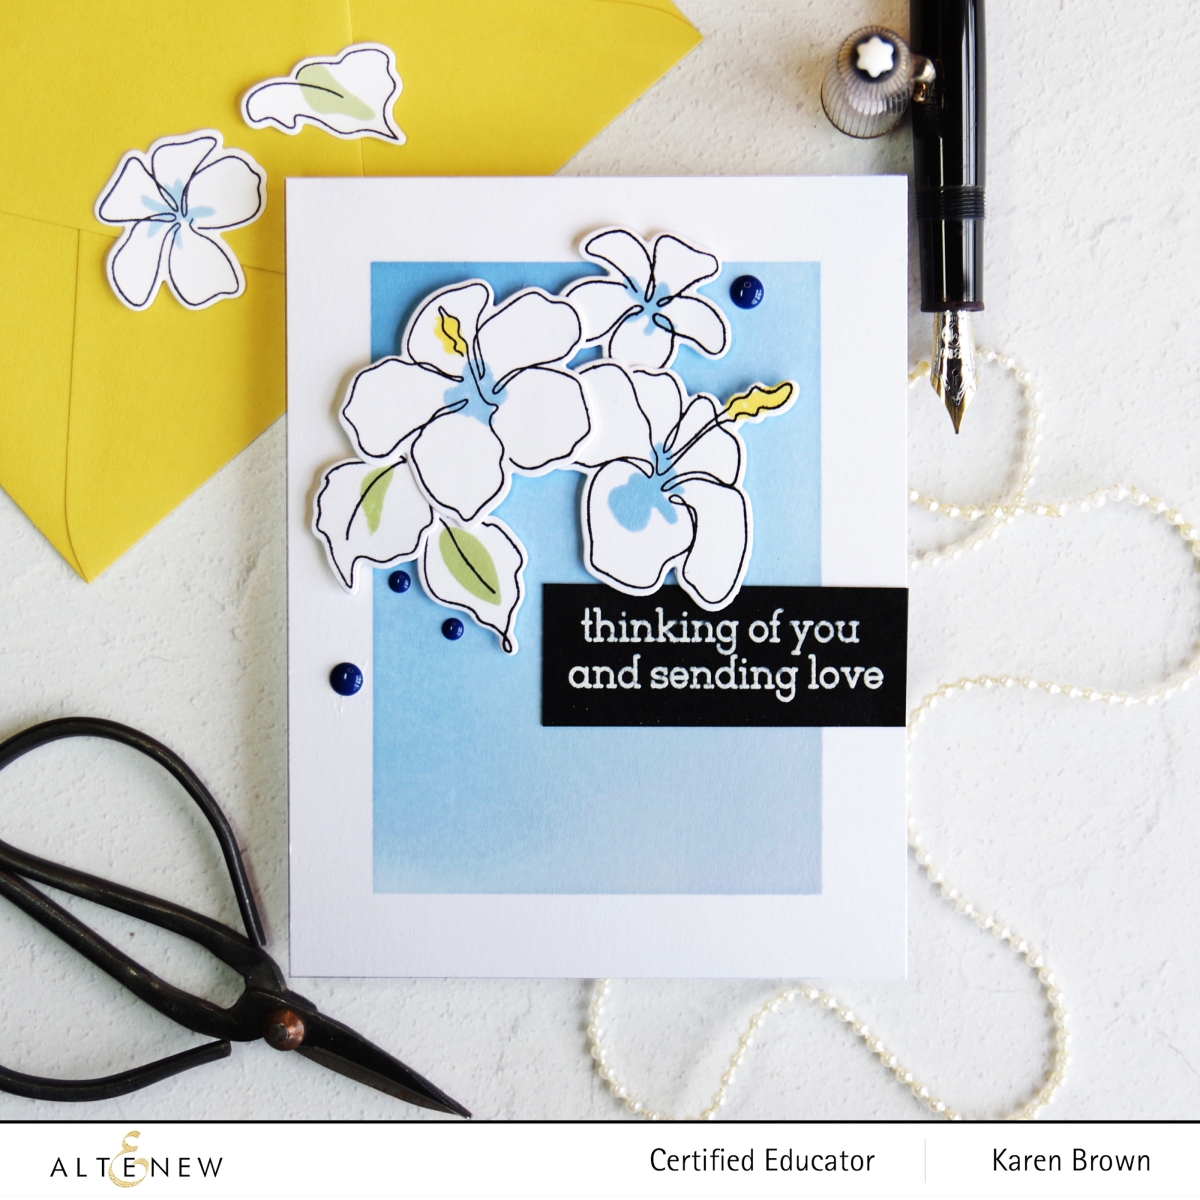
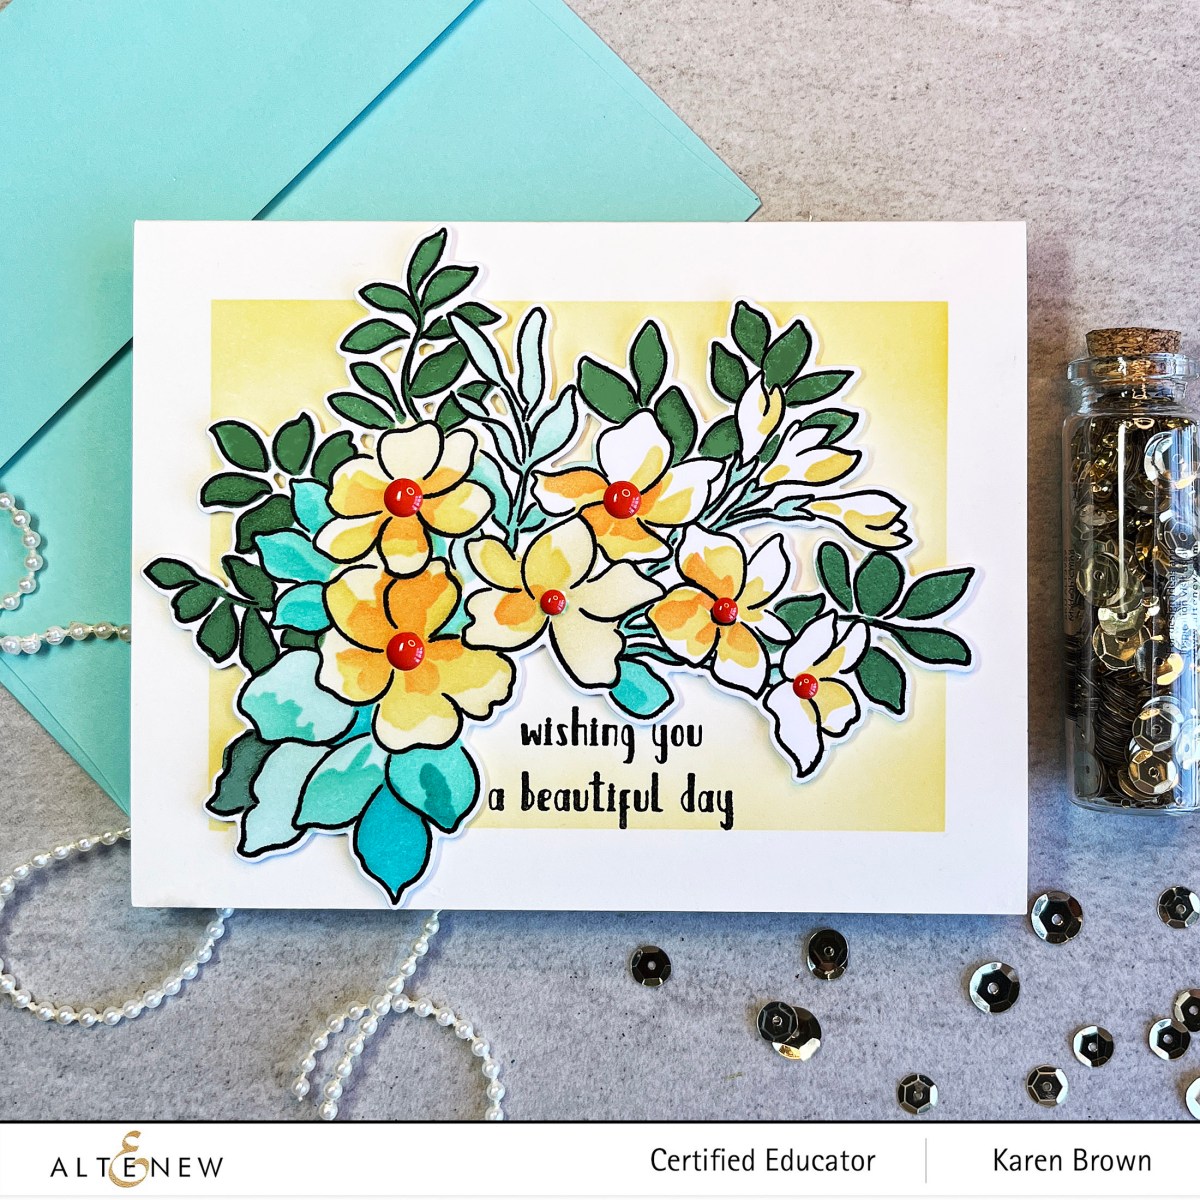
I love the modern look of these loose sketchy outline flower stamps! They are very versatile and would work great on clean and simple projects but I also plan to use it on some mixed media cards.
I started again by ink blending my background. I used the three lightest colors in Altenew’s Glacier Cave Mini Cube Set. I masked off a frame with washi tape and then started in the bottom right with Arctic and then moved darker toward the top left corner. I stamped the flowers and leaves with black pigment ink. Once the outlines were dry, I stamped the flower centers with Caribbean Sky Crisp Dye Ink. I die cut the blooms, assembled with foam tape and then added Glacier Caves Enamel Dots to finish the project.
For my first card, I used the coloring stencils and I love the graphic look on the finished card. The sentiment is included in the kit.
I used Altenew Crisp Dye Inks in the following shades: Mango Smoothie, Warm Sunshine, Orange Crush, Mountain Mist, Volcano Lake, Lagoon and Mountain Pine when coloring with the stencil.
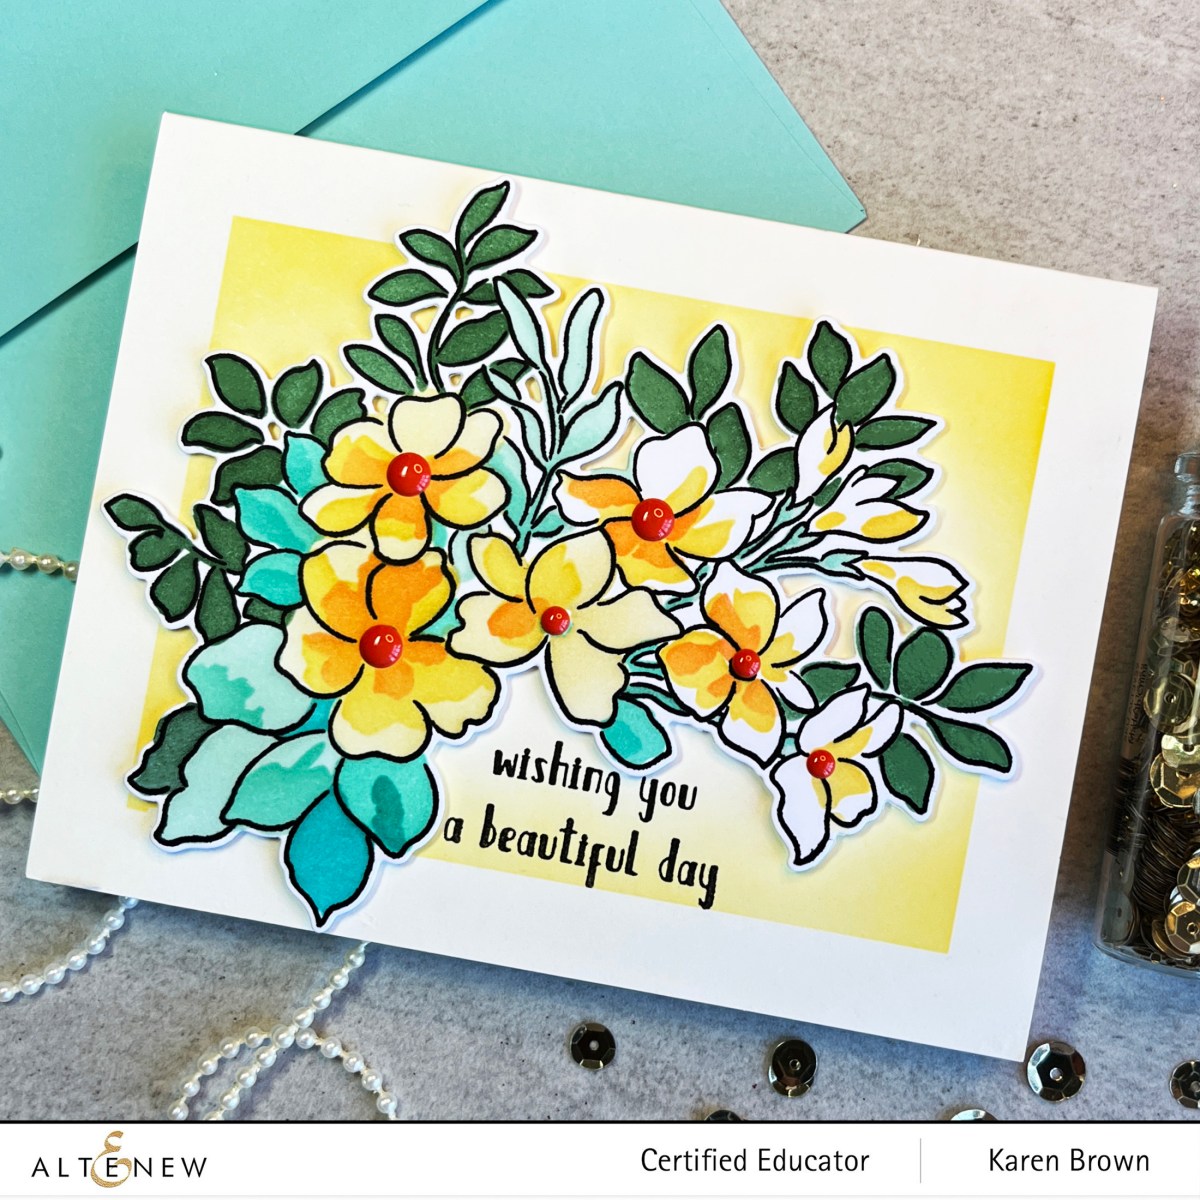
Altenew just came out with their newest set of Alcohol Markers called Beach Garden (Set K) and I wanted to do a second card with this bright set. I love the aquas, blues, yellows and oranges. There are also some really pretty grays included. The only additional color I used on my card was a light Yellow (C004) for the buds on the right side. In addition to the regular brush, Altenew markers have a second fine coloring head for small areas. I used the fine nib a lot on this card and it is one of the reasons I usually reach for Altenew markers over other brands.
I added a subtle background by running a bit of Embossing Paste through parts of the Bubble Wrap Stencil. I lightly heated the embossing paste. The longer you heat, the more the paste will bubble up. I assembled with Instant Dimension Foam Tape, stamped a sentiment using Altenew’s Label Love Stamp set and added Cool Summer Night Enamel Dots to the flower centers.
Watercolor Flowers Embossing Folder
The Craft-Your-Life Embossing Folder is beautiful! I ink blended Persian Blue and Saphire Crisp Dye Inks on cardstock and then embossed it. I then added white pigment over the top of the embossing. I wanted to spotlight the embossing so I die cut 4 circular frames using Halftone Circles dies and then glued them together to form a substantial looking frame. Using one of the die cuts as a guide, I chose the portion of the embossed panel that I wanted to use on my card and then die cut a circle. I stacked the frames on top of the embossed circle and glued to a white A2 top-folding card. I added three enamel dots (Essential Black and White) to the flower centers and stamped a simple sentiment in corresponding ink. I think it makes for a fresh clean look.
Thanks for stopping by! I’d love to hear which card is your favorite.
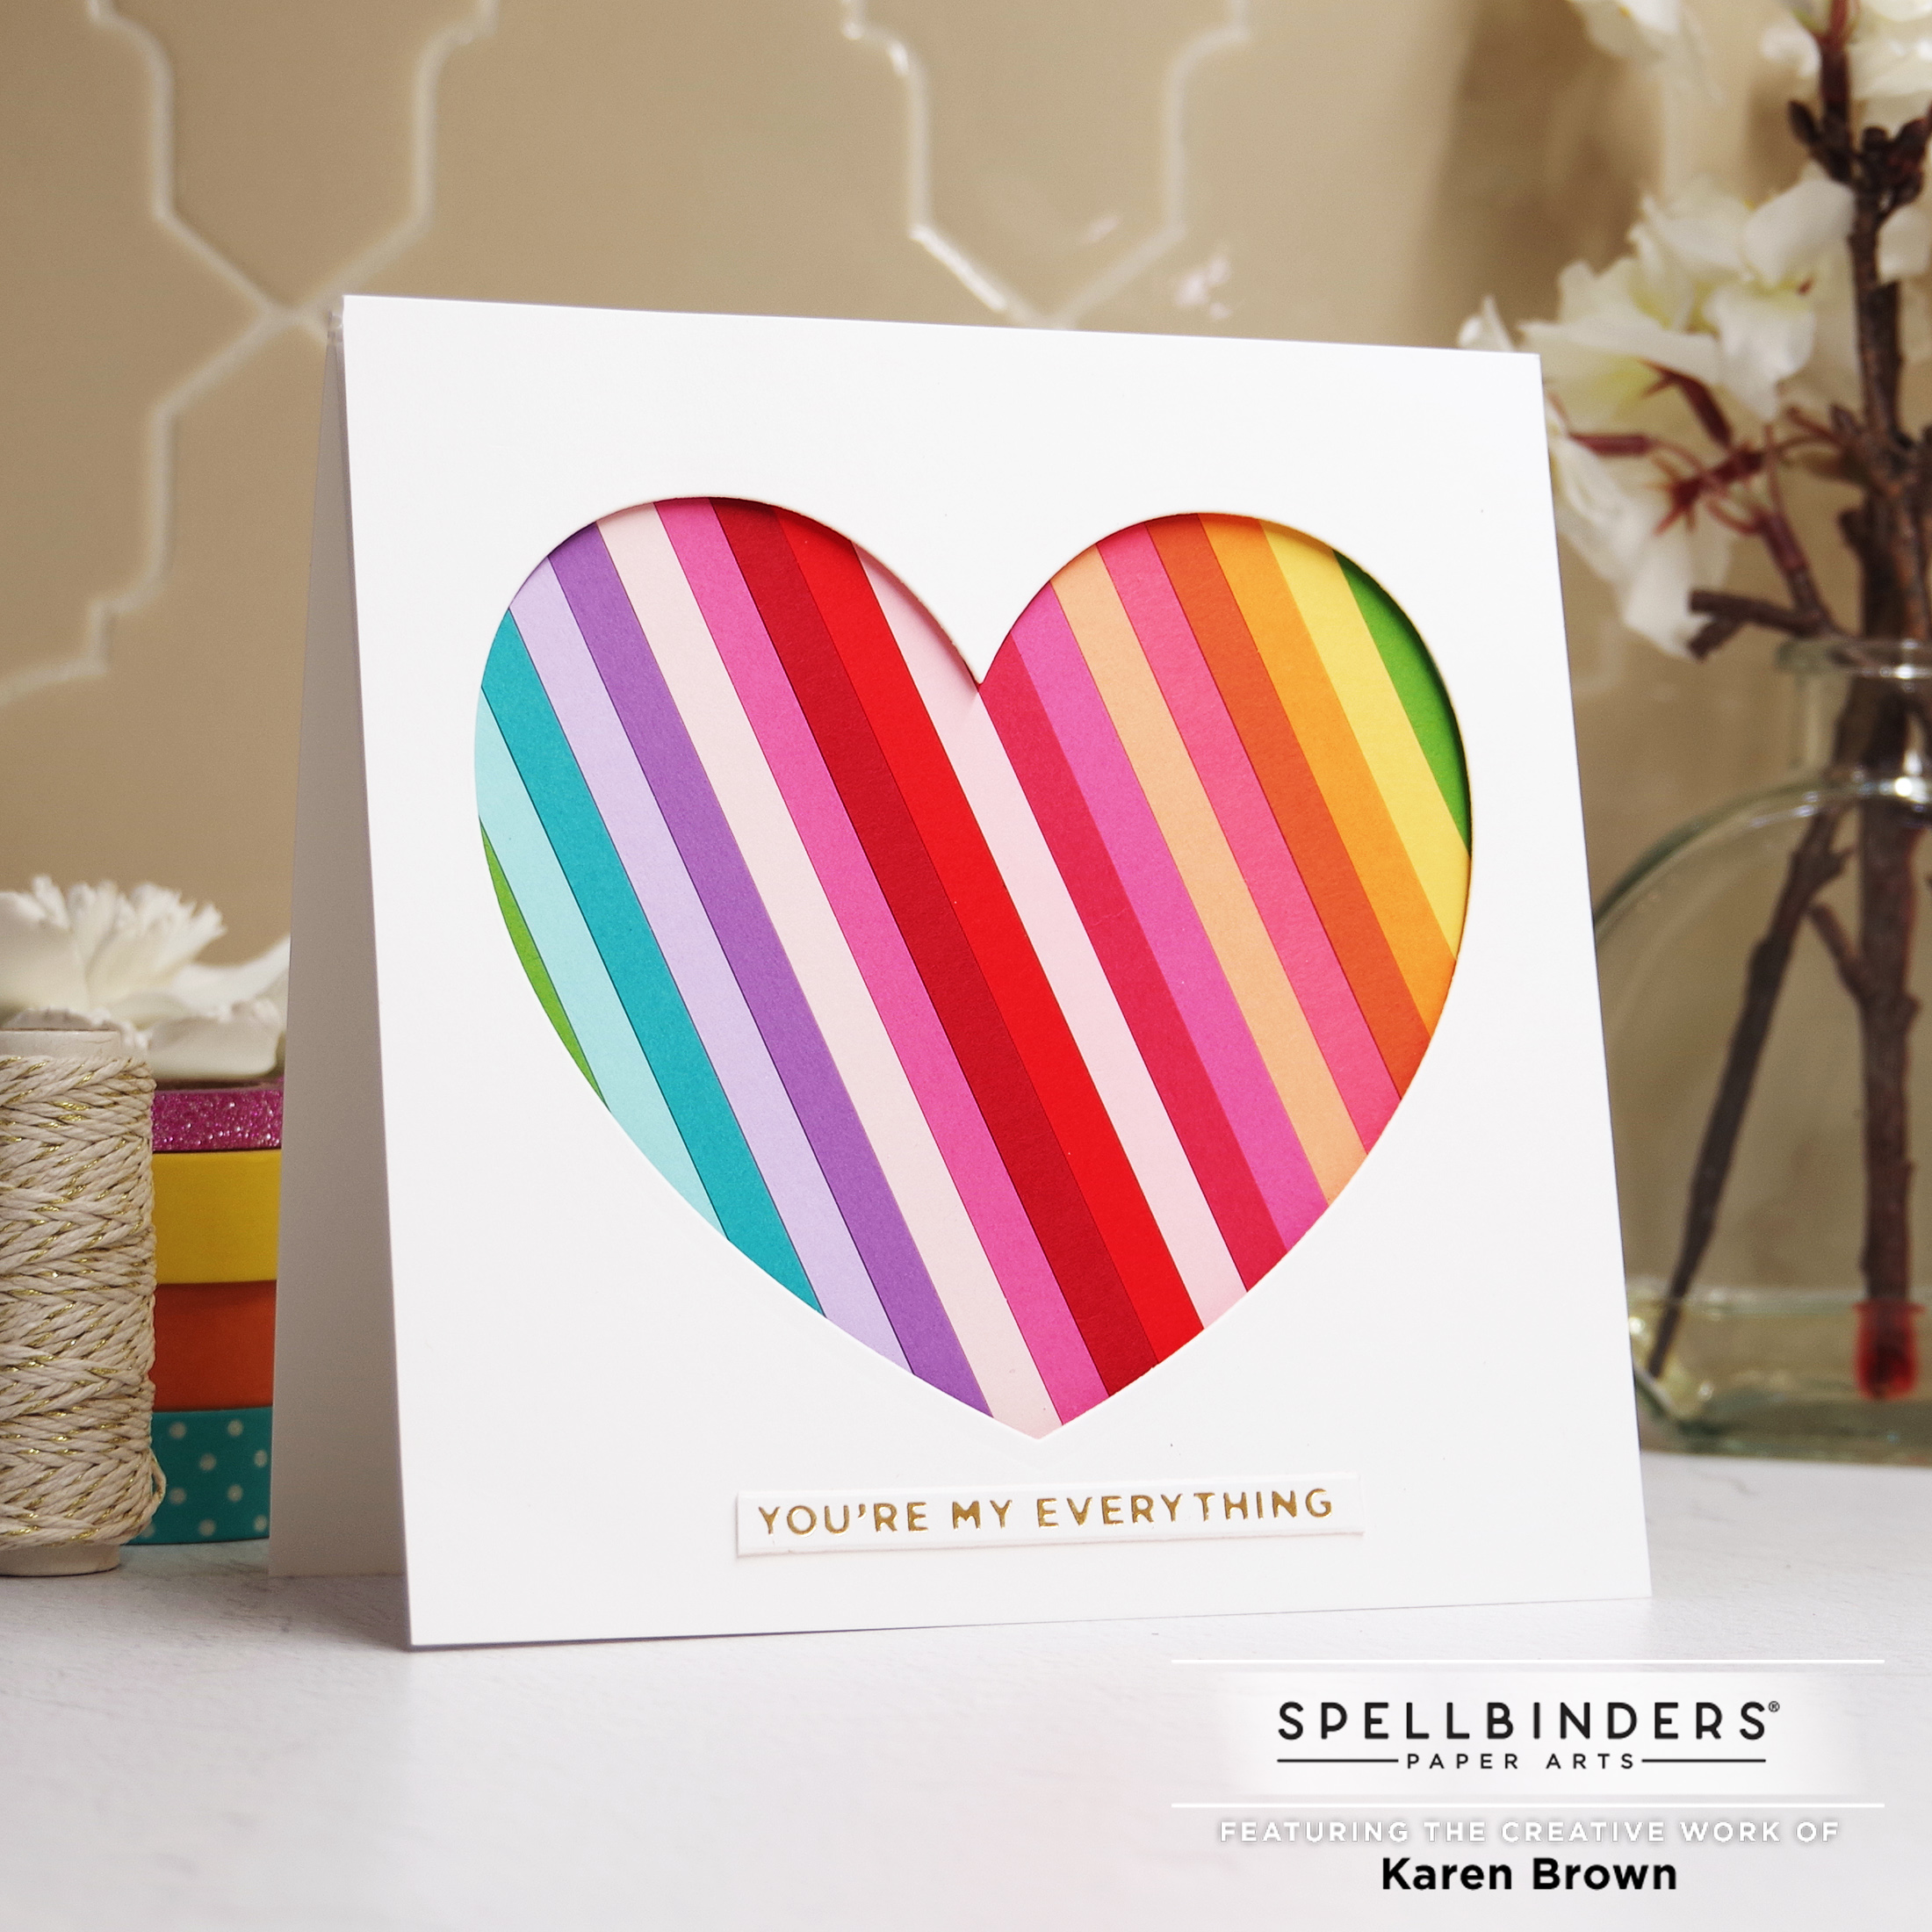
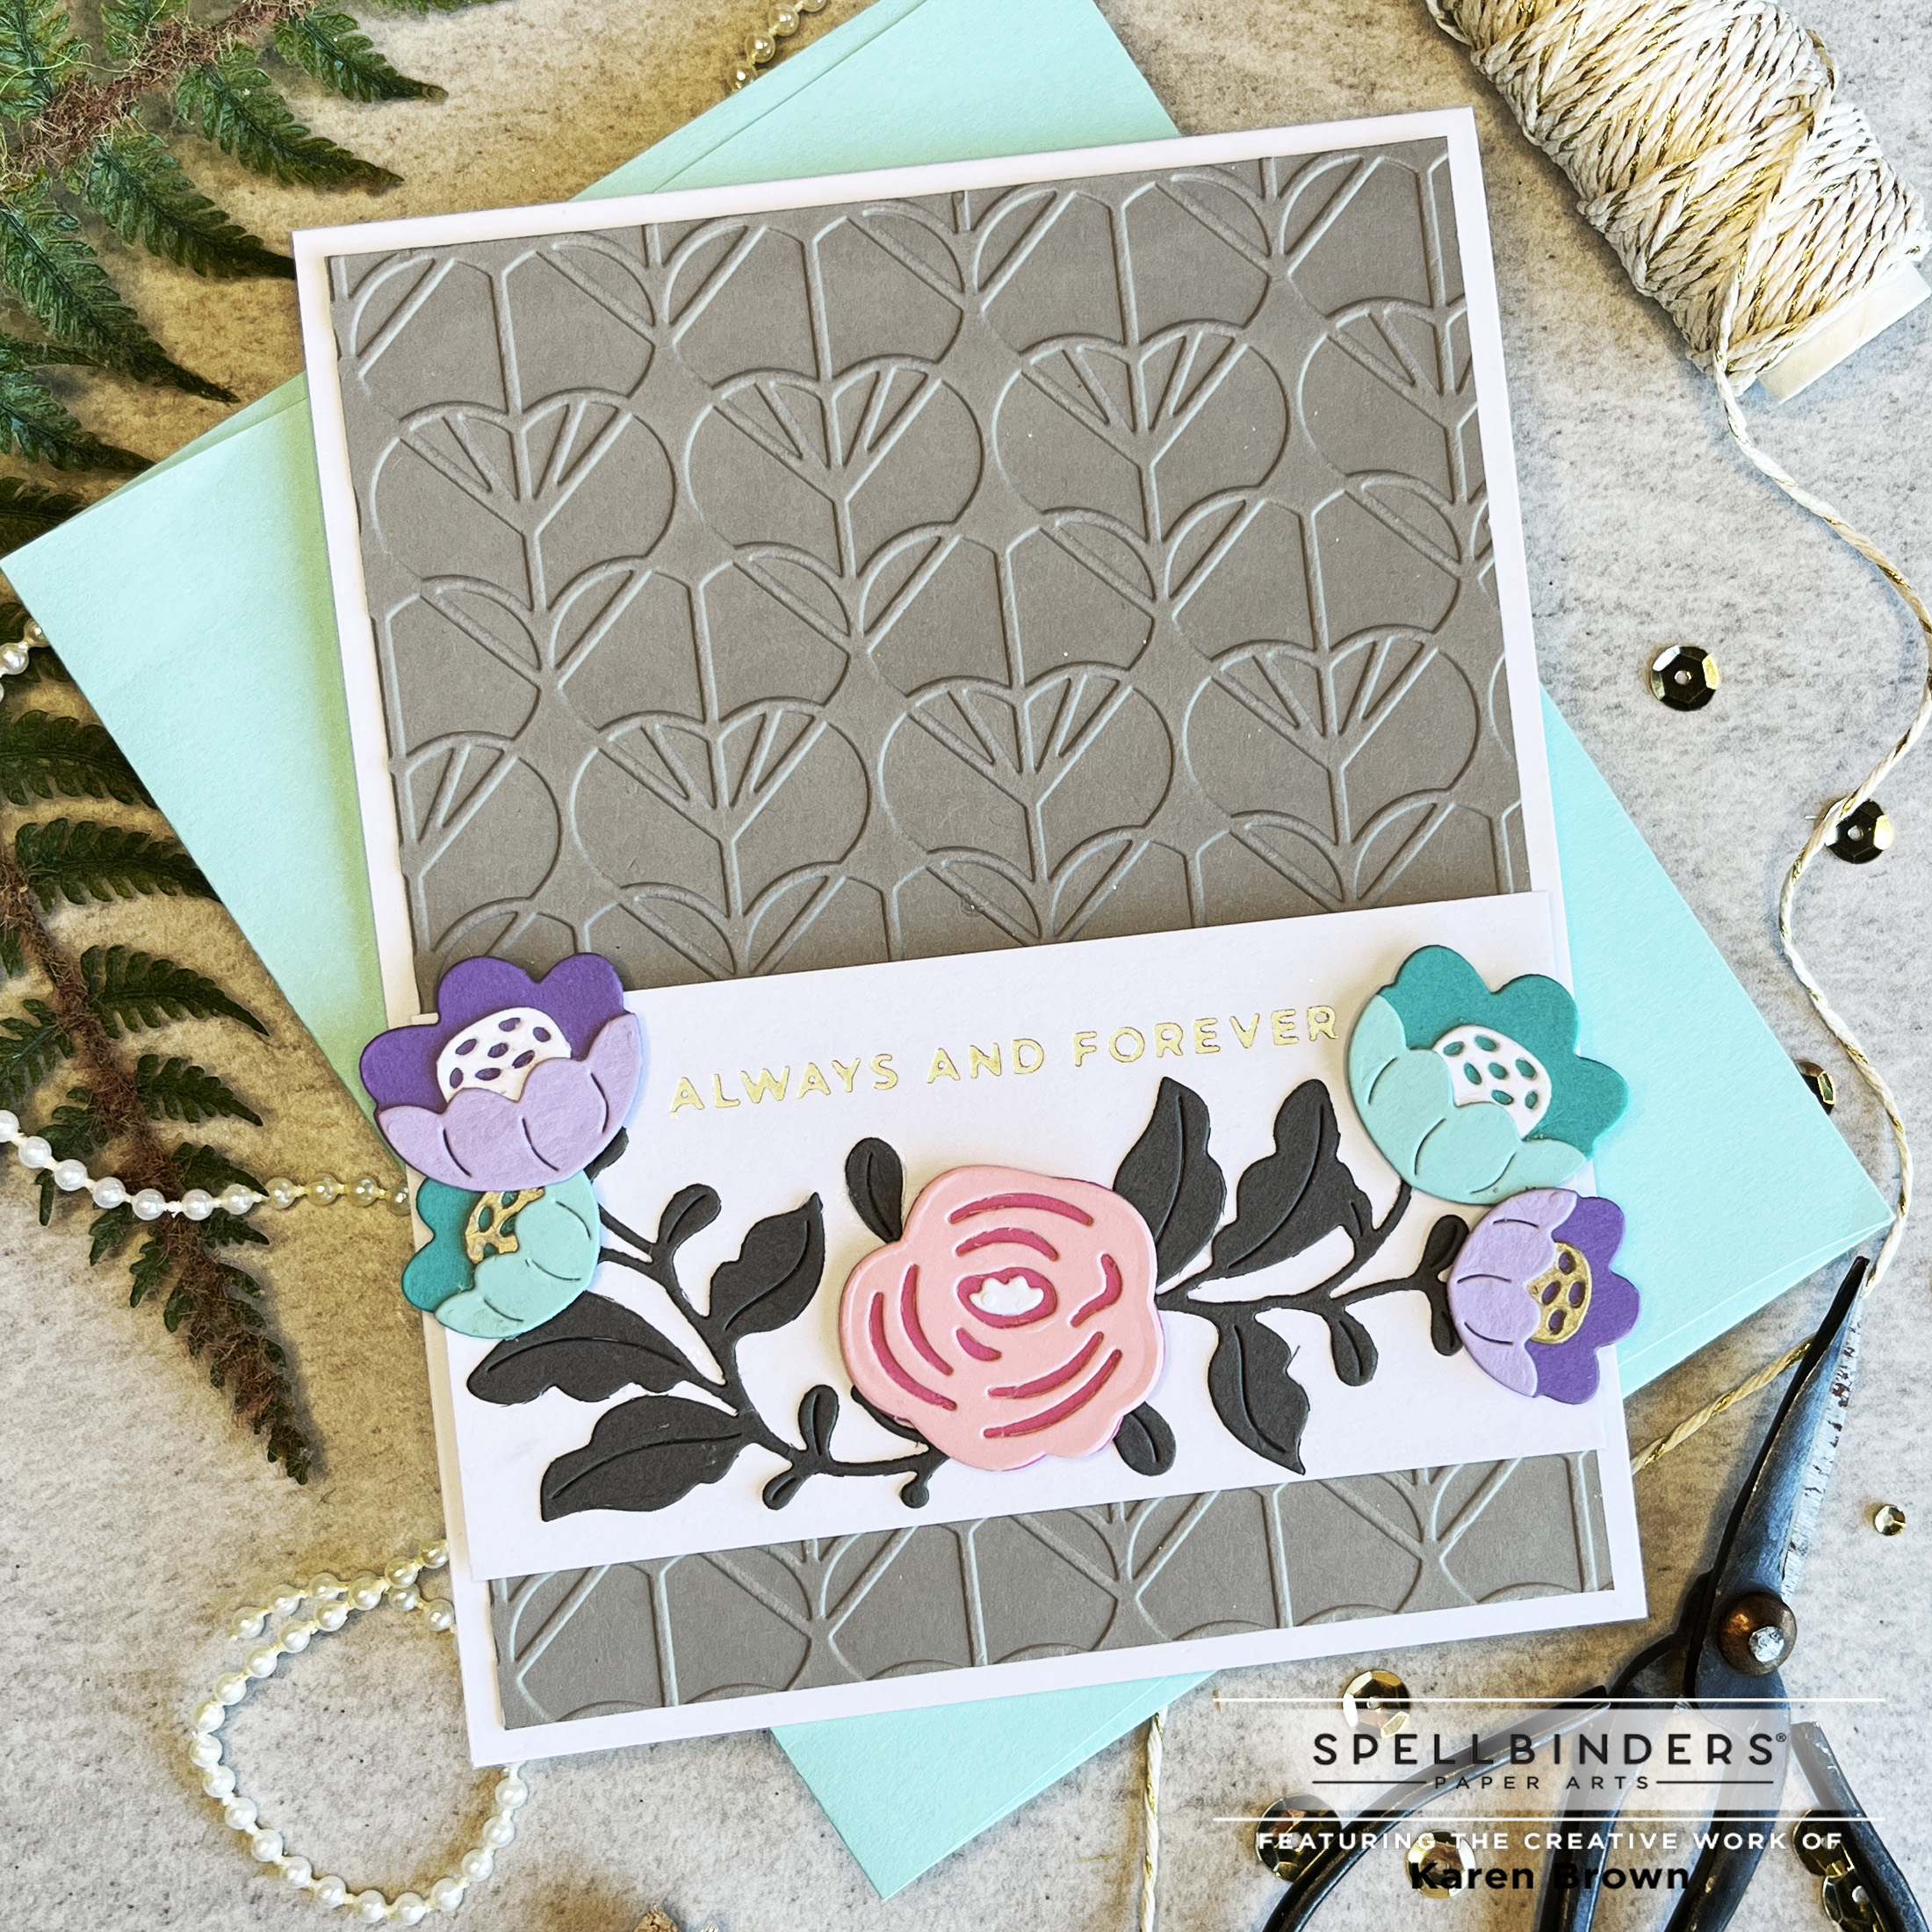
Who is ready for Valentine’s Day? The Spellbinders December Club Kits are live and there are so many fresh ideas for Valentines Day and beyond. I am excited to show you the cards I made. I started with the Large Die of the Month called “Blooming Heart”.
I made this colorful card for my husband and I am so pleased with it! I started by cutting 20 1/4″ strips from leftover card stock scraps. The only color I repeated is the green that shows on both edges. Using a dot-liner glue runner, I added adhessive to cardstock and then I adhered each strip. This goes much more quickly than you think. Next, I die cut the heart from a 5 1/2″ x 5 1/2″ panel. Using foam tape, I attached the heart to the background panel. For me, the most difficult part was selecting a sentiment. I tried a bunch but eventually decided on this simple hot foiled sentiment from Spellbinders Mini Everday Sentiments set: GLP-260. It expresses my feelings without drawing the eye away from the rainbow heart.
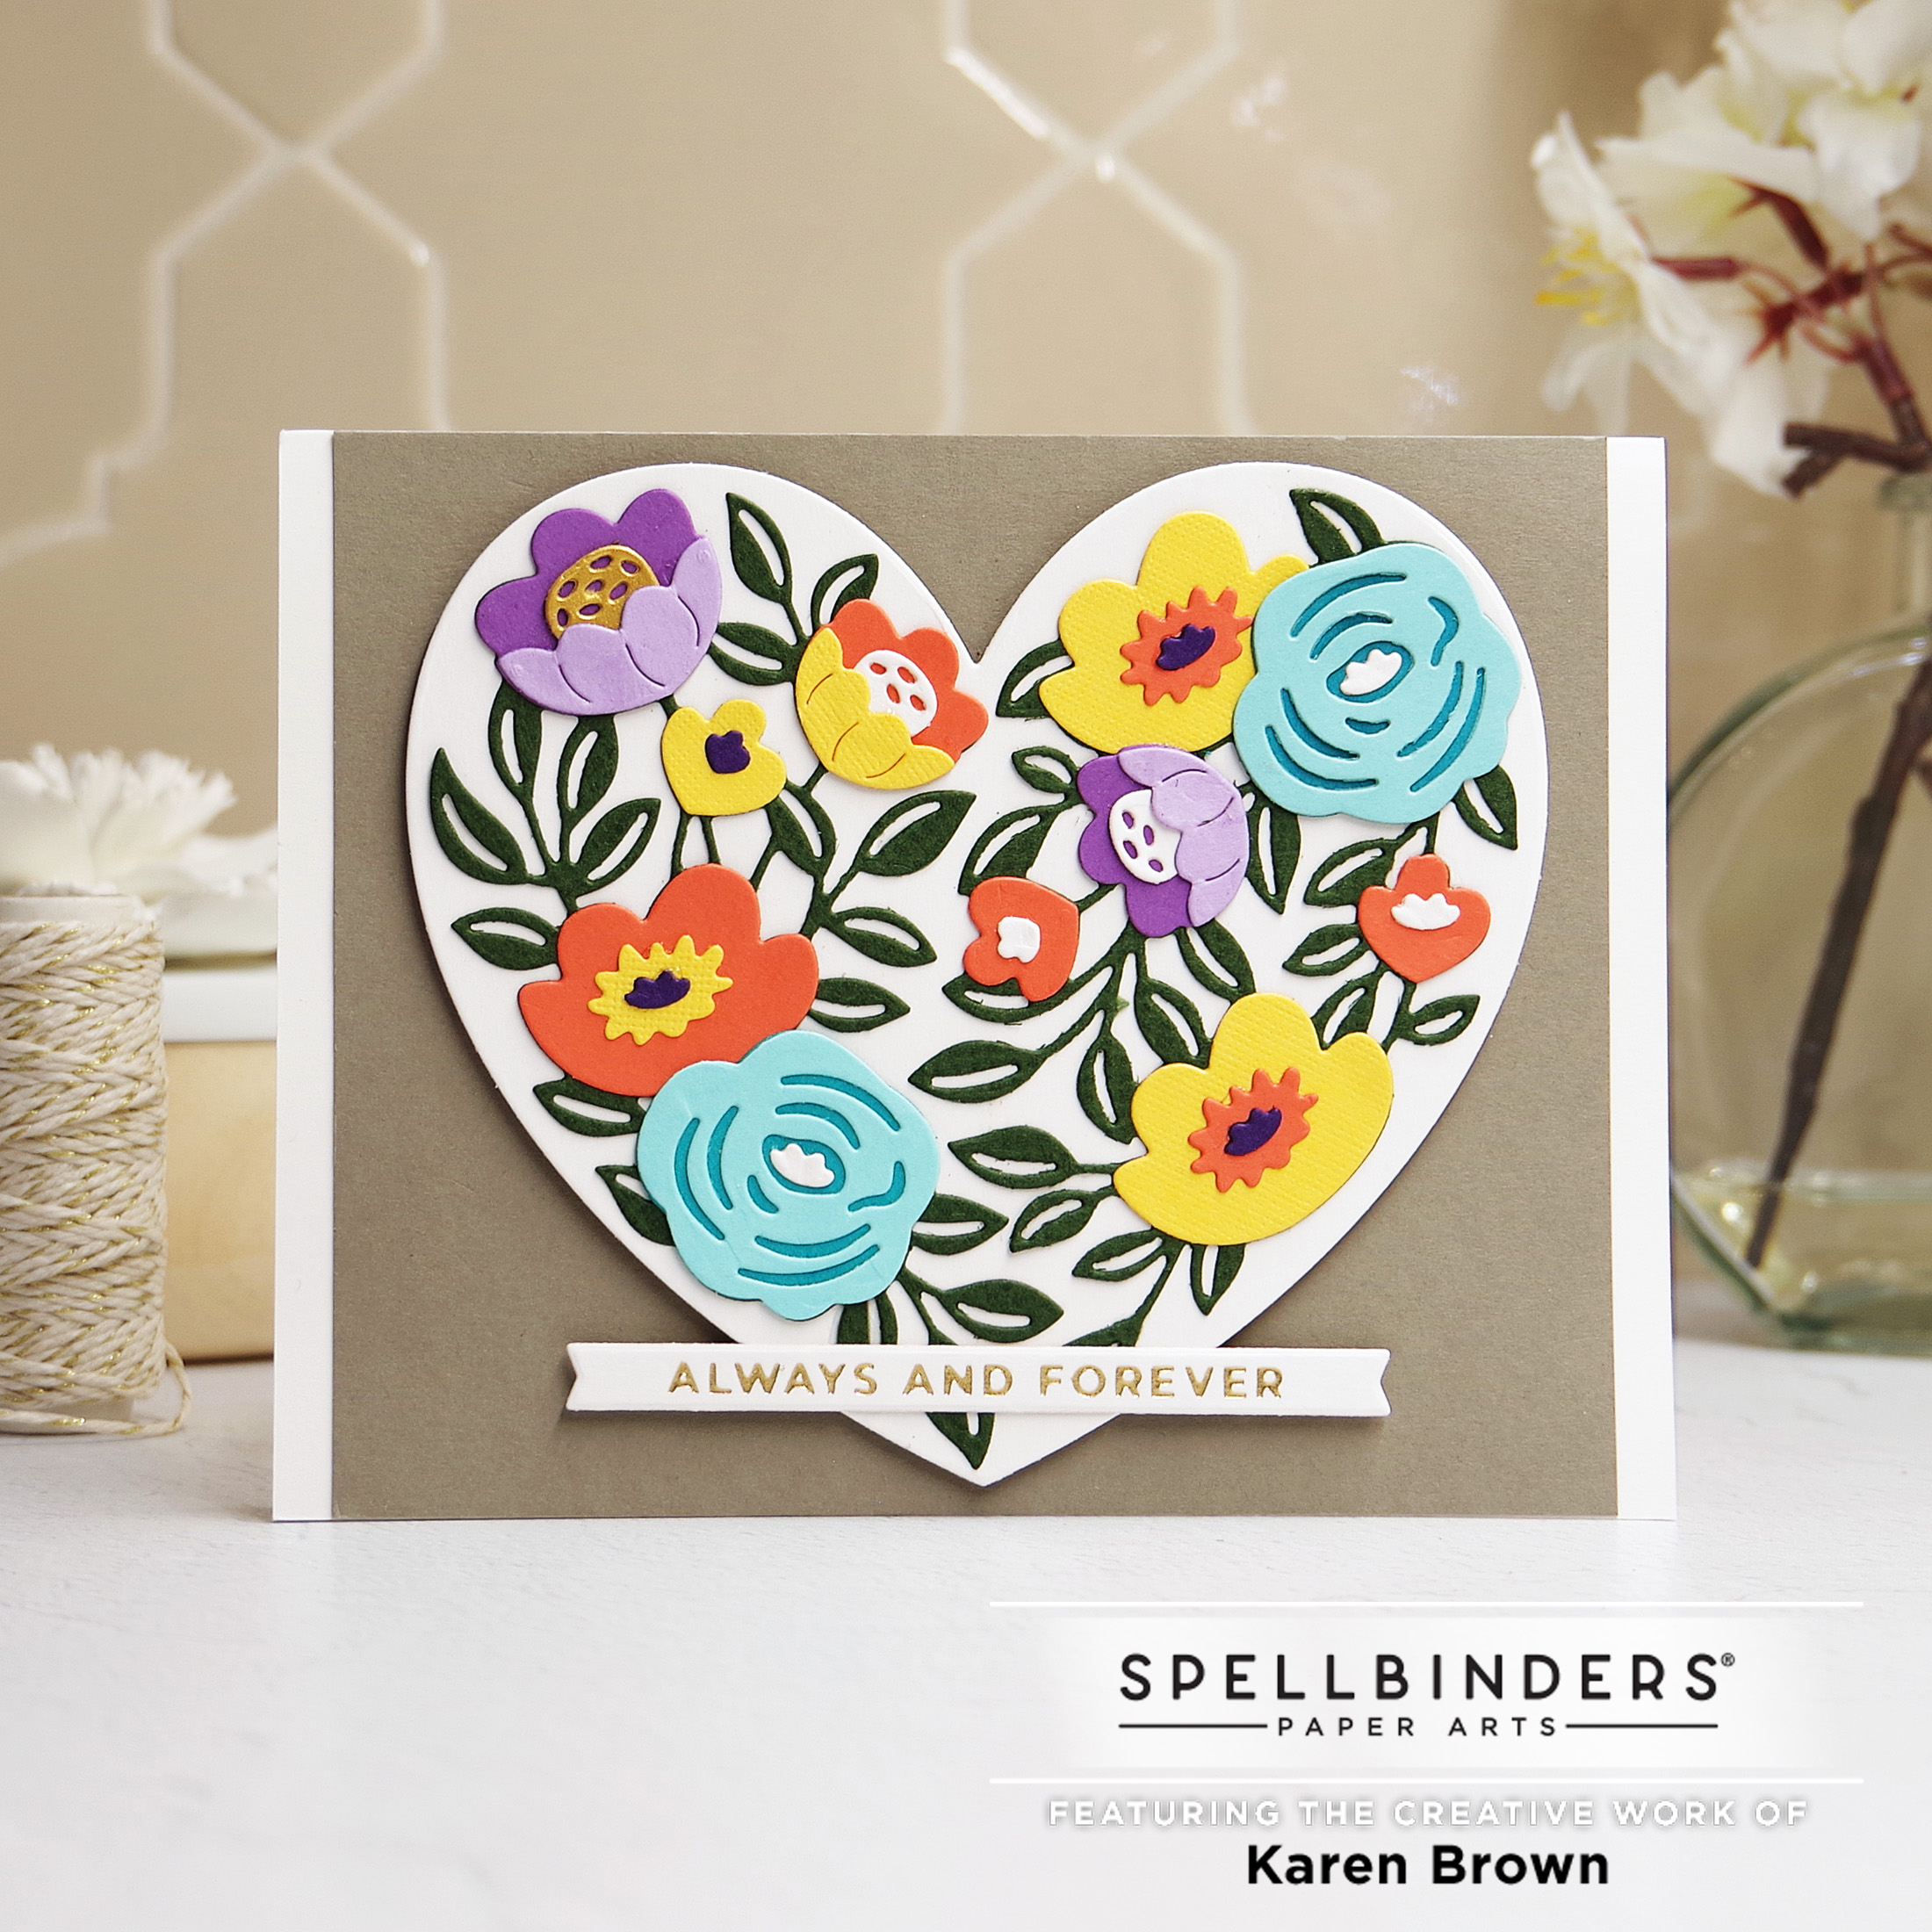
The December Large Die of Month kit(Blooming Heart) is stunning and oh so fun! I die cut all my pieces using an additional metal shim for precise cutting. I then assembled the heart with liquid glue. Using foam tape, I attached the heart to a mushroom colored background and then adhered it to an A2 card base. The sentiment is again hot foiled using Spellbinders Mini Everday Sentiments set: GLP-260.
Embossing Folder of the Month: Heart Blooms
Don’t you just love the texture on this gorgeous embossing folder? It is called Heart Blooms and I wanted it to be the star of this card. I embossed a panel of mushroom colored cardstock. I then added a hot foiled sentiment to a 2″ strip of cardstock and then embellished with die-cut flowers from this month’s Large Die of the Month and greenery from a previous release.
This stitched valentine kit is so pretty….the card just glows in person! I started by die cutting the diamond backdrop in salmon and brushed gold cardstock and then I stacked them. You don’t really notice the bottom layer but it adds nice dimension. I glued the two delicate pieces together with E6000 spray glue, which is perfect for this type of die cut.
The background is lovely but simple and I know I’ll be using it a lot on future cards. I cut one white panel and two from brushed gold. I assembled by scooting one of the gold panels slightly above the white and one slightly below so there is a pretty band of gold at the top and bottom. The sentiment is included in the kit.
I die cut the heart from white cardstock and then did my stitching in front of a fire in our hearth. I used DMC gold floss. I added some white enamel dots for embellishment and attached to an A2 Top Fold Card Base. I made this card for my mom.
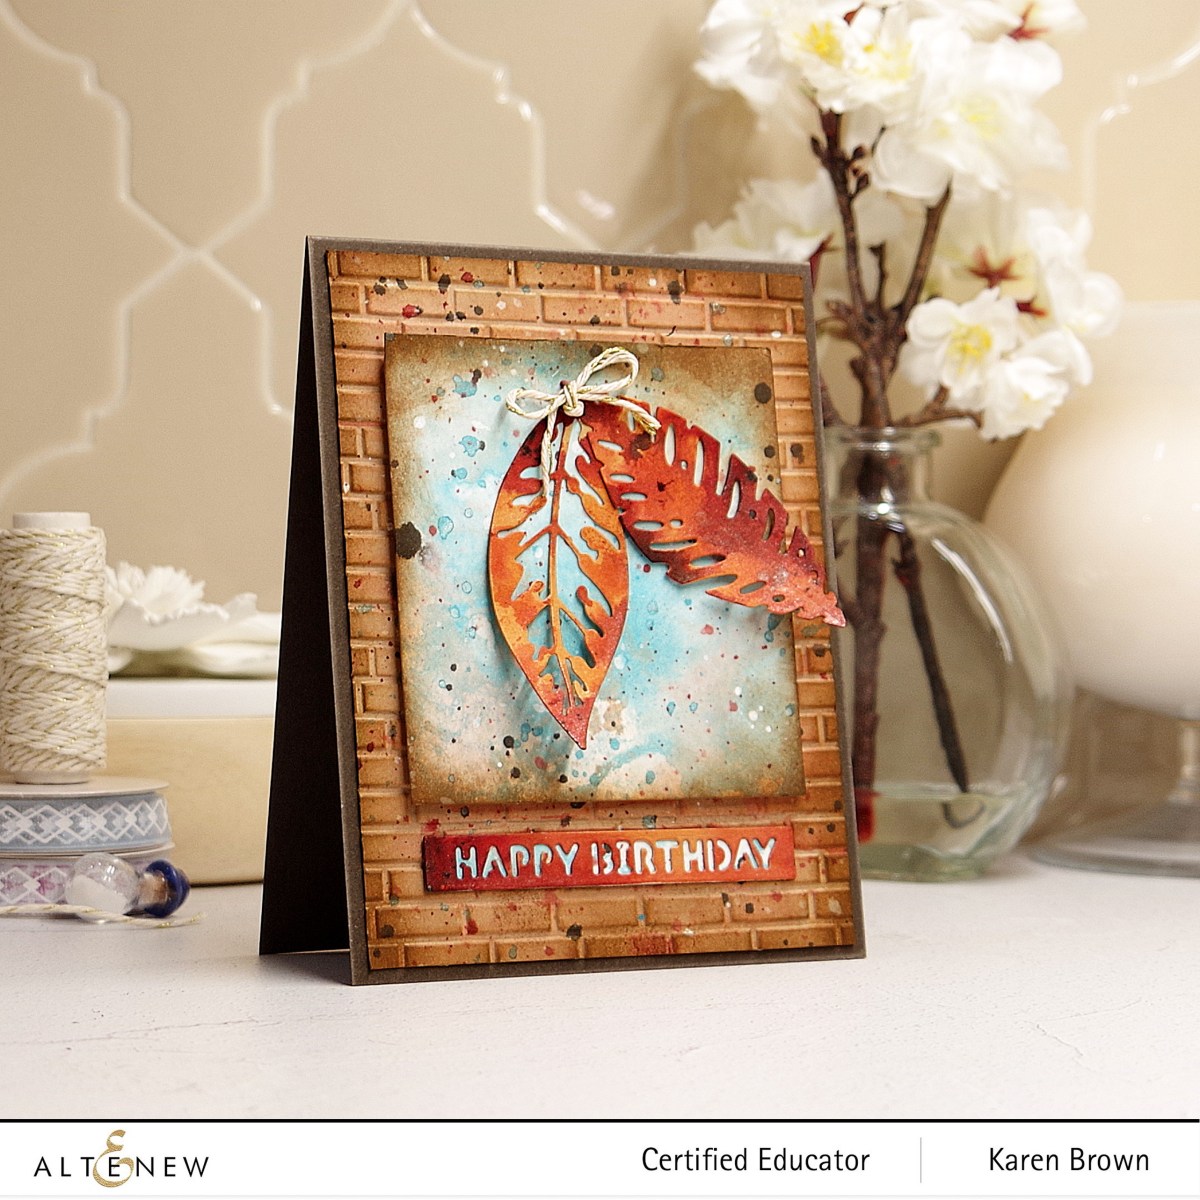
Welcome! I had the idea for a messy mixed media card with fall-color die cut leaves on a brick embossed background. I have to say, this was a really fun creative journey.
The first card is for my friend Paul who thinks I am a mixed media artist and is always encouraging me to do more art. I especially like how the blue panel shows through the leaves on the birthday card.
On my craft mat, I made three puddles of ink: Orange Cream Metallic Shimmer Ink Spray + Water, Warm Sunshine Metallic Shimmer Spray + water and Infusions Frankly Scarlet Colored Stain. I then dabbed portions of each die cut into each puddle of ink. I did this 2 or 3 times until I was happy with the colors.
Using a panel of Neenah 110 cardstock, I dabbed some Espresso Ink onto my craft mat, spritzed with a bit of water and then dabbed in my cardstock. I did the same thing with a panel of kraft paper.
I painted on some distressing to the brick wall panels using the left over yellow, orange and red inks. You can see I used more red on the birthday card and I really like how that panel turned out.
After the splatters dried, I distressed the edges with more Espresso Ink and a finger dauber.
I made a brown top folding A2 card base and then assembled my card. I glued the brick panel directly to the card base but used Instant Dimension Foam Tape to adhere the blue panel to the bricks. I glued the leaves at a jaunty angle and added a small bow.
I love the grungy vintage look of these two cards.
I am so happy you stopped by! Spellbinders new Floral Reflections Collection is live and I LOVE how fresh the collection is. I made two cheerful cards, one for a friend’s birthday the second is ready to send for a get well.
For my first card, I used the Sealed Wildflower die kit (S4-1255). I felt like clean and simple was the way to showcase these lovely die cuts so I selected Waterfall cardstockfor my backdrop. I kept my color palette simple: aqua, melon, dark green and white and added coordinating enamel dots to my flower centers. My sentiment was hot foiled and die cut using GLP-260: Mini Everyday Sentiments. Using an A2 top folding card base, I added my waterfall panel with craft foam for a bit of dimension.
All I needed was one sweet grouping of flowers to embellish the tag and I again used the Sealed Wildflowers die kit. My base is an A2 top folding card and then I added a kraft background mat and enamel dots to the flower centers and mounted my tags using foam tape for dimension.
I love the texture that the embossing folder adds to the card, but by using a tag, the overall feel is still clean and simple.
I like to keep Get Well cards on hand so they are ready to send when the need arises. This card is in my desk drawer ready to go.
Thanks for stopping by and taking a peek at my die cut cards.
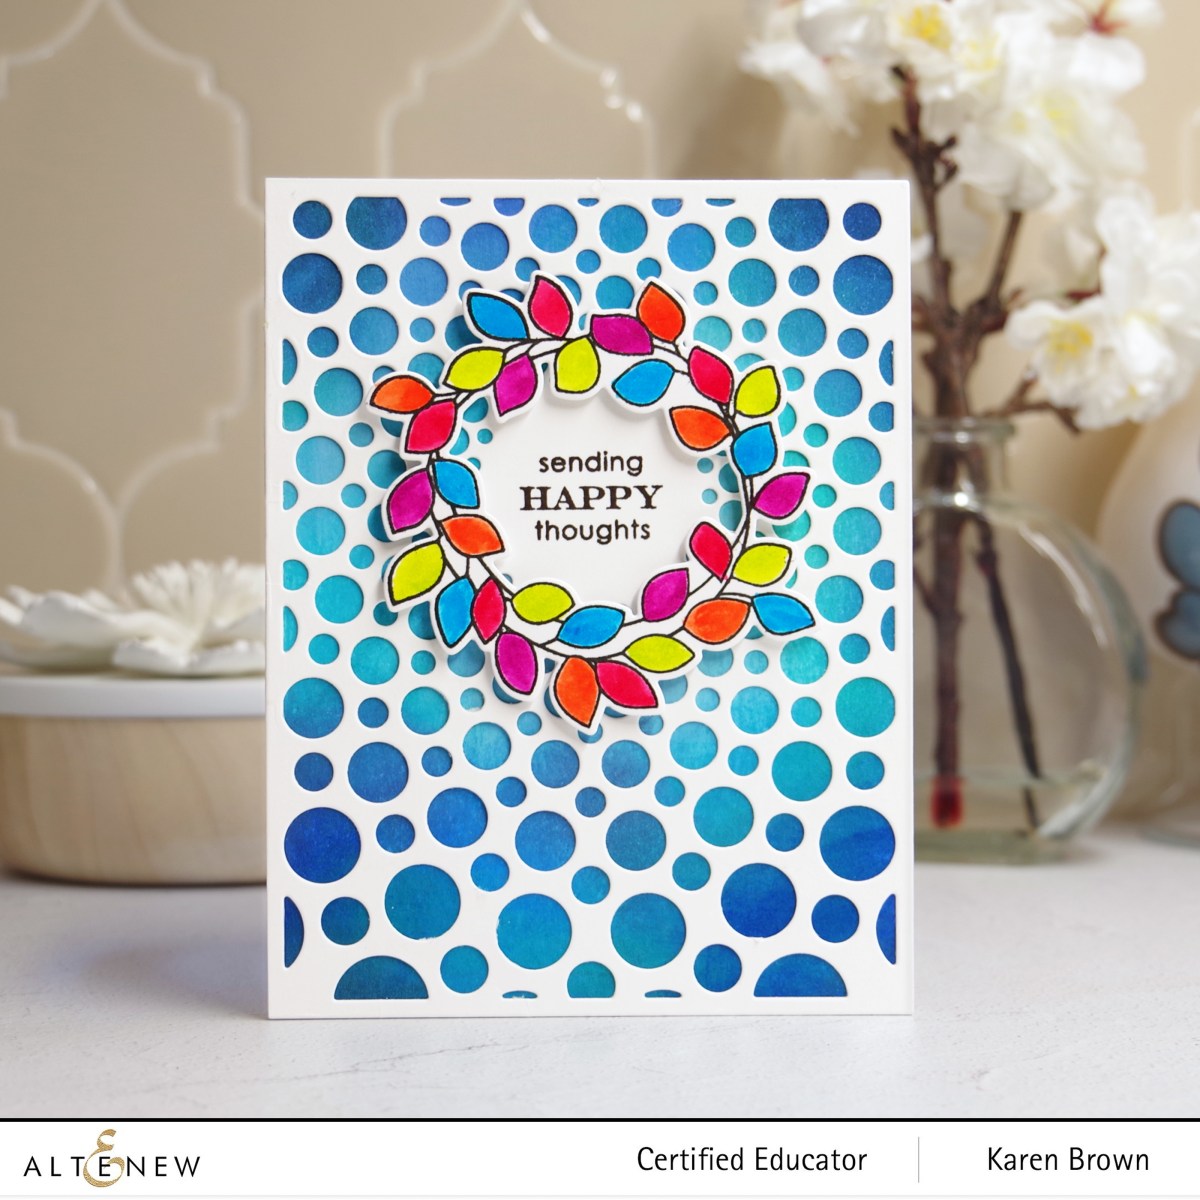
I started by making a background using the “Direct To Paper” method. I used 8 colors of Altenew Crisp Dye Inks in blues, greens and aquas and I just swipped the ink cube over my cardstock. I wanted the edges darker than the middle but that was the extent of my plan. Don’t worry about blending, it will look great under the die cut panel. I love the bold vivid color from this technique.
Direct to Paper Background
For the cover die, I used a metal shim for precise die cutting.
I thought a wreath would look pretty around the sentiment and I colored the leaves with my Altenew watercolor brush markers for a bright cheerful card.
If you want a quick and easy card with loads of impact, you can quickly make a background with the Direct to Paper technique described above and then just pop on a die cut cover panel and stamp a sentiment.
I love the adorably punny sentiments included in this set!
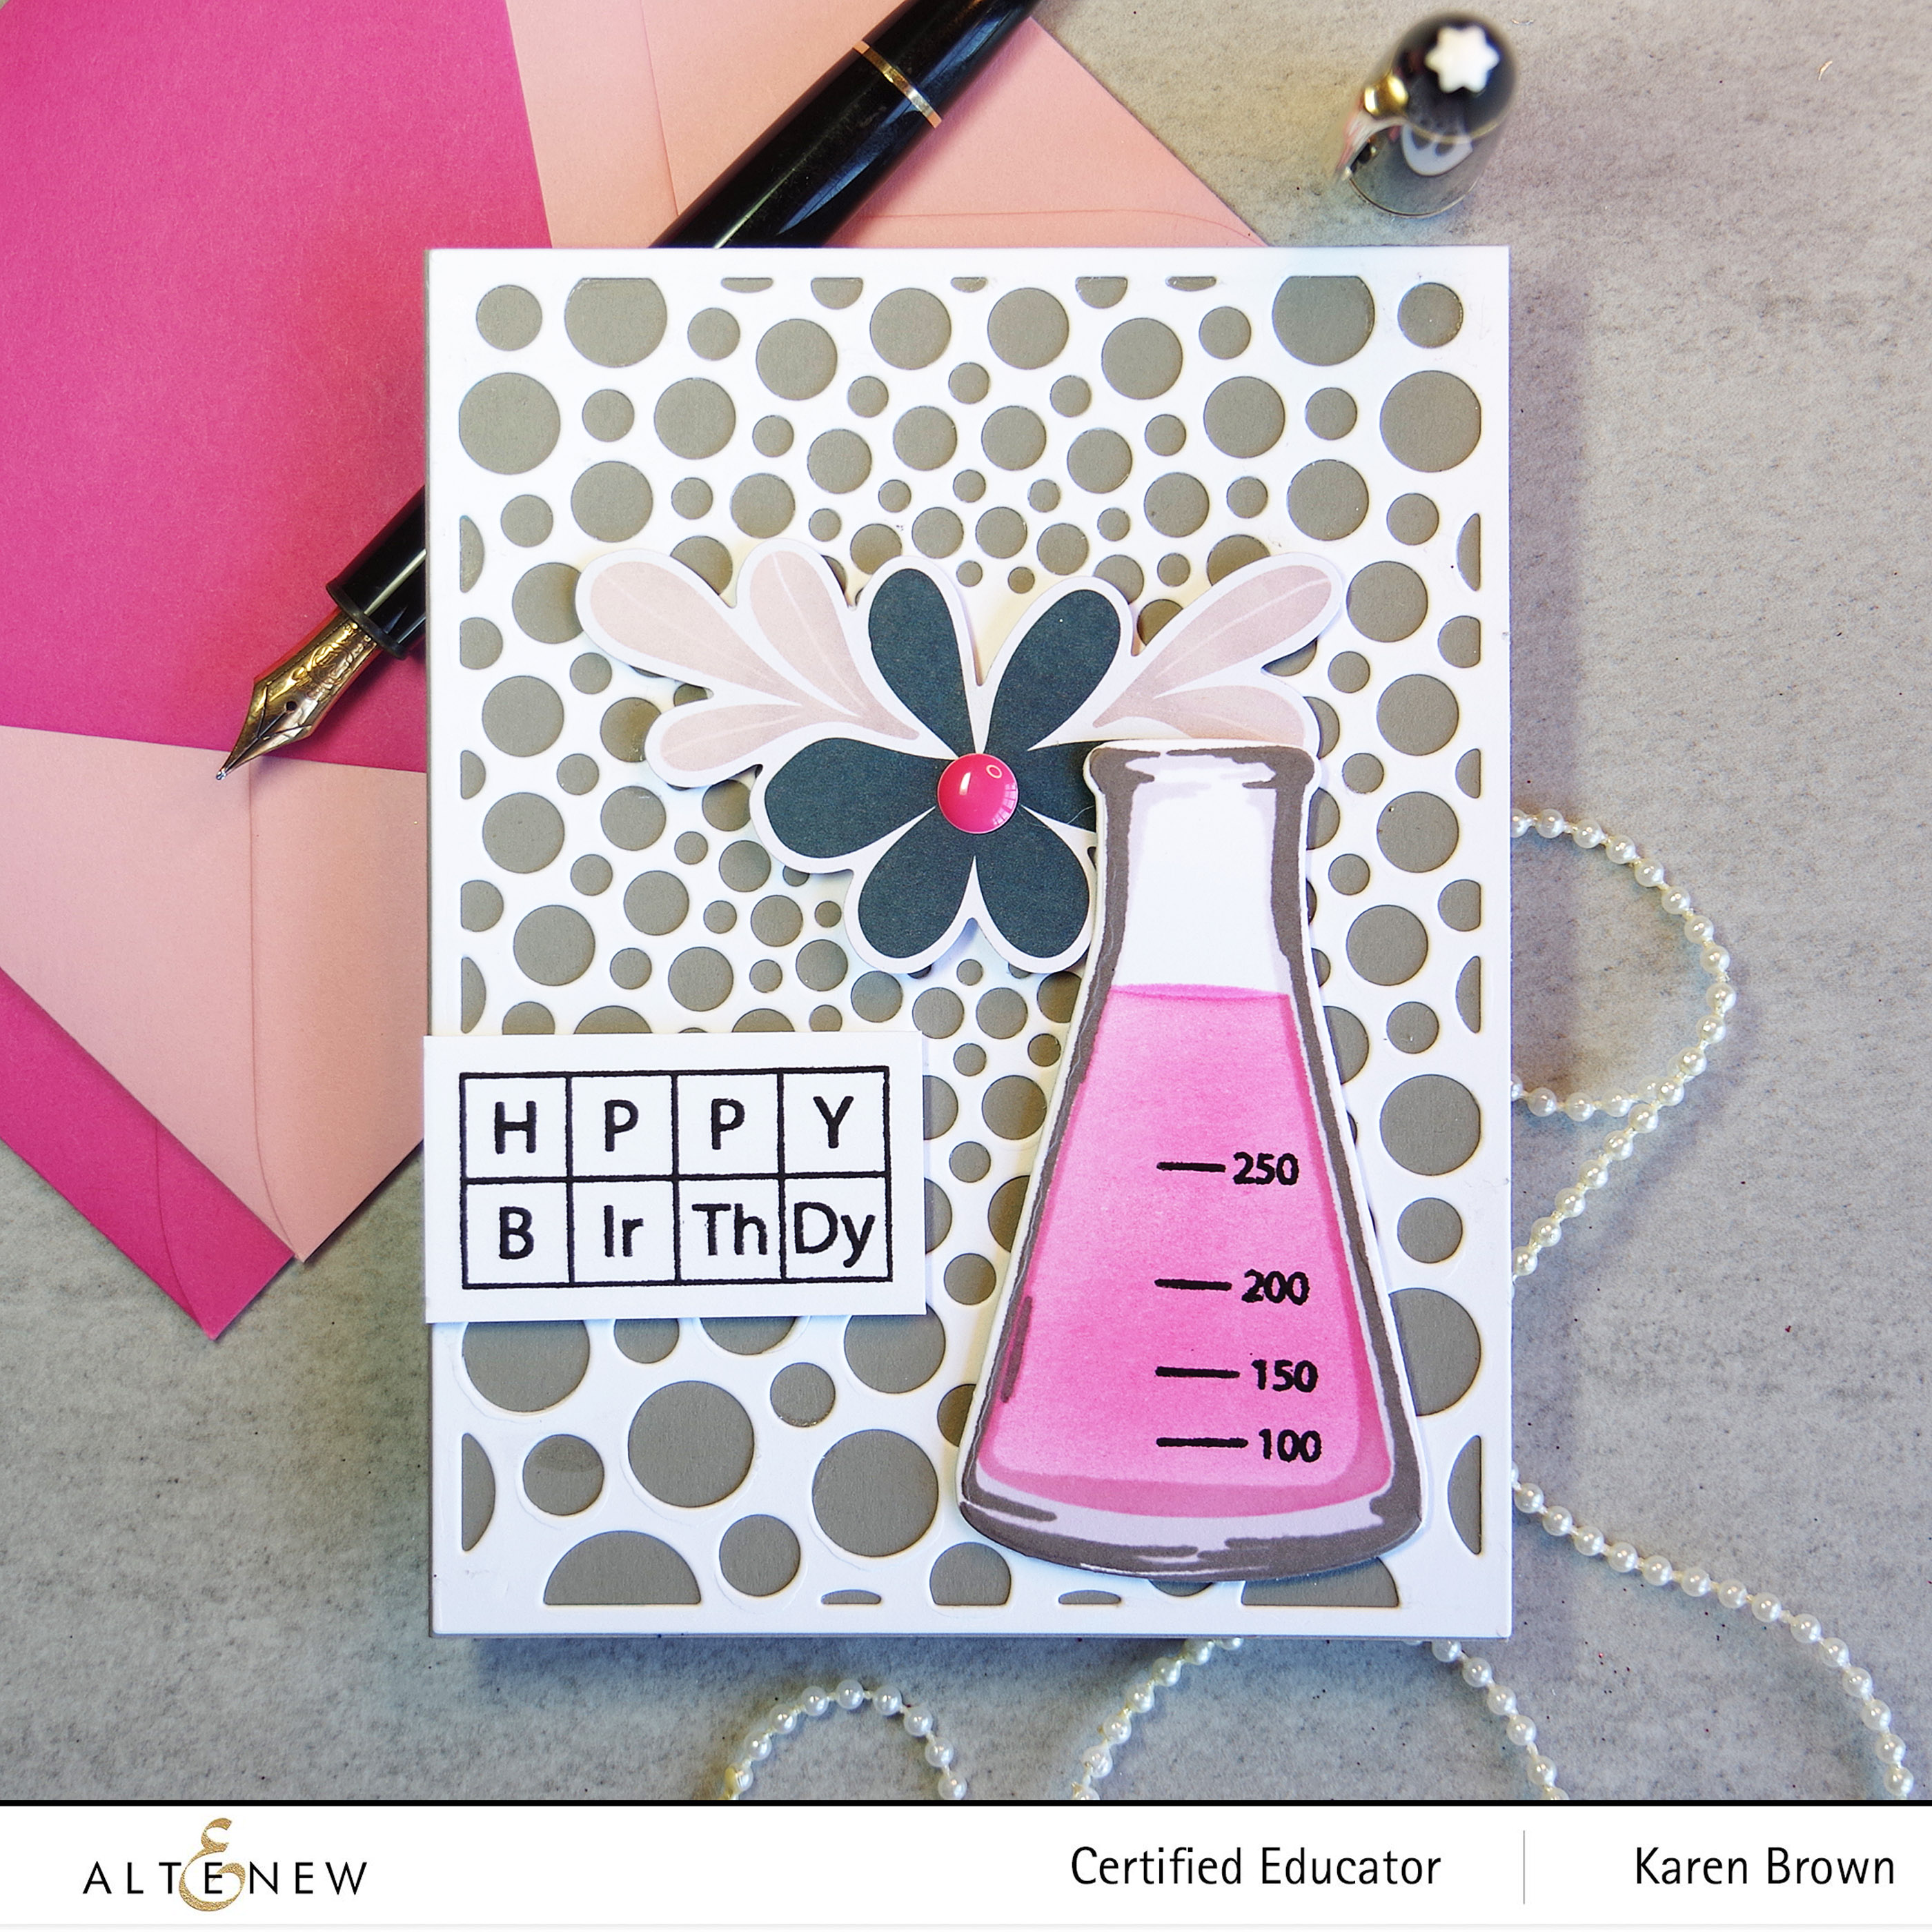
For my last card, I combined Altenew’s Chemistry Vases Bundle with the Radial Circles Cover die. I have a friend who runs a medical laboratory and I thought this card would be perfect for her birthday. I used a taupe A2 card base, added a floral embellishment from the Bitty Bits Ephemera Kit and topped it with a pink enamel dot.
I think this Chemistry Vases set is perfect for students, teachers, scientists, professors, and medical professionals.
Giveaway Prizes:
$300 in total prizes! To celebrate this release, Altenew is giving away a $50 gift certificate to 2 lucky winners and a $25 gift certificate to 8 winners! Please leave a comment on the Altenew Card Blog and/or each designer’s blog post on the blog hop list below by 11/06/2022 for a chance to win.
Altenew will draw 10 random winners from the comments left on each stop of this blog hop and announce the winners on the Altenew Winners Page on 10/08/2022.
Spellbinders Small Die of the Month Kit: November 2022
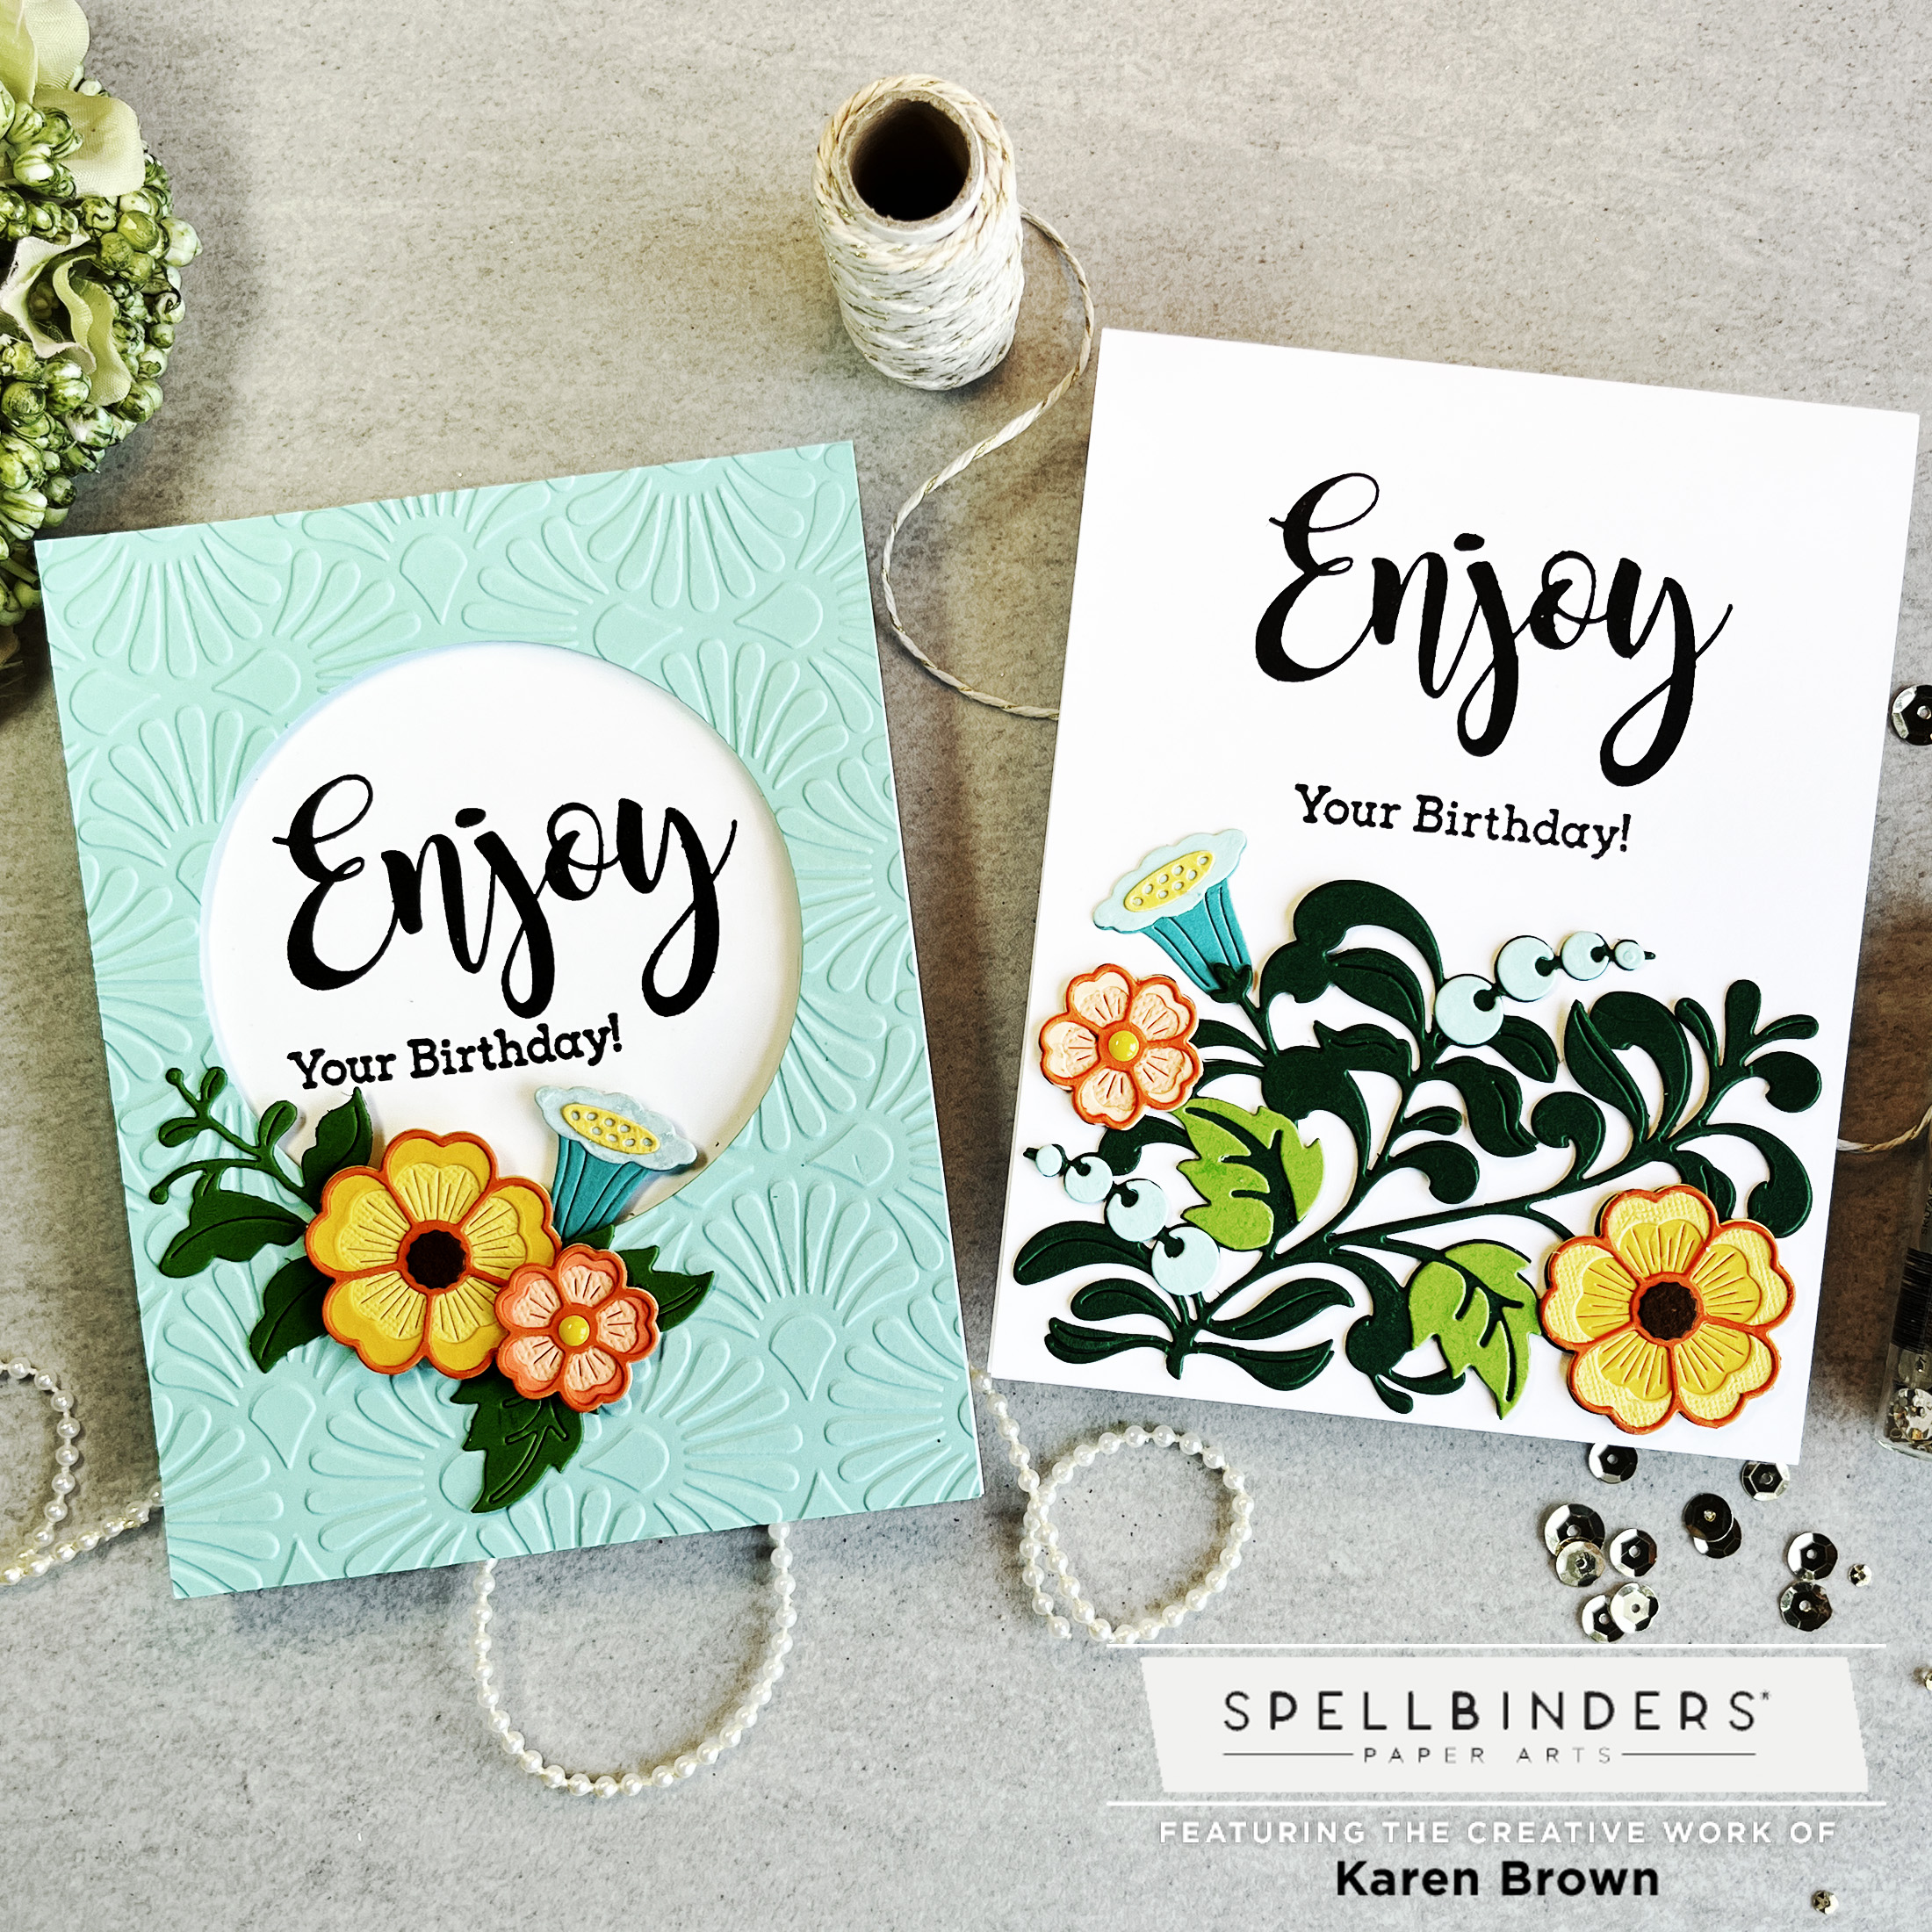
The November Spellbinders kits are GORGEOUS and I am excited to show you the cards that I made! I used the Small Die of the Month Club Kit called Layered Floral Card Creator on my first two cards.
For Card #1, I used the leafy background plus flowers to make a high contrast showy birthday card. I started by cutting the background twice from dark green cardstock. I found that if I started at the bottom stem and then worked my way up, the two panels glued together seemlessly.
The die cuts are quite bold so I wanted the sentiment to be large too. I stamped my sentiment on a Top Folding A2 cardbase and then glued my die cuts to the panel with liquid glue. This card has a definite “wow” factor but it came together very quickly.
Spellbinders Embossing Folder of the Month: November 2022
I then die-cut and assembled my flowers (Small Die of the Month) and added some greenery from Stitched Ornament (S4-1231), which was released earlier this year. I used the same bold sentiment as in card 1. I wanted lots of dimension on this card, so I adhered the embossed panel to the A2 card base with foam tape.
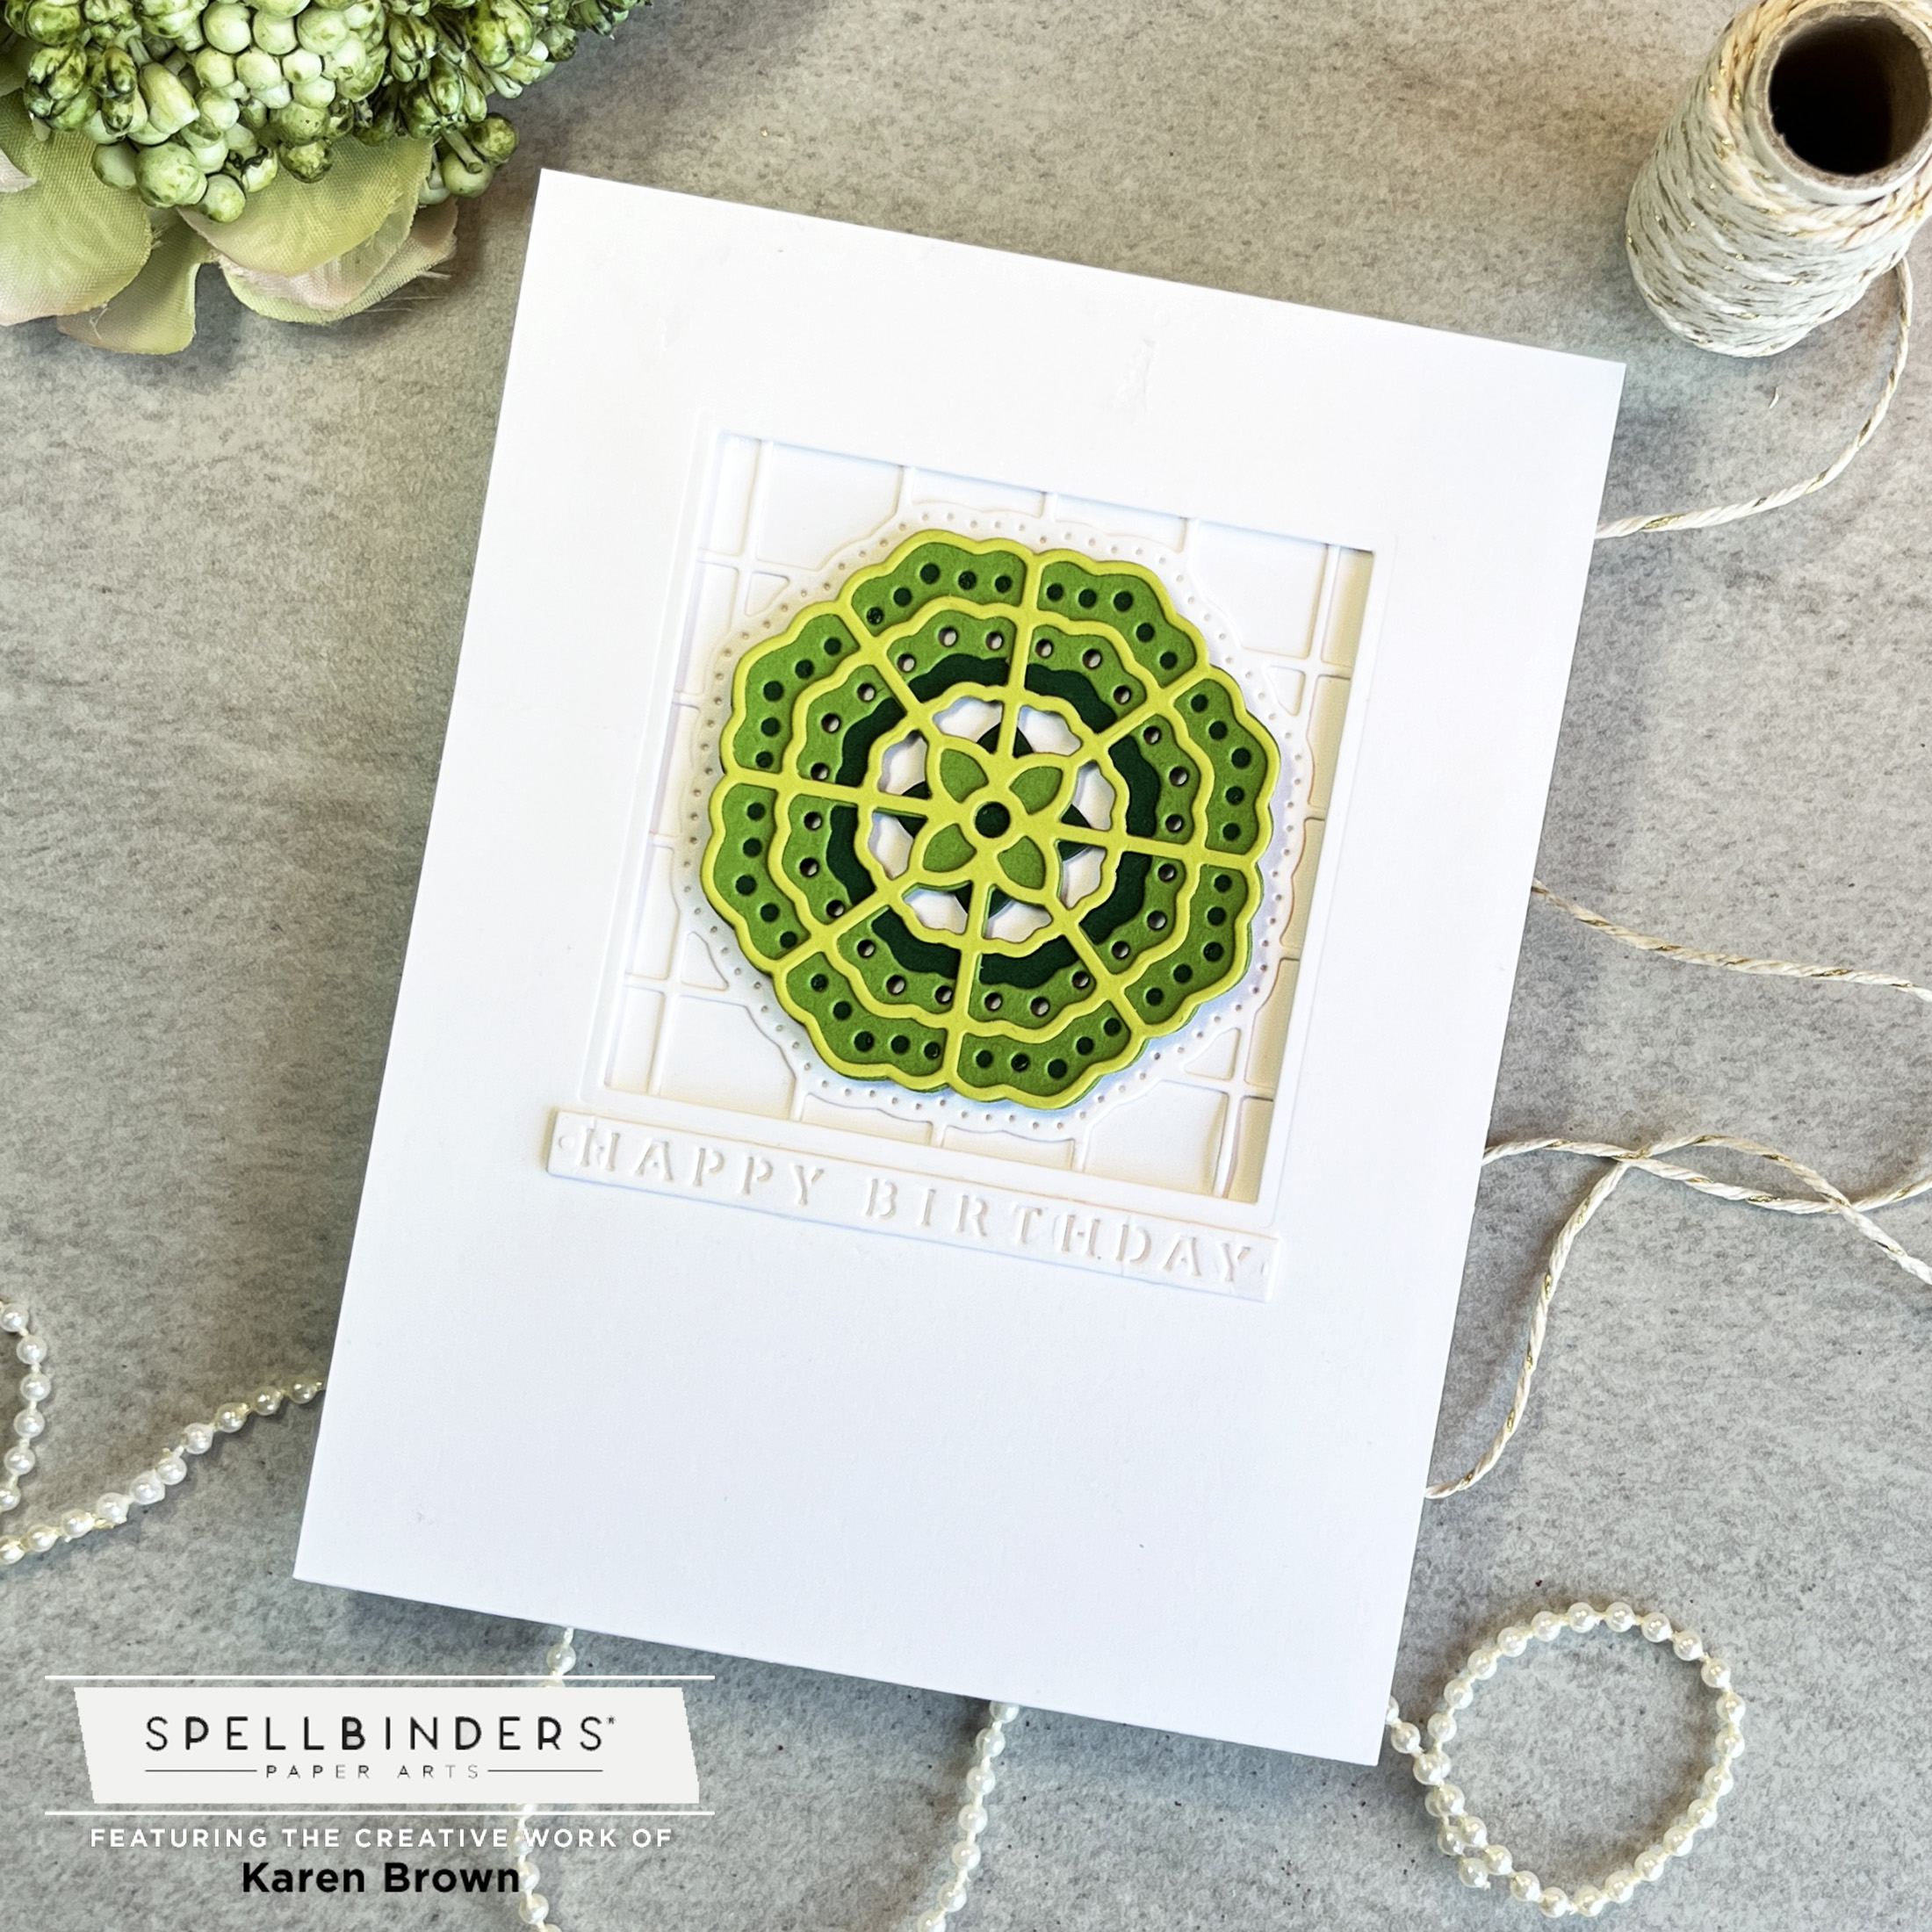
Spellbinders Large Die of the Month: November 2022
I also wanted to make some masculine cards, and I thought clean and simple window cards would be perfect. Using Stylized Floral Kaleidoscope Slimline, I made one card in blue (window only) and one in green (with a trellis backdrop). These were quick and easy to make but they are so eye-catching! I really like the sentiment that is included with this kit…I used it on all three cards.