A fun, stand-up papercraft project perfect for summer, gifting, and display
I was in the mood to create something a little different… something dimensional, display-worthy, and fun.
And then it hit me—what about a stand-up tote bag that could double as a gift card holder?
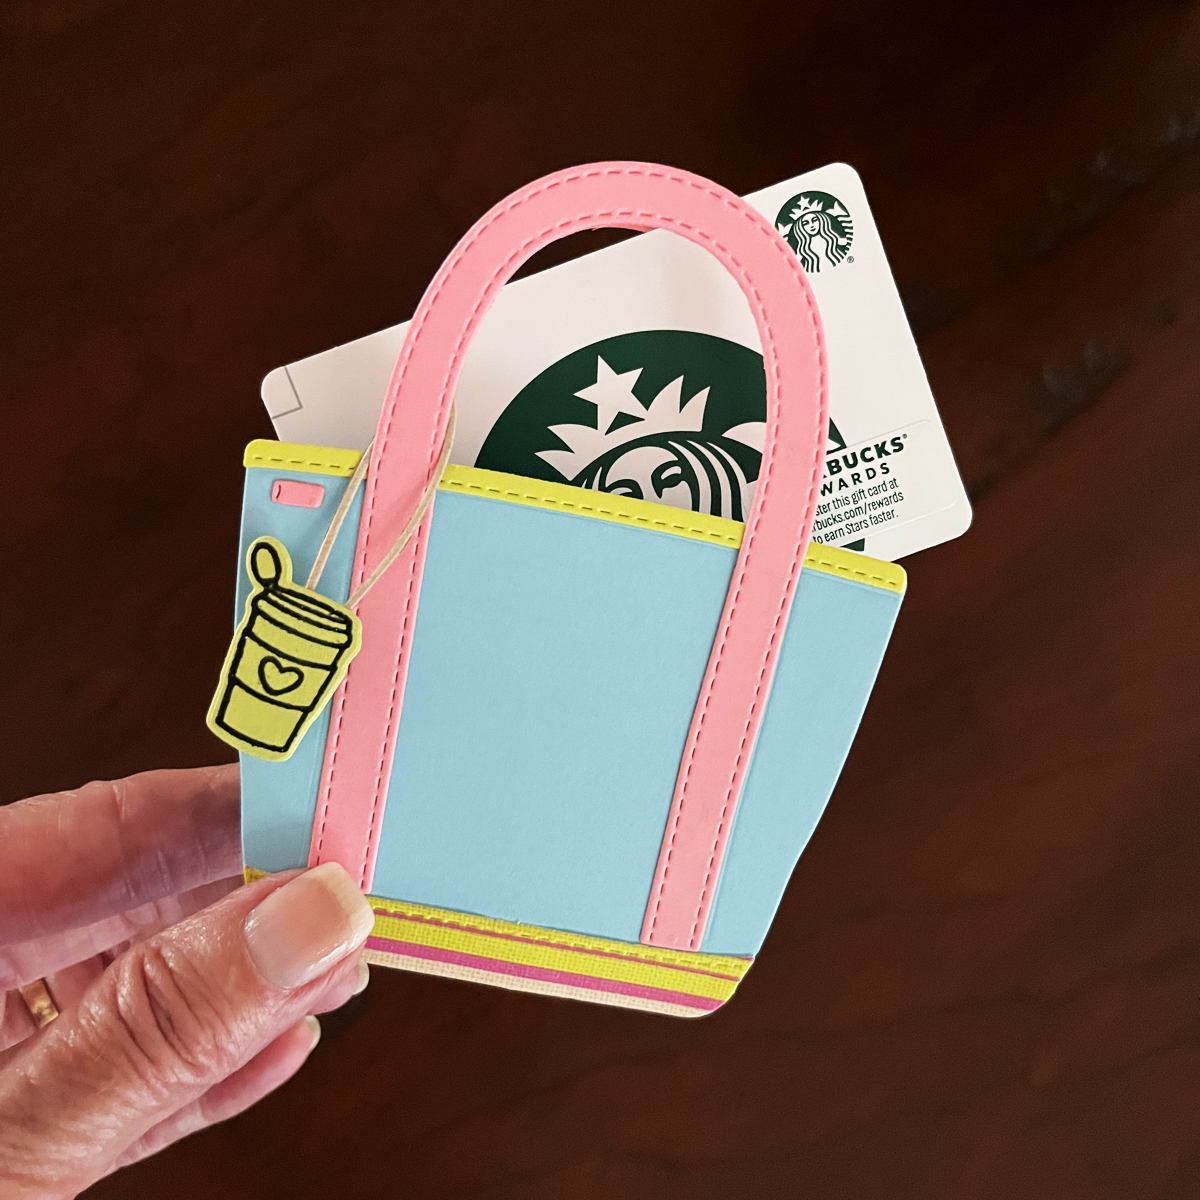
This die-cut tote is not exactly a traditional card… but it could easily become one. Instead, I designed mine as a summery beach tote, filled with bright, happy colors and just the right amount of personality.
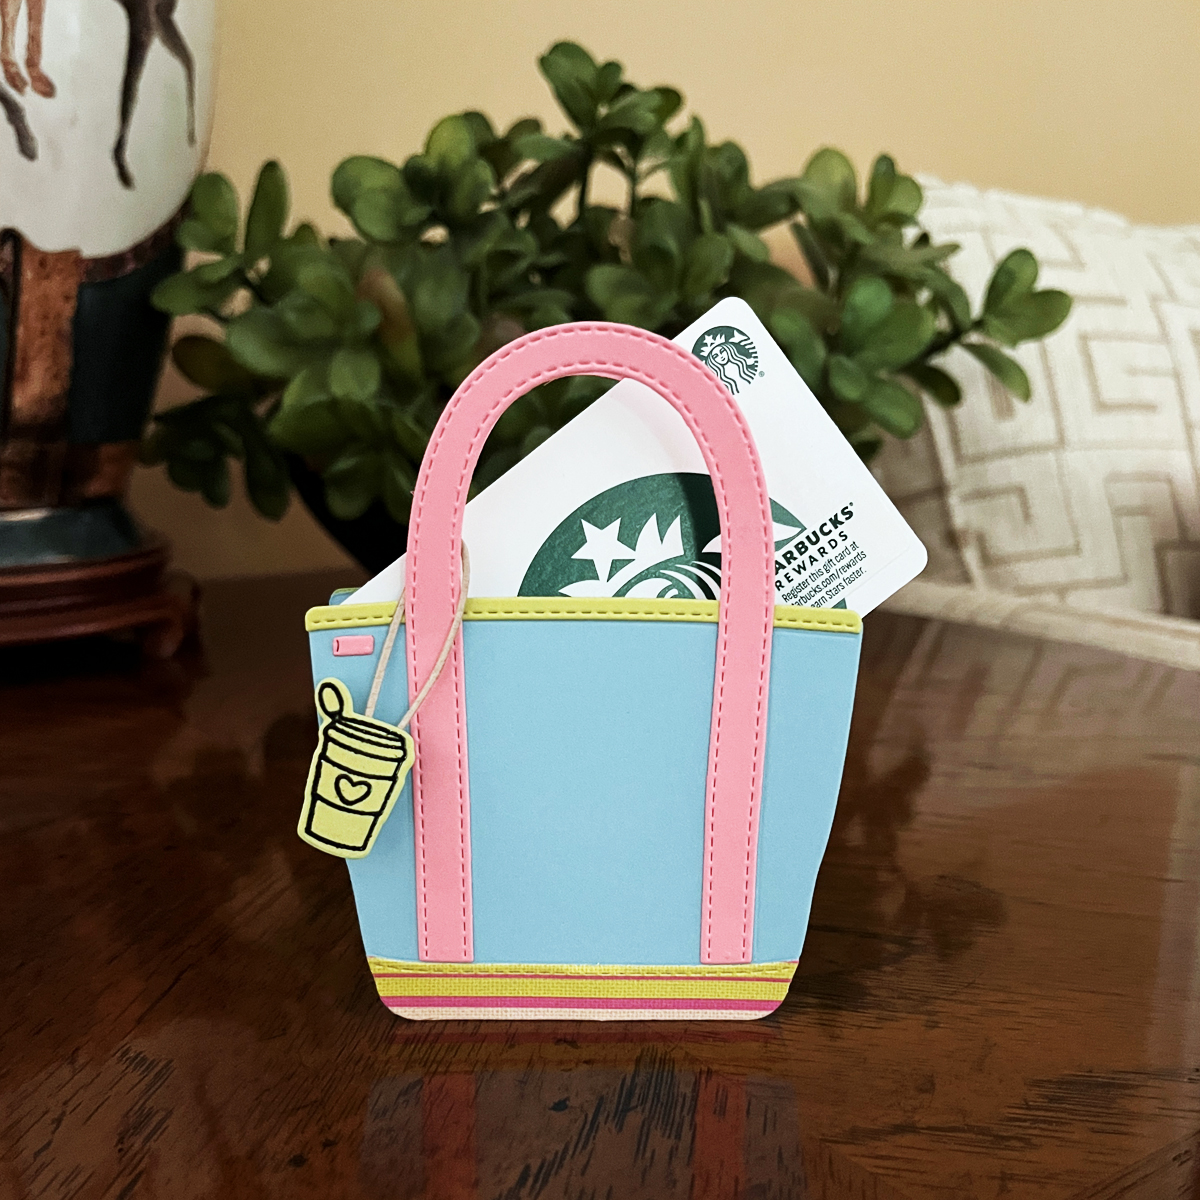
It’s the kind of project that looks adorable sitting on a table, shelf, or countertop—and even better when it’s holding a little surprise inside.
What You’ll Learn in This Post
- How to create a die-cut stand-up tote bag
- Easy ways to customize your design for any occasion
- Why dimensional papercrafts make such memorable gifts
- Creative ideas for using this tote as a gift card holder
- How to turn this design into a traditional card if desired
Product Spotlight: A Simple Die Set with Endless Possibilities
The Hero Arts Tote Bag die set (Tote-Ally Awesome Bundle) is wonderfully simple:
- A large tote shape
- Long, strappy handles
- Two accent strips for added detail
To personalize my tote, I used the Tiny Treasures Stamp & Cut set, filled with adorable charms and sentiments. It also pairs well with sentiments from the Keep Calm Stamp Set, which work beautifully with this design.
What I love most is how versatile this tote is. With just a few small changes, you can create completely different looks—making this a die set you’ll reach for again and again.
If you enjoy working with versatile tools like this, you might also like my roundup of the 14 Best Cardmaking Products and Supplies for 2026, where I share the tools I truly use the most.
Why Dimensional Designs Are So Loved
There’s something special about a project that stands up on its own.
Dimensional designs feel:
- Interactive
- Giftable
- Display-worthy
- A little unexpected
This tote has that “keepsake” quality—the kind of project recipients don’t toss aside. They display it.
If you enjoy dimensional projects, you might also love my post 1 Die Set, 2 Moods: Coffee Shop Chalkboards & a Lemonade Easel Card, where I explore another fun stand-up design.

📌 Pin This for Later
Ways to Customize Your Tote
This is where the fun really begins.
- Add charms to match the recipient’s personality (coffee, hearts, cherries, lemons, bows… there are so many options!)
- Choose colors based on the occasion:
- Red & green for Christmas
- School colors for graduation
- Soft pastels for spring
- Try masculine styles (camo paper would be amazing!)
- Emboss the tote for added texture and dimension
- Keep it simple with one charm—or layer multiple for a playful look
Today, I added a coffee cup charm, but there are endless ways to make this tote your own.
A Creative Gift Card Holder Idea
One of my favorite uses for this tote?
Slip a gift card inside.
It instantly becomes:
- Thoughtful
- Unique
- Memorable
I’ll be sharing a few photos of this option, along with how it looks styled on a shelf—because this little tote truly deserves to be displayed.
How to Create Your Stand-Up Tote
I started by choosing a bright, beachy color palette:
- Sky blue tote
- Pink handles
- Striped pink and lime green accent base
I die cut two of each piece to build dimension.
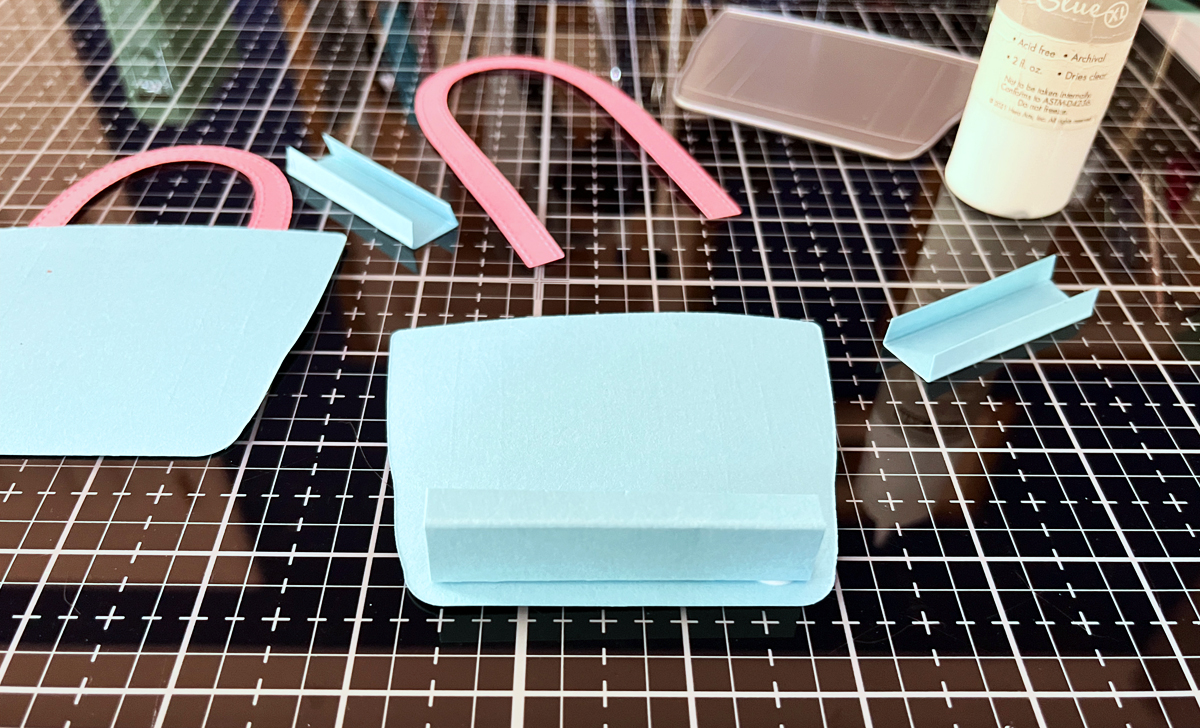
To create the stand-up base:
- Cut a 1” strip of cardstock
- Score ¼” in from each side
- This leaves a ½” center base
- Trim into:
- One 2¼” strip for the bottom
- Two additional strips for the sides
This simple structure allows the tote to stand beautifully on its own.
Adding the Charm
To personalize my tote:
- I stamped and heat embossed a coffee cup
- Die cut the image
- Attached it to the handle as a charm
You can:
- Add one charm for a clean look
- Or layer several for a more playful design
Both styles work beautifully.
🧰 Supplies I Used
These are the exact tools I used to create this technique-focused card.
If you’d like to recreate this card, here are the supplies I used:
- Hero Arts Tote Bag Die – the star of today’s card and a great place to start
- Tote-Ally Awesome Bundle – all the products in one bundle
- Tiny Treasures Stamp & Cut (charms + sentiments) – adds custom personality to your tote
- Keep Calm Sentiment Stamps – quick coordinating sentiments
- ColorWheel Cardstock – makes color coordination simple and consistent
- Platinum 6 Die Cutting Machine – I have several, but this is my favorite
- Best Ever Craft Tape – best for holding dies in place
- Bearly Glue – precise nozzle is great for smaller die cuts
If you’re building your craft stash, I also keep a curated list of my go-to cardmaking supplies pinned here:
👉 My Go-To Cardmaking Supplies
And if you love discovering new kits, don’t miss my guide to the Best Subscription Cardmaking Kits for 2026—it’s a great way to keep your creativity flowing.
Final Thoughts
This tote checks all the boxes:
- Easy to die cut and assemble
- Highly customizable
- Display-worthy
- Perfect for gifting
📌 Pin This for Later
And it’s just plain fun.
💙

