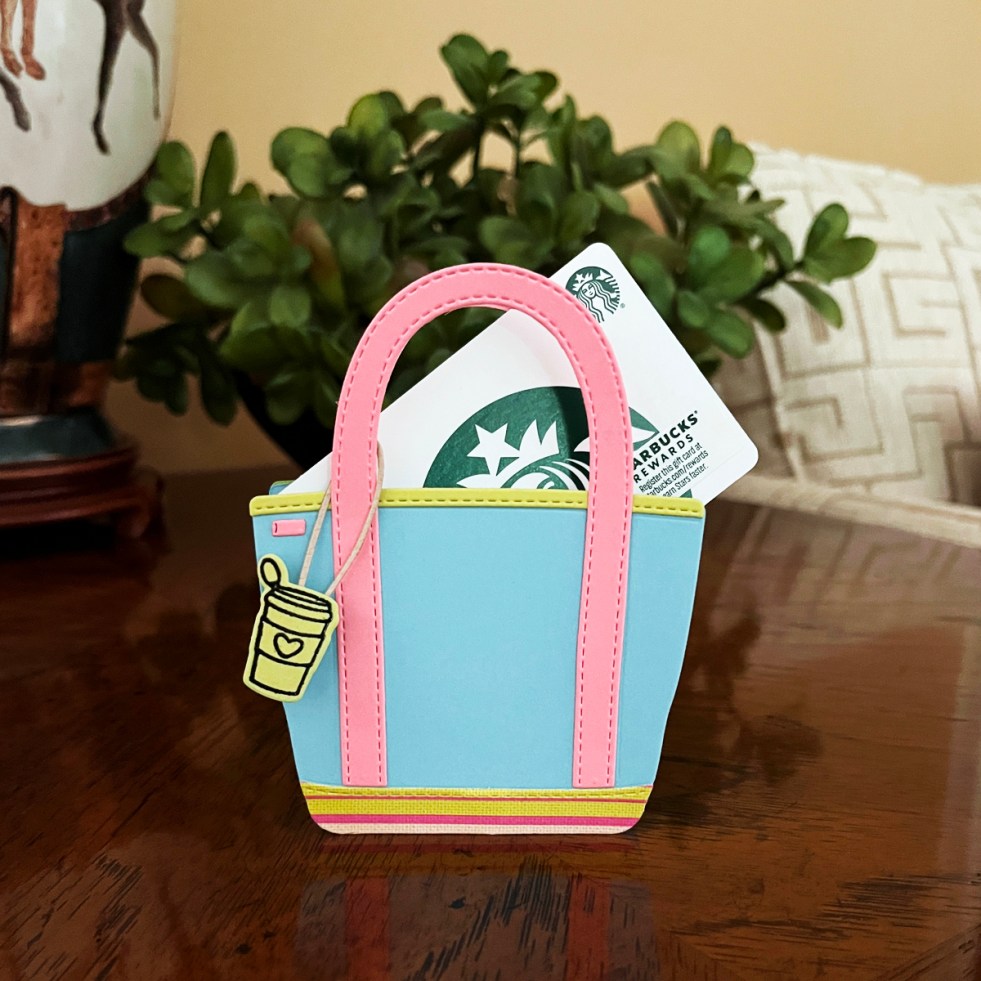
Learn how to create a dimensional die-cut tote bag that doubles as a unique gift card holder. This beginner-friendly papercraft project is customizable, display-worthy, and perfect for any occasion.
Tag: Coffee
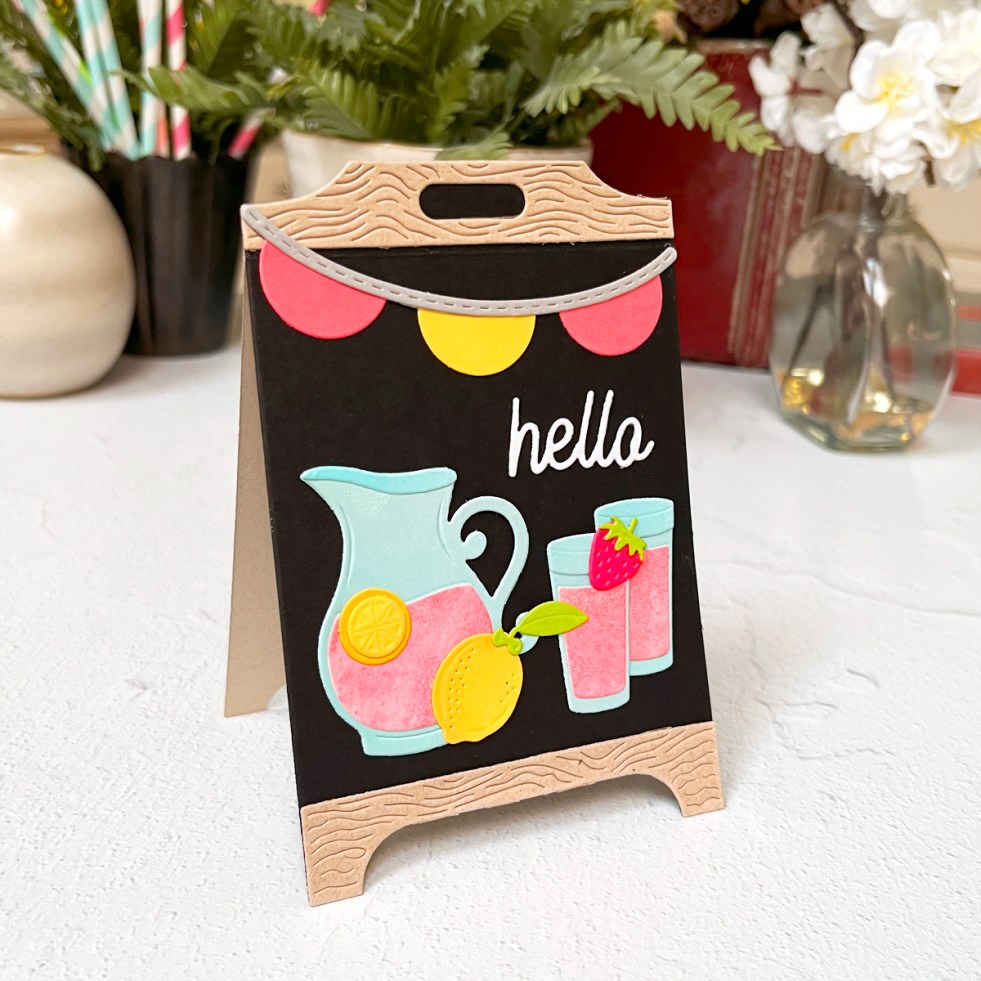
1 Die Set, 2 Moods: Coffee Shop Chalkboards & a Lemonade Easel Card
Looking for a die set you’ll use again and again? Today I’m sharing two very different looks using the Spellbinders Lemonade Stand Collection—a trio of dramatic black chalkboard thank-you cards with heat embossing, plus a bright, cheerful lemonade easel card that’s made to be displayed. Along the way, I’m sharing a reliable heat embossing tutorial, easel card tips, and ideas to help you get the most from this versatile die set.

Top 5 Hero Arts Cards of 2025 (Fan Favorites & Personal Picks)
A roundup of the best and most popular Hero Arts cards of 2025, including fan favorites, personal picks, and standout techniques. Featuring Valentine cards, clever themed designs, coffee-inspired projects, letterpress and foil cards, and bold floral die cutting—with links to each original tutorial.

Cute Coffee Theme Thank You Card Featuring House Mouse
Today I’m sharing a cute and easy House Mouse thank you card using the Brew-tiful Day rubber stamp from Spellbinders. I colored everything with Copic markers and used a fun coffee-themed sentiment—because who doesn’t love a latte pun? House Mouse cards always make people smile and this one is quick to create!
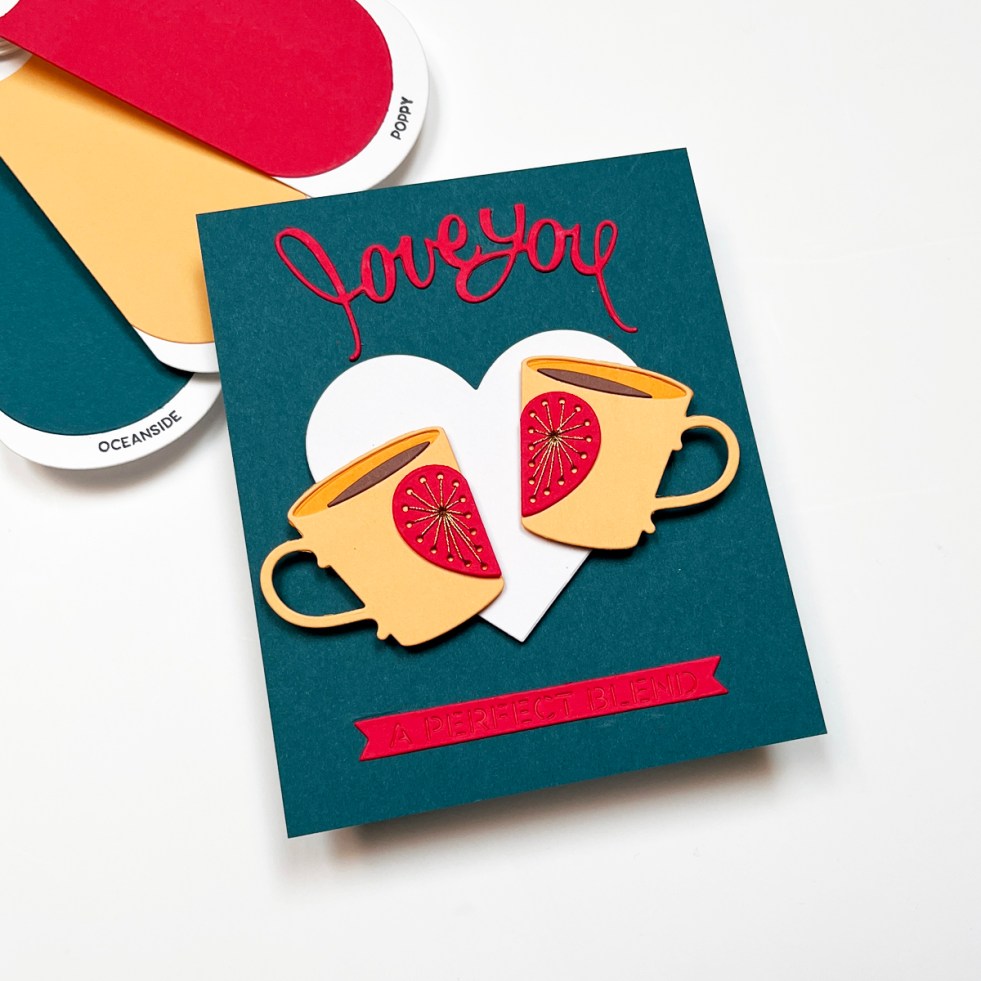
Spellbinders December 2025 Stitching Die of the Month – A Valentine
Handmade Coffee Theme stitched Valentine created with Spellbinders December 2025 Stitching Die of the Month: A Perfect Blend Stitching Die

How to Choose Colors for Handmade Cards
In this post, I explore creative color selection for handmade cards using Spellbinders’ July 2025 Christmas dies. I share two holiday cards—one inspired by Color Cube #255 with bold purples and oranges, and another using the Spellbinders Color Deck Holiday Expansion Pack with soft pastels and glitter. Plus, I share helpful color-picking tips including how to use color wheels, Google image searches, and color sampler tools to bring your card ideas to life.
Spellbinders Club Kits – July 2025
Get a head start on your holiday crafting with the Spellbinders July 2025 Club Kits! This month’s festive collection features colorful cocoa mugs, an adorable penguin mug, elegant stitched diamonds with peppermint flair, and a sweet gingerbread man—all perfect for Christmas in July. I created four unique cards using the Large Die of the Month, Die of the Month, Stitching Die of the Month, and Caboodle Bonus Gift. Whether you're in the mood for cozy, cute, or classic holiday vibes, there’s inspiration here for every style!

What’s Brewing? A Bold & Graphic Espresso-Themed Card with Hero Arts
If you love coffee (or tea!) and cardmaking, you’ll adore the new What’s Brewing Collection from Hero Arts. I created a vivid espresso-themed thank you card using the Stove Top die set and "Thanks a Latte" sentiment. Come see how I brought my kitchen inspiration to life!
Autumn Coffee
Hello and Welcome! Last year, Jane\'s Doodles had the cutest fall stamp sets so I commented on a blog post. I would have left the comment anyway but was excited to learn that I would be receiving both sets as a gift from Jane\'s Doodles. I thought some pattern stamping would be bright, fun and seasonal.Recipe:Jane\'s… Continue reading Autumn Coffee
