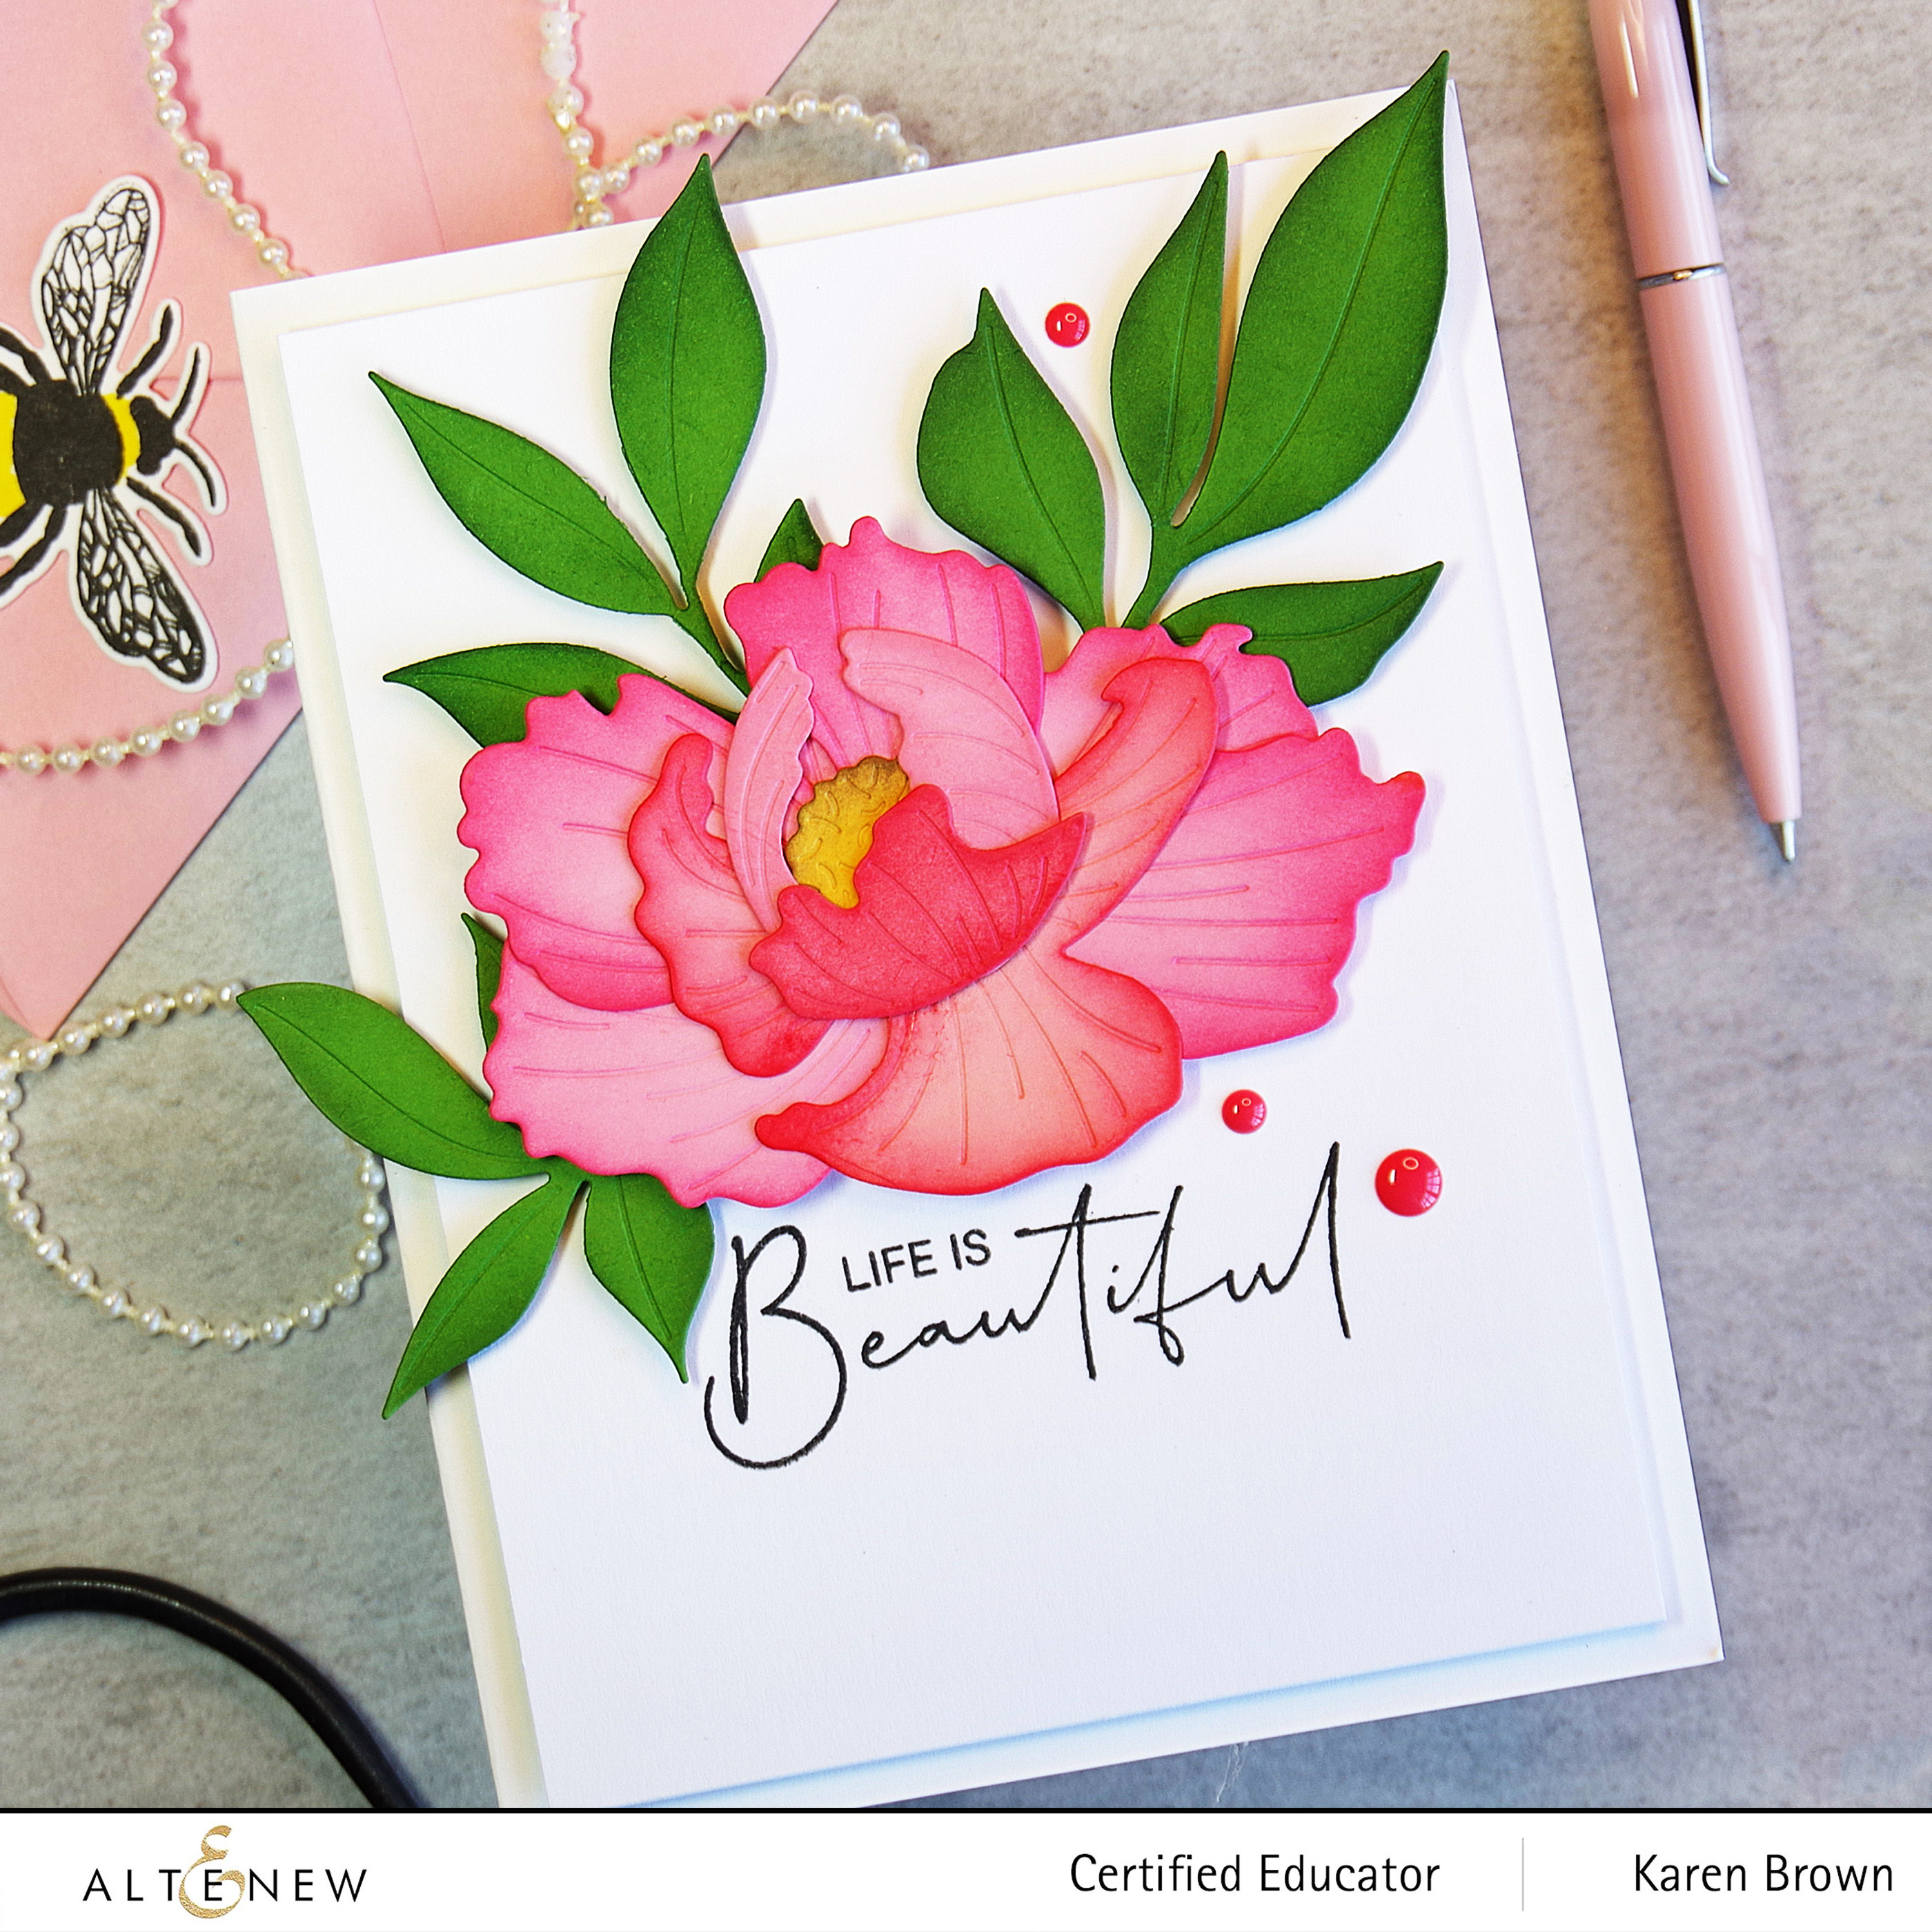
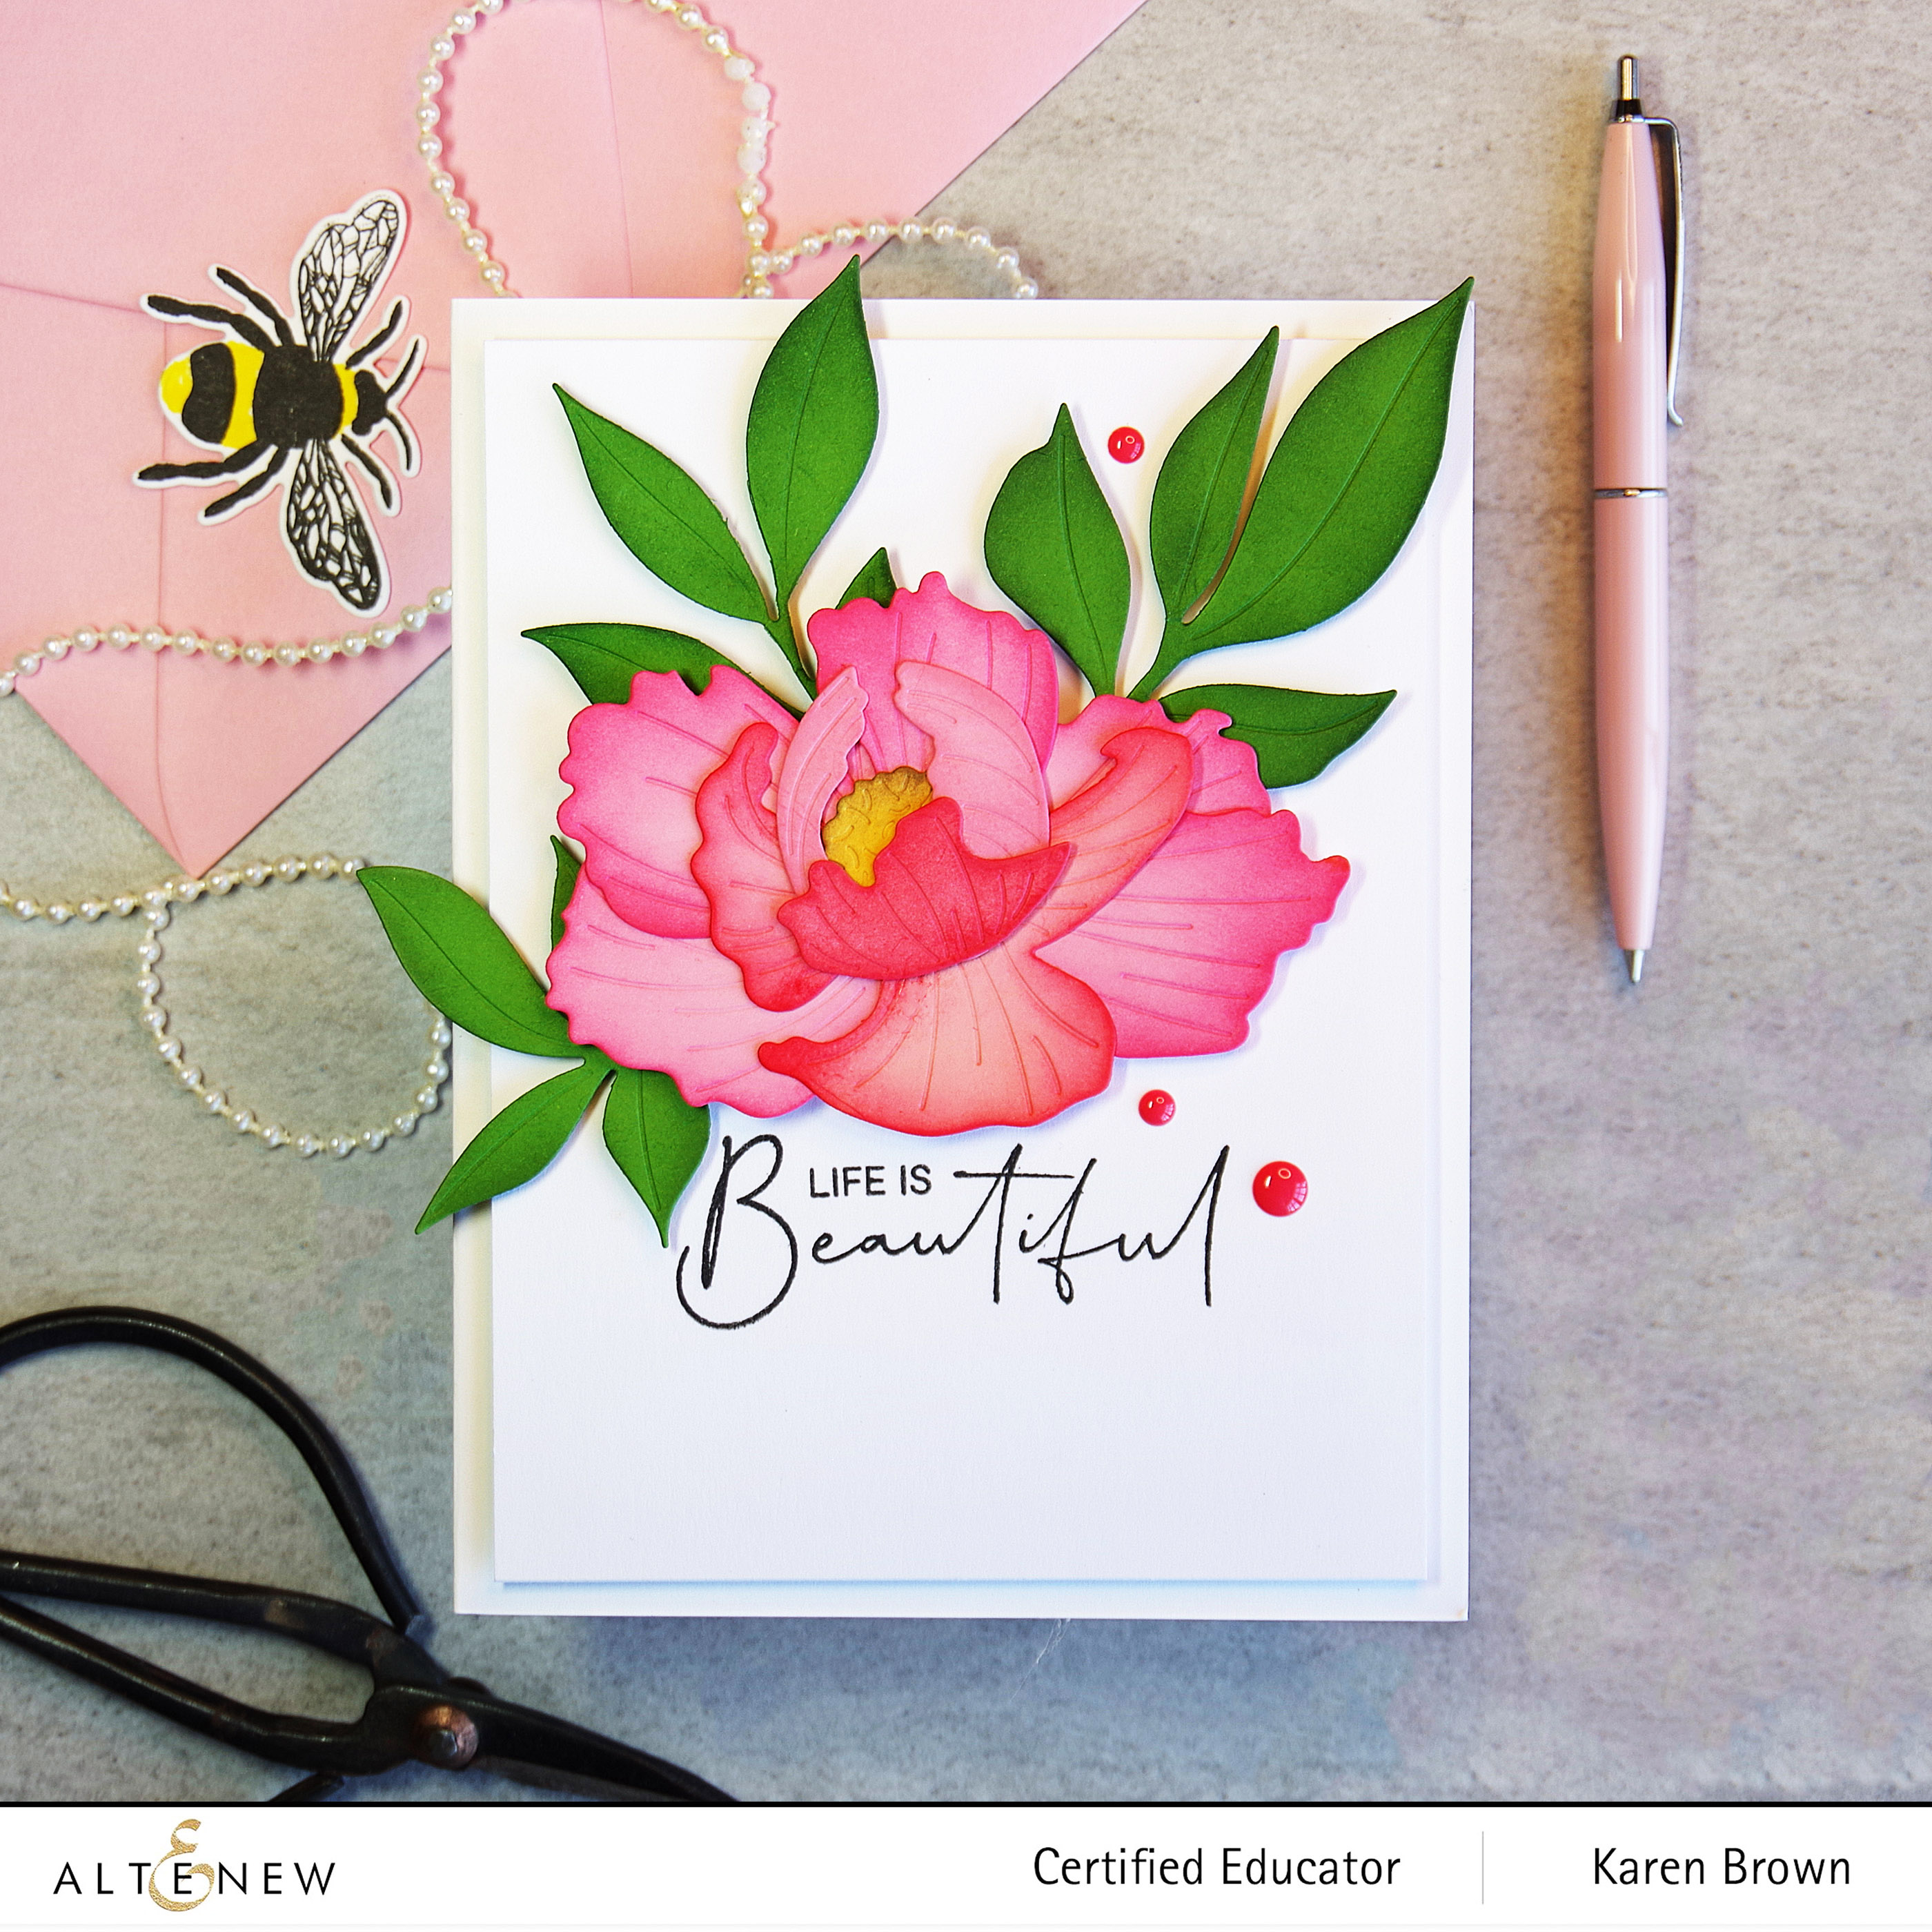
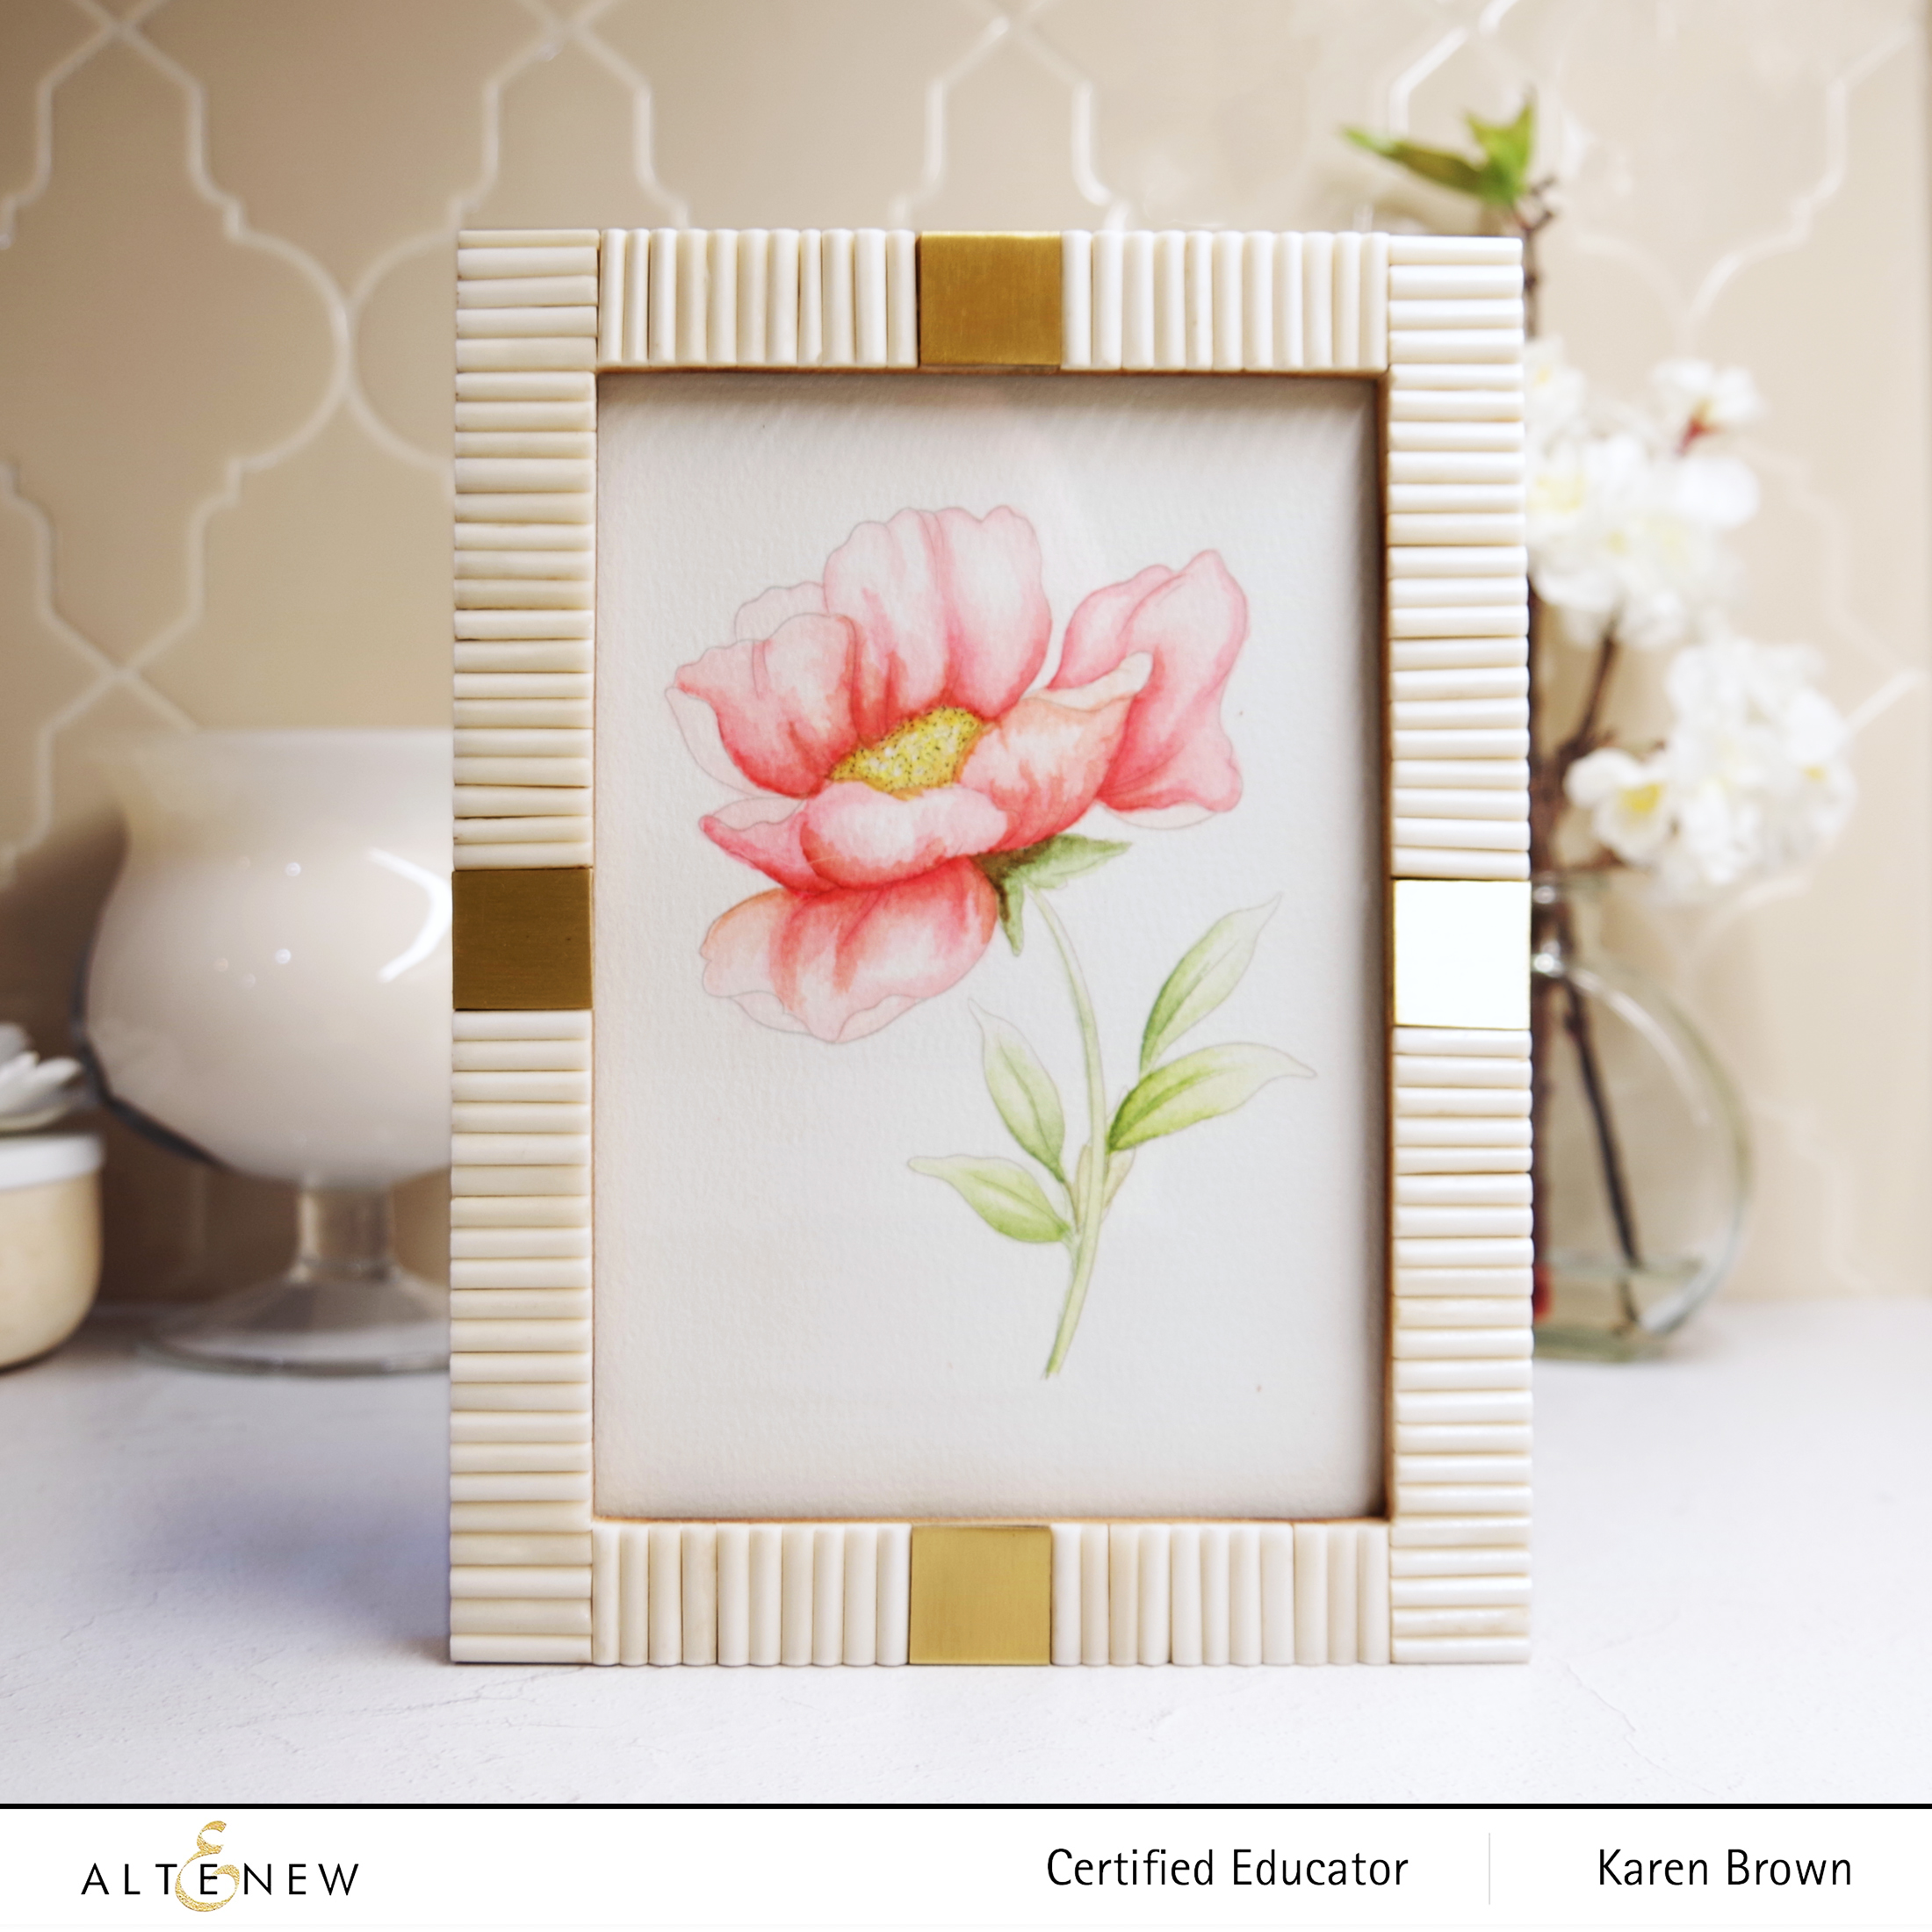
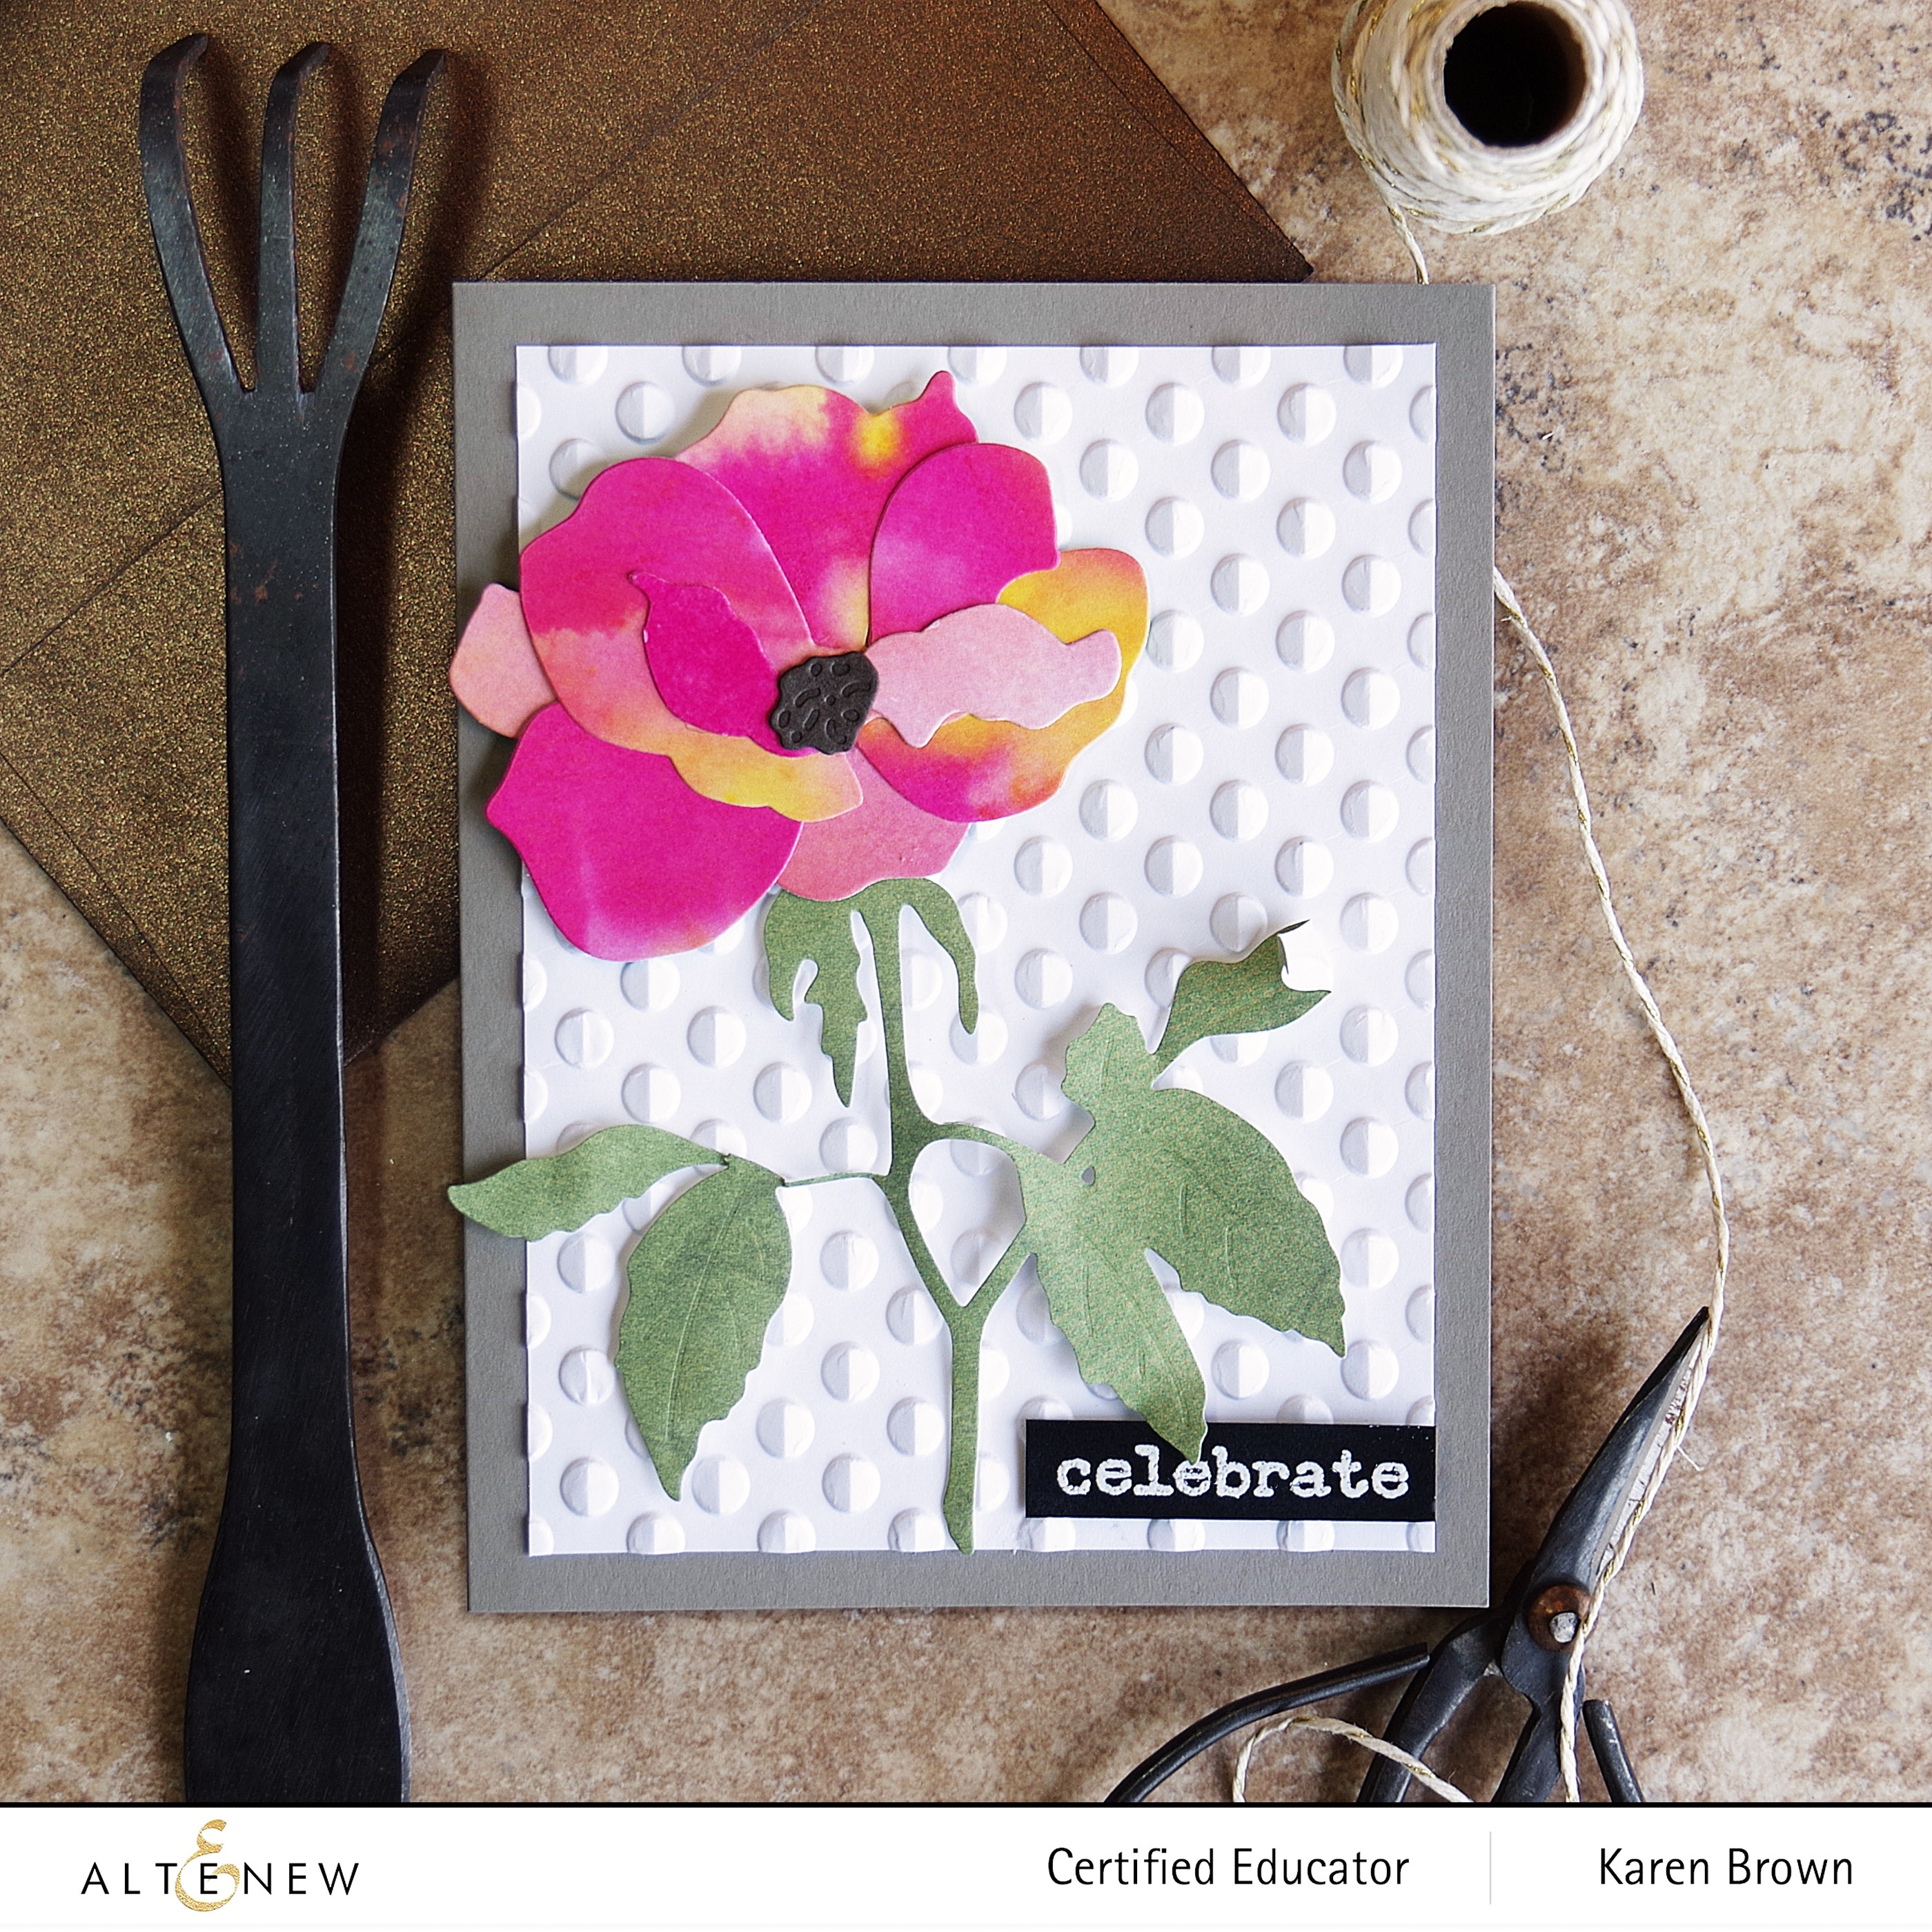
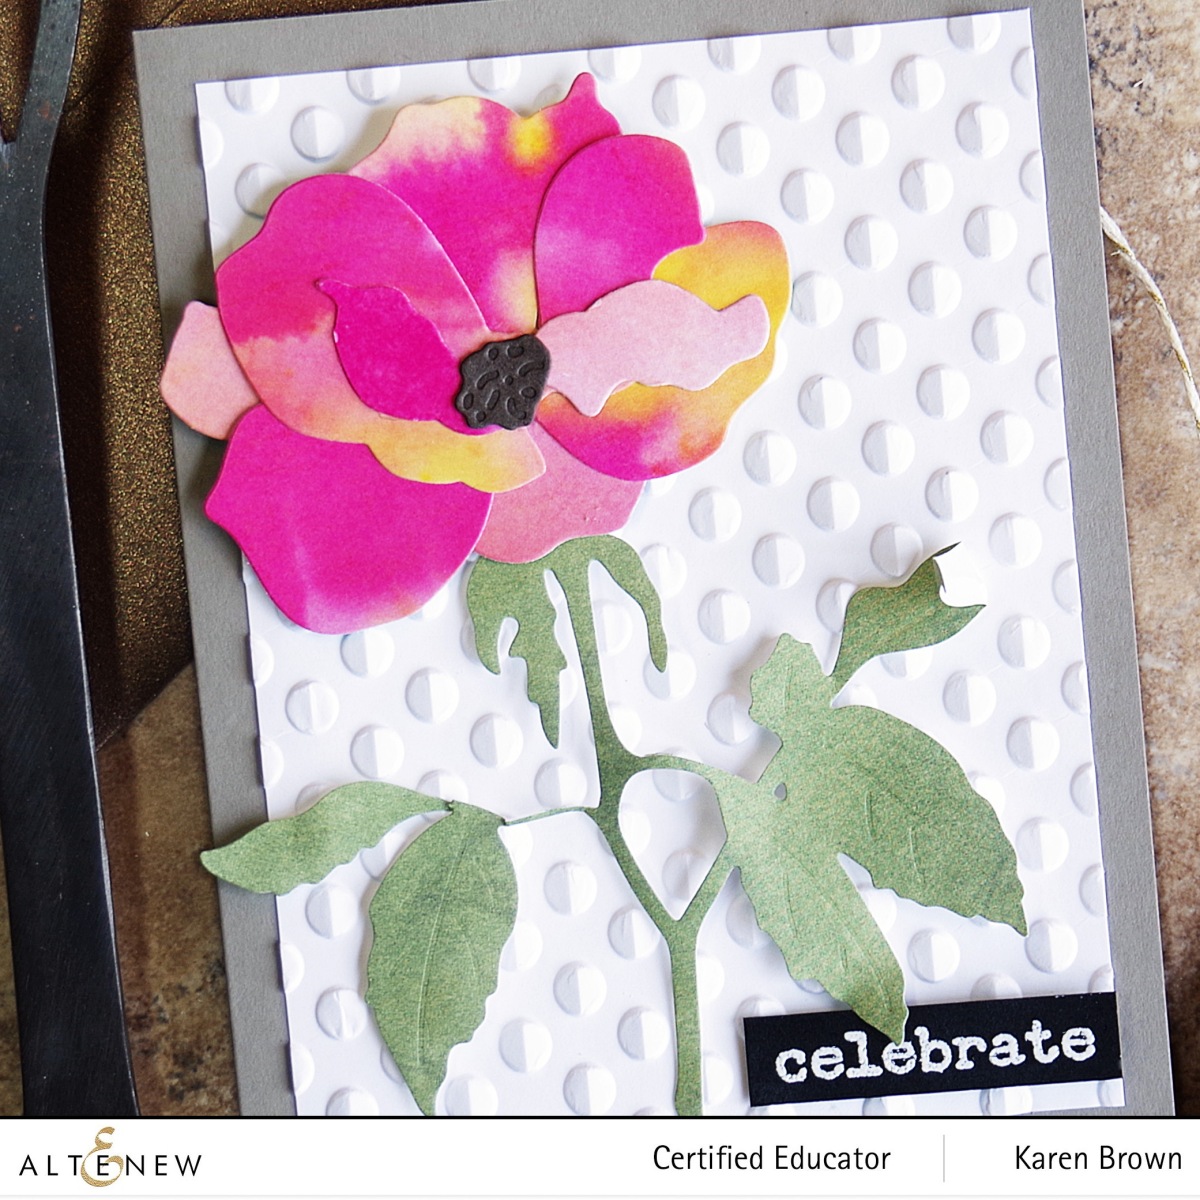
Hello and welcome! Every month, I look forward to Altenew’s Craft-A-Flower Subscription Release and this Open Peony may be my new favorite! This card is beautiful but it actually came together very quickly. My inspiration was a photograph of a Coral Charm Peony.
Ink Blending on Floral Die Cuts
I started by die cutting the floral elements from pale pink cardstock and then I ink blended Altenew’s Crisp Dye Inks on each piece. I concentrated the color around the edges. For layers #1 and #2, I used Coral Berry. Layer #3 was Coral Berry + Orange Cream. With layer #1, I added just a bit of ink and I used a heavier hand as I progressed to the top layers. Layer #4 (around the flower center) was Cotton Candy and Layer # 5 (top layer) was Crimson. I ink blended the last overlay that would go around the edges, but decided I liked the Peony without them.
For the leaves, I started with a medium green cardstock and then ink blended Mountain Pine Crisp Dye Ink around the edges. For the flower center I started with yellow cardstock and then added Warm Sunshine and Espresso ink blending.
The Peony is so beautiful that I kept the background simple. The sentiment is from Paint-A-Flower Clematis and I added three New Day Enamel Dots.
Altenew has five wonderful monthly subscription kits that you can see HERE.
Giveaway Prizes
$300 in total prizes! To celebrate this release, Altenew is giving away a $50 gift certificate to 2 lucky winners and a $25 gift certificate to 8 winners! Please leave a comment on the Altenew Card Blog and/or each designer’s blog post on the blog hop list below by 08/18/2022 for a chance to win. Altenew will draw 10 random winners from the comments left on each stop of this blog hop and announce the winners on the Altenew Winners Page on 08/20/2022.
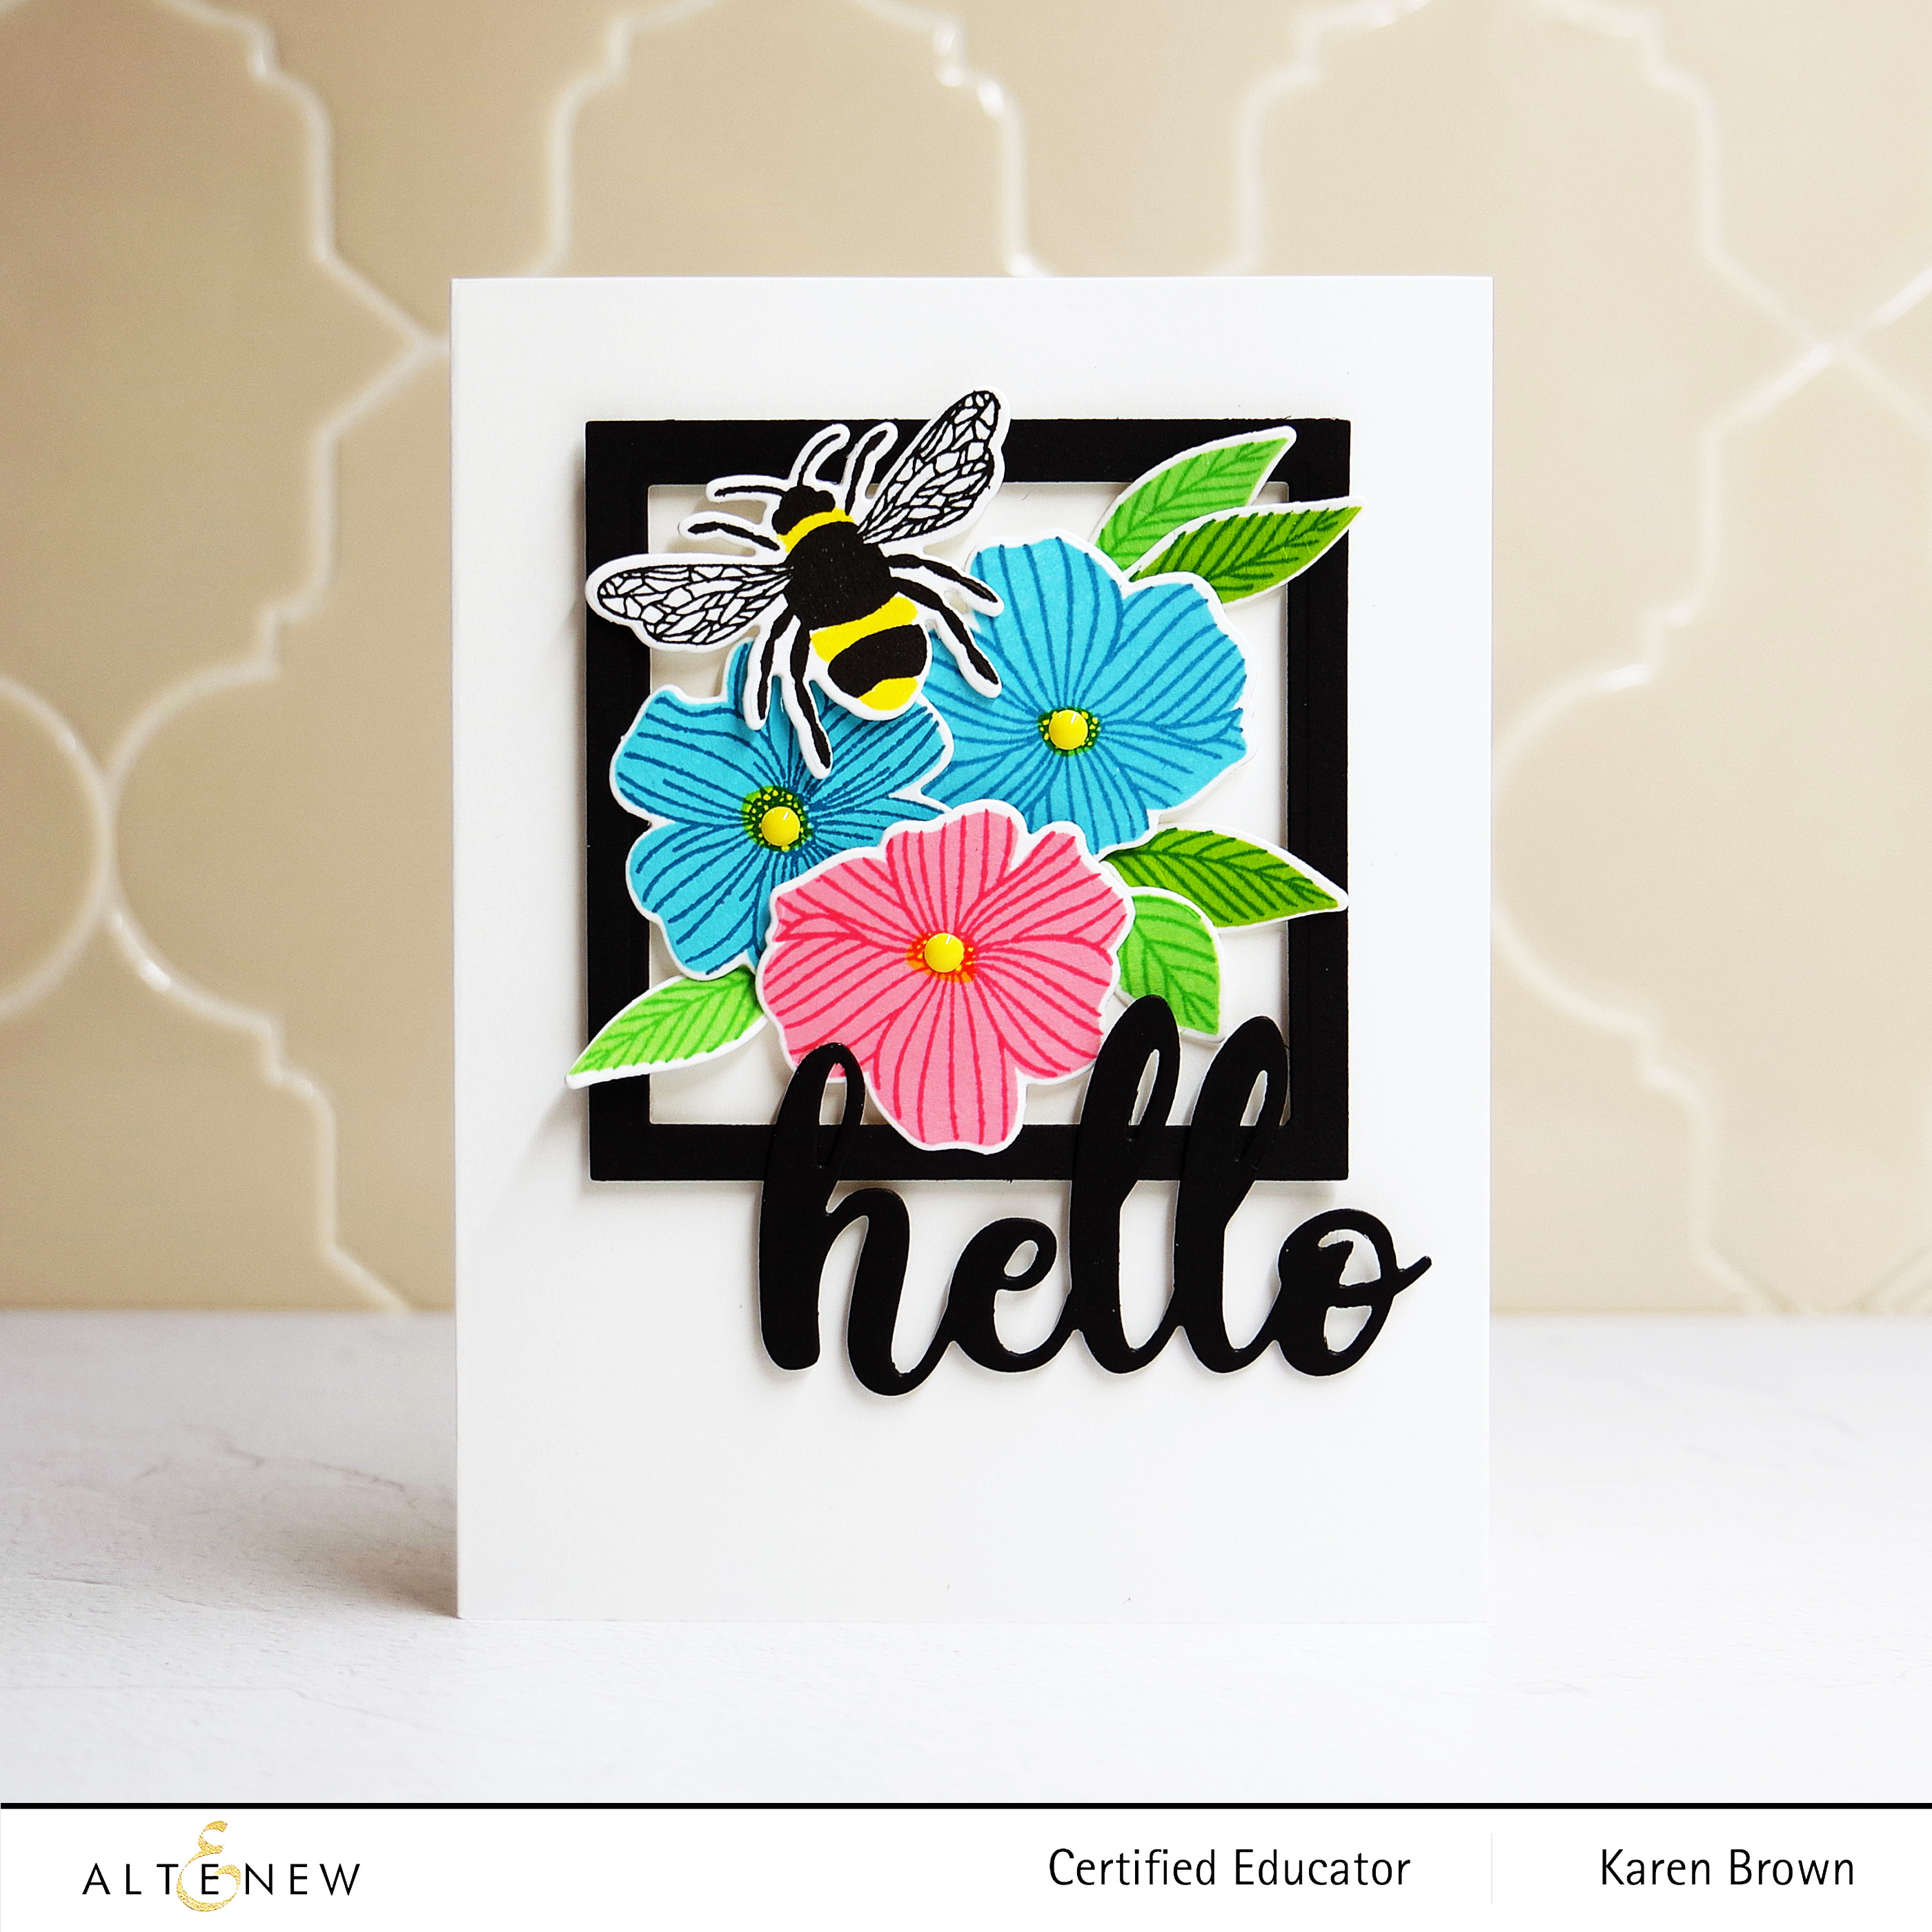
I thought I would start with the Precious Doodles Bundle. When “doodles” is in the title, I know it is going to be a favorite of mine!
Precious Doodles is a happy little stamp layering set and I used Altenew Crisp Dye Inks: Cotton Candy + Coral Berry, Ocean Waves + Dusk, Parrot + Shadow Creek and Firefly + Green Fields. Once my Doodles were stamped, I embellished with Enamel Dots, die cut a frame, added the darling bee and die cut the sentiment.
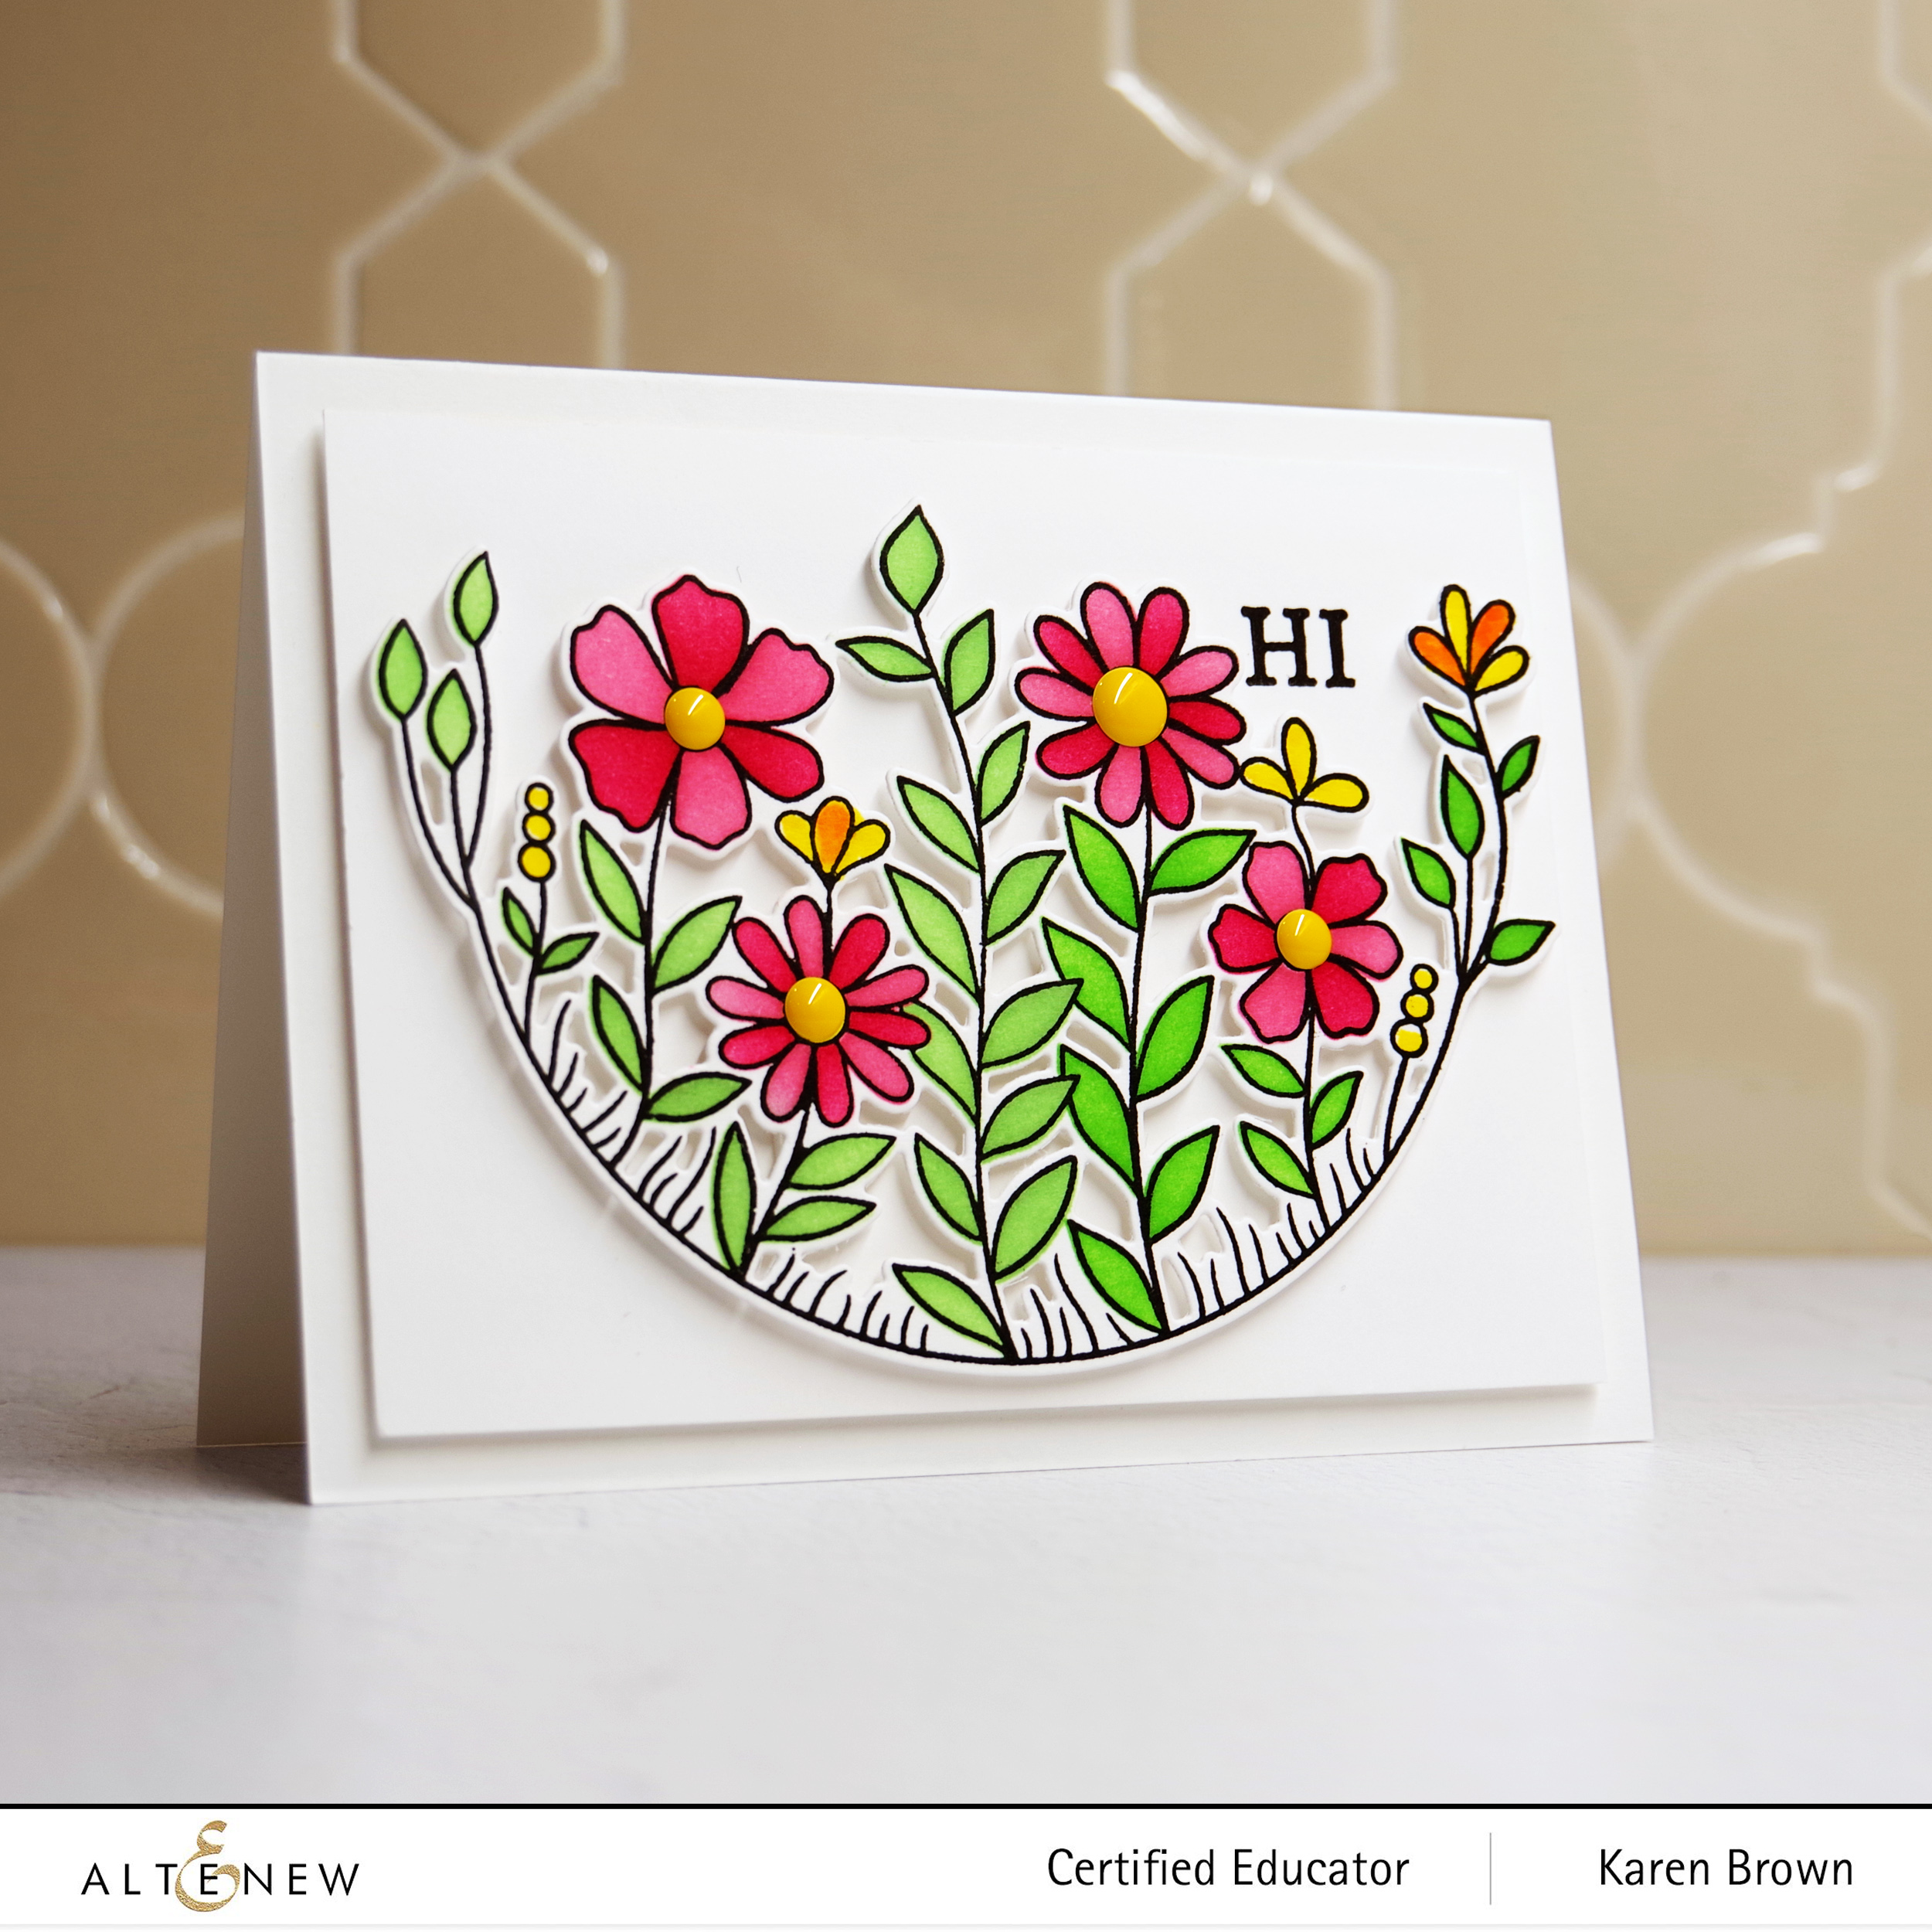
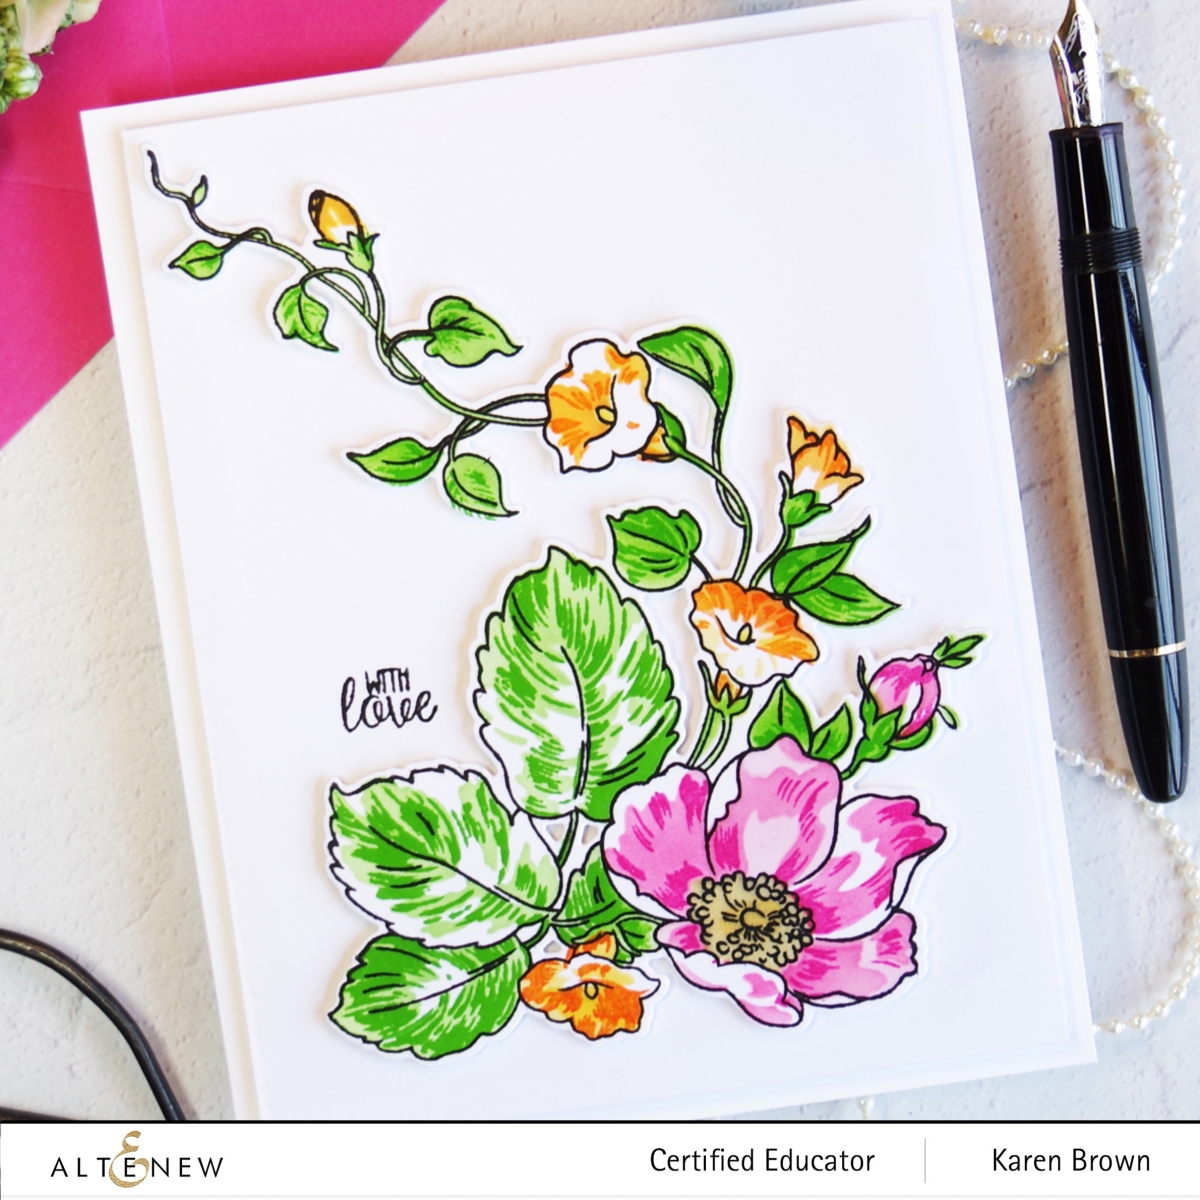
The Arch of Flowers Bundle is such a fun and creative kit! For my first card, I used the stamp, coloring stencil and die. The die is gorgeous and very detailed which really adds to its beauty! The coloring stencil was very easy to line up and use and I love the effect. The stamp set also has great sentiments included, which is always a big plus! To finish the card I just added enamel dots to the flower centers.
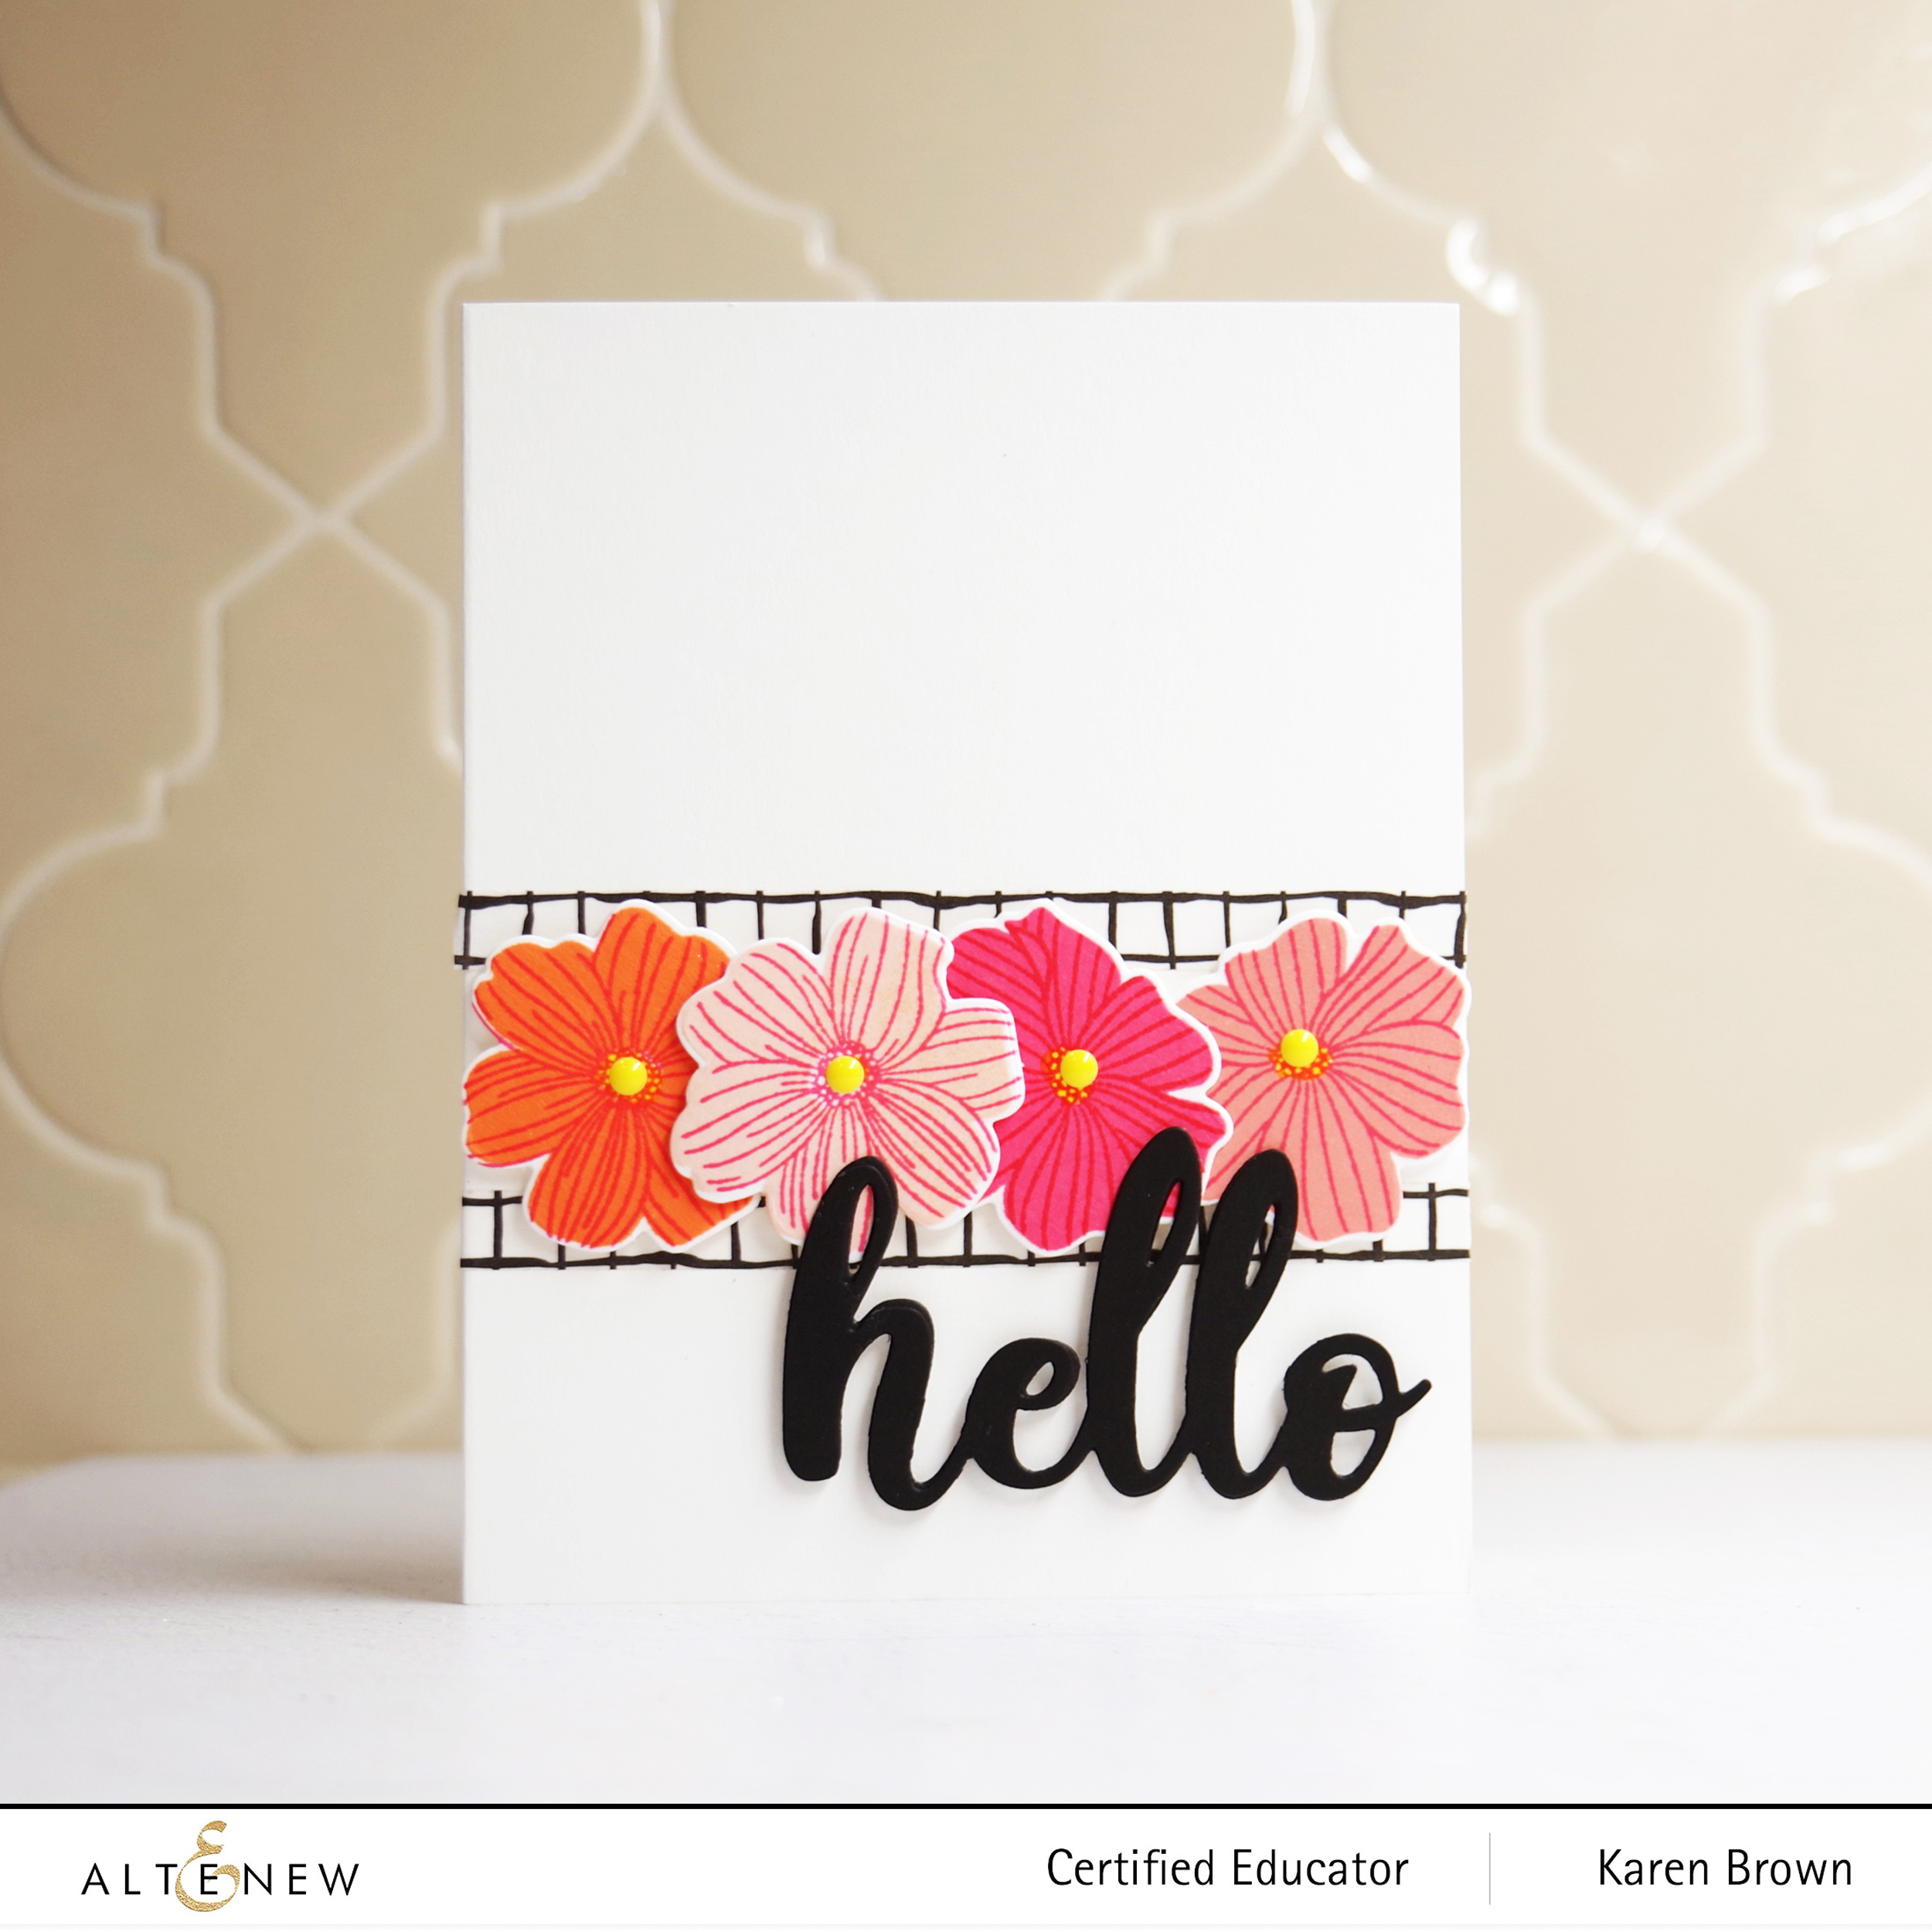
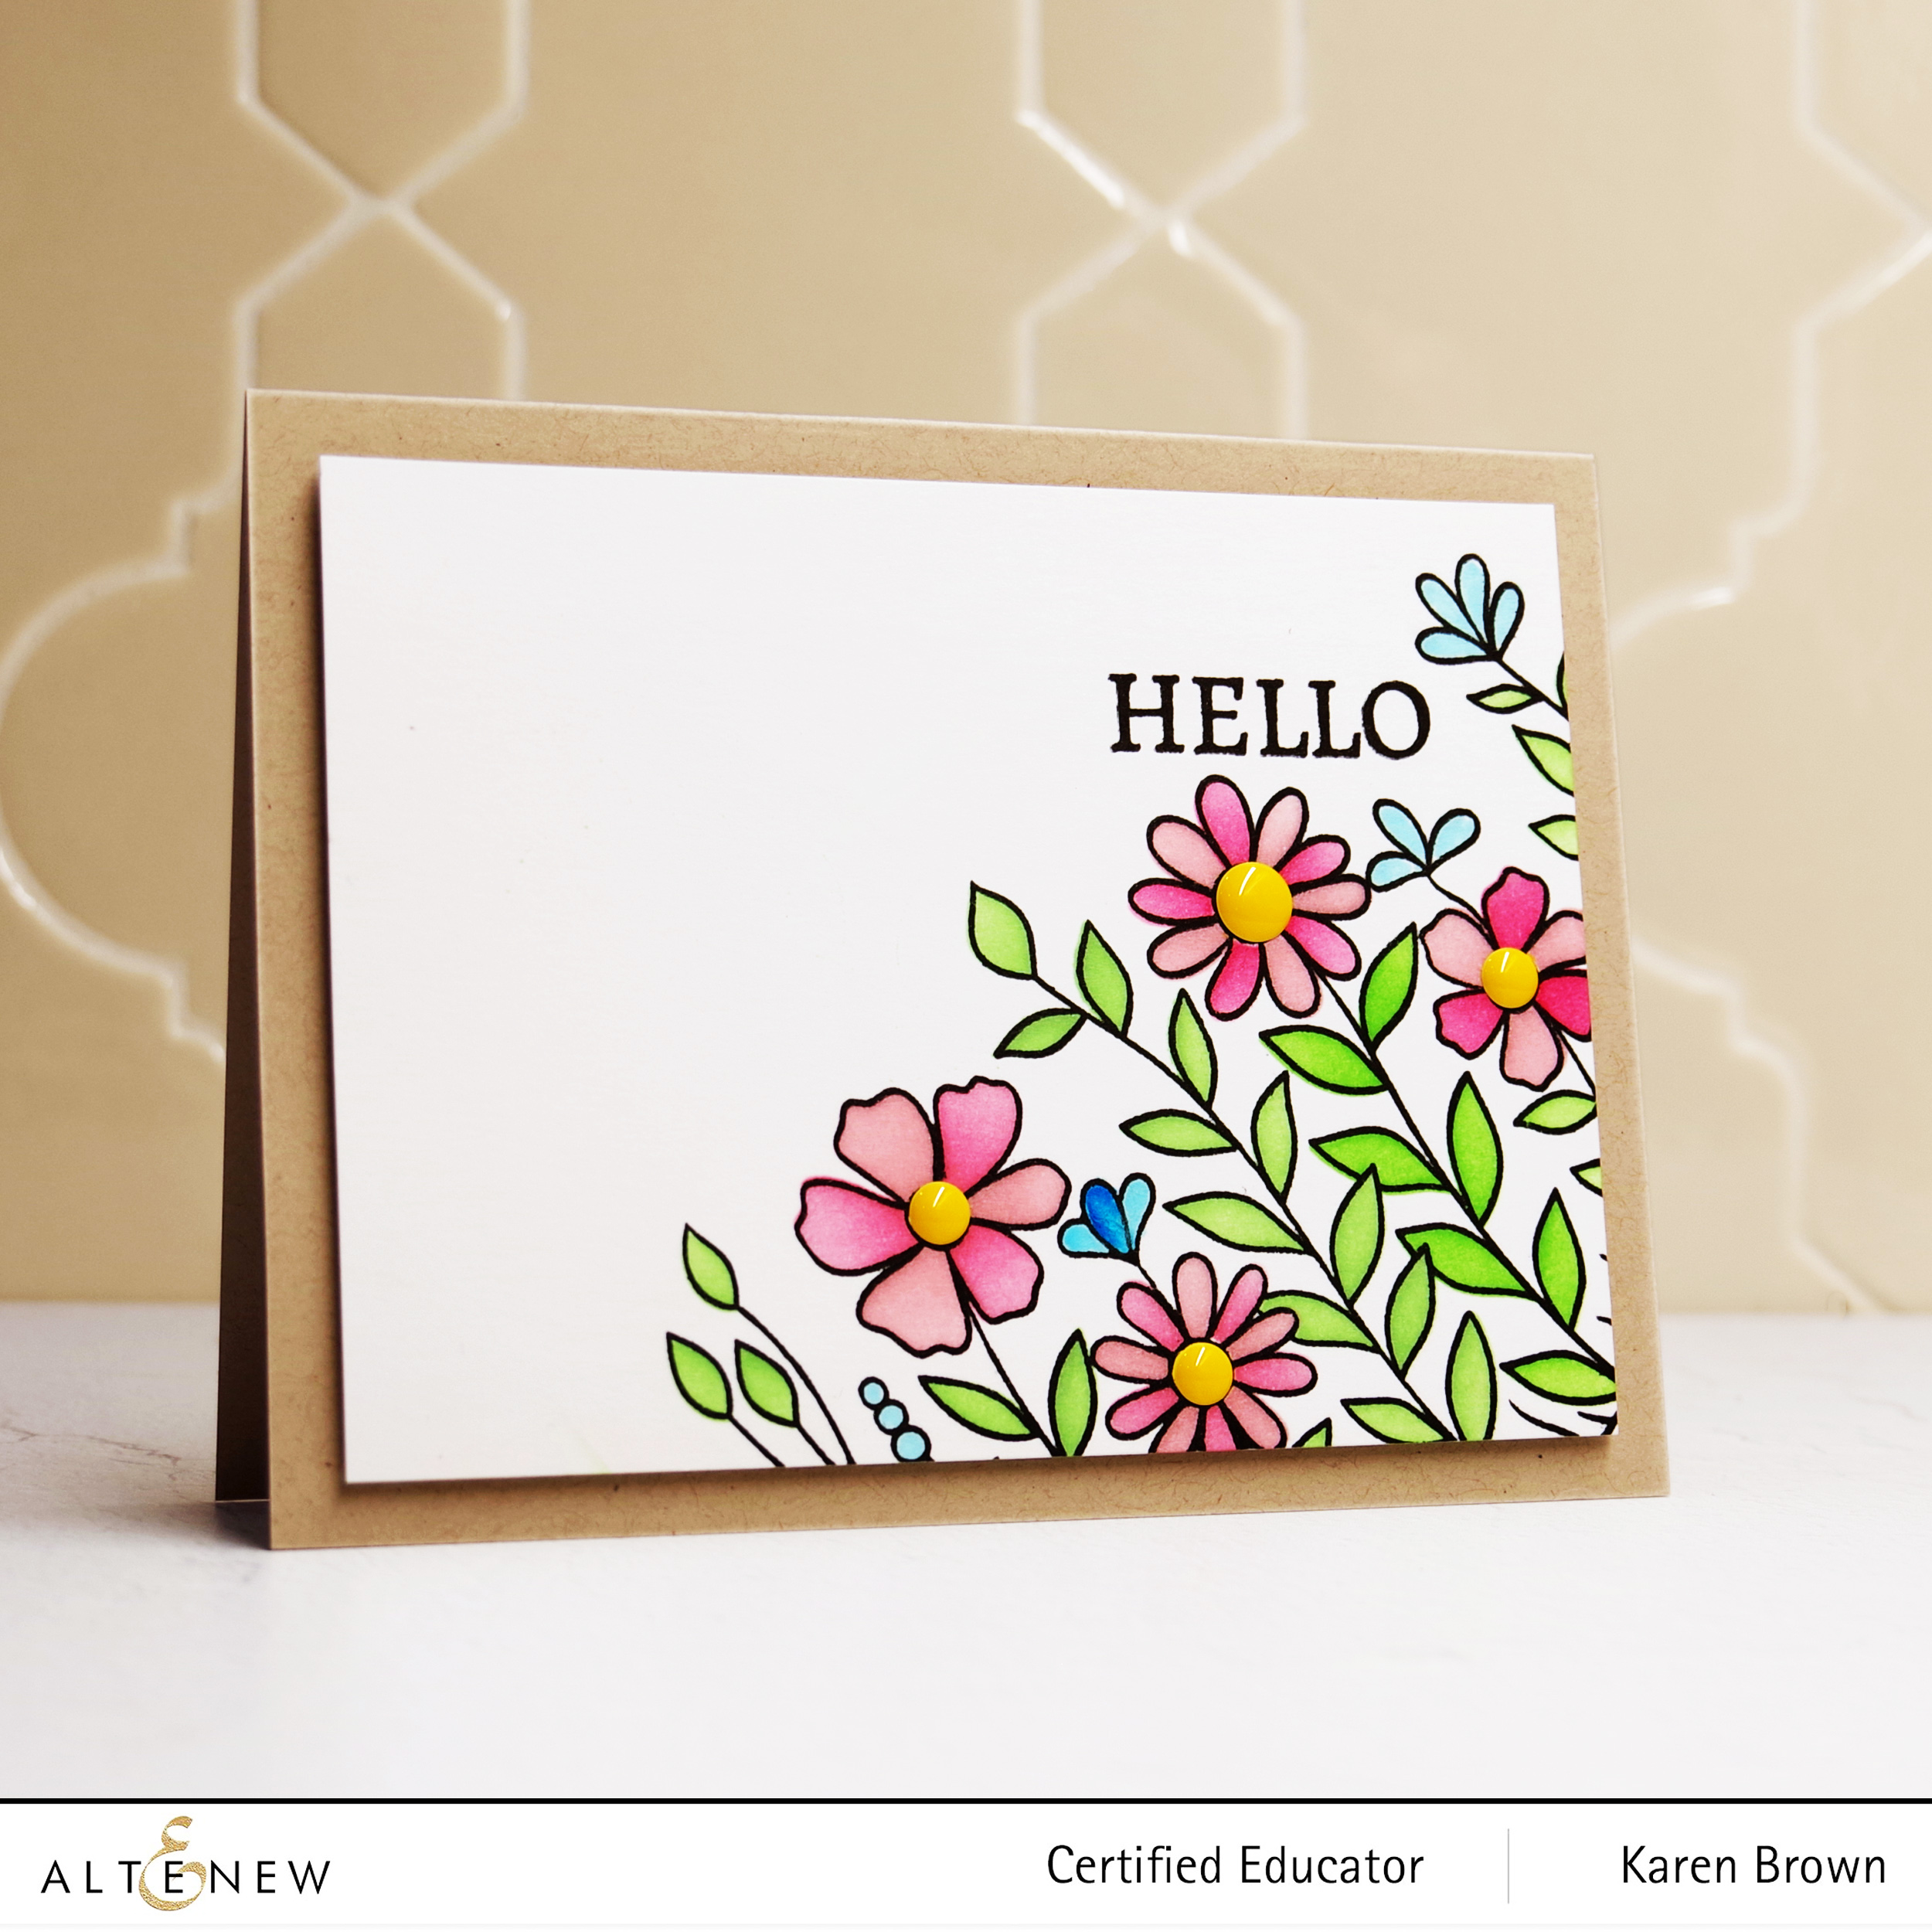
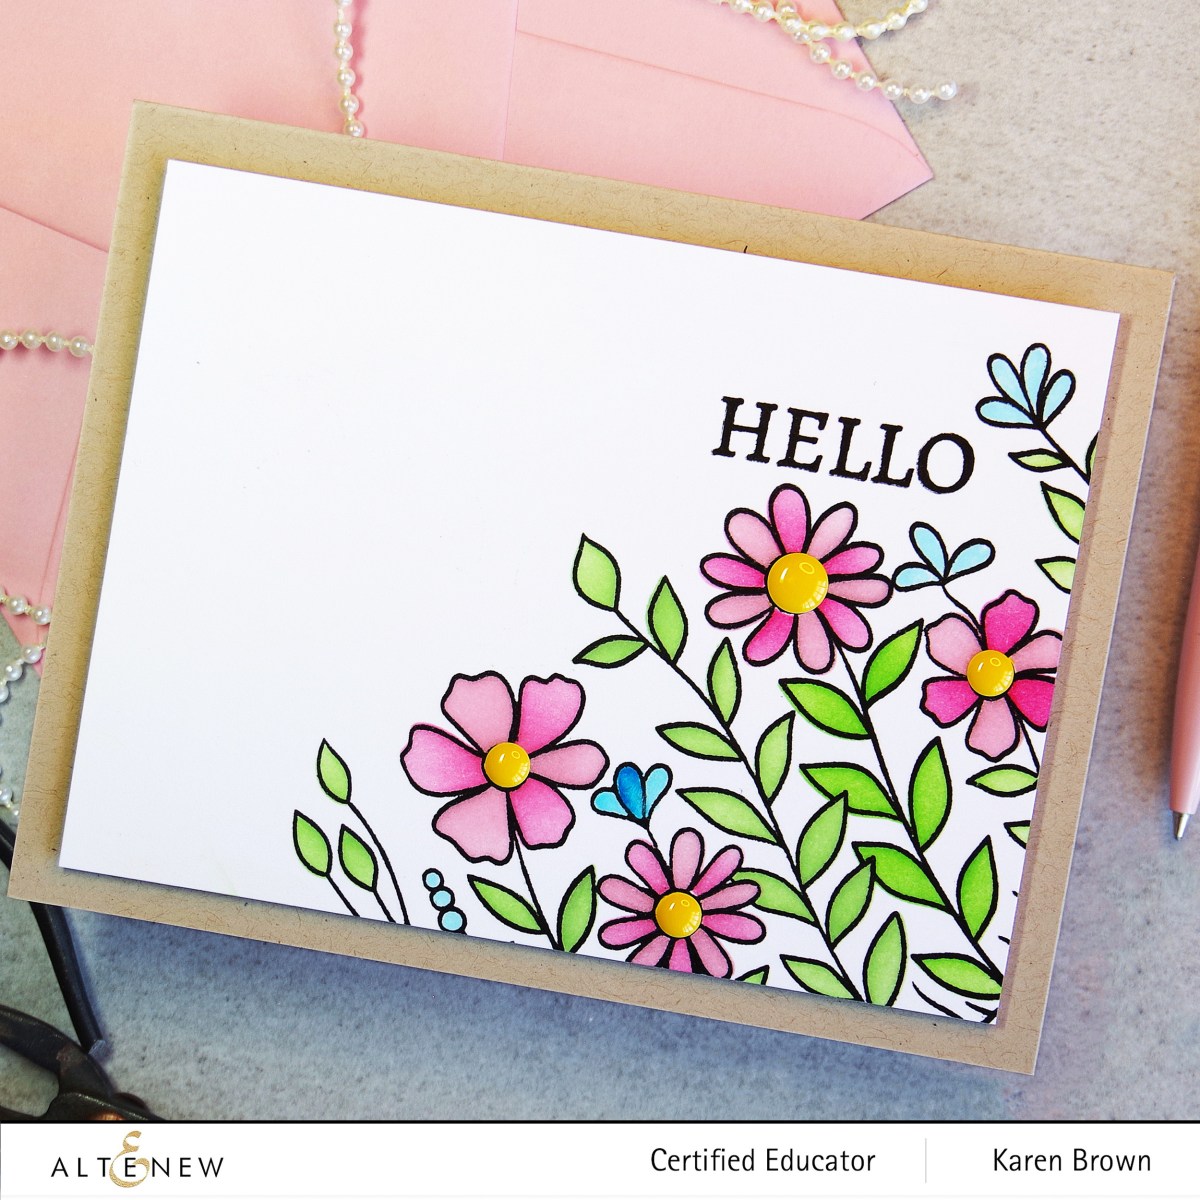
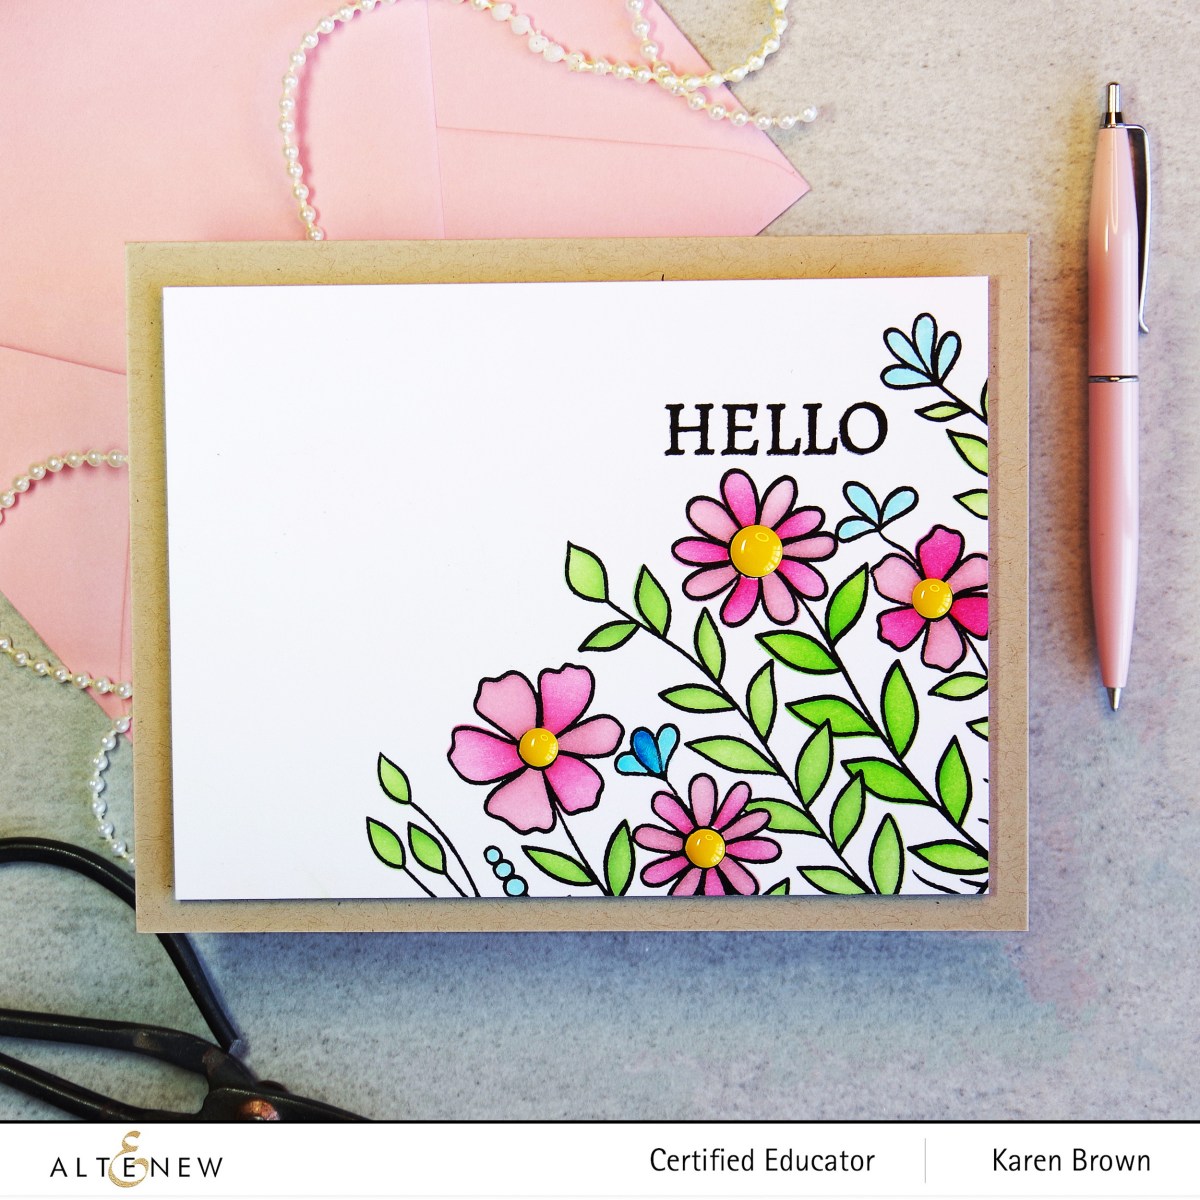
I also wanted to make a quick casual hello card with the stamp and coloring stencil. I angled the stamp and then quickly colored in the sunny little flower scene. Don’t the flowers look like they are reaching for the sun?
I think this would make a cute stationary set or get well card too.
FREE GIFT OFFER!
To celebrate the release, we are running a free gift promotion. Feel free to share the promotion info with your followers.
Get a FREE brand new Bold & Beautiful Mini Inspiration Guide with every order from 08/04/2022 through 08/06/2022. Shop HERE!
Get a FREE brand new Bold & Beautiful Stamp & Die Release Inspiration Guide e-book (worth $5.99) with every order of high-value Bold & Beautiful Bundles. Shop HERE! *Exclusions apply.
Get a FREE brand new Online Cardmaking Class with every order from the new Bold & Beautiful Stamp & Die Release Collection from 08/04/2022 through 08/10/2022. Shop HERE!
300 in total prizes! To celebrate this release, Altenew is giving away a $50 gift certificate to 2 lucky winners and a $25 gift certificate to 8 winners! Please leave a comment on the Altenew Card Blog and/or each designer’s blog post on the blog hop list below by 08/10/2022 for a chance to win.
Altenew will draw 10 winners randomly from the comments left on each stop of this blog hop and announce the winners on the Altenew Winners Page on 08/11/2022.
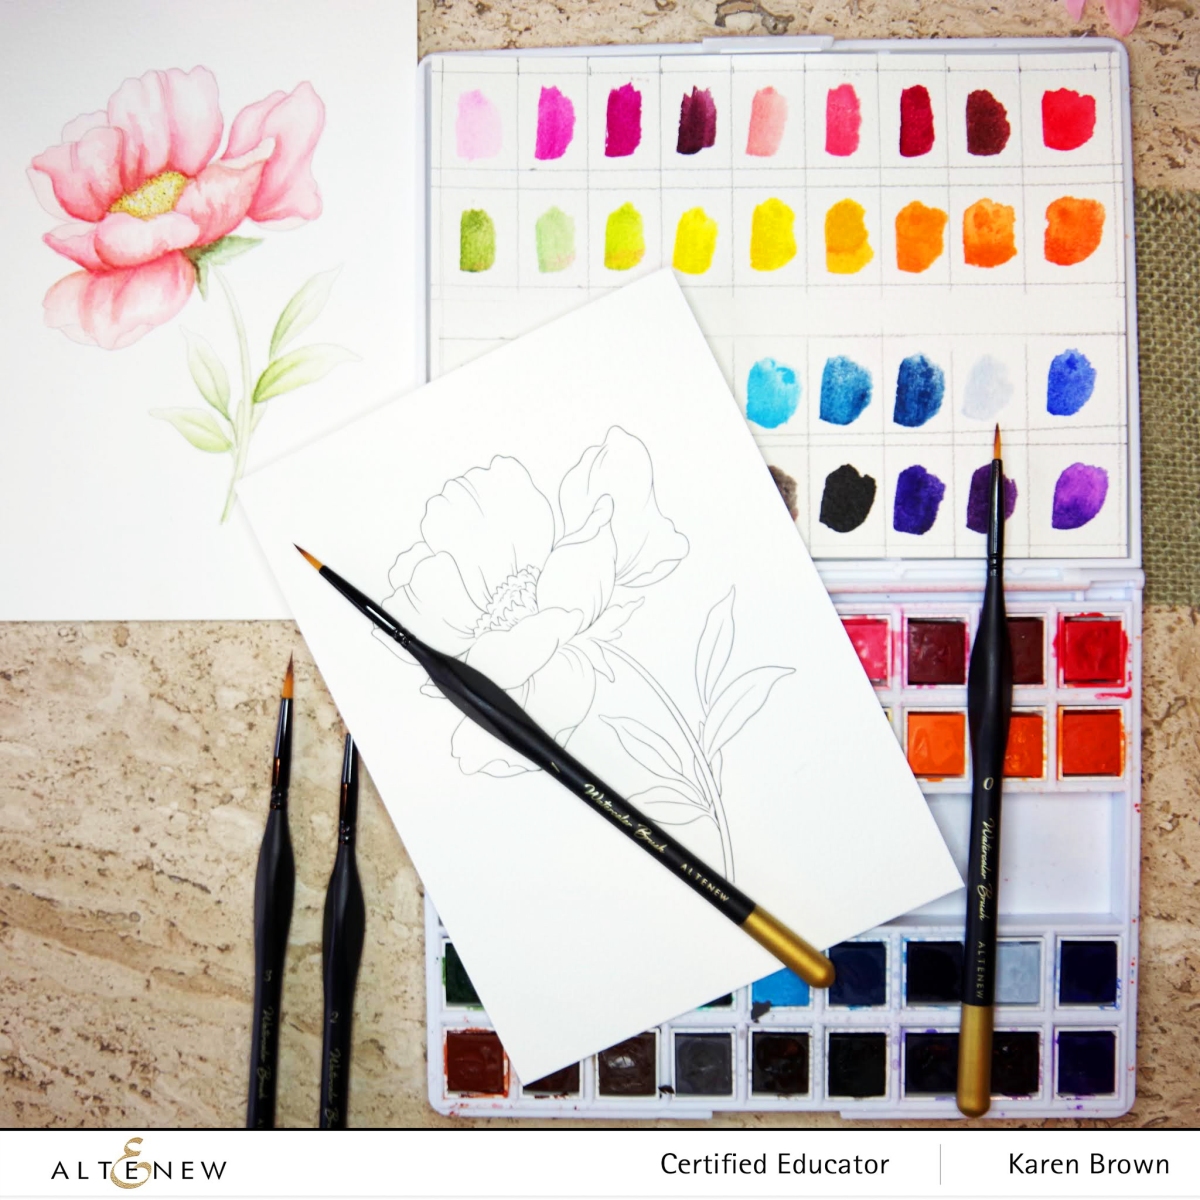
The coloring book is such a great idea! There are 12 designs…24 printed pages on good quality watercolor paper. Each design has a black outline and a “no-line” outline. I am going on vacation soon and this coloring book will be making the trip as it is so packable. Grab the book, brushes and watercolors and I am set for hours of creating. I also think this would make a great gift!
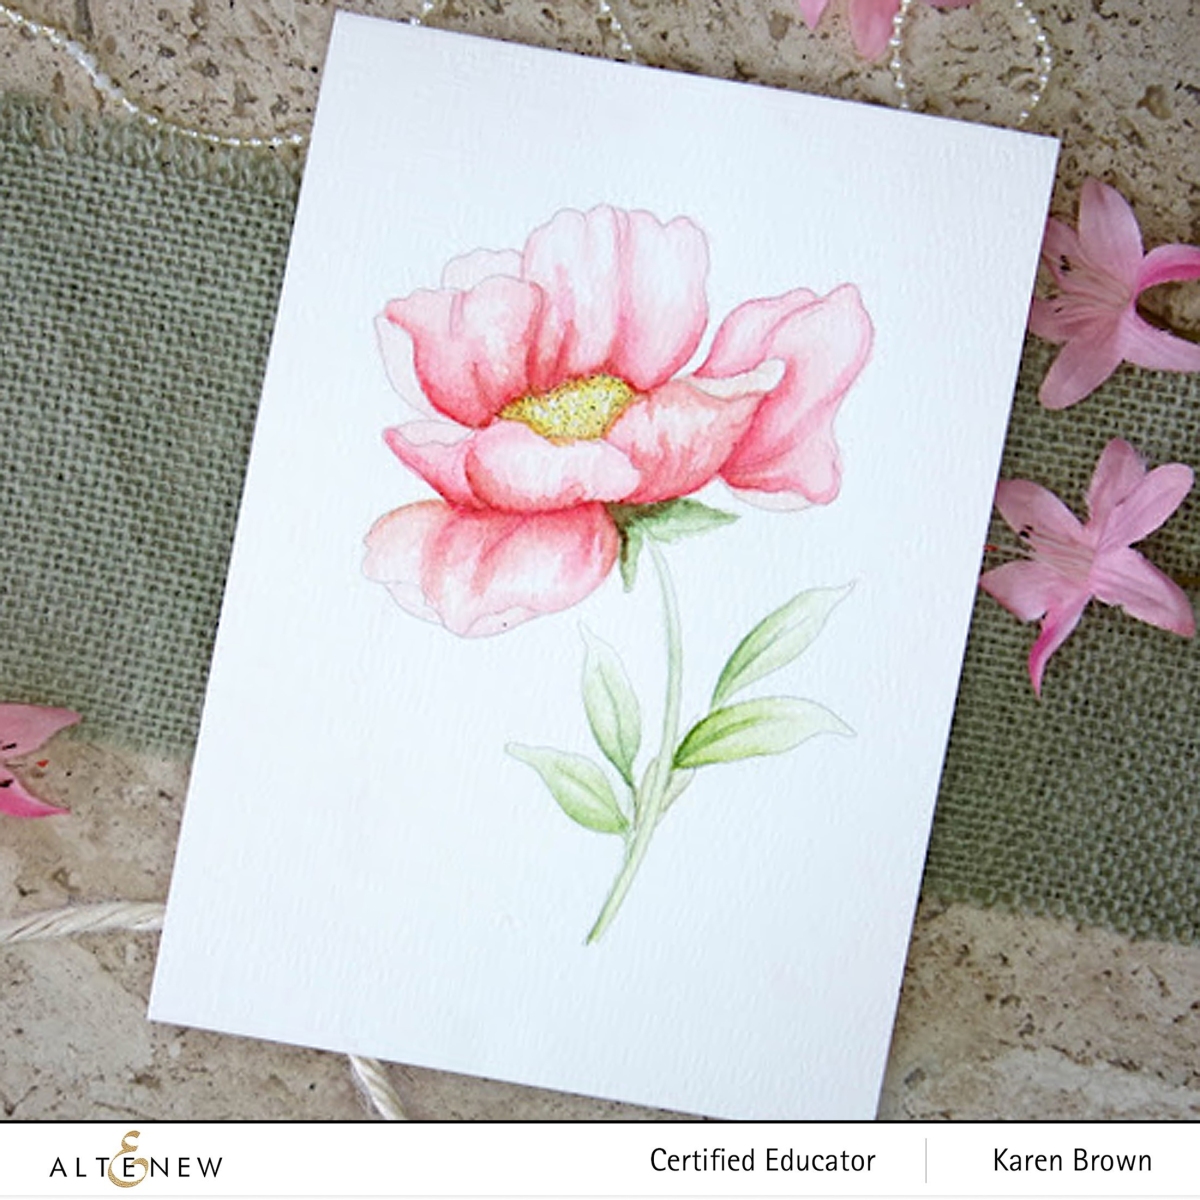
I went slow while I painted and added layer upon layer of color. For me, this is the secret to watercolor painting. Add color and blend with a damp brush with clean water, let dry and repeat. The quality of the paper in the coloring book allowed me to add lots of layers without any worry about the paper breaking down.
This no-line Poppy was loads of fun to paint! I didn’t mix the paints but used the color right out of the pans. Lovely and feminine. I did add a few accents to the flower’s center with a black pen and white gel pen.
Altenew’s Coloring Book
Giveaway Prizes
$300 in total prizes! To celebrate this special blog hop,Altenew is giving away a $50 gift certificate to 2 lucky winners and a $25 gift certificate to 8 winners! Please leave a comment on the Altenew Card Blog and/or each designer’s blog post on the blog hop list below by 08/05/2022 for a chance to win. Altenew will draw 10 random winners from the comments left on each stop of this blog hop and announce the winners on the Altenew Winners Page on 08/09/2022.
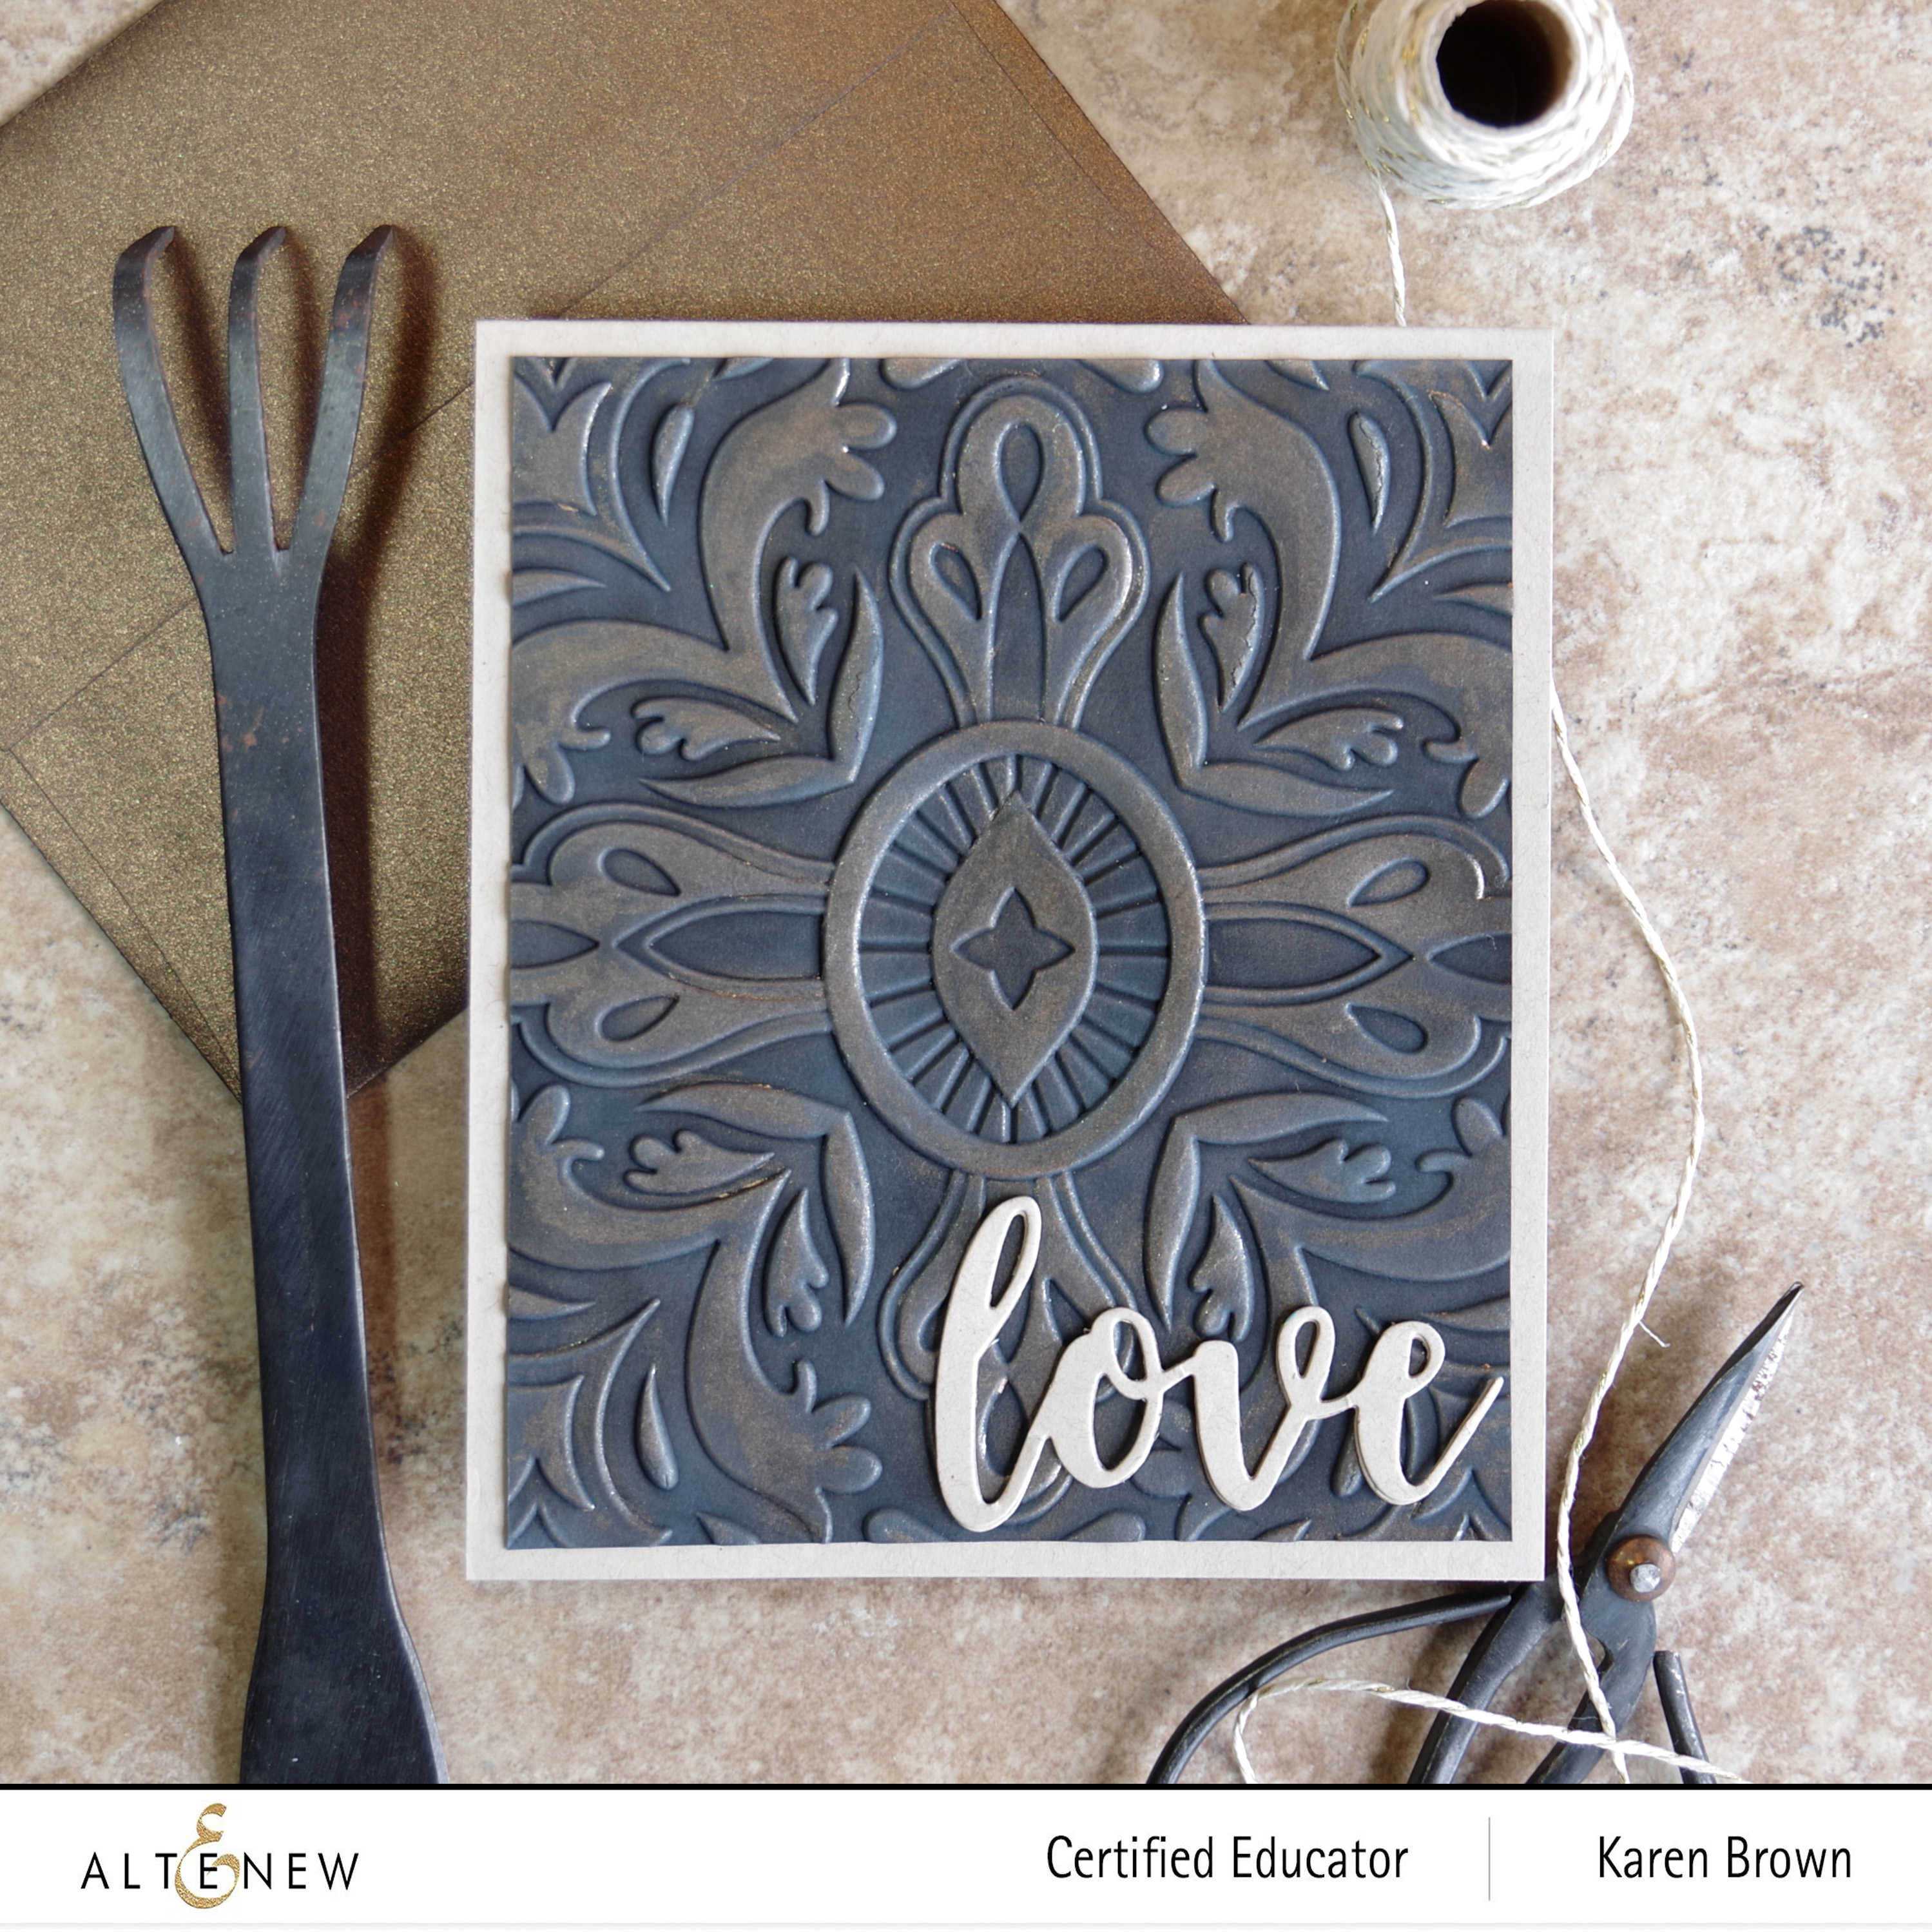
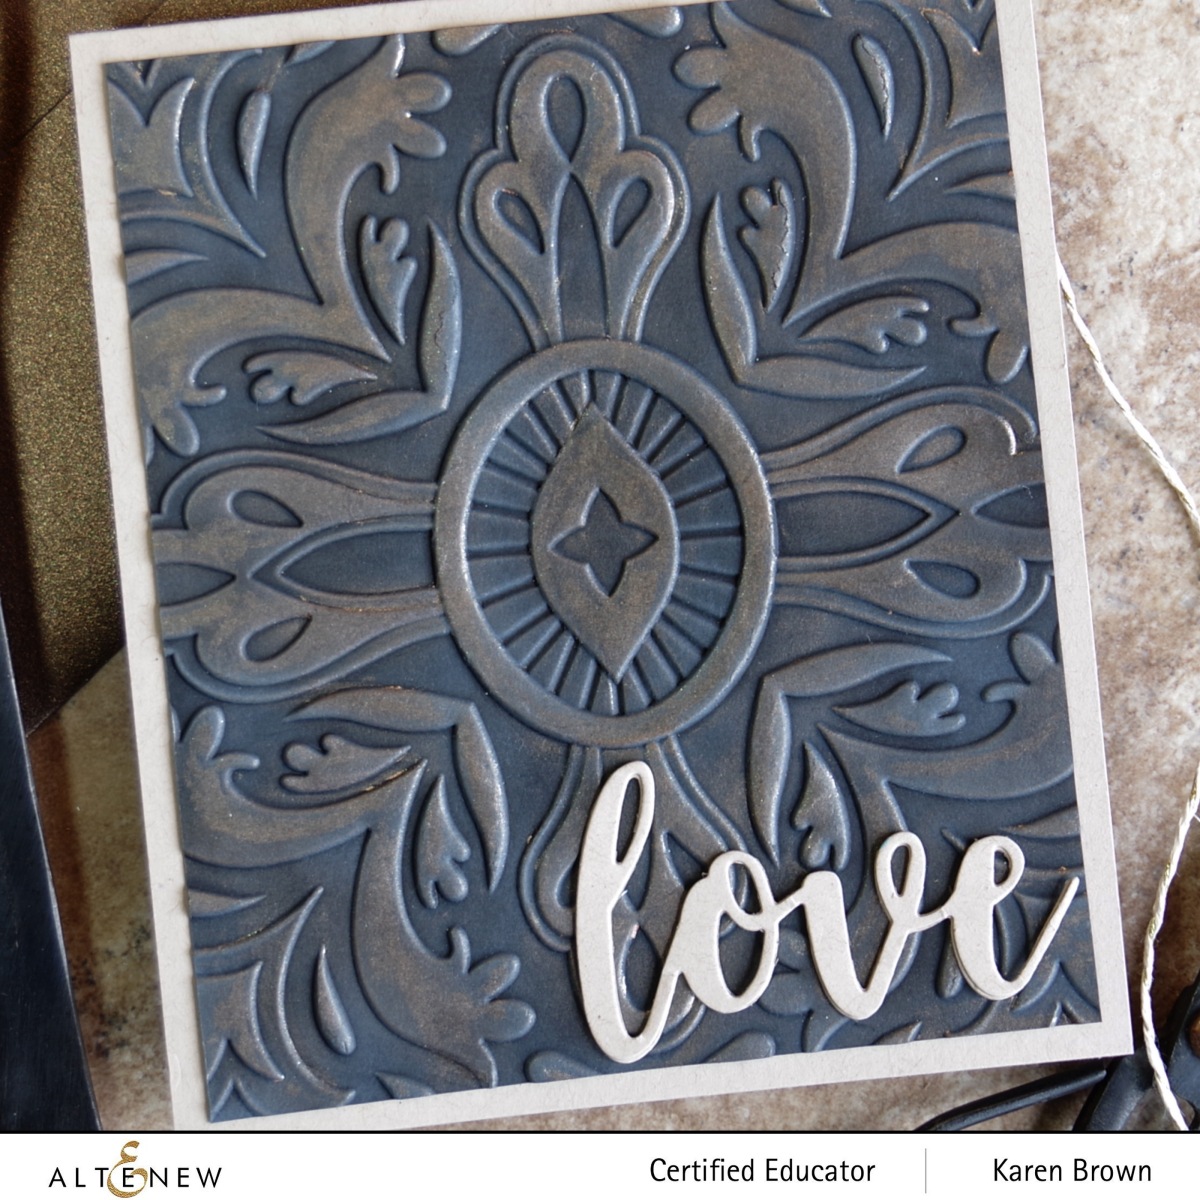
Hello and thanks for stopping by! Altenew just released a lovely collection of 3D Embossing Folders as part of their Summer Love Collection, and I made 3 very different projects. I started by making a very masculine card using the Fantasy Emblem 3D Embossing Folder. My inspiration was an antique metal medallion.
My Process:
I started by embossing a piece of black cardstock with the Fantasy Emblem 3D Embossing Folder.
Next I tinted white pigment ink with Ocean Waves Crisp Dye Ink. On my craft mat, I dabbed the pigment ink and then Ocean Waves Crisp Dye Ink next to the white and then I mixed the two together. I blended this all over the embossed panel to “age” the cardstock.
I colored Antique Bronze Distress Crayon on the raised areas and then blended with my finger.
I die cut my sentiment (Script Words Die) from kraft card stock and then attached my panel to a kraft base.
This card was quick and easy to make but looks so rich in person.
This embossing folder is definitely a new favorite that will work with so many papercrafting projects! Today, I combined Altenew’s Craft-A-Flower: Garden Rose with the very versatile Playful Circles 3D Embossing Folder. The embossing folder adds loads of texture and interest to the card. The embossed panel is very pretty on both sides….depressed and impressed.
I gently applied clear pigment ink to portions of the panel and then sprinkled on Golden Peach Embossing Powder. I brushed most of the embossing powder off but left the powder in and around the embossed crevices. I heat set the powder.
I die cut my sentiment, Altenew’s Thanks Die, and gently inked the die cut with Ocean Waves Crisp Dye Ink to “age” it a bit so it wasn’t so white. I popped it on a card base and was done.
Special Offer!
Receive a FREE Ultra Sticky Double Sided Tape ($11.99 value) on orders over $79 from 07/22/2022 at 12:01 am EDT until 07/24/2022 at 11:59 pm EDT. The free gift will be added to cart automatically. Find more details on the Promotions page.
Giveaway Prizes
$300 in total prizes! To celebrate this release, Altenew is giving away a $50 gift certificate to 2 lucky winners and a $25 gift certificate to 8 winners! Please leave a comment on the Altenew Card Blog and/or each designer’s blog post on the blog hop list below by 07/28/2022 for a chance to win.
Altenew will draw 10 winners randomly from the comments left on each stop of this blog hop and announce the winners on the Altenew Winners Page on 07/29/2022.
To celebrate the July Subscription Kits, Altenew is hosting a Blog Hop with loads of prizes and fresh inspriation so come hop with us! You probably came from Emily Midgett and her gorgeous cards.
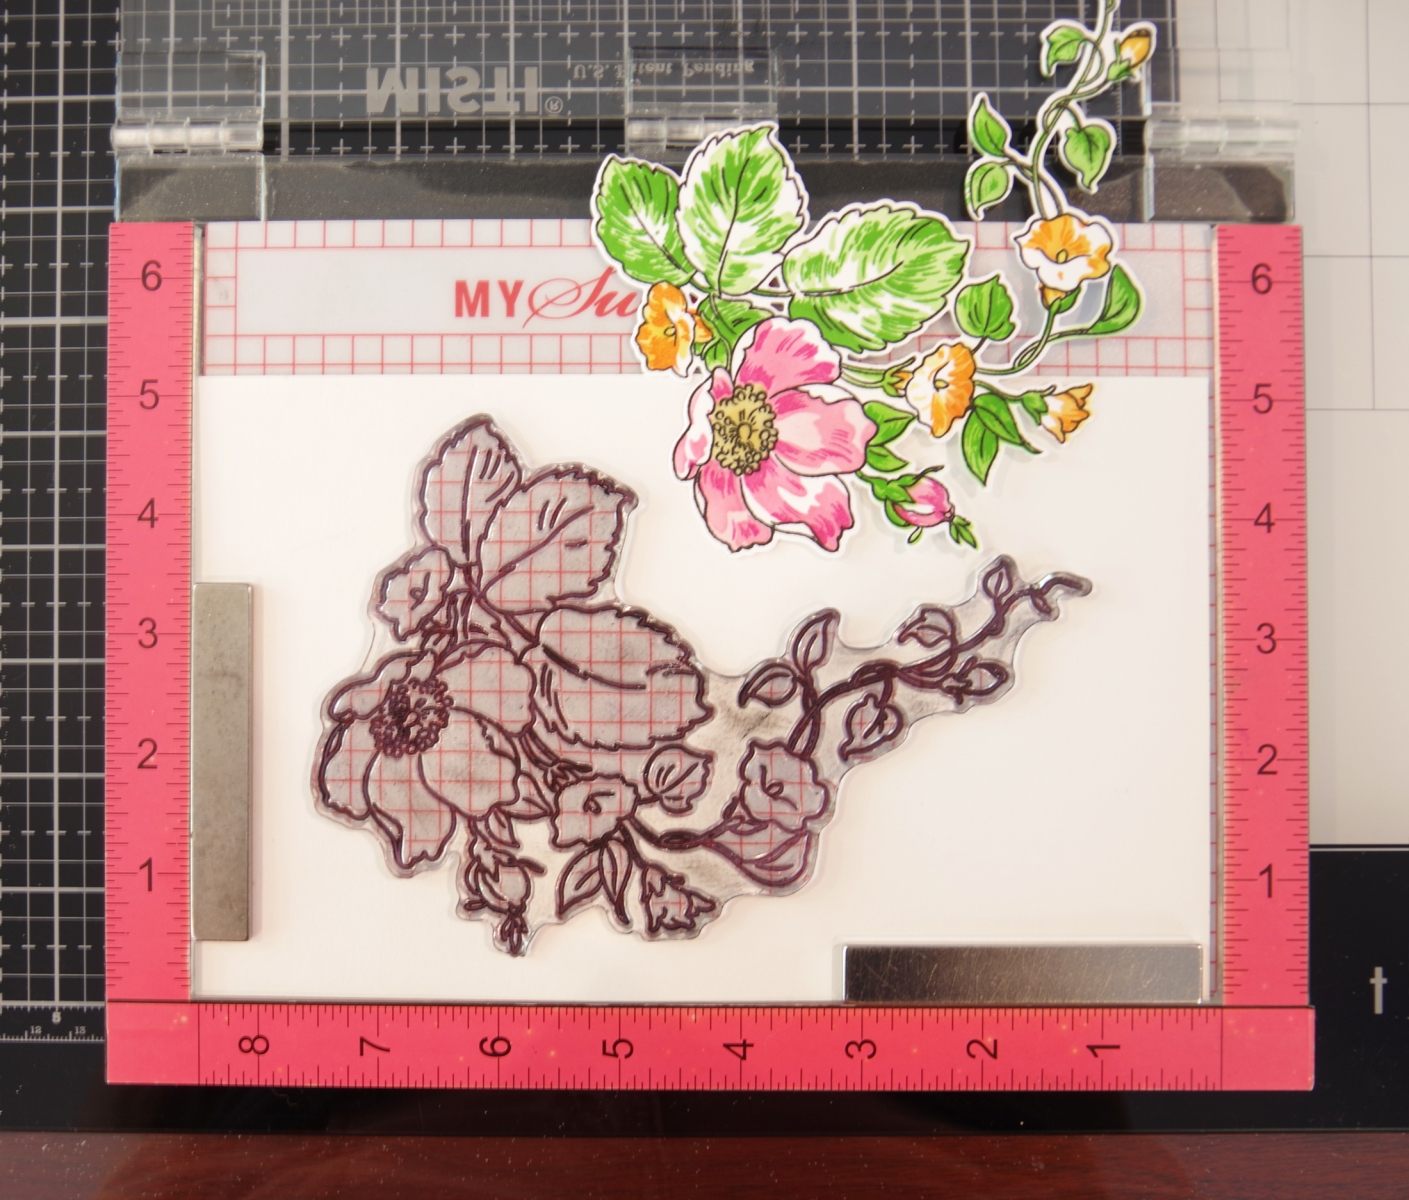
If you want to make a showy “Wow” project, you’ll want to try the July Craft Your Life kit. The flowers, leaves and vines are gorgeous! The Craft Your Life Project Kit comes with a 6 x 8 Stamp set and its coordinating Die Set, Stencil, and Embossing Folder. You will want to buy the kit becuase the items included in this kit are not sold separately.
I started by diecutting a template for my stamp. The main stamp is large and to ensure I had it positioned correctely, so it would die cut well, I set the stamp inside the template in my Misti. This little extra step makes for a much better finished project. Next, I stamped the outline with pigment ink and let it dry. I then used the coloring stencils to ink blend the flowers and leaves. I wanted a bit of fresh white so I didn’t use every stencil layer. I just love the look of coloring with stencils. To finish, I used the layering stamps to add detail and then die cut. This is a big stamp, so using foam tape, I attached the die cut to a 5″ x 6 1/2″ panel. The stamp is so beautiful that I kept the rest of the card clean and simple.
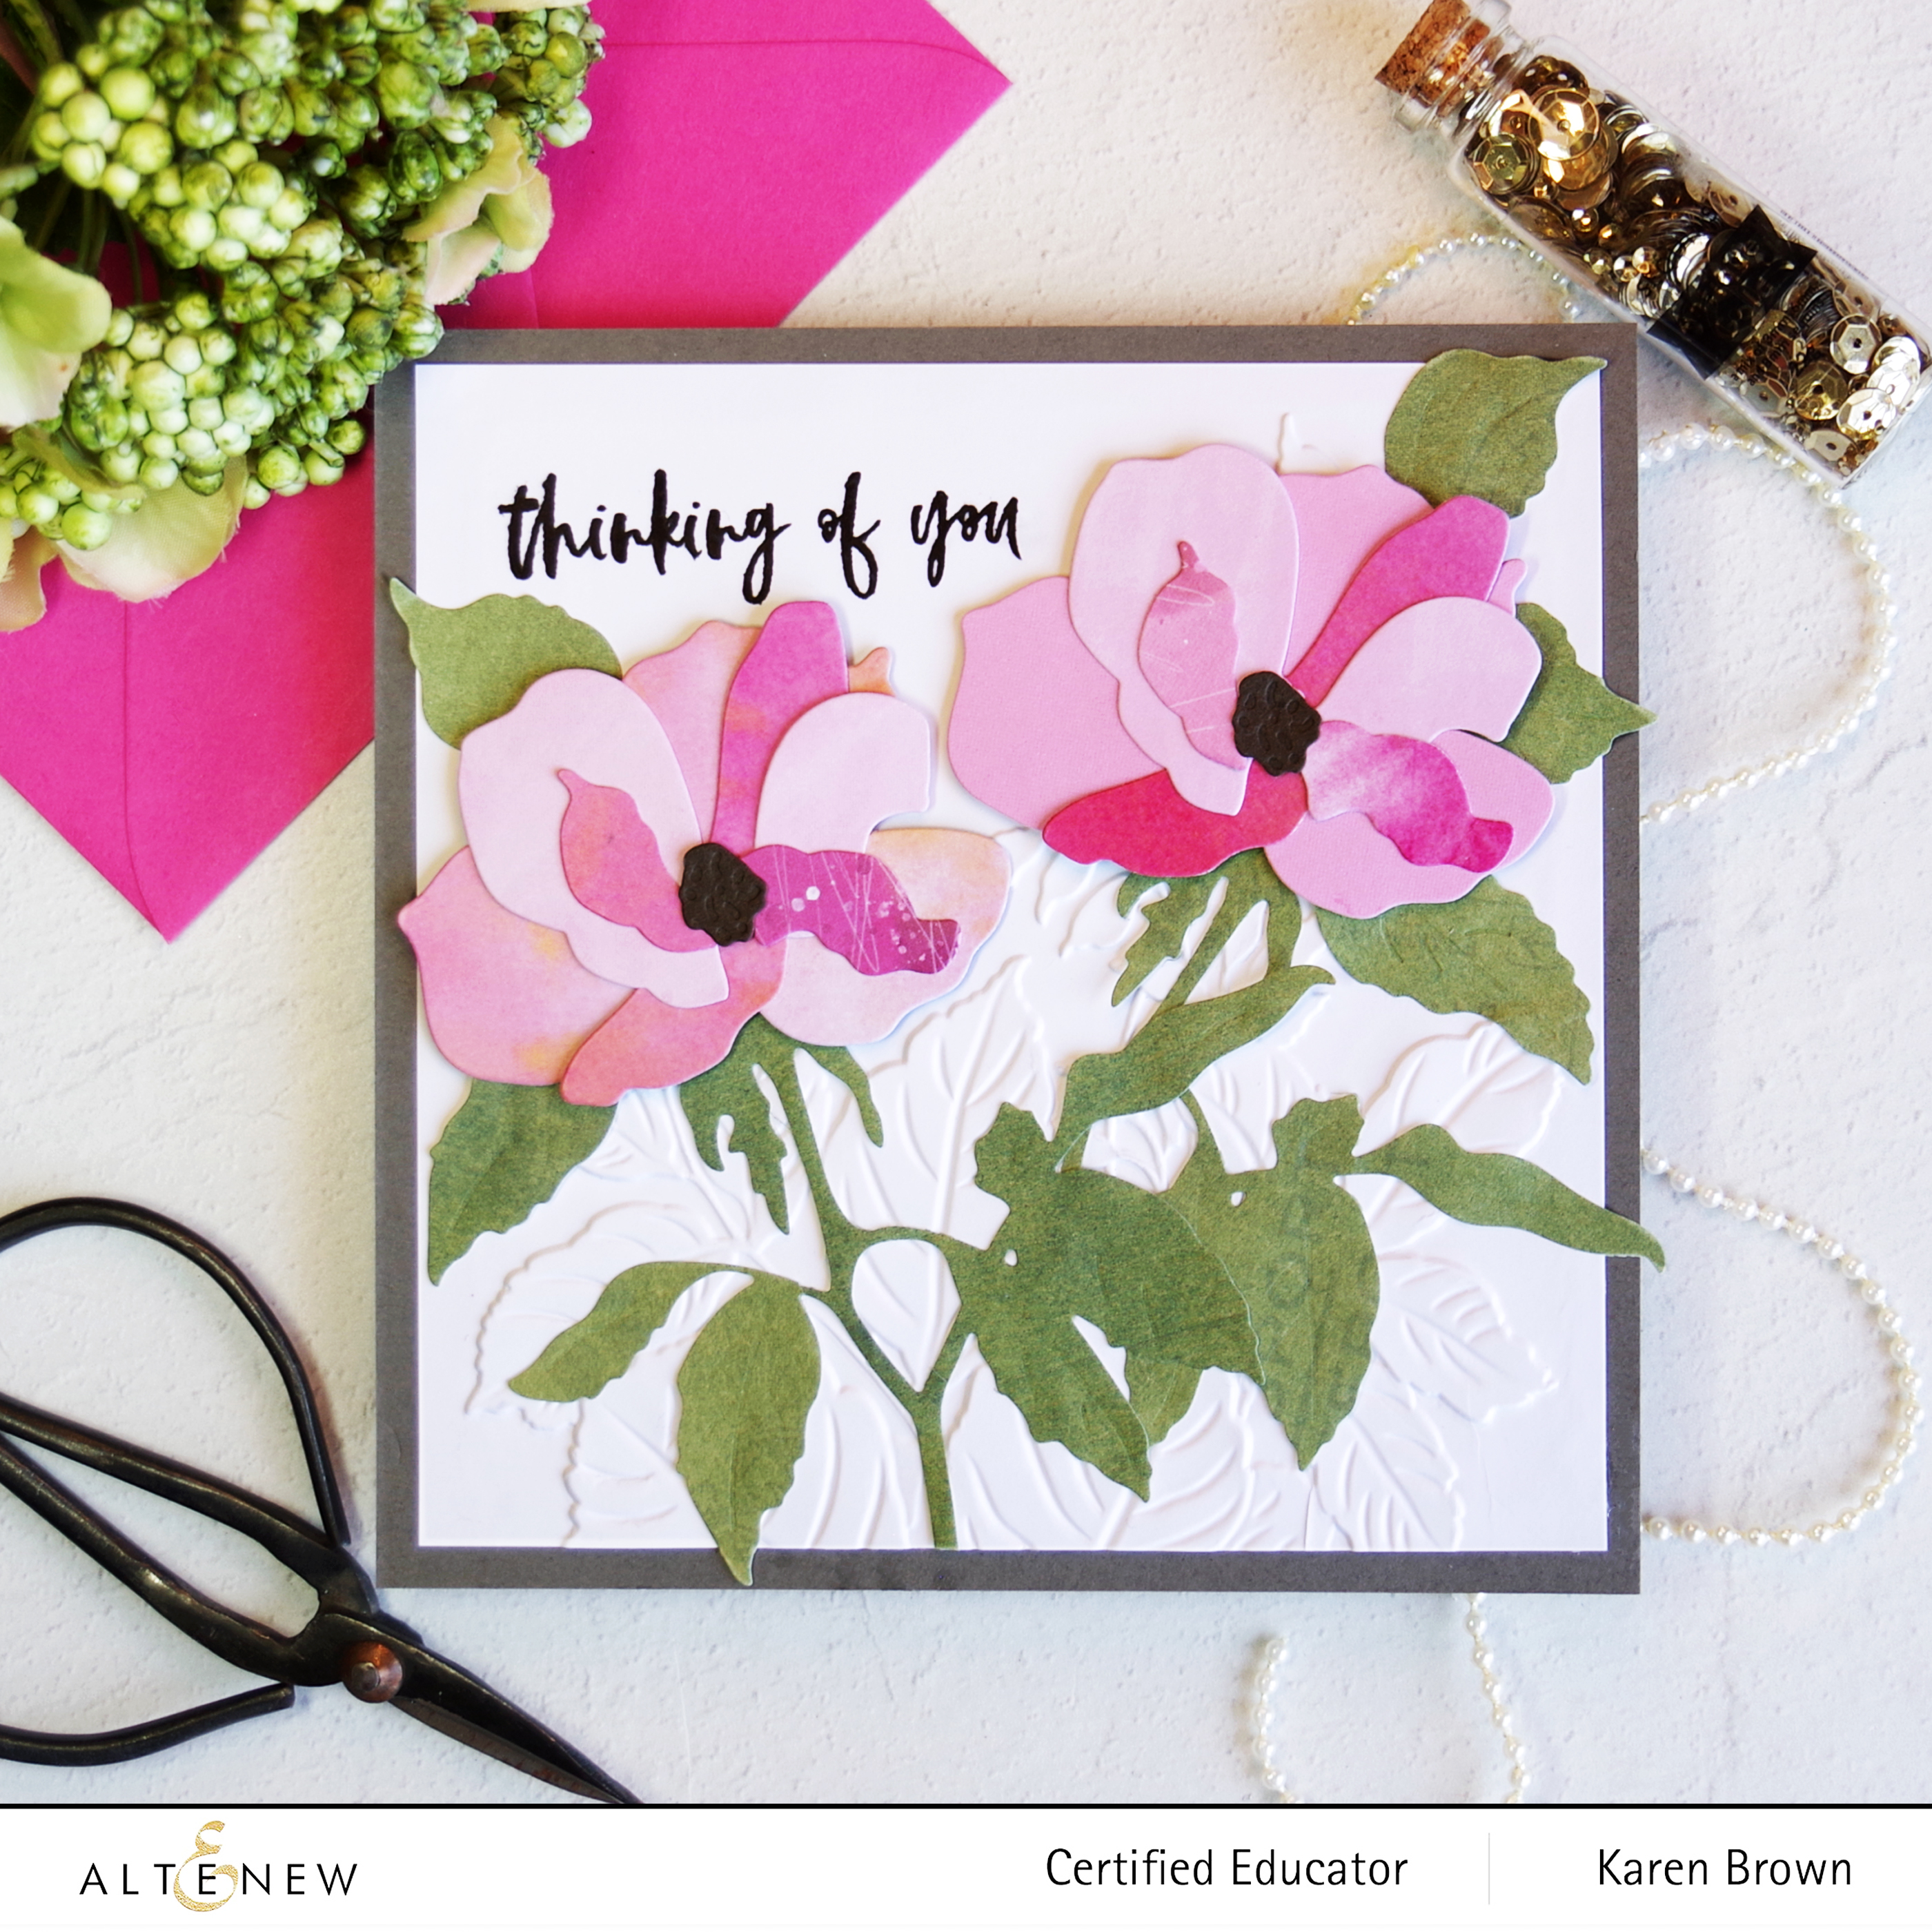
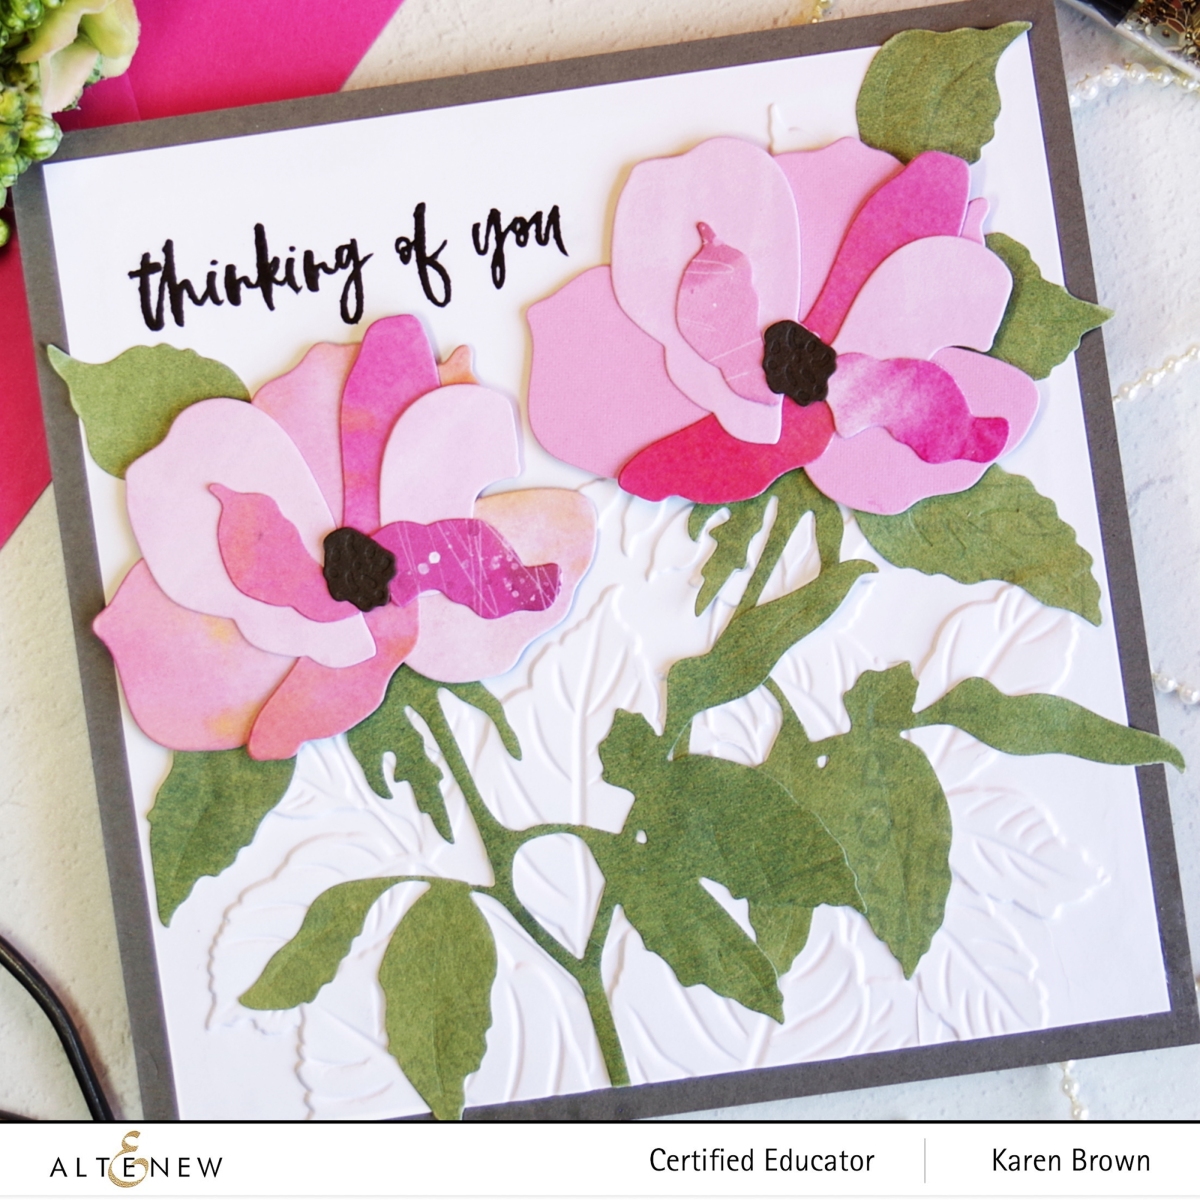
Altenew’s Craft-A-Flower kits are favorites that I use frequently. This month kit has roses, which are a classic. And, I LOVE the leaves in this month’s kit! I know I will be pulling the leaf dies out to use with future die kits.
I die cut my roses from pinks from two of Altenew’s designer paper packs and the background is from a just released 3D Embossing Folder. The “keyholes” make lining up the die-cut layers so easy!
$300 in total prizes! To celebrate this release, Altenew is giving away a $50 gift certificate to 2 lucky winners and a $25 gift certificate to 8 winners! Please leave a comment on the Altenew Card Blog and/or each designer’s blog post on the blog hop list below by 07/18/2022 for a chance to win.
Altenew will draw 10 random winners from the comments left on each stop of this blog hop and announce the winners on the Altenew Winners Page on 07/20/2022.
Hello friend! I am excited to show you some of Altenew’s new products in their wonderful July release. To kick off the release, Altenew is hosting a fun Blog Hop and we hope you will visit each stop.
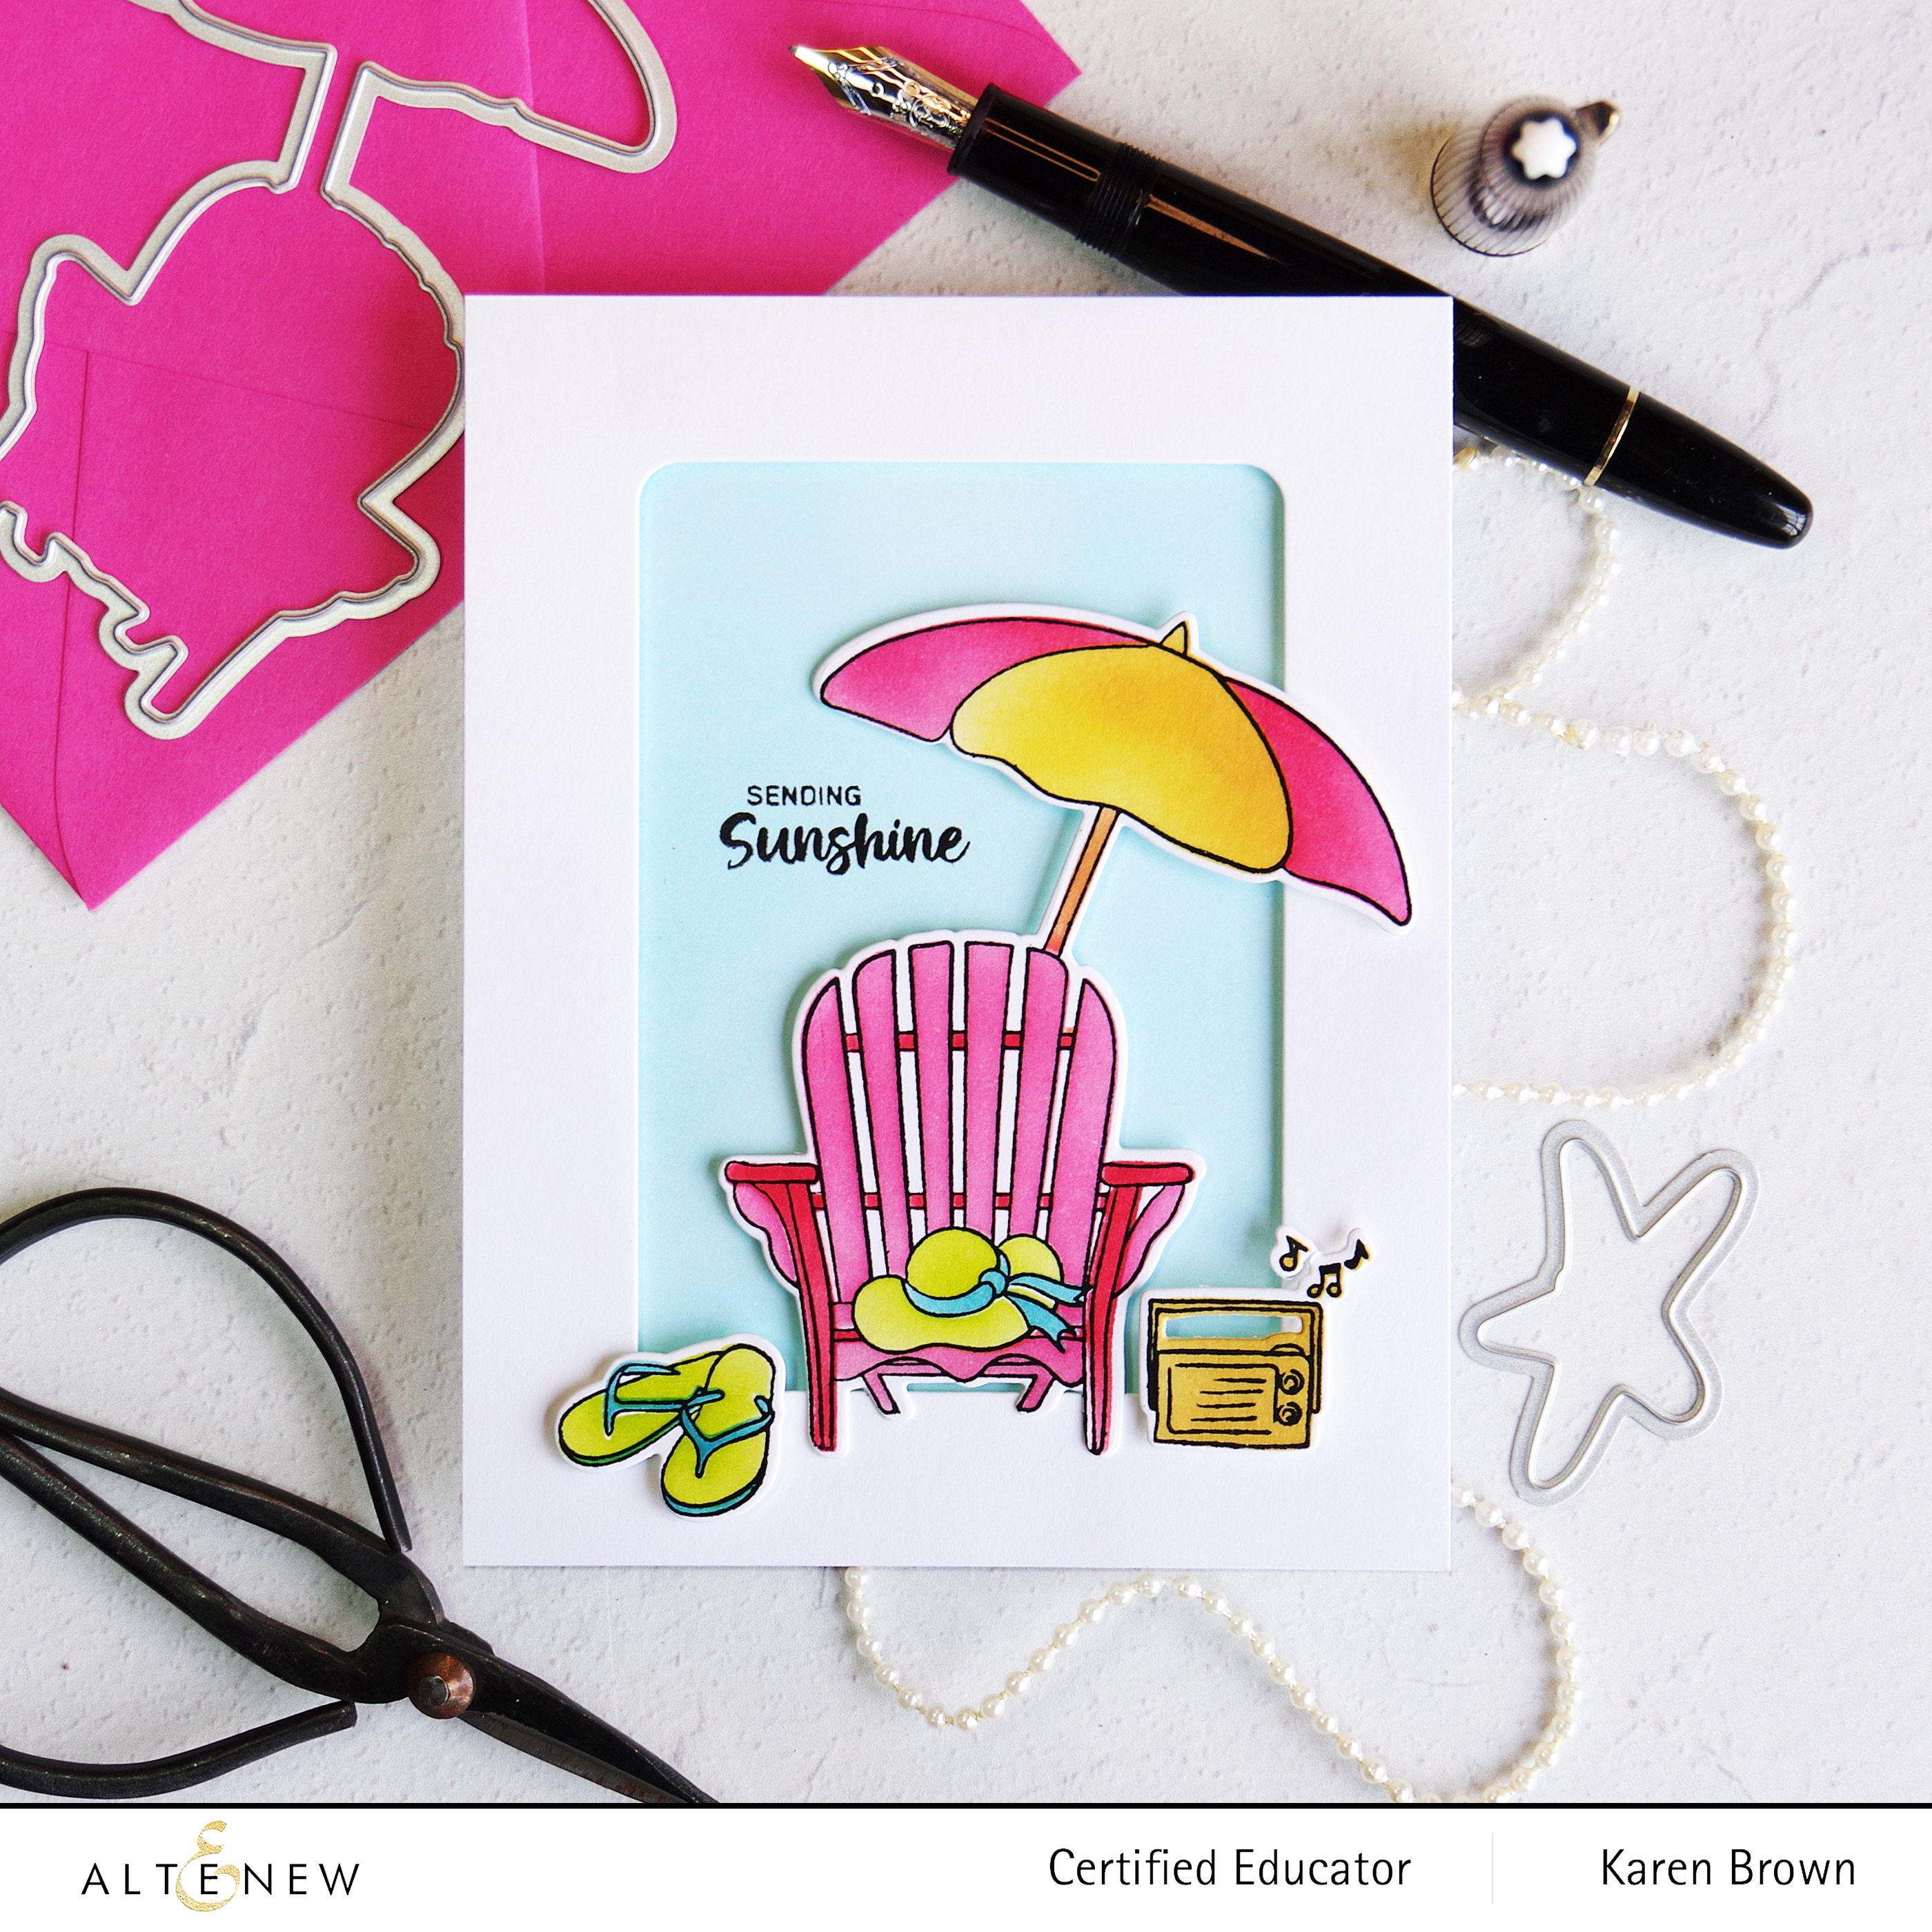
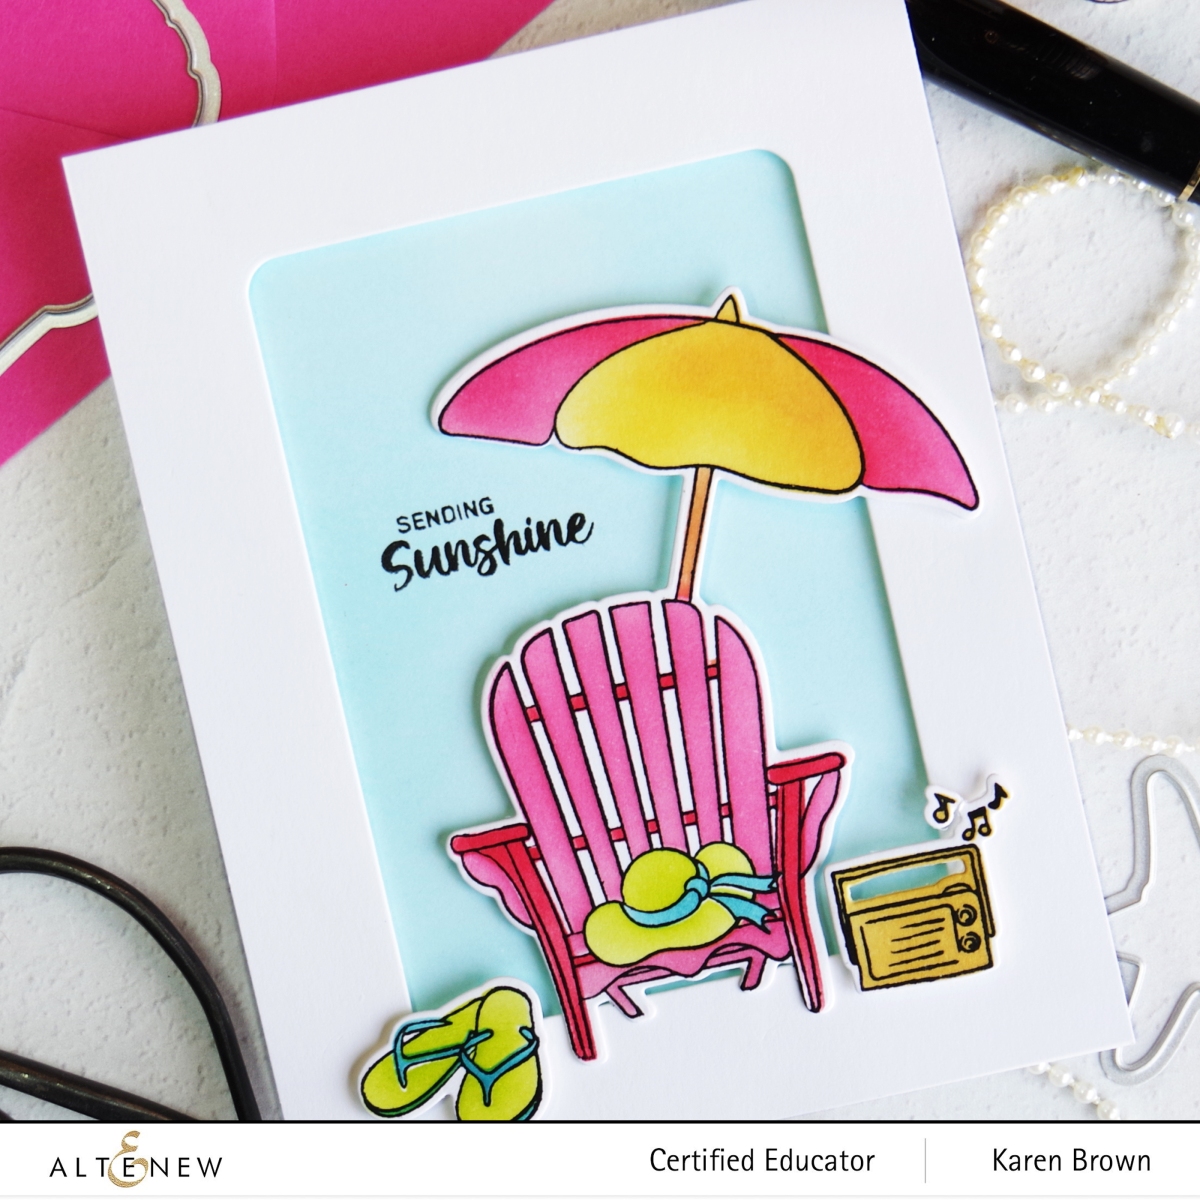
I’d like to start with the Summer Wishes Bundle which is oh, so fun! For my first card, I created a cozy little beach scene comprised of an adirondack chair, umbrella, radio and flip flops.
I started by ink blending my background with Altenew’s Large Blending Tool + Ocean Waves Crisp Dye Ink. Next, I stamped the elements with black pigment ink and let them dry. I colored the images with the coordinating stencil. I really like the effect of ink blending through stencils and it is so easy to do! To set the stage, I cut a frame using the Rounded Rectangles Die Set. I then die cut each element and assembled my card with foam tape.
Beach Themed Card with Adirondack Chair and Umbrella
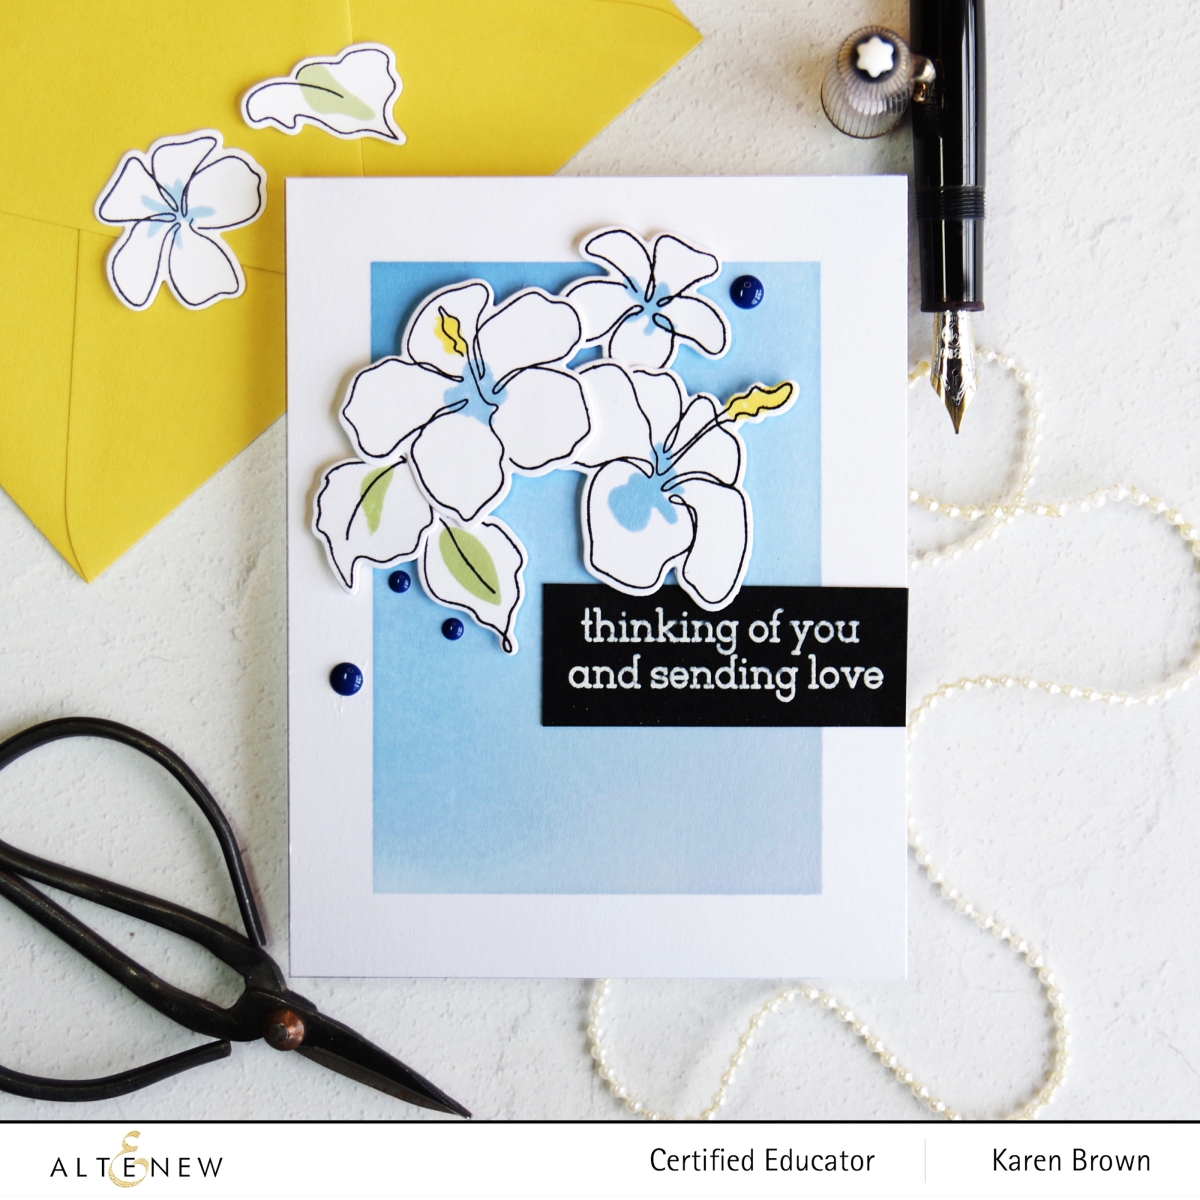
I love the modern look of these loose sketchy outline flower stamps and I know this set will become a favorite that I use over and over again. It is very versatile and would work great on clean and simple projects but I also plan to use it on some mixed media cards.
I started again by ink blending my background. I used the three lightest colors in Altenew’s Glacier Cave Mini Cube Set. I masked off a frame with washi tape and then started in the bottom right with Arctic and then moved darker toward the top left corner. I stamped the flowers and leaves with black pigment ink. Once the outlines were dry, I stamped the flower centers with Caribbean Sky Crisp Dye Ink. I die cut the blooms, assembled with foam tape and then added Glacier Caves Enamel Dots to finish the project.
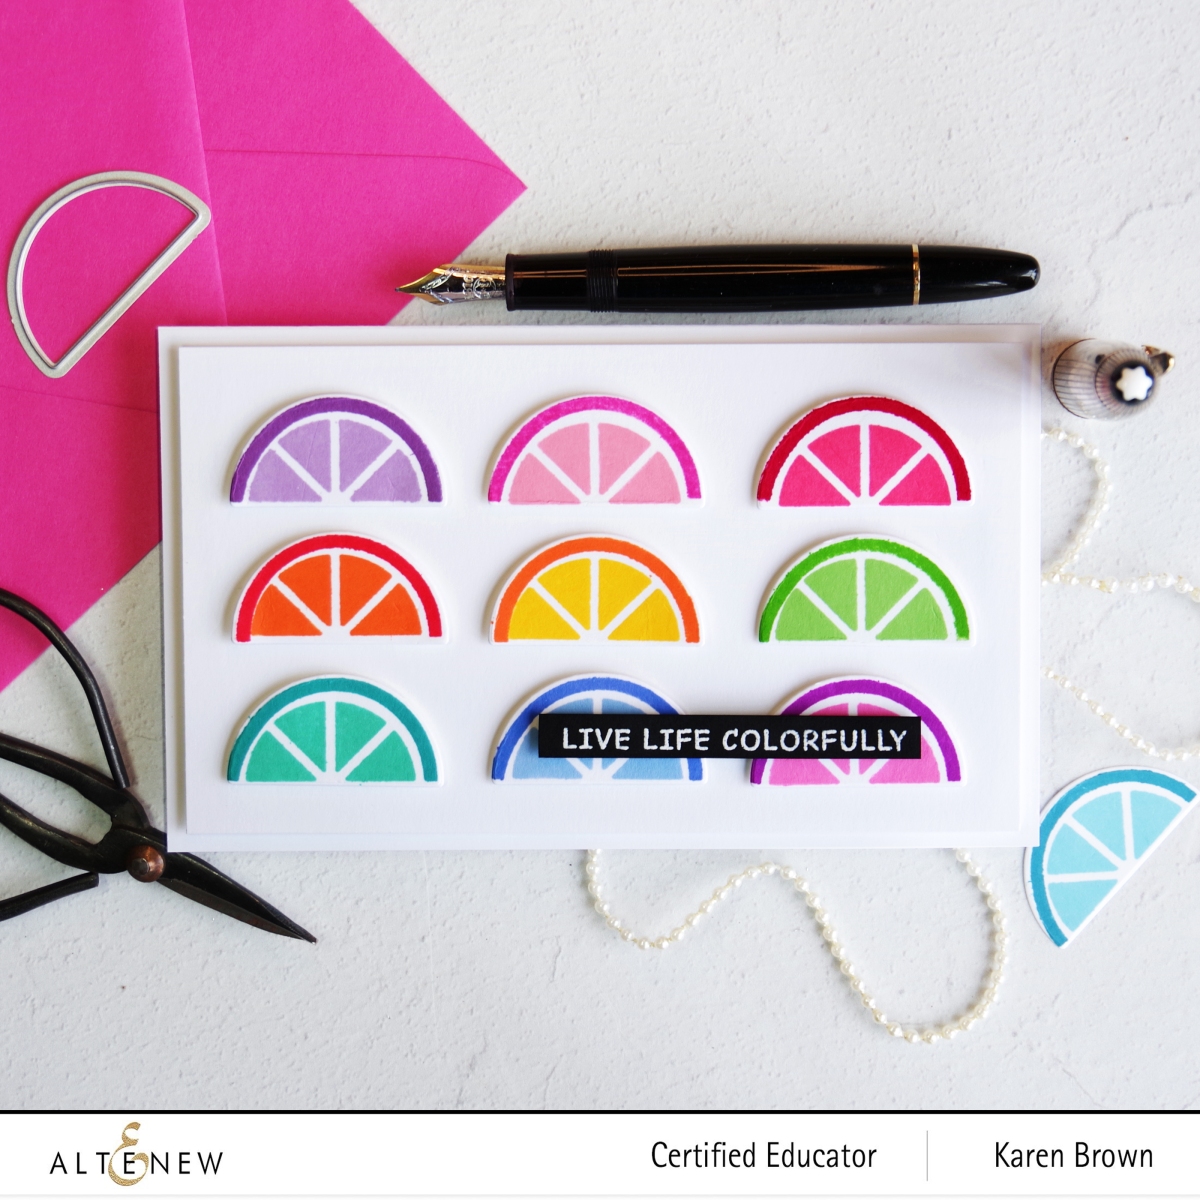
I LOVE citrus, so I couldn’t wait to get this set! I have three Meyer Lemon Trees that are like little babies to me and they were the inspiration for this project.
I wanted a bright happy card so I went with rainbow colors. I started by cutting cardstock into identically sized pieces so I could set up an assembly line for stamping the citrus elements. I stamped the segmented portion on the left side of my Misti and then I moved the panel to the right side and added the rind. With this assembly line, I had all the colors stamped very quickly. All I needed to do was wipe off the ink in between colors. My Mini Blossom Die Cutter made die-cutting a snap. I find it so handy to use on my desk for die cutting smaller elements. I attached the die-cuts (spaced 2″ apart) to a 6 1/4″ x 3 3/4″ panel and added my sentiment.
Get a FREE brand new Summer Sunshine Mini Inspiration Guide with every order from 07/01/2022 through 07/03/2022. Shop HERE!
Get a FREE brand new Summer Sunshine Stamp & Die Release Inspiration Guide Ebook (worth $5.99) with every order of high-value Sweet Moments Bundles. Shop HERE! *Exclusions apply.
Get a FREE brand new Online Cardmaking Class with every order from the new Summer Sunshine Stamp & Die Release Collection from 07/01/2022 through 07/07/2022. Shop HERE!
Giveaway Prizes
$300 in total prizes! To celebrate this release, Altenew is giving away a $50 gift certificate to 2 lucky winners and a $25 gift certificate to 8 winners! Please leave a comment on the Altenew Card Blog and/or each designer’s blog post on the blog hop list below by 07/17/2022 for a chance to win.
Altenew will draw 10 random winners from the comments left on each stop of this blog hop and announce the winners on the Altenew Winners Page on 07/19/2022.
Hello and welcome! You are probably here “hopping” with the Altenew Educators and I am pleased you stopped by! To start at the beginning of Altenew’s Hop, please click HERE.
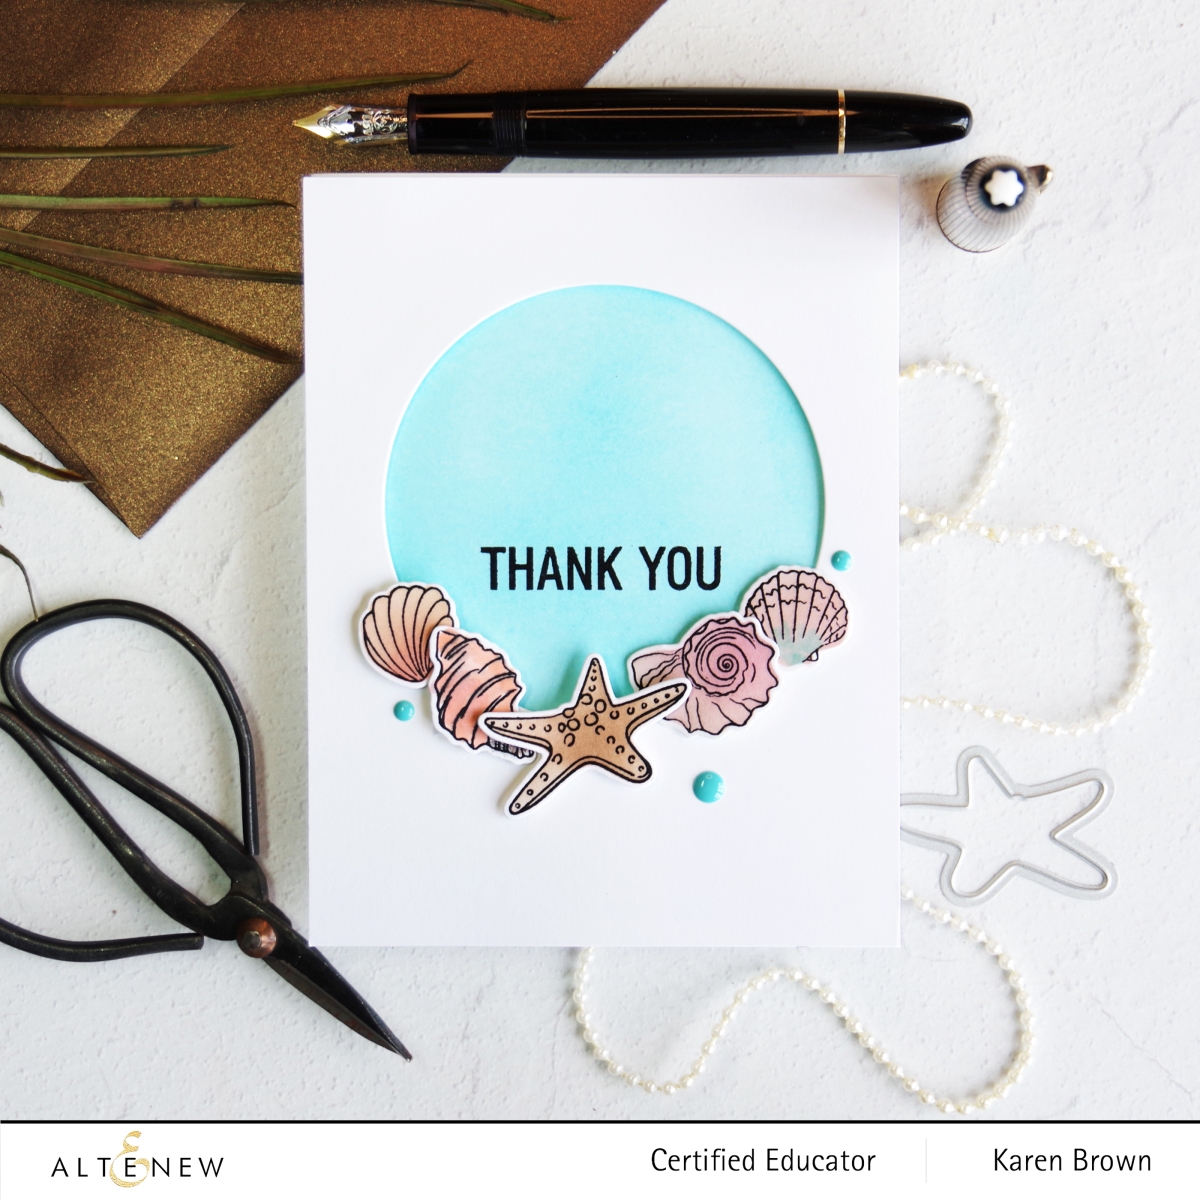
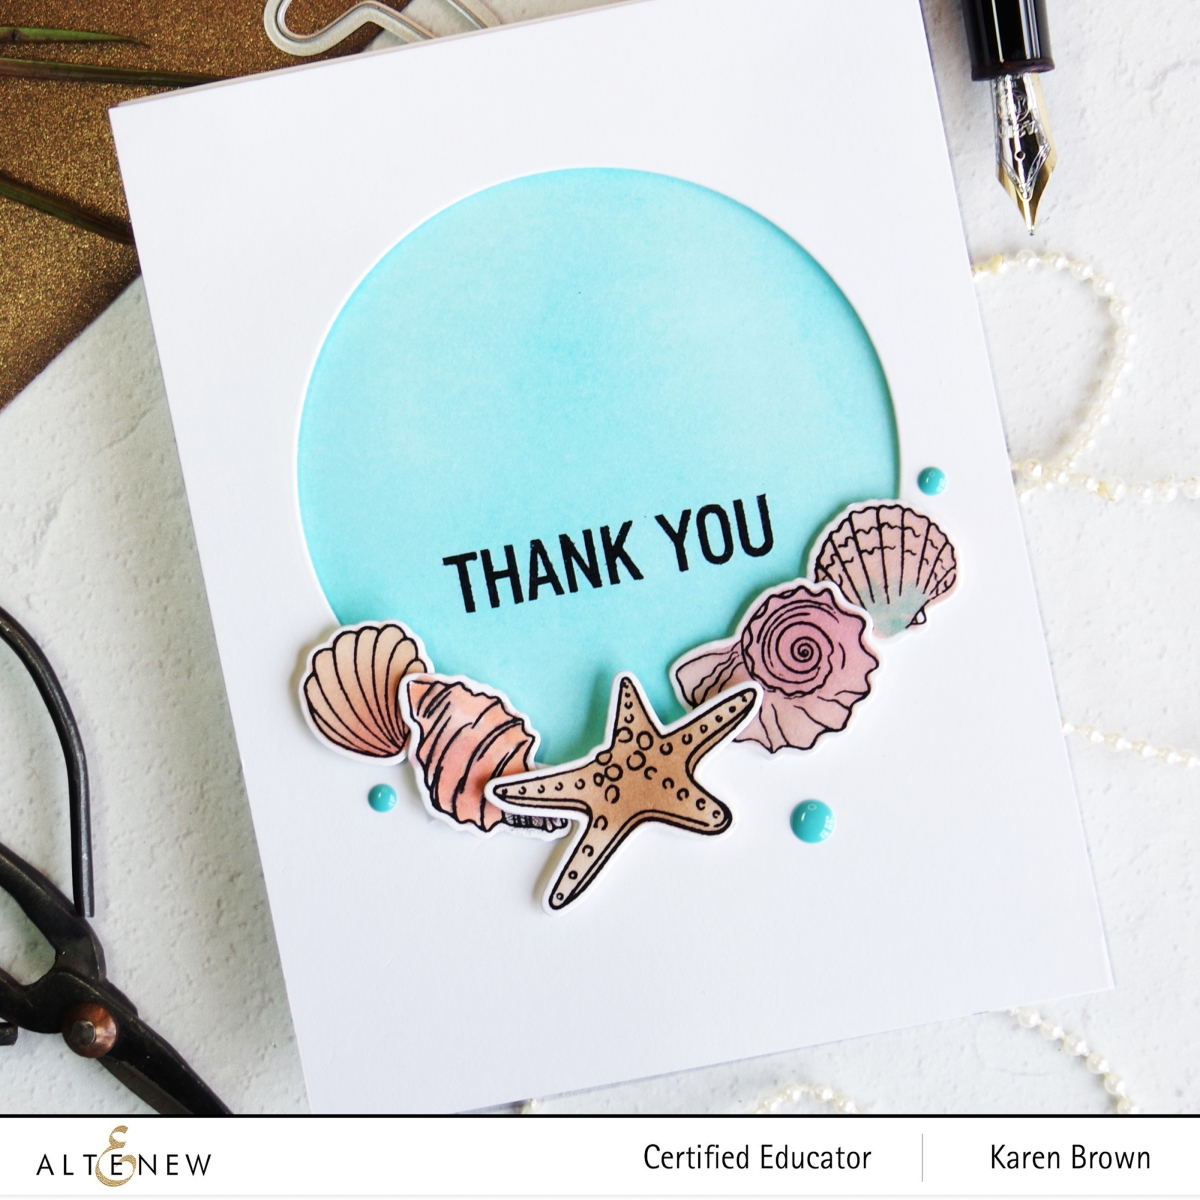
Today I have two clean and simple cards to share. This is not my typical style, but I do love CAS cards. To me, Clean and Simple means LOTs of white space. To make that work, I like contrast so I used bold colors and black accents to make my card pop.
I think it would be fun to make a pack with thank you sentiments for a handmade gift.
Prizes:
$130 in total prizes! Altenew is giving away a $20 gift certificate to 3 lucky winners and a $15 gift certificate to 4 winners! To win, please comment on the Altenew Card Blog and/or each designer’s blog post on the blog hop list below by 07/03/2022.
There’s MORE! Join our party! We have included an Inlinkz at the Altenew blog for you to enter your beautiful, Altenew “Clean and Simple” creations.
We will pick one of our favorite handmade creations from those who joined the linky party, and they will receive a $10 Altenew gift certificate!
Altenew will draw 5 random winners from the comments left on each blog hop stop and announce the winners on the Altenew Winners Page on 07/04/2022.
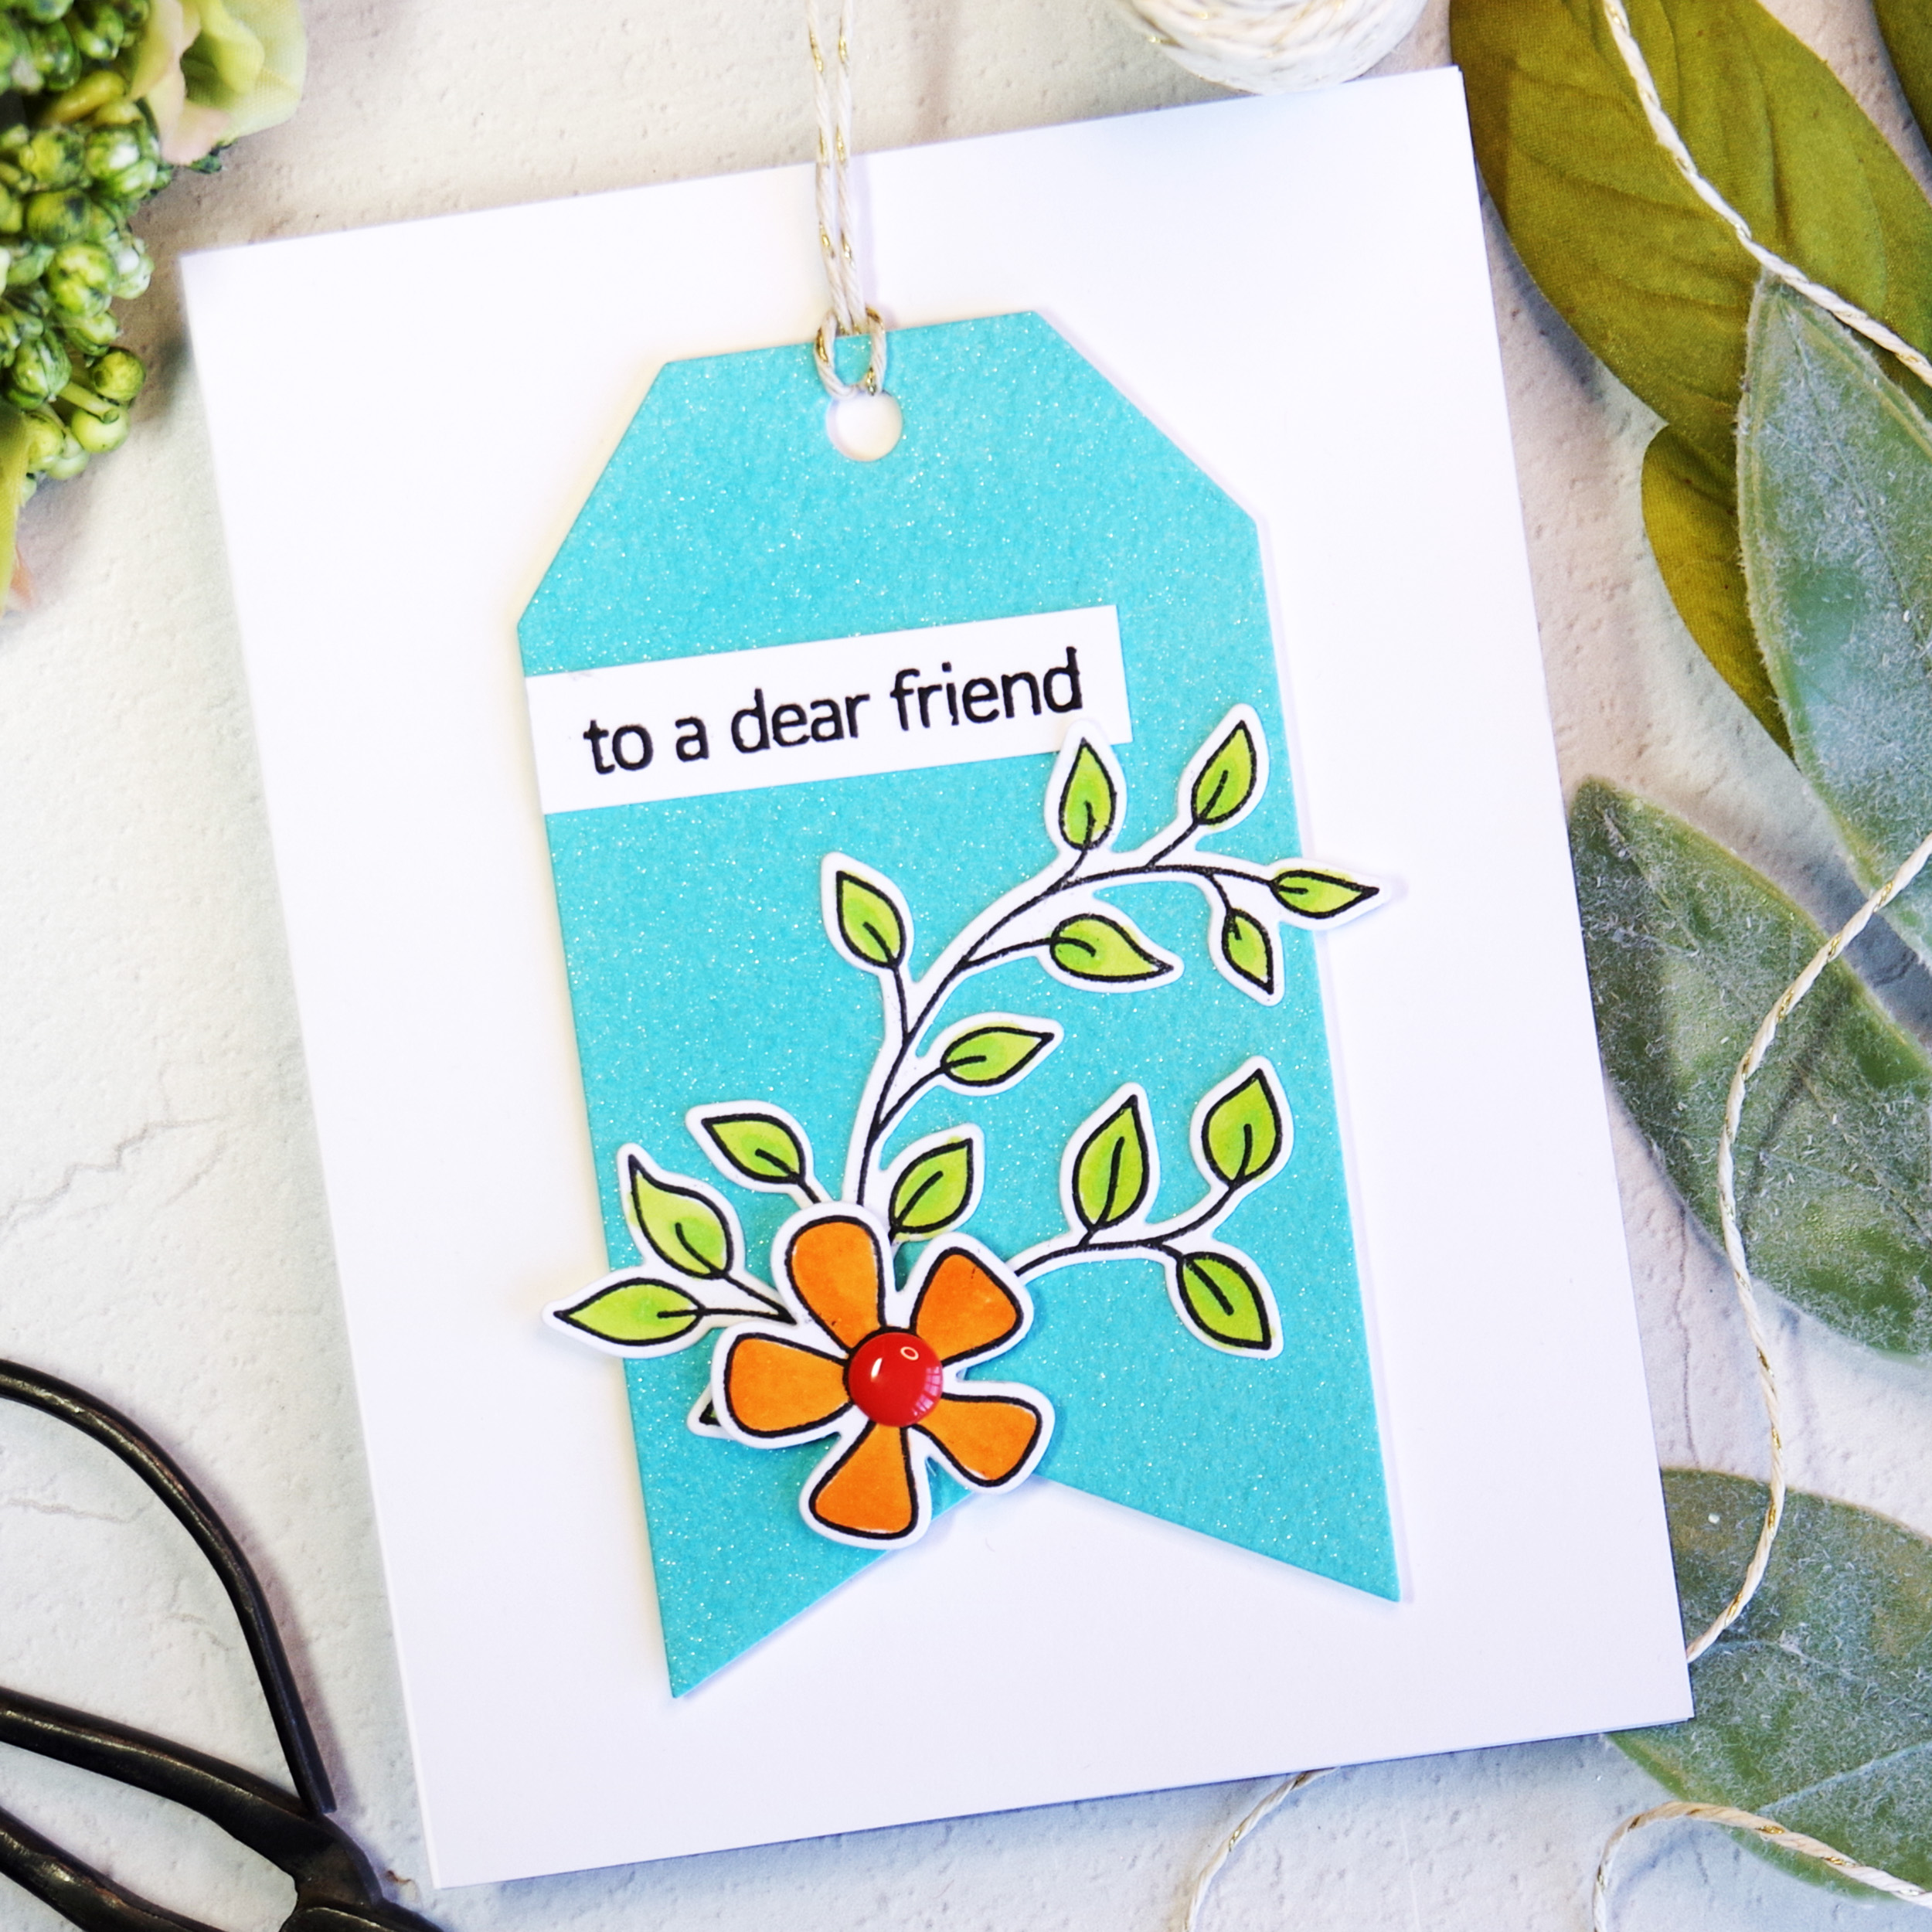
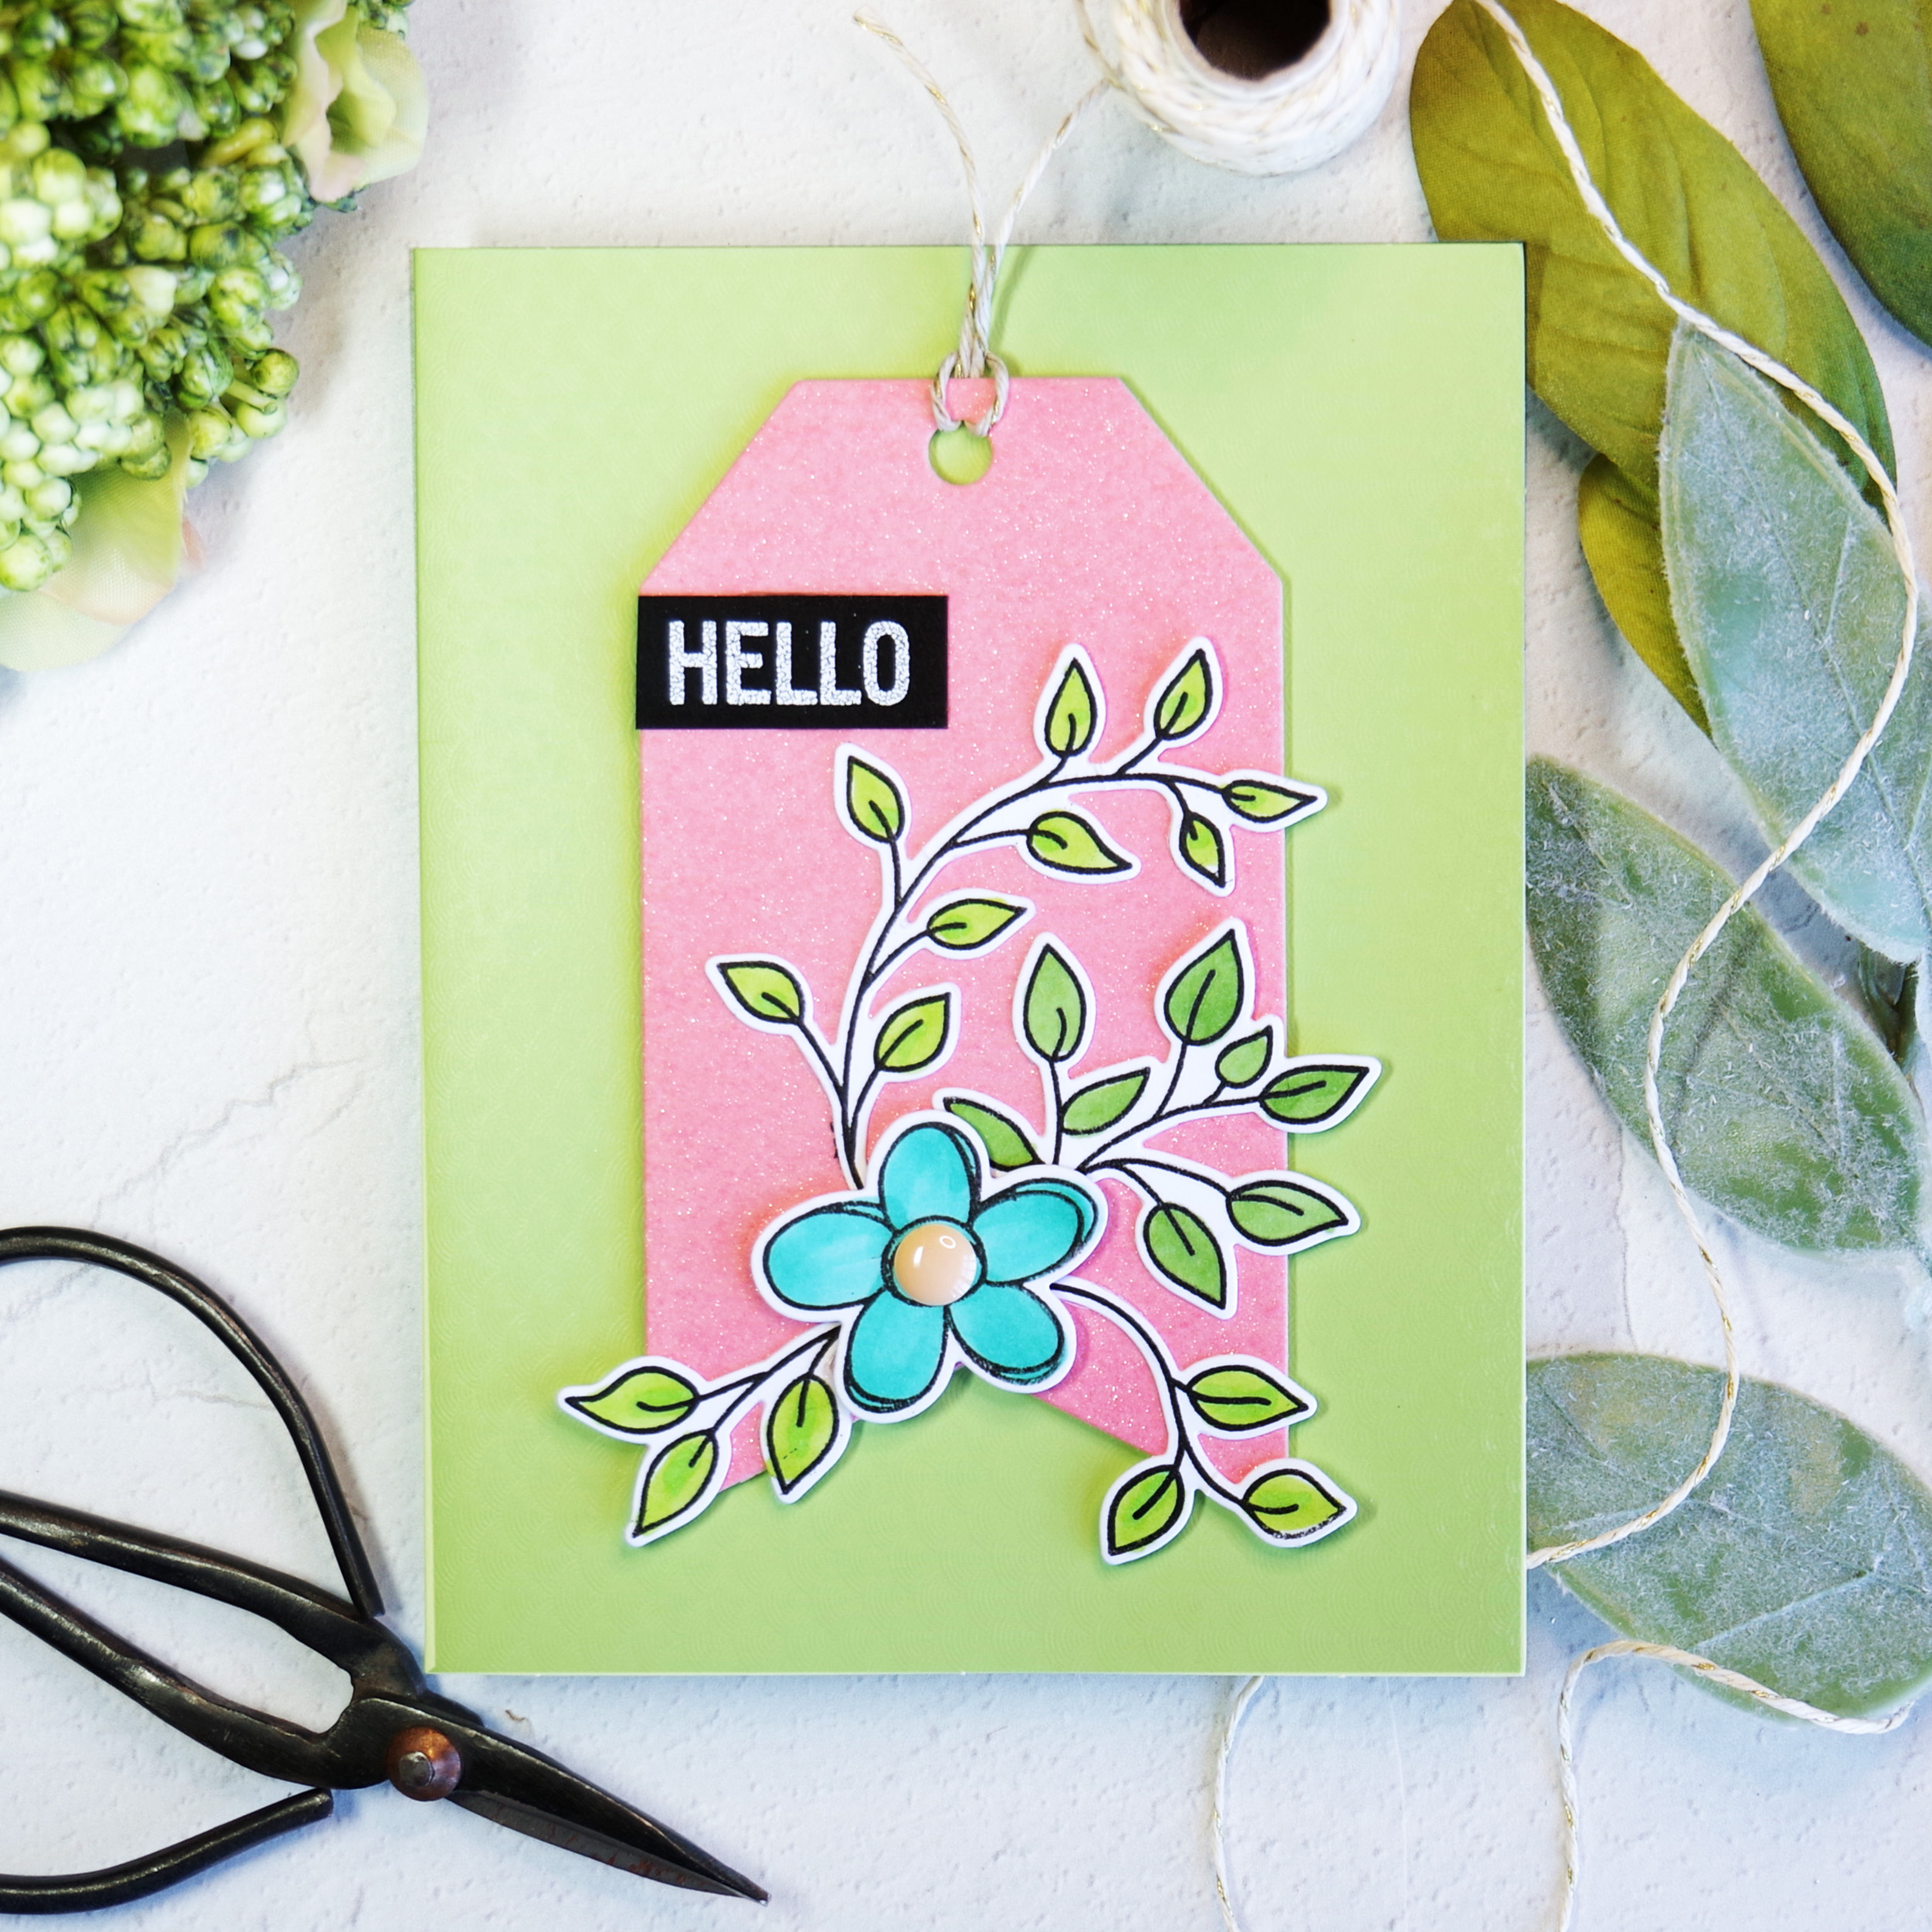
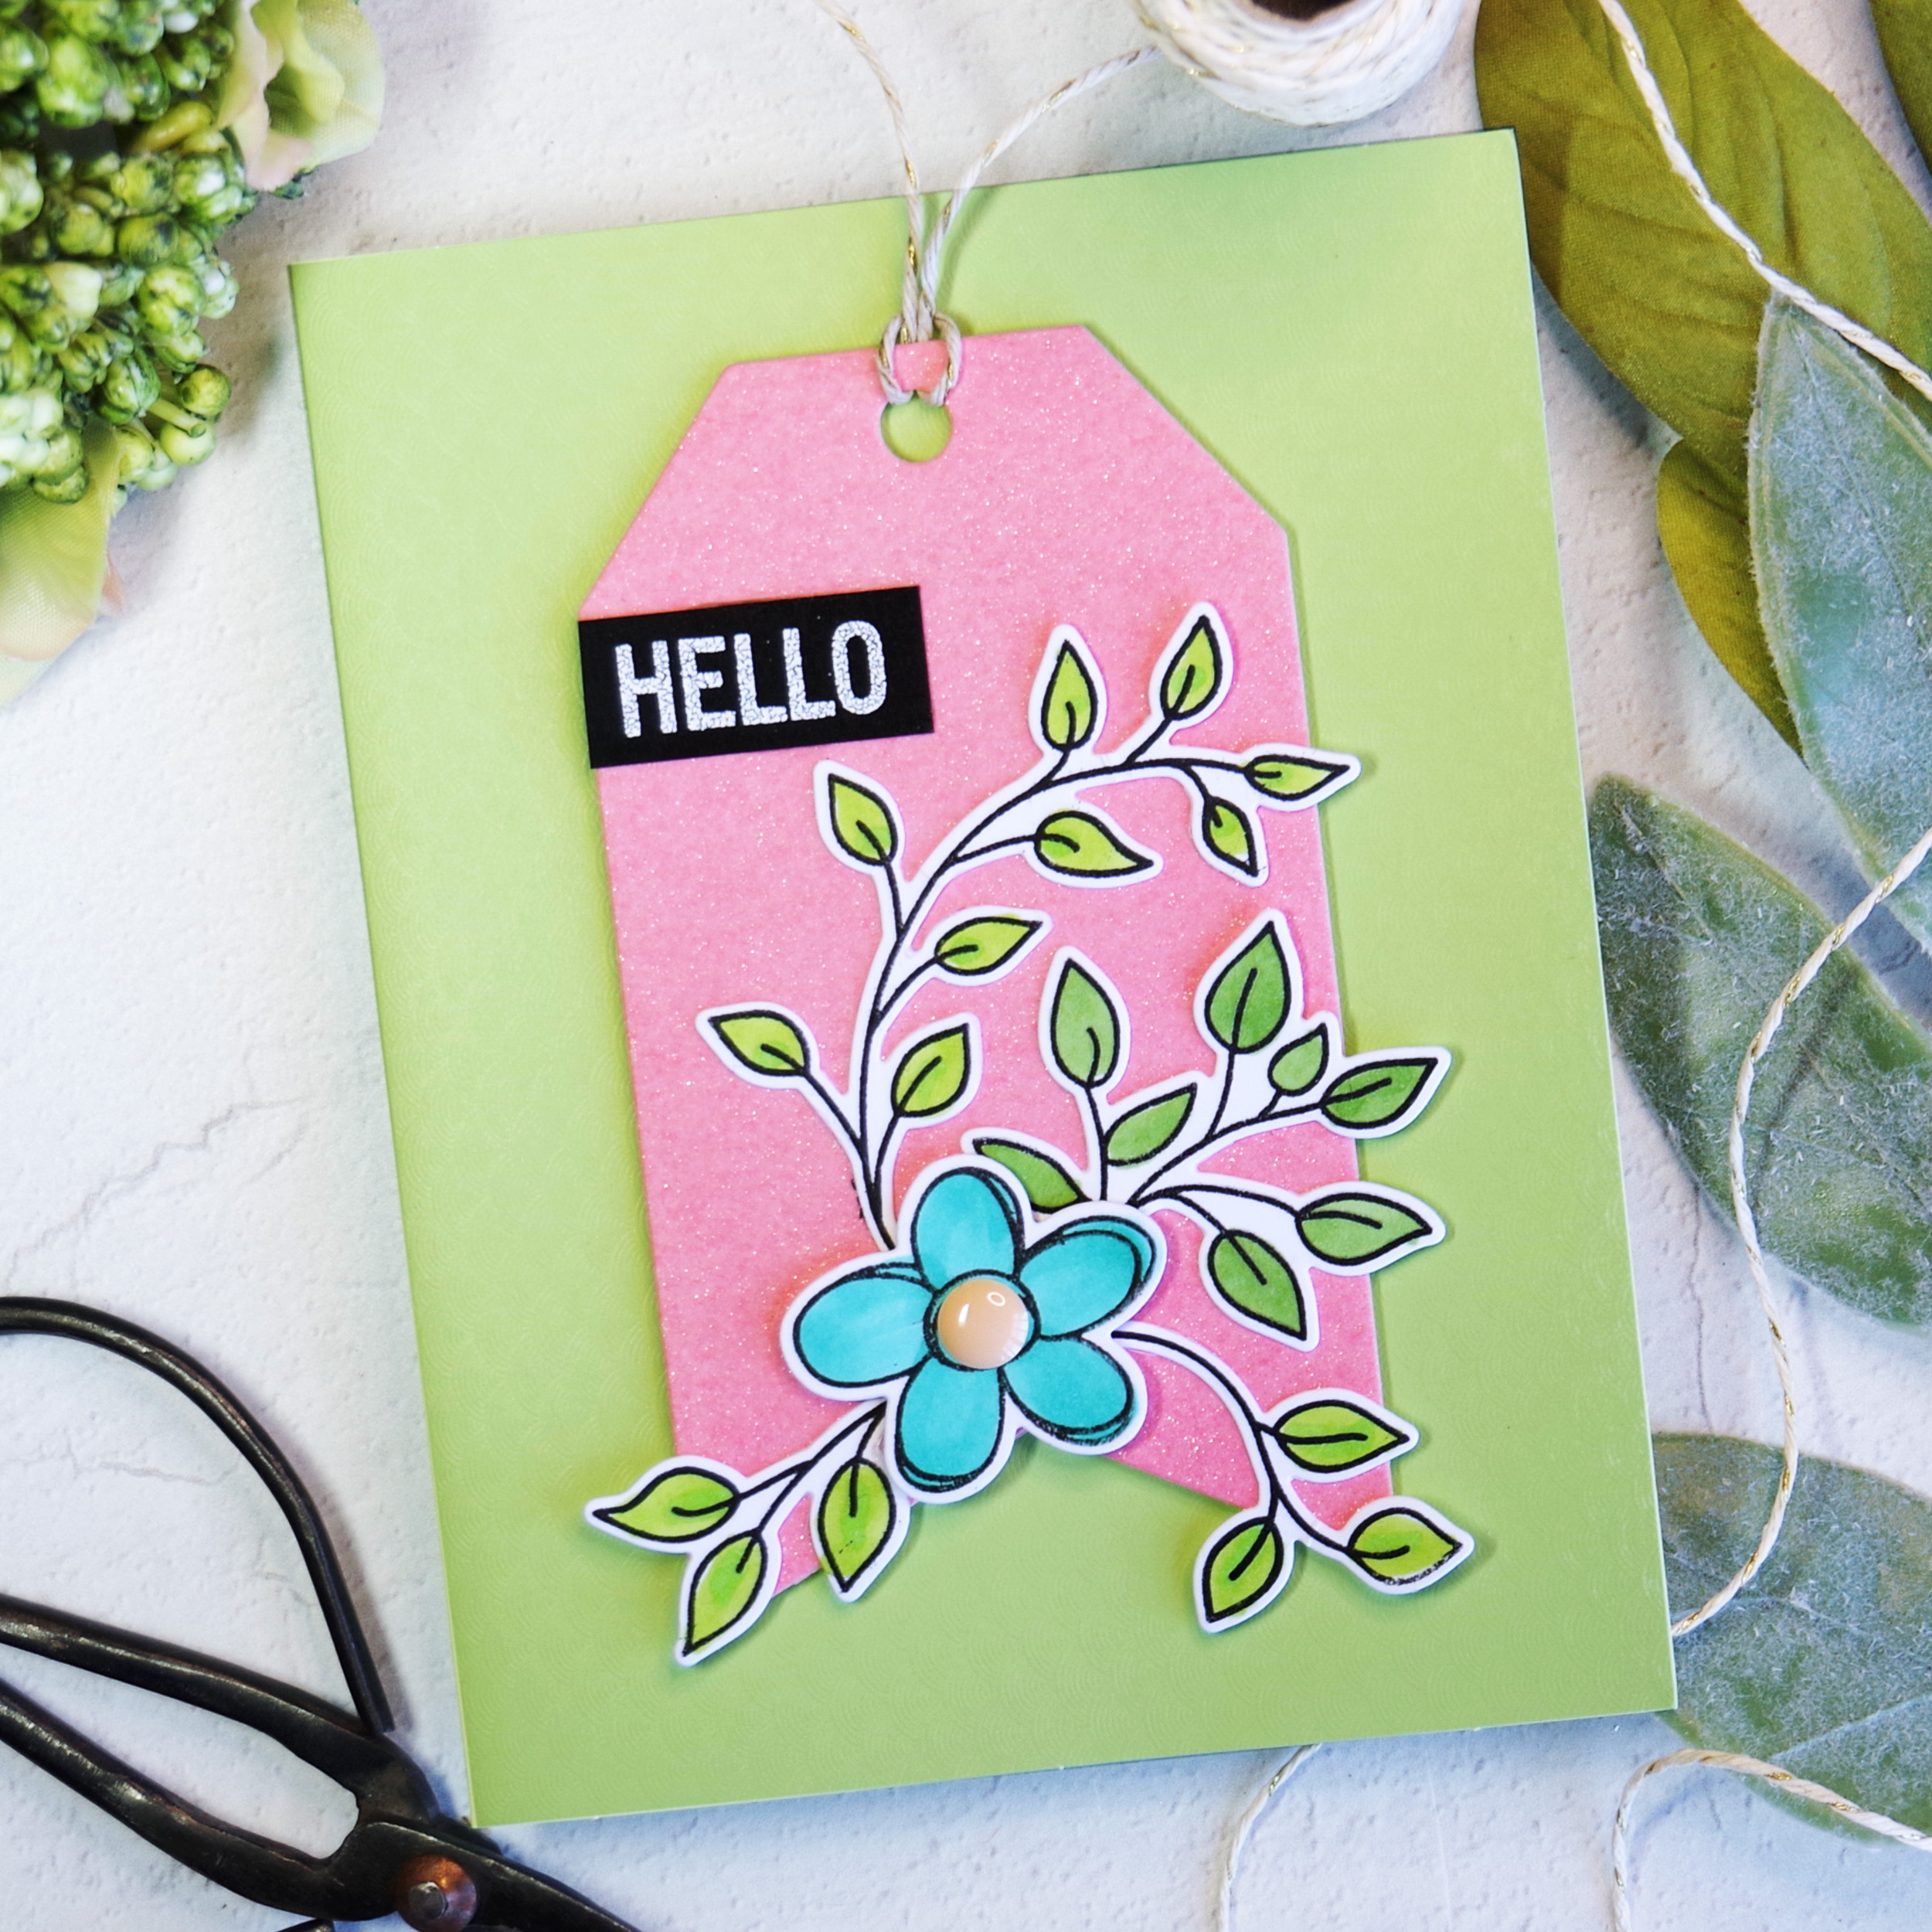
Hello and welcome! Don’t you just love bright summery colors? I recently posted about how to make your own glitter cardstock which I then turned into tags. I decided to take it a step further, and turned two of my tags into cards.
The Educators at Altenew are hopping on Intstagram and the theme is “Background Check – it’s All About the Background“! I wanted to combine fun backgrounds with Majestic Bouquet, my favorite floral stamp layering set from the past year. I think it is just gorgeous done in blues!
For my background I used Altenew’s Cross Stitch Cover Die . I ran the cover die through my die-cutting machine and then cut out a tag using Altenew’s Terrific Tags die set. The little perferations add just the right amount of interest to showcase the beautiful floral bloom.
Other than the enamel dots, all that was needed was a bit of ribbon or twine.
If you would like to see my first post using Altenew’s Majestic Bouquet, click HERE. My Majestic Blooms Instagram post made my “Top 9” for 2021. 🙂
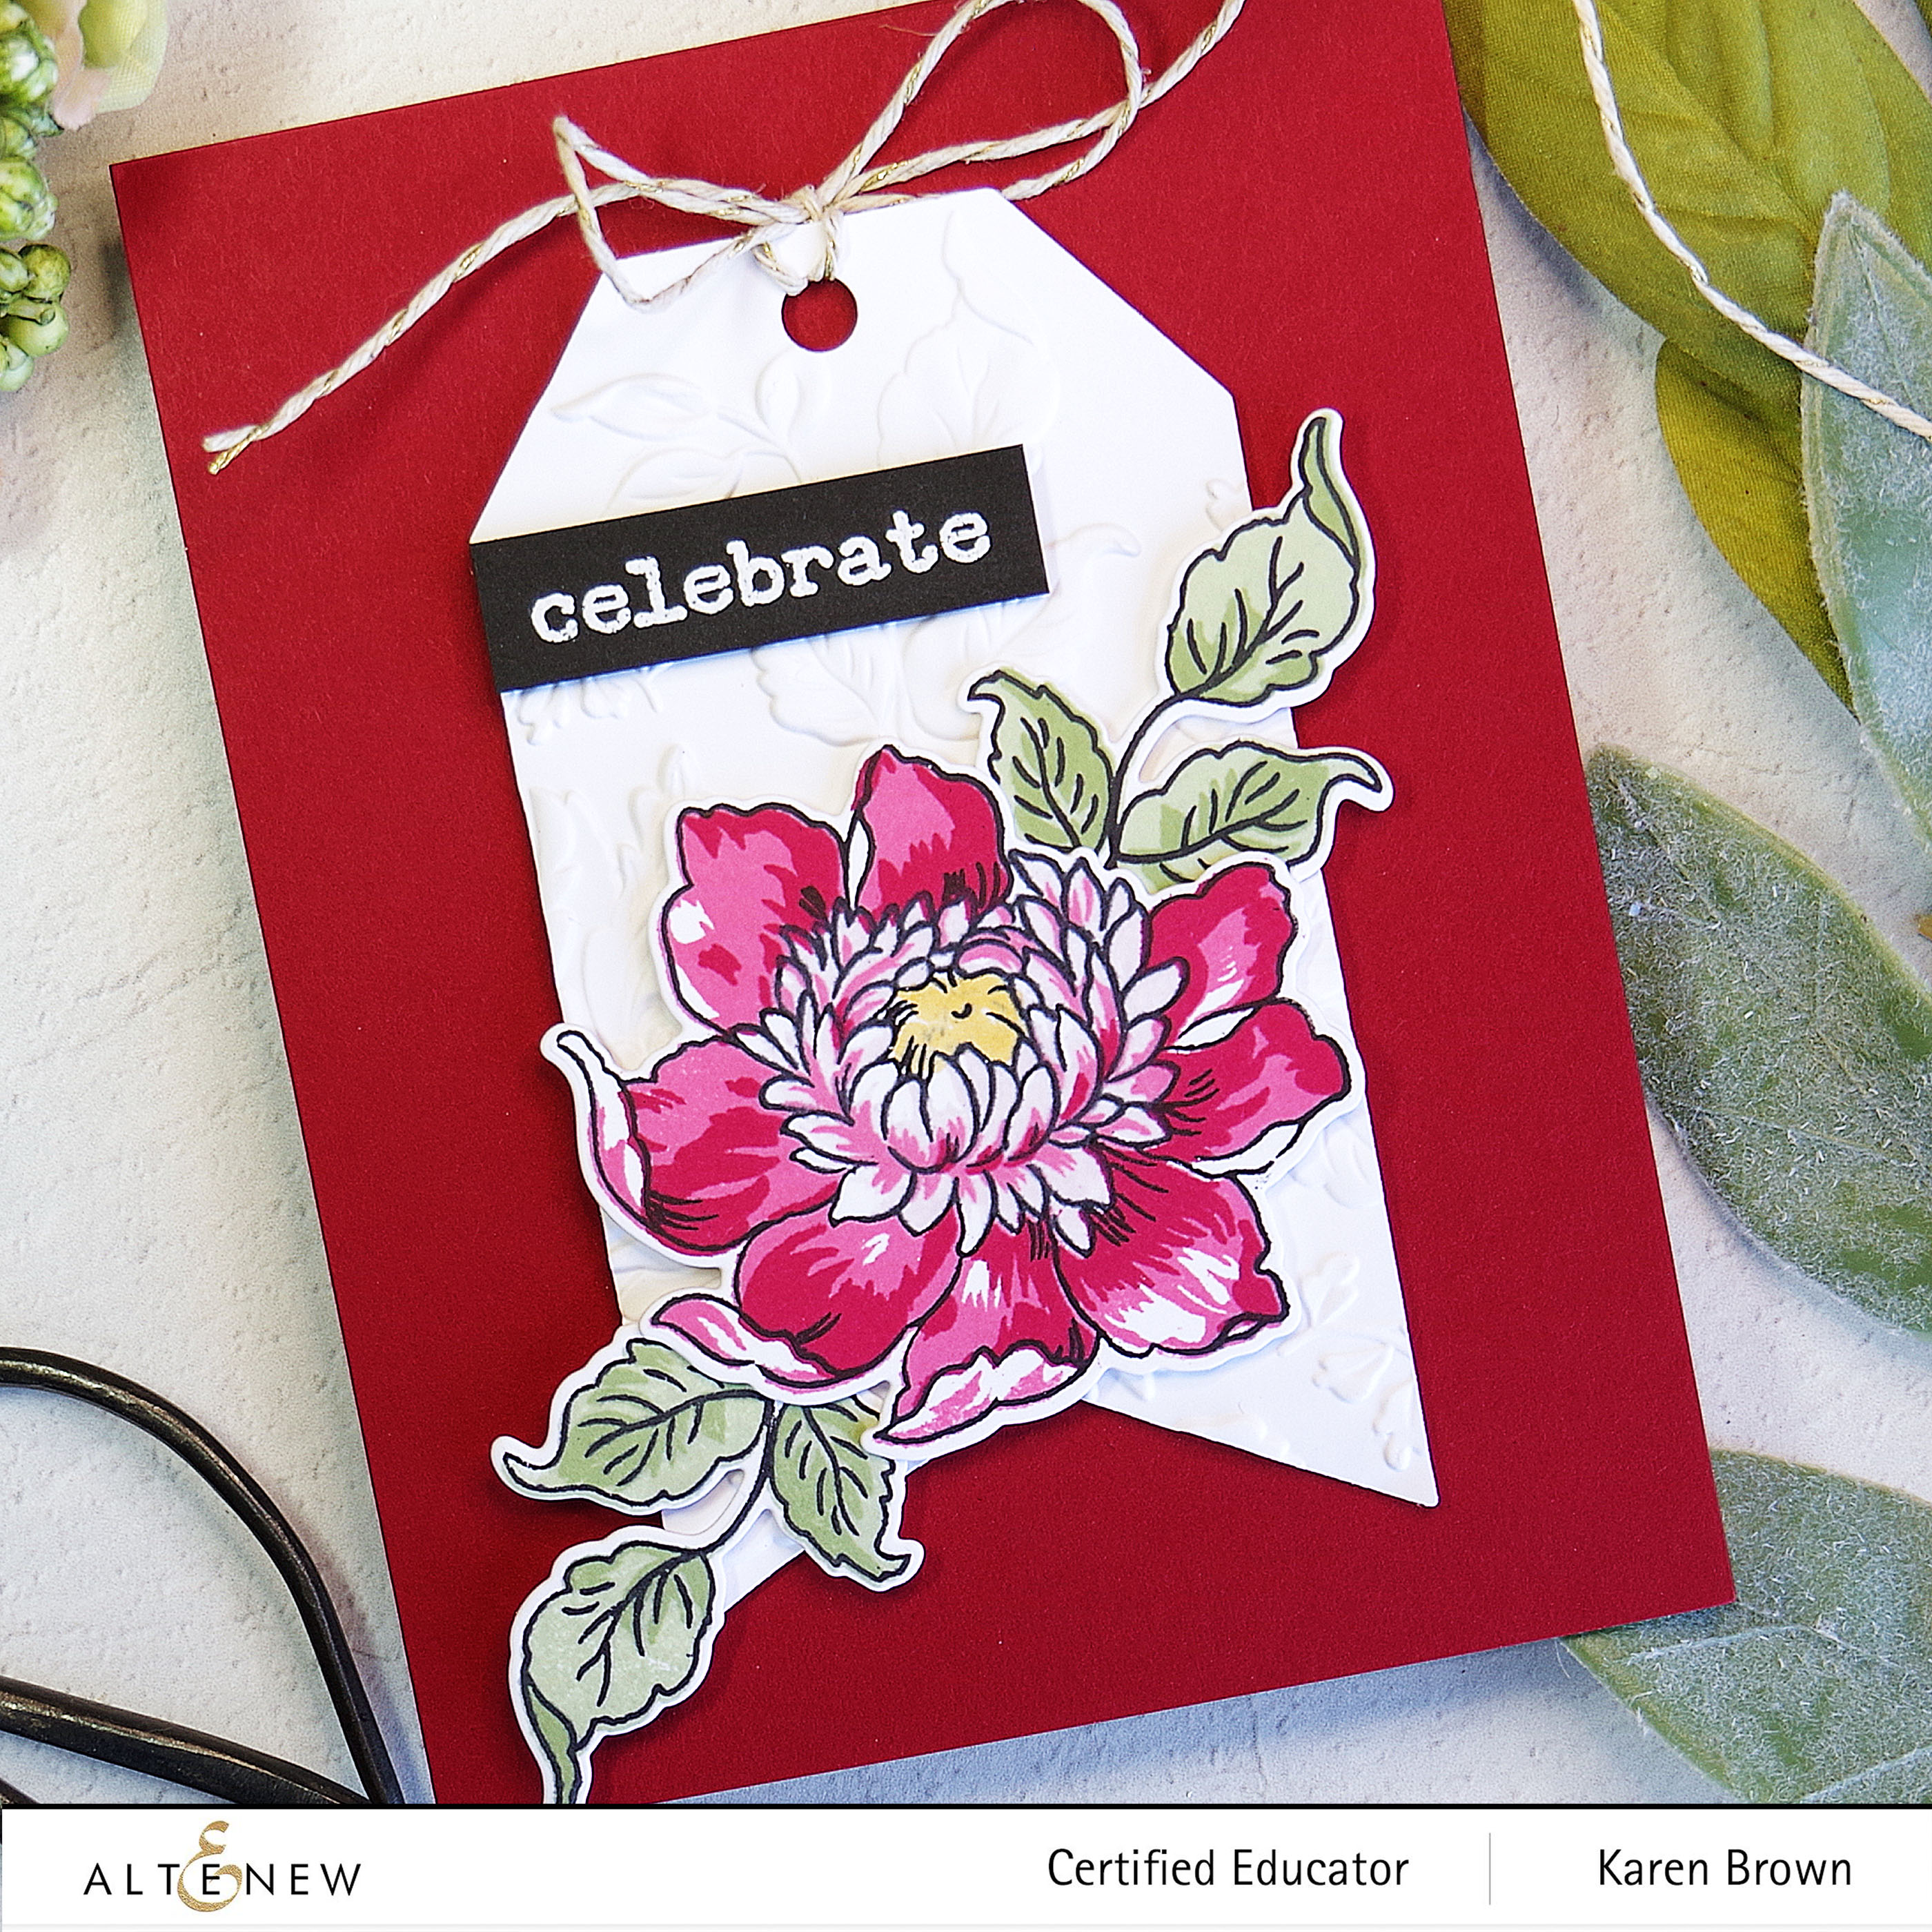
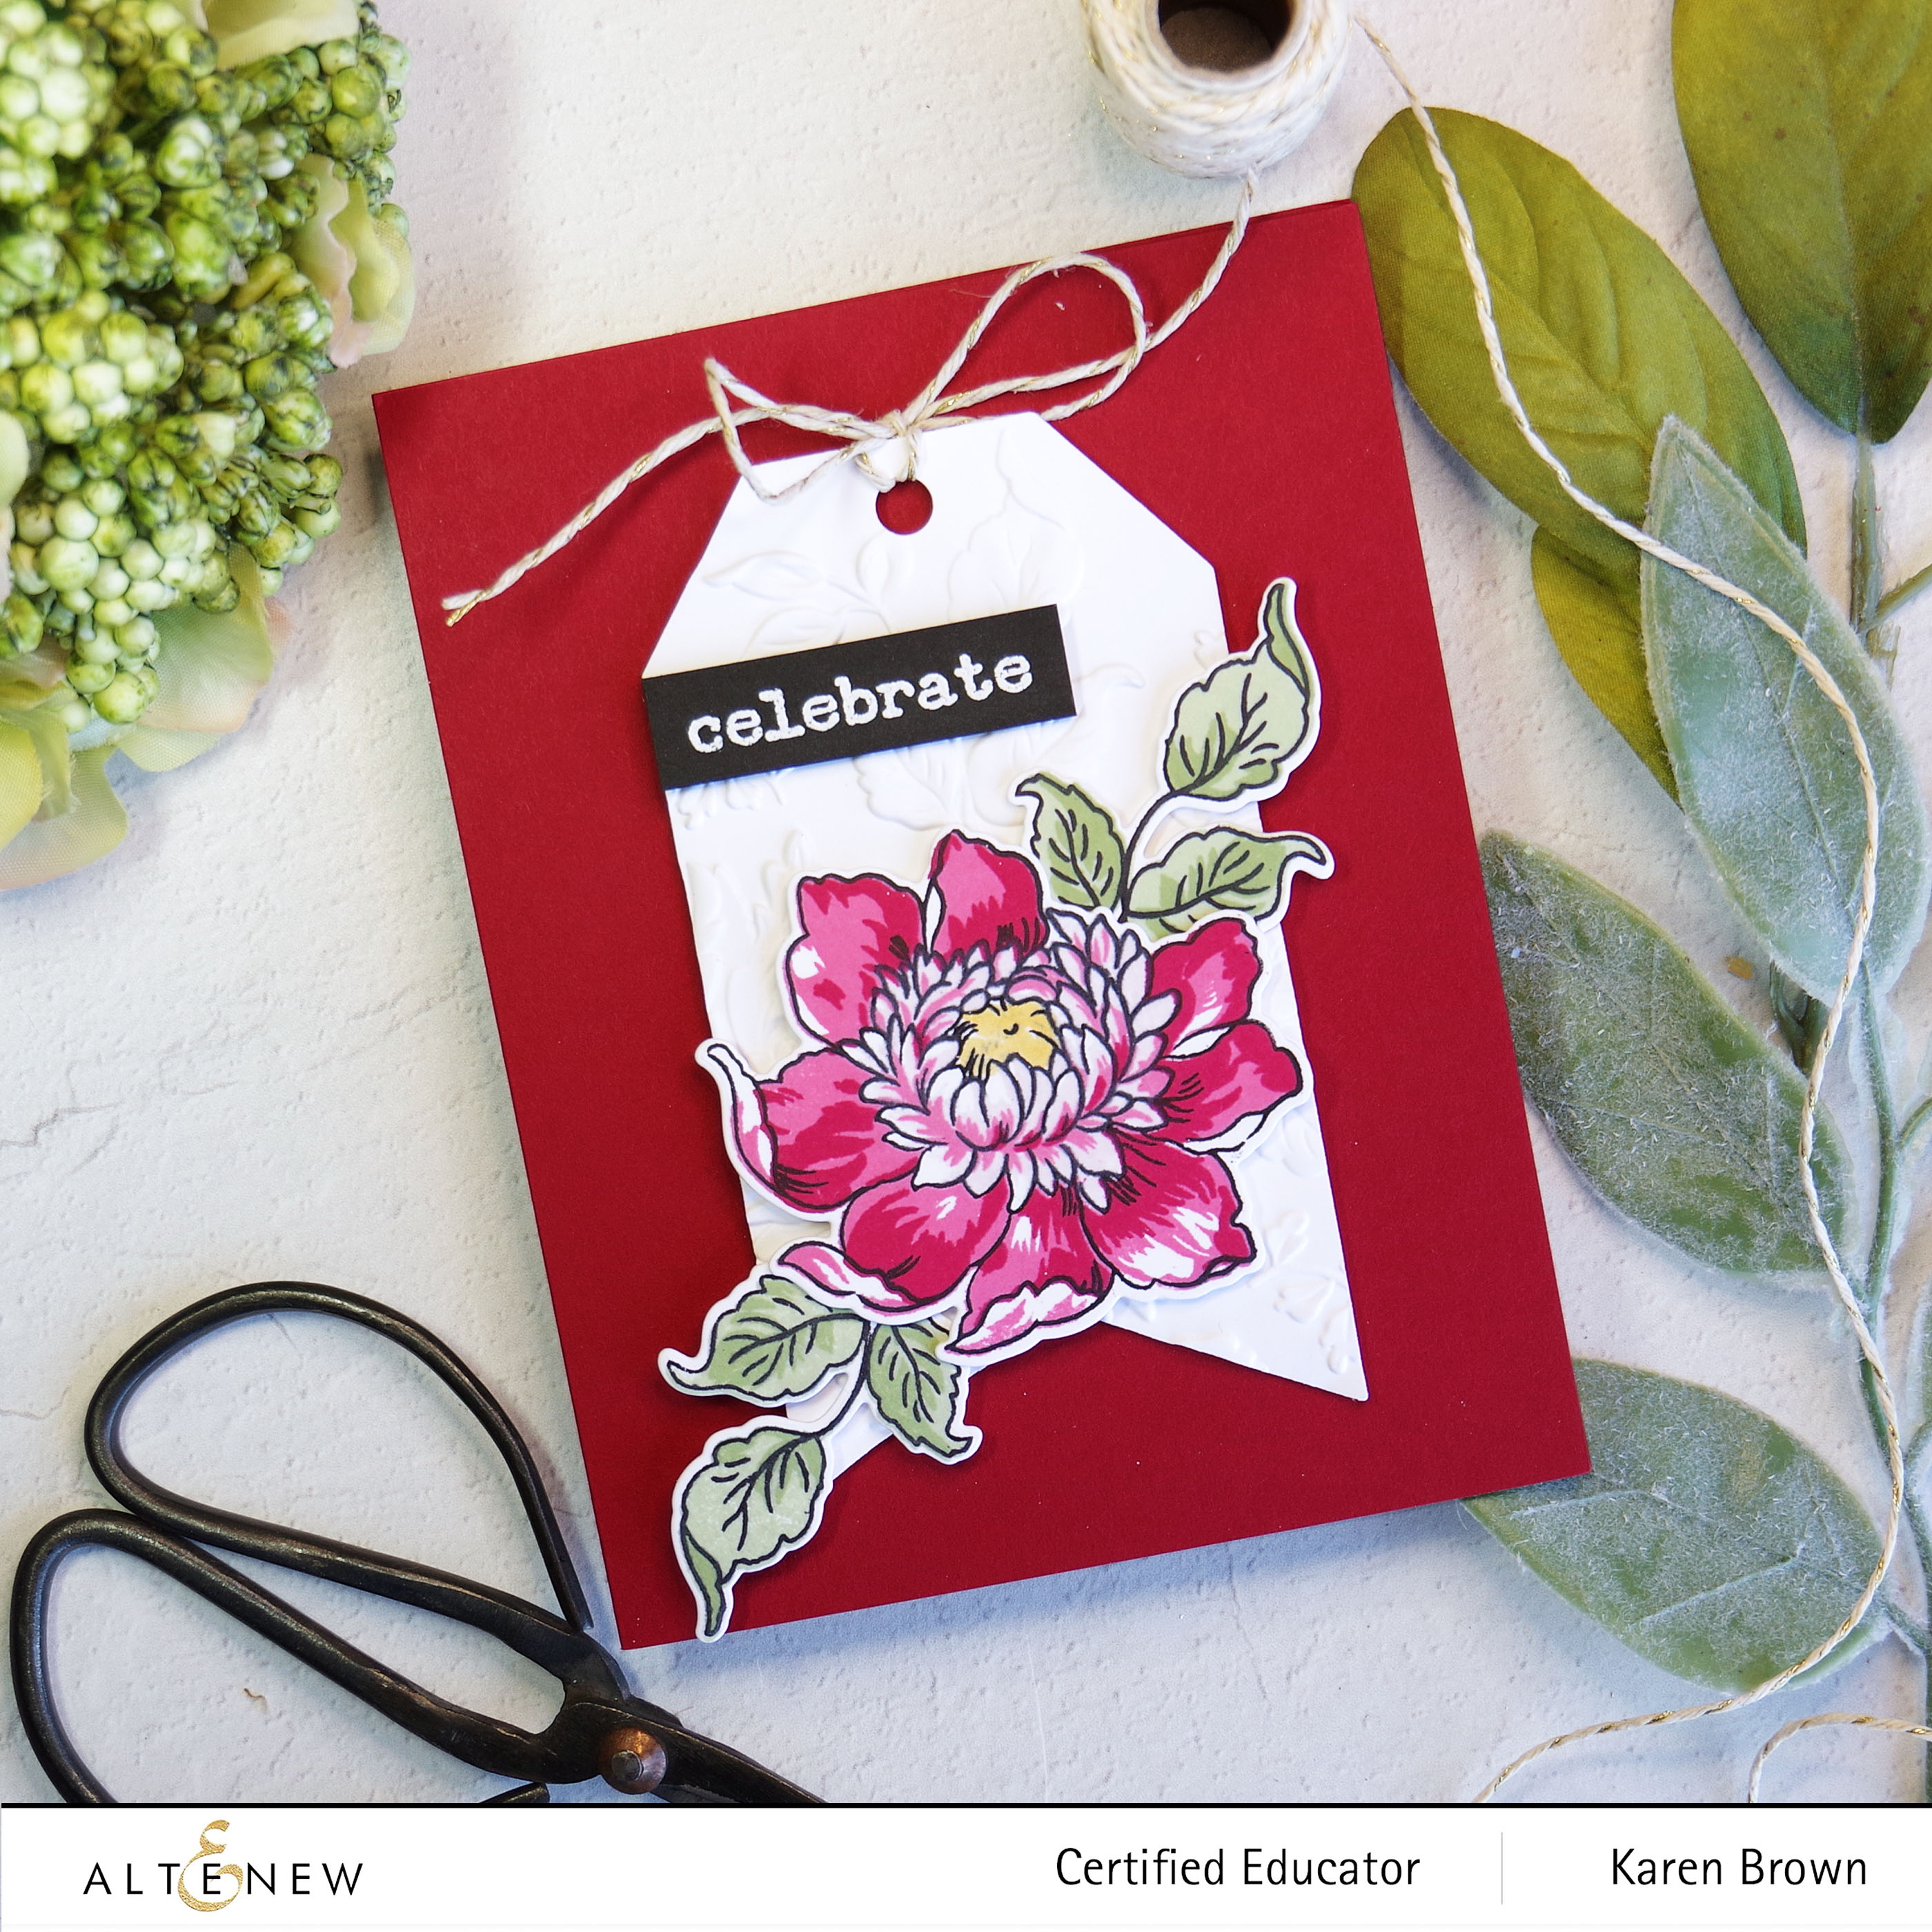
For my second card I went BOLD! I love the gorgeous red against the white textured background. I die cut the tag first and then embossed the tag so I wouldn’t loose the lovely detailed embossing. I got a great impression by embossing on 80# cardstock
Adding twine or ribbon is easy: Double the twine and poke the two ends through the hole. Next, slip the ends through the looped middle and then pull flat. Neat, easy and functional.
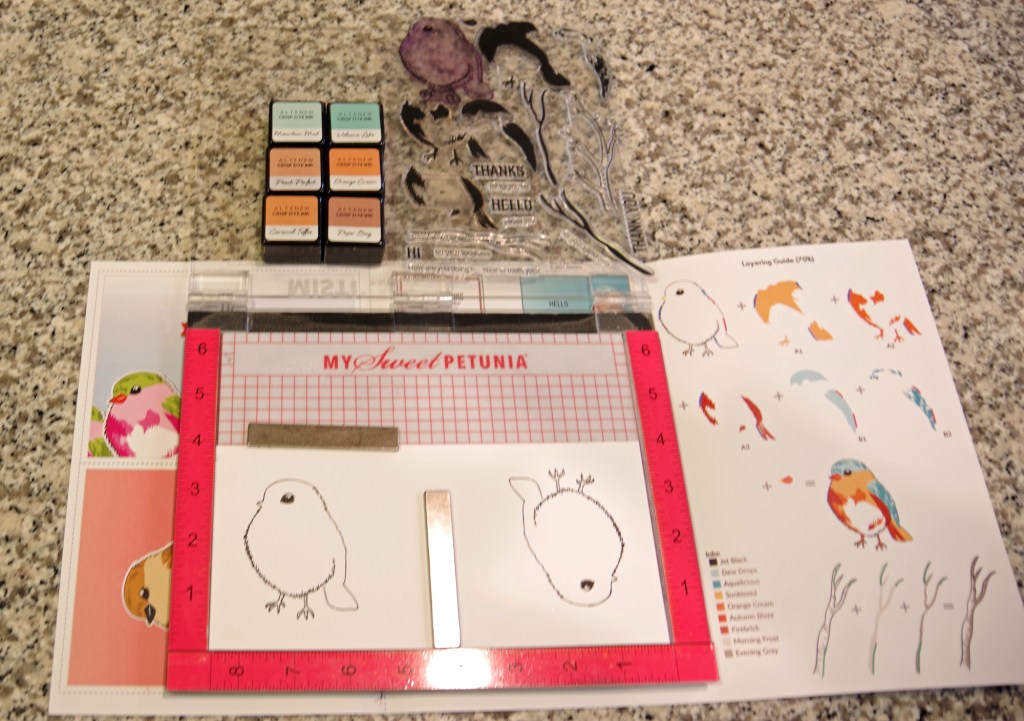
I am getting ready for Mother’s Day and am so excited about this whimsical yet elegant card. I used Altenew’s Bird of the Woods layering stamp and dies.
I used an assembly line method which I write about below. For my Mother’s Day card I used the following:
I wanted to make a bunch of cards so I set up an assembly line. I cut cardstock panels to fit in my Misti Stamping Tool and stamped one bird on the left, rotated the panel upside down, reinserted the panel and then stamped a second bird on the clean half.
I stamped my outlines with Pigment Ink for a nice dark outline and let them dry overnight so there was no risk of smearing. You could also heat set to speed up the process.
I then positioned the layering stamps in two Mistis. I was careful to line up the stamps so I could then stamp quickly. I put the first layering stamp on the left in Misti 1, the second layering stamp went on the right in Misti 1 and the third layer went in Misti #2. This way I was able to stamp all the cards in assembly line fashion.
I repeated this technique with the two layering stamps for the bird’s head.
7 ink color combinations
While I had my supplies out, I made a companion birthday card.
Colors used for stamping the birthday card: Peach Perfect, Orange Crush, Brown Paper Bag, Mountain Mist, Volcano Lake.
I made a sparkly custom background by mixing Volcano Lake ink with Shimmer Spray. I applied three layers to wet watercolor paper. You can’t see the shimmer in the photos but it is beautiful in person.