cardmaking · Mixed Media · papercrafting

Crazy Quilt Mixed Media Card

Colorful Crazy Quilt inspired background for my Mixed Media Paper Artsy Whimsical Tree card.

Just playing and experimenting today. I got the idea of making a bright colorful background inspired by crazy quilts.

My Process:

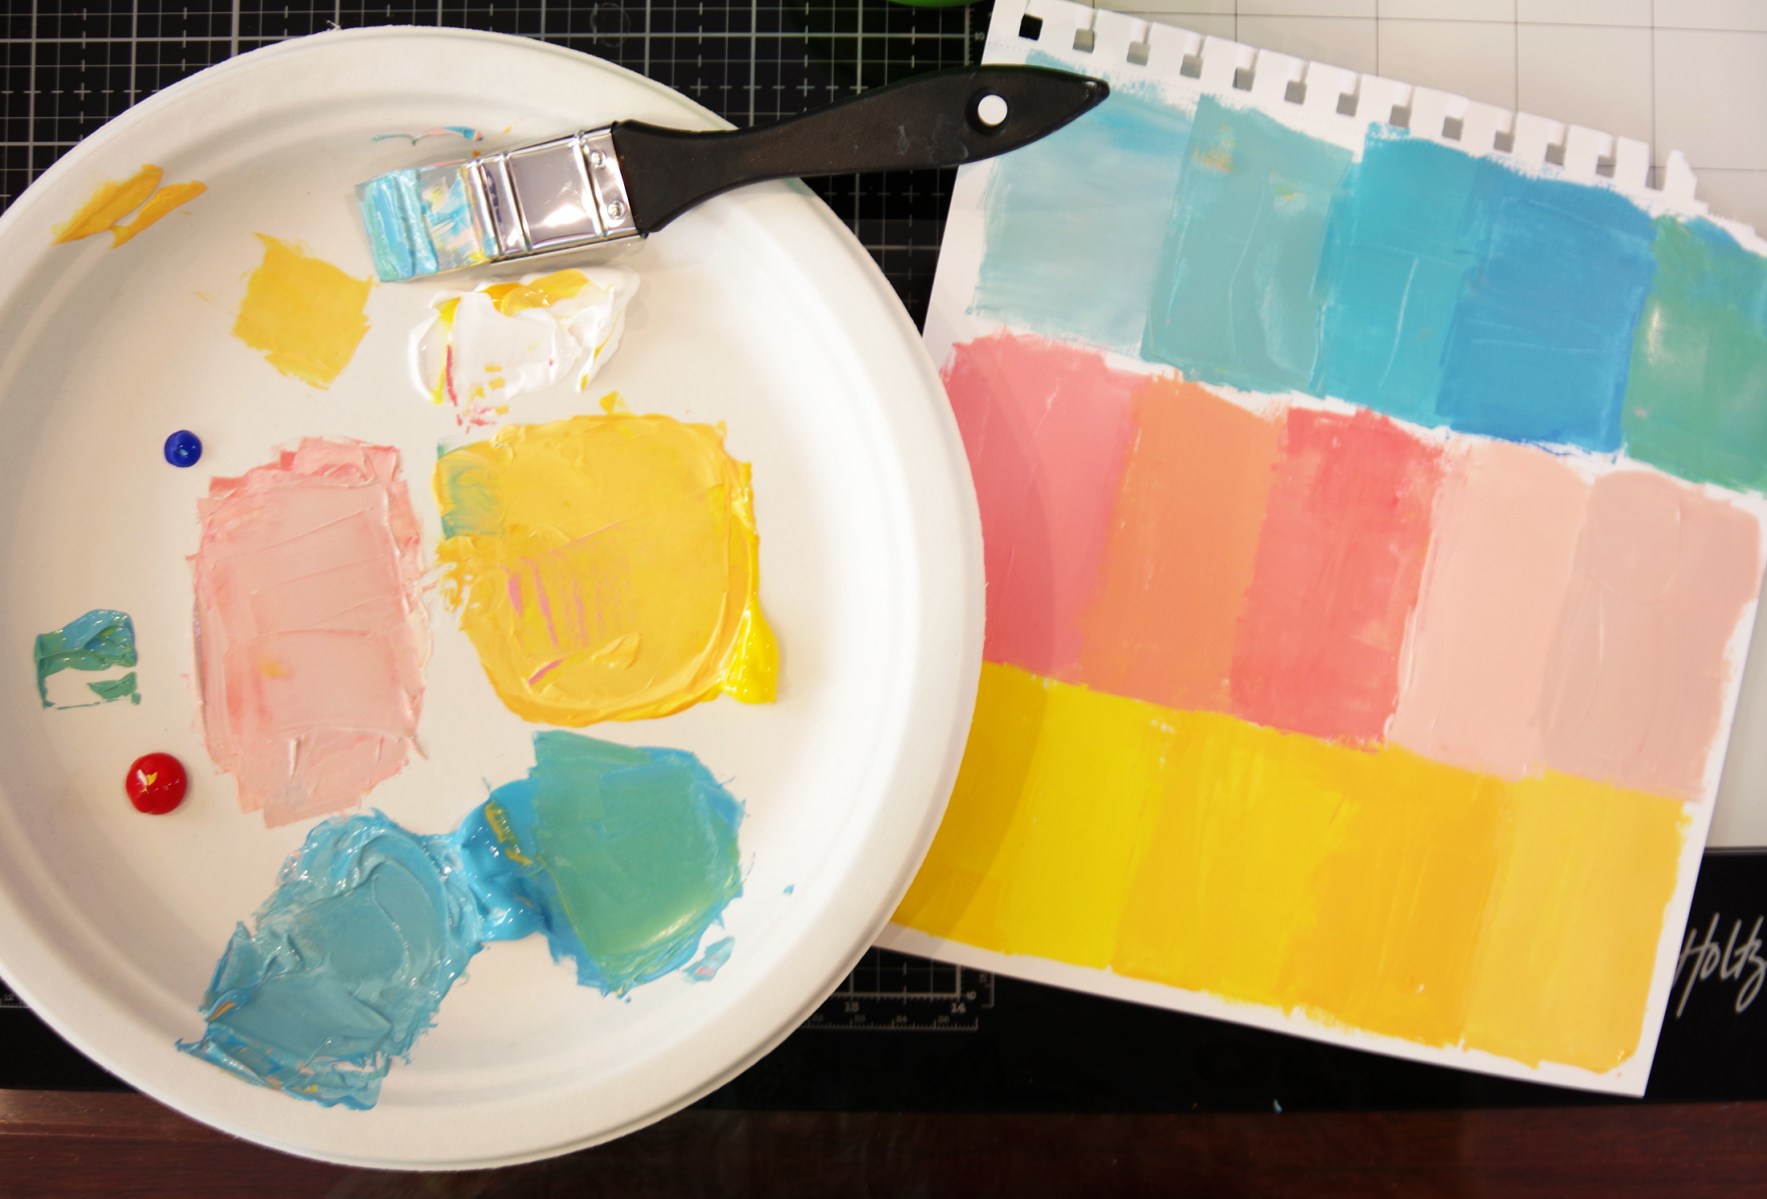
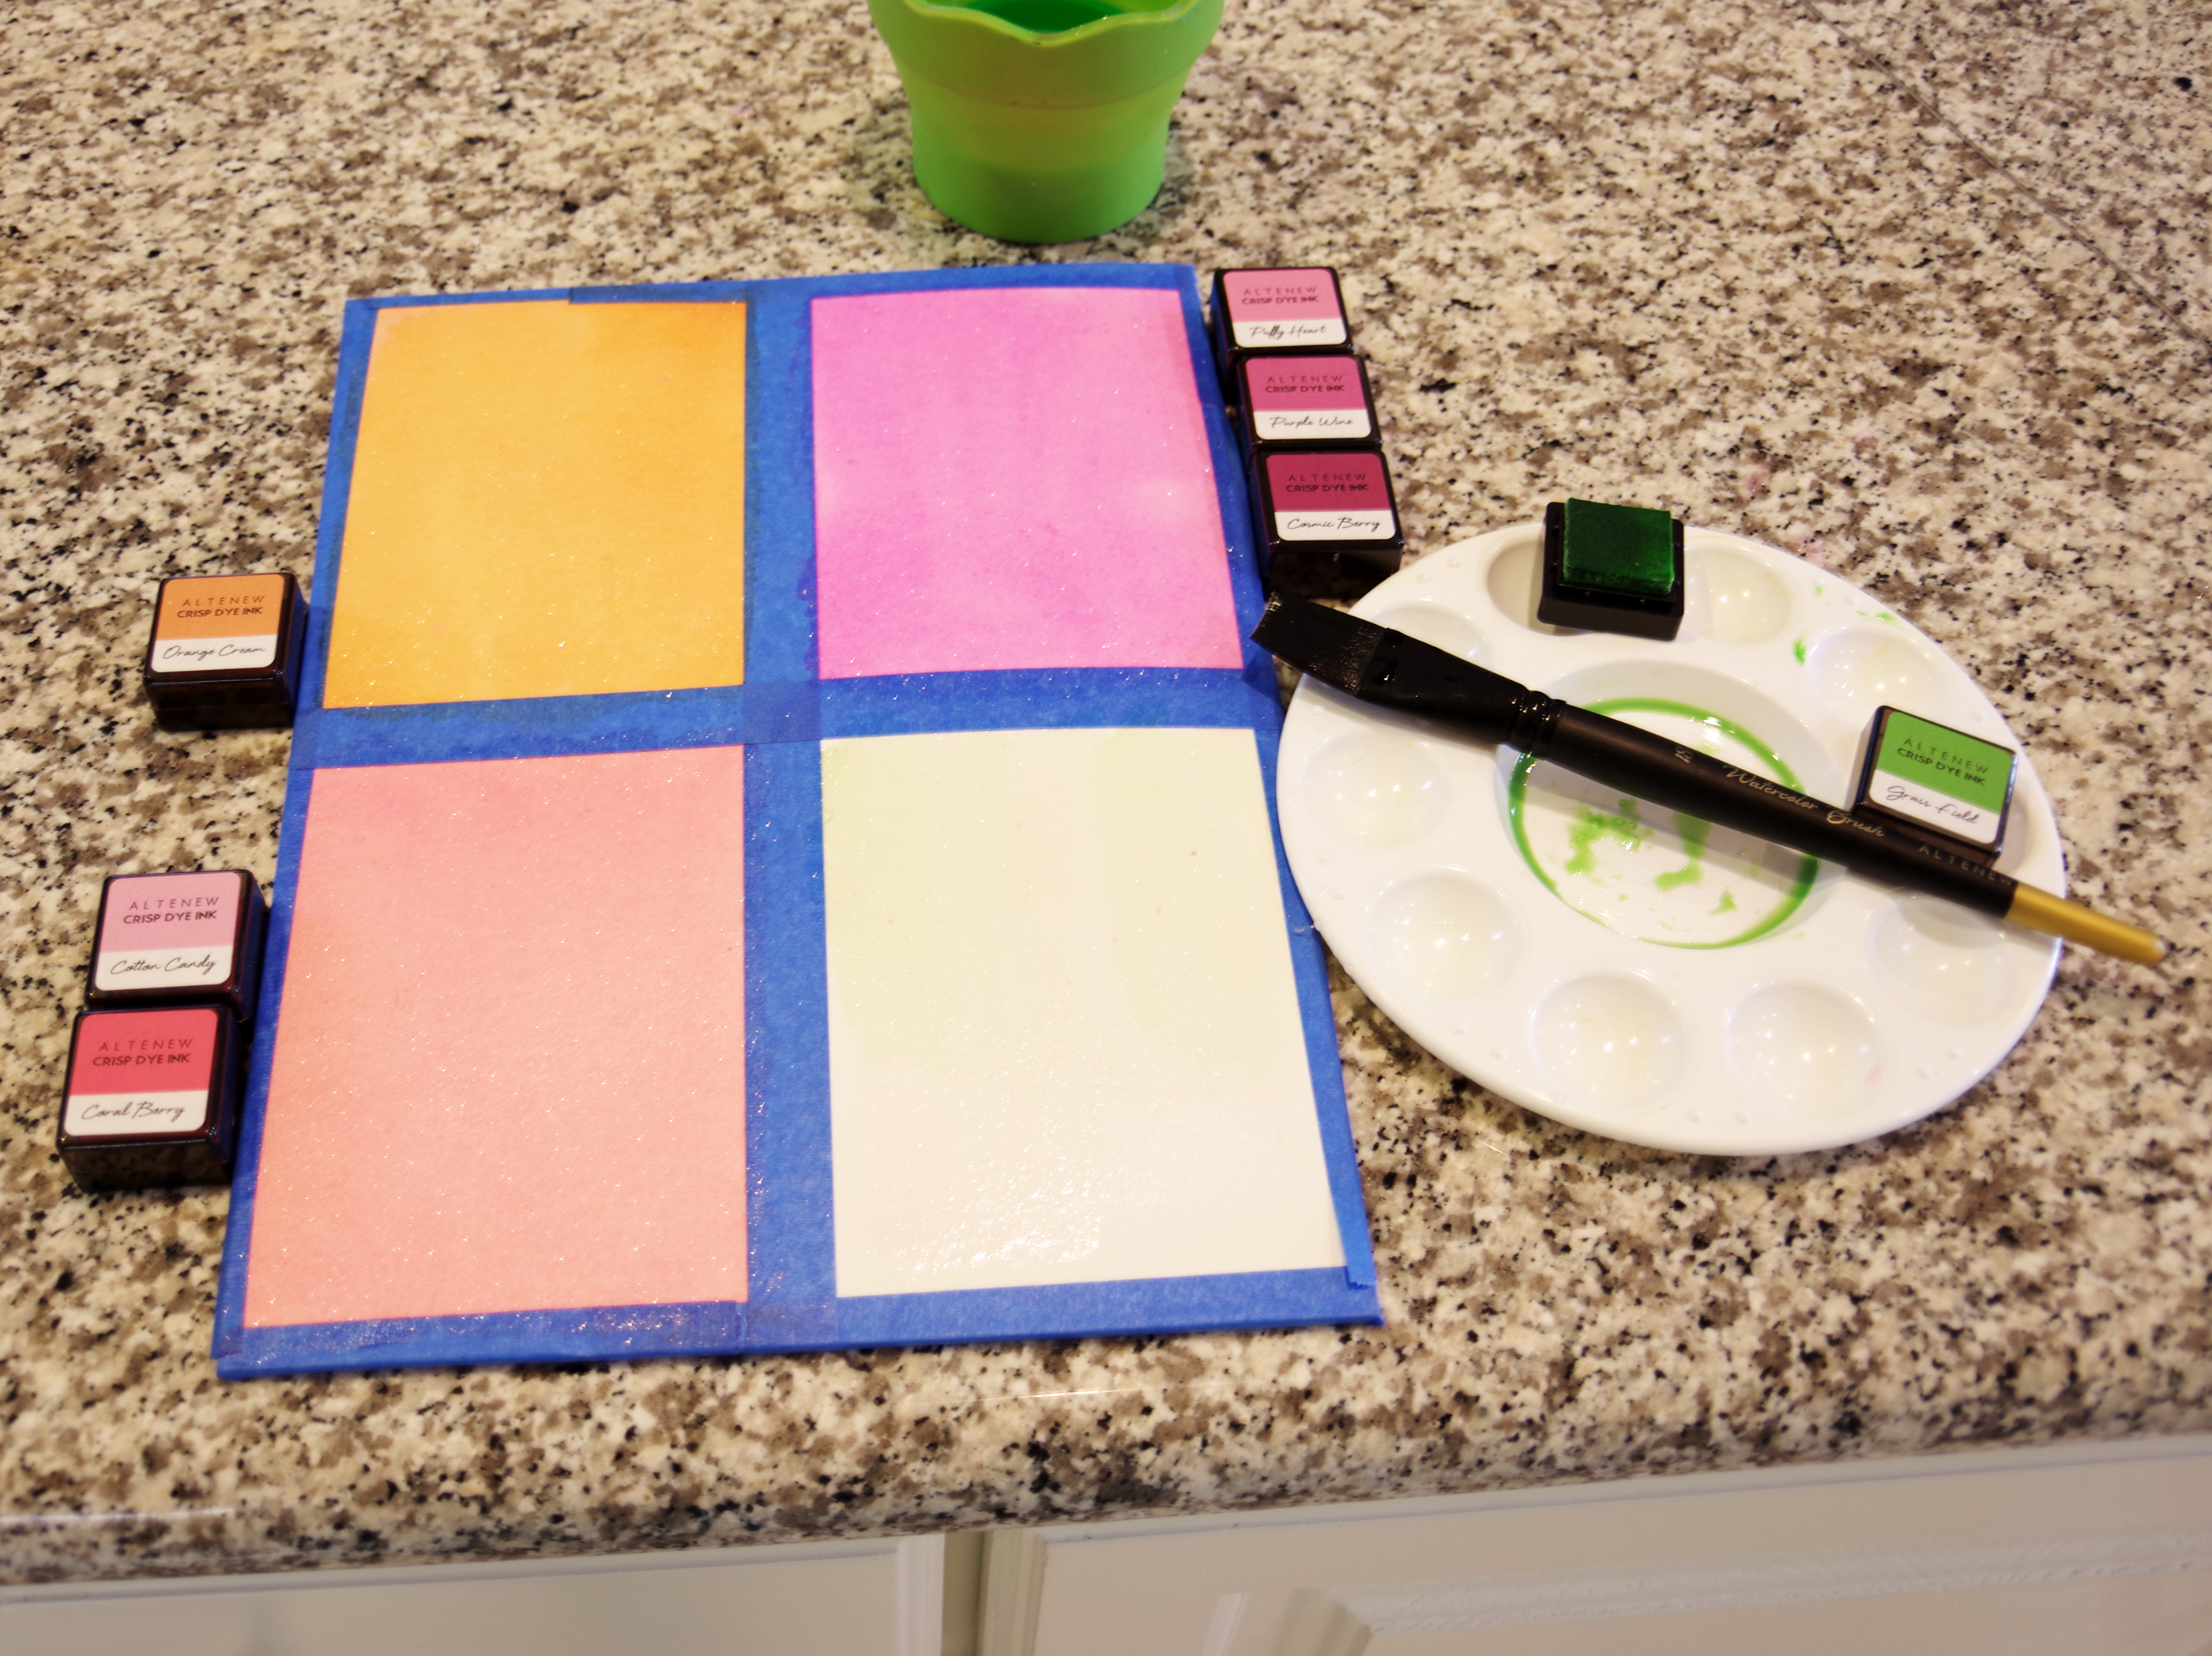
  • I started by painting a freehand grid using acrylic paints. No measuring, just eyeballing it. I was aiming to have each grid be about 1 1/4″ X 1 1/4″. Since I was playing, I custom mixed the colors.
  • Next, using Derwent Inktense pencils, I outlined each square in one or more colors. I also added some colored pencil squiggles, doodles and shapes.
  • A bit of stamping came next.
  • And I knew I wanted several colors of paint splatters.
  • Using Posca Pens, I added dots and other marks.
  • To finish the card, I stamped this whimsical tree from Paper Artsy on the background and then again on white cardstock. I fussy cut the trees and used foam squares to add dimesion to the project.
  • The sentiment is from Waffle Flowers: Rainbows Stamp Set.
Bright colorful whimsical painted grid mixed media card

This card was so fun to create! As always, thanks for stopping by!

Karen

cardmaking · papercrafting

Altenew Background Check – It’s All About the Background

Altenew's Majestic Bouquet layering stamp and die bundle card in blues.

The Educators at Altenew are hopping on Intstagram and the theme is “Background Check – it’s All About the Background“!  I wanted to combine fun backgrounds with Majestic Bouquet, my favorite floral stamp layering set from the past year. I think it is just gorgeous done in blues!

For my background I used Altenew’s Cross Stitch Cover Die . I ran the cover die through my die-cutting machine and then cut out a tag using Altenew’s Terrific Tags die set. The little perferations add just the right amount of interest to showcase the beautiful floral bloom.

Altenew Majestic Bouquet + Terrific Tags + Cross Stitch Canvas Cover die in Glacier Caves Blues.

Supplies used card #1:

Other than the enamel dots, all that was needed was a bit of ribbon or twine.

Handmade card with Altenew Terrific Tags background and Altenew Majestic Bouquet floral die cut.

If you would like to see my first post using Altenew’s Majestic Bouquet, click HERE. My Majestic Blooms Instagram post made my “Top 9” for 2021. 🙂

Adding texture to Altenew die cut Terrific Tags + Majestic Bloom 3D Embossing Folder.

For my second card I went BOLD! I love the gorgeous red against the white textured background. I die cut the tag first and then embossed the tag so I wouldn’t loose the lovely detailed embossing. I got a great impression by embossing on 80# cardstock

Supplies Used for Card #2:

Altenew Majestic Bouquet + Majestic Bloom 3D Embossing Folder handmade card.

Adding twine or ribbon is easy: Double the twine and poke the two ends through the hole. Next, slip the ends through the looped middle and then pull flat. Neat, easy and functional.

Altenew Majestic Bouquet Layering Stamp set + Red Cosmos Ink Set.

It was good seeing you today!

Karen

cardmaking · Mixed Media · papercrafting

Altenew Inked Lotus + Custom Color Mixed Backgrounds

Altenew's Inked Lotus Stamp + Custom Mixing Acrylic Backgrounds

Hello, a little playtime in my art studio today. My friend Paul has been encouraging me to create some small art pieces in addition to the cards I typically make. He suggested that I give them as gifts to my girls, so here goes my first and second attempt!

Framed collage Mixed Media art project
Here I framed Project 1 and put it on display

Custom mixing acrylic ink swatches to use on Mixed Media Art Backgrounds.

I decided to custom mix acrylic paint for my backgrounds and found it very addicting! In fact, I made more panels than I originally intended. The swatches remind me of the colorful paint chips you find at the hardware store.

How To Custom Mix Acrylic Ink Swatches.

MY PROCESS:

  • I put acrylic paint dabs of each of the three primary colors + white on a paper plate. You can use any hue of red, yellow and blue.
  • I started with yellow and added a tiny bit of red and blended. When I liked the color, I painted a rectangle onto Mixed Media Paper. I used a silcone brush, which added a fun bit of extra texture.
  • Next, I added white to the first orangey color I mixed. I added a lot of white to many of the subsequent colors for a softer more muted color. Those muted shades were the colors I chose to use on today’s projects, but I have lots of color swatches left over for future projects. I kept mixing and painting until I’d filled up a page. I think I created 4 pages.
  • For Project #1, I tore two strips for the main background. For Project #2, I tore each color into an individual rectangle so there are a lot more white seams visible.
  • Next, I pieced together my background with other interesting scraps and fodder that I had in my studio. I love UHU glue sticks for mixed media gluing. For Project #2, I also added a strip of Altenew’s Painted Grid Washi Tape to ground the panel.
  • My focal element, Altenew’s Inked Lotus, was stamped onto pages torn from an old cookbook. I used Ranger Archival Ink.
  • Using Derwent Watercolor Pencils, I shaded the lotus and then blended the color with a wet brush. When the flower was dry, I glued the bloom to my background.
  • Last, I added a few marks with Posca pens and Micropens.
Laying out Mixed Media Fodder.
Selecting the fodder papers to complete the look
Custom mixing acrylic paint for Mixed Media Backgrounds.
The background panels and focal elements

I couldn’t stop without making a card too, so I created a campanion birthday card to go with panel #2.

Altenew Inked Lotus Stamp + Acrylic Paint Blending

Thank you for visiting! If you have a moment, let me know which project you like best. Let me know what you think…I always love getting feedback.

Thanks,

Karen

cardmaking · Mixed Media · papercrafting

Easy DIY Glitter Cardstock

Easy DIY Glitter Cardstock tutorial.

Don’t you just love bright summery colors? I’ve been thinking about making a shimmery rainbow hued tag set and I thought now was the perfect time. Recently, I started making my own glitter cardstock, and I have been loving the subtle sparkle it adds to my projects!

Rainbow Colored Gift Tags + Altenew Terrific Tags dies

The process is easy and fun…all you need is some ink and Altenew Iridescent Shimmer Ink Spray.

How to make your own glitter cardstock

How To Make Your Own Glitter Cardstock

  • I taped some watercolor paper to a hard board and brushed water over the surface with a #18 brush.
  • Next, I mixed Altenew Dye Inks with Iridescent Shimmer Spray (no water was added) and I painted the mixture on the wet watercolor paper. I wanted an intense color so I applied three layers but I didn’t bother to let it dry in between.
  • I stamped, colored and die cut a bunch of floral elements from Altenew’s Doodle Blooms stamp and die bundle.
  • I let my shimmer panels dry overnight so that they would die-cut well, but you could speed up the drying with your heat tool.
How to make glitter cardstock using Altenew Shimmer Spray.

Next, I die cut my tags using the largest finned die from Altenew’s Terrific Tags die set and worked on my layouts

How to make your own gift tags with Altenew Terrific Tags.

To finish off the cards, I added an Enamel Dot to each flower center.

Altenew Enamel Dots for flower centers.

The background is so pretty in person but it’s hard to see the sparkle in the photos so I added a quick video below:

Video clip showing shimmer on DIY Glitter Cardstock

Adding twine or ribbon is easy: Double the twine and poke the two ends through the hole. Next, slip the ends through the looped middle and then pull flat. Neat, easy and functional.

 Aqua Altenew Terrific Tags + Doodle Blooms stamp and die bundle

I love how the tags turned out so I’ve included some closeup photos.

Pink Altenew handmade gift tag

There is a detailed list of the inks, supplies and enamel dots used below.

Altenew Orange Cream Glitter gift tag.
Pink Altenew Glitter cardstock gift tag.

The tags are so happy and cheerful together and I think they would make a great gift for a friend.

DIY rainbow hued gift tags made with Altenew Terrific Tags and Doodle Blooms stamp and die set.

Ink Used:

Stamps, Dies and Supplies:

Enamel Dots Used:

Sentiments:

Thanks for stopping by!

Karen