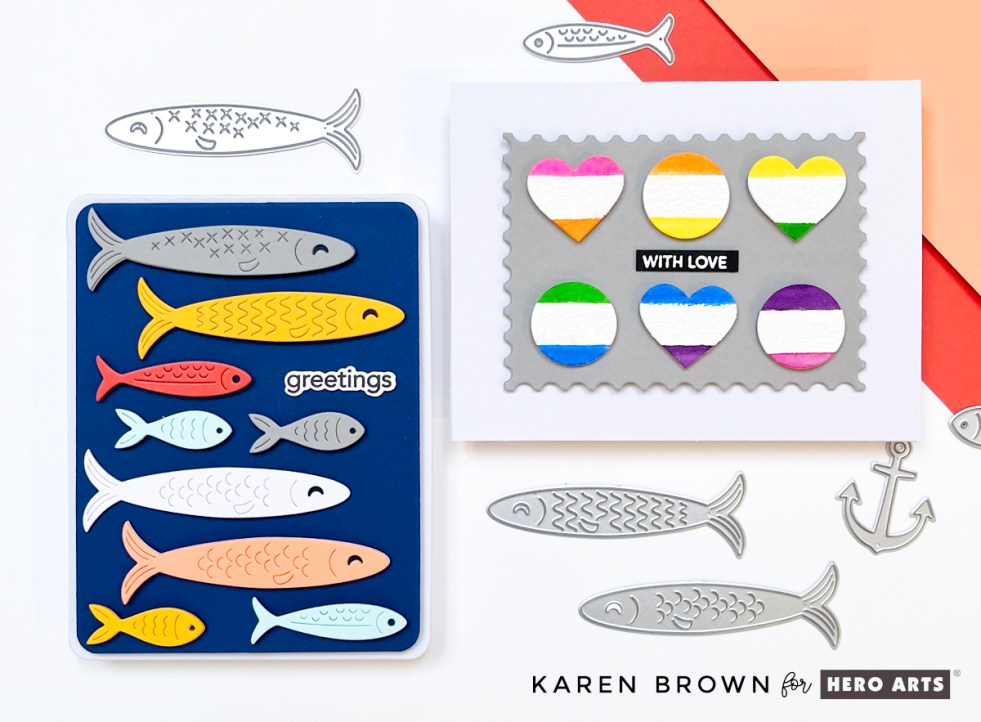
Create 2 cheerful, modern carda using Hero Arts Big Mouth Sardine Tin Dies and the Wide Stripe background stamp from the Packed with Love Collection. The playful school-of-fish design features colorful die cutting, simple layout tips, and easy dimension—perfect for quick cardmaking with big visual impact. The bright modern watercolor geometric valentine is an artistic beauty for anyone you love.
Tag: Valentine

Top 5 Hero Arts Cards of 2025 (Fan Favorites & Personal Picks)
A roundup of the best and most popular Hero Arts cards of 2025, including fan favorites, personal picks, and standout techniques. Featuring Valentine cards, clever themed designs, coffee-inspired projects, letterpress and foil cards, and bold floral die cutting—with links to each original tutorial.

Spellbinders December 2025 Die of the Month | Gel Press Print Card Ideas
Today I’m sharing a simple mixed media Valentine using the Spellbinders December 2025 Die of the Month – Better Together. I combined one of the adorable owls with a Polaroid-style frame, a rub-on “love” sentiment, and two of my favorite Gel Press prints for a soft, artistic look full of layered texture and color.
Spellbinders December 2025 Stitching Die of the Month – A Valentine
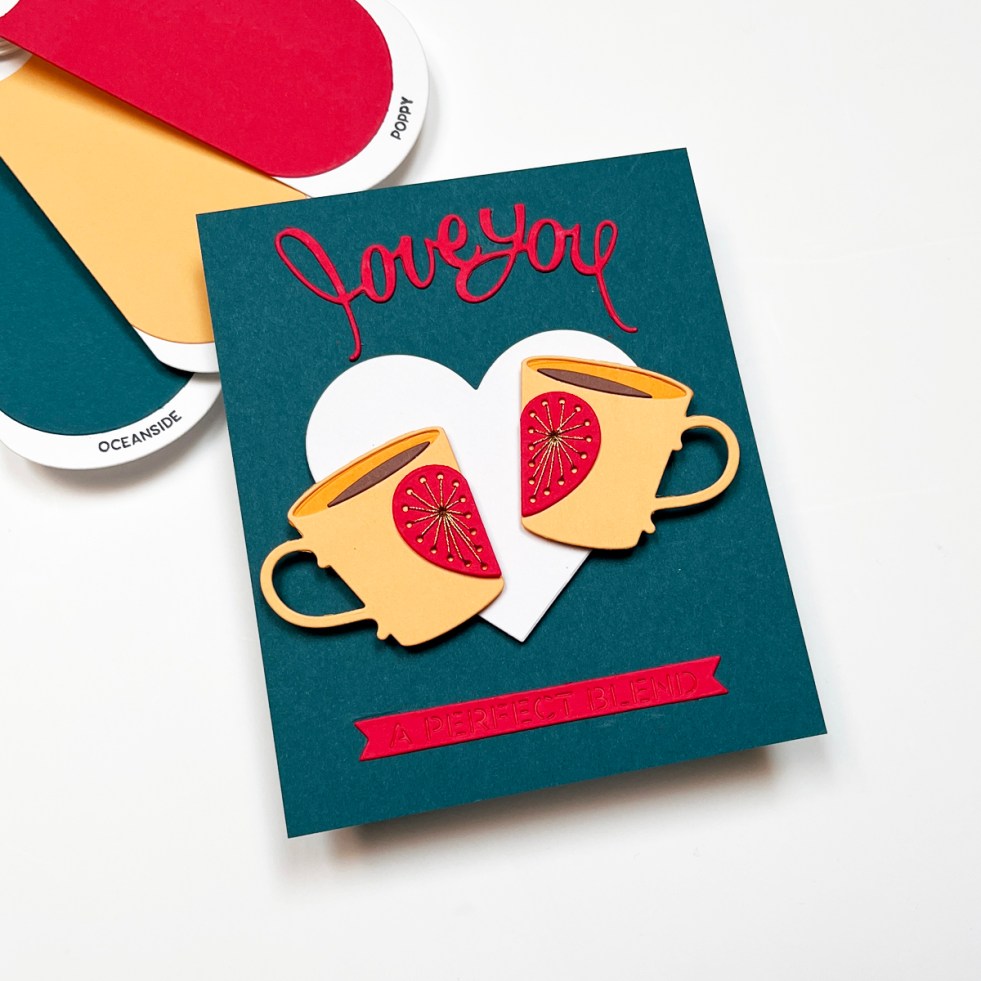
Handmade Coffee Theme stitched Valentine created with Spellbinders December 2025 Stitching Die of the Month: A Perfect Blend Stitching Die
Royal Inspiration: Playing Card-Themed Cards | Spellbinders
A post about creating die-cut handmade cards featuring The Queen of Hearts and King of Hearts with a playing card theme. The dies are from Spellbinders Jack of All Trades Collection: Royal Court and Pip and Rank.
Hero Studio January Card Kit Release and Blog Hop: Love is in the Air!
Hero Arts Studio January 2025 Release featuring bright colorful die cut handmade Valentine Cards with The Card Kit and Folded Love Notes die set.
Handstitched Love | Spellbinders December 2024 Stitching Club of the Month
Handstitched Valentine "Love You" card in lovely pinks and gold created with Spellbinders December 2024 Stitching Die of the Month kit.
Hero Arts | My Monthly Hero January 2024 Release + Blog Hop
Have you seen the wonderful new Hero Arts My Monthly Hero Kit for January 2024? The theme is Love, Flowers and Friendship...so versatile! The Classic Kit is a $70 Value for $36.99The Premium Kit is a $106 Value for $49.99 Premium Subscription Kit I can't seem to get enough of the fun florals in this month's… Continue reading Hero Arts | My Monthly Hero January 2024 Release + Blog Hop
Spellbinders | House Mouse Candy Hearts Vintage Look Valentine Card
There's something undeniably captivating about a vintage valentine, where every delicate stroke of ink and carefully chosen sentiment carries a timeless charm. This new House Mouse Candy Hearts rubber stamp had a very retro look to me, so I went with an old-timey mixed media vibe. Easy One Layer Vintage Look Mixed Media Valentine Tutorial:… Continue reading Spellbinders | House Mouse Candy Hearts Vintage Look Valentine Card
3 Colorful Sentiment Focused Cards +Video
3 Colorful Sentiment Focused die cut handmade cards + how to video and photos.
