cardmaking · Die cutting · papercrafting

Spellbinders | All Occasion Bow | New and Unique Die Cut Card

Spellbinders All Occasion Bow die cut card.

I love versatile supplies in my craft room and Spellbinders just released a lovely All Occasion Bow etched die kit that is perfect for so many occasions. The bow is part of the beautiful Merry & Bright Collection but I will also be using it on Birthday, Wedding/Shower and Graduation cards.

Spellbinders Merry & Bright Die Cut Bow + Petite Blooms and Sentiments

My Card Process:

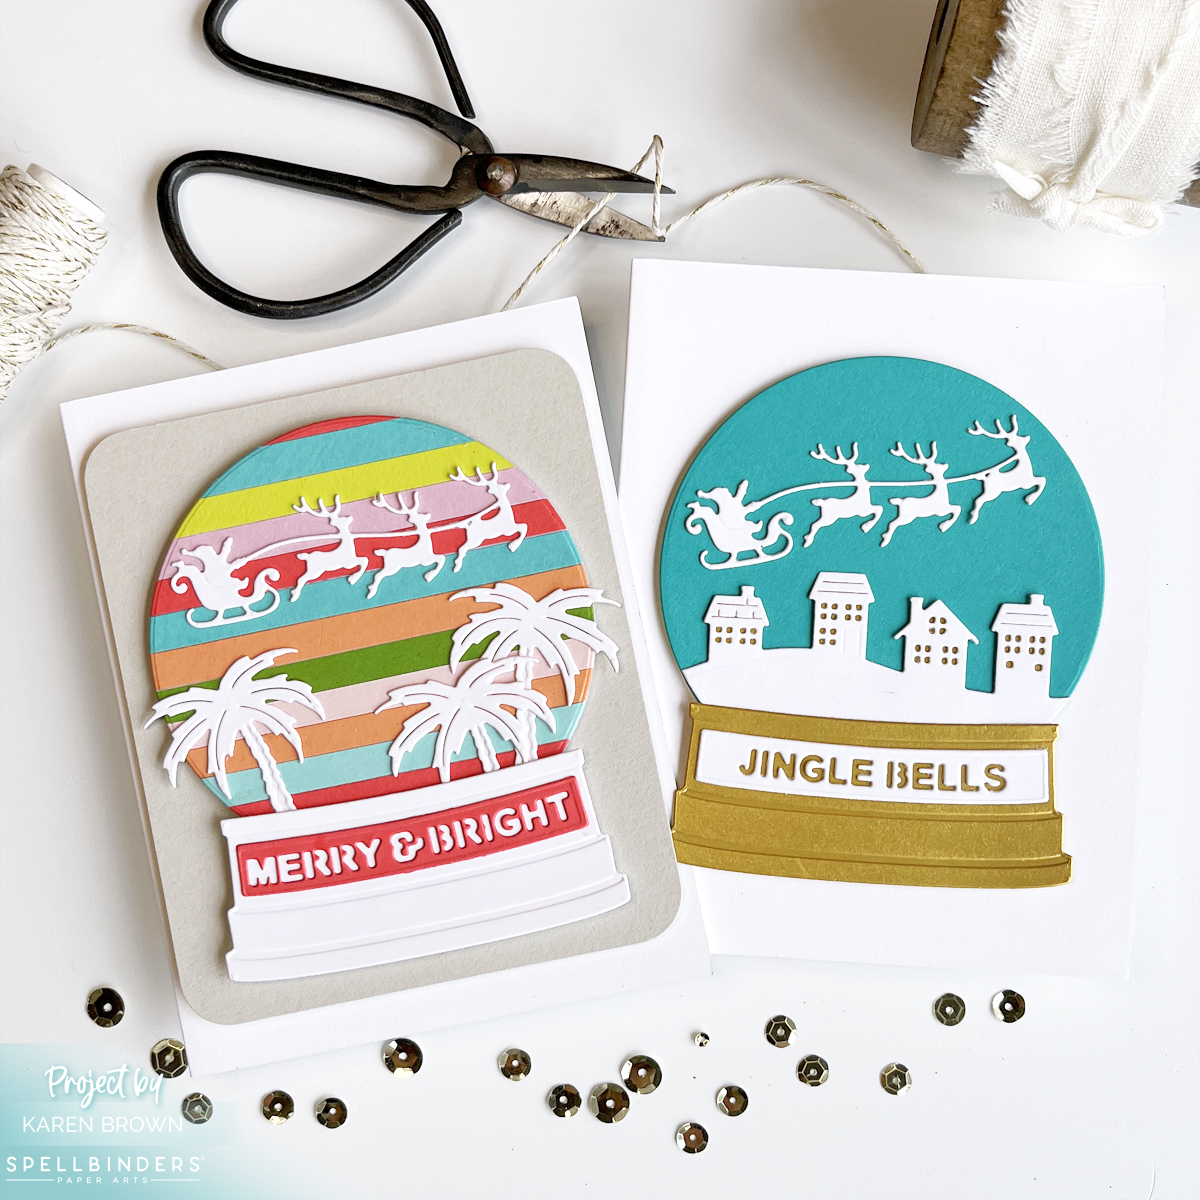
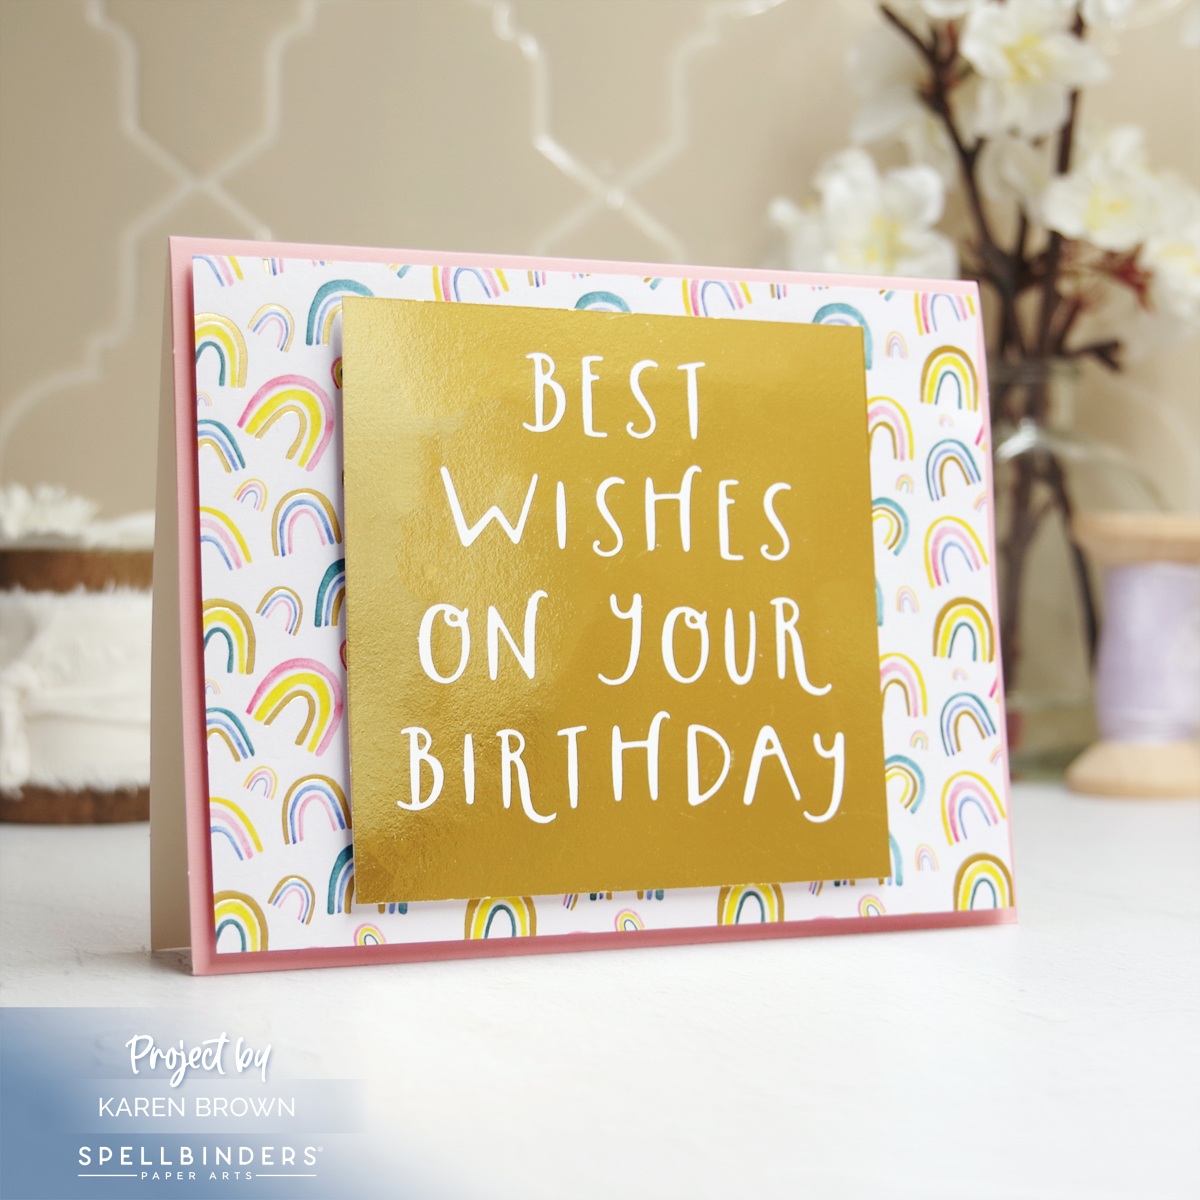
  • My first step is usually color selection. I have a Christmas paper sampler pack (see note below) that I thought would work beautifully for this project so I chose aqua, teal, pinks and greens from this pad.
  • I divided the All Occasion Bow dies into two piles. The bottom layers were all cut from teal and the top “highlight” die cuts were from aqua. Once I organized my dies between bottom (teal) and “highlights”, I didn’t need to think about which color paper to use and the die-cutting went very quickly.
  • I assembled my bow with foam adhessive squares, and then decided I wanted to anchor the bow with a focal point label. Spellbinders/Simon Hurley have a beautiful Playful Poinsettia Embossing Folder that I embossed and then die cut using a retired Ornamental Labels Die. This nesting die set has an interesting shape and I love the subtle interest this step adds to my card. I glued this die cut and embossed label (using craft foam and Bearly Glue) to a white A2 Top Folding Card Base.
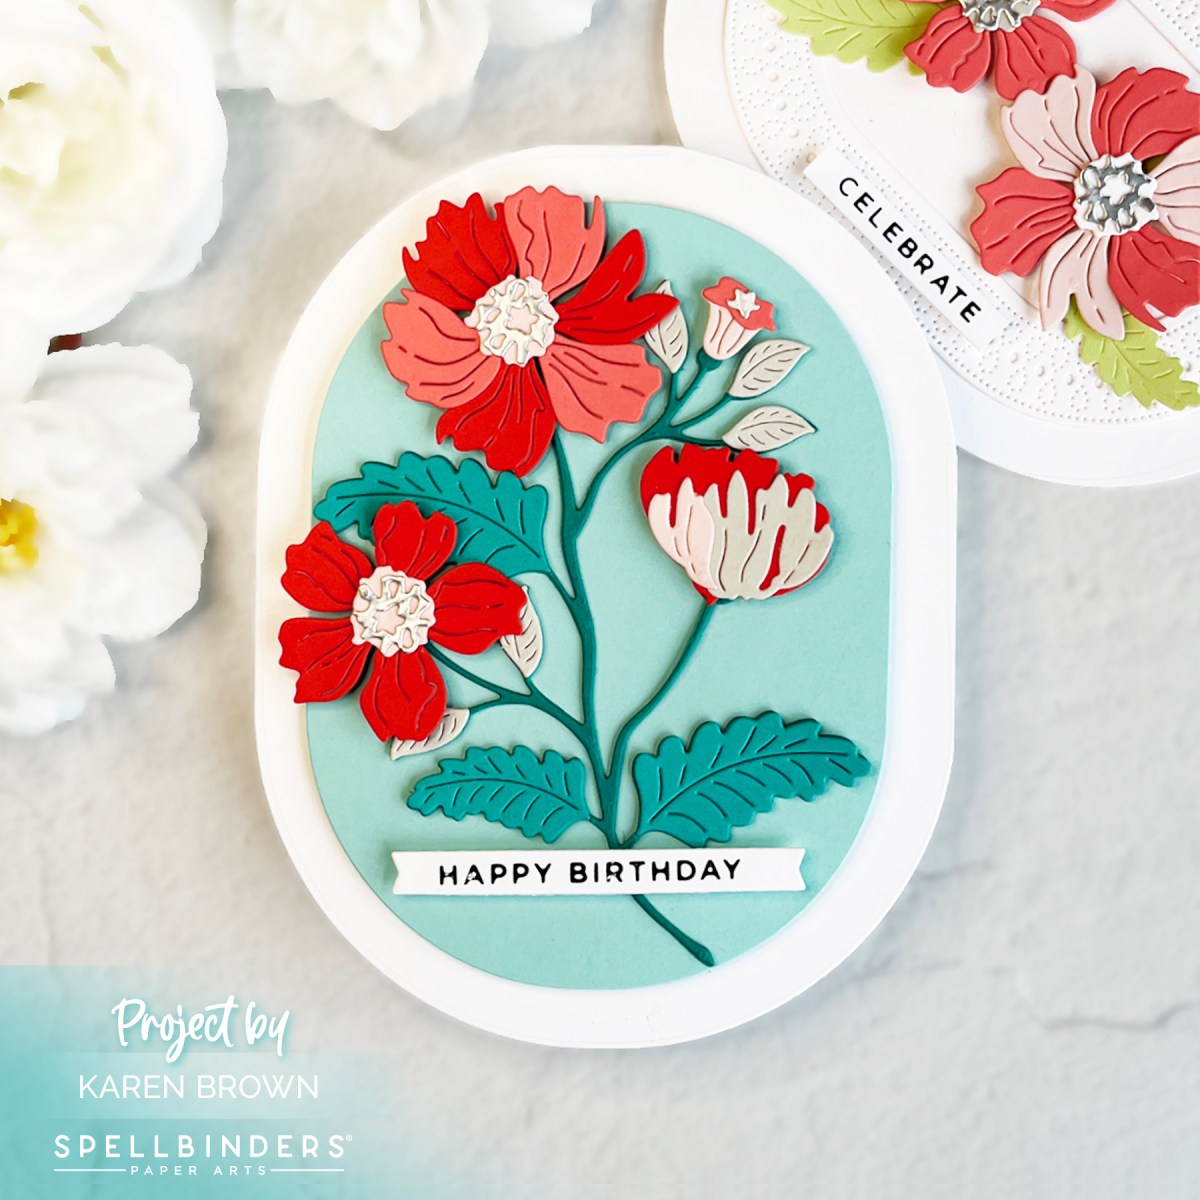
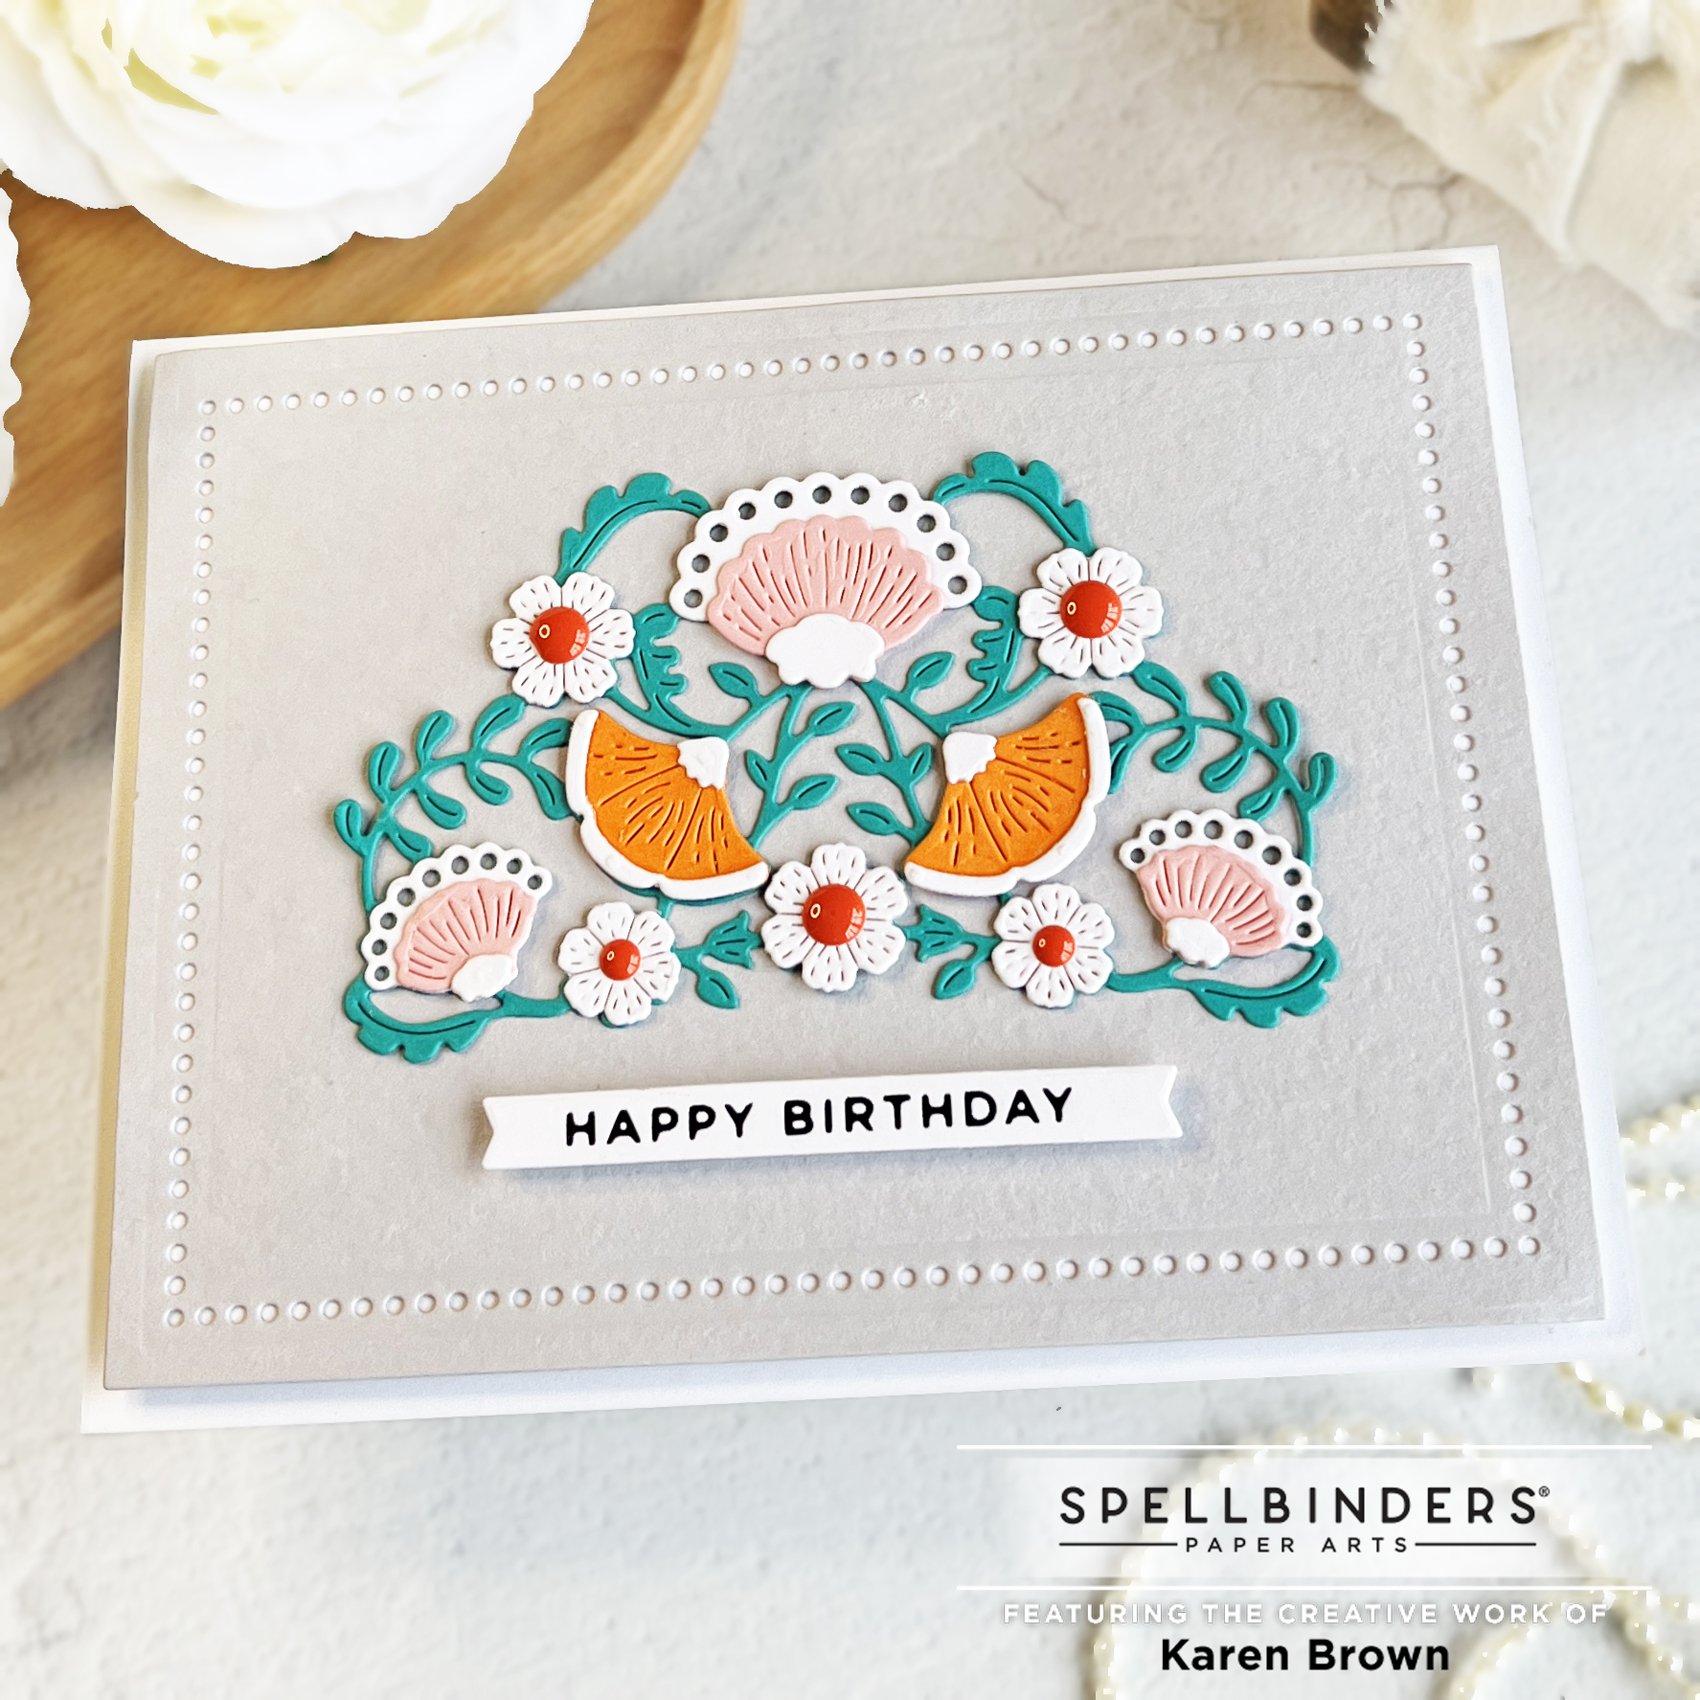
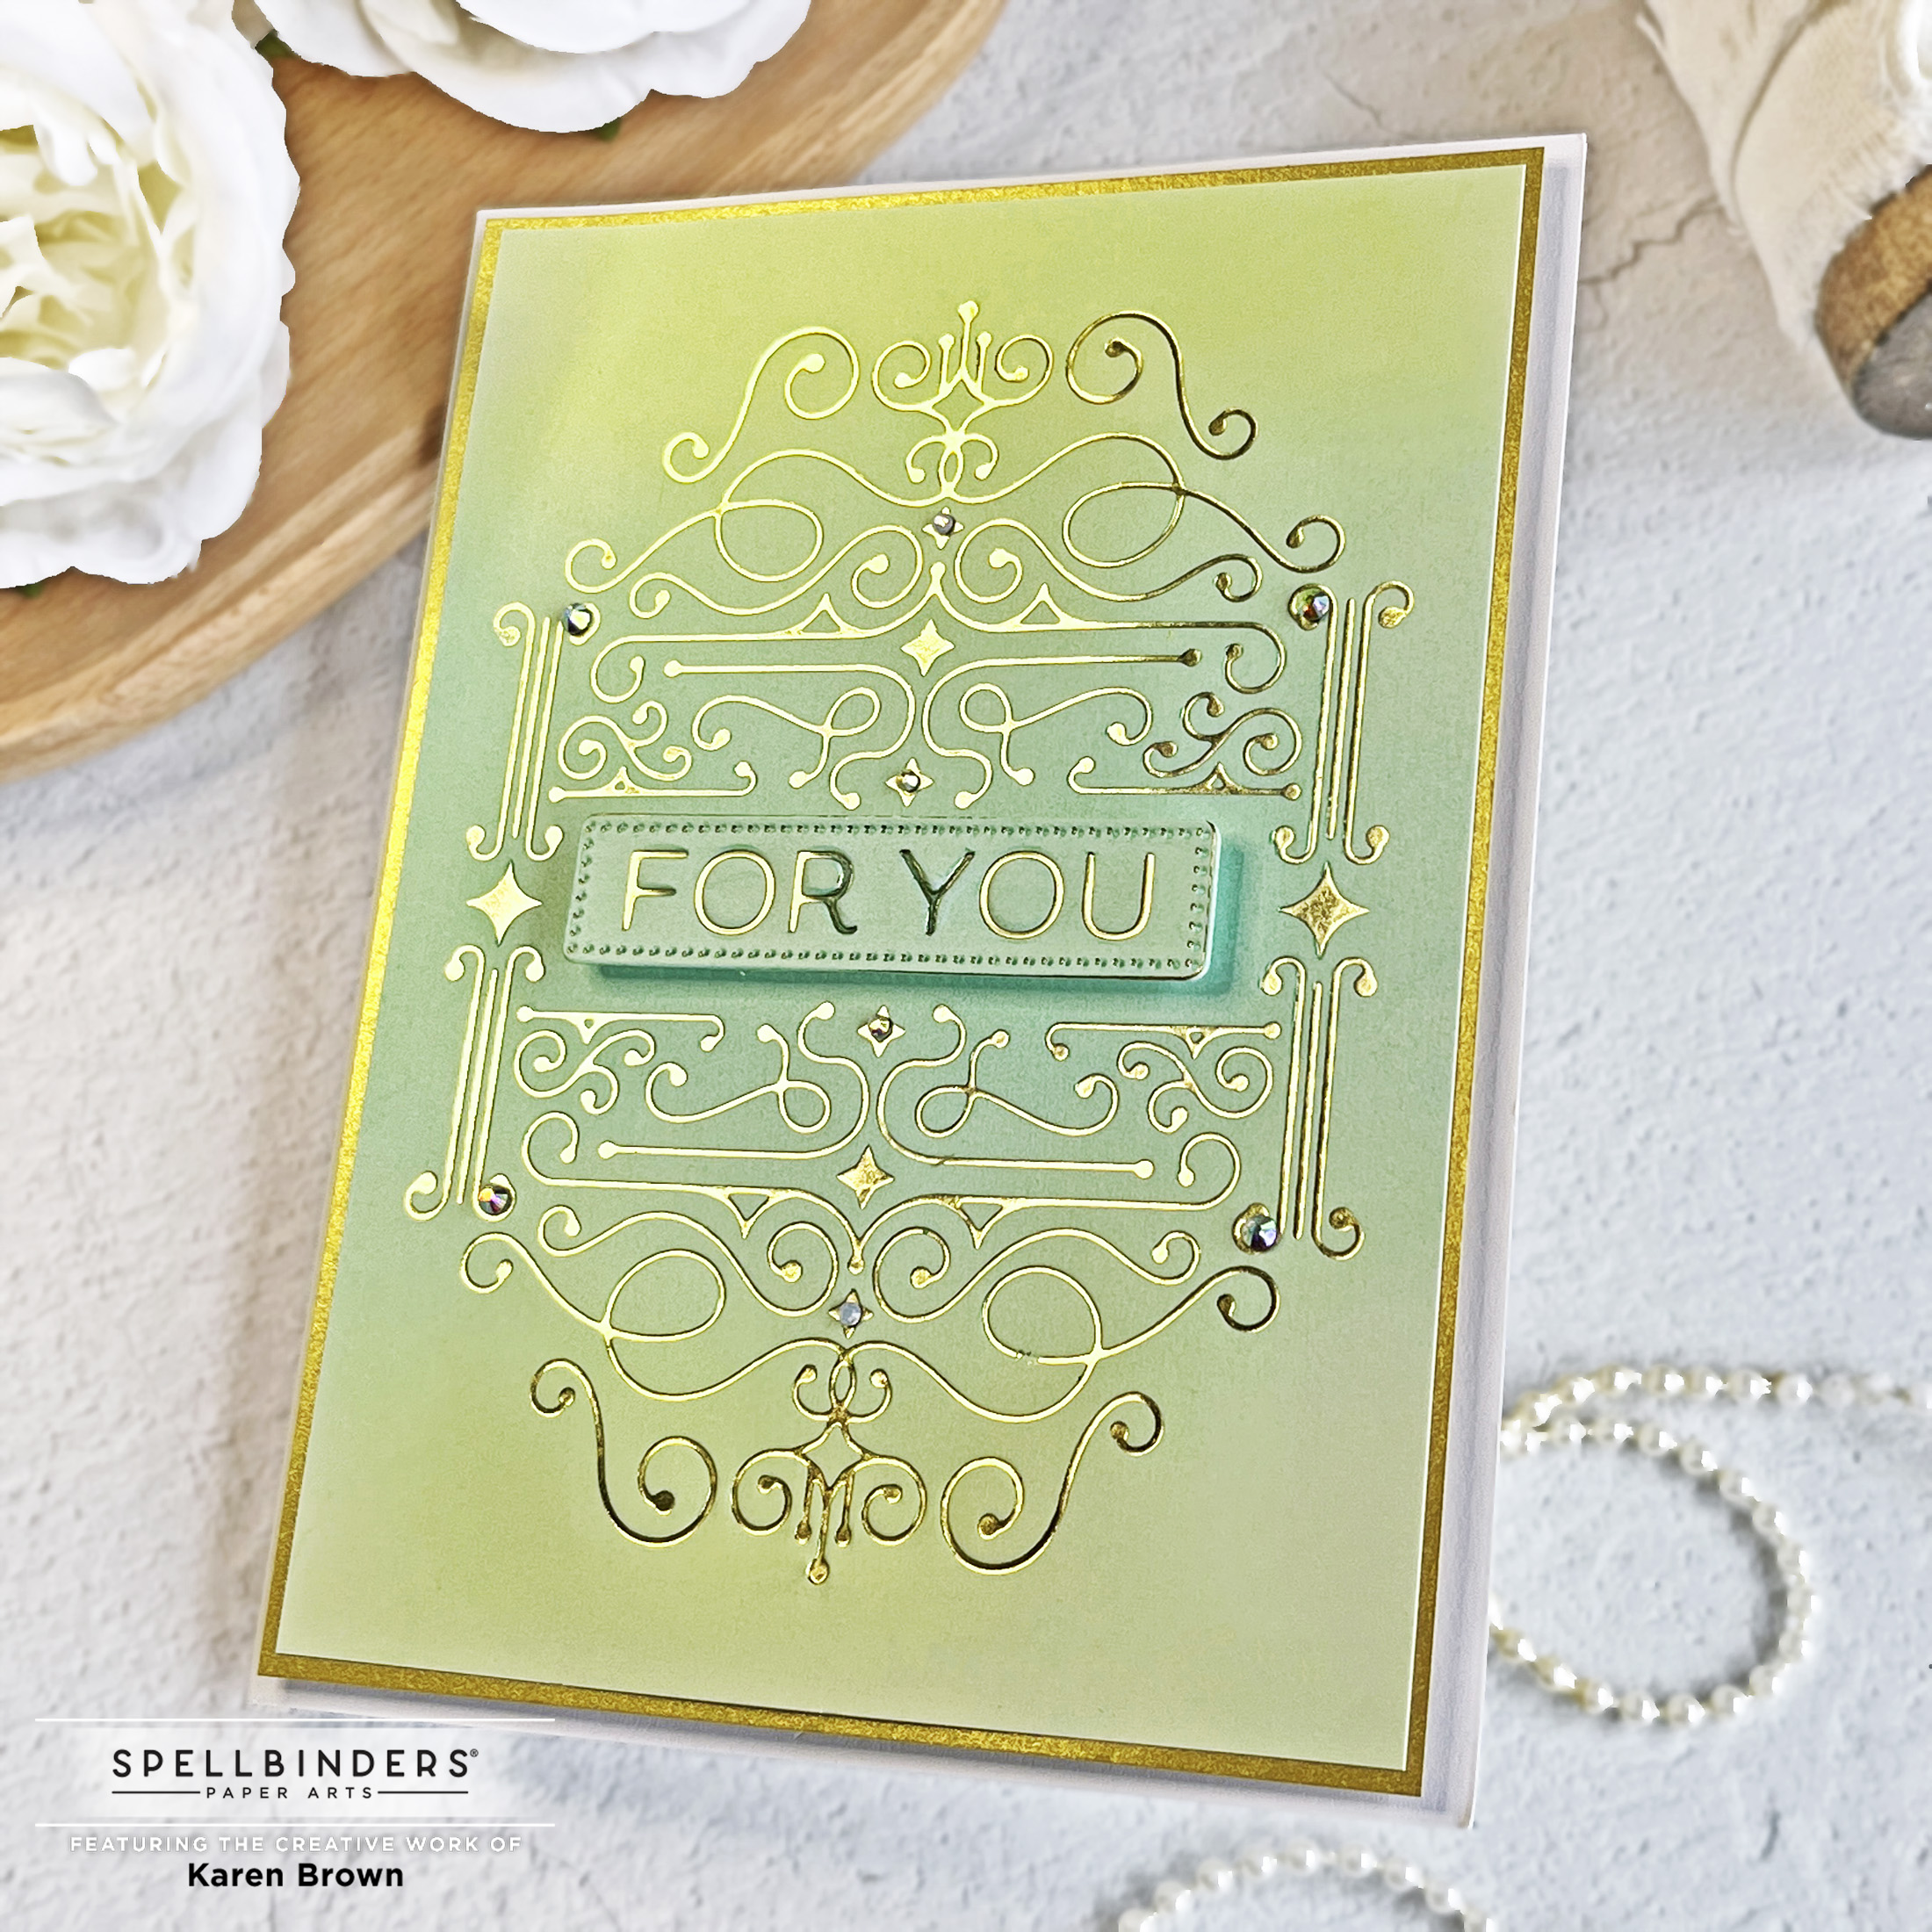
  • Now that the basics were done, I wanted to embellish my bow with floral elements and a tag sentiment. I used Spellbinders Petite Blooms and Sentiments, which is also from the Merry & Bright Collection. I especially love the “For You” etched tag die! I like to die cut lots of elements and then I sit down and play around with different layouts. I added some enamel dots for flower centers. For the bow, I wanted to add pops of color but the bow is so beautiful I didn’t want to cover too much either. Its always a balance, isn’t it?
Spellbinders All Occasion die cut Bow + Petite Blooms and Sentiments

Products Used:

I am not an affiliate of Simon Says Stamp, but I bought the paper (Candy Christmas) I used there and I am providing a link HERE.

See ya next time!

Karen

Interested in more…You can also find me at these spots too:

@karens_mini on Instagram

Pinterest: @karenabrown

FaceBook: Karens_Mini

YouTube: Karen Brown

Spellbinder’s Black Friday Sale

cardmaking

Spellbinders FransFormer Snowy Friends | Cute Quick Christmas Card | Easy Copic Coloring

Spellbinders Fransfomers Snowy Friends  cute with quick easy Copic coloring

Cute creatures + easy Copic coloring makes for an enjoyable afternoon! Spellbinders was kind enough to send me an advance copy of the new Fransformer Snowy Friends by Stupendous cling stamp set and I can’t remember the last time I enjoyed creating a card more. FransFormers are flexible clear stamps that you can squish, squeeze, shape and adjust plus they are just loads of fun!

My card is 5 1/2″ square which allowed me to add three snowmen. I used the same stamp for the left and right snowbabies, but you can see I was able to shape them so they each have their own personality. I did a little easy Copic coloring and I was done.

Three adorable snowmen in hats and scarves on a handmade Christmas card with easy Copic marker coloring.

Spellbinders Fransformer Snow Friends Flexible Cling Stamps STP-218

Copic Markers Used:,

  • Blues: B00, BG11, BG45, B24, B29
  • Pinks: BV00, BV11, RV21, RV23
  • Light Peach: E11, E21
  • Gray: N0, N1
  • Green: YG01
  • Orange: YR04

If you are interested in another easy stamped Copic colored card, check out my blog post HERE.

Let it snow, let it snow, let it snow…

Karen

Interested in more…You can also find me at these spots too:

@karens_mini on Instagram

Pinterest: @karenabrown

FaceBook: Karens_Mini

YouTube: Karen Brown

cardmaking · Die cutting · papercrafting

Spellbinders New Simon’s Snow Globes | Colorful Christmas Card Ideas

Simon Hurley's Snow Globe Christmas Card ideas in bright tropical hues.

Christmas at the beach anyone? I am excited to share 2 cards featuring Simon Hurley’s new Snow Globe holiday collection from Spellbinders. I created 2 bright colorful little vignettes that I think are quite fun!

Bright Tropical Christmas Card

Bright colorful tropical Christmas Card with Palm Trees, Santa and Reindeer.

For my first card, I was simulating a tropical sunset (including palm trees!) with Santa and reindeer flying overhead. I used the Snow Globe etched dies and added the palm trees from the coordinating Nativity Scene. The entire die bundle is wonderful with snowmen, homes, deer and nativity….endless combinations

I love making backgrounds from colorful strips of paper. The background was so easy….I cut 1/4″ strips of colored paper and then adhered to a piece of cardstock. Funny story, I usually use a tape runner for this but halfway through, my tape runner ran out and I didn’t have a refill. No worries though, I just finished the panel with liquid glue, and you can’t tell a difference in the end result. If you’d like to see a quick video on how to create a rainbow striped background, click HERE. (I shot this as a reel for Instagram, but also posted it to YouTube, so the YouTube orientation is a little unusual.)

After my background was complete, I die cut all my components and then assembled my card with Bearly Glue and craft foam (for dimension).

PRO TIP: I like using a combination of liquid glue and craft foam as it allows me to micro-adjust the placement of my die-cuts. I slid the Globe around until it was centered, which is harder to do with Adhessive Foam Squares. I do use double-sided foam squares a lot when placing flowers.

CAS Die Cut Chritmas Card

Handmade  silhoutte Christmas Card with Santa, Reindeer and Snowy village houses.

For card #2, I did a more traditional wintry Christmas scene using Teal Topaz and Brushed Gold Cardstocks. I love the contrast of the bright white against the teal sky. And, the gold adds a subtle elegance to the snow globe.

Spellbinders Simon's Snow Globe holiday card ideas in teal and pinks.

Products Used:

So there you have two bright colorful snow globes. As always, I am so pleased you stopped by!

Karen

Interested in more…You can also find me at these spots too:

@karens_mini on Instagram

Pinterest: @karenabrown

FaceBook: Karens_Mini

YouTube: Karen Brown

cardmaking · Hot Foiling

Spellbinders| Glimmer for the Holidays| Swirling Foliage Tree

Quick and easy Christmas cards are my favorite! Today I am sharing three bright colorful DIY cards that came together very quickly.

Glimmer for the Holidays Hot Foil Christmas Cards

Sometimes, it seems that it takes me several tries to get the hot foil result that I am looking for, but this Spellbinders Swirling Tree and Comfort and Joy sentiments came out perfectly everytime!

I did three versions, and I love them all. These glimmer plates would work so well for mass producing Christmas cards. And I love that I get 6 sentiments with every foil and die-cutting pass! I have tons leftover for future cards. Such a time-saver.

For the Rainbow tree I angled the rainbow foil and I really like the end result. I also used the rainbow foil for the sentiment on the blue and amythest cards.

Products Used:

Supplies Available at Amazon:

X-Press It Blending Cardstock For Great Foiling Results

Waffle Flower Foam Strips

6 Inch T Square Ruler
cardmaking · hot foiling · papercrafting

Spellbinders | Its My Party Too Collection: 3 Colorful Rainbow Card Ideas

Spellbinders Hip Hip Hooray clean and simple foil glimmer card.  GLP-388

Clean and Simple Foil Glimmer Card

Today I am sharing some sentiment focused hot foil cards and the first one was so quick and easy! I wanted to spotlight the fun sentiment so I added some 1/4″ paper strips to the bottom right corner and then angled my sentiment. Done!

Products Used:

Paper Trimmer available at Amazon:

Tonic Studios paper trimmer

Spellbinders Glimmering Hooray Hot Foil Plate and Die Set + handmade card | GLP-388

Hot Foil Stamping + Texture + Rainbow Colors

For my second card, I wanted some texture on my background panel and I thought the Tiny Dots Embossing Folder would be perfect. To add fun pops of color, I added a 1″ rainbow accent strip to the bottom of my card. The width of each strip is 1/4″.

Products Used:

Spellbinders Glimmering All About You Hot Foil Plate and Dies Set  GLP-389 + handmade card

Hot Foiling + White and Gold Floral Die Cuts

For card #3, I kept the rainbow color theme but I added lots of white and gold floral elements to emphasize the lovely gold foiled sentiment. I started with the star of the card, which is the gorgeous hot foiled sentiment. Next, I ink blended a rainbow panel that I die cut into an oval shape and then embossed with the Tiny Dots embosssing folder. At this point, I thought the card looked too plain so I die cut a bunch of my favorite flowers and added them around the perimeter of the center oval. I also embellished with some colorful enamel dots. I die cut the card base from an A2 top folding card. To keep the top fold, I positioned the top edge of the die just above the fold.

Spellbinders Glimmering All About You Hot Foil Plate and Dies Set  GLP-389 + Tiny Dots Embossing Folder SES-051.

cardmaking · Mixed Media

Spellbinders | House Mouse Designs Collection 3 Ways

Spellbinders House Mouse Designs | Daisy Mouse | Mixed Media handmade card.

Spellbinders just released 6 adorable House Mouse Designs Rubber Cling Stamp Kits + a bundle of the entire collection. The whimsical stamps are all so fun and today I am sharing three cards that I created.

Vintage Look Mixed Media Tutorial + Daisy Mouse (RSC-002)

Mixed Media cards have so much interest and I thought the technique would work perfectly with this Daisy Mouse (RSC-002) stamp set.

My Process:

  • I started by creating my background. I masked off a border and then used two shades of tan to ink blend my background. (Antique Linen and Frayed Burlap)
  • With the masking tape still on the cardstock, I then used the same tan inks to stencil and stamp bits and pieces on the background. Most of the stamping was “second generation” where I stamped first on a scrap and then onto my background so that the pattern would be subtle. Cathe Holden has some great stamps (Handle with Care: STP-093 and Friendly Society: STP-094) that I added here and there. I also used a bit of stamping with white pigment ink, but it is hard to see in the photograph.
  • Carefully remove your masking tape. I used Post It Tape, which is the best!
  • After my background was dry, I stamped The Daisy Mouse with Versafine Black Pigment Ink.
  • PRO TIP: For a crisp look, keep the stamp in your Misti stamping platform and restamp the image after you are done coloring. You won’t believe how much this one step will elevate your project!
  • I used Faber Castell Polychromo Colored Pencils to color the mouse and daisy. I used white, 2 shades of gray, 3 shades of yellow, orange, 2 shades of green, blue and coral.
  • PRO TIP: A bit of blue colored pencil was the secret ingredient!
  • Remember to restamp the image and let dry.
  • I also added a few white Posca Paint Pen (.9-1.3mm) dots.
  • The adorable Special Delivery sentiment is included with the stamp set.
  • I mounted my card panel on a navy card base and the finished card is 7″ x 4 3/4″. I usually add lots of foam tape, but I kept this card simple and just used Bearly liquid glue.
Spellbinders + House Mouse Designs | Daisy Mouse (RSC-002) two handmade cards

I loved the Daisy Mouse stamp so much that I made a second Copic colored version.

House Mouse Designs + Copic Coloring Tutorial

Spellbinders + House Mouse Designs | Daisy Mouse (RSC-002) Copic colored handmade card.

The detail on these stamps is so well done that coloring is so easy! I used the following Copic Colors:

  • E50, E40, E00, R20 (face, hands and tail)
  • BV0003 (shadows)
  • W0, W3, W5 (mouse body)
  • YG01, YG03 (stem and flower)
  • Y00, Y06, YR04, YR07 (flower)
Spellbinders + House Mouse Designs Collection Copic colored handmade  cards.

My final card uses Tea for Two (RSC-005). I am a tea drinker so this stamp set definitely called to me!

I used the following Copic colors:

  • E50, E40, E00, R20 (face, hands and tail)
  • BV0003 (shadows)
  • W0, W3, W5 (mouse body)
  • RV00, RV02, RV04 (teacups)
  • YG03 (stems)
  • BG05. B05 (flowers)

I wanted to add a small little sentiment in the middle of the scene, so I stamped the Hello from Fill My Heart Sentiments (STP-183)

Spellbinders + House Mouse Designs Tea for Two (RSC-005) Copic colorered handmade card.

Products Used:

Items Available at Amazon:

Faber Castell Polychromos Colored Pencils
cardmaking · Hot Foiling

Spellbinders | Glimmer Cardfront Birthday Sentiments 6 Ways

Spellbinders Glimmer Cardfront Birthday Sentiment handmade card in Rainbow Hot Foil

Making Your Own Backgrounds with Rainbow Strips of Cardstock

Big bold sentiments can really add a lot of impact to your cards, so I was so excited to see Spellbinders new Glimmer Cardfront Sentiment Collection. Today, I am sharing 6 different glimmer hot foil birthday cards featuring the Best Wishes on Your Birthday Foil Plate.

I love bright colored cards so I started with Rainbow Hot Foil and then created coordinating backgrounds made of colorful strips of cardstock. The sentiment panel was die cut using Stylish Oval Nesting Dies. For card #1, I used a paper trimmer to cut fifteen 1/4″ strips of cardstock. Next, I applied a tape runner over a cardstock panel and then adhered the cardstock strips in rainbow order. Surprisingly, this is actually fast and easy to do.

PRO TIP: To assemble my card, I used craft foam and liquid glue to add a layer of dimension under both the background and sentiment panel. On many projects I prefer craft foam to foam tape. With craft foam and glue, I can slide my element and make micro-adjustments for perfect placement.

Don’t you just love the shine and shimmer?

How to make your own Make Your Own Backgrounds with Rainbow Strips of Cardstock

For card #2, I used my paper trimmer to cut six 1/2″ strips of colored cardstock and then I cut five 1/8″ strips of white cardstock. I think the white dividers really brighten up the look! I again used a tape runner to adhere the white and colored strips to the background. For the second card, I used gold foil and and then matted the sentiment with brushed gold cardstock.

Spellbinders Glimmer Cardfront Birthday Sentiments 6 Ways

Using Printed Designer Paper for Quick and Easy Cards

These fun foiled sentiments do all the heavy lifting so it is easy to quickly make cards using printed designer paper for the background. Spellbinders Cheerful Occasions pad (I think this pad sold out) has such fun designs and I used the papers on the backgrounds of cards #3, #5 and #6.

Using Printed Designer Paper for Quick and Easy Cards + Spellbinders Glimmer Cardfront Sentiments hot foiling

Reverse Foiling | Using the Glimmer Hot Foil Negative Space for 2 For 1 Cards

I hated to throw away the foil after I created the cards above, so I created 2nd bonus cards with the leftover foil. The result is so bright and eyecatching! Card #3 uses the negative from the Rainbow Foil.

I cranked up the heat and time and ran the “foil negative” through a second time using a solid foil plate. I used the highest heat setting for 1 minute and got a beautiful result.

PRO TIP: There is a thin protective layer on top of the foil that I peeled off after my card was finished. I kept the foil covered (with the clear protective layer) during assembly to prevent scratches on the foil.

Using the Glimmer Hot Foil Negative Space for 2 For 1 Cards + Spellbinders Glimmer Cardfront Sentiments

Card #5 uses designer paper paired with the negative from the gold foil.

Quick and Easy DIY glimmer hot foil cards.

My final card pairs designer paper, black foil plus I added a second mat die cut from velum. The velum mat is subtle but very pretty.

Spellbinders Glimmer Hot Foil Cardfront Sentiments Birthday Card

Products Used:

Do you have a favorite? I’d love for you to tell me in the comments.

Karen

cardmaking · Die cutting · papercrafting

Spellbinders | Stylish Ovals Collection 4 Ways

Spellbinders Stylish Oval Hello You Floral Dies (S5-565) + Oval Nesting Dies (S5-562) on a handmade card.

Oval Shaped Cards

Shaped dies can really change the look of your cards and projects so I was excited to see Spellbinders new Stylish Ovals Collection. I created the first card for my mom’s upcoming birthday. Red is her signature color so I paired corally reds with aquas and greys for a very eye-catching color palette.

To make my oval cardbase, I used the largest oval die for the base. I took a white A2 top folding card base and put the top edge of the die just above the fold so that the die would cut around the top. I die cut the stem twice and glued together for added heft and stability.

Supplies Used:

Shaped Oval Card with Spellbinders Stylish Ovals Collection

Spellbinders Floral Die Cut Cards

Spellbinders Stylish Oval Hello You Floral Dies (S5-565) + Oval Infinity Punch and Pierce Plate Cover Die handmade card.

I needed a card for a bridal shower so I made a second oval shaped card with die cut flowers. This one is smaller than card 1, it is 5″ x 3 3/4″. I think it makes for a sweet gift encloser.

I used the same products as card one but added a pretty little oval frame from the Infinity Punch and Pierce Plate Cover Die. This die is so beautiful and a has an incredible amount of detail, but it cuts beautifully. I used just the middle section on this card and I used the other 2 sections on card #4 below.

Products Used:

White oval shaped card with die cut red flowers.

Die Cut Rainbow Arch Birthday Card

Colorful Rainbow Arch card with Spellbinders Stylish Oval Nesting Dies (S5-562) handmade card.

In case you haven’t noticed, I LOVE these oval nesting dies. Just for fun, I wanted to make a bright cheerful rainbow card so I selected 8 bright shades of cardstock and then die cut my rainbow elements.

This type of birthday card is so versatile that I love to keep them on hand. I could send this to anyone…man, woman or child.

Products Used:

Festive Rainbow Colored Die Cut Birthday card.

Spellbinders Infinity Punch and Pierce Plate Cover Die

Spellbinders Stylish Oval Infinity Punch and Pierce Plate Cover Die (S5-566) handmade card.

This cover die is gorgeous in person! I started by making a rainbow gradient background with inks and blending brushes. I then placed the center and exterior components of the cover die over the top and added two floral embellishments that echo the spring colors.

Supplies Used:

Oval pierced cover die with spring ink blending on a handmade card.

I hope I offered some inspiration for your crafting.

Karen

cardmaking · Die cutting

Spellbinders Cards | Be Bold Blooms Floral Die Kit 3 Ways

Spellbinders Be Bold Blooms Die Set (S5-502) handmade card.

Happy Birthday to me! I had several crafty items on my wish list that I received as birthday gifts:

I thought it would be fun to combine these products together for a birthday blog post.

Using Sarah Renae Clark’s Color Cubes and Catalogue

I love color so Sarah Renae Clark’s bundle has been so fun to explore! I started by looking for color inspiration in the Color Catalogue and then I pulled out several Color Cube Cards that I found inspiring. I like to start with the Color Catalogue where I can search by Color, Key Word or Collection. I wanted a bright springy card so I began by searching for combinations with hot pink/magenta. For my first card, I settled on combination #35. My second card uses #218.

Once I had my colors selected, I matched them up with hues in my new Papertrey Cardstock. I love that there are 36 colors in each package!

Spellbinders Be Bold Blooms handmade cards in Pinks and Yellows from Papertrey Perfect Match Cardstock.

Spellbinders Flowers | Be Bold Blooms Die-Cutting Tutorial

I started die cutting with my Be Bold Blooms kit. I love the variety of flowers included…they are fun and whimsical! I used my Papertrey paper plus some Spellbinders Brushed Gold. I like that the gold adds a rich elegance without being too shiny.

I wanted to experiment with backgrounds too. For Card 1, I “debossed” my background panel with an older Embossing Folder of the Month called Intertwined Lattice. For Card 2, I die cut a frame with an old favorite Spellbinders Essential Rectangles.

Spellbinders Be Bold Blooms Die cut handmade card in blues and yellows.

I played around with layouts and once I had the die-cuts they way I wanted I carefully applied Press-N-Seal wrap over the top, flipped it over and applied Instant Dimension Foam Tape to the bottom of each piece. All I had to do was flip it back over, place, add a bit of pressure and then gently peel back the Press-N-Seal. So much faster than laying out, disassembling, adding foam tape and then reassembling piece by piece.

Spellbinders Be Bold Blooms die cut handmade card in blues and yellows using Papertrey Perfect Match Cardstock.

I added my sentiments (hello is from a past club kit) and was done.

Elegant Die Cut floral Sympathy Card.

I needed a Sympathy Card so did another quick card with white, gold and pink die cuts.

Die Cut Sympathy Card.

Products Used:

Have a great week!

Karen

cardmaking · Die cutting · Hot Foiling

Spellbinders | Four Petal Collection

Spellbinders Four Petal Bloom Reflection Die Kit: S4-1263 handmade card.

Hi friends, I am sharing two cards from Spellbinders new Four Petal Collection. The cards are very different but they are both so pretty!

Spellbinders Four Petal Bloom Reflection Die Kit: S4-1263

I adore die-cutting so The Four Petal Bloom Reflection Kit called to me. I love all the gorgeous detail on these dies! I added an extra metal shim while die-cutting which resulted in beautiful die-cut results. I framed the florals with the Essential Rectangles die as I liked the way it complimented the small die-cut circles on the fan flowers. I also embellished the white flowers with enamel dots.

Products Used:

Spellbinders Four Petal Bloom Reflection Die Kit: S4-1263 + Handmade Card

Spellbinders Four Petal Scroll Label Hot Foil Plate: GLP-370

Last year, I finally bought myself a foiling system and I really love the results! For this card, I used the new Four Petal Scroll Label Foil Plate. The shine can be difficult to photograph, but I did my best. This card just glows in person!

Spellbinders Four Petal Scroll Label Hot Foil Plate + handmade card

I used Gold Foil on Yupo paper and the results are beautiful! I then ink blended Lagoon and Parrot ink over the foiling and let the ink dry overnight so it would not smear. I like foiling on the slick Yupo paper but it does take longer for the ink to dry. The next day, I matted with Brushed Gold cardstock and added some Crystal Gems to further enhance the beautiful shine of the foiling. The sentiment is included in the kit.

Spellbinders Four Petal Scroll Label Hot Foil Plate:  GLP-370 + ink blending over gold foil.

Products Used:

I am so happy you stopped by!

Karen