Cardmaking Kit · Die cutting

Hero Arts September 2025 Club Kit Release: Fall into Fall

Two fun homemade cards created with the September 2025 Hero Studio card kit and Fancy Dies Kits.

Hello friends! It’s time for the Hero Arts September Club Kit Release, and this month’s theme is Fall into Fall. 🍁 Autumn crafting is one of my very favorite seasons, and this release is packed with stamps, dies, and sentiments perfect for cozy, colorful cardmaking. I have two very different projects to share with you today—one-layer stamping and coloring, and a layered die cut scene—that both capture the warmth of fall.

Card 1: One-Layer Stamped + Colored Fall Scene

One-layer fall card featuring stamped and colored pumpkins, mushrooms, acorns, and leaves with the sentiment “Fall is my Favorite Color” created with Hero Arts September 2025 Card Kit of the Month.  Embellished with enamel dots.

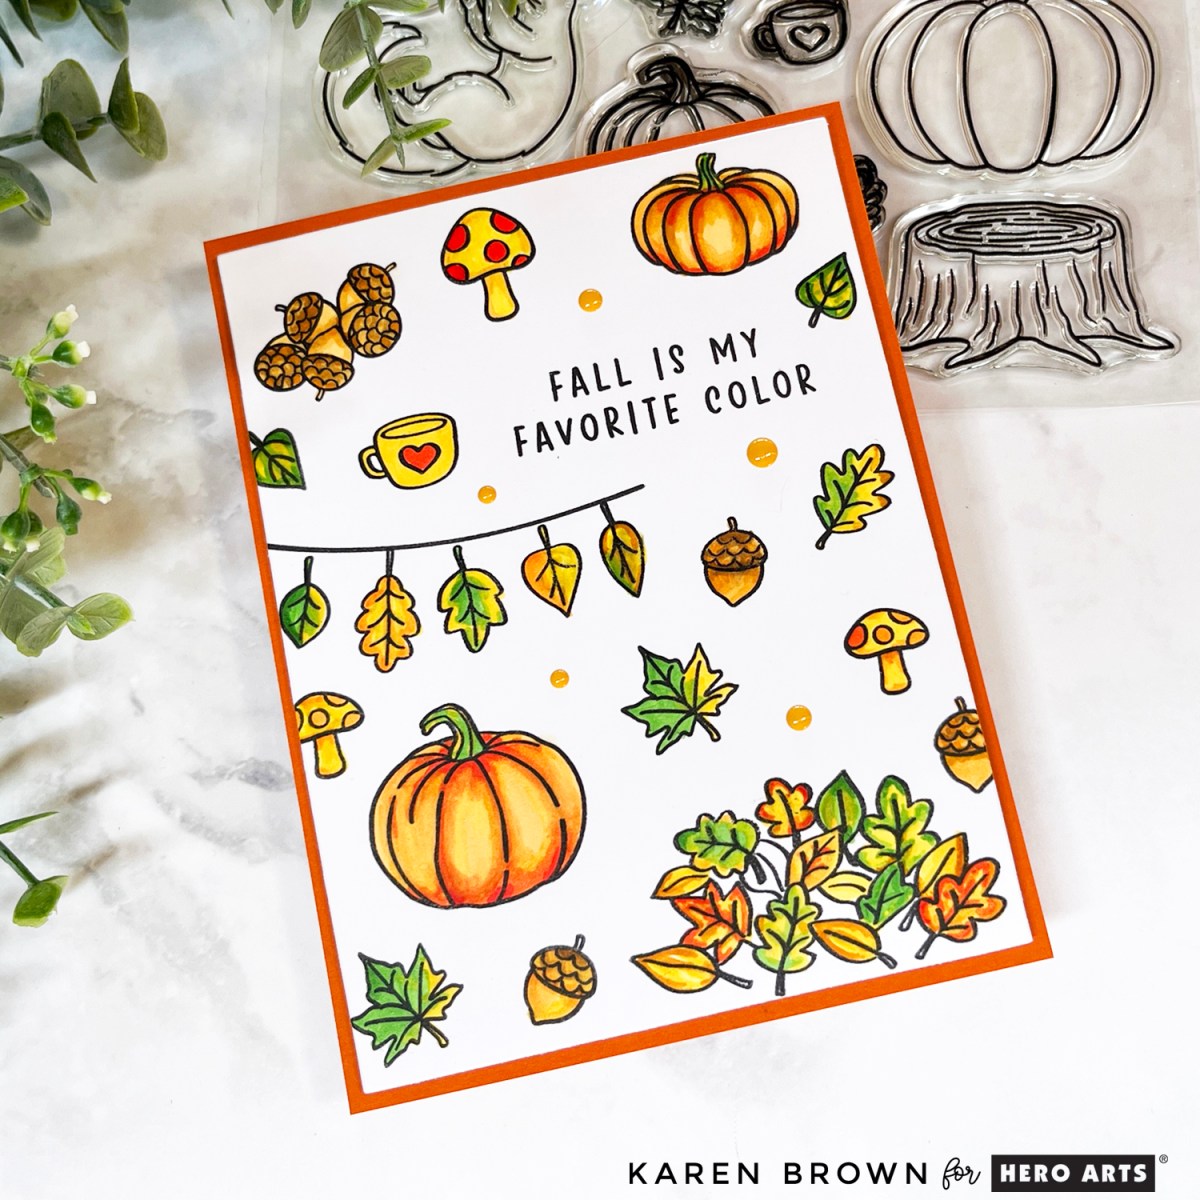
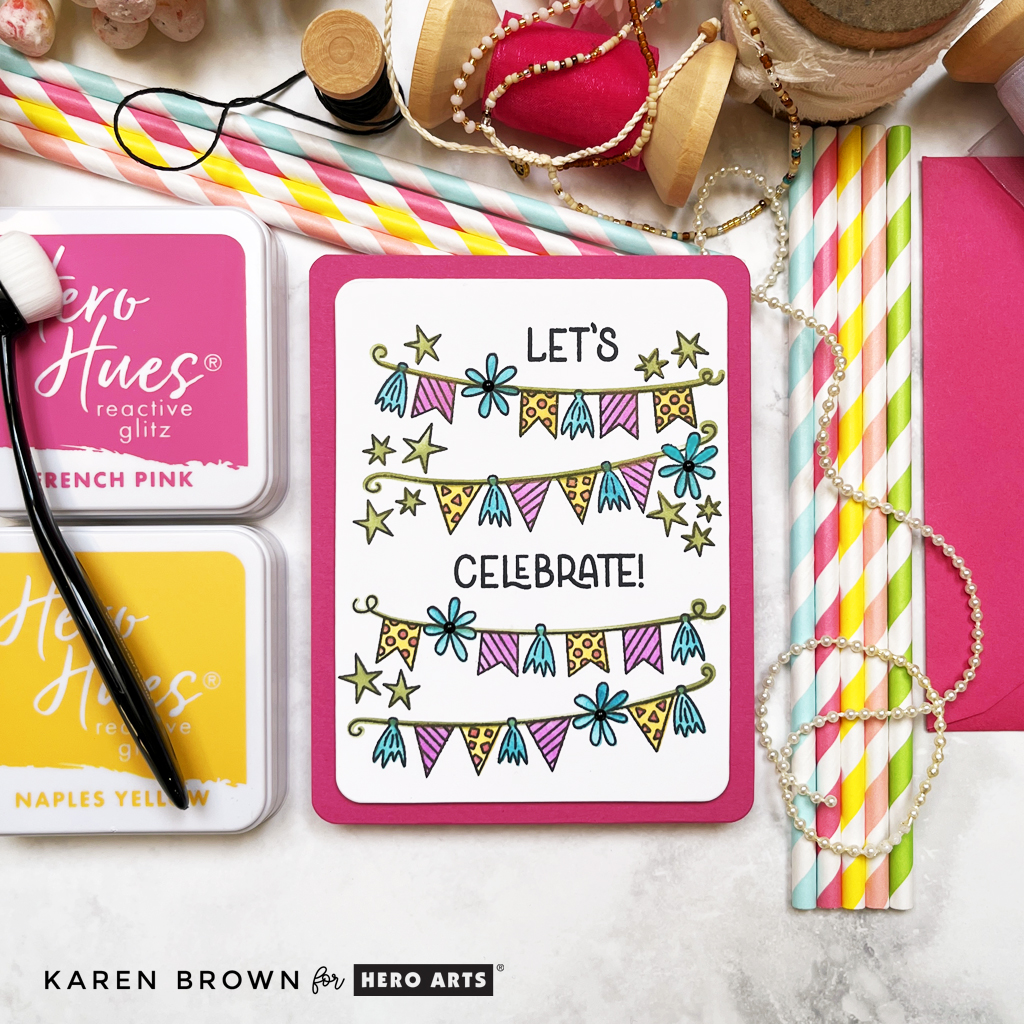
The September Card Kit includes gorgeous fall imagery: pumpkins, acorns, mushrooms, leaves, and more. I wanted to let the stamps take center stage, so I designed a one-layer background that doubles as the focal point.

I stamped a scattering of pumpkins, mushrooms, and leaves across a white card panel, then brought them to life with alcohol marker coloring in classic fall hues:

  • Oranges and yellows for pumpkins
  • Warm tans and browns for acorns
  • Fresh greens, yellows and oranges for leaves

The finishing touch is the sentiment, “Fall is My Favorite Color,” stamped boldly in black. A few enamel dots (also included in the kit!) add just the right amount of shine.

This card is simple, flat, and easy to mail—but still rich in detail and warmth.

Hero Studio September 2025 stamped one layer card featuring alcohol marker colored pumpkins, fall leaves, acorns and mushrooms + a few enamel dot embellishments.

What’s Included in the September Card Kit?

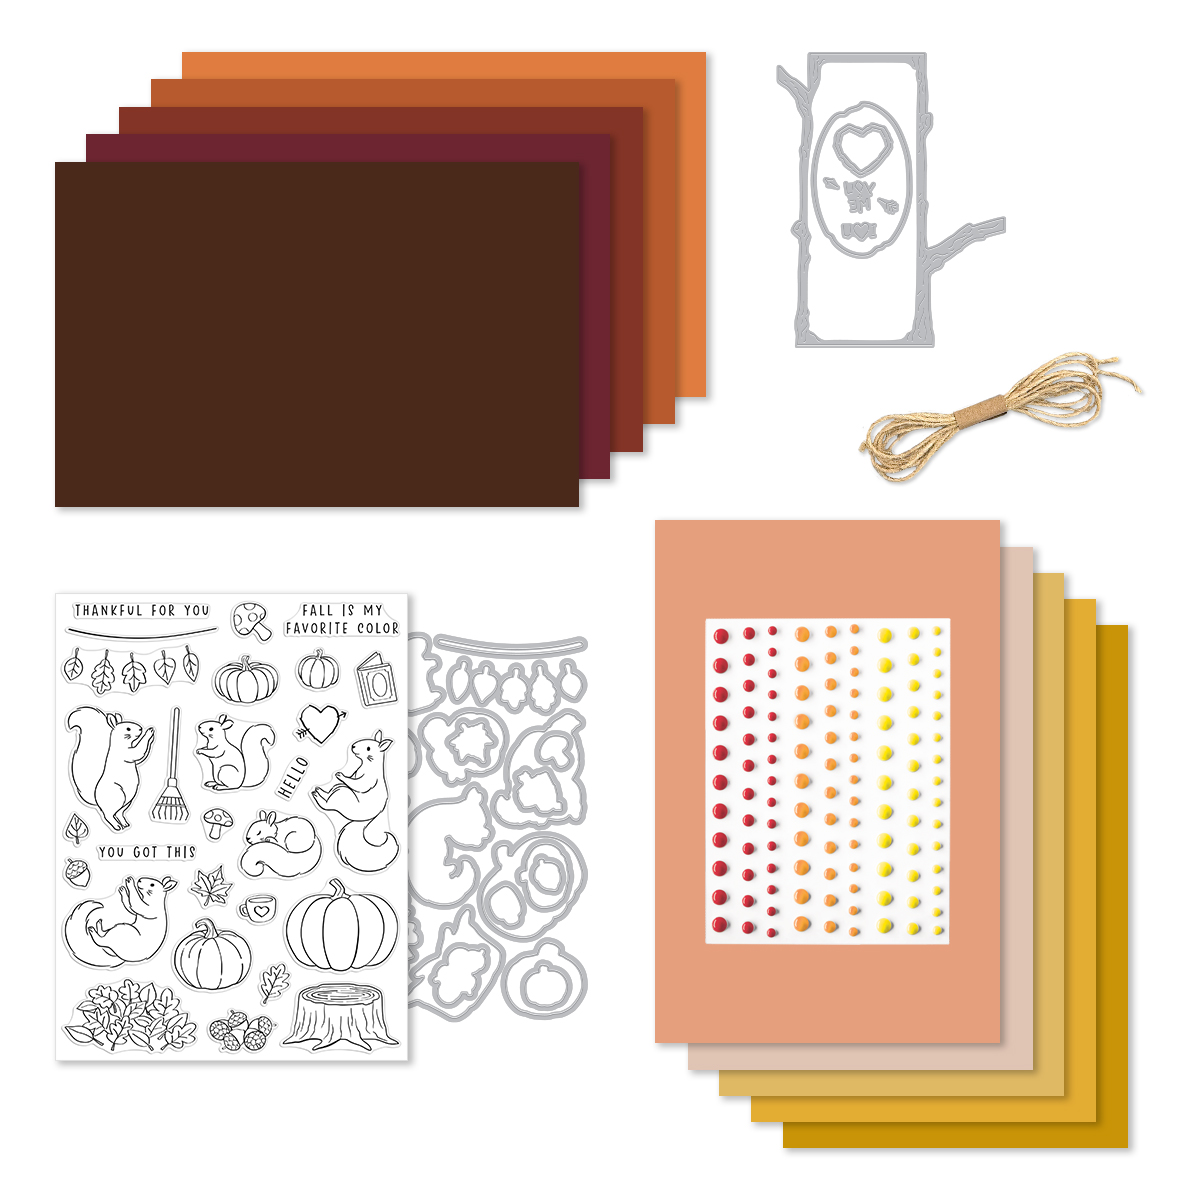
  • Fall is my Favorite 6×8 Stamp Set
  • Fall is my Favorite Coordinating Dies
  • Treehouse Die Set
  • Sunset Enamel Dots
  • Brown Twine, 1 yard
  • 10 Sheets of Cardstock- 1 of each color, 5.5″ x 8.5″ (Truffle, Merlot, Cinnamon, Terra Cotta, Carrot, Coral, Bellini, Beeswax, Saffron, Tuscan)

Receive a FREE adorable Cozy Kitty Die Set when you purchase The Whole Studio!

Hero Arts has many different Monthly Kits that you can subscribe to including:

🦊🐻 Card 2: Cozy Critters Fancy Die Scene

Adorable die cut scene card featuring an adorable brown bear and red fox snuggling in a brass bed with their stuffed animals.  Created with the Hero Arts September 2025 Fancy Die Kit of the Month:  Cozy Critters.

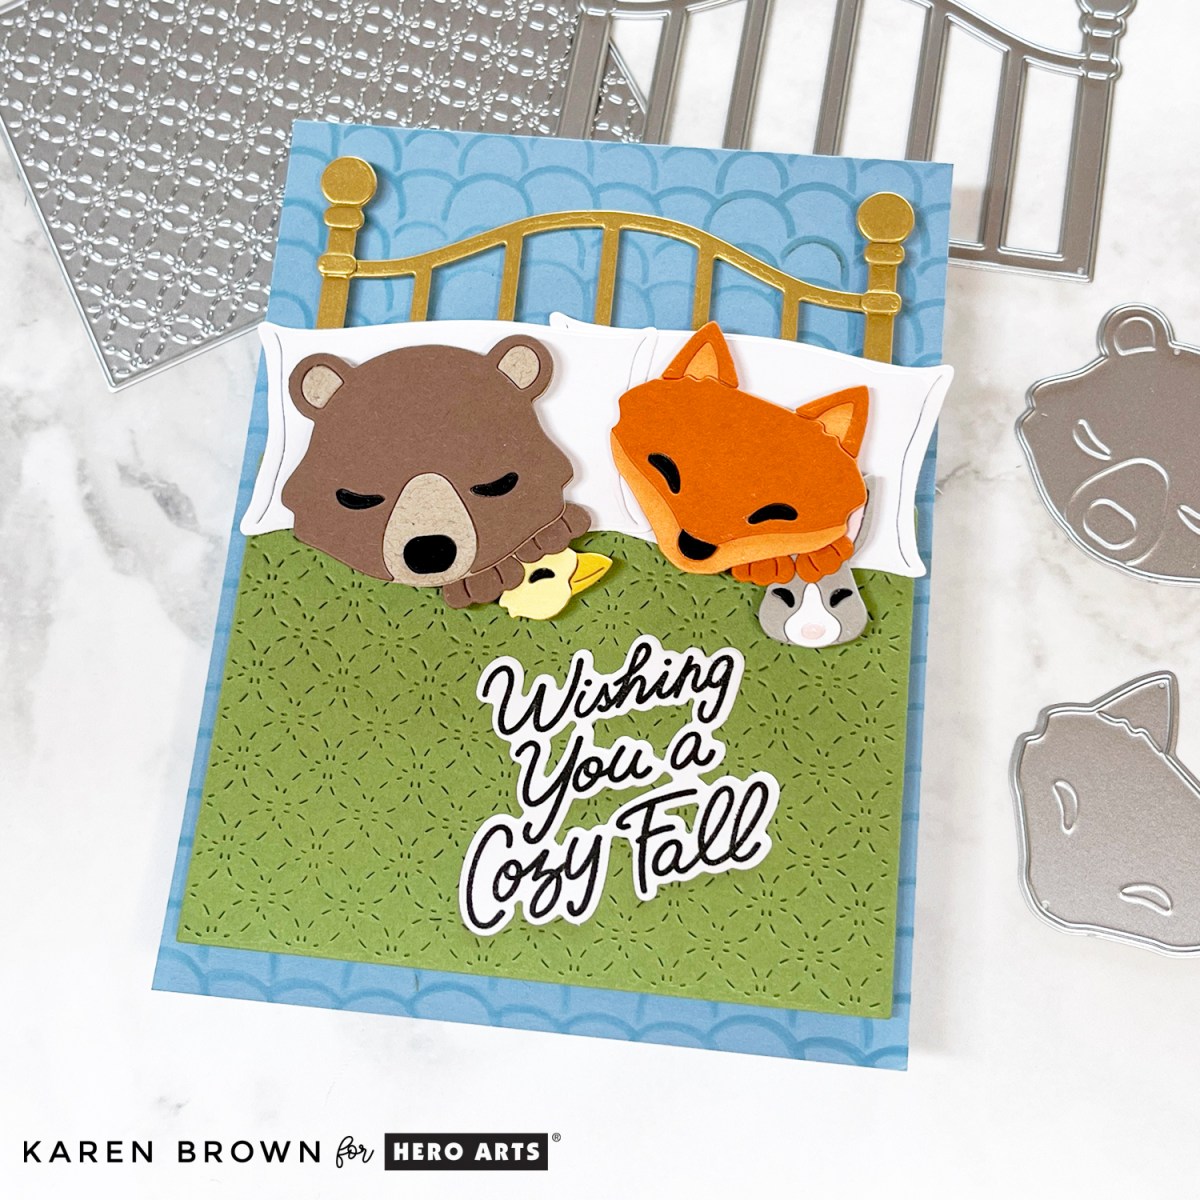
Next, I dove into the September Fancy Dies: Cozy Critters. This set has my heart! I created a cozy little bedtime scene featuring a brown bear and an orange fox tucked into a brass bed with a green quilt.

  • The bear is snuggling with a little stuffed duck.
  • The fox is holding the sweetest bunny.

The scene is playful, heartwarming, and perfect for fall—but I think it would also make an adorable Valentine’s Day card!

Die cut scene card featuring a brown bear and orange fox tucked into a brass bed with a green quilt. Bear snuggles a duck, fox holds a bunny. Sentiment “Wishing You a Cozy Fall” with a subtle stenciled wallpaper background.

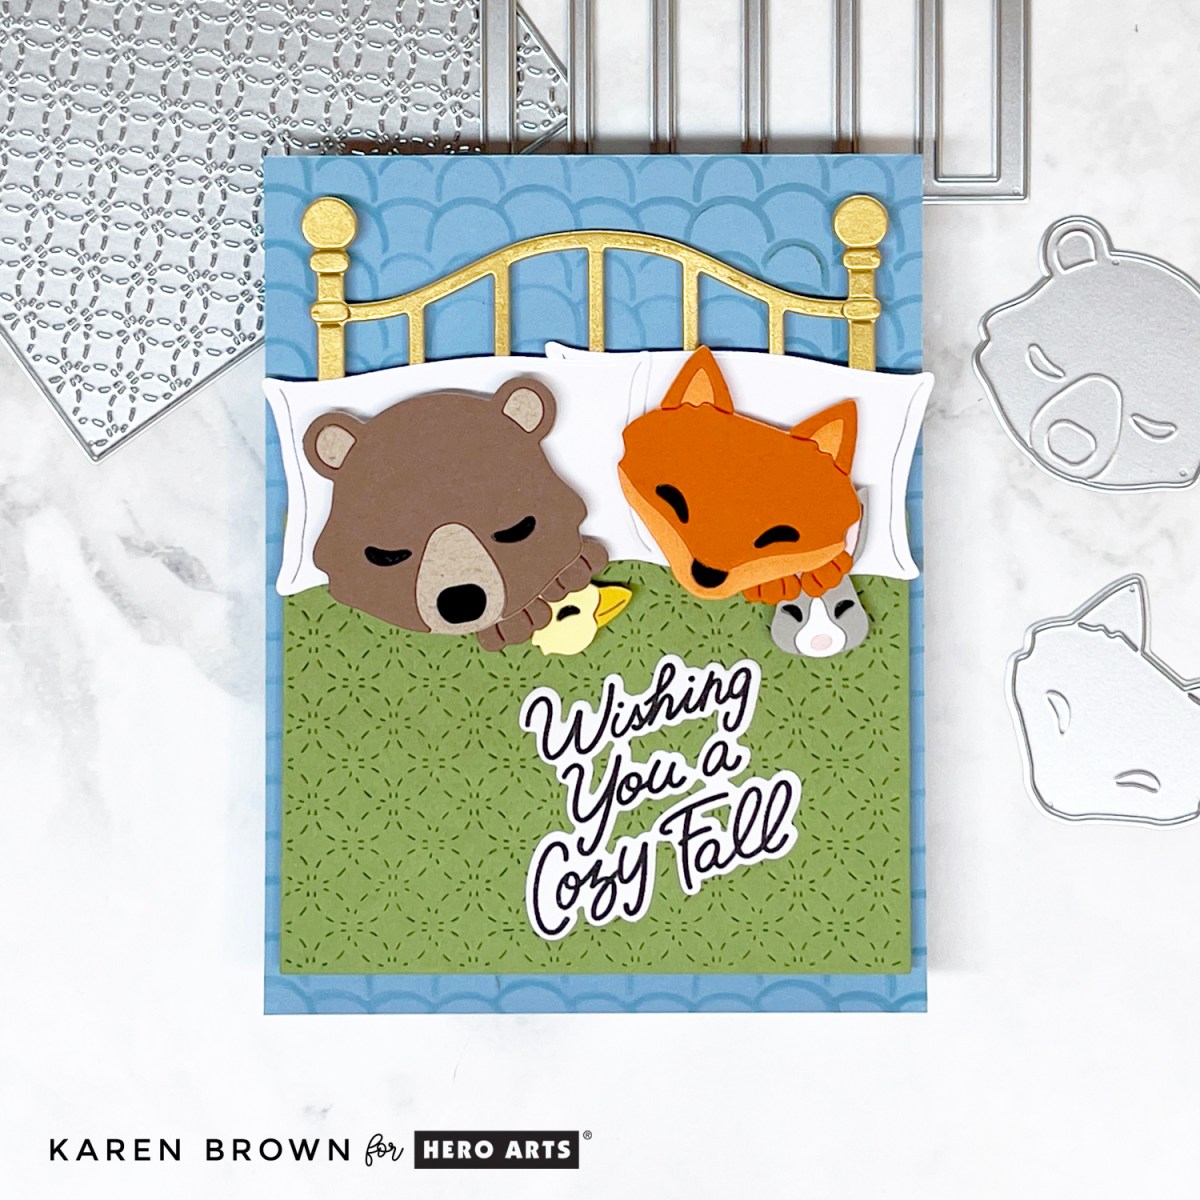
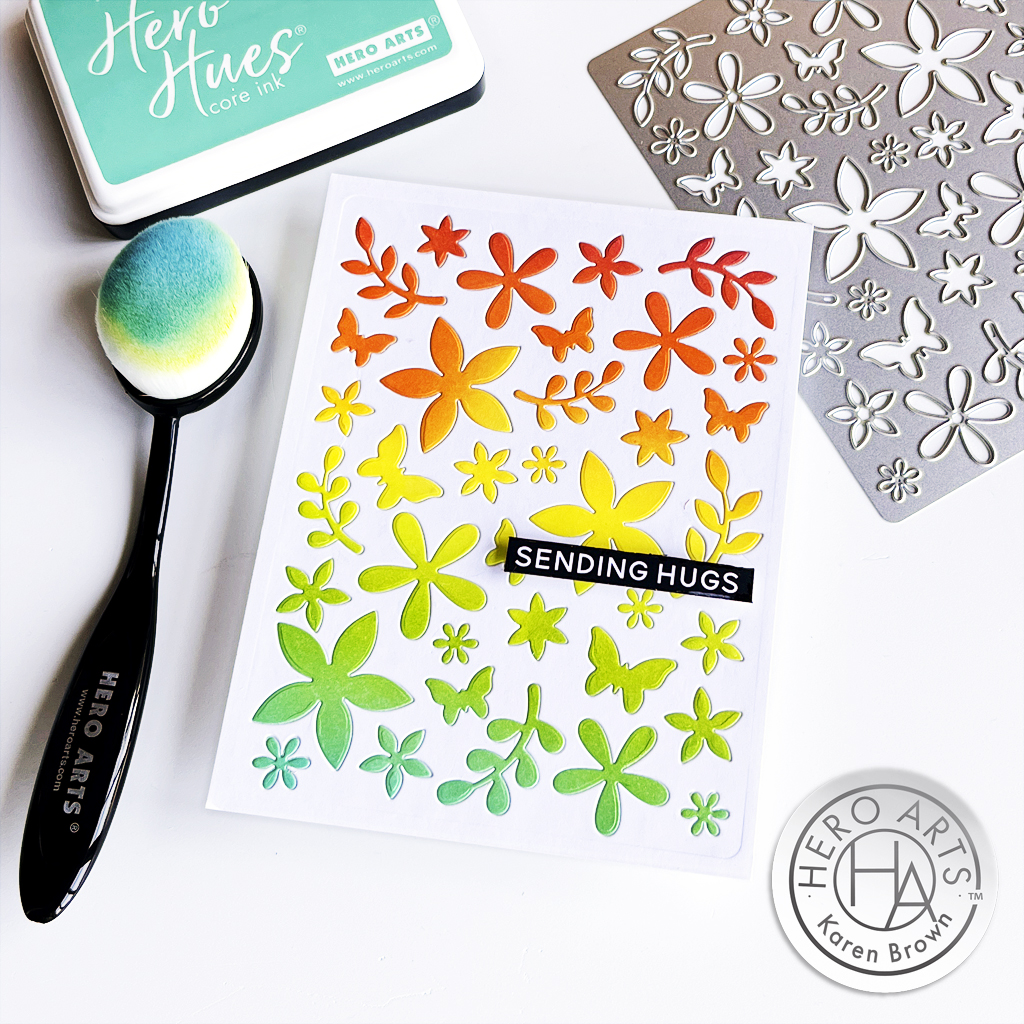
The sentiment, “Wishing You a Cozy Fall,” comes from the September Clear Stamp & Cut Set and fits perfectly with the theme. For the background, I added a touch of subtle pattern using the Retro Rainbow Stencil with Contour Ink. The soft “wallpaper” design adds depth without competing with the cozy critters in bed.

Love this die set? I have another adorable creation that you can see HERE.

Charming Die Cut Scene card featuring cozy die cut critters from the September Hero Studio Club Kits.

Blog Hop

Hero Arts is celebrating this release with a Blog Hop full of inspiration from the creative team. Hero Arts will give away a $50 gift card, drawn from the comments left across the hop. Enter by Friday, September 5th at 11:59pm PT, and the winner will be announced on the Hero Arts blog the following week. Leave a comment on all stops for more chances to win!


Hero Arts Creative Team:
Anna Mahtani
Channin Pelletier
Charlene Madrid
Jeannie Lieu
Jennifer Kotas
Karen Brown You Are Here!
Lea Lawson
Lisa Tilson
Michelle Lupton
Michelle Short
Mindy Eggen
Natasha Polite
Nichol Spohr
Rachel Kleinman
Rosie Lopez
Seeka

Cardmaking Video

Video Hop | Easy, Fun & Festive Birthday Cardmaking: Color, Shine, Celebrate!

Can you ever have too many birthday cards? I think not! Today, I’m sharing a fun, modern, and eye-catching birthday card featuring the Hero Arts Celebrate Stamp & Stencil Set—perfect for anyone on your list!

Click link to see the Hero Arts Spring Collection.


You can watch the video above, or you can click the link HERE to watch on YouTube.

Plus, this video is part of a Video Hop, so be sure to check out the other fabulous creators linked below.

A vibrant handmade birthday card featuring four colorful stenciled banners with flowers, created using the Hero Arts Celebrate Stamp & Coloring Stencil Set and Glitz Inks.

Bold Colors & Easy Techniques

For this card, I started with a large focal stamp of four birthday banners—such a fun and festive design! Instead of traditional coloring, I brought in Glitz Inks and Color Layering Stencils to add French Pink, Naples Yellow, Byzantine Green and Egyptian Blue to the banners. These inks add beautiful shimmer that makes the design pop without needing extra embellishments (but you know I couldn’t resist a few black enamel dots in the flower centers!). This is totally optional, but I used my Rounded Rectangle Infinity Dies to round the corners and trim down my panel.

Pro Tip: Glitz Inks are not only stunning, but they’re also super easy to clean up! A quick rinse, and your brushes are good as new.

Festive Birthday card perfect for men, women and children.  The card features 4 birthday banners stamped and colored with layering stencils in pink, yellow, aqua and green.

Organizing My Stamps & Dies

I also wanted to share a quick tip on storing stamps and dies. I use Hero Arts Magnetic Sheets and Storage Sleeves, which help keep my dies neat, tidy, and easy to find. No more hunting for that one missing die—it’s all in one place and ready for my next crafting session! I also love their Stamp Storage Sleeves. More details in the video.

Key Products Used:

Join the Celebration! Blog Hop Order:

This card was a joy to make, and I hope it inspires you to break out your Glitz Inks and stencils! Be sure to check out the Video Hop and leave a comment on my video—I’d love to hear what you think! And tell me… do you think it’s possible to have too many birthday cards? (Spoiler: I don’t!) 🎉

cardmaking · Give Away · papercrafting

Hero Arts | Spring Catalog Collection Release + Blog Hop

Bright and colorful Smile Friend sentiment handmade card from Hero Arts.

I am so excited about Hero Arts Spring Catalog release, which goes live TODAY! There is so much wonderfulness that I can’t wait for you to see. To celebrate, Hero Arts is hosting a Blog Hop and Giveaway.

I wanted to start off with two fabulous new sentiment dies that I just love from Smile Friend Stamp and Cut XL. I went crazy die cutting a bunch so I will have them on hand for future cards.

Products Used on Smile Friend Card:

Flower Pattern Cover Die

Rainbow ink blending + Inlaid die cutting using Hero Arts Flower Pattern Cover Die.

I LOVE cover dies so I was excited to create with this Flower Pattern Cover Die, which is perfect for Spring and Summer. I started by ink blending a rainbow panel which I then die cut with the cover plate and then used the inlay technique to create a one layer background. This went more quickly than you would think because the die cuts fit like a good quality puzzle. My placement and gluing took about 20 minutes.

TIP: Keep your die-cuts in the panel until you start gluing so you know the orientation and position on your background.

Products Used on My Flower Pattern Cover Die Card:

Birthday Animals Stamps + Pointed Arches Infinity Dies

Fun and happy Copic colored Alligator Gator Birthday Card using Hero Arts Birthday Animal Stamps  + Pointed Arches Infinity Dies.

Isn’t this Alligator the cutest? He is one 7 animal stamps included in the Birthday Animals Bundle. The set also includes 8 birthday/everyday sentiments. I combined the stamps with the Pointed Arches Infinity Dies. Infinity Dies are definitely staples in my craft room and I like the interest the arches add to projects. 

Products Used on The Gator Card:

Easy One Layer Sympathy Card

Easy one layer Sympathy Card Using With Sympathy Hero Rub-on Transfers.

I love everything about Rub-on transfers. I love how easy they are to use, the look they add to projects and how fun they are to apply! This Spring, Hero Arts included “Sympathy Transfers” in their release. I did some quick ink blending on my background and then added my Hero Transfers for a quick and easy card.

Products Used on My Sympathy Card:

Blog Hop and Giveaway Information:

Hero Arts will be giving away two $50 gift cards, drawn from the comments left along the hop. Comment on all the blogs for more chances to win! You have until Wednesday, February 21st at 11:59pm to enter. The winners will be announced on the Hero Arts blog.

Kailash Naidoo is next on the hop and I have links to everyone below.

Hero Arts
Hero Arts Creative Team:
Mindy Eggen
Natasha Vacca
Ilina Crouse
Charlene Madrid
Lydia Fiedler
Heather Ruwe
Natasha Polite
Seeka
Jeannie Lieu
Dana Joy
Pocono Pam
Rachel Kleinman
Michelle Short
Jennifer Kotas
Rosie Lopez
Karen Brown
Kailash Naidoo
Channin Pelletier
Special Guests:
Nichol Spohr
Ralph Tyndall
Laurie Willison
Cathy Zielske
Laura Bassen
Caly Person

I am so glad you could join this Hop!

cardmaking · Mixed Media · papercrafting

Spellbinders | House Mouse Candy Hearts Vintage Look Valentine Card

There’s something undeniably captivating about a vintage valentine, where every delicate stroke of ink and carefully chosen sentiment carries a timeless charm. This new House Mouse Candy Hearts rubber stamp had a very retro look to me, so I went with an old-timey mixed media vibe.

Spellibinders House Mouse Candy Hearts (RSC-022) handmade Mixed Media Valentine Card.

Easy One Layer Vintage Look Mixed Media Valentine Tutorial:

  • I started by creating my background. I masked off a border and then used two shades of tan Distress Ink to ink blend my background. (Antique Linen and Frayed Burlap)
  • With the masking tape still on the cardstock, I then used the same tan inks to stencil and stamp bits and pieces on the background. Most of the stamping was “second generation” where I stamped first on a scrap and then onto my background so that the pattern would be subtle. I also added light stenciling to the background. Cathe Holden has some great stamps and stencils that I added here and there. I also used a bit of stamping with white pigment ink, but it is hard to see in the photograph. To finish I added a touch of Gold Wax to a few places around the border.
  • Carefully remove your masking tape. I used Post It Tape, which is the best!
  • After my background was dry, I stamped the Valentine Mouse with Versafine Black Pigment Ink.
  • PRO TIP: For a crisp look, keep the stamp in your Misti stamping platform and restamp the image after you are done coloring. You won’t believe how much this one step will elevate your project!
  • I used Faber Castell Polychromo Colored Pencils to color the mouse and candy hearts.
  • Remember to restamp the image and let dry.
  • The cute sentiment is included with the stamp set and finishes off my one layer valentine.

House Mouse Products:

One layer mixed media valentine featuring a cute mouse laying in a pile of candy hearts.

If you like this card, you might also want to visit my blog post on House Mouse Designs 3 Ways.

Thanks for stopping by!

Interested in more…You can also find me at these spots too:

@karens_mini on Instagram

Pinterest: @karenabrown

FaceBook: Karens_Mini

YouTube: Karen Brown

Uncategorized

WWC266 – Heidi\’s Challenge: All About Occasions

Hello and Welcome!  This week we are making occasion cards at The Watercooler Wednesday Challenge and our hostess is Heidi.  There are so many occasions to send cards, but I chose to make a birthday card.

I started by making a card base out of Arches Cold Press watercolor paper.  Next I grabbed several floral stamp sets and planned my layout using a mixture of stamps.  I painted the stamped images with my Kuretake watercolors.  This was a project I packed to work on at the beach.  I stamped a bunch of designs on watercolor paper and then worked on the batch during slow times on vacation.  It was nice because I didn\’t need to pack many supplies this way.  

I like the natural look of a one layer card on watercolor paper.

CAS Watercolour \”Spring Flowers\” Challenge


Allsorts \”Something Old…\” Challenge  I dug through and found some of my oldest floral stamps for this watercolor card.

Inkspirational – Spring Challenge


I am so pleased you stopped by!
Karen 
Image may contain: text

Uncategorized

WWC232 – Anything Goes Challenge

Hello and welcome!  There are five Wednesdays in July so that means it is Anything Goes at Watercooler Wednesday

Hello Bluebird Rainbow Script Sentiment
Sometimes you just know you need a stamp. It was that way when I saw Hero Arts\’ Venetian Neighborhood.  This card is so much fun to color that I made four different versions in one week. This card is colored with Zigs.  The building was colored with 064 Oatmeal and 061 light brown.  I think the result is very stucco like, which is what I was going for.  This is a get well card so I wanted bright rainbow colors for the windows and clothes.  

I love the sentiment:  Hello Bluebird Rainbow Script.

Thanks for stopping by!
Karen
No photo description available.
Uncategorized

WWC206 – Anything Goes Challenge

Its time for another Watercooler Wednesday Challenge and this week is the bonus 5th week of the month so we have our broad \”Anything Goes\” prompt.  To find out more, please pop on over to the Watercooler Wednesday website.

A while back I watched a Jennifer McGuire video about one layer \”Framed Stamping\” and thought I would give it a try.  I loved the last card she did where there was coordinating outline stamping outside the frame.  Jennifer McGuire Framed Stamping Video link.

I used the Create the Smile Botanical Love (love that daisy!) and In Bloom sets and then hand drew in the black frame.  For the outline outside the frame I used pink dye ink   I then colored with Copic markers. Pretty effect.
I am entering this card in the following challenges:
Create a Smile Challenge  L is for (Botanical) LOVE!  Create-a-Smile florals are definitely favorite stamps sets.
Thanks for stopping by!
Karen