cardmaking · Rainbow Colors · Tutorial

Rainbows & Glitter: Tips on Making Your Own Glitter Cardstock

Tips and Tutorial on how to make a floral rainbow card with a custom tinted DIY glitter cardstock background.

Hi there! I’m so happy to share a card project that combines whimsical charm with vibrant color. If you love crafting as much as I do, you’ll want to stick around for all the dreamy details.

The Star of the Show: A Floral Rainbow

A handmade card featuring a colorful die-cut floral rainbow with fluffy white clouds, set against a sparkling custom glitter cardstock background and a bold scripty 'hello' sentiment

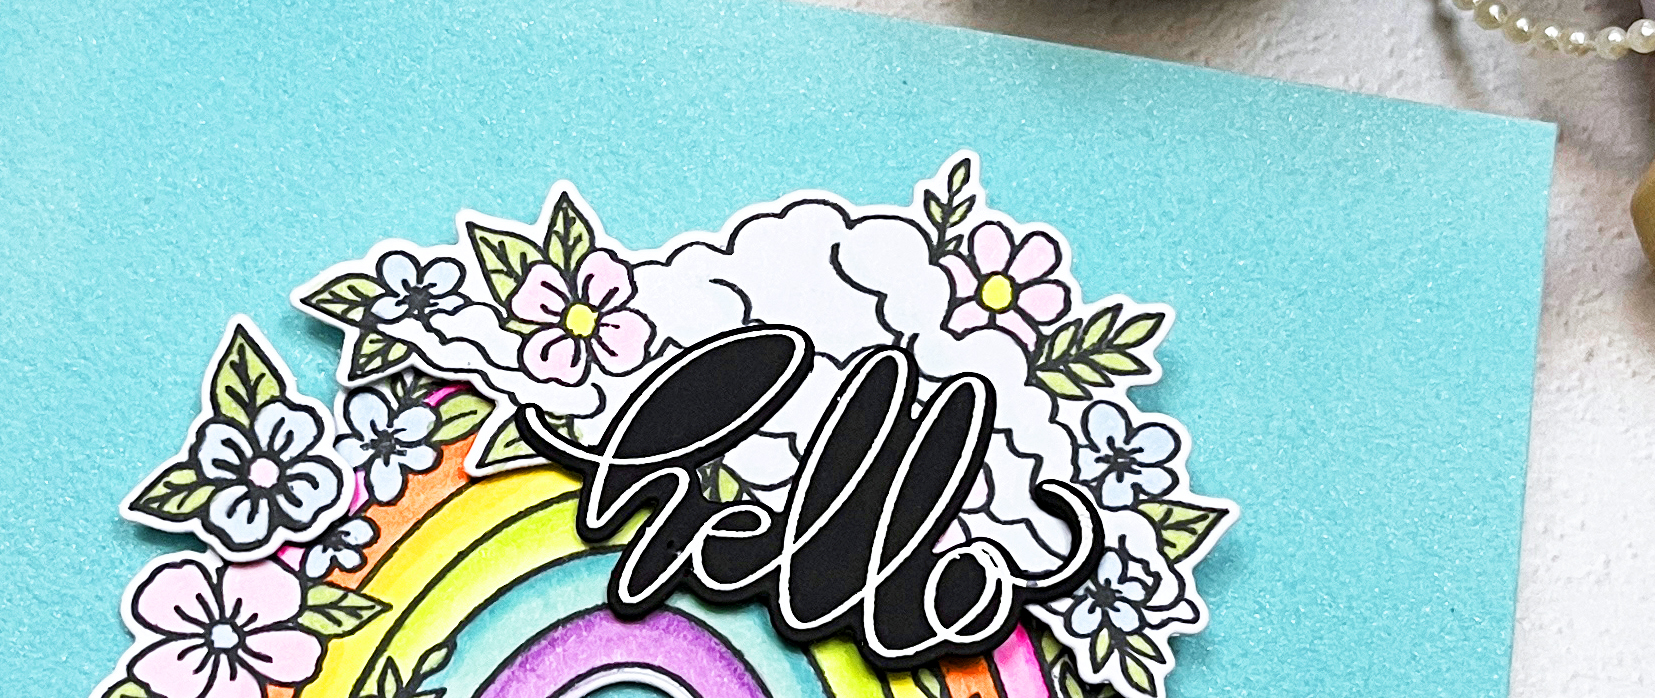
To me, Hero Arts Floral Rainbow and Clouds stamp and die bundle feels like a burst of happiness! I perched my rainbow and clouds on a custom background made of handmade glitter cardstock. By combining blue and green metallic shimmer sprays on watercolor paper, I created a sparkling, ethereal look that mimics a sunny sky. Now, let’s dive into the details of this colorful creation!

Key Products Used:

A colorful handmade card featuring Hero Arts Floral Rainbow stamp and die bundle.

At the heart of this design is a vibrant rainbow that I stamped and brought to life with Copic markers. The colors are rich yet soft, evoking a dreamy vibe that’s both uplifting and playful. After coloring, I used coordinating dies to cut out the floral arc, ensuring clean lines and perfect dimension. It’s not just a rainbow; it’s a celebration of color and joy!

Copic Colors Used: RV02, RV04, RV10, YR02, YR07, Y06, Y08, YG01, YG03, G43, BG11, BG45, B0000, B41, V01, V15

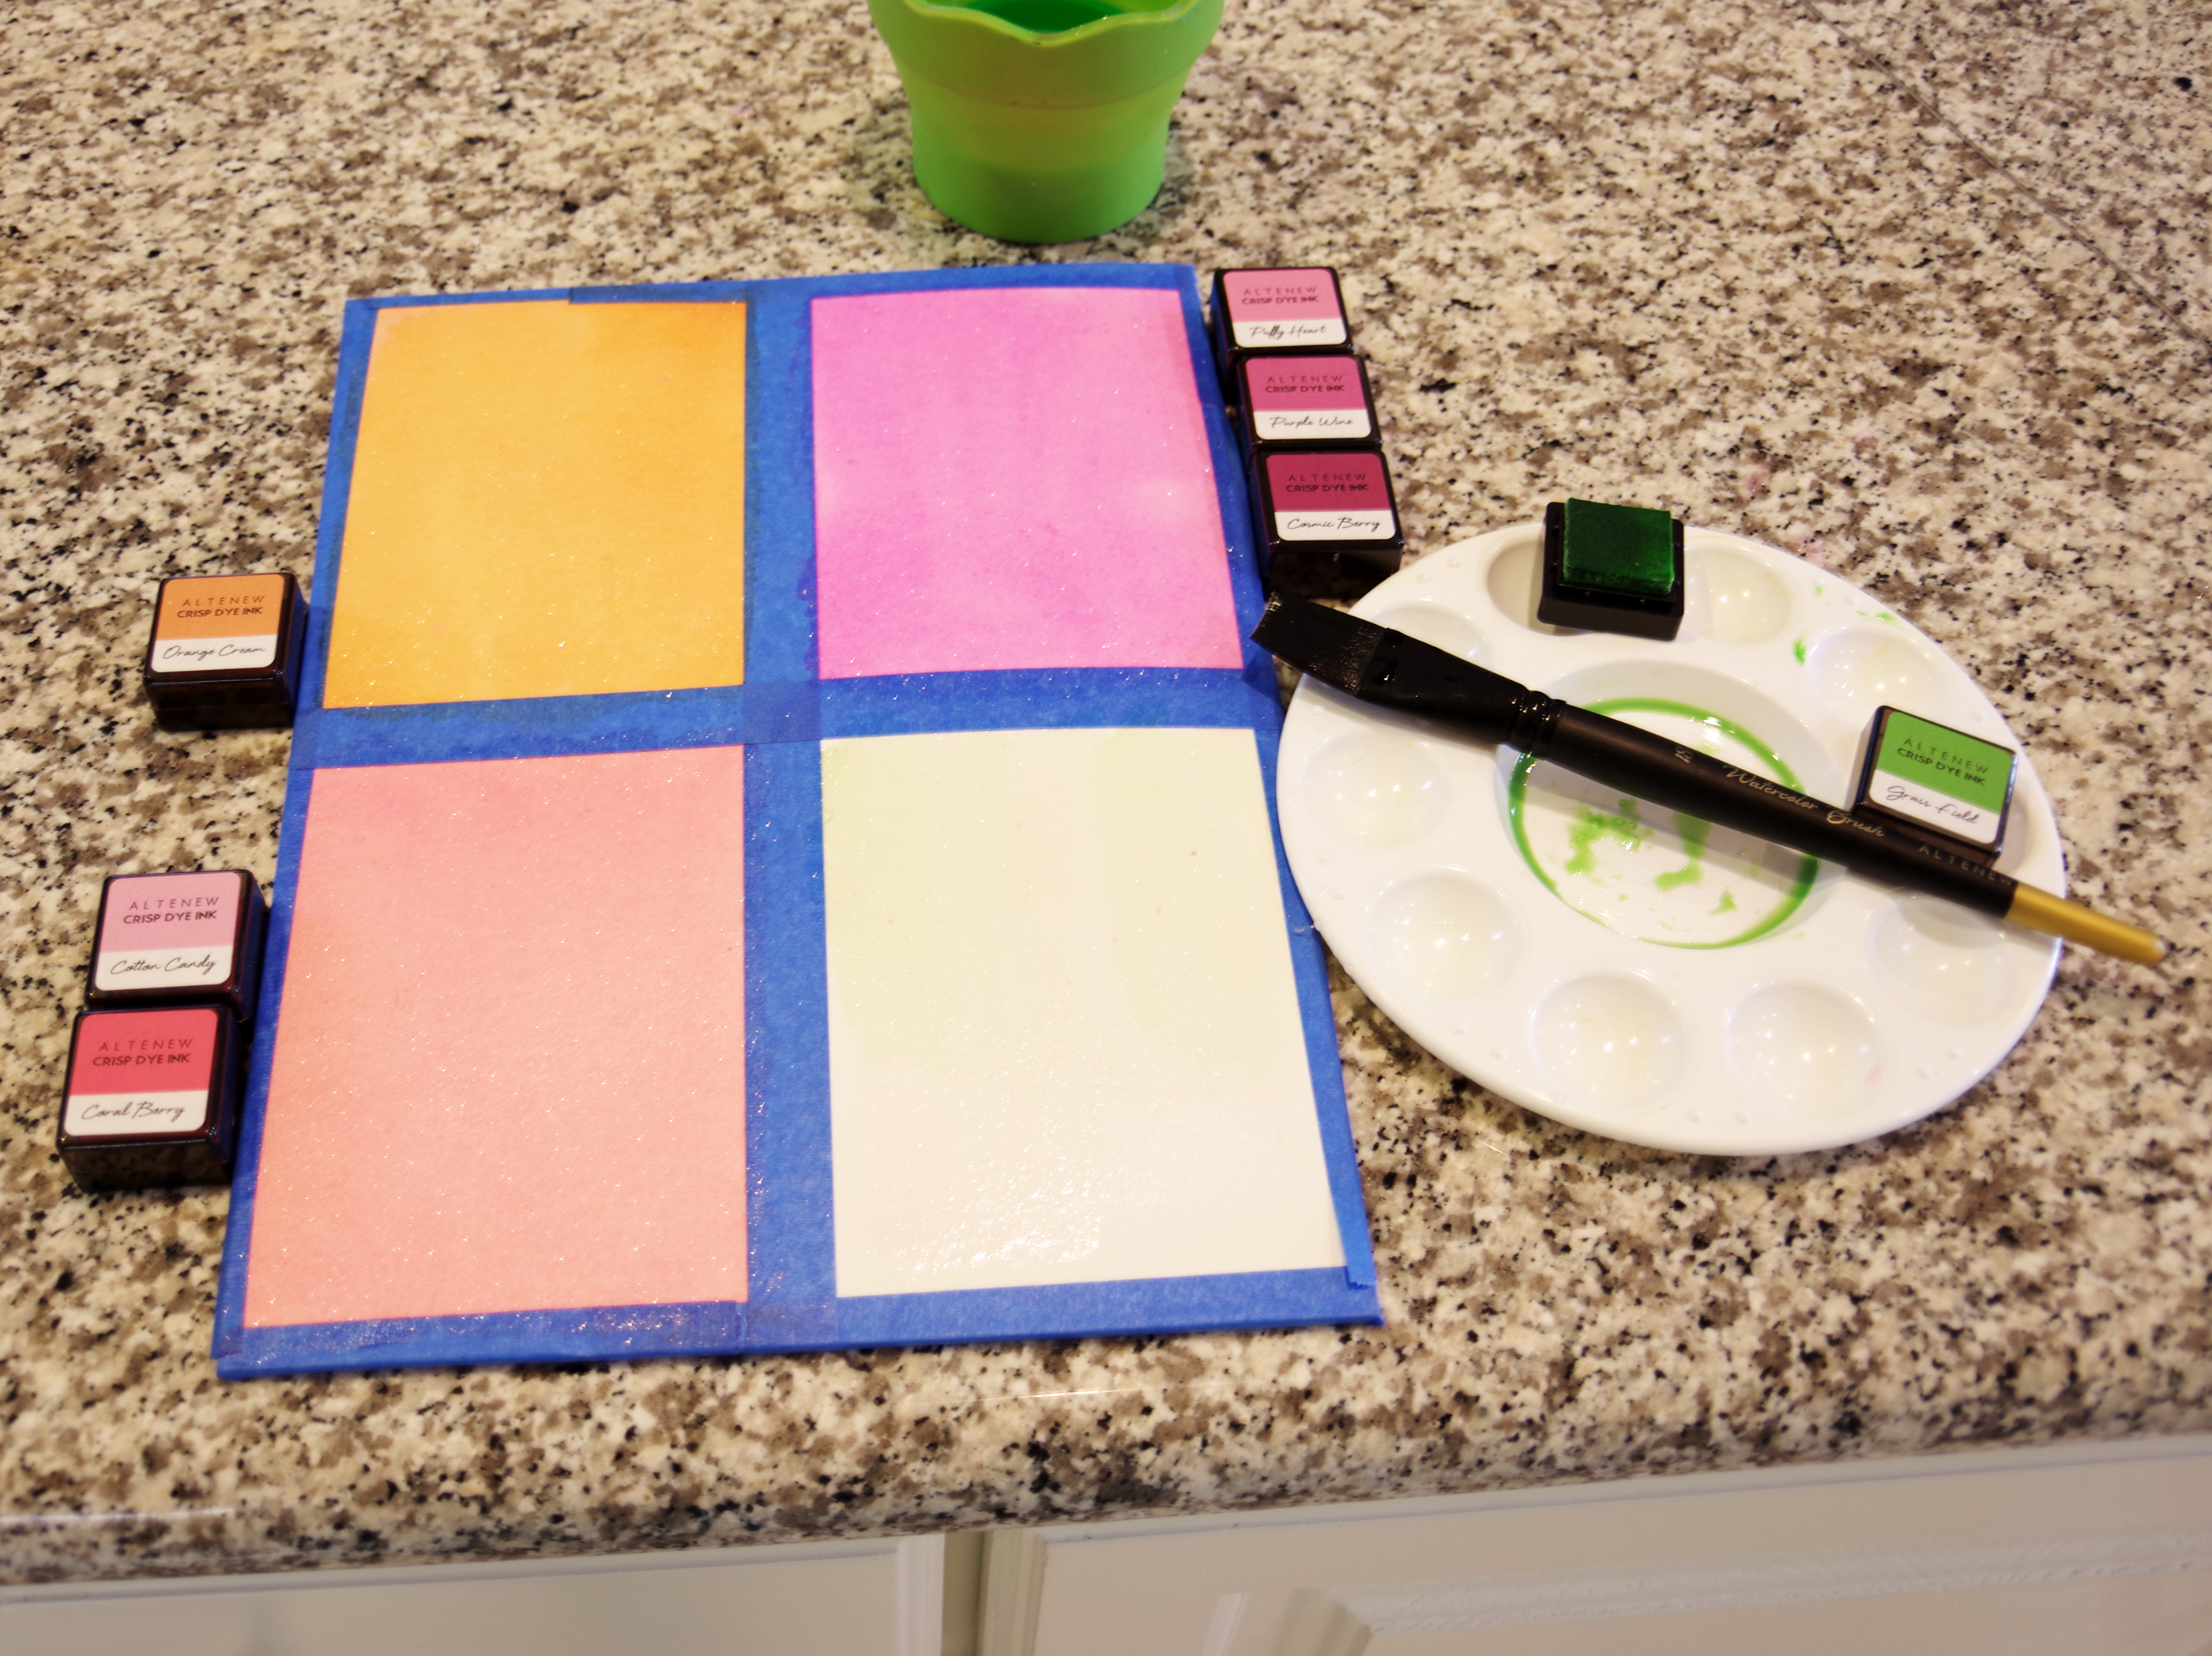
How To Make Your Own Custom Glitter Cardstock

Creative Process Photo: "An in-progress shot of painting blue and green shimmer sprays onto watercolor paper to create a custom glitter cardstock background."

Creating your own glitter cardstock is easier than you think and adds a personalized touch to your projects. Here is how I created my background:

  • I taped a panel of watercolor paper to a hard board and brushed water over the surface with a flat brush. I didn’t saturate the paper, but I did add a light coating of water.
  • Next, I mixed Blue + Shimmer Tone on Tone Metallic Spray with just a hint of Green + Shimmer Tone on Tone Metallic Spray in a paint palette and then painted the mixture on the wet watercolor paper with a damp flat brush. These sprays are very pigmented, so start with a little and add additional spray if you want more intense color, or more water if you want a more muted shade. I applied two layers but I didn’t bother to let it dry in between.
  • I let my shimmer panels dry overnight, but you could speed up the drying with your heat tool.

Experiment with different color combinations to make your custom glitter cardstock truly one-of-a-kind!

A shimmering custom-made glitter cardstock background in blue  green hues, adding sparkle and dimension to the card design.

To finish my focal point, I heat embossed the beautiful scripty “hello” sentiment that is included in the bundle.

Glitter can be tricky to capture on camera, but I hope you can see shimmer and sparkle in this close-up photo.

Close up shot of DIY handmade glitter cardstock to use in cardmaking, papercrafting and scrapbooking.

Who wouldn’t love a little rainbow magic in their mailbox? Let’s keep spreading those handmade vibes, one card at a time! 🌈✨


cardmaking · Mixed Media · papercrafting

Using Tags on Handmade Cards

Using die cut tags on handmade cards + Altenew Terrific Tags + Altenew Doodle Blooms

Hello and welcome! Don’t you just love bright summery colors? I recently posted about how to make your own glitter cardstock which I then turned into tags. I decided to take it a step further, and turned two of my tags into cards.

Handmade card with die cut Altenew Terrific Tags.
Can you see the pretty shimmer on the tag?

I used Altenew Supplies on these cards:

Altenew Doodle Blooms + Altenew Terrific Tags

I love how bright and happy the cards turned out.

Handmade glitter cardstock in cardmaking.

Tags are so versatile. Hang them on a wrapped gift, decorate a gift bag or box or turn the tag into a card.

I am so happy you stopped by!

Karen

cardmaking · Mixed Media · papercrafting

Easy DIY Glitter Cardstock

Easy DIY Glitter Cardstock tutorial.

Don’t you just love bright summery colors? I’ve been thinking about making a shimmery rainbow hued tag set and I thought now was the perfect time. Recently, I started making my own glitter cardstock, and I have been loving the subtle sparkle it adds to my projects!

Rainbow Colored Gift Tags + Altenew Terrific Tags dies

The process is easy and fun…all you need is some ink and Altenew Iridescent Shimmer Ink Spray.

How to make your own glitter cardstock

How To Make Your Own Glitter Cardstock

  • I taped some watercolor paper to a hard board and brushed water over the surface with a #18 brush.
  • Next, I mixed Altenew Dye Inks with Iridescent Shimmer Spray (no water was added) and I painted the mixture on the wet watercolor paper. I wanted an intense color so I applied three layers but I didn’t bother to let it dry in between.
  • I stamped, colored and die cut a bunch of floral elements from Altenew’s Doodle Blooms stamp and die bundle.
  • I let my shimmer panels dry overnight so that they would die-cut well, but you could speed up the drying with your heat tool.
How to make glitter cardstock using Altenew Shimmer Spray.

Next, I die cut my tags using the largest finned die from Altenew’s Terrific Tags die set and worked on my layouts

How to make your own gift tags with Altenew Terrific Tags.

To finish off the cards, I added an Enamel Dot to each flower center.

Altenew Enamel Dots for flower centers.

The background is so pretty in person but it’s hard to see the sparkle in the photos so I added a quick video below:

Video clip showing shimmer on DIY Glitter Cardstock

Adding twine or ribbon is easy: Double the twine and poke the two ends through the hole. Next, slip the ends through the looped middle and then pull flat. Neat, easy and functional.

 Aqua Altenew Terrific Tags + Doodle Blooms stamp and die bundle

I love how the tags turned out so I’ve included some closeup photos.

Pink Altenew handmade gift tag

There is a detailed list of the inks, supplies and enamel dots used below.

Altenew Orange Cream Glitter gift tag.
Pink Altenew Glitter cardstock gift tag.

The tags are so happy and cheerful together and I think they would make a great gift for a friend.

DIY rainbow hued gift tags made with Altenew Terrific Tags and Doodle Blooms stamp and die set.

Ink Used:

Stamps, Dies and Supplies:

Enamel Dots Used:

Sentiments:

Thanks for stopping by!

Karen