Hi! I wanted to give you a heads up that I am hosting an Instagram Giveaway that just started! Here is a link to my Instagram page so you can join in the fun…it is so easy.
Giveaway Details:
I am giving away 2 $25 Altenew Gift Cards and I want to make sure you get a chance to win.
Just follow these easy steps for a chance to win:
1. FOLLOW @Karens_mini and @altenewllc on Instagram
2. LIKE the corresponding Giveaway post.
3. COMMENT on the Giveaway Instagram post.
2 Winners will be announced on my Instagram post one week from today.
If you would like to see the original post for this card, please click HERE.
Recently, some friends and I got together to experiment with “Squeegee Art”, which I find just mesmerizing. I love to watch @sharecestudios on Instagram! Sharece is an artist but I am just an experimenter, as you can see in my photos.
Squeegee Art (also known as “Scraped Art”) is created by putting acrylic paint (dots, squiggles, lines, shapes…) on cardstock and then pulling the paint down with a shower squeegee. I posted a short video below showing how I created one of the panels.
Quick Video Showing My “Squeegee Art” Process
Video: creating a squeegee scraped art panel
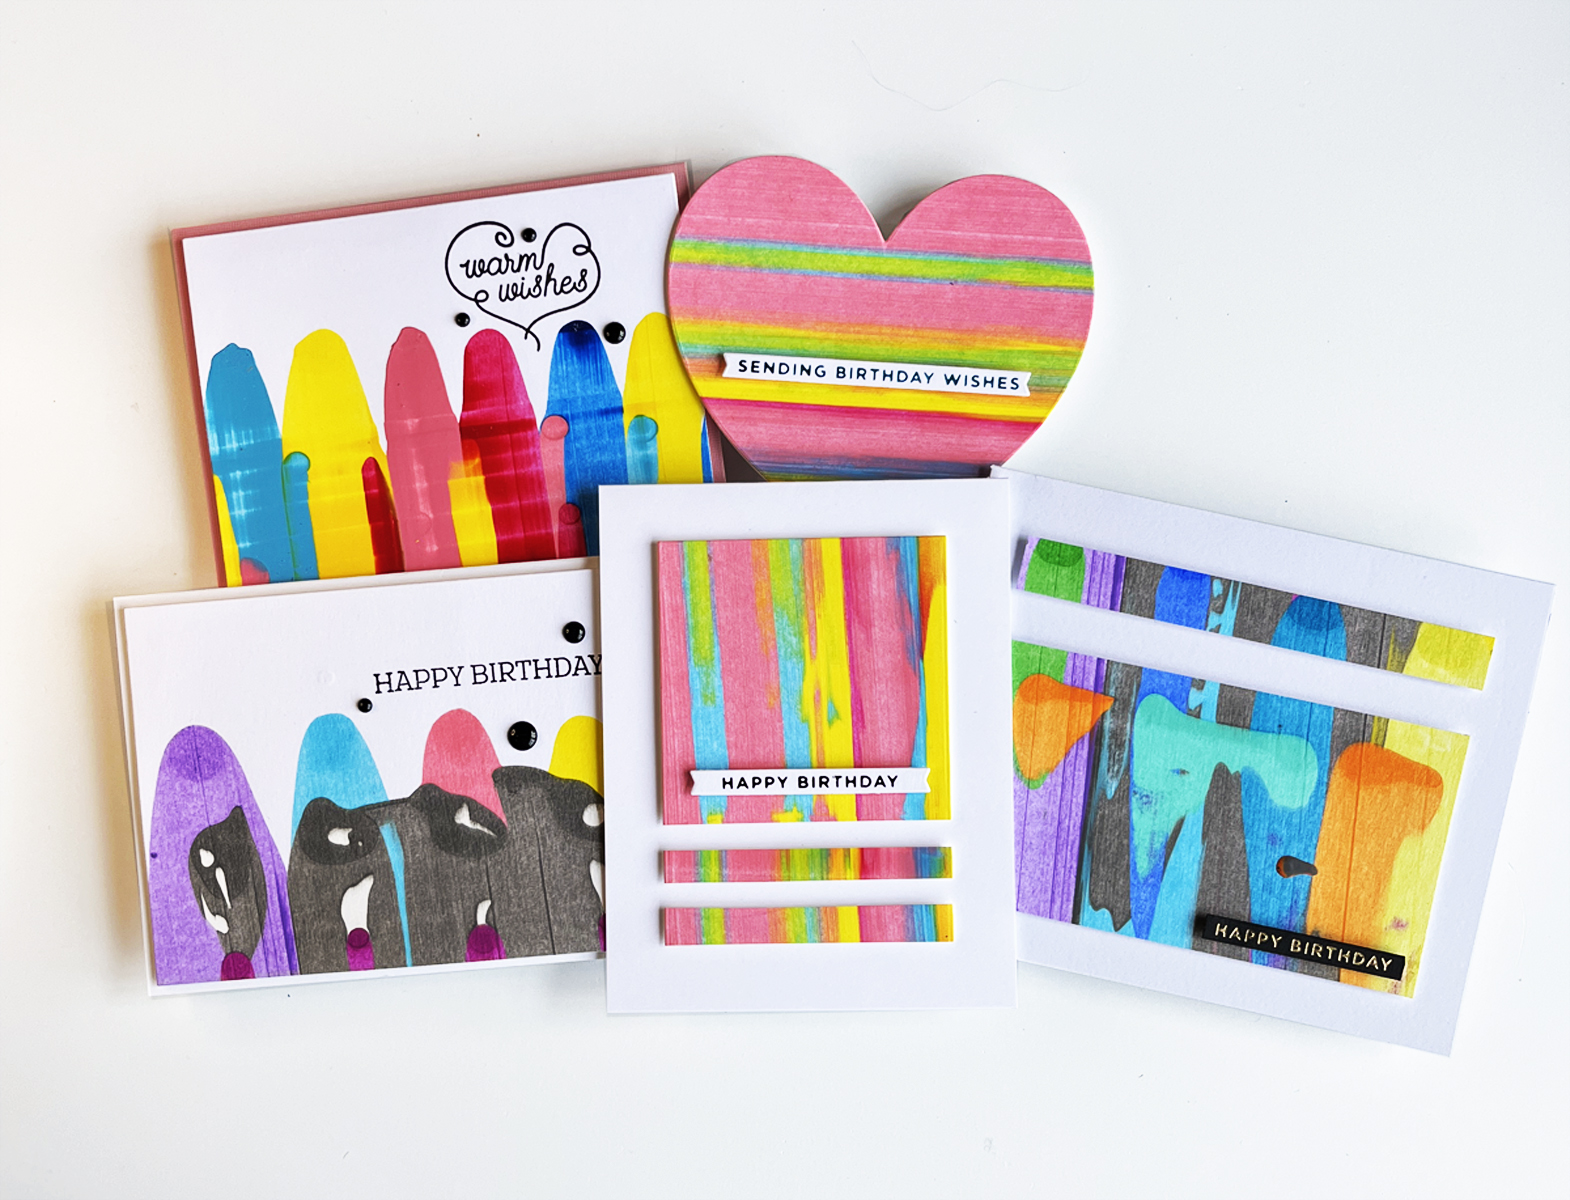
You know me, once I was done, I took three of my panels and made them into contemporary art cards.
Summery Acrylic Art Birthday Card
I love how bright and happy this card is! This panel was from a second generation “scrape”. The first generation panel is on card #3 below. After I created panel one, I scraped the leftover paint that was on the squeegee onto a second piece of cardstock and I love how the colors blended.
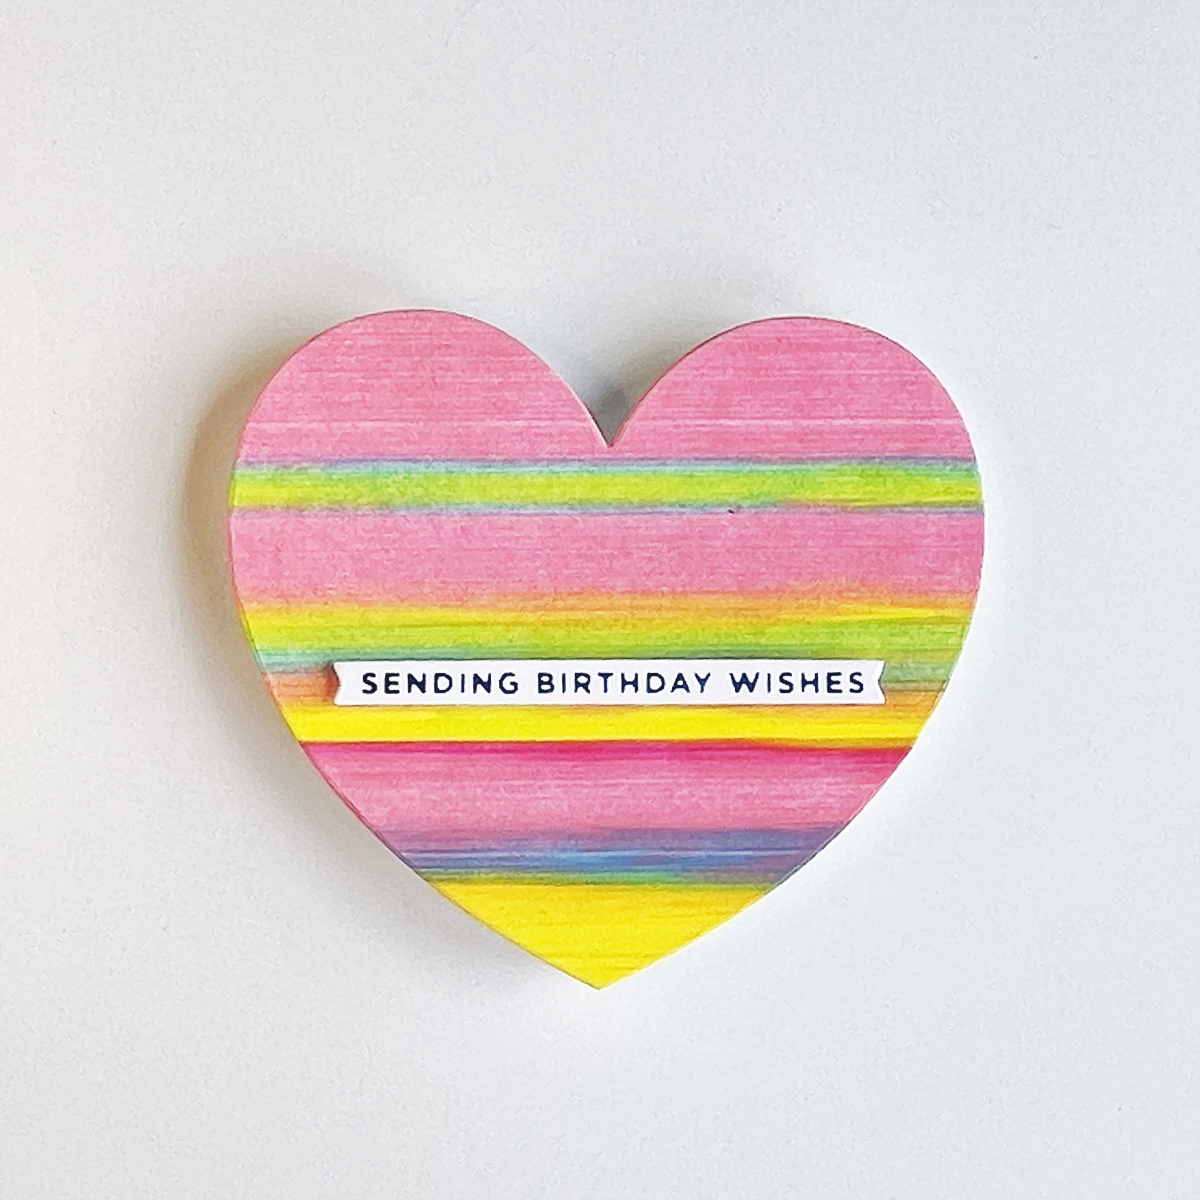
Card #2 was die cut from the same panel as card #1, and it is so adorable in person!
Below, is a photo of the paints and supplies that I used.
Card #3 (shown below) was created from the “1st generation” scrape that I talked about above.
Contemporary Masculine Birthday Cards
Cards 4 and 5 were made from the panels created in the video above.
Supplies Used:
(Affiliate links are provided below but there is no additional cost to you. For more information please see the Affiliate Programs info to the right or click on the link at the top of my blog. I purchased all the products used in this blog post, with the exception of the 2 * items from Spellbinders.)
Die cut flower and leaf silhouettes over a rainbow striped background makes for a colorful high impact card. I love Altenew’s Sweet Blossom’s Layering Dies and wanted to play with them again (You can see my first card HERE). This time I wanted to use just the outline dies so you could see the beautiful background I created.
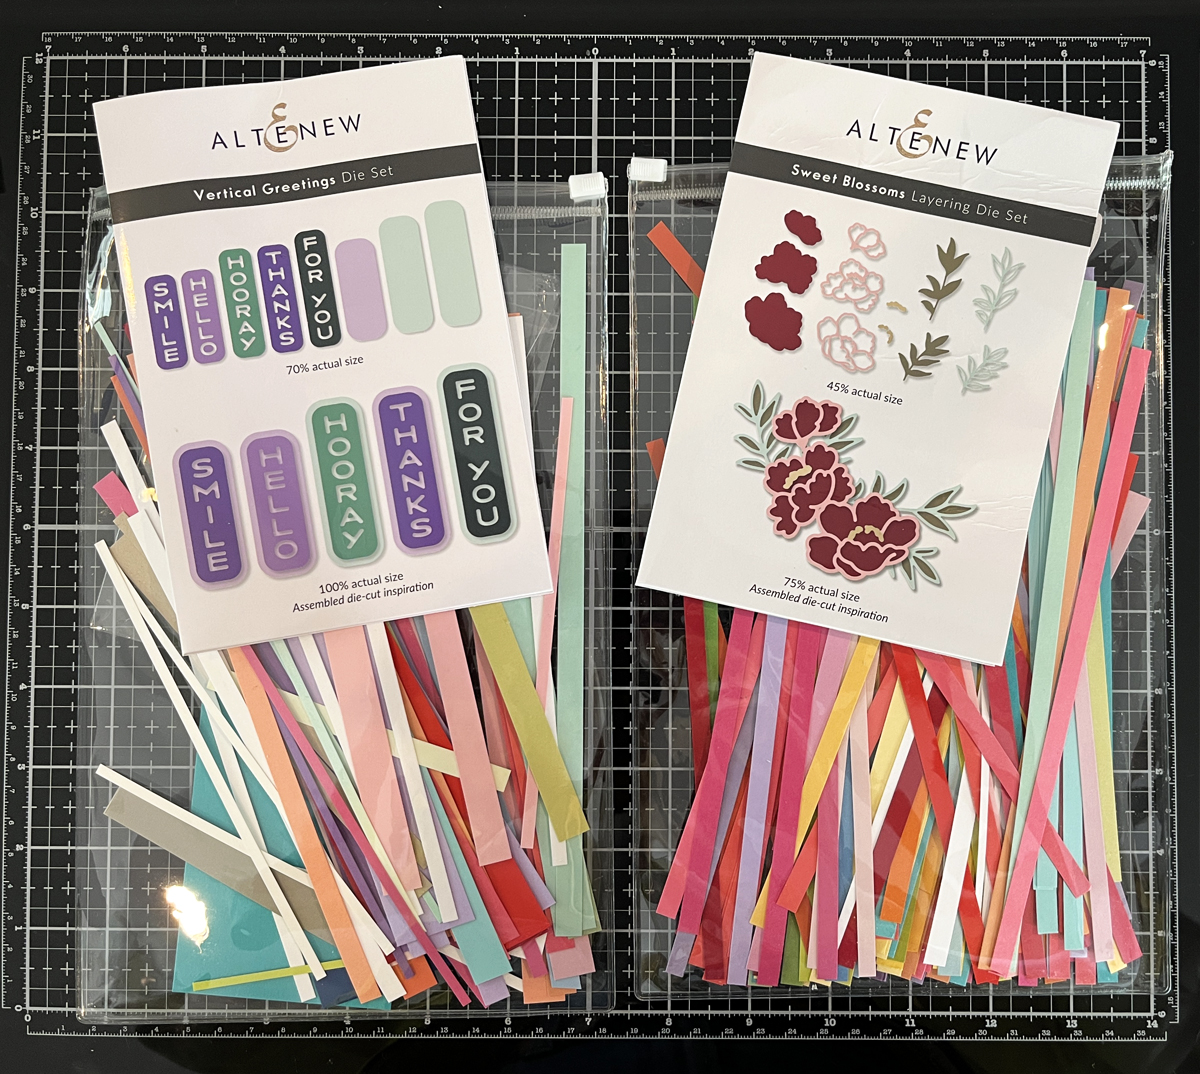
I created a short video (below) to show how I made my background panel. I love rainbow striped backgrounds so I have two pouches (see final photo) where I keep my pre-cut colored cardstock strips. The pouch on the left has a variety of widths and all the strips in the right pouch are cut to 1/4″ widths. It is easy to take a paper trimmer and cut lots of strips and then it is so quick to make a colorful background. For this card, I used PaperTrey’s Perfect Match Colored Cardstock.
Click HERE to see a card where I used just 1/4″ strips.
For this card, I wanted variety so I used colored cardstock bands from both packets. I like to use Altenew’s Glue Tape Runner when making these types of backgrounds.
I wanted my flower bloom to sit on a stem, so I did a little surgery on the larger leaf die cut, and with scissors, I cut off the top three leaves. This left me with a stem and an additional little leaf cluster to use on my card.
I wanted substantial die cuts, so using the Sweet Blossoms and Vertical Greetings sets, I die cut each element three times and then glued them together.
Quick Video: How I Created This Rainbow Striped Background
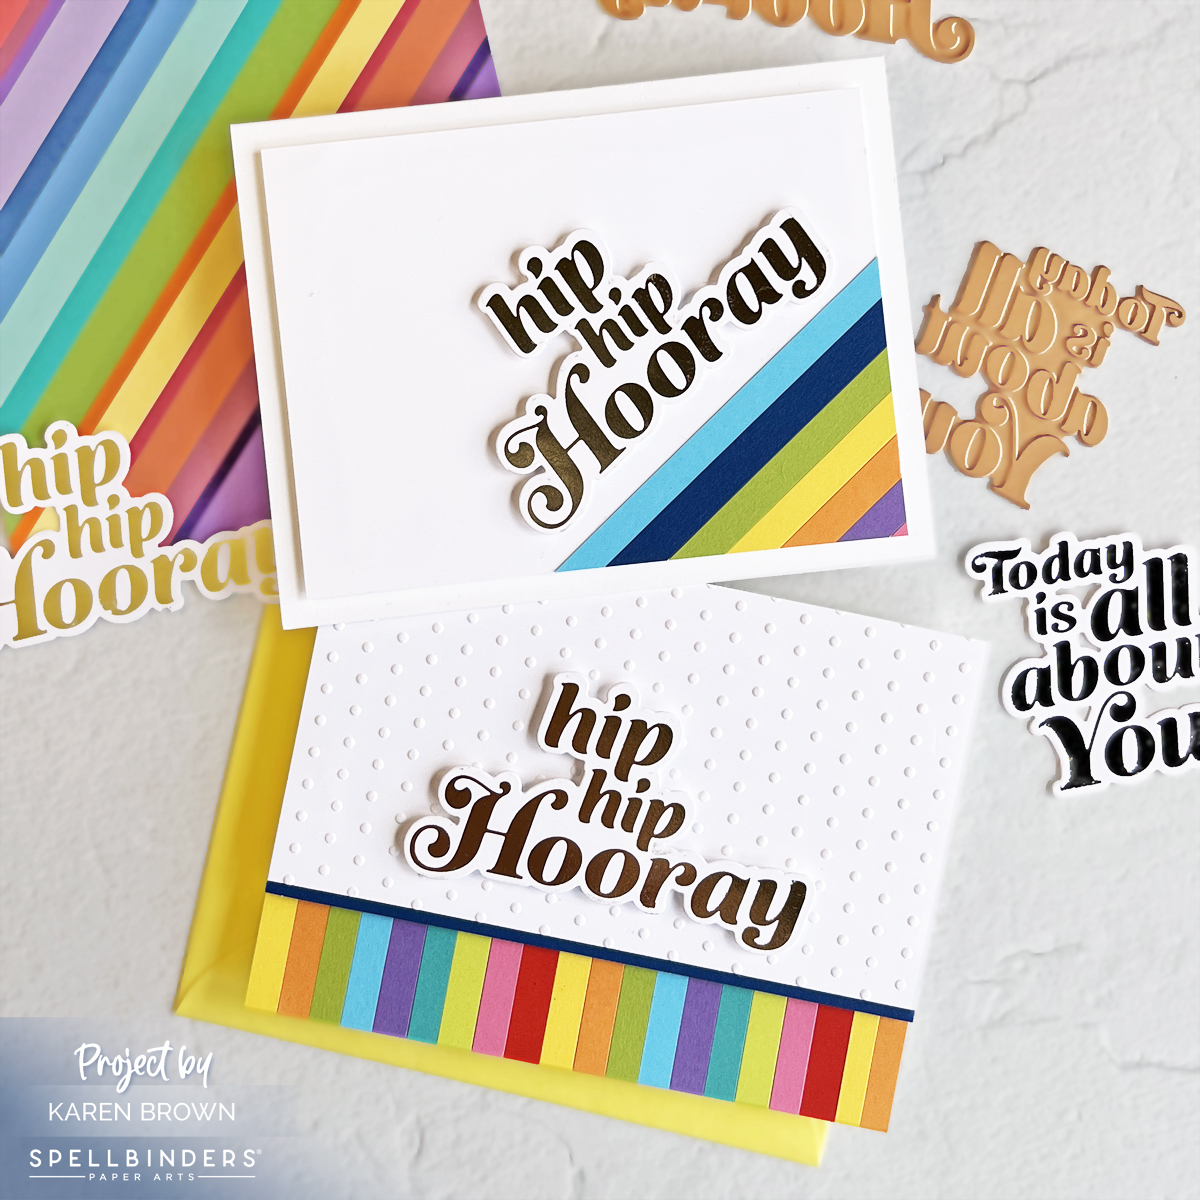
Today I am sharing some sentiment focused hot foil cards and the first one was so quick and easy! I wanted to spotlight the funsentimentso I added some 1/4″ paper strips to the bottom right corner and then angled my sentiment. Done!
For my second card, I wanted some texture on my background panel and I thought the Tiny Dots Embossing Folder would be perfect. To add fun pops of color, I added a 1″ rainbow accent strip to the bottom of my card. The width of each strip is 1/4″.
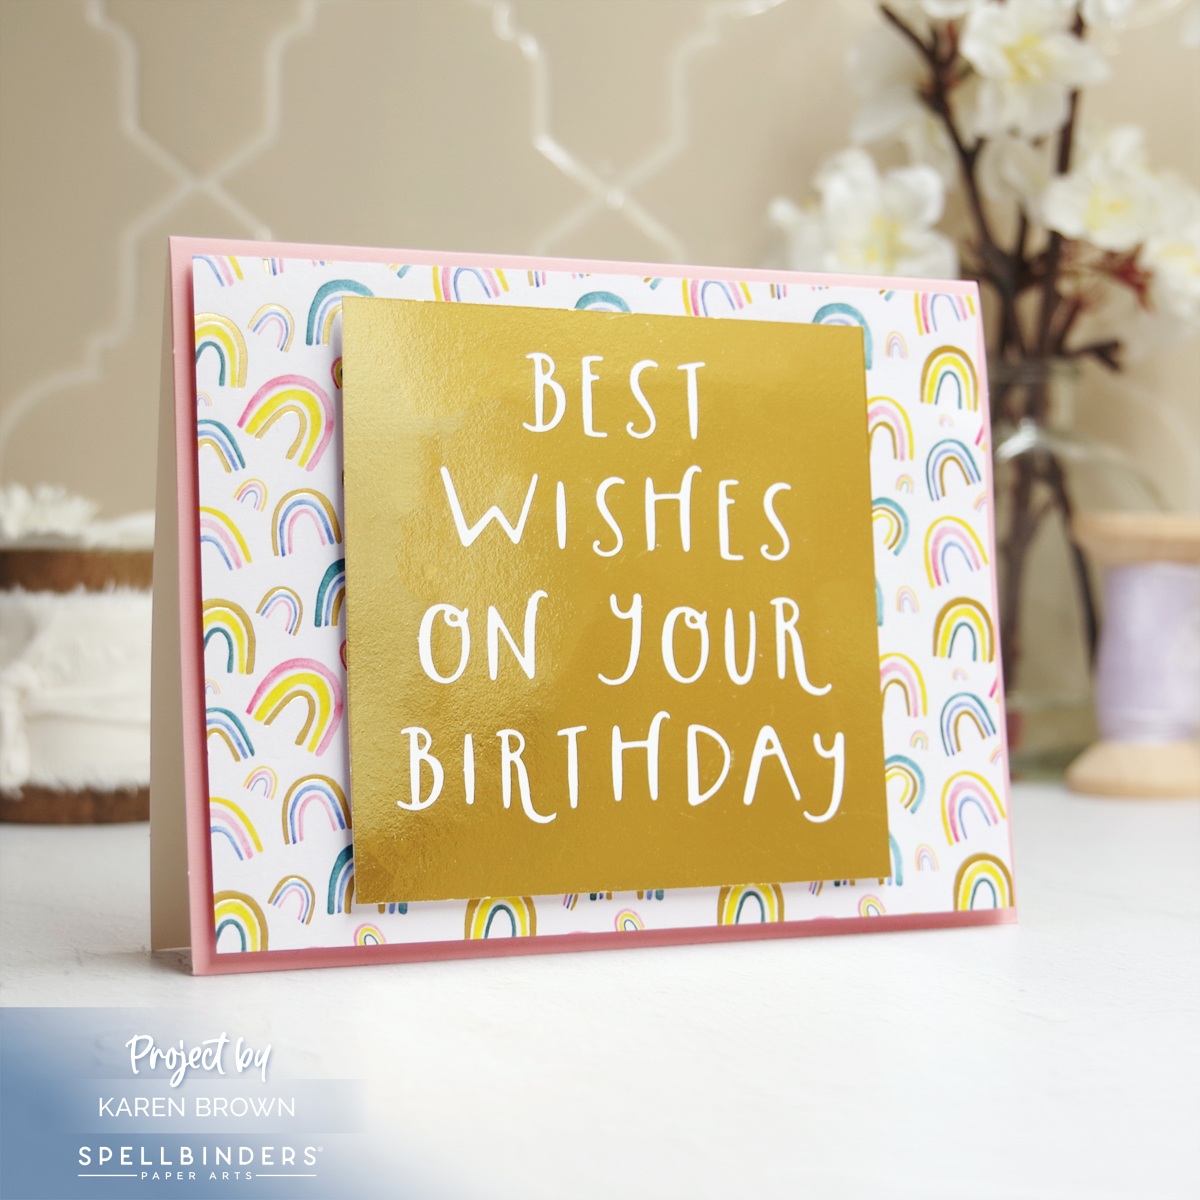
For card #3, I kept the rainbow color theme but I added lots of white and gold floral elements to emphasize the lovely gold foiled sentiment. I started with the star of the card, which is the gorgeous hot foiled sentiment. Next, I ink blended a rainbow panel that I die cut into an oval shape and then embossed with the Tiny Dots embosssing folder. At this point, I thought the card looked too plain so I die cut a bunch of my favorite flowers and added them around the perimeter of the center oval. I also embellished with some colorful enamel dots. I die cut the card base from an A2 top folding card. To keep the top fold, I positioned the top edge of the die just above the fold.
Vintage Look Mixed Media Tutorial + Daisy Mouse (RSC-002)
Mixed Media cards have so much interest and I thought the technique would work perfectly with this Daisy Mouse (RSC-002) stamp set.
My Process:
I started by creating my background. I masked off a border and then used two shades of tan to ink blend my background. (Antique Linen and Frayed Burlap)
With the masking tape still on the cardstock, I then used the same tan inks to stencil and stamp bits and pieces on the background. Most of the stamping was “second generation” where I stamped first on a scrap and then onto my background so that the pattern would be subtle. Cathe Holden has some great stamps (Handle with Care: STP-093 and Friendly Society: STP-094) that I added here and there. I also used a bit of stamping with white pigment ink, but it is hard to see in the photograph.
Carefully remove your masking tape. I used Post It Tape, which is the best!
After my background was dry, I stamped The Daisy Mouse with Versafine Black Pigment Ink.
PRO TIP: For a crisp look, keep the stamp in your Misti stamping platform and restamp the image after you are done coloring. You won’t believe how much this one step will elevate your project!
I used Faber Castell Polychromo Colored Pencils to color the mouse and daisy. I used white, 2 shades of gray, 3 shades of yellow, orange, 2 shades of green, blue and coral.
PRO TIP: A bit of blue colored pencil was the secret ingredient!
The adorable Special Delivery sentiment is included with the stamp set.
I mounted my card panel on a navy card base and the finished card is 7″ x 4 3/4″. I usually add lots of foam tape, but I kept this card simple and just used Bearly liquid glue.
I loved the Daisy Mouse stamp so much that I made a second Copic colored version.
House Mouse Designs + Copic Coloring Tutorial
The detail on these stamps is so well done that coloring is so easy! I used the following Copic Colors:
E50, E40, E00, R20 (face, hands and tail)
BV0003 (shadows)
W0, W3, W5 (mouse body)
YG01, YG03 (stem and flower)
Y00, Y06, YR04, YR07 (flower)
My final card uses Tea for Two (RSC-005). I am a tea drinker so this stamp set definitely called to me!
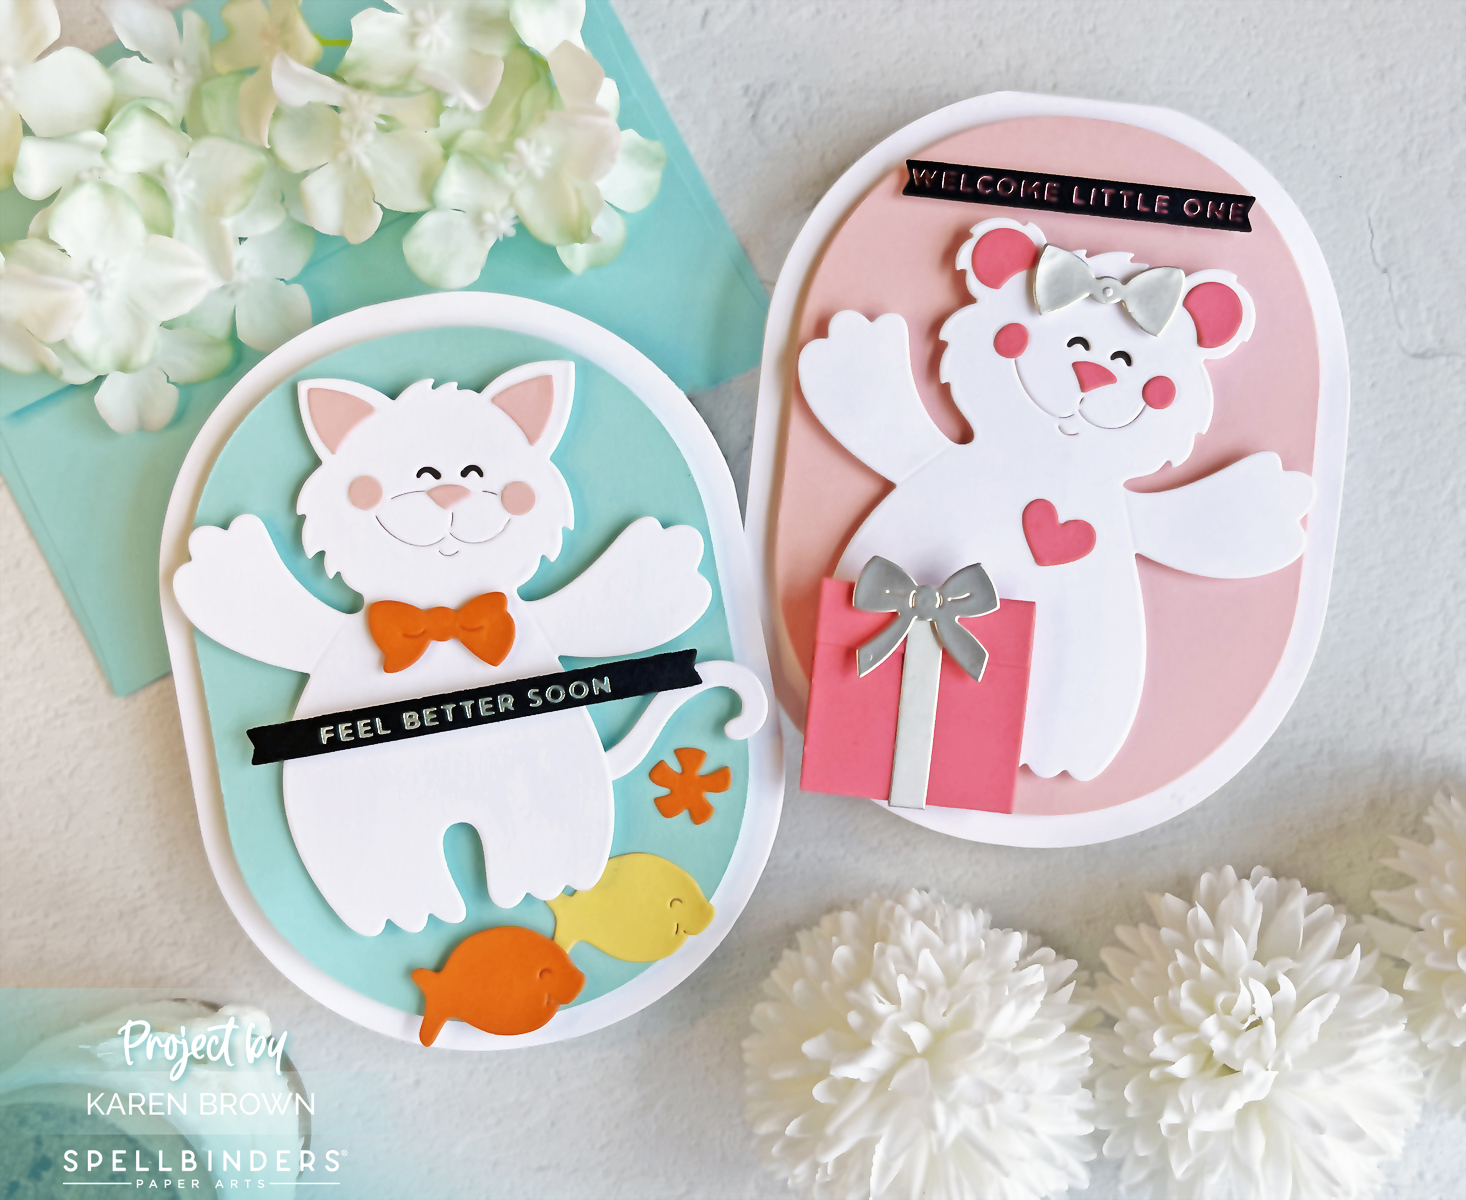
Simple die-cuts can make high impact creations for cards, scrapbooking or any other papercrafts. Today, I created 2 quick and easy cards using Spellbinders + Stampendous new Hugs Collection.
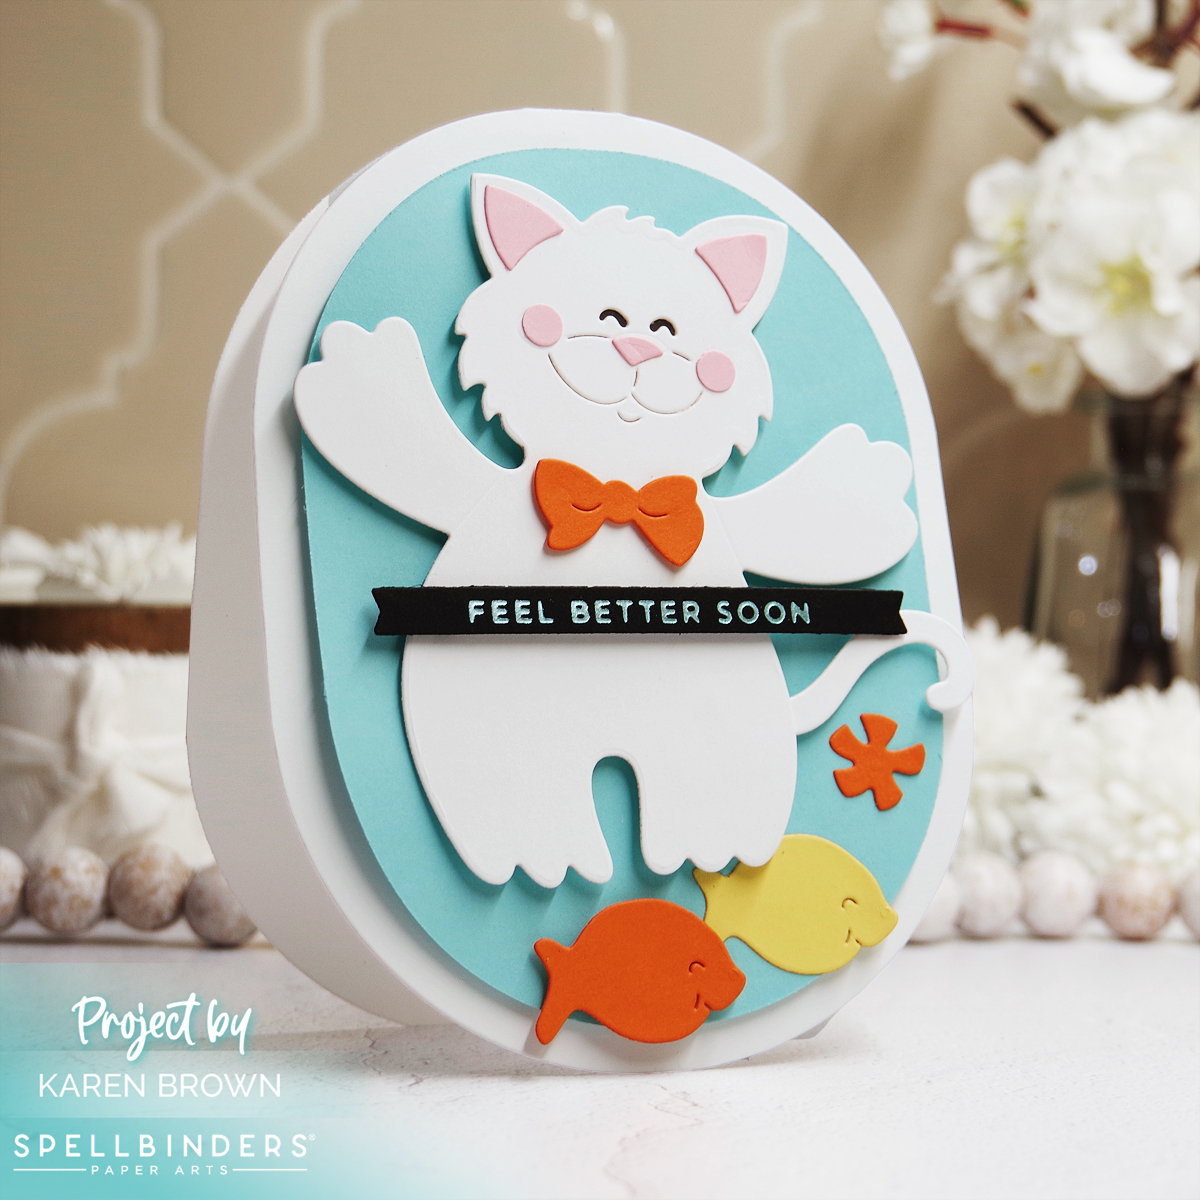
For Card #1, I made a Get Well card using the new Kitty Hugs (S5-587)etched die kit . I played around with layouts and in the end decided to keep my card very simple. I die cut my kitty from white card stock and then used my Stylish Ovals nesting diesto make a shaped background and card. The background is my alltime favorite Waterfall cardstock. I added a few pops of color with the facial features, bow tie, star and fish, which are all included with the die kit.
To make my shaped card, I took an A2 top folding card baseand taped the top of the largest Stylish Oval die just above the fold, so the card base would remain in one piece, and then ran it through my die cutting machine. I hot foiled a quick sentiment and then assembled with adhessive squares.
Sweet Die Cut Card for a Baby Shower
I am co-hosting a baby shower this month so Card #2 is for Baby Juliette. This die set is called Bear Hugs (STP-586). I love the simple sweetness of the pinks and whites.
The gift box , ribbon and bow are also from the Hugs Collection and the die set is called Hugs Accessories (S5-590). The set also contains several hearts, envelops, letters and a swag…very cute.
I can see so many occasions when I will use these sets again!
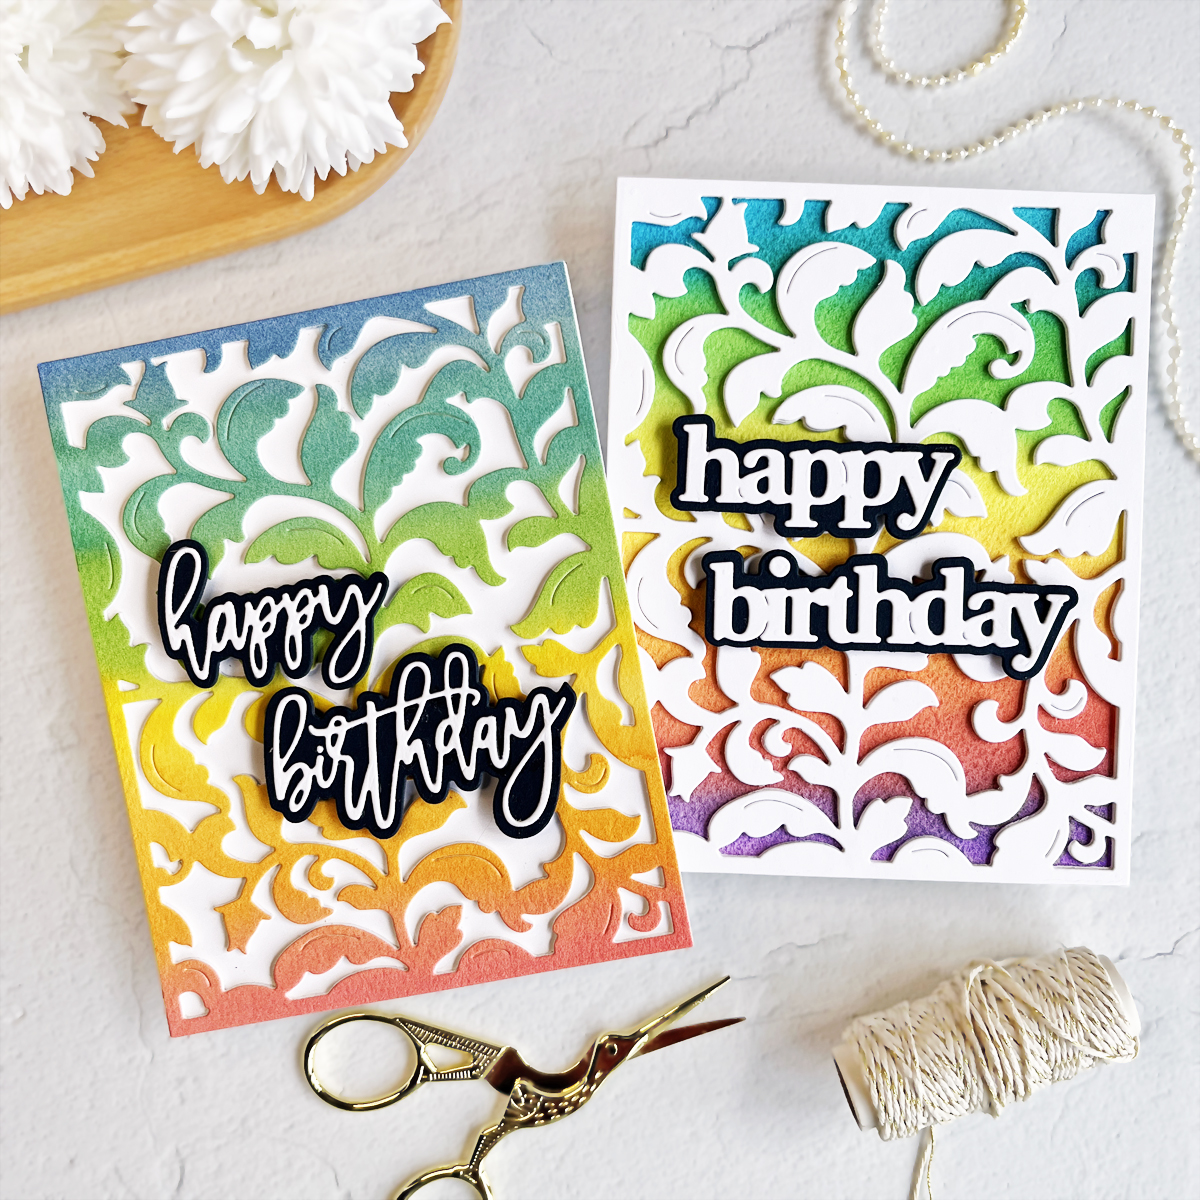
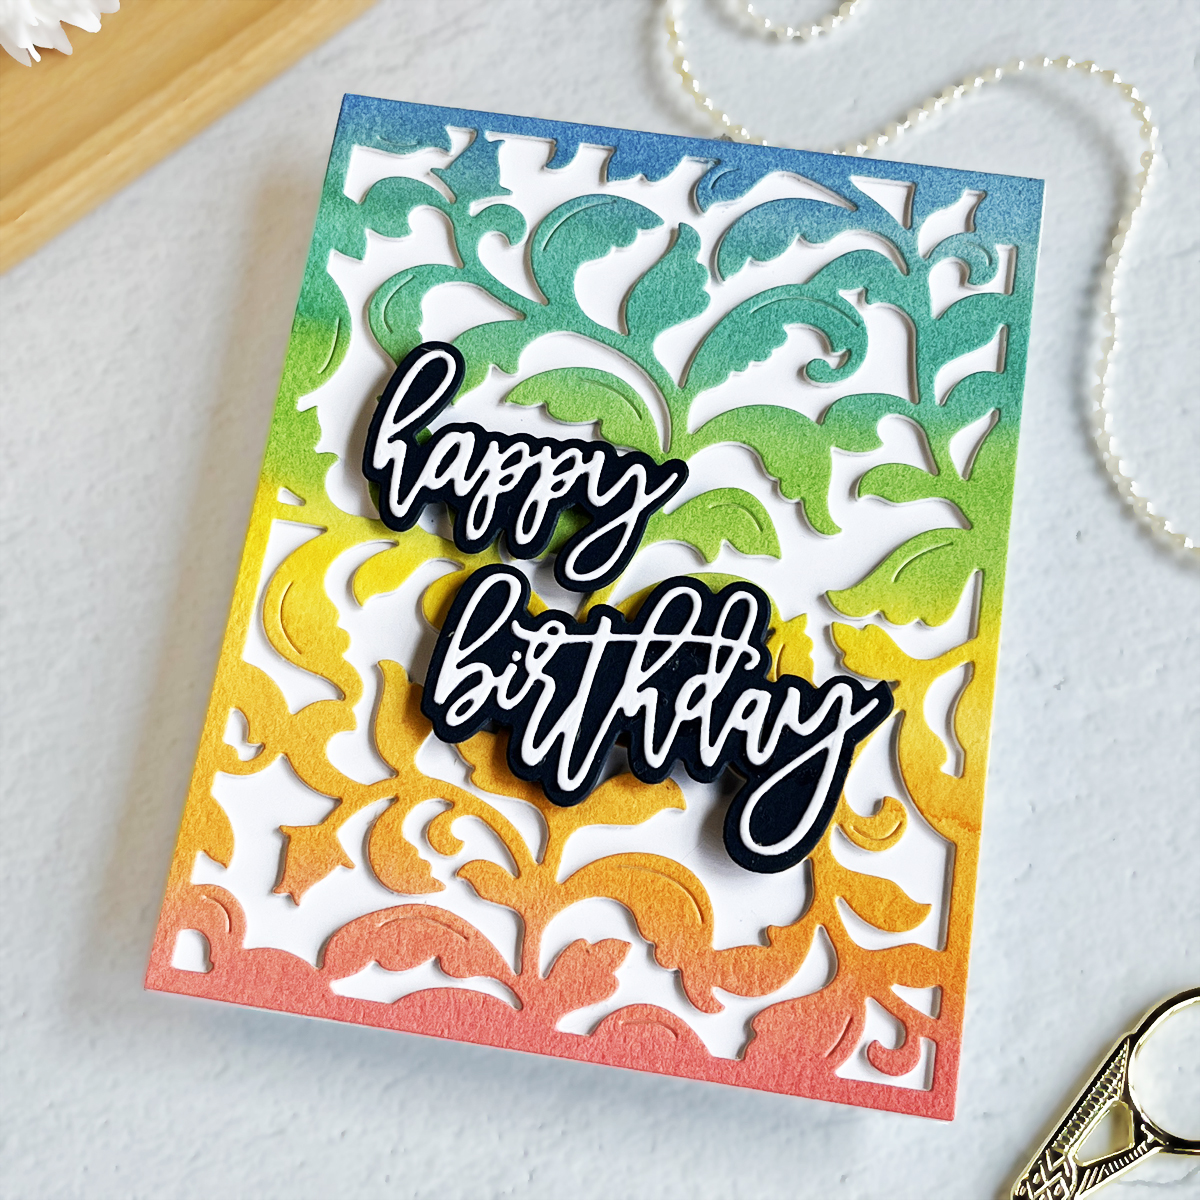
Rainbow colors in cardmaking are always a good idea! I recently received a new cover die from Waffle Flower Crafts called Flourish Panel and it is a real beauty! I couldn’t decide whether to have the rainbow panel on the top layer or below the lattice so I opted to do it both ways. I still can’t choose which way I like it better. What do you think…..I’d love to hear your thoughts in the comments.
How To Add Dimension on Die-Cut Cards
I have step-by-step directions (with process photos) below. On one card I die-cut the watercolor panel and on the second card I used the rainbow colors as a background.
Cardmaking Tutorial: How I Made These Two Die Cut Cards
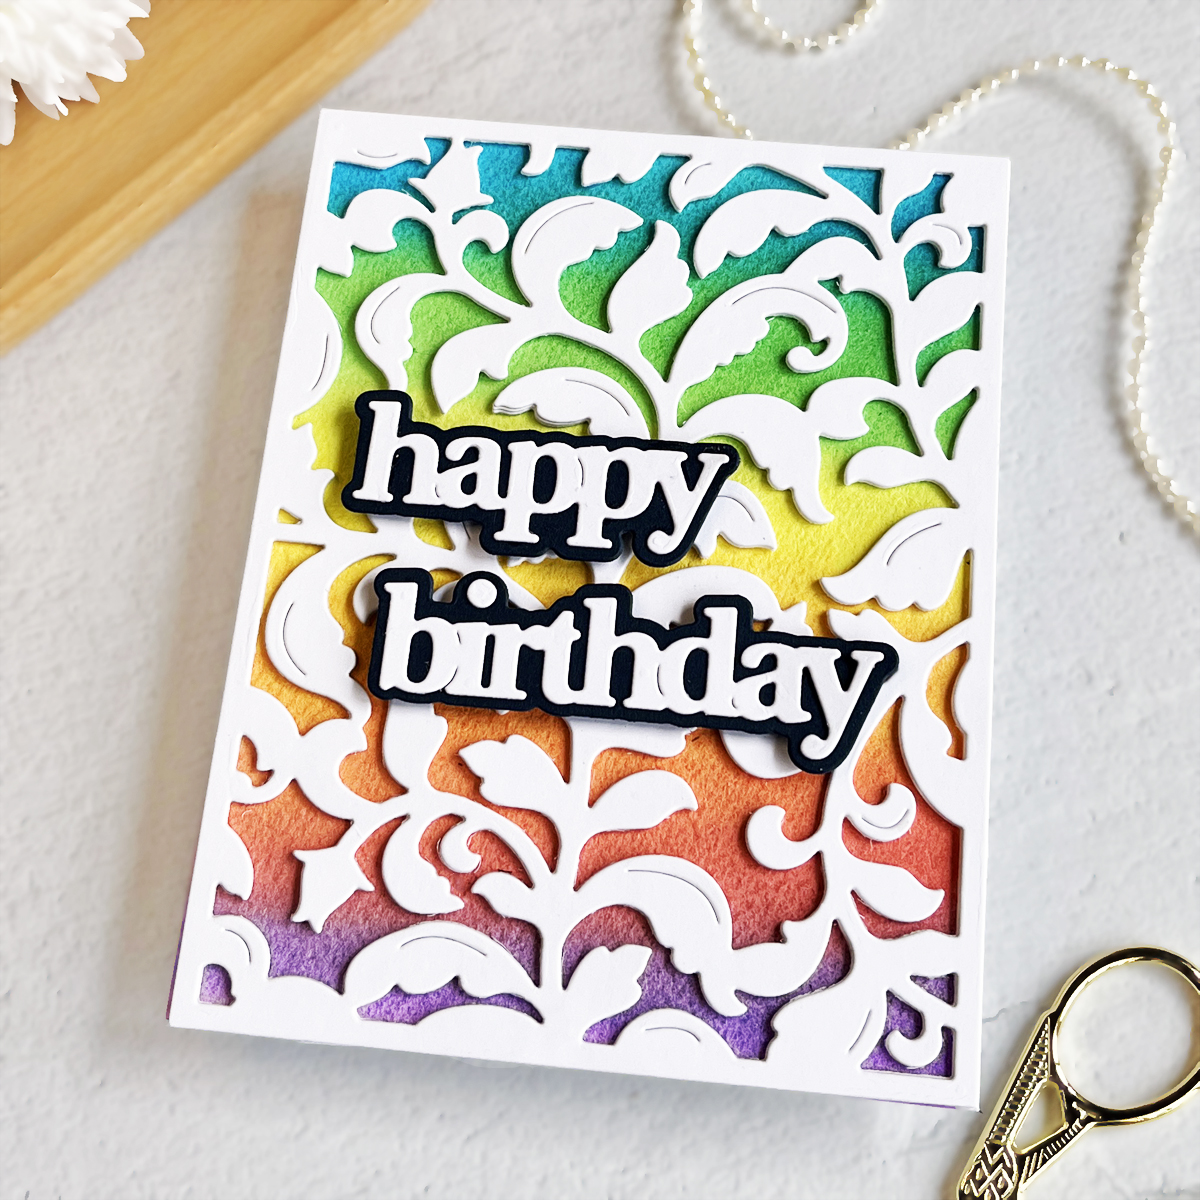
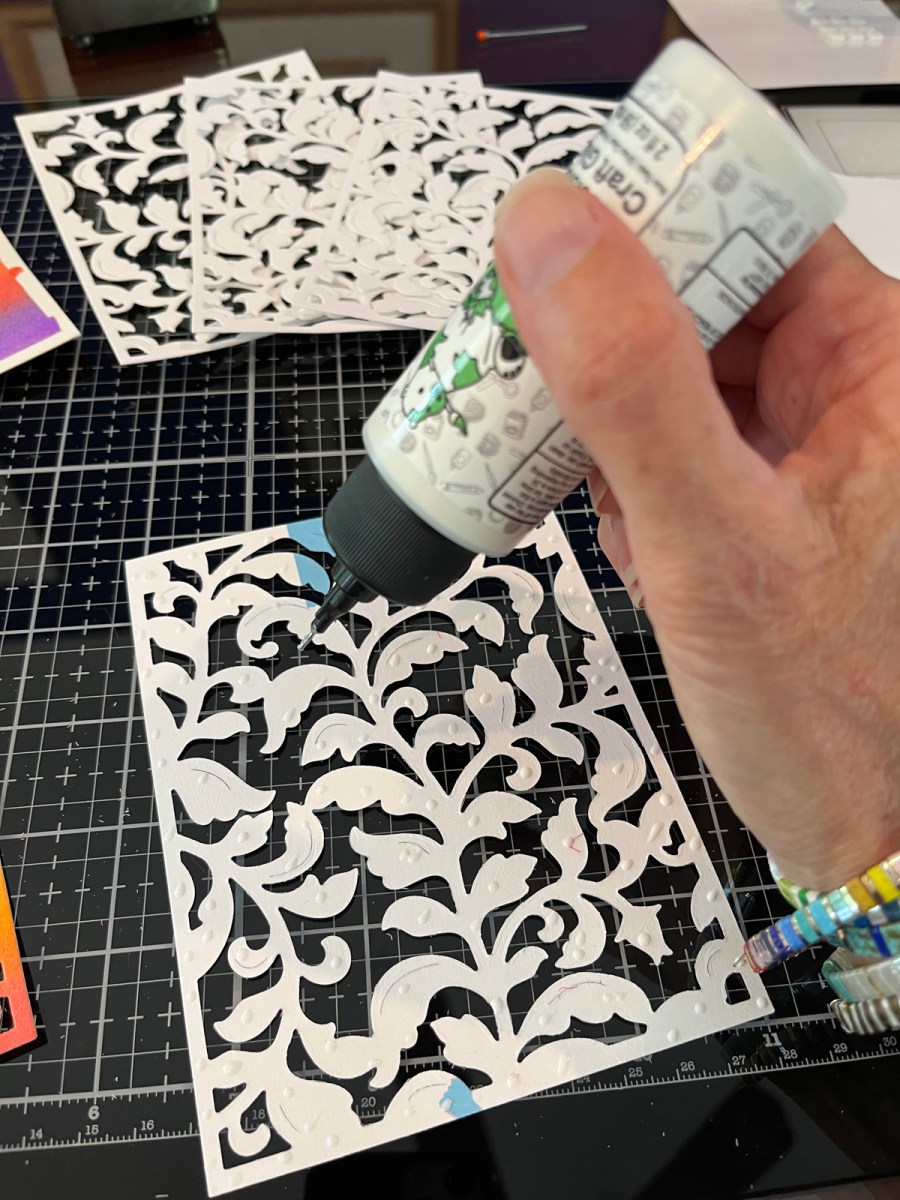
Step 1: Make Your Rainbow Watercolor Panel. Today, I used watercolors for my colorful focal point. On the panel with the rainbow on the top layer, I used Kuretake Watercolors to blend a rainbow. I went over the watercolor panel twice to get an intense color. On the second, panel, I used inexpensive Crayola Watercolors and it worked beautifully! You could also ink blend your background.
Step 3: You could stop die-cutting here, but I wanted a lot of dimension, so I die cut two additional panels so I could stack my layers.
Step 4: Glue Your Layers Together. Using Bearly Glue, I glued three lattice layers together for a substantial top panel. Be sure to weight them down after gluing so they stay nice and flat. I have a large acrylic block that I use. I also adhered the layers to an A2 Top-folding card.
Step 5: Add A Sentiment. I always need Birthday Cards so I used Waffle Flowers new Print and Script Birthday Sentiment Dies. I love that they come with both a cursive and block font with coordinating shadow dies. I cut the sentiments from white cardstock and the shadows from Navy.
Now I have two bright cheerful birthday cards to share.
I love bright colored cards so I started with Rainbow Hot Foil and then created coordinating backgrounds made of colorful strips of cardstock. The sentiment panel was die cut using Stylish Oval Nesting Dies. For card #1, I used a paper trimmer to cut fifteen 1/4″ strips of cardstock. Next, I applied a tape runner over a cardstock panel and then adhered the cardstock strips in rainbow order. Surprisingly, this is actually fast and easy to do.
PRO TIP: To assemble my card, I used craft foam and liquid glue to add a layer of dimension under both the background and sentiment panel. On many projects I prefer craft foam to foam tape. With craft foam and glue, I can slide my element and make micro-adjustments for perfect placement.
Don’t you just love the shine and shimmer?
For card #2, I used my paper trimmer to cut six 1/2″ strips of colored cardstock and then I cut five 1/8″ strips of white cardstock. I think the white dividers really brighten up the look! I again used a tape runner to adhere the white and colored strips to the background. For the second card, I used gold foil and and then matted the sentiment with brushed gold cardstock.
Using Printed Designer Paper for Quick and Easy Cards
These fun foiled sentiments do all the heavy lifting so it is easy to quickly make cards using printed designer paper for the background. Spellbinders Cheerful Occasions pad (I think this pad sold out) has such fun designs and I used the papers on the backgrounds of cards #3, #5 and #6.
Reverse Foiling | Using the Glimmer Hot Foil Negative Space for 2 For 1 Cards
I hated to throw away the foil after I created the cards above, so I created 2nd bonus cards with the leftover foil. The result is so bright and eyecatching! Card #3 uses the negative from the Rainbow Foil.
I cranked up the heat and time and ran the “foil negative” through a second time using a solid foil plate. I used the highest heat setting for 1 minute and got a beautiful result.
PRO TIP: There is a thin protective layer on top of the foil that I peeled off after my card was finished. I kept the foil covered (with the clear protective layer) during assembly to prevent scratches on the foil.
Card #5 uses designer paper paired with the negative from the gold foil.
My final card pairs designer paper, black foil plus I added a second mat die cut from velum. The velum mat is subtle but very pretty.
Welcome to the Waffle Flower May Release Blog Hop! I’m happy to be hopping with the folks from Waffle Flower to show you all the fun new stuff awaiting you on the Waffle Flower website! Be sure to check out each stop in today’s blog hop for fun, inspiration, and chances to win some of these new release goodies!
Today I created four festive birthday cards for Waffle Flowers May 2023 Blog Hop. I hope you’ll “hop” along with us and visit each stop along the way.
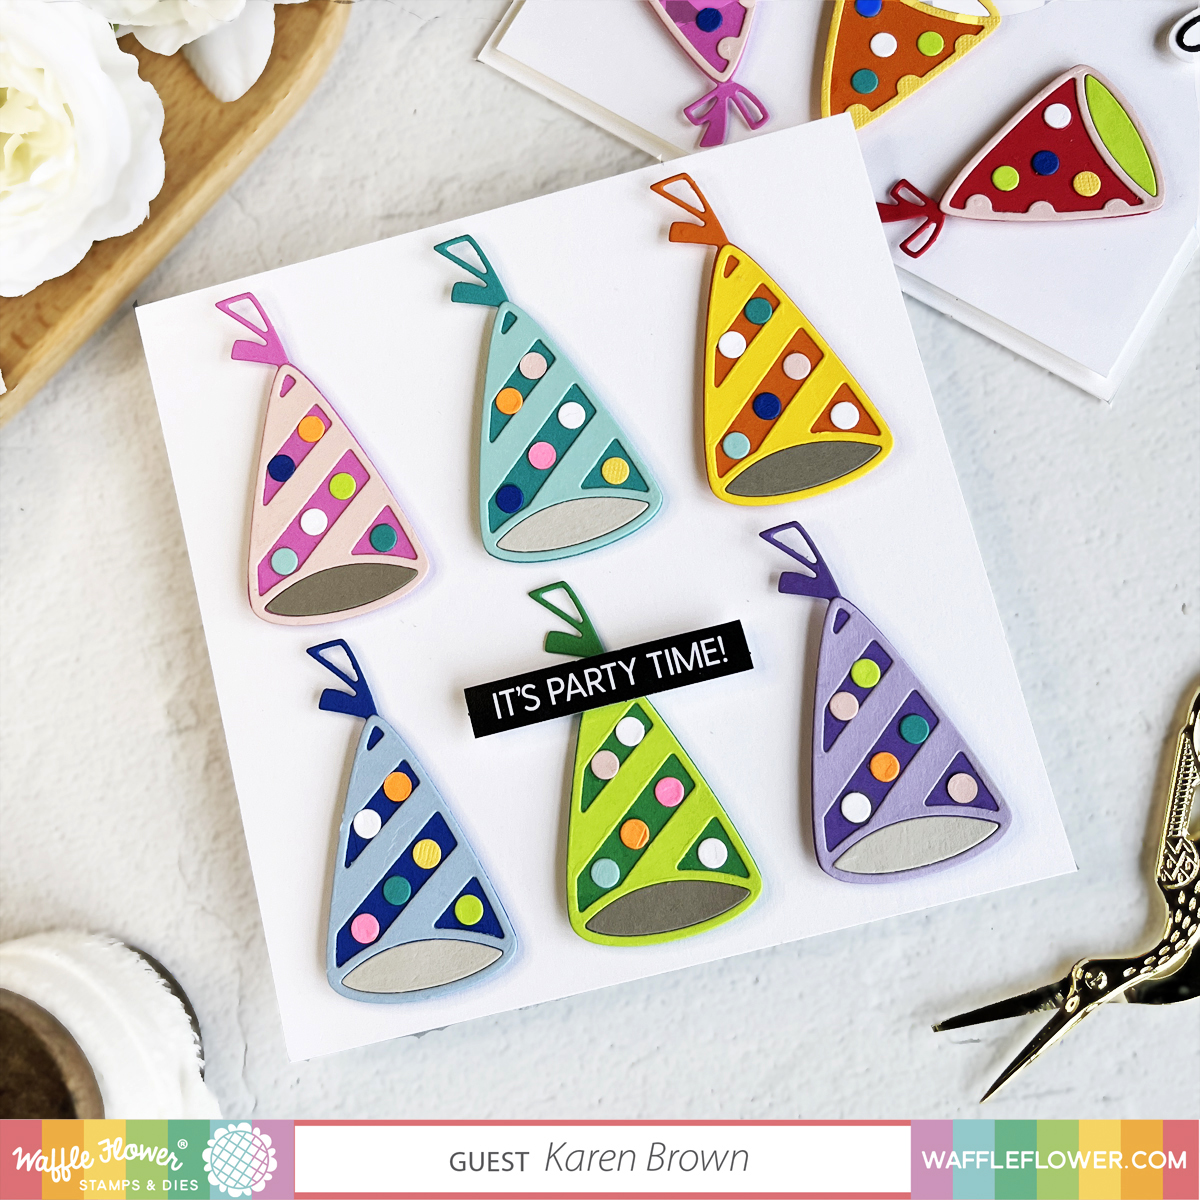
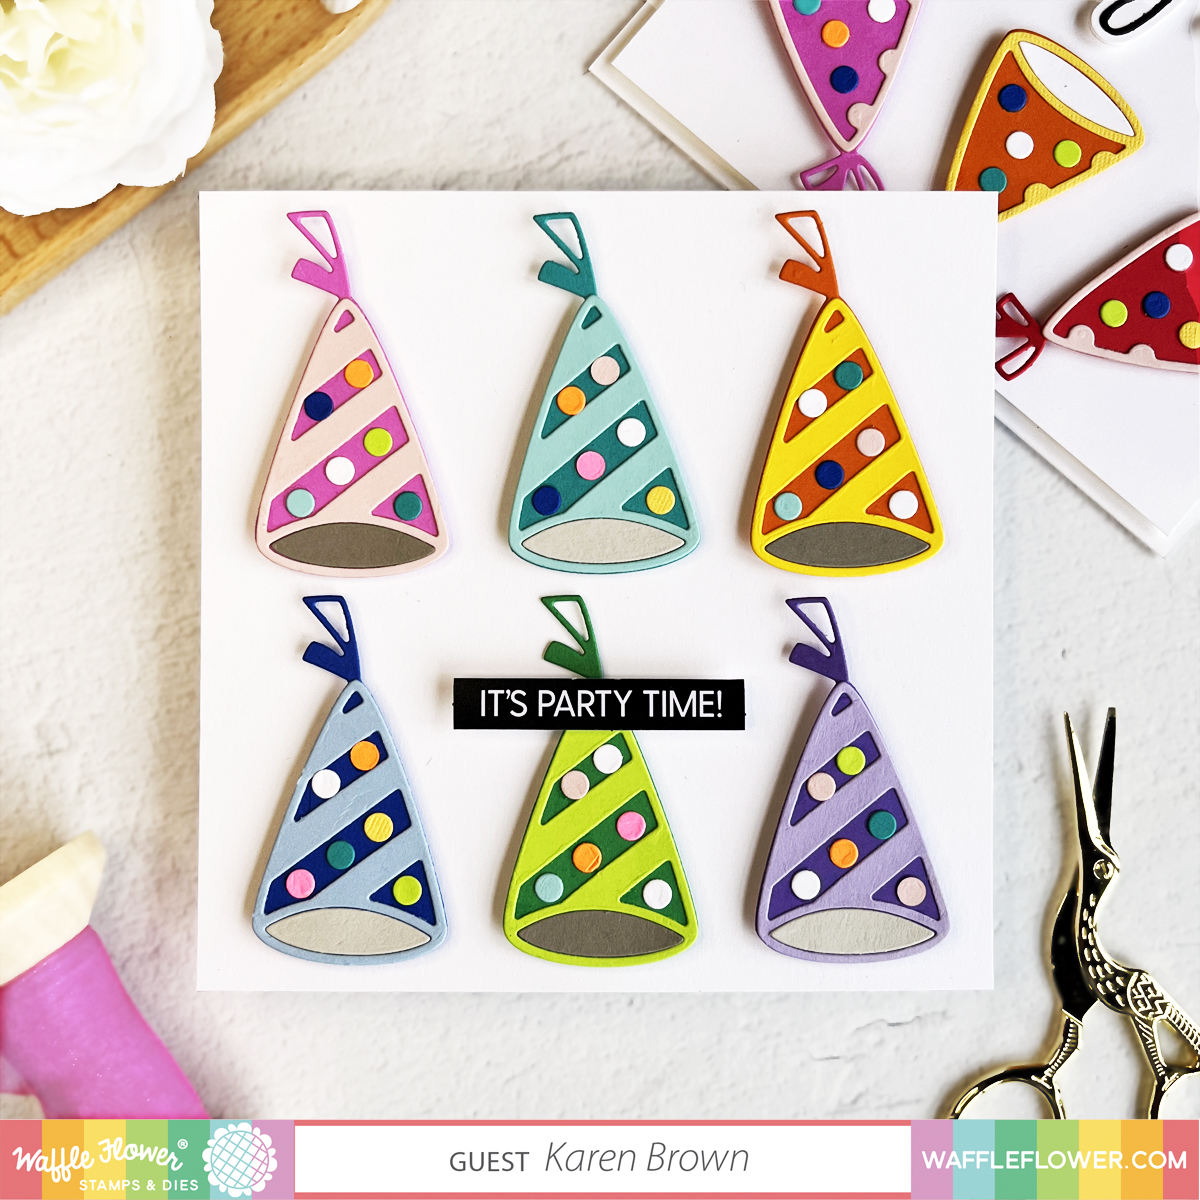
Waffle Flower Layered Party Hat Die Set
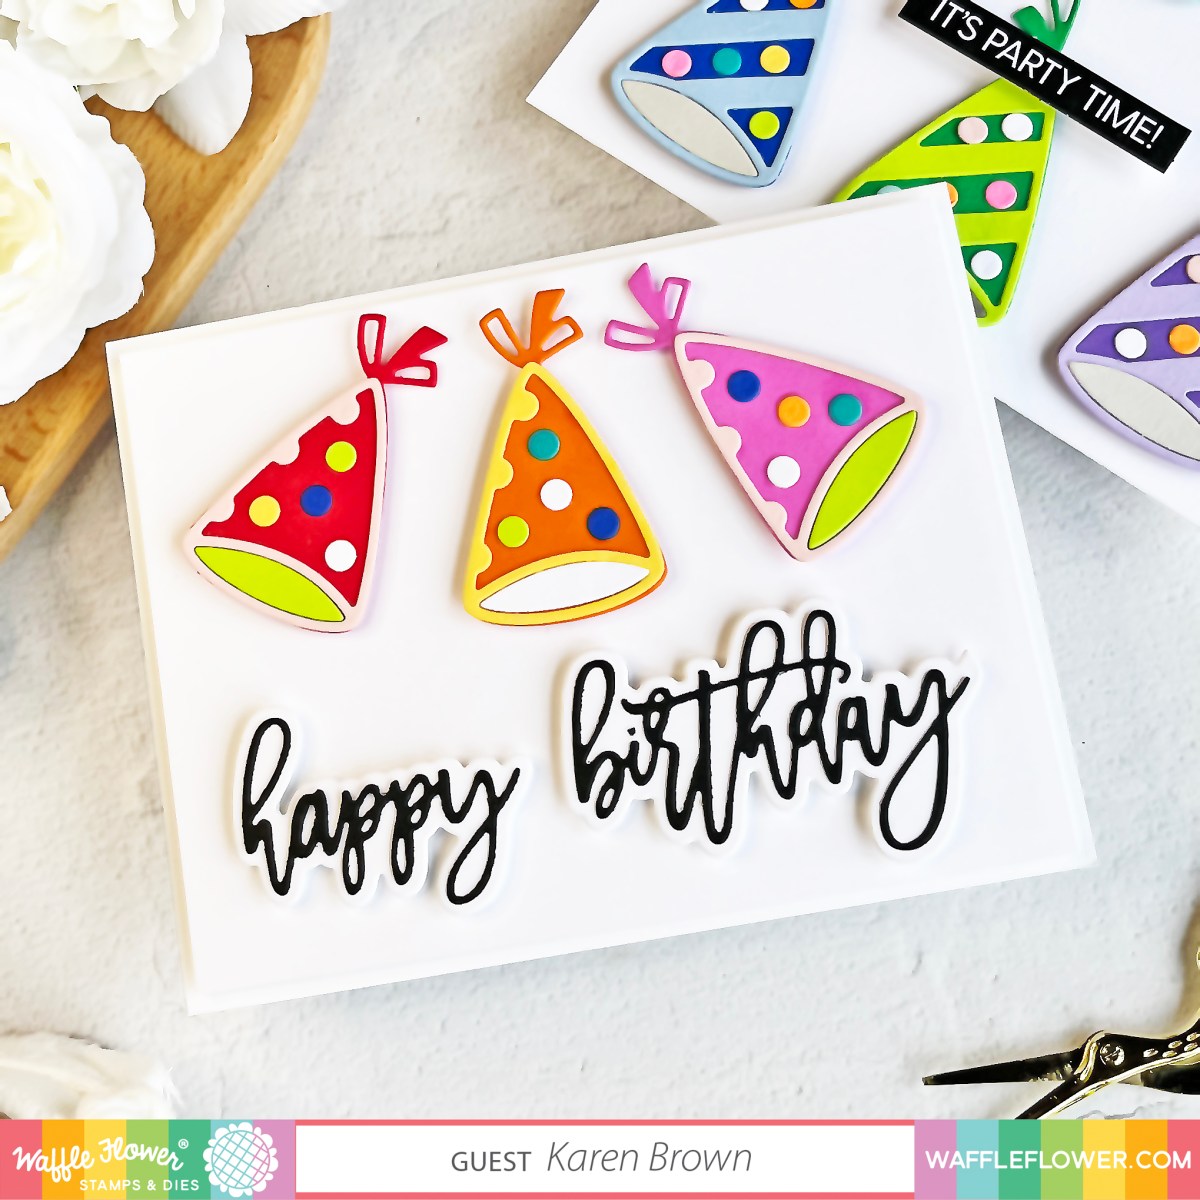
I had so much fun with this Layered Party Hat die set and I cut loads of colorful elements. I posted two cards here but I have lots of leftovers that I plan to make into cards when I get back from my trip with friends.
I started by picking vibrant colored cardstock, then I die cut and started making combinations with the hats. For this post, I really liked using the darker color on the base and then adding a lighter shade on top. And the confetti made the hats even more fun! For my sentiment, I chose the new Print and Script Birthday Sentiment die set that has a fun cursive Happy Birthday and a coordinating shadow.
For my second card I wanted a rainbow grid look so I cut a 5 1/2″ x 5 1/2″ base and added 6 hats. I used a new Subsentiments Birthday Die Cut Embellishment for my sentiment. I love how easy it is to finish cards with preprinted sentiments.
Pro Tip: Instead of adhering the hats with foam tape, I used craft foam. This allowed me to microadjust the hats to get them lined up the way I wanted. Putting liquid glue on the craft foam enabled me to wiggle and move the hats until I was happy with their placement.
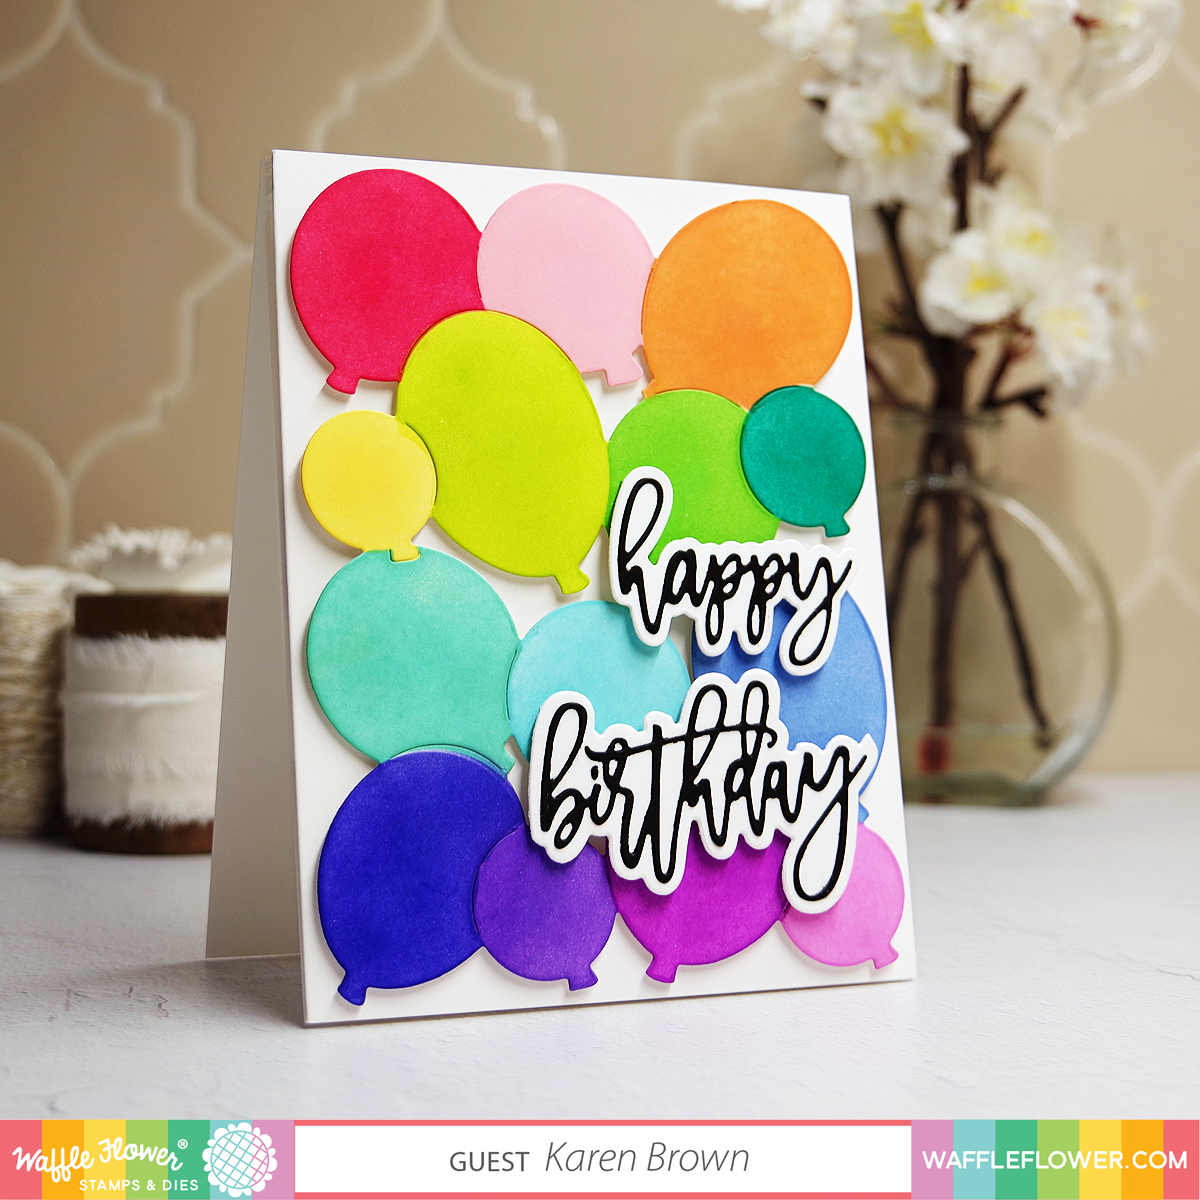
Waffle Flower Balloon Background Die and Stencil Trio
Color selection is one of my favorite parts about cardmaking so this card was extra fun for me. I chose 14 inks in rainbow colors and then started blending away.
PRO TIP: I found it easiest to lay my inks out in order so that I wouldn’t get confused during the ink blending process. I included a process photo to illustrate.
PRO TIP 2: Remember to turn your background for more even blending.
To compliment this release, Waffle Flower included two wonderful new birthday sentiments. One has a beautiful scripty font and the other is a bold print.
I love both new sentiments so I made a rainbow balloon card with each.
Don’t you just love cards that are so versatile? This is the type of card I love to keep on hand….each could be used for a friend, child, man, female.
For today’s hop, Waffle Flower is giving away $25 gift certificate to THREE lucky winners. You can leave a comment on this blog and along the hop by 11:59pm EST on Tuesday May 9th, 2023 for your chances to win. Winners will be chosen at random from the comments left on any of the posts in this blog hop and will be announced on the Waffle Flower Blog on 05/10/2023.
Additional Gift Certificate for One of My Commentors:
I am excited that there is an additional Gift Certificate for one lucky commentor on my Blog Post! I really love reading your comments…you all make me smile!
Specials:
From now till May 8th, 2023, all orders placed at waffleflower.com will receive a mysterious gift (No code required!).
For those of you who are new to Waffle Flower, they have a Last Chancesection on their website that lists many goodies for 25% off until they are gone! This would be a great place to start your collection! And don’t forget to check out their monthly Flash Sales!
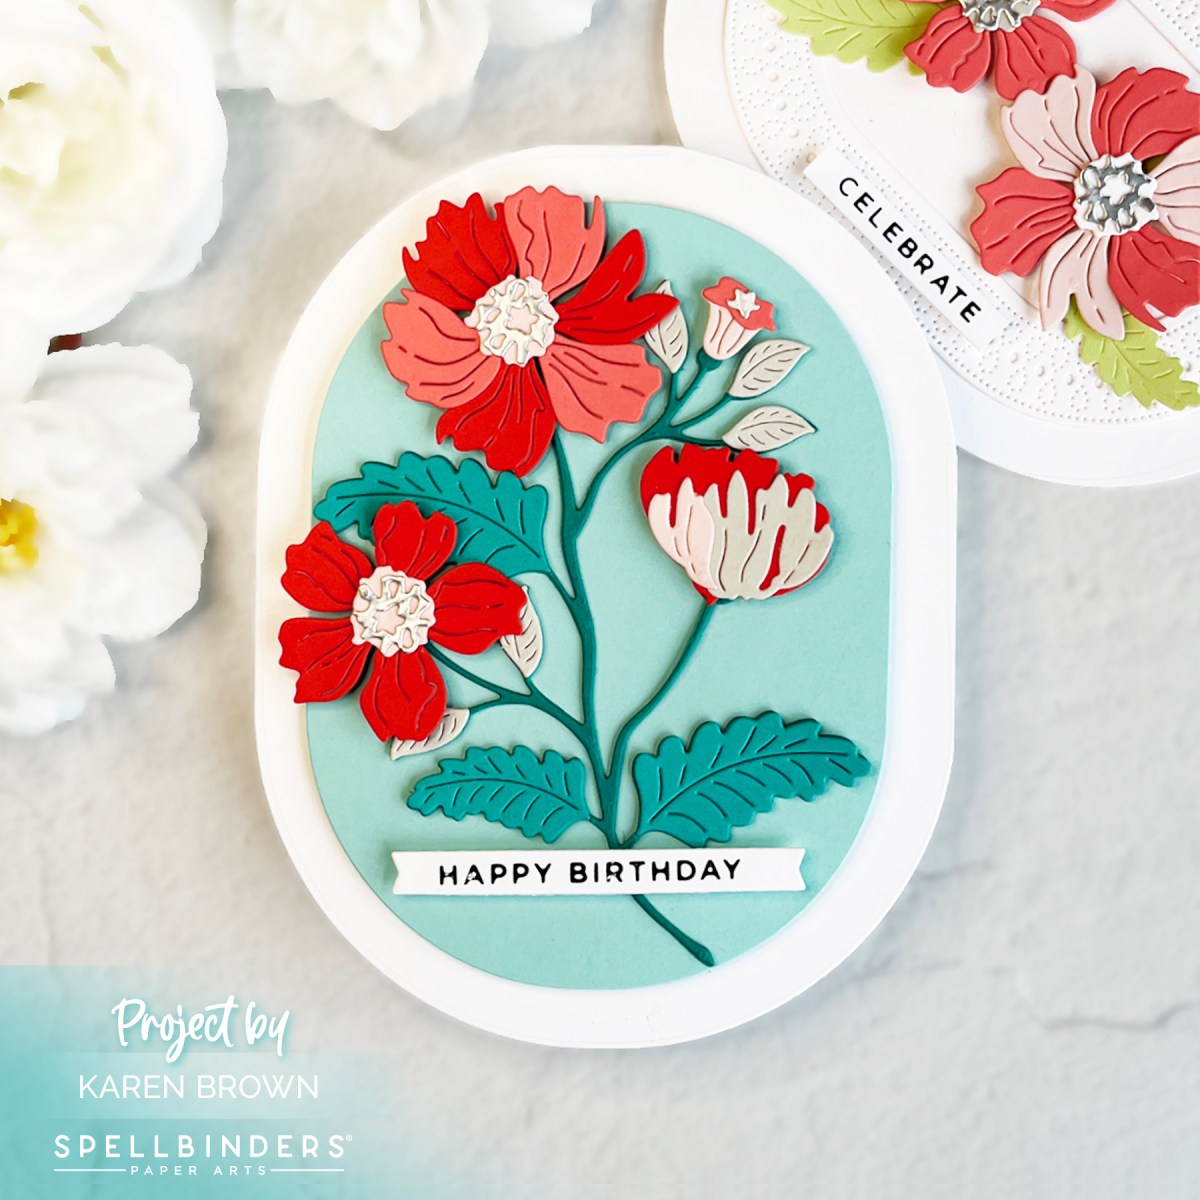
Shaped dies can really change the look of your cards and projects so I was excited to see Spellbinders new Stylish Ovals Collection. I created the first card for my mom’s upcoming birthday. Red is her signature color so I paired corally reds with aquas and greys for a very eye-catching color palette.
To make my oval cardbase, I used the largest oval die for the base. I took a white A2 top folding card base and put the top edge of the die just above the fold so that the die would cut around the top. I die cut the stem twice and glued together for added heft and stability.
I needed a card for a bridal shower so I made a second oval shaped card with die cut flowers. This one is smaller than card 1, it is 5″ x 3 3/4″. I think it makes for a sweet gift encloser.
I used the same products as card one but added a pretty little oval frame from the Infinity Punch and Pierce Plate Cover Die. This die is so beautiful and a has an incredible amount of detail, but it cuts beautifully. I used just the middle section on this card and I used the other 2 sections on card #4 below.
In case you haven’t noticed, I LOVE these oval nesting dies. Just for fun, I wanted to make a bright cheerful rainbow card so I selected 8 bright shades of cardstock and then die cut my rainbow elements.
This type of birthday card is so versatile that I love to keep them on hand. I could send this to anyone…man, woman or child.
Spellbinders Infinity Punch and Pierce Plate Cover Die
This cover die is gorgeous in person! I started by making a rainbow gradient background with inks and blending brushes. I then placed the center and exterior components of the cover die over the top and added two floral embellishments that echo the spring colors.