I’m so excited to be part of CASE Me A Christmas Card 2025! My talented crafty friend @michelle_lupton invited me to join this year’s creative lineup, and I was thrilled to say yes. This fun annual event features ten creative hops throughout October—two on YouTube and eight on Instagram—where cardmakers CASE (Copy And Selectively Edit) cards from one another.
To join the fun, create your own Christmas card inspired by one from the hop and upload it via Inlinkz on Michelle’s blog. You can also win prizes from amazing sponsors just by participating or leaving comments on the hop posts!
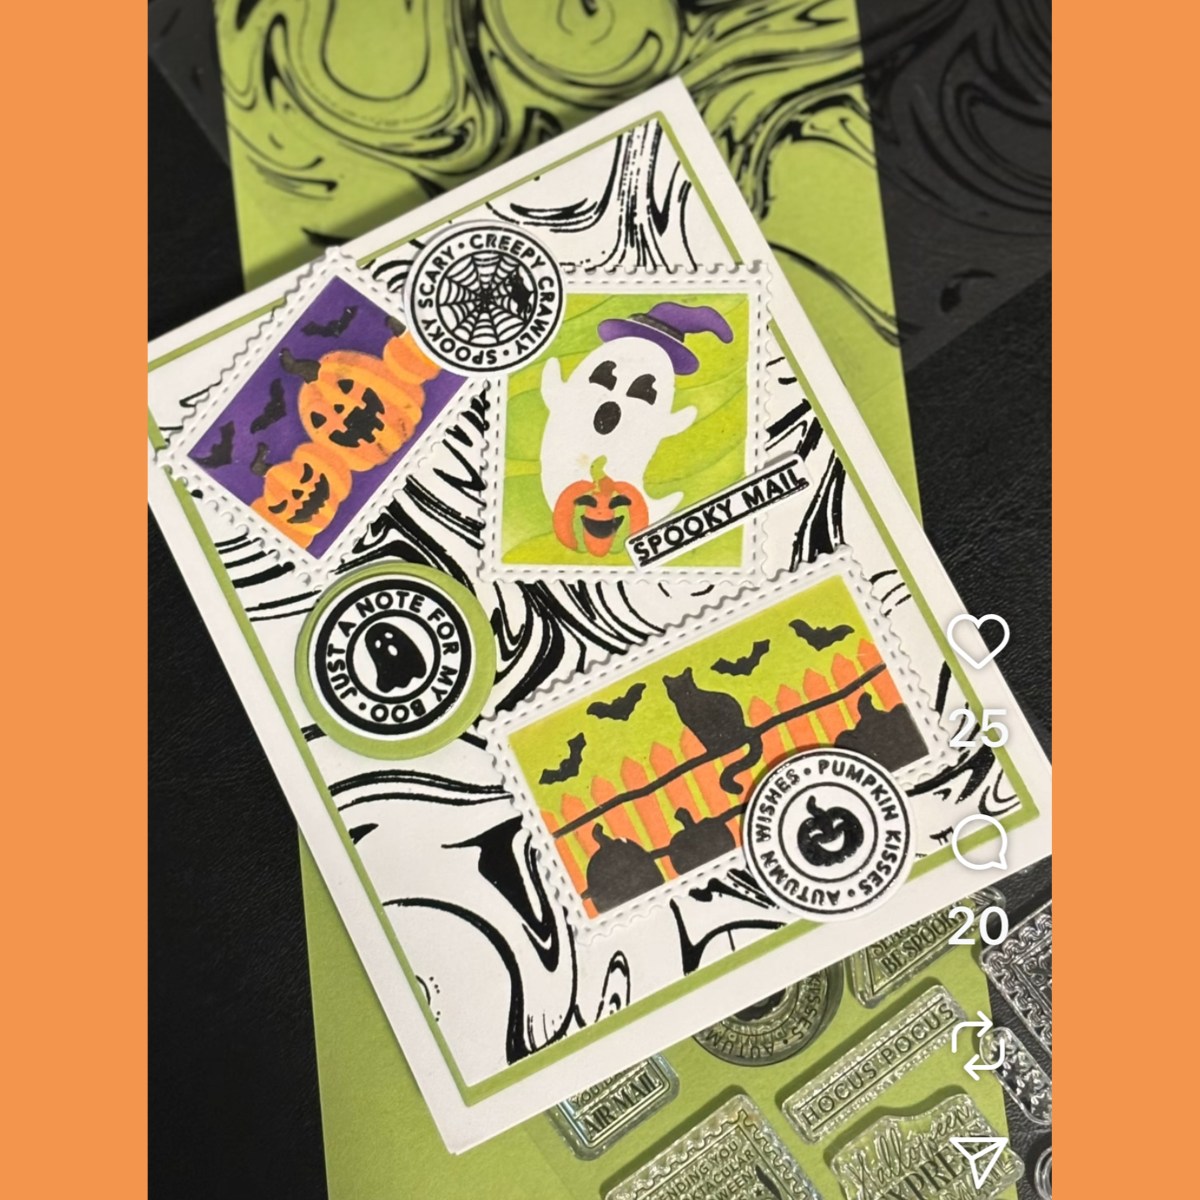
I’m part of Hop #9 and am CASEing the wonderful @expressivepaper – Kathy Pisupati. Kathy created an absolutely adorable Halloween card that I just had to reimagine as a Christmas design!
Kathy’s Halloween Card:
My Card Details
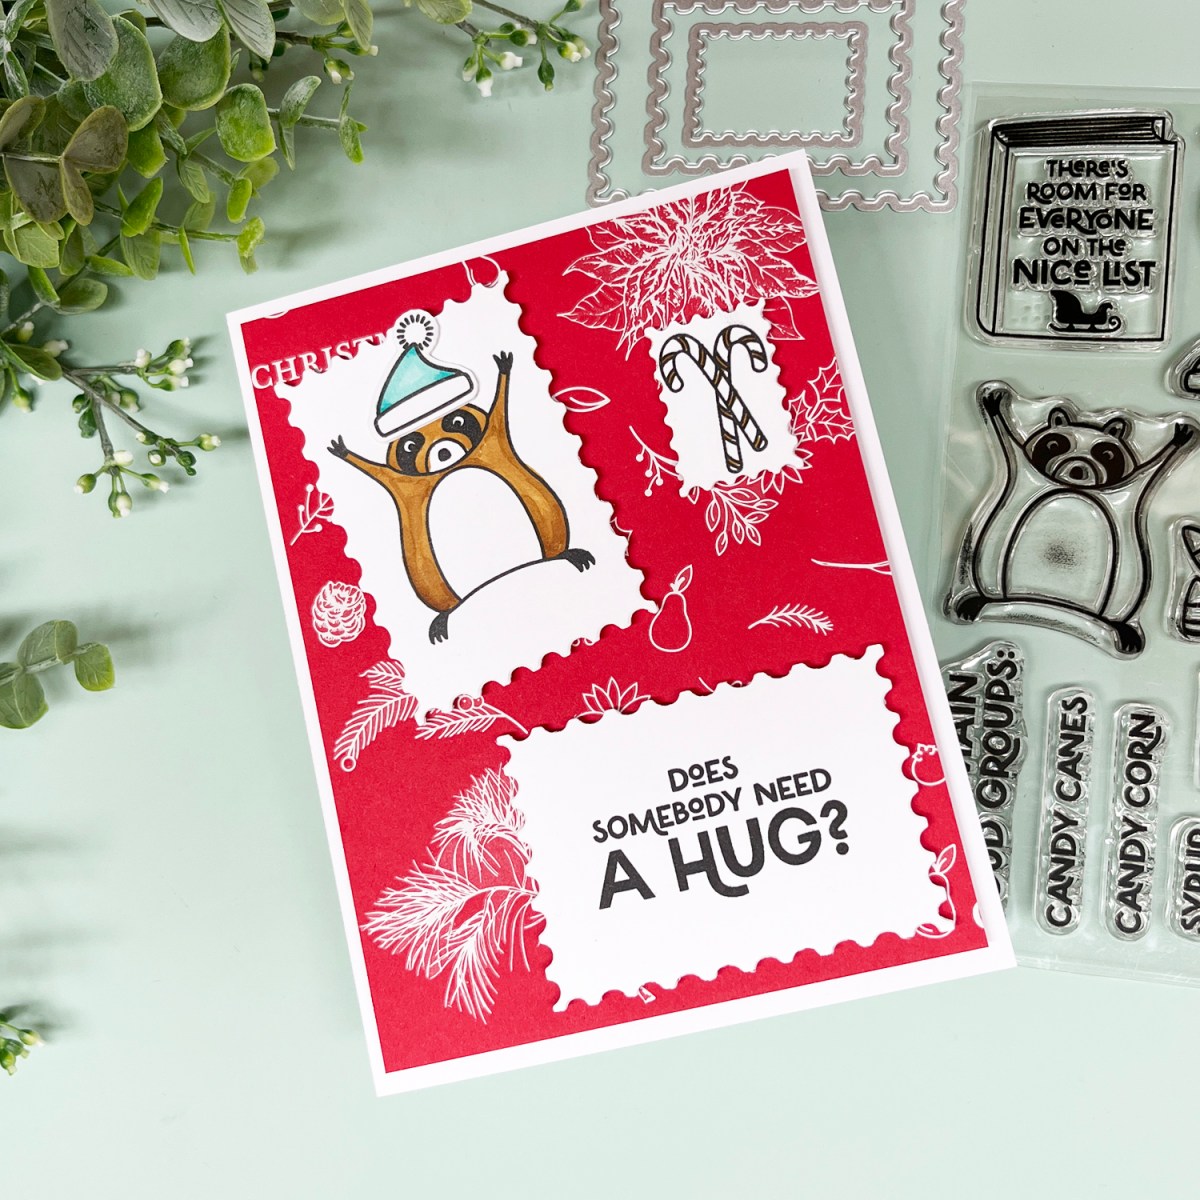
I was inspired by Kathy’s use of postage stamp dies (always a favorite of mine) and her clever background. Instead of stenciling, I used one of my other go-to products—Hero Transfers—to create my own twist.
I stamped an adorable raccoon reaching for a hug, paired with the perfect sentiment: “Does Somebody Need a Hug?” My color palette is limited to Christmas red, white, and small dabs of aqua and tan, which gives the card a striking and dramatic look while keeping it silly, fun, and a little bit heartwarming. I also think it’s a great option for masculine cards this holiday season!
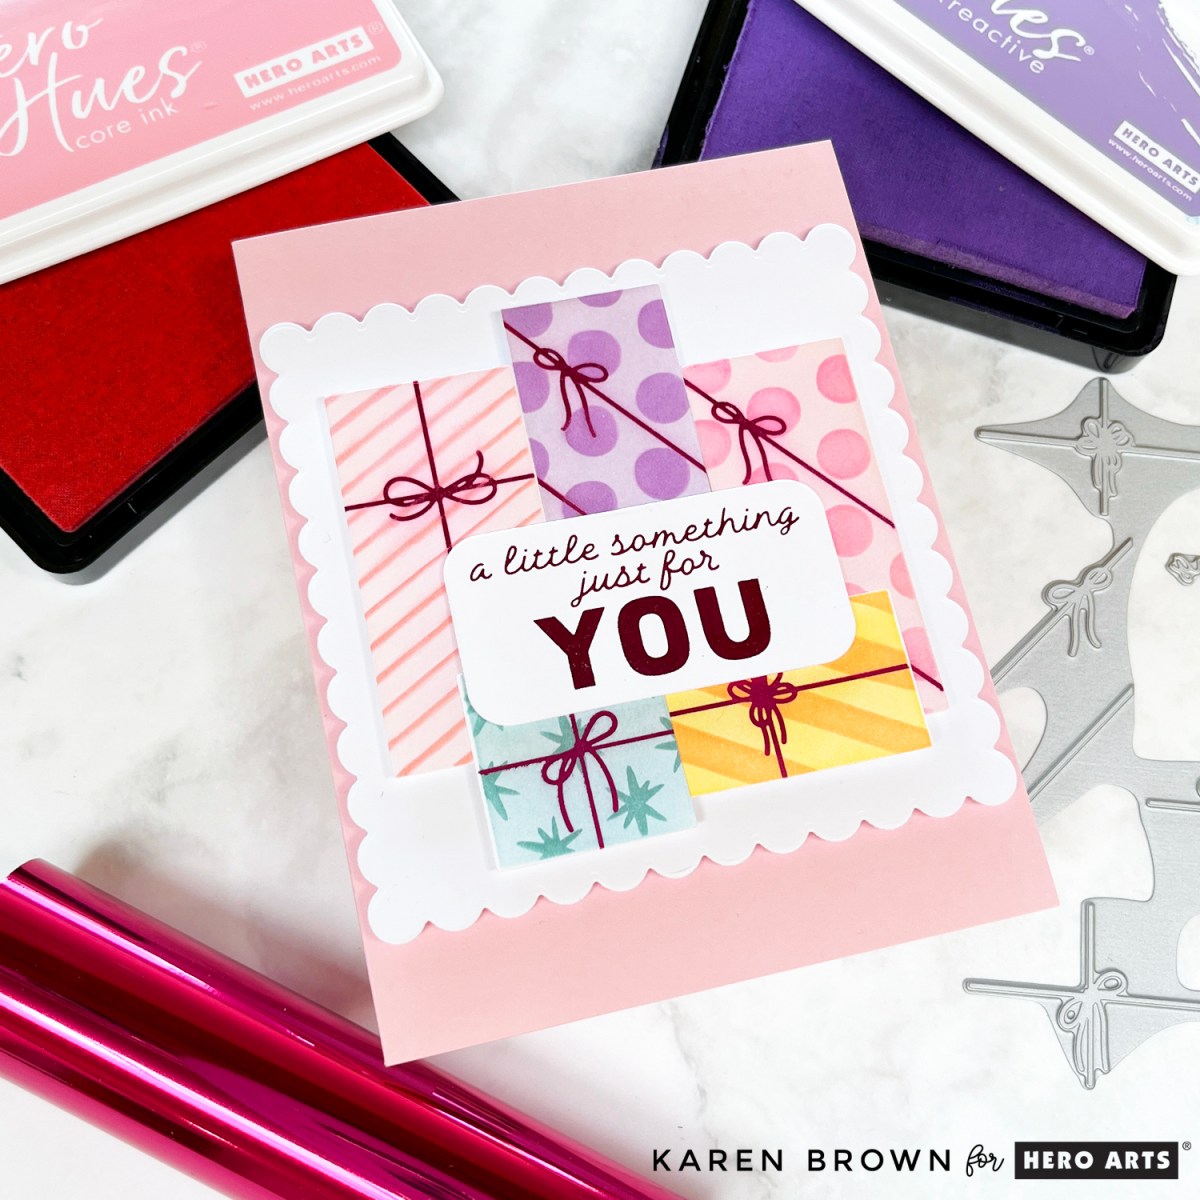
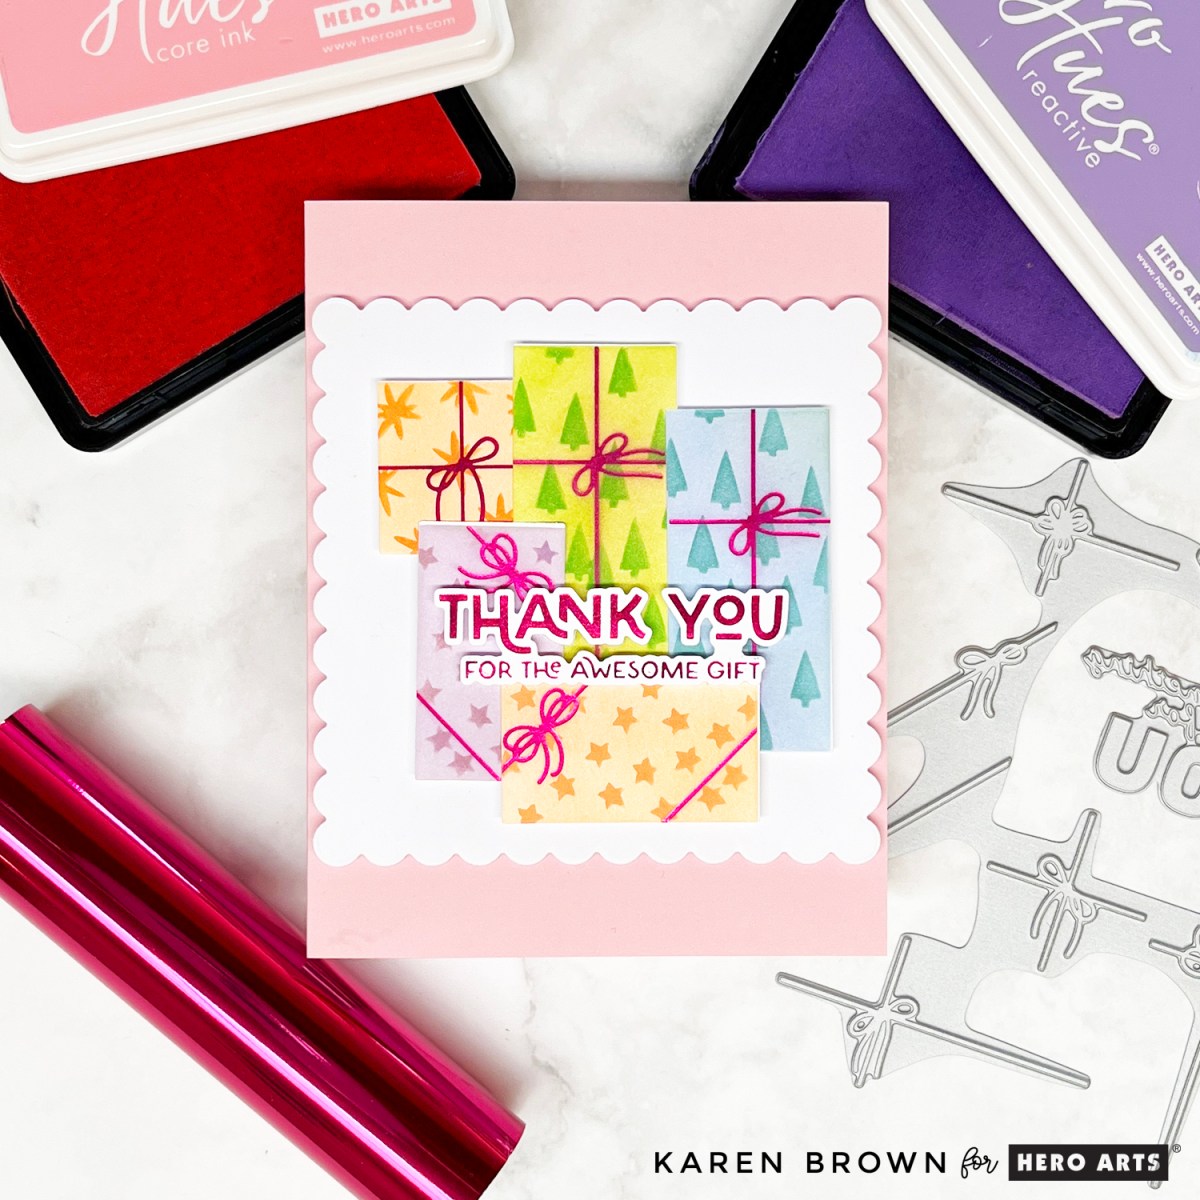
The new Hero Arts October 2025 Best Gift Ever Collection is here, and I couldn’t resist creating with the Best Gift Ever Boxes Bundle. These products are incredibly versatile—you can use them for birthdays, Christmas, graduations, showers, or anytime you need a festive card. I went with pastel rainbow colors and magenta foil for two cheerful and celebratory designs.
I arranged the die-cut gifts and sentiments into a loose square composition, mounting them with foam squares onto a white scalloped square panel (from the Square Scallop Infinity Dies). Finally, I adhered them to a pale pink card base.
The result? Two pastel, rainbow-inspired cards with a touch of elegant foil shine. These gifts are perfect for any season or occasion—and I love how the foil details elevate the look for something extra special.
💡 Foiling Note: I own two foiling machines, but I consistently get my best results with the Spellbinders Glimmer System. In fact, I haven’t reached for my other machine since 2023! This is, of course, just my personal experience, but I thought it might be helpful to share if you’re curious about foiling systems.
I am also participating in an Instagram Hop for this release, and we’d love for you to pop by! You can find all the details HERE.
Interested in another post on foiling? Click HERE.
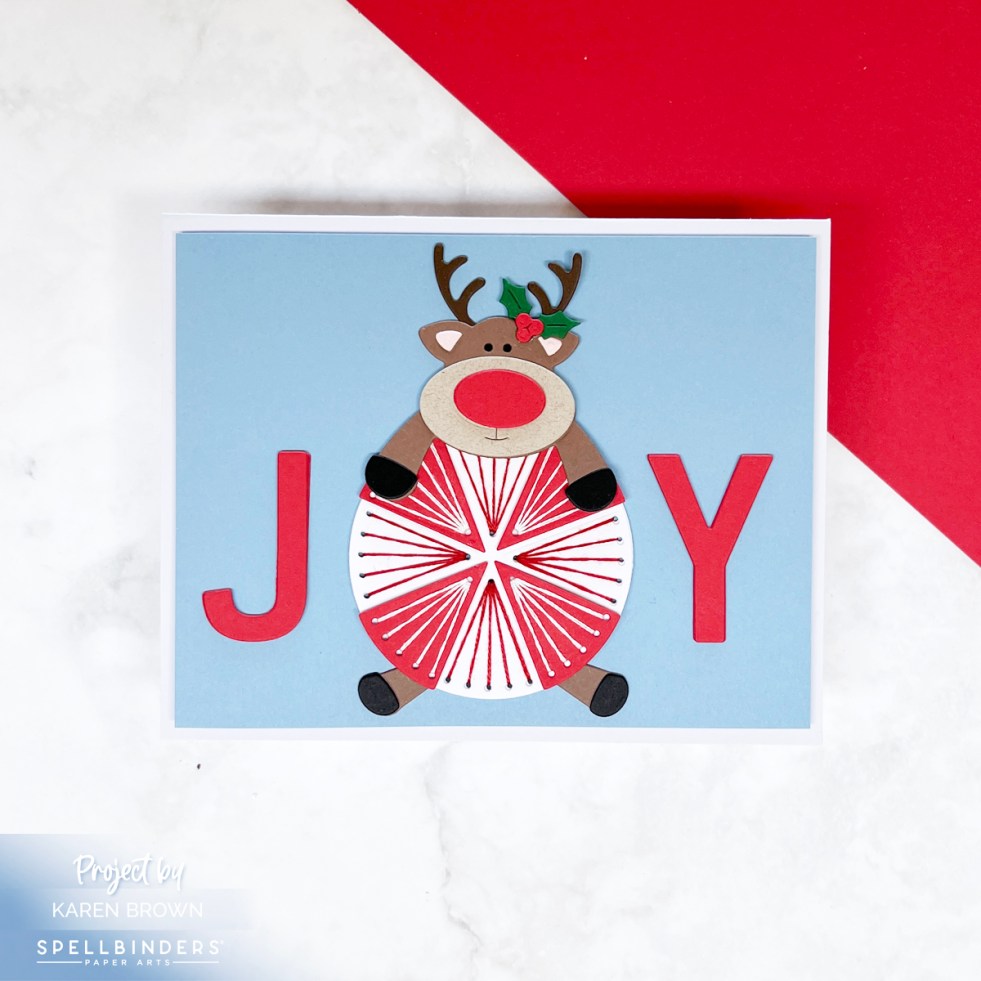
The October 2025 Stitching Die of the Month is called Peppermint Prancer, and it’s as festive as it sounds! This month’s design combines the sweetness of peppermint candy with the whimsy of a playful reindeer—perfect for cheerful holiday cards.
🍬 The Peppermint
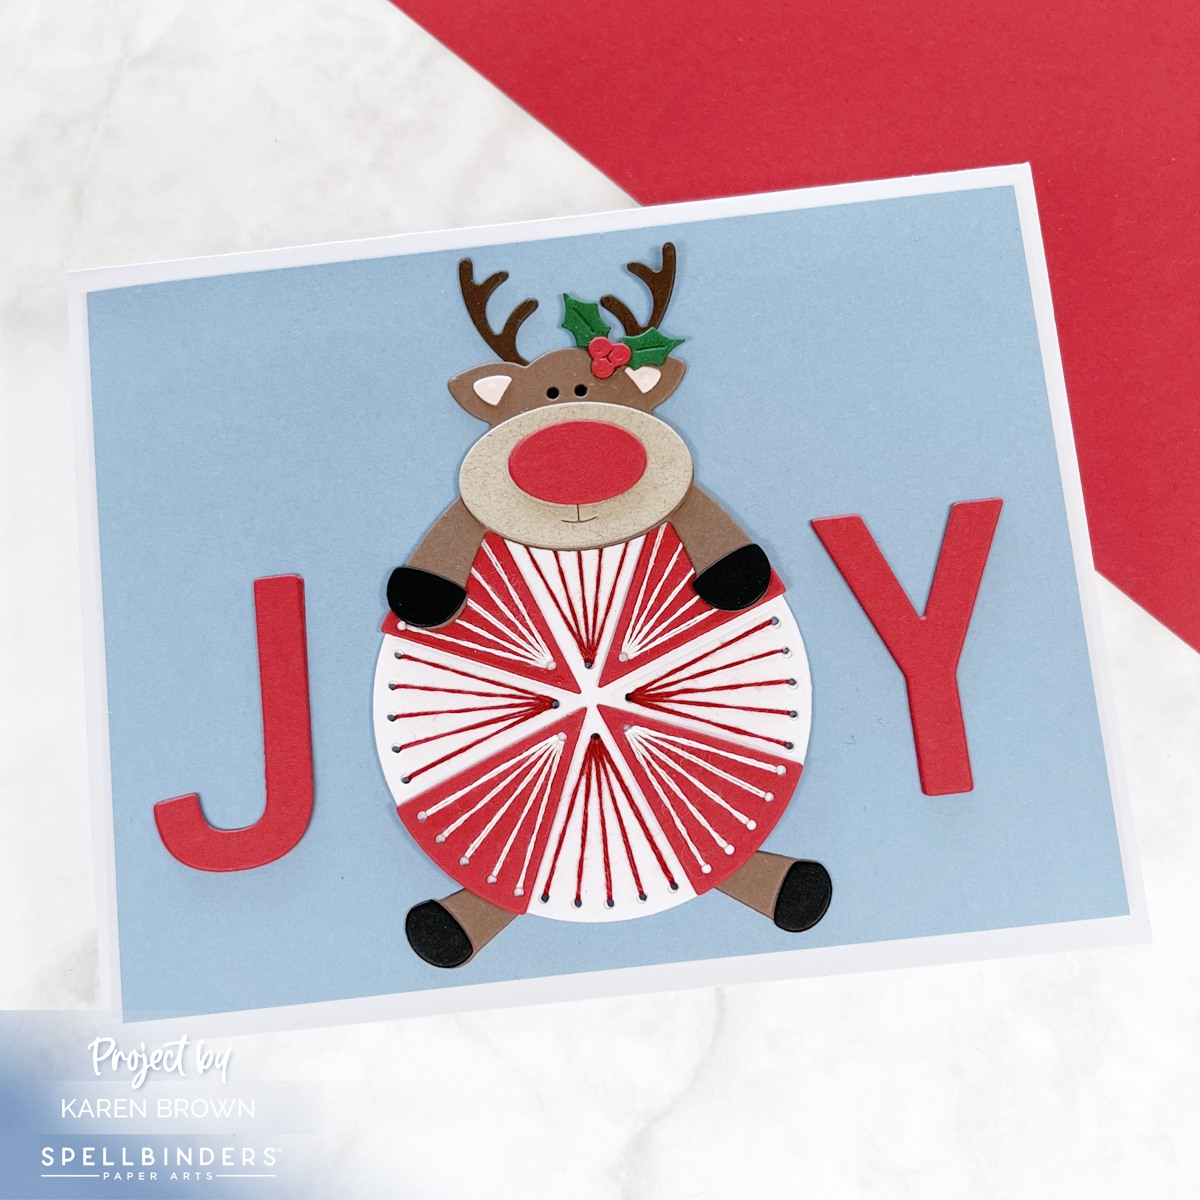
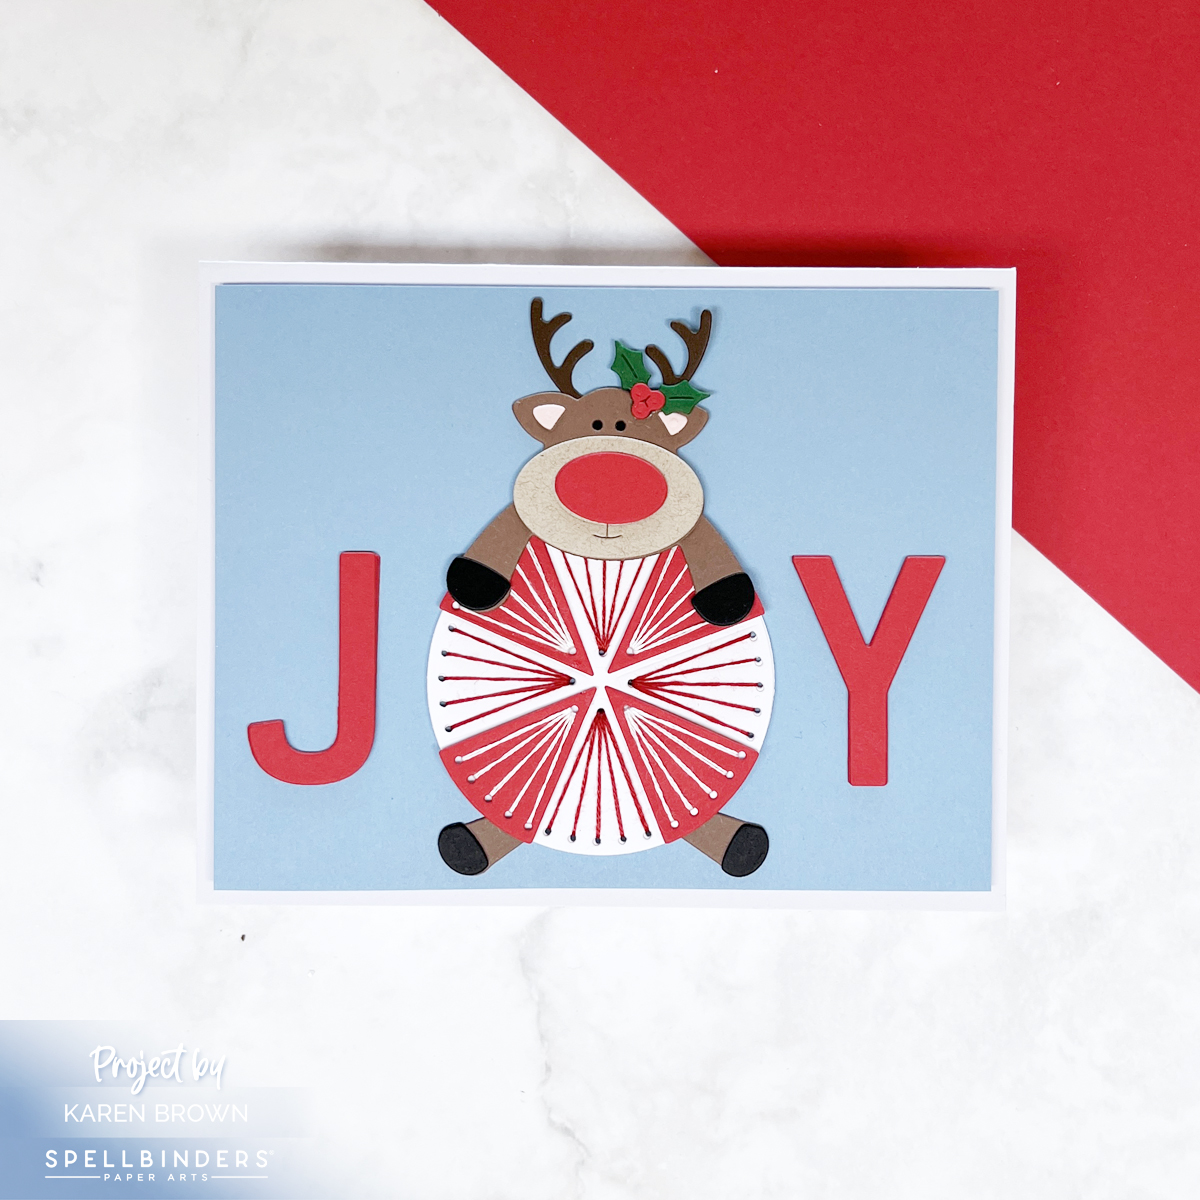
I started with a Cascade blue background to give my card a crisp winter feel. The stitched peppermint takes center stage: alternating red and white cardstock wedges stitched with contrasting thread—red stitches on the white wedges and white stitches on the red wedges. The result is a bold, candy-like design that feels dimensional and playful.
🦌 The Reindeer
Of course, no holiday peppermint is complete without a reindeer! I gave my prancer a bright red die cut nose to turn him into Rudolph, and I positioned him sprawled out across the peppermint as if he’s hanging on for dear life. It makes the whole card feel lighthearted and full of energy.
🎄 The Sentiment
Here’s where the fun twist comes in: the stitched peppermint doubles as the “O” in the word JOY. I die cut a bold J and Y (included in the kit) from the same red cardstock as the peppermint so the word stretches across the entire card front. The peppermint pulls double duty as both candy and sentiment—an easy way to make your design more impactful.
✂️ Stitching Details & Supplies
I stitched with two strands of embroidery floss and recommend keeping thread taut but not tight for smooth stitches. For those new to stitching dies, I’ll be linking to my favorite stitching accessories and tools so you can jump right in.
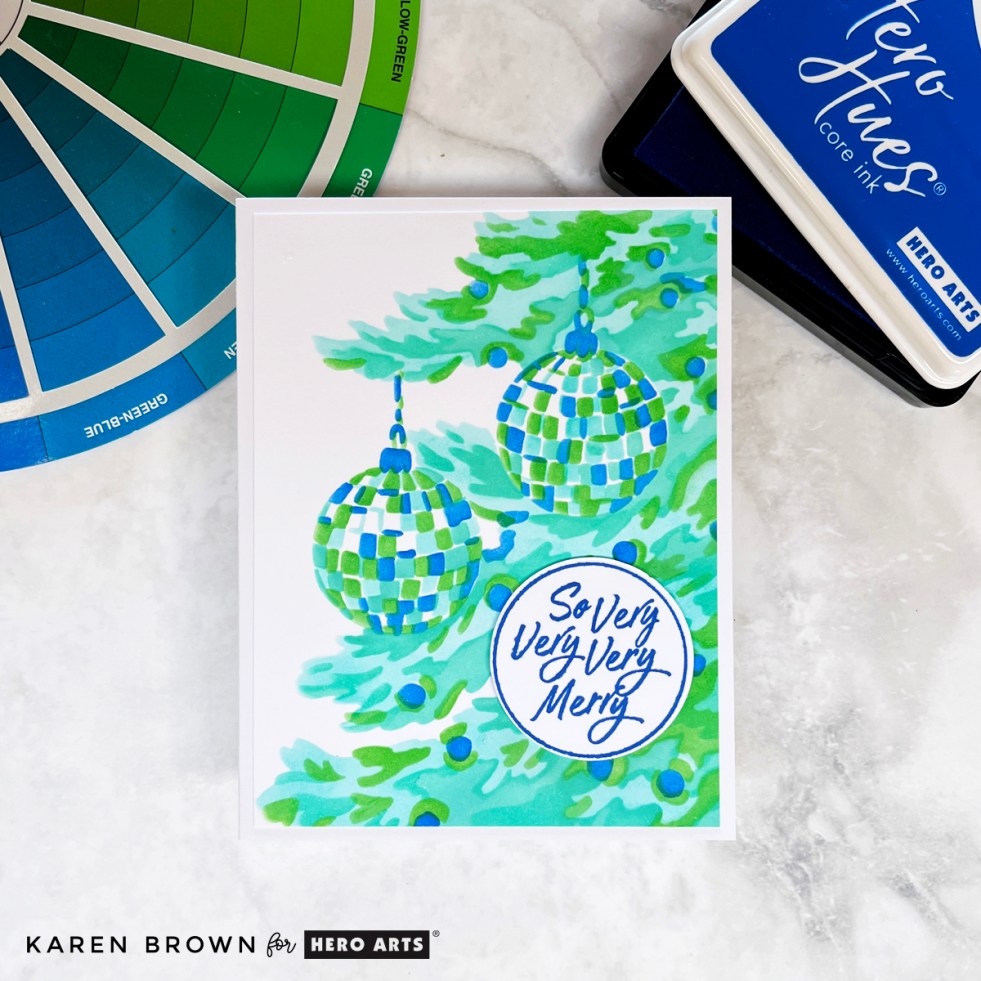
I couldn’t resist creating one more card with the October 2025 Release—this time featuring the Layering Stencil: The Tree. This gorgeous four-layer stencil creates a close-up view of a Christmas tree filled with ornaments, and it was such a joy to blend.
You can see my other October Club Kits Cards HERE.
I chose analogous colors (neighbors on the color wheel) for a soft, harmonious look in shades of greens, aquas, and blues:
Using Deluxe Smooth White Cardstock made the ink blending go on like butter, and as always with Hero Arts stencils, the layers lined up perfectly.
For the sentiment, I used the “So Very Very Merry” circular stamp and coordinating die from the October Card Kit, stamped in Indigo ink. The deep blue ties the whole design together beautifully.
This card has already gone into my holiday stash, ready to be mailed in December!
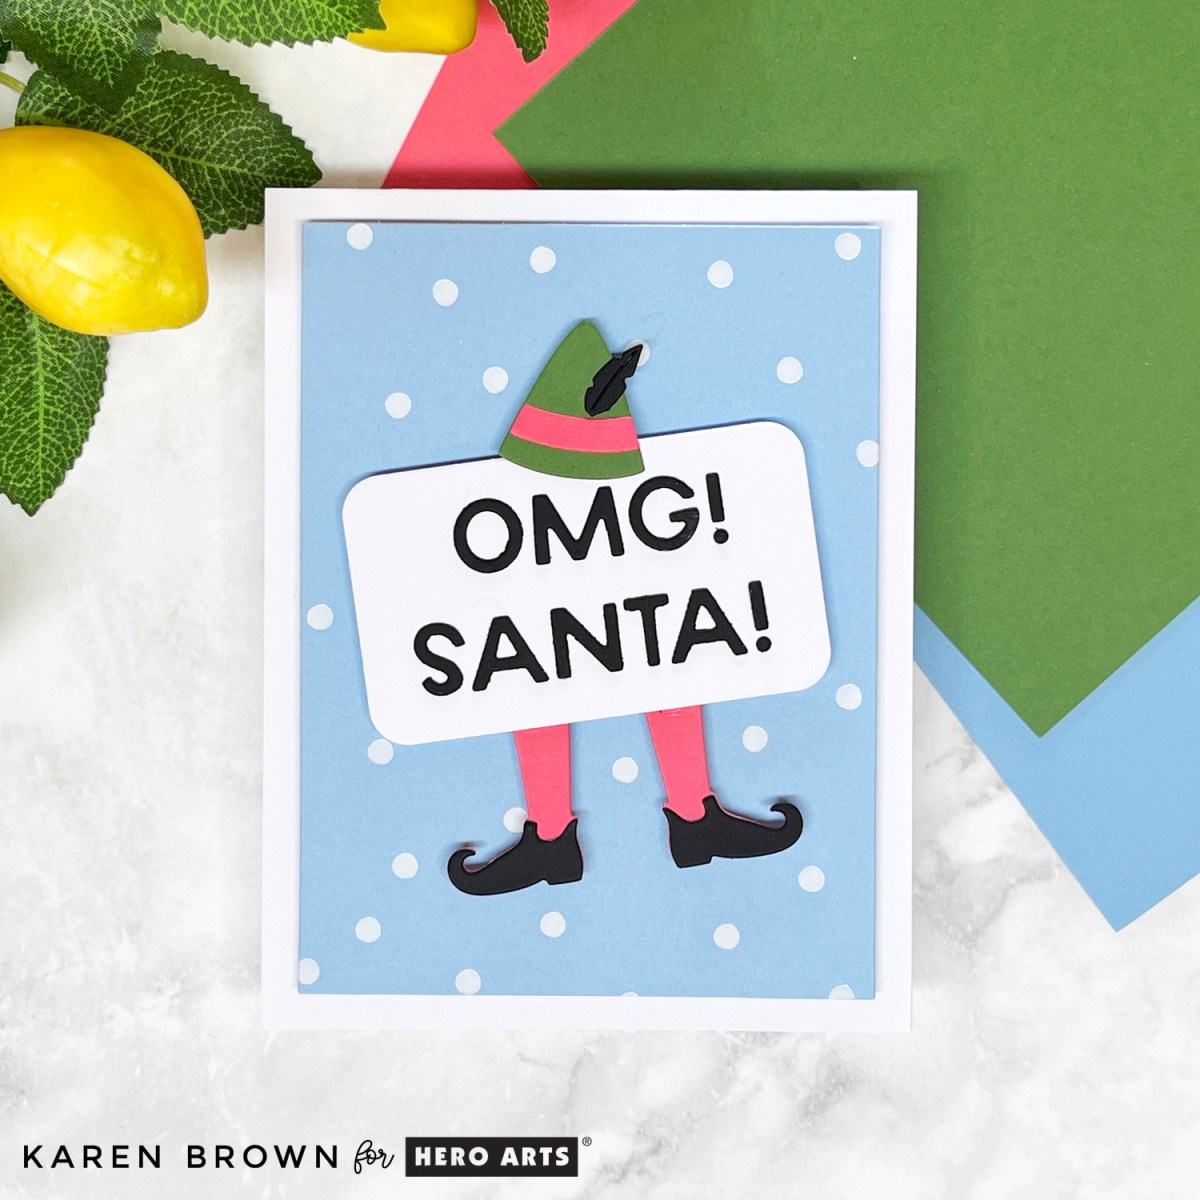
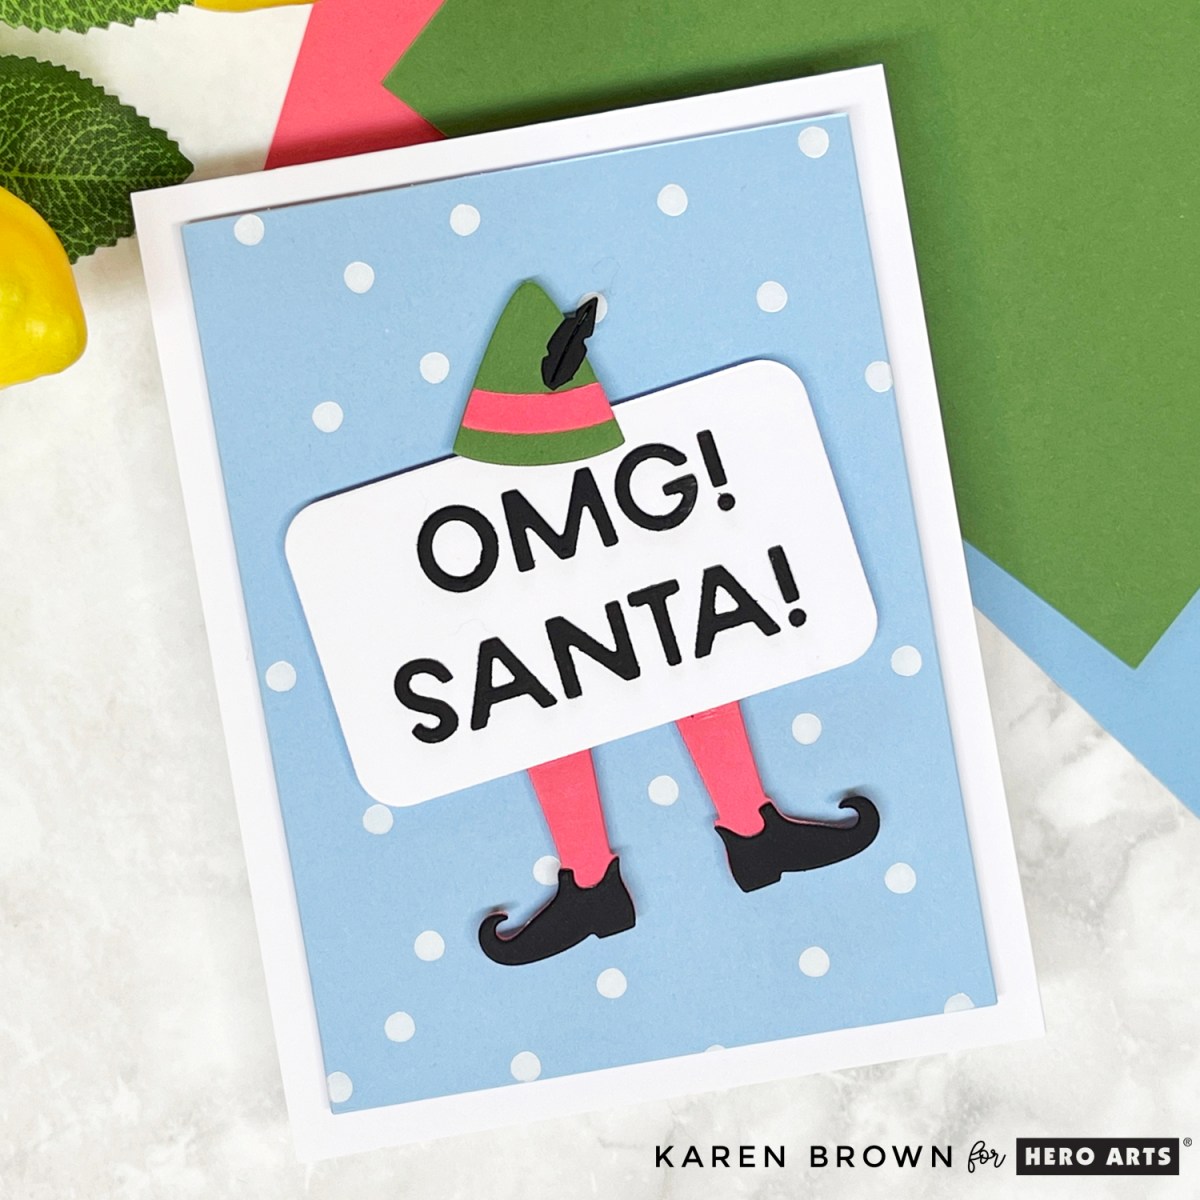
Today I’m sharing a playful Christmas elf card that combines bold colors, a cheeky sentiment, and a versatile foiled background. Even better—I filmed the entire process so you can craft along step by step.
I have a list of key supplies used below the video.
I started with the Hero Arts Celebration Press Plate (part of the Yule Fuel Collection). I love how versatile this plate is—it looks like snowflakes when foiled in white but could also become a confetti background in bright colors. For this project, I went snowy, since my elf needed a winter wonderland to stand in.
The Sassy Elf
Next came my focal point: a die cut elf from the Yule Fuel Collection. He’s cheeky, a little silly, and absolutely festive. To give him personality, I used ColorWheel Cardstock in:
Cascade (blue)
Dahlia (pink)
Fern (green)
The mix of colors makes him bold and fun—perfect for standing out against the snowy background.
The Cheeky Sentiment
Every good elf needs a punchline, and this one couldn’t be better: “OMG! Santa!”
The die cut letters are crisp, bright, and perfectly straight across the card front (in the video, I share my favorite tip for gluing letters evenly every time).
Watch the Video Tutorial
And in my video, I show you:
Exactly how I foiled the Celebration Press Plate
How to glue tricky die cut letters so they’re straight and evenly spaced
My step-by-step process for putting the whole card together
Create a charming hand-stitched felt gnome with step-by-step tips, stitching guidance, and personalization ideas.
If you’ve never tried stitching on felt before, this is a great place to start.
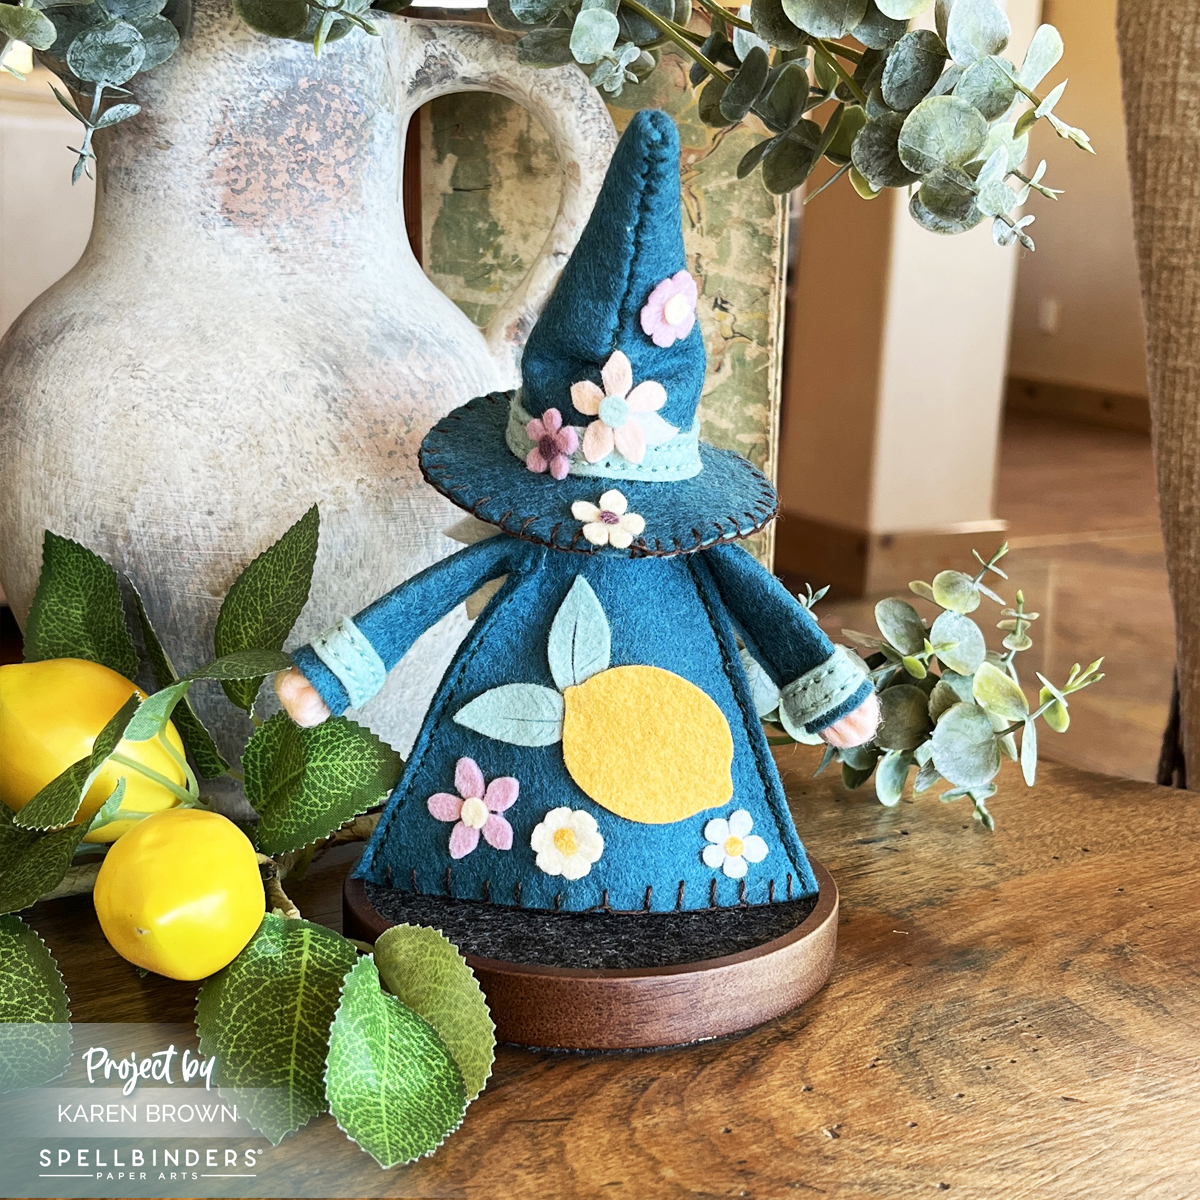
Meet Fergus the Gnome—Spellbinders’ newest felt décor project and one of the most fun stitching projects I’ve made.
Fergus is a hand-stitched wool felt doll with endless opportunities for personalization. In this tutorial, I’ll share my tips and tricks for stitching, assembling, and customizing your own gnome—plus the materials that make this project easy and enjoyable.
Using high-quality merino wool felt, I created my own version: a cheerful Lemon Gnome decorated with citrus and flowers.
I’ve tried different felts in the past, but they sometimes frayed or stretched, leaving me frustrated. Merino wool felt cuts beautifully with Spellbinders dies and keeps its shape. For this project, I used my Platinum 6 Die Cutting System + felt from the Trend and Holiday Collections—smooth, sturdy, and vibrant.
This is the exact felt I recommend using—after trying others, this one gave me the best results.
Die cutting: use a regular sandwich in your machine; Spellbinders Platinum 6 dies cut felt beautifully
Stuffing: I used cotton fiber filling for the stuffing and then added uncooked rice to the bottom of the gnome’s body to add ballast. I inserted about an inch of rice right before I stitched on the base.
Assembly:Bearly Art Glue worked great for securing embellishments and components. I used a generous amount. I also cut a little triangle from deli paper and inserted inside the coat prior to gluing (see photo 2 down). This kept the glue from seeping to the other side.
You build Fergus piece by piece—hat, coat, nose, accessories—and then assemble him. He’s adorable, sturdy, and so fun to make.
📸 Organization Process Photo
I used my Stash Stax to keep me organized while I created Fergus.
Giftable & Customizable
You can decorate Fergus for any season, occasion, or holiday. Imagine Christmas gnomes, Valentine’s gnomes, Easter gnomes, or even citrusy summer gnomes like mine. They make unique gifts, handmade keepsakes, or cheerful décor.
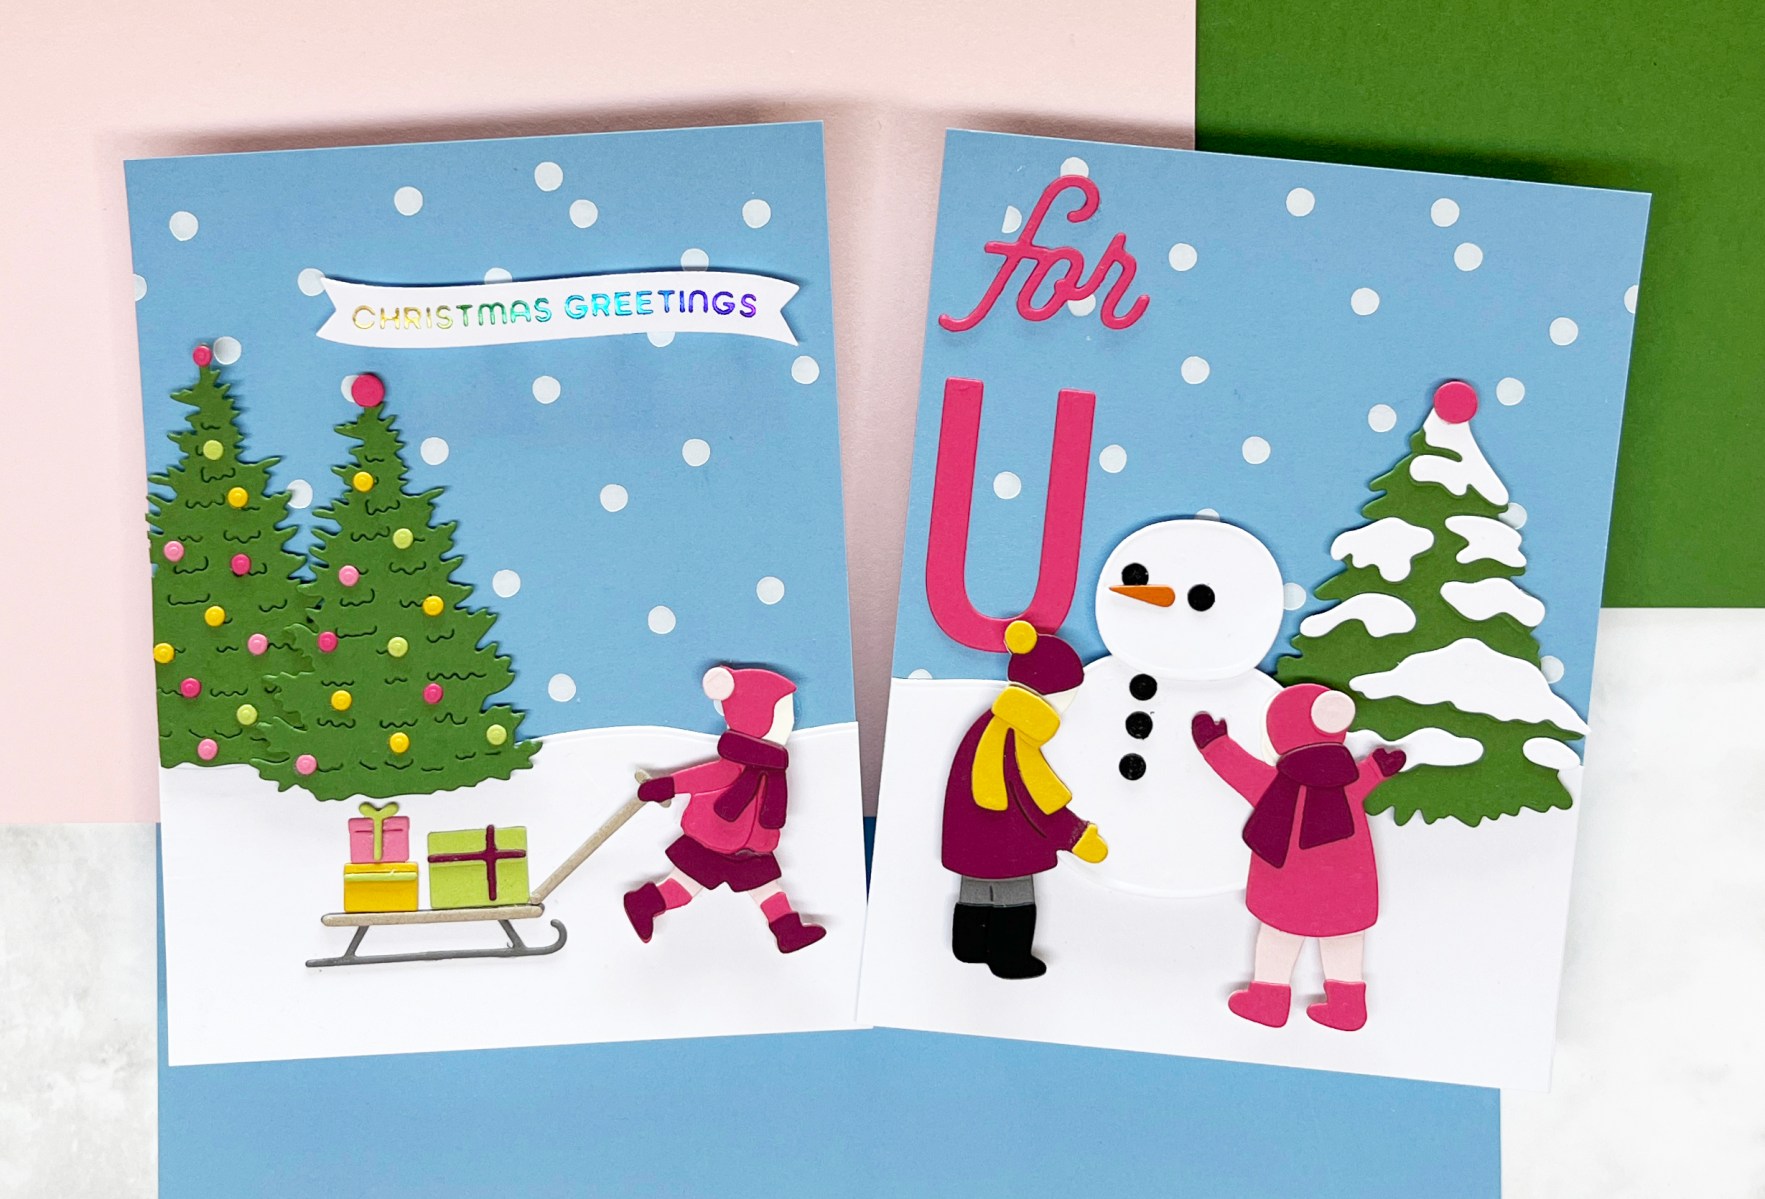
One of my favorite things about cardmaking is building little worlds with die cuts. The Spellbinders October 2025 Club Kits are perfect for creating playful, outdoor winter scenes full of joy, color, and personality. Today I’m sharing two companion cards I made using the Die of the Month Kitand the Large Die of the Month Kit—both with matching colors and snowy backdrops.
At the bottom, I’ll also walk you through a few of my favorite tips for planning and arranging die cut scenes.
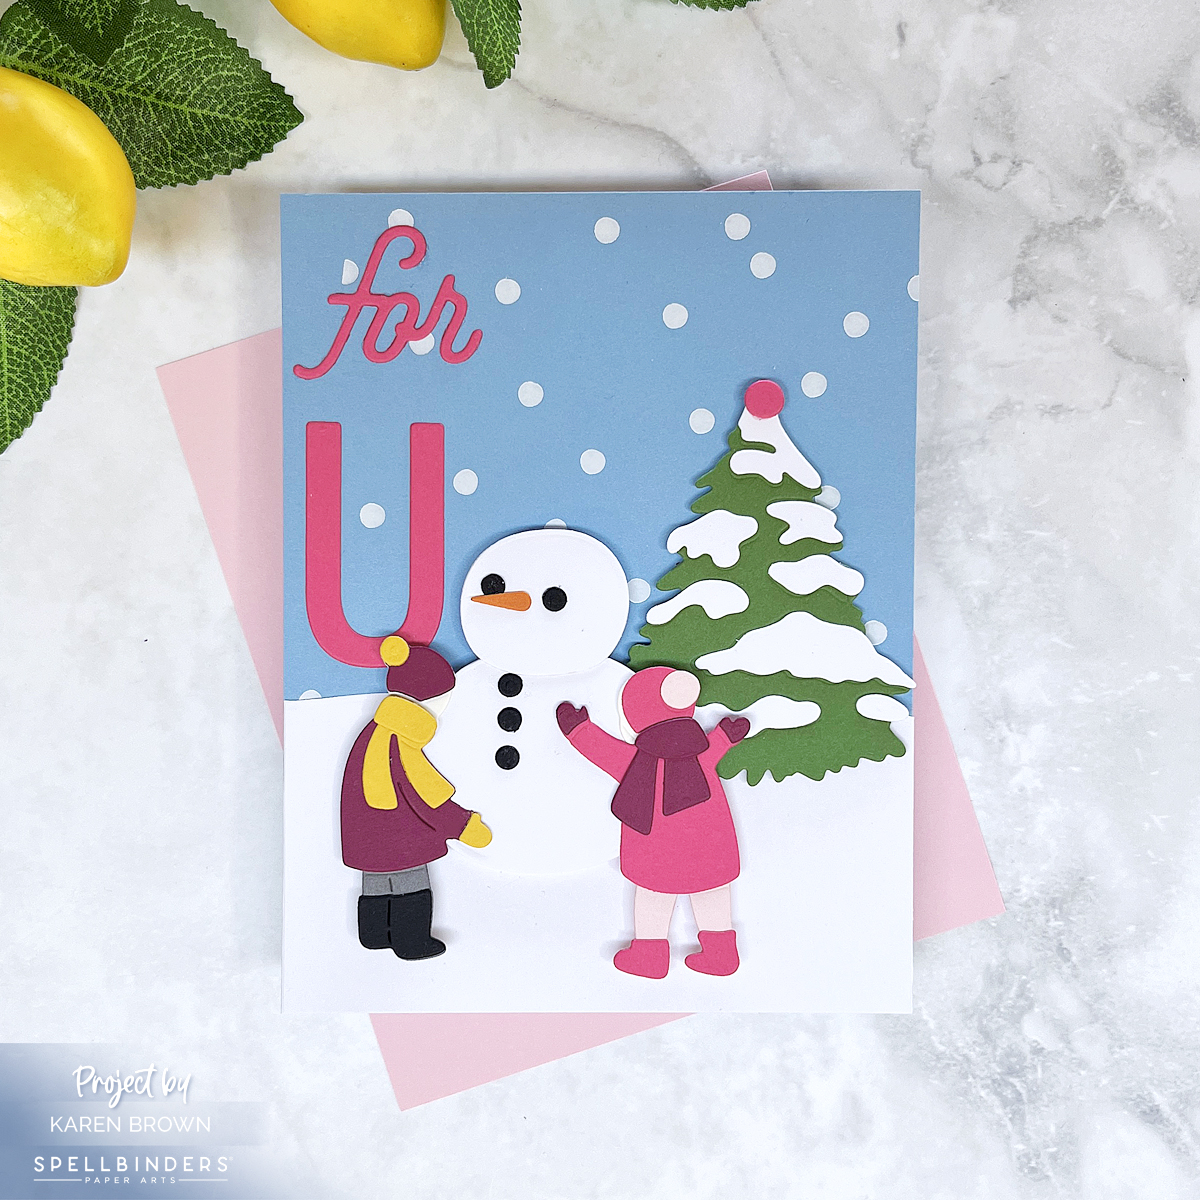
Sled of Gifts (Large Die of the Month)
I started with the Large Die of the Month Kit, creating a cheerful winter scene of a little girl, pulling a sled piled high with gifts. To set the stage, I added two decorated Christmas trees with colorful ornaments.
For the sentiment, I combined a scripty “for” with a giant U (both from the October Caboodle Bonus Gift), both die cut in hot pink. Together, they form a bold, playful greeting.
This card has a storybook charm and pairs perfectly with the sled design.
📝 Tips for Arranging Die Cut Scenes
Here are five simple steps I use whenever I build a die cut scene:
Plan Colors First: Choose your key colors. For these cards, I used blue gray, hot pink, and fern green as my anchors. White cardstock provided snowy contrast.
Die Cut All Elements: Having all the pieces ready makes it easier to plan your layout.
AssembleEach Element: I use Bearly Art glue and a Crystal Katana jewel pickerto precisely assemble my elements. Once they are fully assembled, it is much easier to determine exactly where I want to place each component.
Mock Up Layouts: I arrange several versions, take quick photos, and then choose the most balanced design.
Construct Your Scene: I like to use glue, foam squares and craft foam to complete my card.
These tricks make arranging die cut winter wonderlands more fun and less stressful.
It’s time for the Hero Arts October 2025 Release Blog Hop, and this month’s theme is Merry Era! I had so much fun creating two festive cards that sparkle and shine in very different ways.
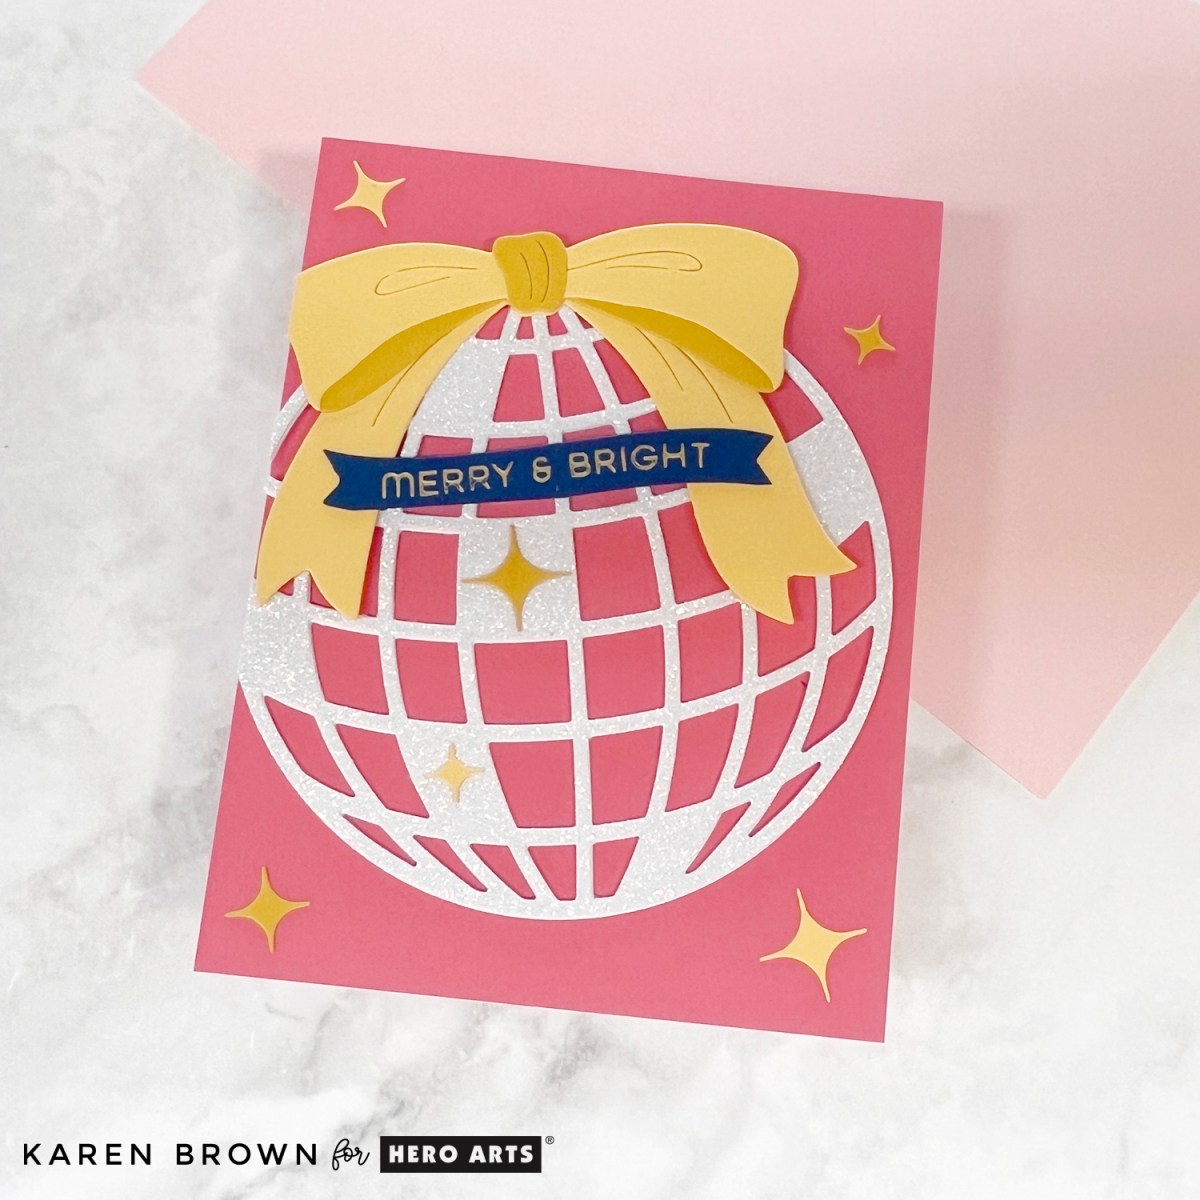
Glittery Pink Christmas Ball
For my first card, I reached for the “Have a Ball” Die Set from the October 2025 Card Kit. I wanted a sparkly look, so I die cut the large Christmas ball twice from white glitter cardstock for extra stability. My card base is Dahlia cardstock (included in the kit) which makes the ornament pop.
💡 Design tip: This die set would work beautifully for New Year’s cards too!
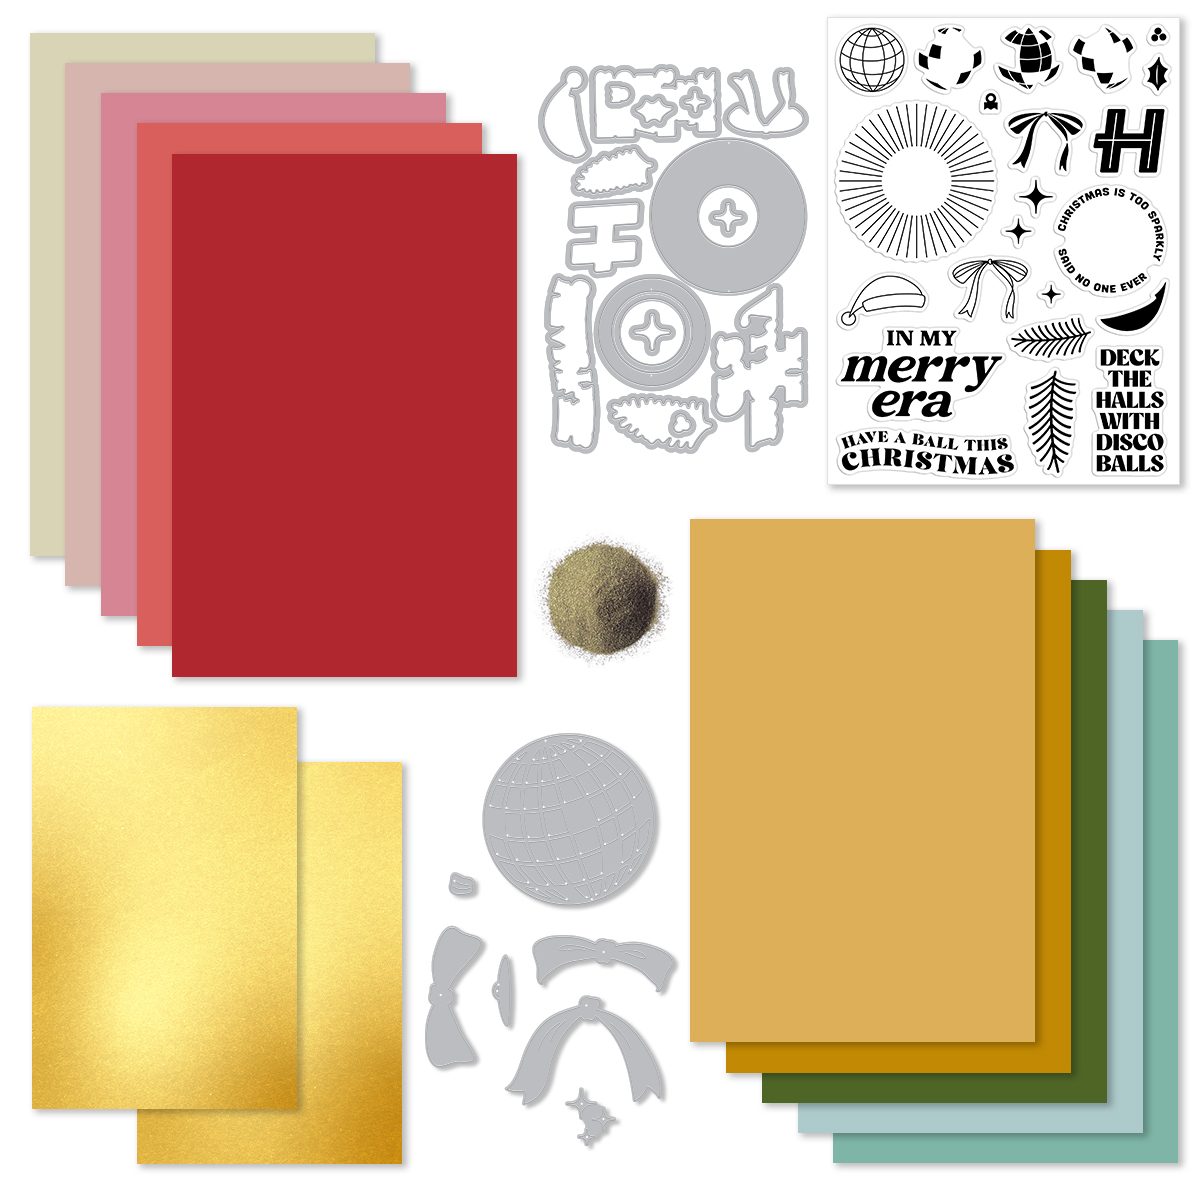
What’s Included in the Kit?
• Deck the Halls with Disco Balls 6×8 Stamp Set • Deck the Halls with Disco Balls Coordinating Dies • Have a Ball Die Set • Gold Embossing Powder .5 oz • 10 Sheets of Cardstock- 1 of each color, 5.5″ x 8.5″ • Two Sheets of Gold Matte Paper, 5.5″ x 8.5″
Receive a FREE beautiful Merry Everything Die Set when you purchase The Whole Studio!
Hero Arts has many different Monthly Kits that you can subscribe to including:
The WHOLE Studio – All 5 Kits (a 40% savings: $130 subscription + Free Shipping)
For my second card, I used the Twinkle Lights Fancy Dies. I die cut the string of Christmas lights from gold paper (included in the kit) and then added pops of color by cutting the bulbs from colorful cardstock scraps.
The combination of shiny gold strings, bright bulbs, and the bold sentiment makes this card full of Christmas cheer.
>>> Click HERE. to see my other October Card Kit Cards.
GIVEAWAY
Hero Arts will give away a $50 gift card, drawn from the comments left across the hop. Enter by Sunday, October 5th at 11:59pm PT, and the winner will be announced on the Hero Arts blog the following week. Leave a comment on all stops for more chances to win!