cardmaking · Give Away

CASE Me A Christmas Card 2025

Adorable Christmas card using Hero Arts Elf Culture Stamp and Die Set, Nesting Postage Stamp dies and White Holiday Collage Hero Transfer background on red paper.

I’m so excited to be part of CASE Me A Christmas Card 2025! My talented crafty friend @michelle_lupton invited me to join this year’s creative lineup, and I was thrilled to say yes. This fun annual event features ten creative hops throughout October—two on YouTube and eight on Instagram—where cardmakers CASE (Copy And Selectively Edit) cards from one another.

Key Instagram hashtag: #casemeachristmascard

Link to Join Our Instagram Hop

To join the fun, create your own Christmas card inspired by one from the hop and upload it via Inlinkz on Michelle’s blog. You can also win prizes from amazing sponsors just by participating or leaving comments on the hop posts!

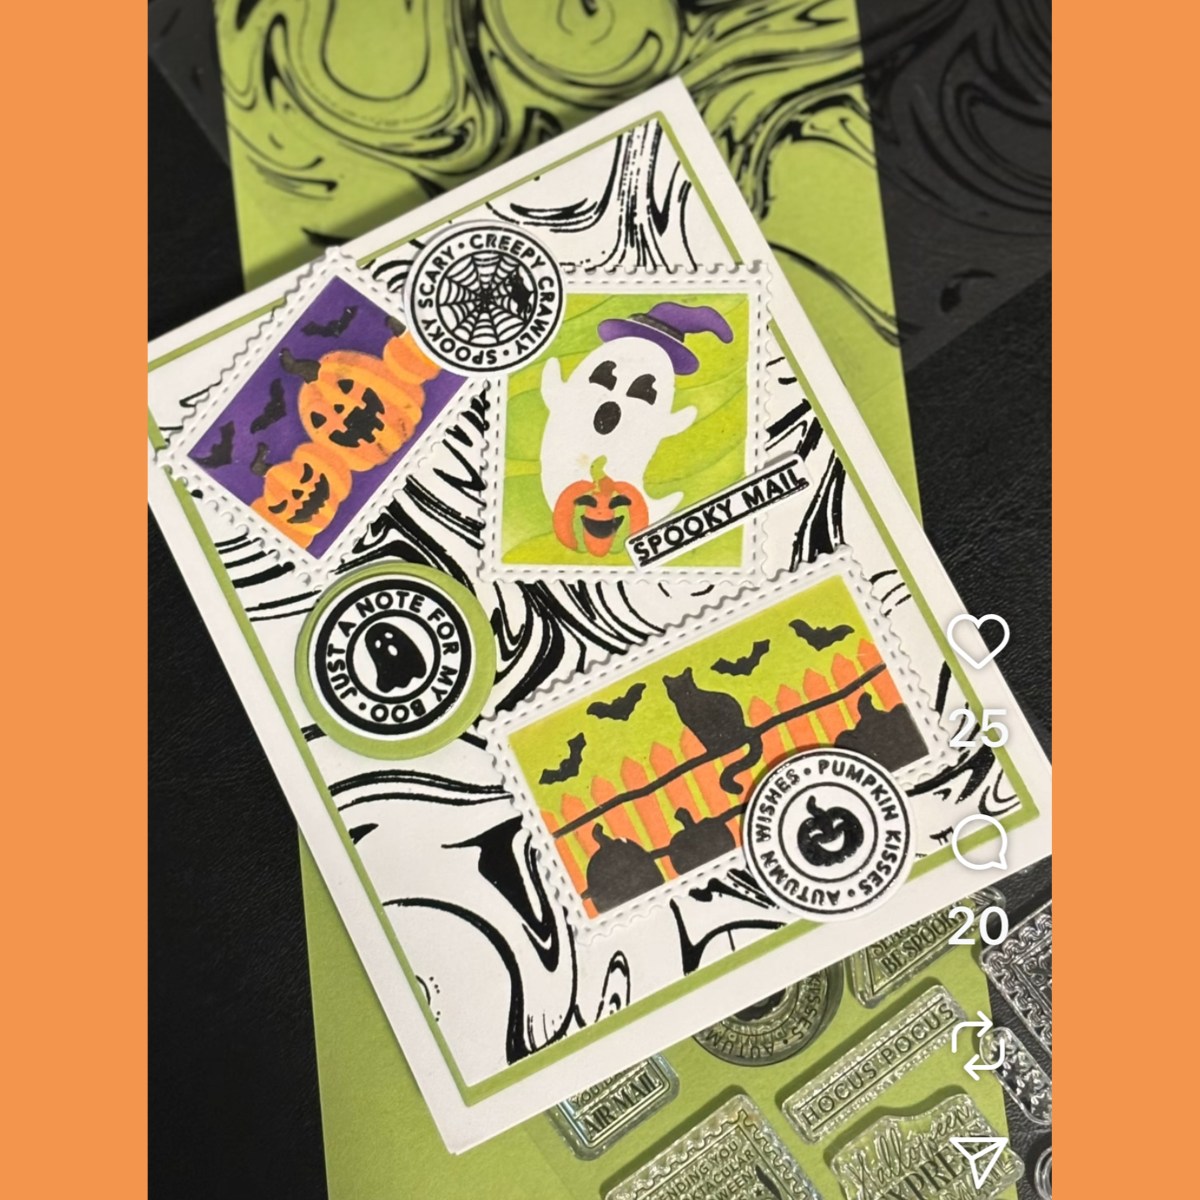
I’m part of Hop #9 and am CASEing the wonderful @expressivepaper – Kathy Pisupati. Kathy created an absolutely adorable Halloween card that I just had to reimagine as a Christmas design!

Kathy’s Halloween Card:

@expresspaper card for CASE my Christmas Card 2025

My Card Details

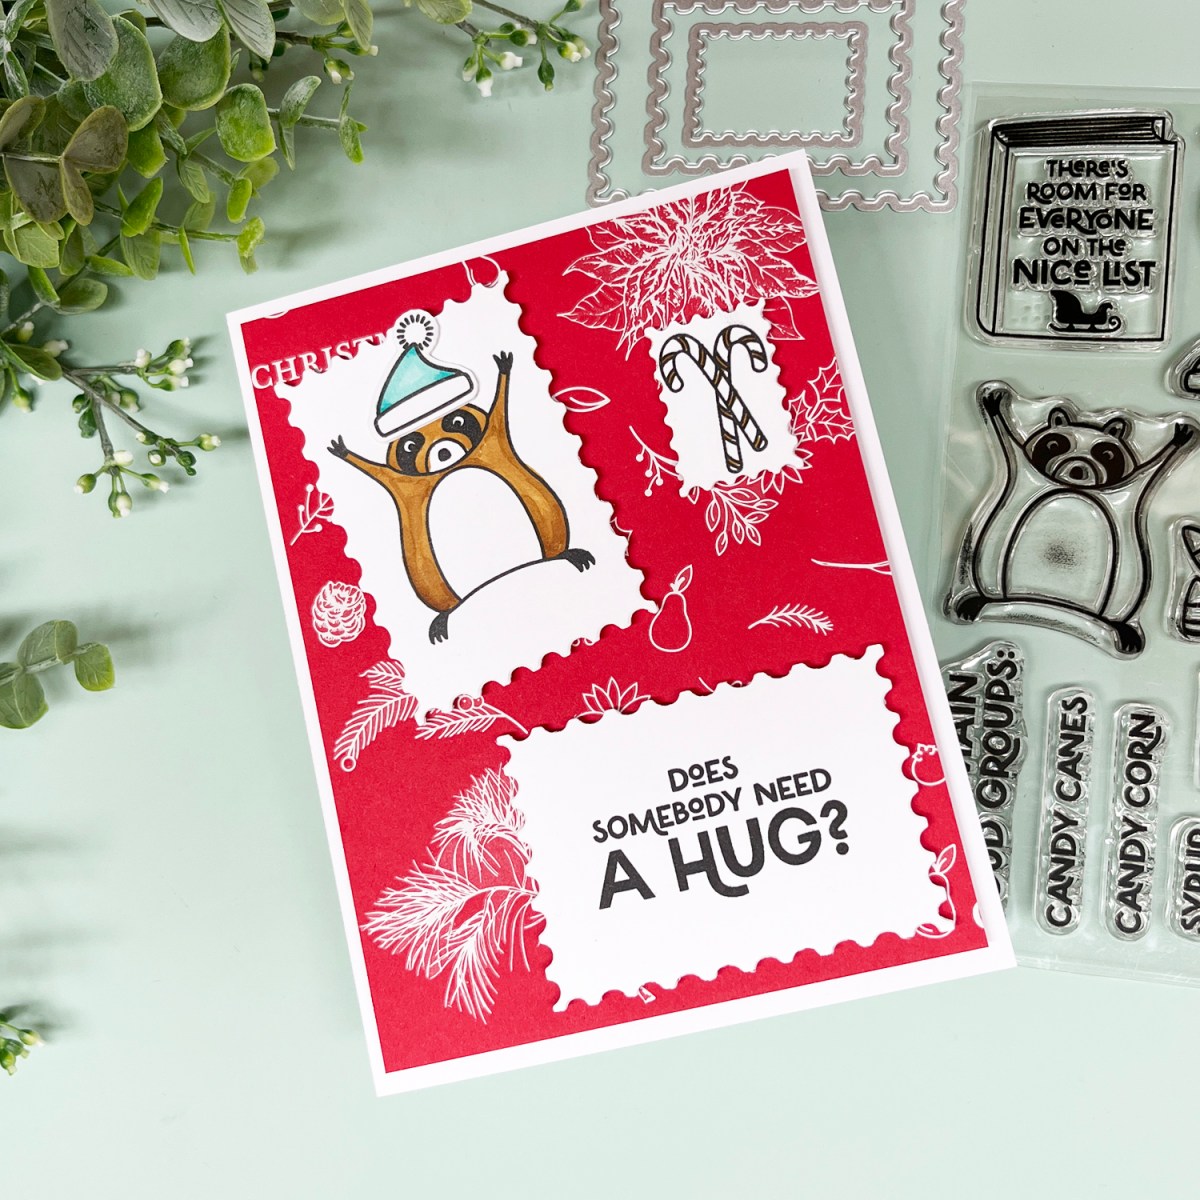
I was inspired by Kathy’s use of postage stamp dies (always a favorite of mine) and her clever background. Instead of stenciling, I used one of my other go-to products—Hero Transfers—to create my own twist.

I stamped an adorable raccoon reaching for a hug, paired with the perfect sentiment: “Does Somebody Need a Hug?” My color palette is limited to Christmas red, white, and small dabs of aqua and tan, which gives the card a striking and dramatic look while keeping it silly, fun, and a little bit heartwarming. I also think it’s a great option for masculine cards this holiday season!

Key Products Used On My Card:

Adorable Christmas card with a raccoon reaching for a hug and the sentiment "Does Anybody Need a Hug?".  Bright red and white Hero Transfer rub-on background with three stamped and postage stamp die cut focal elements.

Enjoy the hop!

cardmaking · Die cutting · Video

VIDEO: Quick and Easy Cardmaking

Fast and easy handmade card using Hero Arts Collage Backgrounds Rub-On Transfers and Magnifying Glass Die Set, featuring the sentiment "The Evidence is Clear – You're Incredible."

Hero Arts Craft Lounge Recap

Last night, I had the pleasure of joining the very first Hero Arts Craft Lounge, a FREE virtual crafting event that brought together so many creatives for an evening of inspiration, tips, and fun. If you missed it, don’t worry—you can catch the replay and enjoy the session at your own pace!

📺 Watch the replay here: Hero Arts Craft Lounge – Facebook Event

And if you haven’t joined yet, look into the new Hero Arts Collective on Facebook.

Video of creating a quick, fast and easy card using Run-On Transfers and a quick die cut focal point - a magnifying glass.

During the event, Channin Pelletier, Rosie Lopez, Michelle Lupton and I each created a unique custom card using the new Case Closed Collection. I opted for a FAST and easy card that anyone can recreate in less than an hour! And you can watch 4 different cards being created at the same time!

I used the Collage Backgrounds Hero Rub-On Transfers to create a dramatic yet effortless background. These rub-ons add instant texture and layered interest—perfect when you’re short on time but still want a showstopper.

For the focal point, I die cut elements from the Magnifying Glass Die Set and added the sentiment: “The Evidence is Clear – You’re Incredible.” The lens was die cut from vellum.

This card came together so quickly and has a sleek detective-style vibe thanks to the mix of vintage background and bold elements from the new Hero Arts release.


cardmaking · Die cutting · Stamping

Case Closed! An Adorably Crafty Mystery with Hero Arts

Card featuring Hero Arts Miss Detective stamp with custom stenciled plaid clothing, rub-on vintage newsprint background, and magnifying glass die cut with sentiment.

The case is cracked, the sleuth is on the scene, and this crafty caper is officially adorable! I’m thrilled to be part of the Hero Arts Instagram HopLink to Instagram Hop – celebrating the launch of the Case Closed Collection. My card today features the delightful Curious Crafter Bundle and its star: Miss Detective.

Key Products:

Card Tutorial: The Curious Case of the Custom Cape

Card created with Hero Arts Curious Crafter Bundle and  Miss Detective stamps and featuring a female sleuth with a magnifying glass sentiment and vintage newsprint background.

Say hello to my favorite cardmaking detective—a stylish sleuth (inspired by my own daughter!) ready to crack any case with flair. She’s decked out in a stenciled houndstooth plaid cape and Sherlock Holmes-inspired hat, thanks to the Curious Crafter Bundle. The finished look? Think Nancy Drew meets crafty couture!

Here’s how the case unfolded:

  • Clothing Construction: I stenciled a custom houndstooth pattern over Peony cardstock, then stamped and fussy cut the pieces to dress Miss Detective.
  • Copic Coloring: I brought her to life with Copic markers: E00, E21, E25, E55, R000, BV000, and BV02.
  • Vintage Vibes: My background is one of my absolute favorites — the Collage Backgrounds Rub-On Transfers applied to Arctic cardstock. The vintage newspaper style is the perfect setting for some crafty sleuthing.
  • Spotlight on Sentiment: A large die cut magnifying glass with vellum “glass” focuses attention on the stamped sentiment: “It’s No Mystery, You’re Incredible” — just one of the many clever sayings in this charming Sentiment Stamp Set.
  • Finishing Touches: I used Precision Glue and craft foam to give the layers dimension and used a bone folder for flawless rub-on application.

Assembling Miss Detective (a step-by-step recap):

  1. Stencil the plaid onto Peony cardstock.
  2. Stamp and color Miss Detective.
  3. Stamp and fussy cut clothes from plaid panel.
  4. Die cut Miss Detective and adhere clothing.
  5. Die cut magnifying glass from cardstock and vellum.
  6. Stamp and die cut sentiment.
  7. Apply rub-on transfers to Arctic cardstock.
  8. Assemble card with dimension and precision.

Click HERE if you’d like to see my post on how to customize your Hounstooth stenciled background.

Pro Tip: These rub-ons are pure magic! They transfer easily with a bone folder and give a rich, detailed finish — no ink needed!


The Verdict?

The Case Closed Collection is a creative knockout—quirky, clever, and a total blast to work with. Whether you’re channeling your inner sleuth, crafting a personalized card, or just in it for the vintage vibes, this collection offers so many possibilities.

Thanks for hopping along with us on Instagram today! Be sure to follow the trail (aka the hashtag) for more clever creations and inspiration from this fun Hero Arts release.

Click Link to Instagram Hop – My IG handle is @karens_mini


Mixed Media · papercrafting · Tutorial

Colorful Cityscape Mixed Media Card | Hero Arts

Cityscape Hero Arts Mixed Media Card

I recently attended Hero Arts Mixed Media Stamp Along and found it so informative! This card was inspired by @cheiron and her wonderful class. I used different products and colors so my card doesn’t look anything like Cheiron’s, but her class gave me the creative spark for my card. Sometimes it is fun to get inky and messy!

For this card, I was trying to simulate a Dove flying over a city at sunrise. I knew I wanted a bold background to contrast with the white Dove. 

My Process:

  • I put 5 sunrise colors of reactive ink (colors listed below) on my craft mat and spritzed with a bit of water and then painted bands of vertical color all over my watercolor cardstock panel. There is no right or wrong way just start painting! I dried and repeated two more times. During the process I also added drips of color.
  • I love Hero Rub-On Transfers and I added parts of the city map from Collage Backgrounds to three spots on my background.
  • Using Indigo and Splash Inks, I stamped the city grid from the Mixed Textures stamp set.
  • I added texture with the Cobblestone Stencil. In some places I used just Gold Hero Paste and on others I rubbed just a bit of Black Hero Wax on the Stencil and then added Gold Hero Paste. I really love the black wax and gold paste combined together.
  • Using a splatter box (for me a repurposed cardboard box) I added three layers of splatters and dried in between each color. White, Blue Shimmer and Orange Shimmer. I love the complexity the shimmer splatters add!
  • I trimmed my background using the Rounded Rectangles Infinity Die set and then lightly inked the edges with Indigo Core Ink.
  • I die cut my Dove and sentiment 3 times and then glued the components together.
Handmade Card with Dove and Olive Branch Die - DF192

Supplies Used:

This card has LOTS of layers, but it did not take as long to complete as I would have guessed….60-90 minutes.

What do you think?

cardmaking · Mixed Media · papercrafting

Big News + Hero Arts | November Add-Ons

I am thrilled to announce that I have been selected to join the Hero Arts Creative Team! This incredible opportunity allows me to collaborate with a group of talented and passionate artists who share a love for crafting and creativity. I am beyond excited to explore new techniques, experiment with Hero Arts’ amazing range of products, and inspire others on their own artistic journeys. Together, we’ll embark on a creative adventure filled with endless possibilities, and I can’t wait to share the magic that unfolds along the way! Stay tuned for a whirlwind of innovative projects, tutorials, and inspiration that will surely ignite your own crafting passions. 🎨✨ #HeroArtsCreativeTeam

Okay, let’s make some art together!

Handmade card with Hero Arts November Add-Ons: Winter Mail Critters, White Holiday Collage Hero Transfers, Wax Seals.

I also wanted to share a card using some of the fun Add Ons from the November My Monthly Hero Kit. This month has so many goodies and I used 4 of them today.

Handmade Christmas Card featuring a Hero Arts bear and fox each holding a letter with a Rub On Transfer background.

Hero Arts Christmas Card Tutorial:

I started by die cutting two frames and two “tapes” from the Journaling Photo Frame Infinity Dies Set. I then very lightly blended Paradise Core Ink along the edges of the photo background (using the sticky mat in my Stamp Wheel), stamped the bear and fox with my Stamping Tool and Copic colored the images (colors listed below). I also rubbed on a transfer Merry & Bright sentiment.

The background was so easy! I rubbed on the fun Twas the Night Before lettering from the White Holiday Collage Hero Transfers (RT121) with a bone folder and all the writing transfered to the paper perfectly on the first try. The card background is Paradise cardstock.

I wanted a pop of red, so I stamped and die cut a Merry Christmas Wax Seal using Crimson Core Ink. I also put a dab of Hero Wax Gold to add a little depth and shine to the “photo tape”

I assembled my card with foam tape and it is ready to send.

Cute holiday card with critters featured in  Hero Arts Journaling Photo Frame Infinity Dies DF125

Products Used:

Hero Arts November 2023 My Monthly Hero Kit and Add Ons

Winter Mail Critters Die Bundle SB385 (or stamps only)

White Holiday Collage Hero Transfers RT121

Holiday Message Strips Hero Transfers RT120

Wax Seals and Dies D306

My Monthly Hero Subscription

Journaling Photo Frame Infinity Dies DF125

Paradise Core Ink

Crimson Core Ink

Paradise cardstock.

Hero Wax Gold

Precision Glue

Compact Desktop Die Cutting Machine

Handy Desktop Tool Holder

Stamp Wheel Stamping Tool and Sticky Mat

Bone folder

Highlighter Tape (for die cutting and to tape the photo background to the frame)

White thin Posca pen to add highlights to the scarf.

Copic Colors Used:

  • Browns: E27, E15, E13, E11, E50
  • Reds: R27, R39
  • Pink: RV11
  • Blue: B00

I am so glad you stopped by!

Interested in more…You can also find me at these spots too:

@karens_mini on Instagram

Pinterest: @karenabrown

FaceBook: Karens_Mini

YouTube: Karen Brown