I recently signed up for Willa Wanders Fodder Challenge 2023 and I was so inspired by Instructor Barb Smucker and her Collaged Notebooks. I knew I wanted to try this technique and I am so glad that I did!
Collaged Mixed Media Notebook Covers

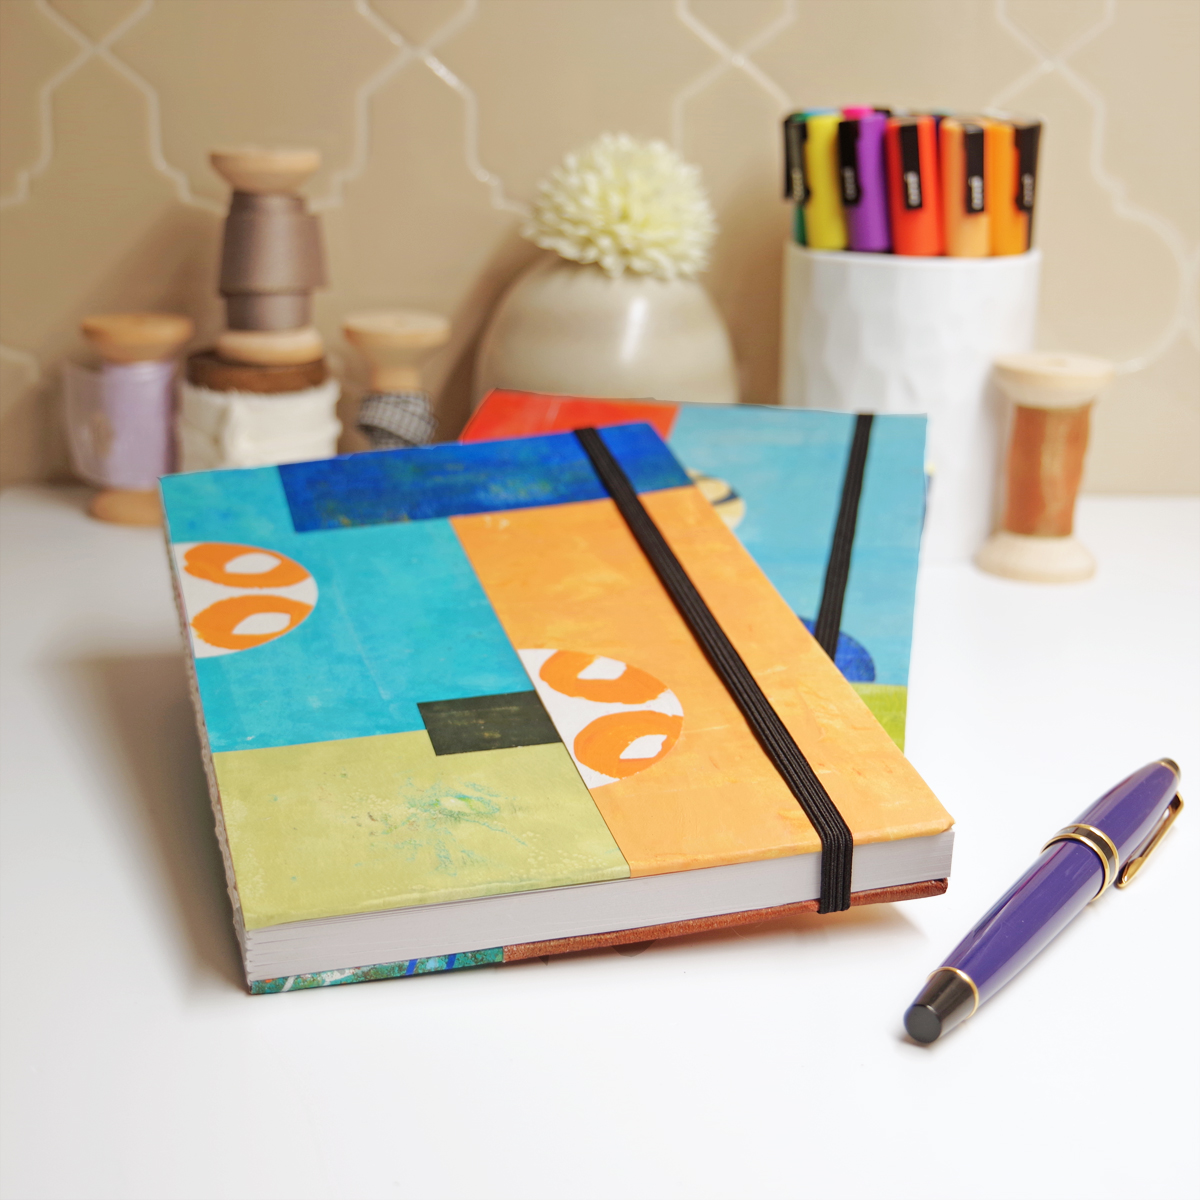
My “How To” Process:
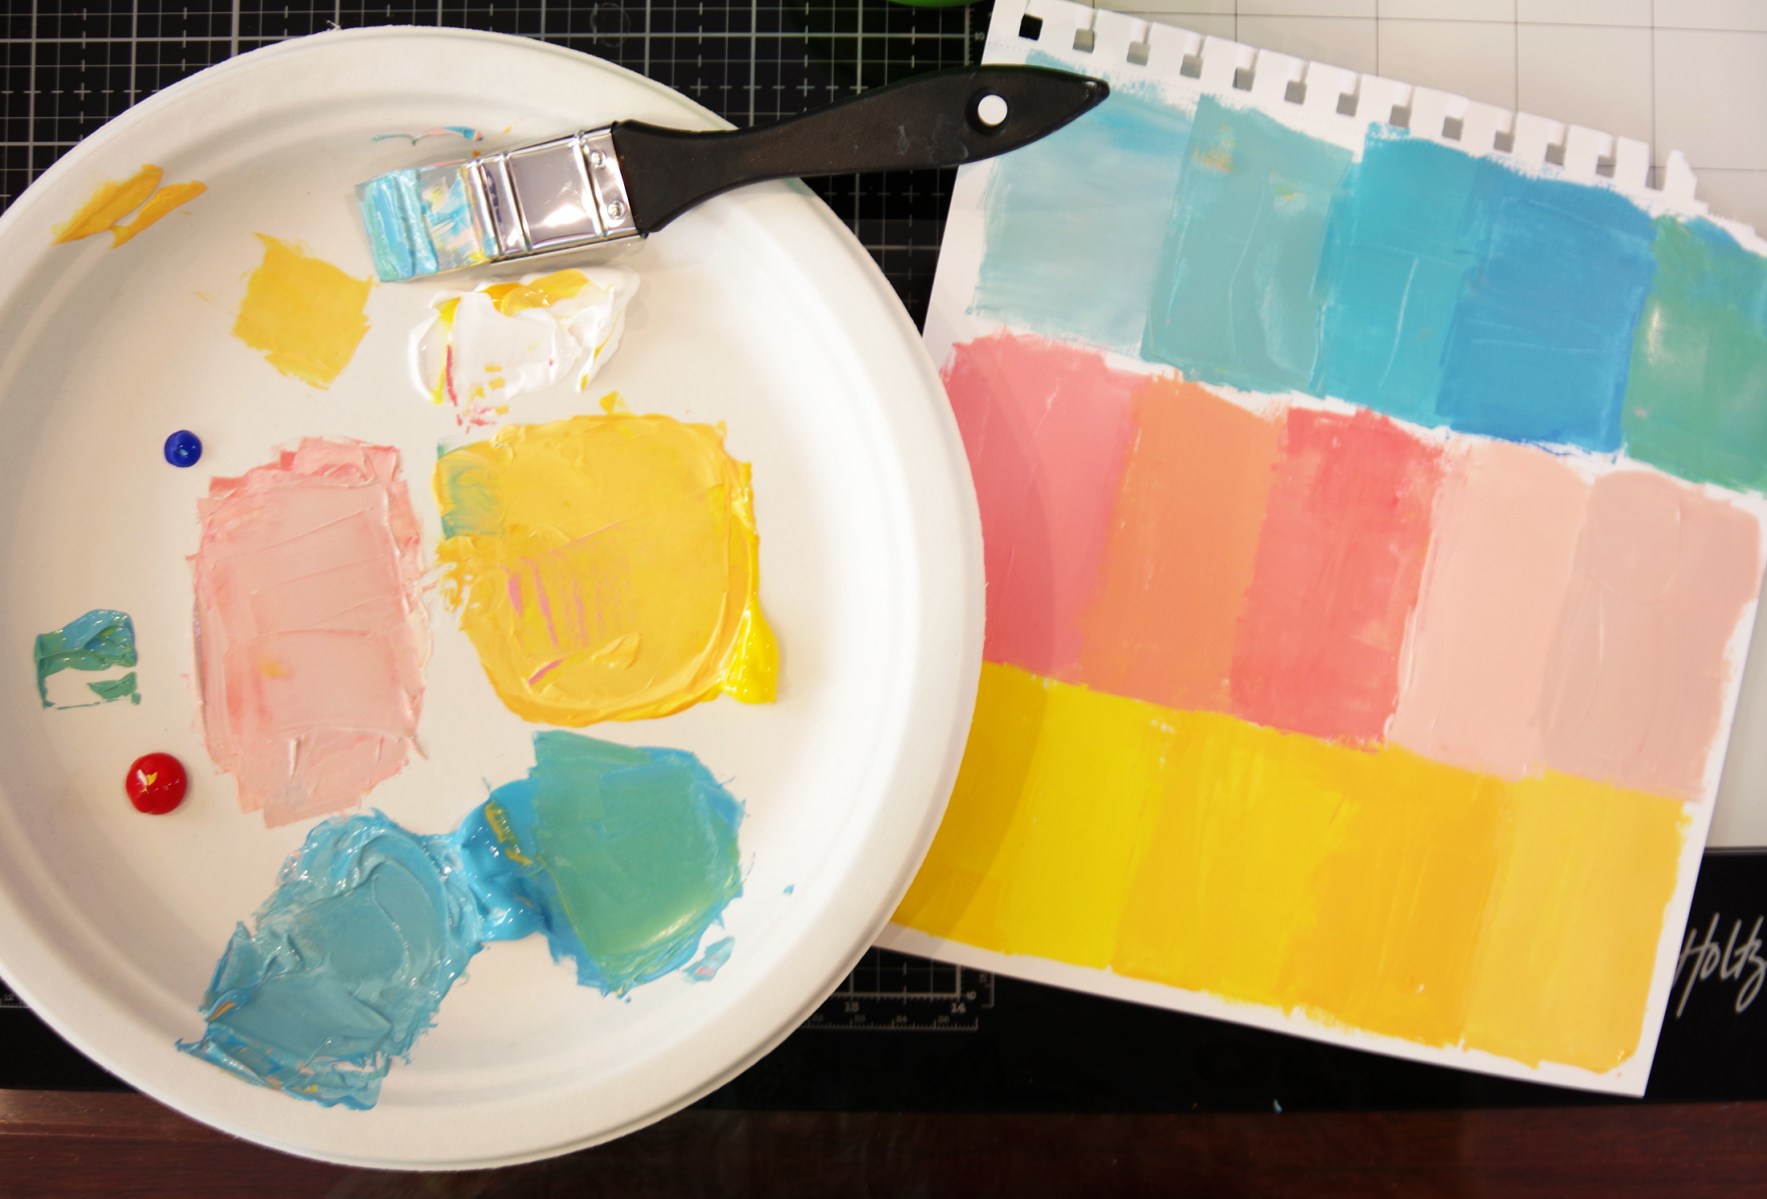
- I started by creating colorful papers for my cover. Instead of using a gelli plate, I put acrylic paint on my mixed media paper and then used a scraper to move the paint around. On a palette, I started with basic primary colors and then had loads of fun custom mixing my colors. I was going for coral but wound up with several really pretty melon colored pages. On some pages I smoothed out the paint and on others I left it a bit rough with slight ridges of acrylic. I also painted marks (circles, lines, Xs and doodles…) on additional pages.
- I also went through my gelli prints and selected some more papers that I used. The dark blue and bright orange were both gelli prints.
- Once I selected a bunch of papers that I liked, I started playing around with layouts. I was going for a contemporary color-block look. Using a metal ruler, paper trimmer and 1 1/2″ circle punch I trimmed the pages to the sizes and shapes I wanted.
- I laid a piece of plain paper inside the cover to protect the journal pages from excess glue during my assembly process.
- Next, it was time to start covering my journal. I started with the the papers that would go along the spine. This journal has a cool open spine that did not need to be covered so the paper edge went directly up to the edge of the spine, but I left a 1/2″-1″ overhang for the other side. To get a nice smooth cover I dipped the paper in a pan of water for 2 seconds, blotted off the excess water, and on the back, brushed on a 50% mixture of Matte Modge Podge and Matte Medium with a flat brush. Then, I carefully put the paper up against the spine, leaving the overhang off the edge. Next, I put a piece of wax paper over the glued piece and brayered over the area to remove air bubbles and excess glue. Finally, I dabbed up the excess glue that seeped out.
- I repeated this process until the front and back covers were complete. This journal has a nice black elastic band, but it was a little trickier to cover the back because of the grommets. For my next journals, I ordered notebooks without the elastic band. I will report back which style I like better.
- To finish the notebooks, I folded the overhung edges (starting at the corners) toward the inner face pages and then glued securely with the glue mix I used above.
- Last step was to glue a facing page to the front and back inside covers. I again used my mixed media painted pages for this.
- I let my journals dry and then placed books on top overnight to keep the notebook nice and flat.
These two journals are gifts and I plan to make more for Christmas. I hope to have another post about them this fall.

I bought all my own supplies, but I am including links to the products used in case you’d like to give it a try.
Products Used in This Tutorial:
Products Available on Amazon:
Soho Open Spine Notebook Liquitex BASICS Paint I used 3 Primary Colors and white Liquitex Matte Medium Matte Modge Podge Brayers Metal Ruler for Cutting and Tearing Paper ScraperKaren