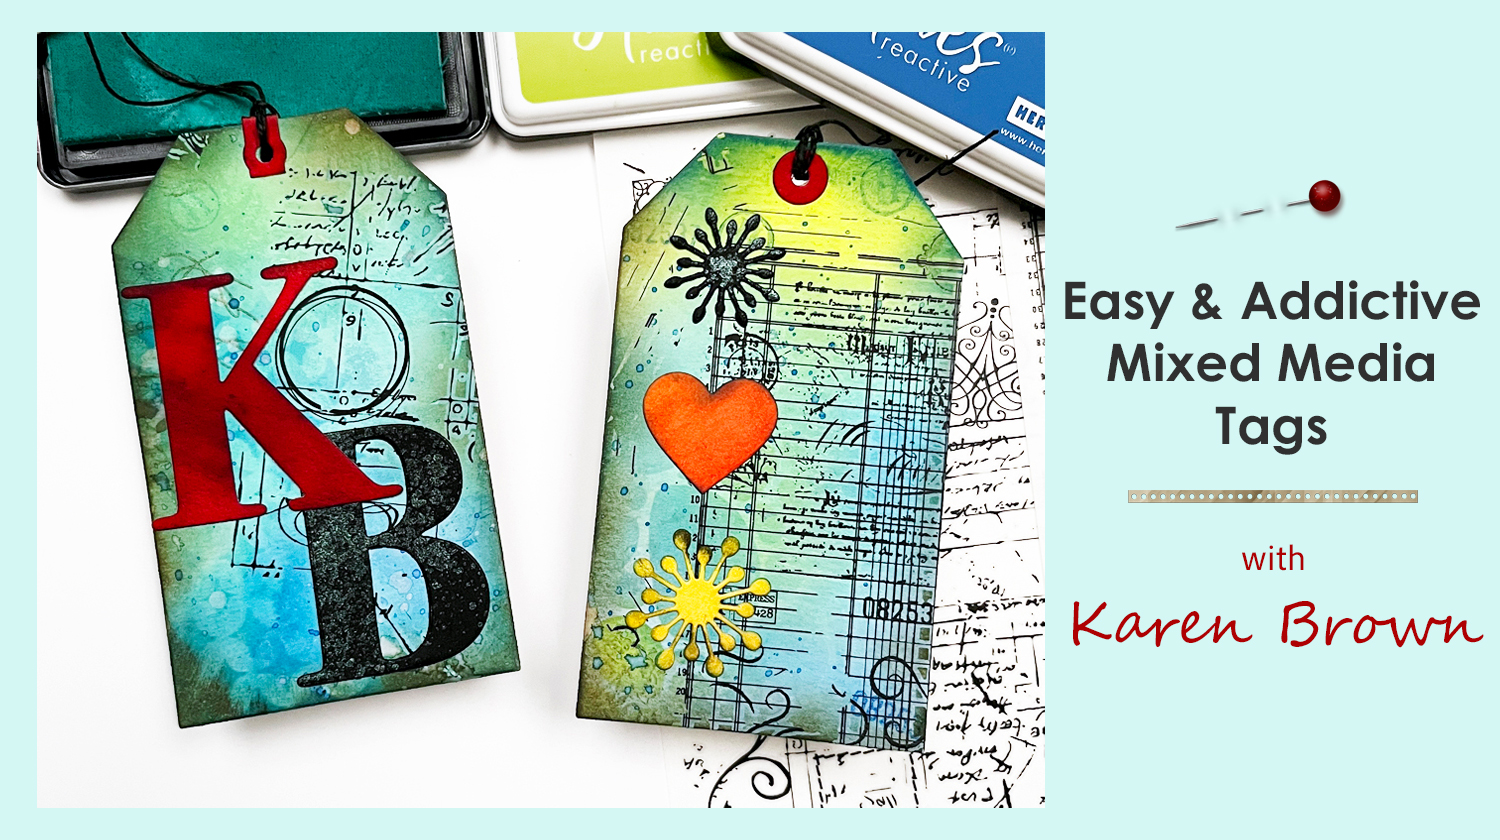
If you’ve ever wanted to try mixed media but weren’t sure where to start, this is the perfect beginner-friendly project.
In this tutorial, I’ll show you how to create easy mixed media tags using simple supplies and a few layering techniques that are both fun and surprisingly addictive.
These tags are a great way to experiment with color, texture, and stamping—without feeling overwhelmed.
Video
👉 Or watch on YouTube HERE.
This post coordinates with my YouTube video where I walk through every step in real time. If you like seeing the process in action, be sure to watch the video alongside this tutorial.
✂️ In This Post, You’ll Learn:
• How to create easy mixed media tags step-by-step
• A simple ink smoosh background technique
• My “viewfinder” trick for better composition
• How to add subtle grunge and texture
• Easy focal point ideas that always work
📌 Save this for later so you can come back when you’re ready to create.
When creating mixed media projects, I use my 3 Step Mixed Media Recipe.
👉 You can find the tools I use most often on my Favorite Cardmaking Supplies page
Exact supplies used in this post are at the bottom of this post.
Why This Is a Great Beginner Mixed Media Project
- No pressure to be perfect
- Great way to practice layering
- Uses simple, repeatable techniques
- Each tag turns out unique
Mixed Media Tags for Absolute Beginners: 11 Easy Steps

📌 Pin this for later
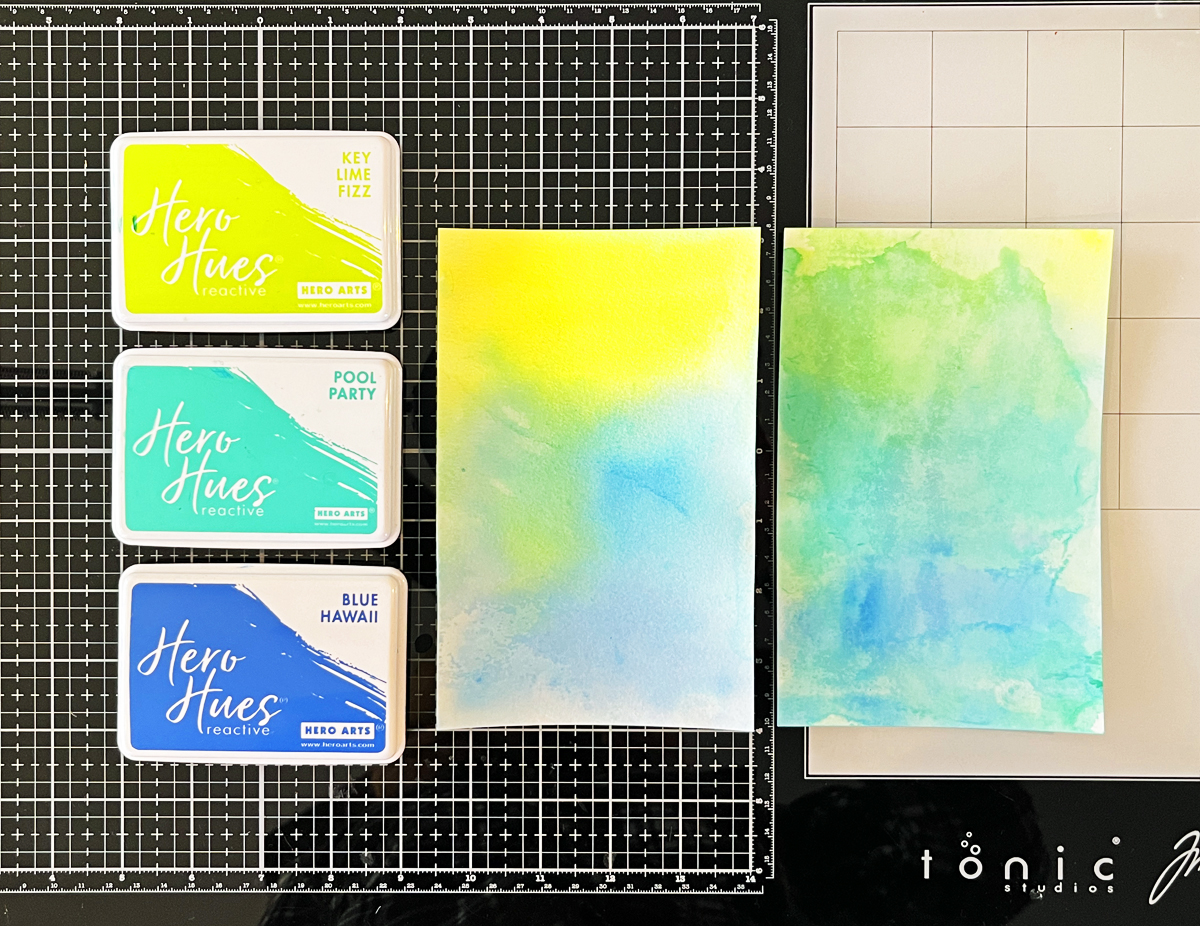
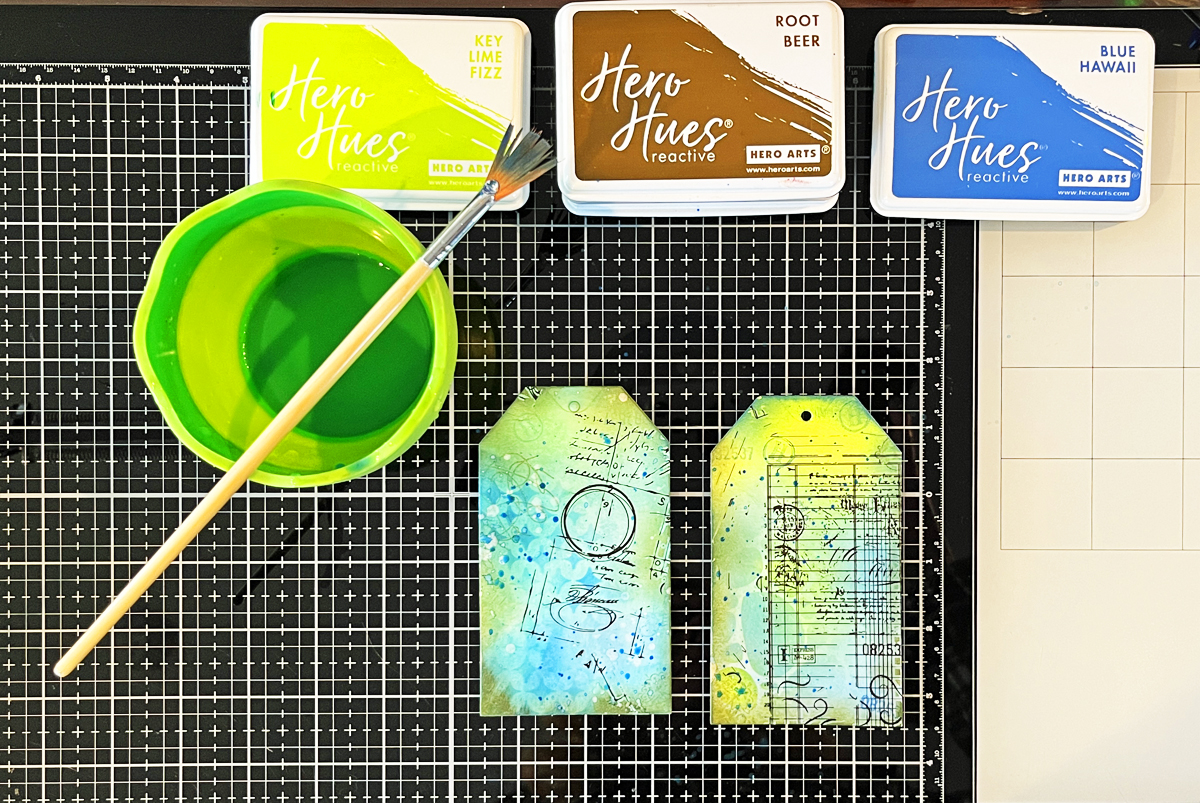
Step 1: Create a Simple Ink Smoosh Background
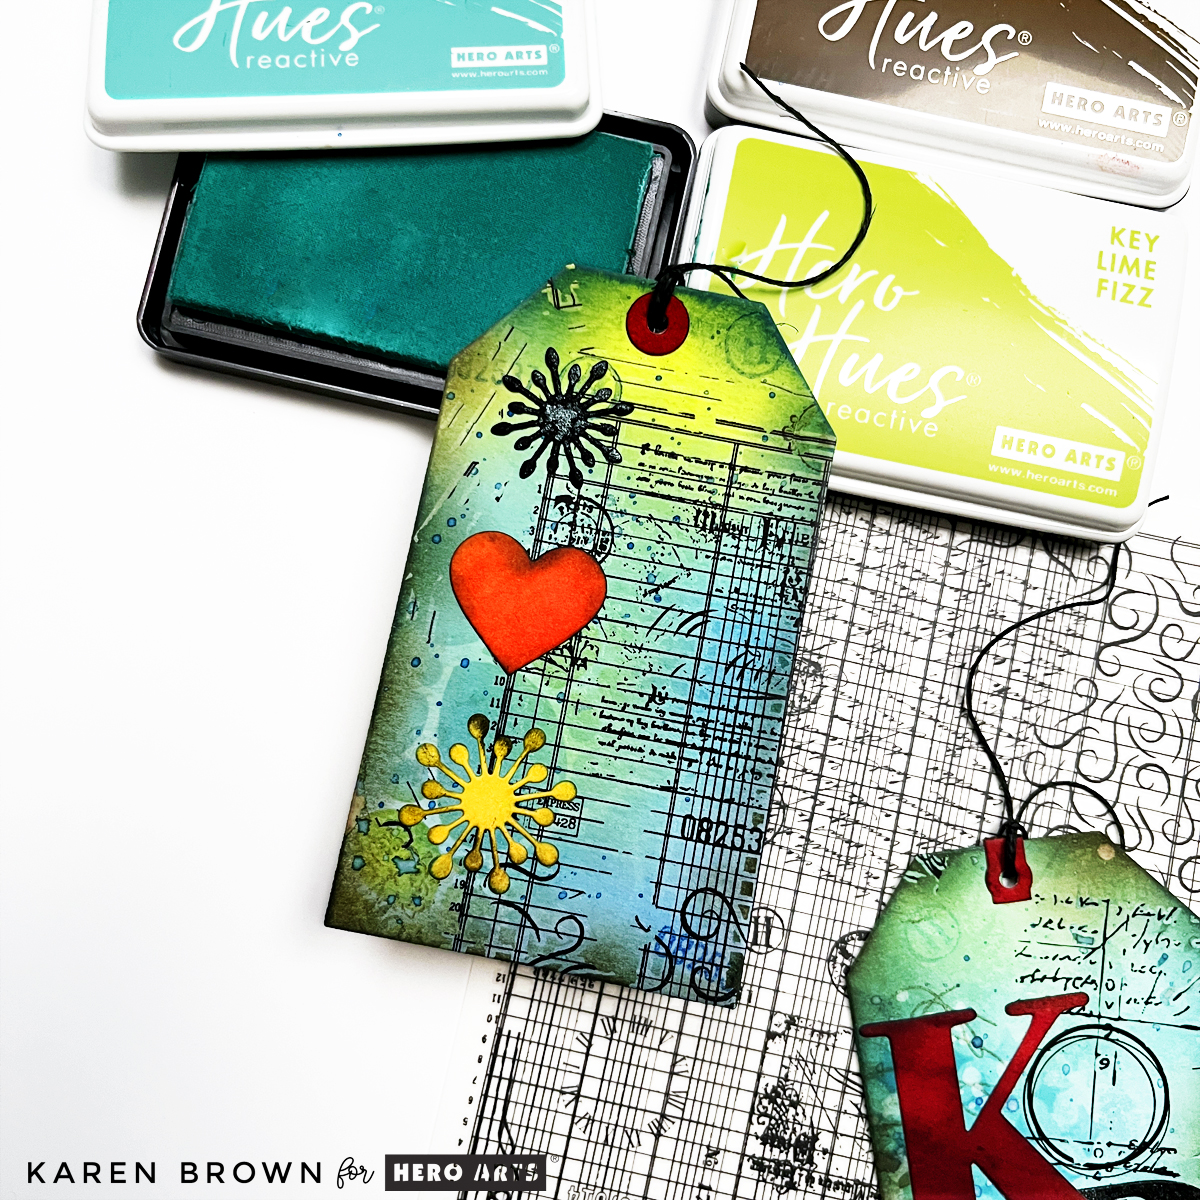
Add three shades of water-based reactive ink to your craft mat, spritz generously with water, and press the watercolor paper into the ink. Let sit in the puddle with an acrylic block on top for 1 – 5 minutes. The more water you use, the softer the panel. I used Key Lime Fizz, Pool Party and Blue Hawaii on my tags.
If you are interested in learning how to create an easywatercolor background, I have step-by-step directions in my tutorial how to make mixed media tags in 9 easy steps.
Step 2: Dry Your Panel
Let the panel air dry or speed things up with a heat tool. If it warps, flatten it under a book once dry.
Step 3: ViewFinder Trick
I like to use my tag die as a viewfinder to decide which part of my panel I want to feature.
Step 4: Die Cutting
Once I’m happy, I tape the tag die in place and run it through my Platinum 6 die cutting machine. It is one of the tools I rely on regularly—several of them are included in my list of the best cardmaking supplies for 2026.
Step 5: Stenciling
Now its time to start layering on top of our background. I add stenciling to about two thirds of each tag using the same reactive ink colors that I used in Step 1. You can use just about any stencil you have. I chose two very different designs and I love how they both turned out!
Step 6: Second-Generation Stamping
This is one of my favorite mixed media techniques.
Ink your stamp, stamp once on scrap paper, then immediately stamp onto your background.
The lighter impression adds depth and texture while keeping things loose and organic.
Use the same colors you used on your background in Step 1. This keeps everything cohesive and soft and adds subtle interest without overpowering the background.
Step 7: Add Rub-On Transfers for Easy Texture
Hero Transfers are one of the easiest ways to add detail and interest—no drying time required. Today, I used the Grids and Icons Transfers.
Cut a small section, place it on your tag, and rub it on using a bone folder or craft stick. I like angling my transfers slightly for a more vintage, organic look.
Step 8: Add Some Grunge and Ink Blend the Edges
Ink blending around the edges of the tags adds instant definition and helps ground all those layers.
This is where everything starts to come together. I like using a darker neutral ink like Root Beer to “grunge up” the edges just a bit.
Step 9: Add Splatters
Using a fan brush, splatter water (then blot with a cloth) and them the same inks used above. This step instantly adds movement and that “mixed media magic” feel.
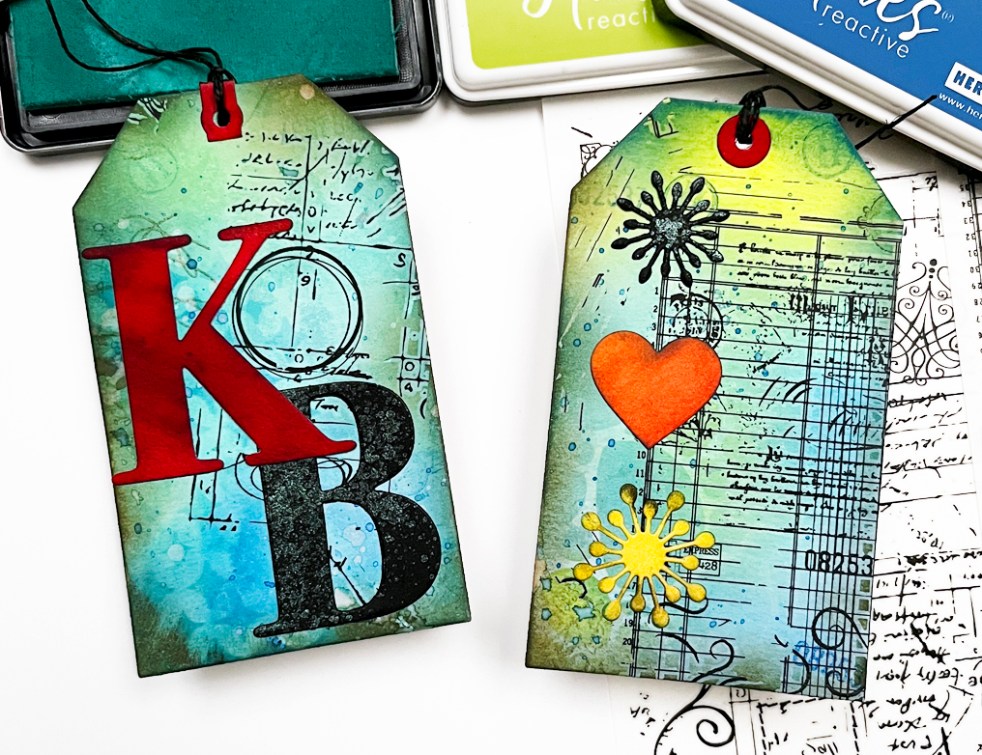
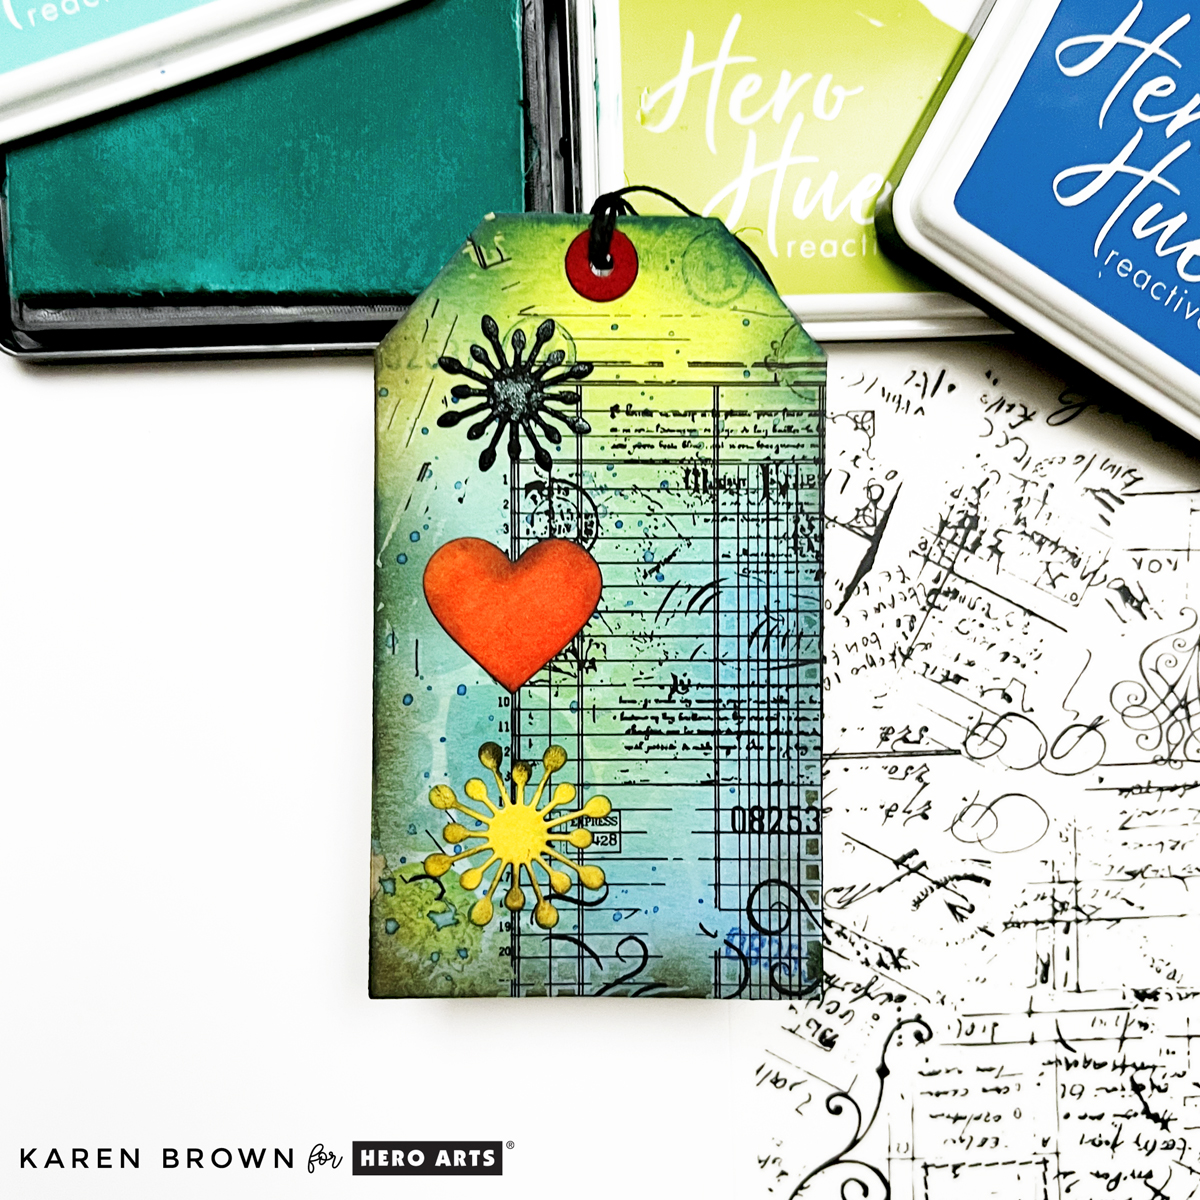
Step 10: Add Focal Points
Now it’s time to bring in focal elements.
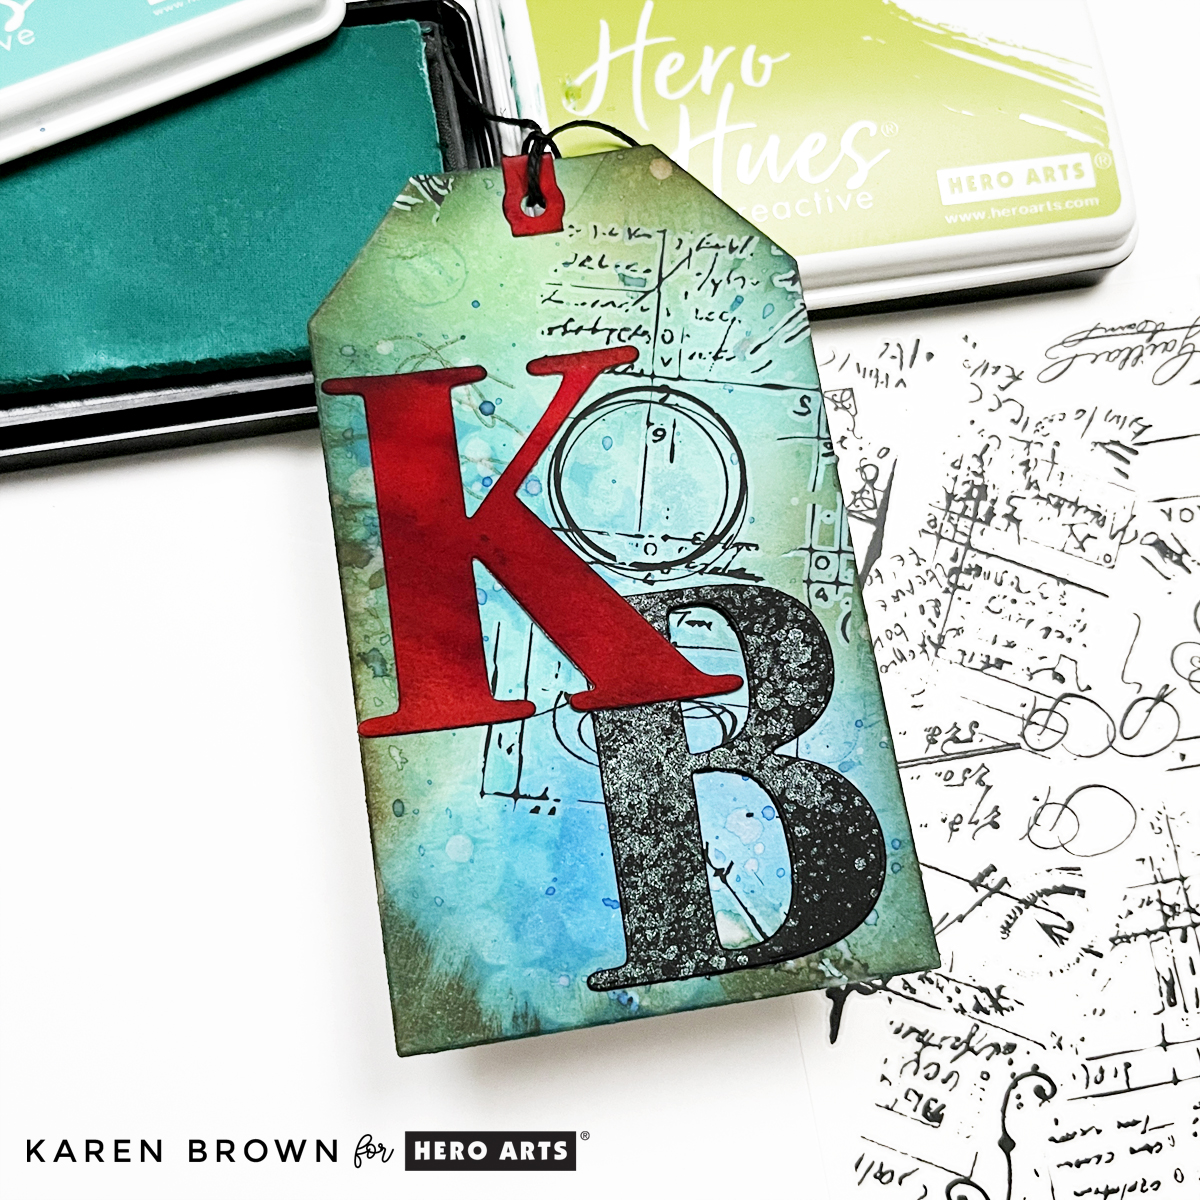
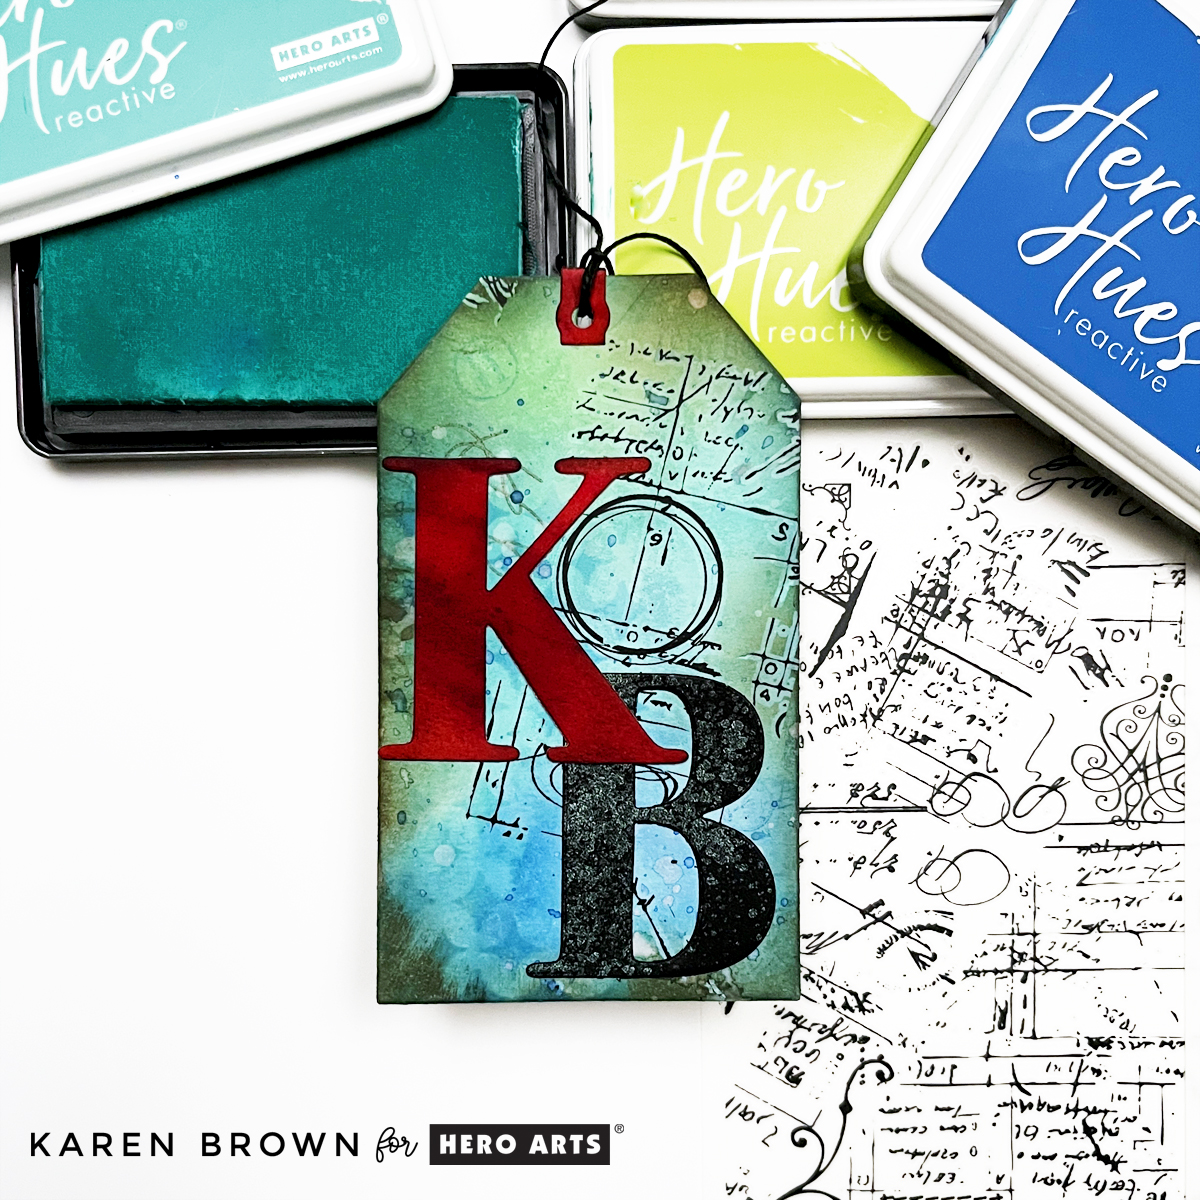
I used small die-cut images, lightly distressed the edges, and glued them directly to the tags. Keep the focal points simple—they should complement the background, not compete with it.
A good rule of thumb: if your background is busy, keep your focal point clean and contained.
Step 11: Finish with Twine or Ribbon
Thread twine or ribbon through the top of each tag to finish them off.
This final step adds texture, softness, and makes the tags feel complete. You can also tuck tags into cards, journals, or gift packaging.
You might also enjoy another recent Mixed Media Tag Tutorial I posted last month. Or if you’d like to try a mixed media card instead, here is how I create one step-by-step, with loads of illustrative photos.
Mixed Media Toolbox
These are the supplies that I personally use:
Stamps and Rub-on Transfers:
- Grids and Icons Hero Transfer
- Hero Transfers
- Vintage Maps and Ledgers Stamp Set
- Postmarks and Tickets Stamp Set
- Nesting Heart Dies
- Small Layering Floral Dies
- Large Flower Layering Dies
Dies:
Inks and Stencils:
Other Supplies:
- Color Coded Blending Brushes
- Large Acrylic Block
- Metallic Shimmer Spray
- 140 pound Watercolor Paper
- Black Twine
Thanks for stopping by! Which tag is your favorite: Initials or Heart?