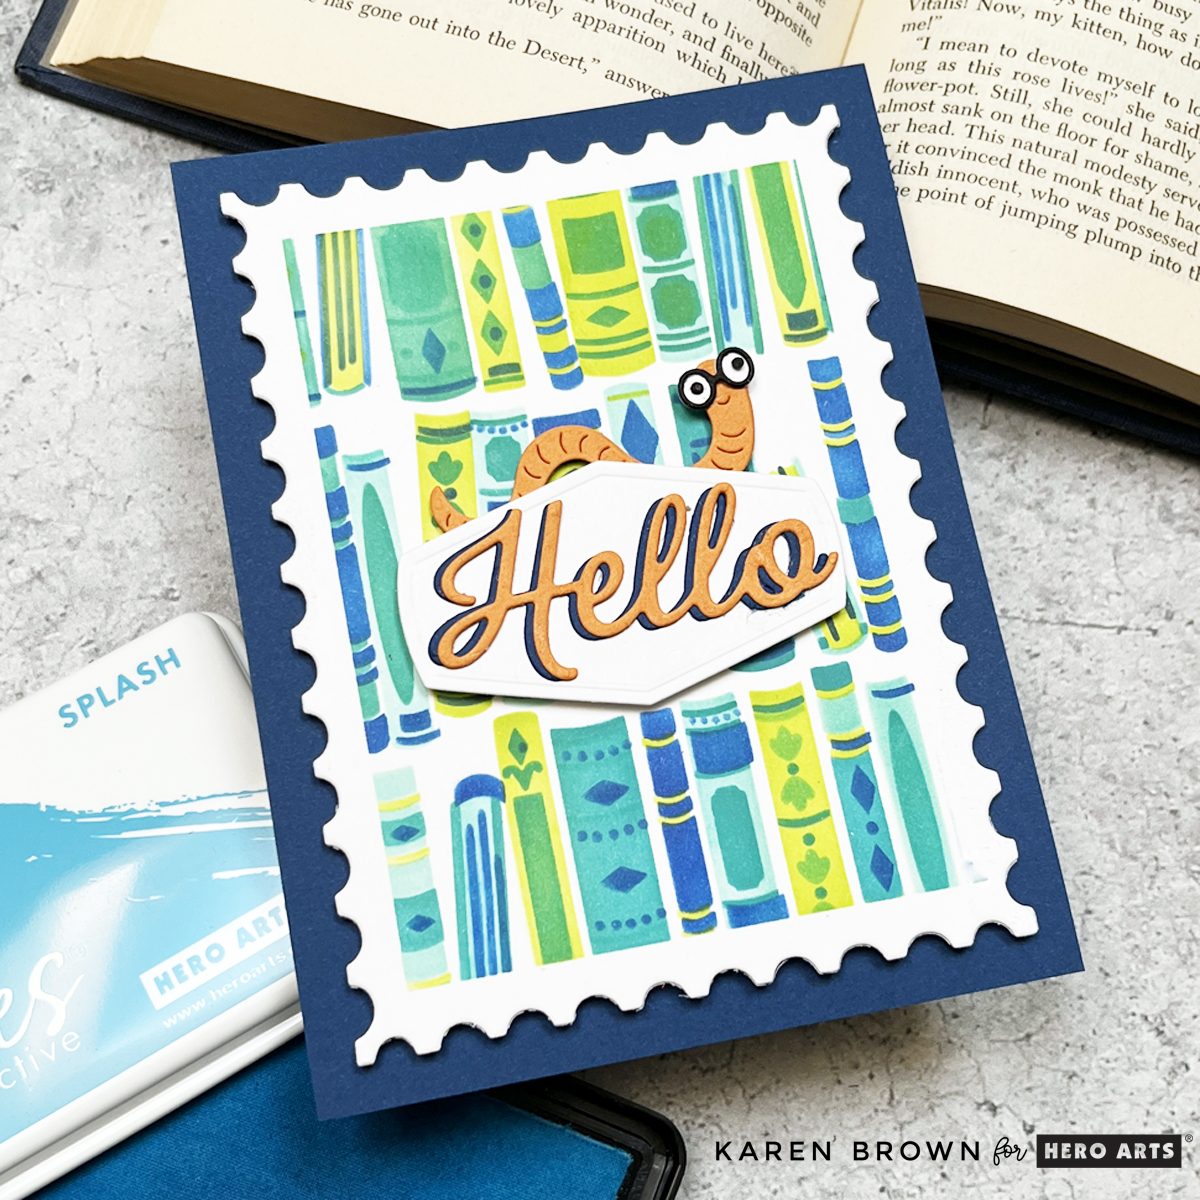
Hello, Karen here, back with another card inspired by the November 2025 Hero Studio “One More Chapter” release! I’ve been absolutely loving this book and reading-themed collection — so much so that I couldn’t resist making one more card. (Here’s a link to my previous post where I shared two other projects from this release!)
This time, I reached for the “On the Shelf” 4-Layer Stencil Kit to build my own bold bookshelf background. I wanted a crisp, postage-themed layout, so I began by masking off a 3″ x 4⅜” rectangle on a piece of Deluxe Smooth White Cardstock — giving me a clean white frame around my stenciling.
🎨 Inky Layers
I chose four analogous ink colors (adjacent on the color wheel) that flow beautifully together for a cohesive look:
Once the inky layers were dry, I die cut the panel with the 2nd largest Nesting Postage Stamp Die to give my bookish scene a framed, mail-art feel.
🧡 Complementary Pops of Color
For contrast, I reached for my ColorWheel Cardstock and added Carrot and Cosmic Sky accents. The playful bookworm with glasses and the scripty “Hello” sentiment (from the Book Bag Die Kit) are both cut from Carrot, with a Cosmic Sky shadow layer that really makes the greeting pop. Orange and blue are complementary colors (opposite on the color wheel), which makes the whole design lively and eye-catching.
Everything is layered with a bit of craft foam for dimension, then mounted onto a Cosmic Sky A2 card base.
The end result? A bright, cheeky, and happy card that would be perfect for a reader of any age — man, woman, or child.
Hero Arts has many different Monthly Kits that you can subscribe to including:
The WHOLE Studio – All 5 Kits (a 40% savings: $130 subscription + Free Shipping)
Hello, Karen Brown here — and I am curling up with a good card kit! The November Hero Studio Release is a dream come true for book lovers. This month’s theme, “One More Chapter,” celebrates cozy reading nooks, favorite stories, and the joy of escaping into a good book.
Even better, there’s a Hero Arts Blog Hop to celebrate — and prizes! So grab a cup of tea (or coffee), and come along for some page-turning inspiration.
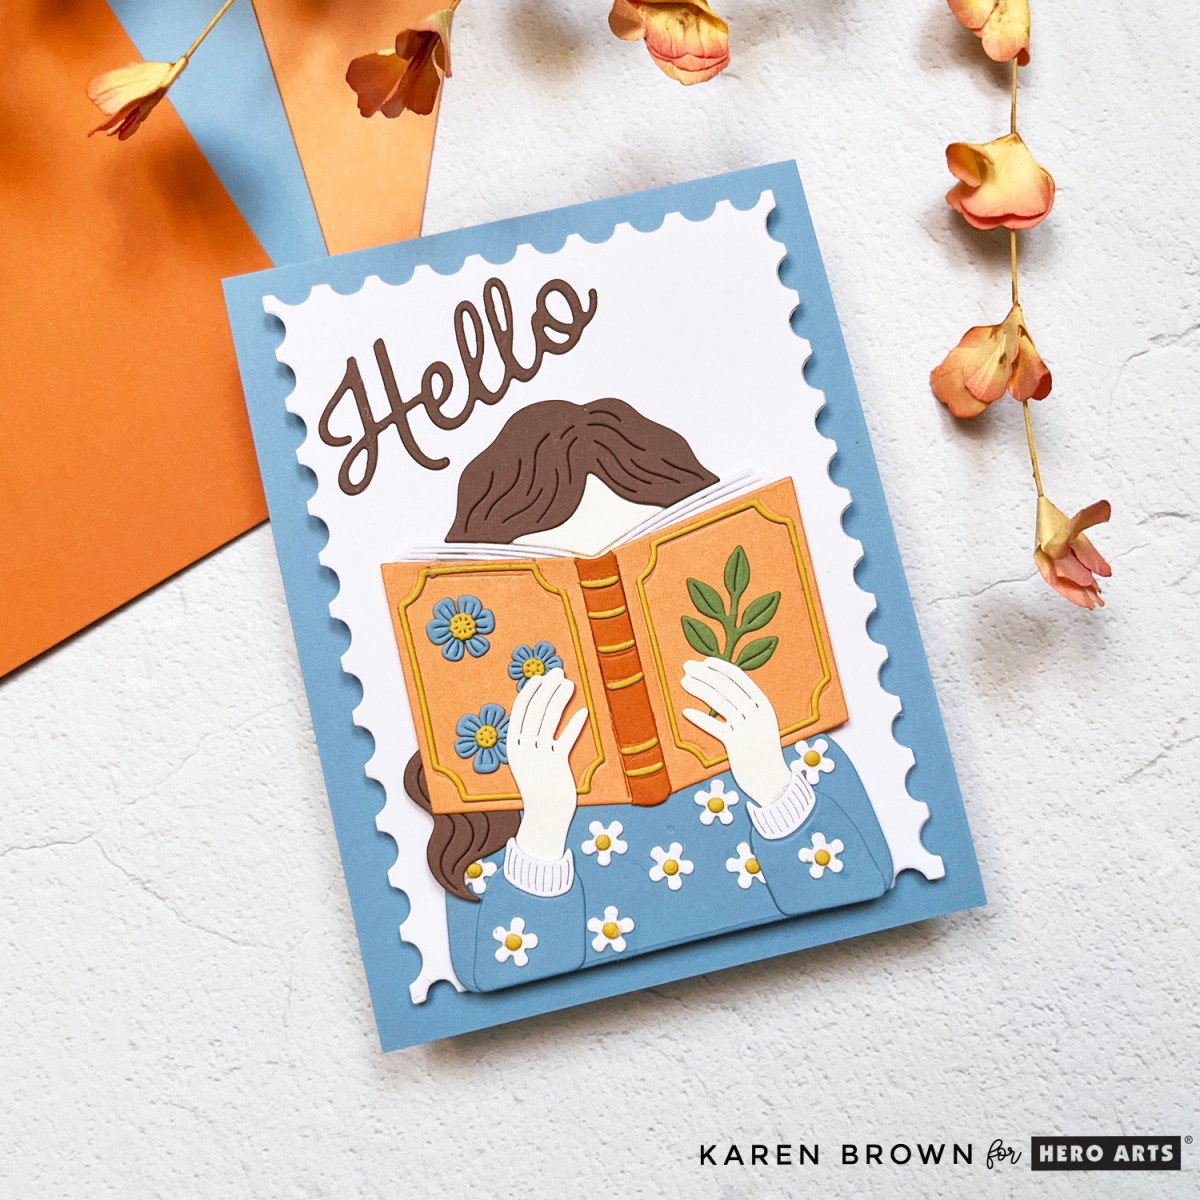
📖 Card 1: My Happy Place
For my first project, I used the “Happy Place” die set from the November Card Kit of the Monthto create a cozy die-cut scene.
Picture this: a girl tucked in with her favorite book, surrounded by soft periwinkle blue and warm orange tones. The card has a charming, feminine feel — like a Saturday morning spent lost in a good story.
This one’s heading to a book club friend who, like me, can never resist reading just one more chapter!
What’s Included in the Kit?
• To Be Read Pile 4×6 Clear Stamp Set and Coordinating Dies • Happy Place Die Set • Professional Bookworm 3×4 Stamp & Cut • Gold Hero Wax, 1 oz. • 10 Sheets of Cardstock- 1 of each color, 5.5″ x 8.5″
>>> Receive a FREE Do Not Disturb Stamp and Cut when you purchase The Whole Studio!
Hero Arts has many different Monthly Kits that you can subscribe to including:
The WHOLE Studio – All 5 Kits (a 40% savings: $130 subscription + Free Shipping)
Next, I pulled out the Stamp & Cut of the Month: One Page at a Time. I love this set — it’s perfect for pairing bold typography with clever bookish sentiments.
I stamped the oval sentiment “Escaping Reality One Page at a Time” and used it as the O in my big JOY design. Then I die cut a bold J and Y from the Letter Fancy Die sets (J–N and W–Z) in bright orange, adding white shadows behind them to tie in the stamped oval.
The letters are large, 2 1/2″, creating a bold and dynamic visual card.
For the background, I created a tone-on-tone checkerboard using the November Cling of the Month— stamped Cornflower ink on Periwinkle cardstock for a crisp, graphic finish.
The result? A bold, cheerful, and clever card that feels fresh and literary — perfect for your favorite reader.
GIVEAWAY
Hero Arts will give away a $50 gift card, drawn from the comments left across the hop. Enter by Wednesday, November 5th at 11:59pm PT, and the winner will be announced on the Hero Arts blog the following week. Leave a comment on all stops for more chances to win!
I adore how all the November Hero Studio kits coordinate beautifully — from cozy die-cut scenes to playful sentiments and graphic backgrounds. Whether you love to stamp, die cut, or mix both, this release has something for every creative reader at heart.
And if you’re tempted by all the coordinating goodness, consider the Whole Studio Bundle — it’s a $240 value for just $130. That’s a deal worth bookmarking!
You might also want to take a peek at Past Club Kits that are still available.
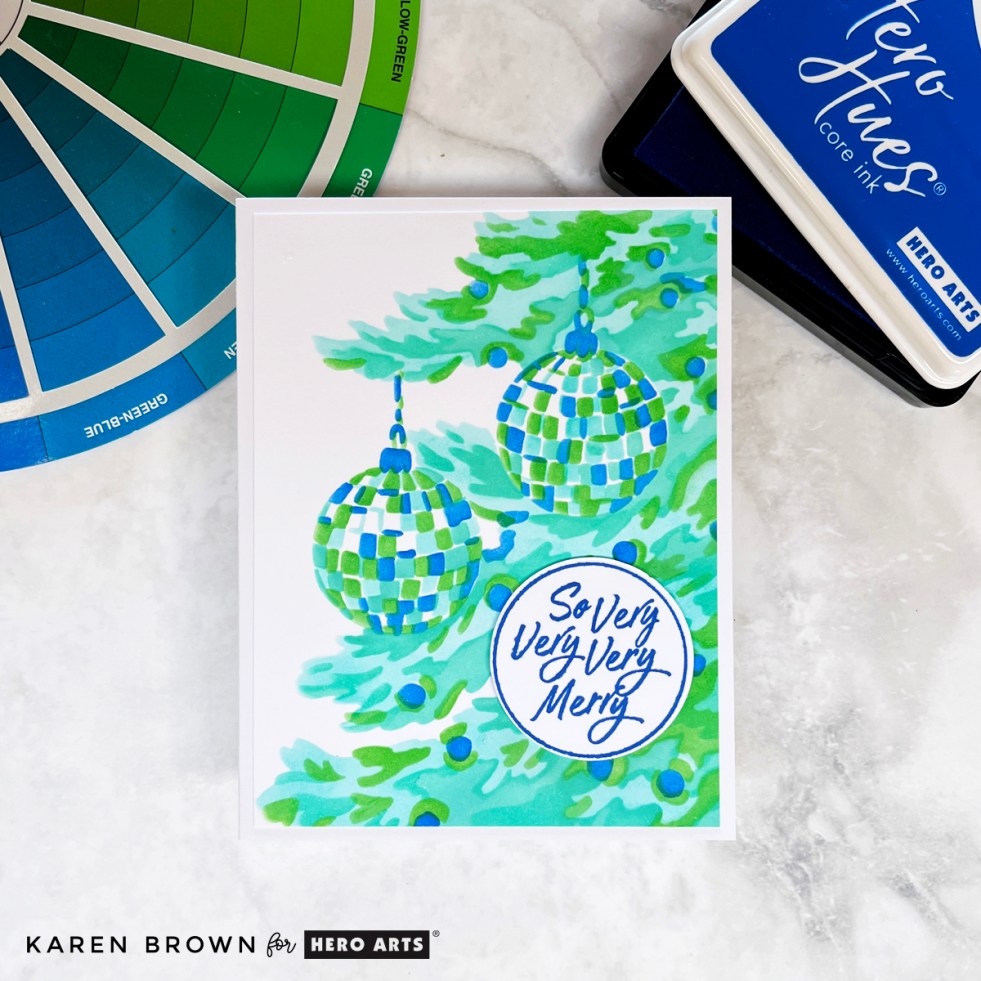
I couldn’t resist creating one more card with the October 2025 Release—this time featuring the Layering Stencil: The Tree. This gorgeous four-layer stencil creates a close-up view of a Christmas tree filled with ornaments, and it was such a joy to blend.
You can see my other October Club Kits Cards HERE.
I chose analogous colors (neighbors on the color wheel) for a soft, harmonious look in shades of greens, aquas, and blues:
Using Deluxe Smooth White Cardstock made the ink blending go on like butter, and as always with Hero Arts stencils, the layers lined up perfectly.
For the sentiment, I used the “So Very Very Merry” circular stamp and coordinating die from the October Card Kit, stamped in Indigo ink. The deep blue ties the whole design together beautifully.
This card has already gone into my holiday stash, ready to be mailed in December!
It’s time for the Hero Arts October 2025 Release Blog Hop, and this month’s theme is Merry Era! I had so much fun creating two festive cards that sparkle and shine in very different ways.
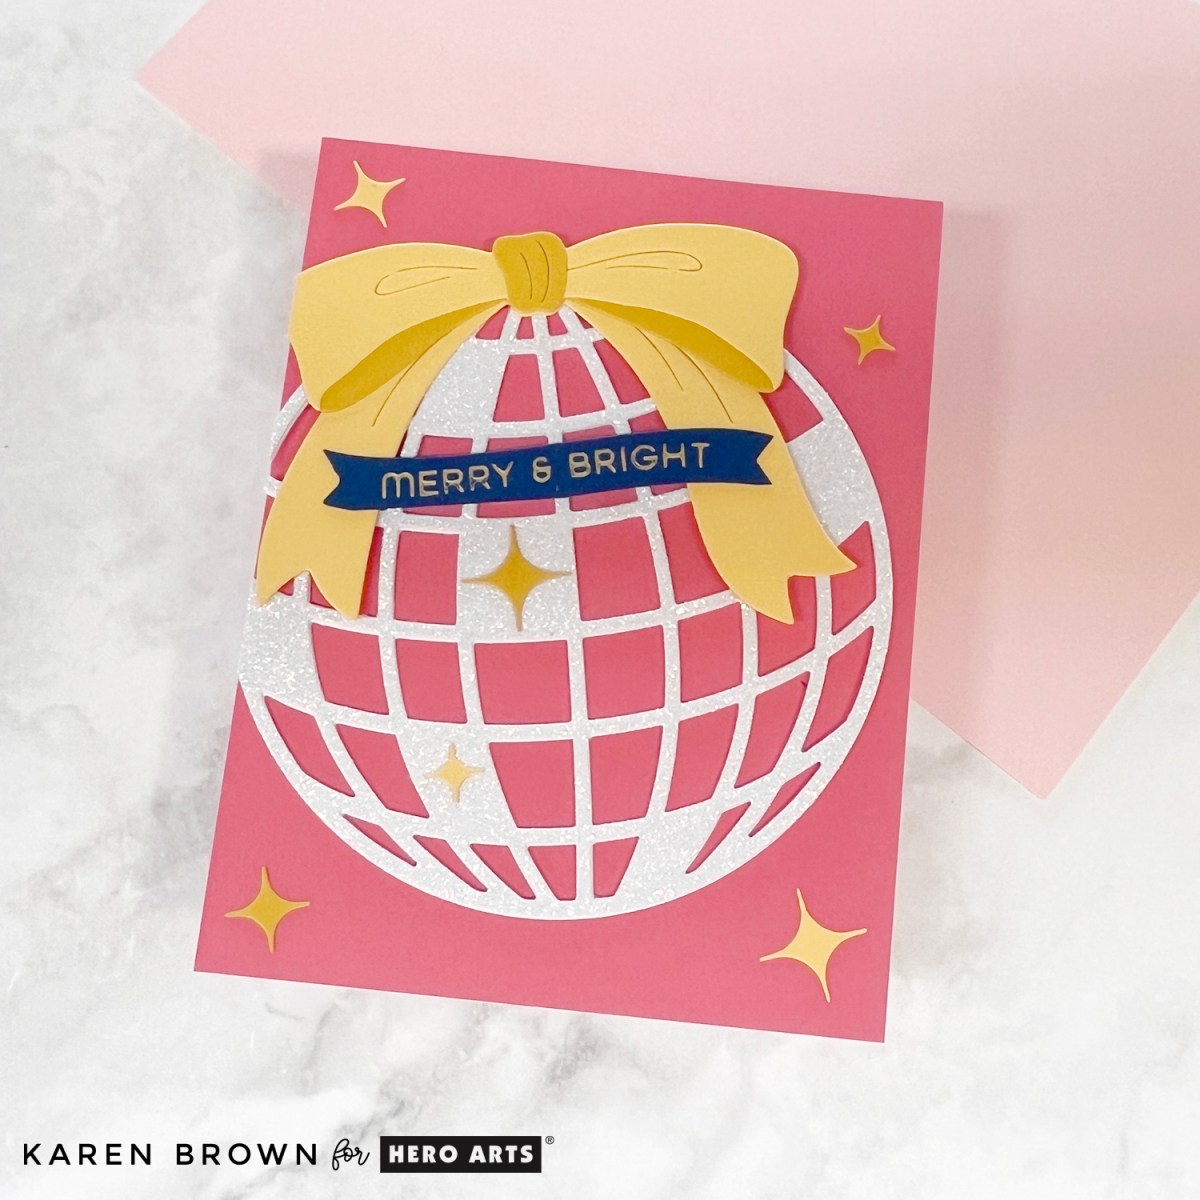
Glittery Pink Christmas Ball
For my first card, I reached for the “Have a Ball” Die Set from the October 2025 Card Kit. I wanted a sparkly look, so I die cut the large Christmas ball twice from white glitter cardstock for extra stability. My card base is Dahlia cardstock (included in the kit) which makes the ornament pop.
💡 Design tip: This die set would work beautifully for New Year’s cards too!
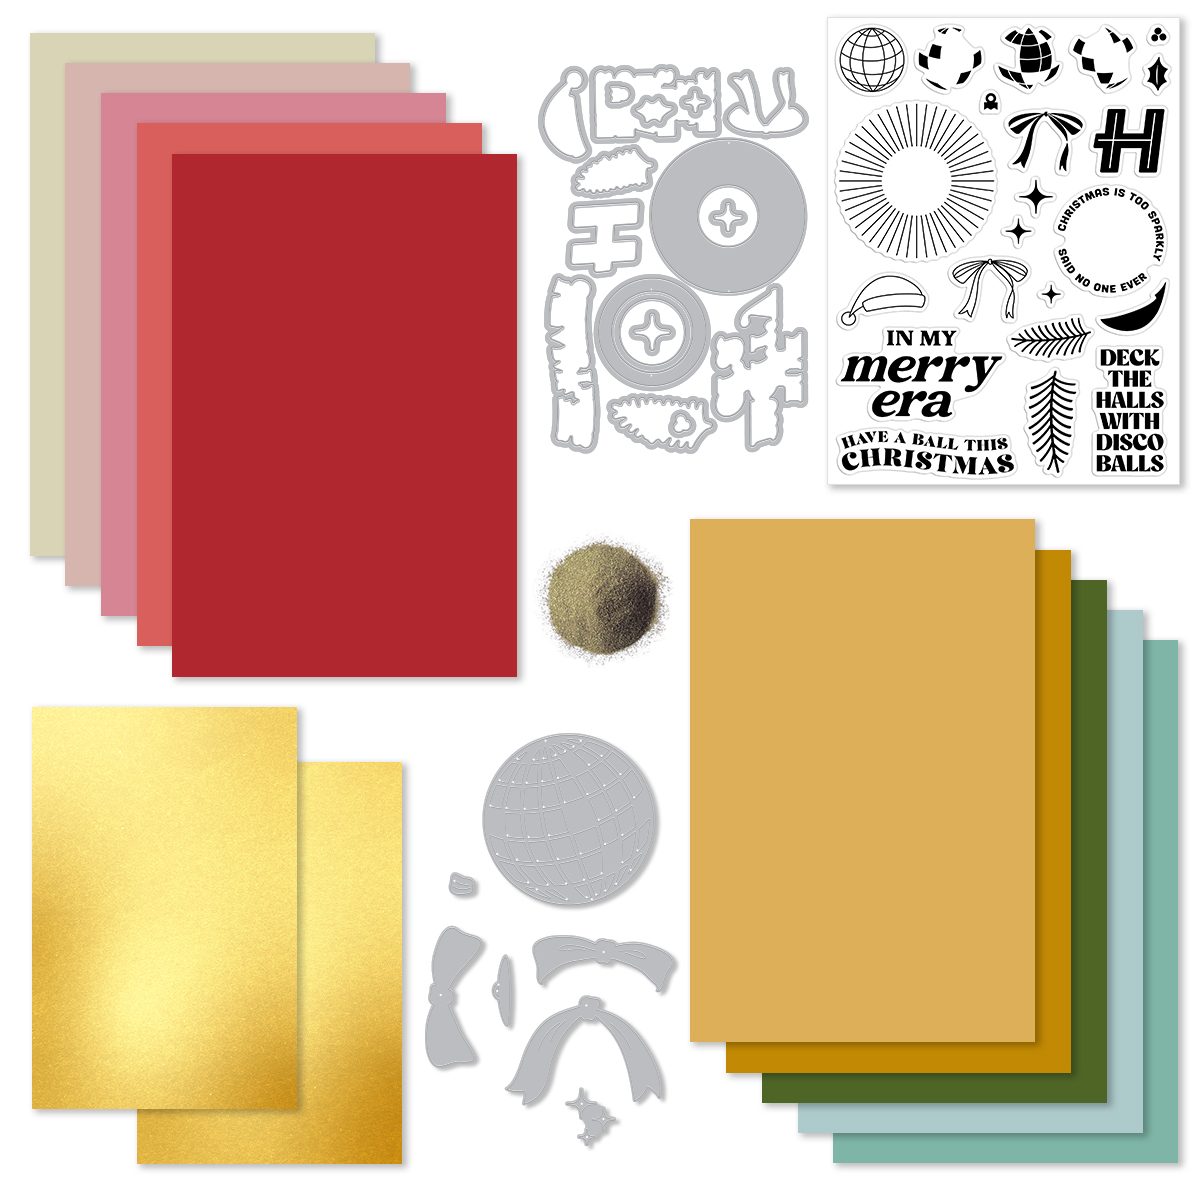
What’s Included in the Kit?
• Deck the Halls with Disco Balls 6×8 Stamp Set • Deck the Halls with Disco Balls Coordinating Dies • Have a Ball Die Set • Gold Embossing Powder .5 oz • 10 Sheets of Cardstock- 1 of each color, 5.5″ x 8.5″ • Two Sheets of Gold Matte Paper, 5.5″ x 8.5″
Receive a FREE beautiful Merry Everything Die Set when you purchase The Whole Studio!
Hero Arts has many different Monthly Kits that you can subscribe to including:
The WHOLE Studio – All 5 Kits (a 40% savings: $130 subscription + Free Shipping)
For my second card, I used the Twinkle Lights Fancy Dies. I die cut the string of Christmas lights from gold paper (included in the kit) and then added pops of color by cutting the bulbs from colorful cardstock scraps.
The combination of shiny gold strings, bright bulbs, and the bold sentiment makes this card full of Christmas cheer.
>>> Click HERE. to see my other October Card Kit Cards.
GIVEAWAY
Hero Arts will give away a $50 gift card, drawn from the comments left across the hop. Enter by Sunday, October 5th at 11:59pm PT, and the winner will be announced on the Hero Arts blog the following week. Leave a comment on all stops for more chances to win!
Hello, crafty friends! Karen Brown here today with a card that is extra cozy, extra cute, and full of September Hero Studio goodness. This month’s release is all about comfort and charm, and I couldn’t resist creating a sweet little bedtime scene featuring some of the most adorable die-cut critters ever.
I really LOVE this die set and I created another card that you might like to see HERE.
Card Details
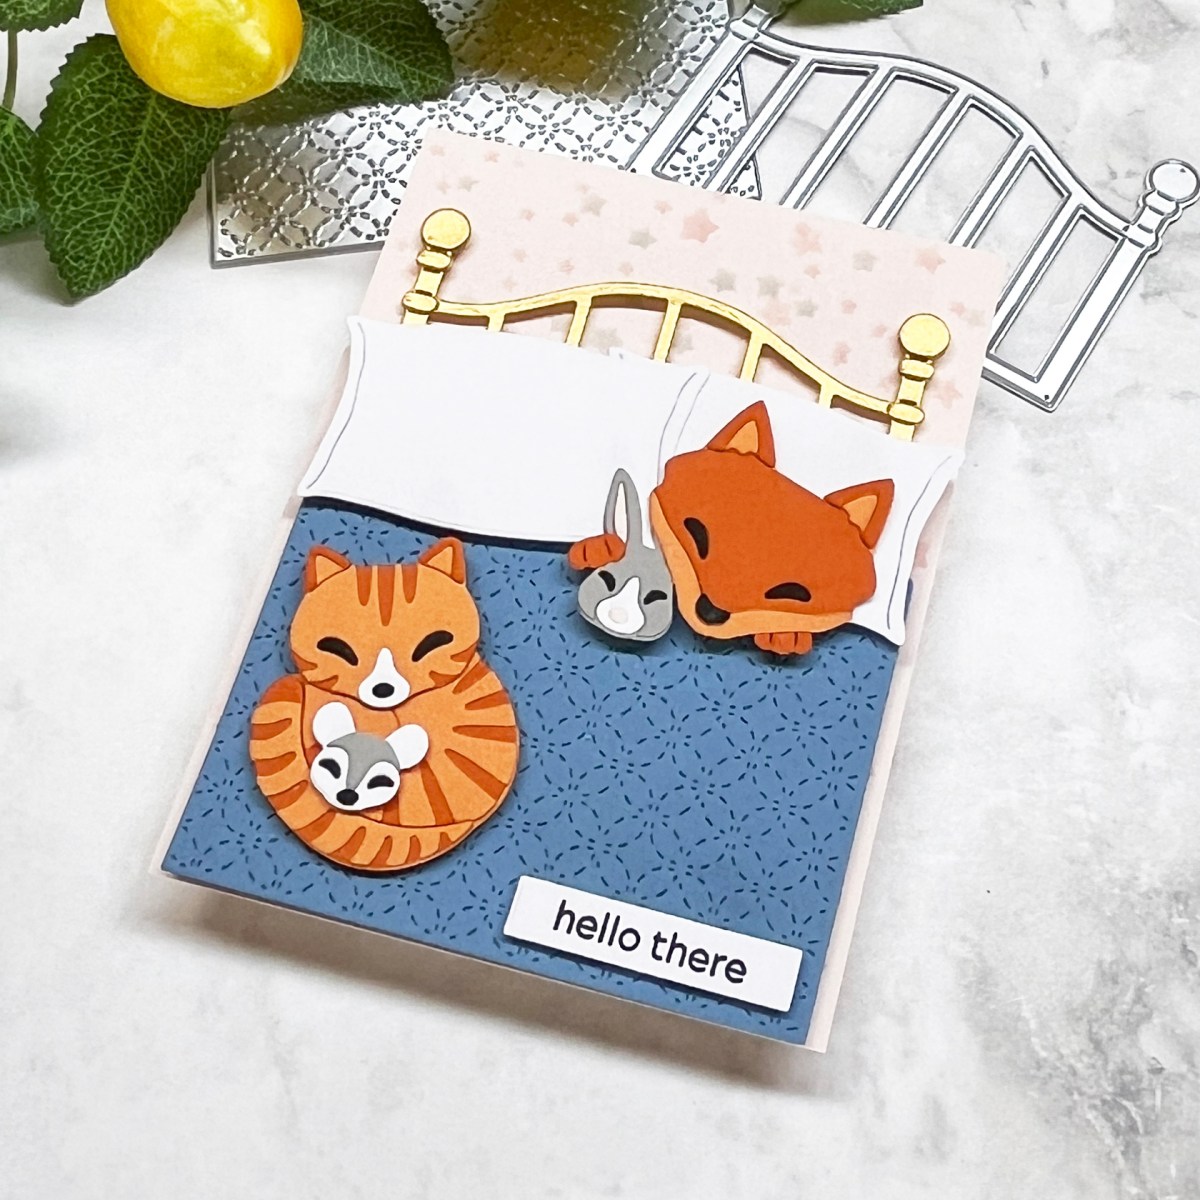
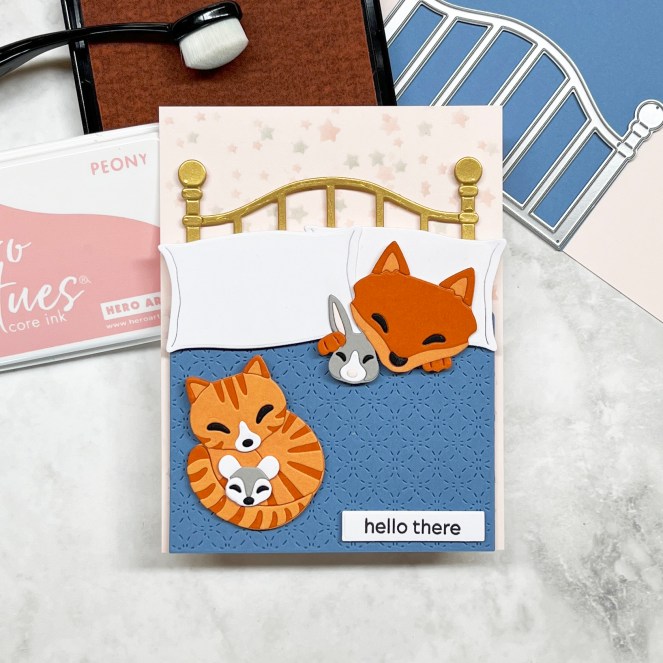
For my design, I started with the September Fancy Die of the Month: Cozy Critters. At the center of the card is a fox, tucked snugly into a brass bed, clutching its “lovey”—a tiny stuffed bunny. To set the scene, I crafted a Celestial Blue quilt with lovely etched stitching details and paired it with two crisp Snow White pillows.
At the foot of the bed, a striped orange tabby cat curls up contentedly, holding its own little stuffed animal. This cutie comes from the Whole Studio Kit Bonus: Cozy Kitty, which coordinated perfectly to complete my charming bedtime vignette.
To finish, I added a clean and simple sentiment, “hello there”, from the Message Strips stamp and cut set. It felt like the perfect greeting for this dreamy scene.
I had so much fun creating this bedtime scene with the September 2025 Hero Studio Release. Between the fox, the kitty, and those snuggly quilts, I think this one might be my coziest card yet! I can already picture more cards made with this die set— seasonal quilts, or even personalized critter bedrooms.
Thanks so much for stopping by today, and sweet dreams of your next crafty adventure!
Hello friends! It’s time for the Hero Arts September Club Kit Release, and this month’s theme is Fall into Fall. 🍁 Autumn crafting is one of my very favorite seasons, and this release is packed with stamps, dies, and sentiments perfect for cozy, colorful cardmaking. I have two very different projects to share with you today—one-layer stamping and coloring, and a layered die cut scene—that both capture the warmth of fall.
Card 1: One-Layer Stamped + Colored Fall Scene
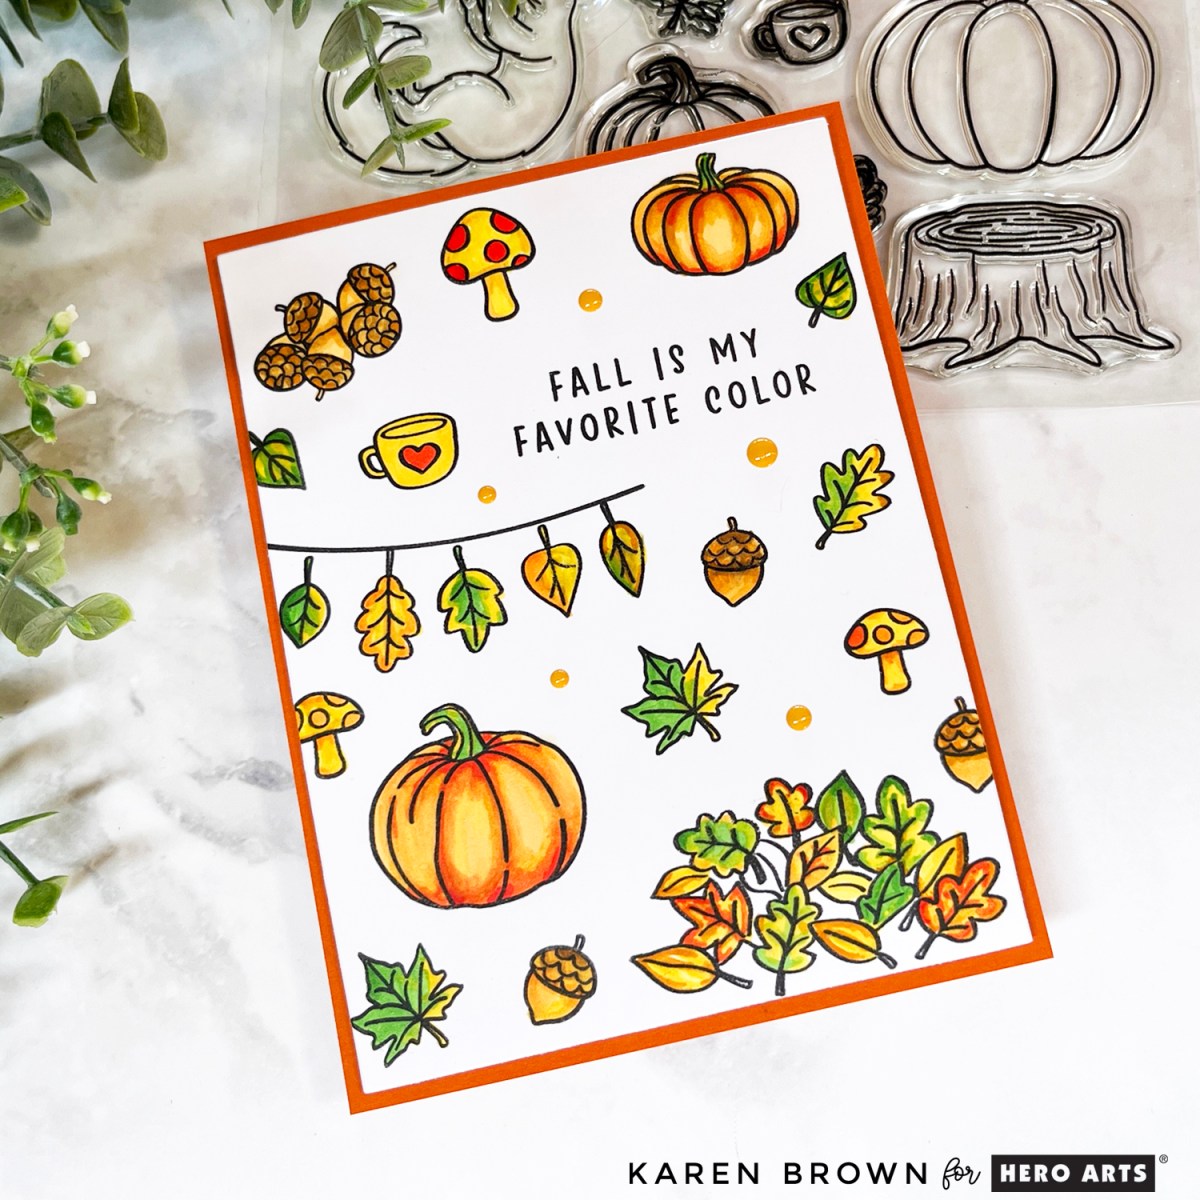
The September Card Kit includes gorgeous fall imagery: pumpkins, acorns, mushrooms, leaves, and more. I wanted to let the stamps take center stage, so I designed a one-layer background that doubles as the focal point.
I stamped a scattering of pumpkins, mushrooms, and leaves across a white card panel, then brought them to life with alcohol marker coloring in classic fall hues:
Oranges and yellows for pumpkins
Warm tans and browns for acorns
Fresh greens, yellows and oranges for leaves
The finishing touch is the sentiment, “Fall is My Favorite Color,” stamped boldly in black. A few enamel dots (also included in the kit!) add just the right amount of shine.
This card is simple, flat, and easy to mail—but still rich in detail and warmth.
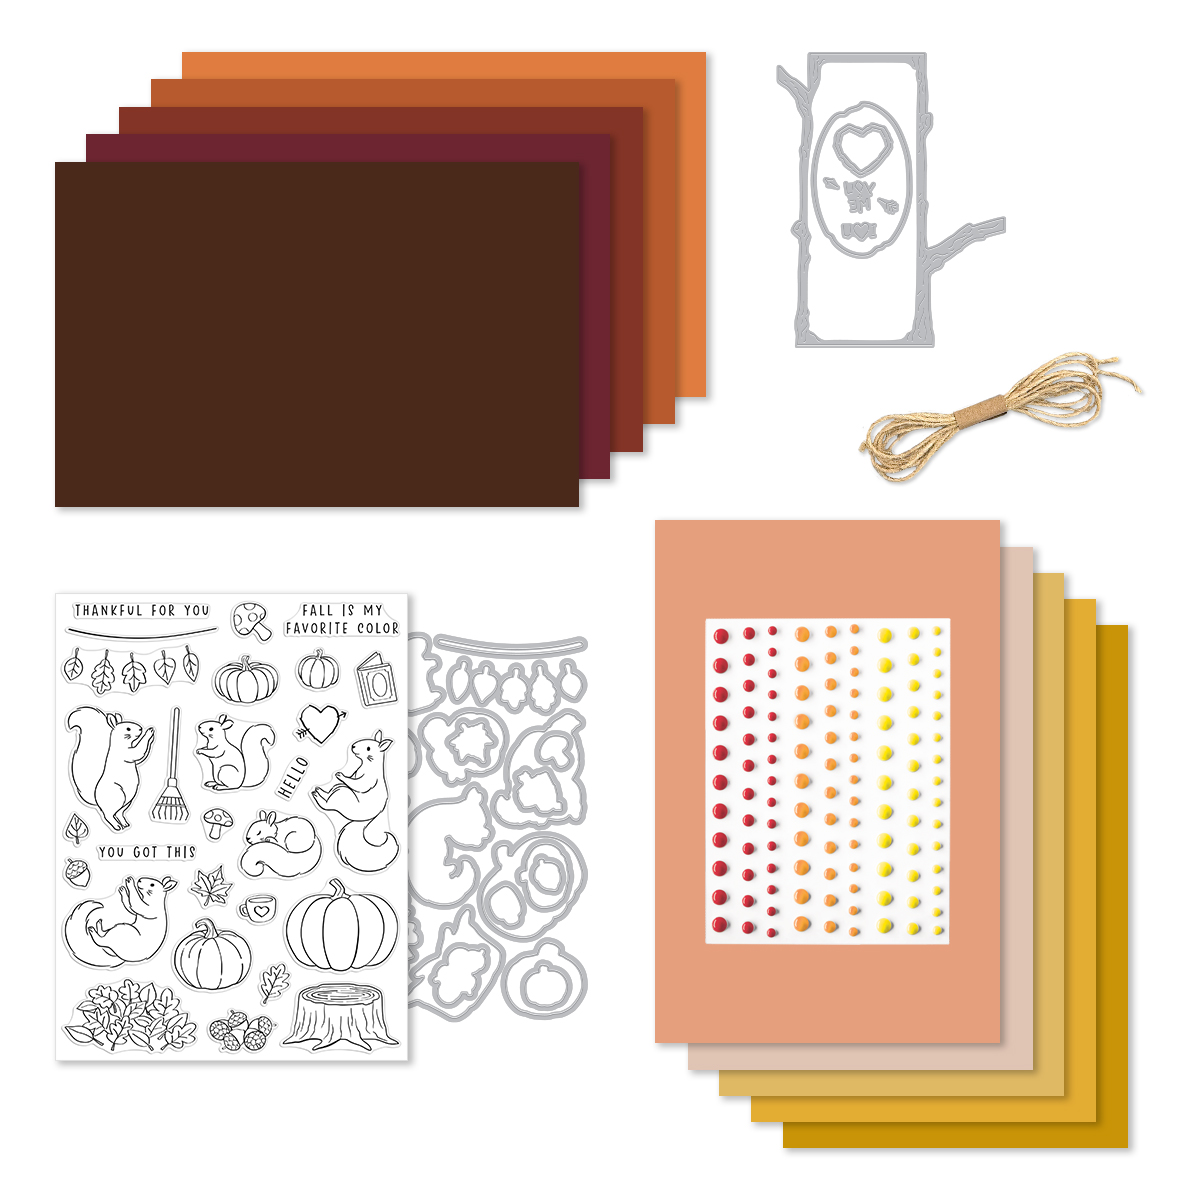
What’s Included in the September Card Kit?
Fall is my Favorite 6×8 Stamp Set
Fall is my Favorite Coordinating Dies
Treehouse Die Set
Sunset Enamel Dots
Brown Twine, 1 yard
10 Sheets of Cardstock- 1 of each color, 5.5″ x 8.5″ (Truffle, Merlot, Cinnamon, Terra Cotta, Carrot, Coral, Bellini, Beeswax, Saffron, Tuscan)
Receive a FREE adorable Cozy Kitty Die Set when you purchase The Whole Studio!
Hero Arts has many different Monthly Kits that you can subscribe to including:
The WHOLE Studio – All 5 Kits (a 40% savings: $130 subscription + Free Shipping)
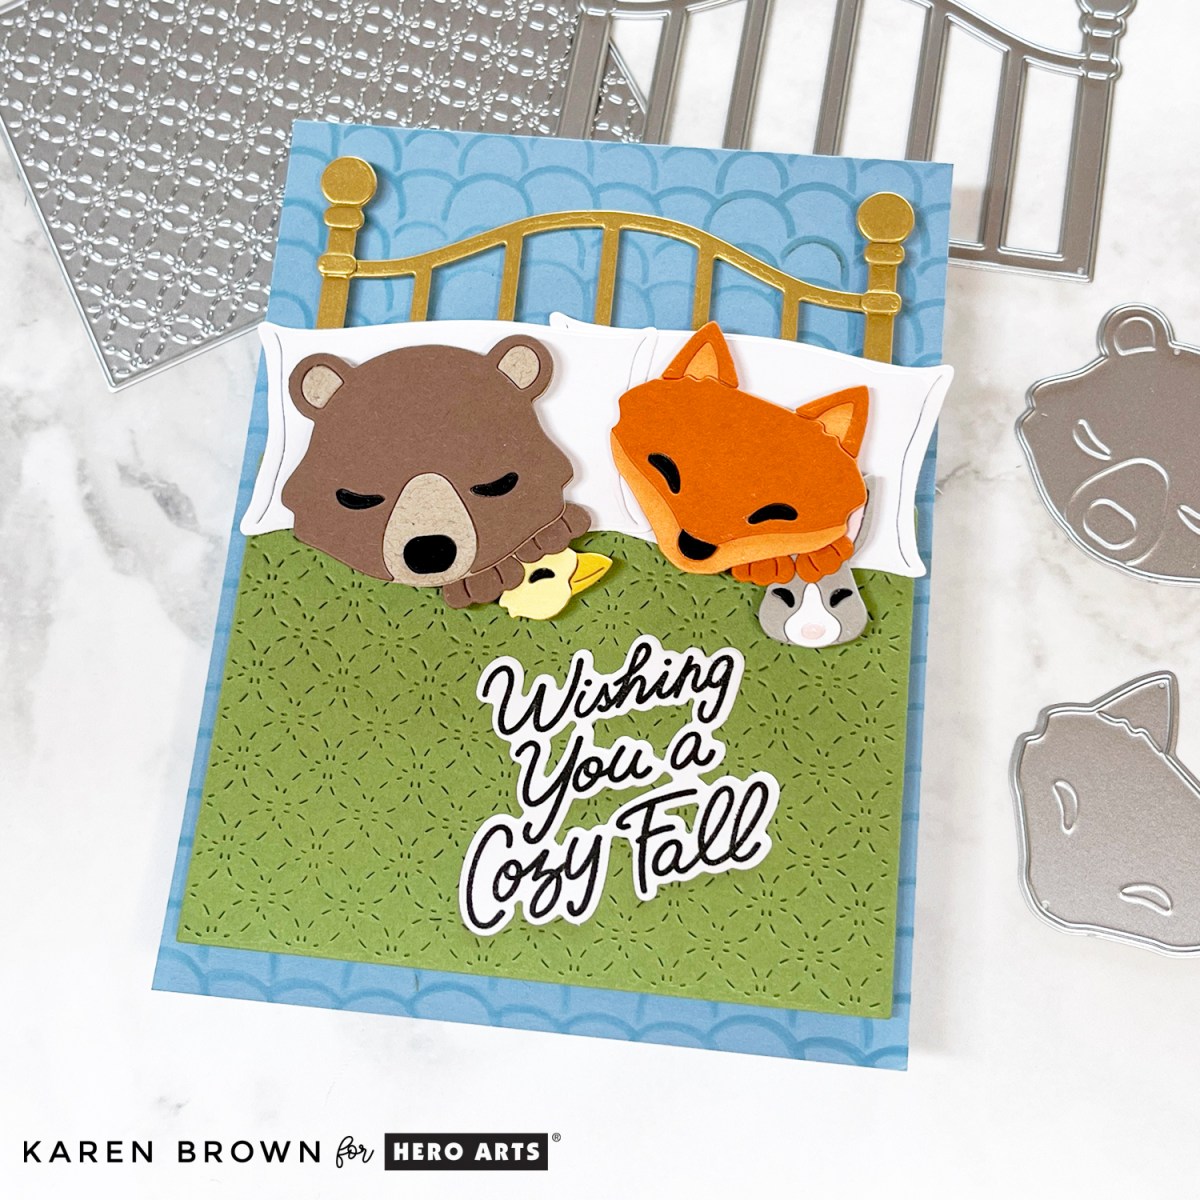
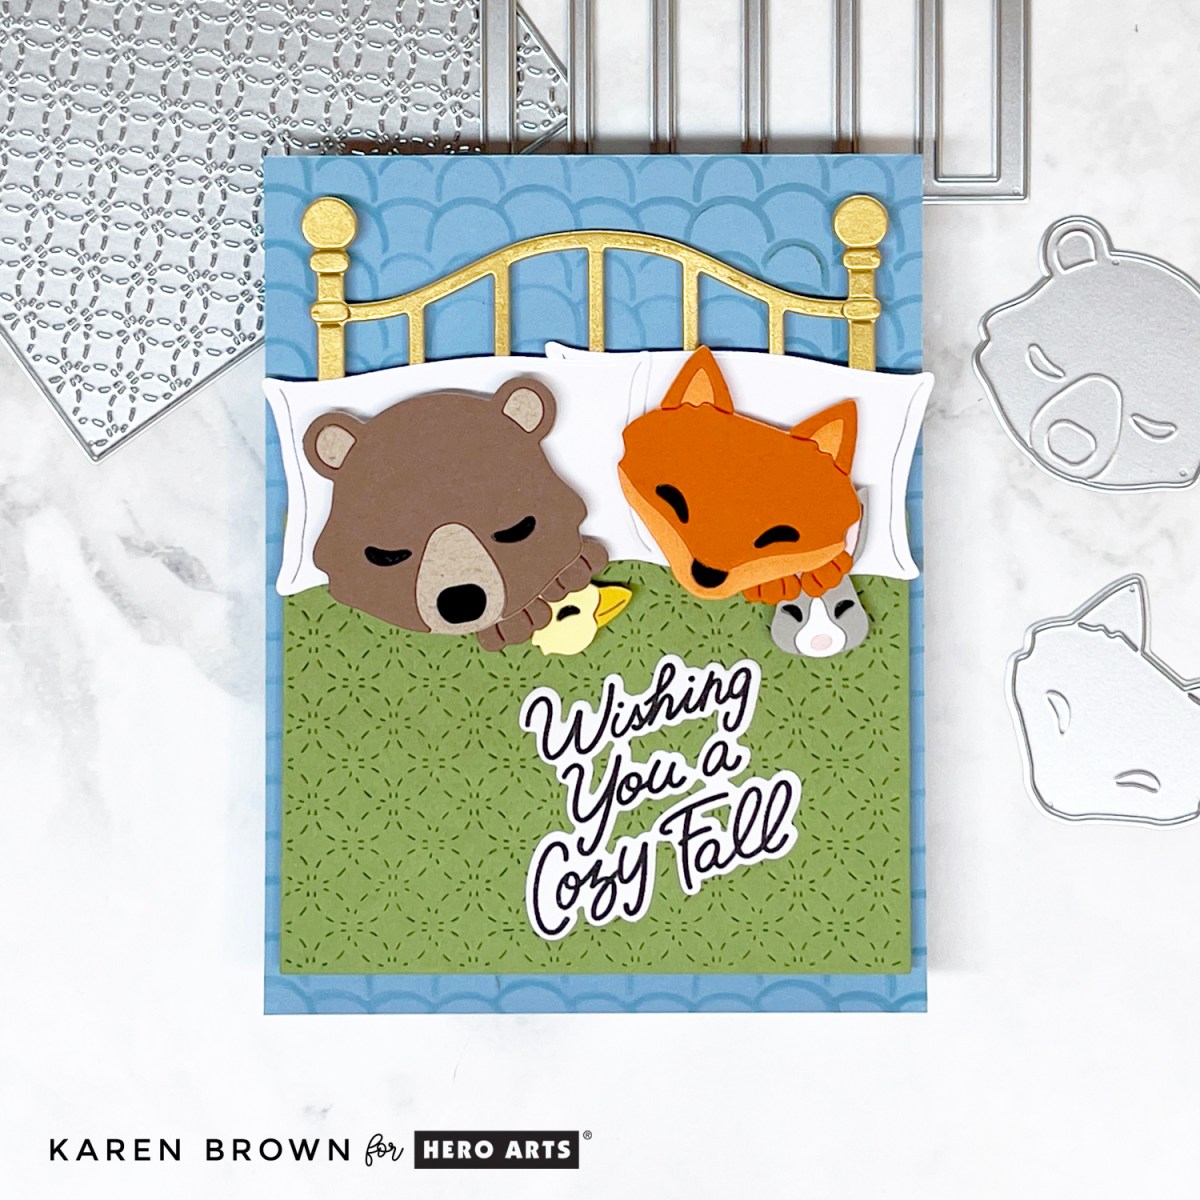
Next, I dove into the September Fancy Dies: Cozy Critters. This set has my heart! I created a cozy little bedtime scene featuring a brown bear and an orange fox tucked into a brass bed with a green quilt.
The bear is snuggling with a little stuffed duck.
The fox is holding the sweetest bunny.
The scene is playful, heartwarming, and perfect for fall—but I think it would also make an adorable Valentine’s Day card!
The sentiment, “Wishing You a Cozy Fall,” comes from the September Clear Stamp & Cut Setand fits perfectly with the theme. For the background, I added a touch of subtle pattern using the Retro Rainbow Stencil with Contour Ink. The soft “wallpaper” design adds depth without competing with the cozy critters in bed.
Love this die set? I have another adorable creation that you can see HERE.
Blog Hop
Hero Arts is celebrating this release with a Blog Hop full of inspiration from the creative team. Hero Arts will give away a $50 gift card, drawn from the comments left across the hop. Enter by Friday, September 5th at 11:59pm PT, and the winner will be announced on the Hero Arts blog the following week. Leave a comment on all stops for more chances to win!
Some cards practically make themselves—this was one of them. Today I’m featuring a project made with the August 2025 Hero Arts Layering Stencil of the Month, Sunnyside Manor. This dreamy stencil has a charming layered interwoven scene that comes to life with just a few colors of ink.
Step-by-Step: How to Use Layering Stencils
If you’re new to layering stencils or just want to brush up, here’s how I created this scene using the Sunnyside Manor Stencil set:
1. Start with a Colored Card Base (Optional)
I used lavender cardstock to add an extra tone to the finished design before I ever inked. You can also use white for a clean slate.
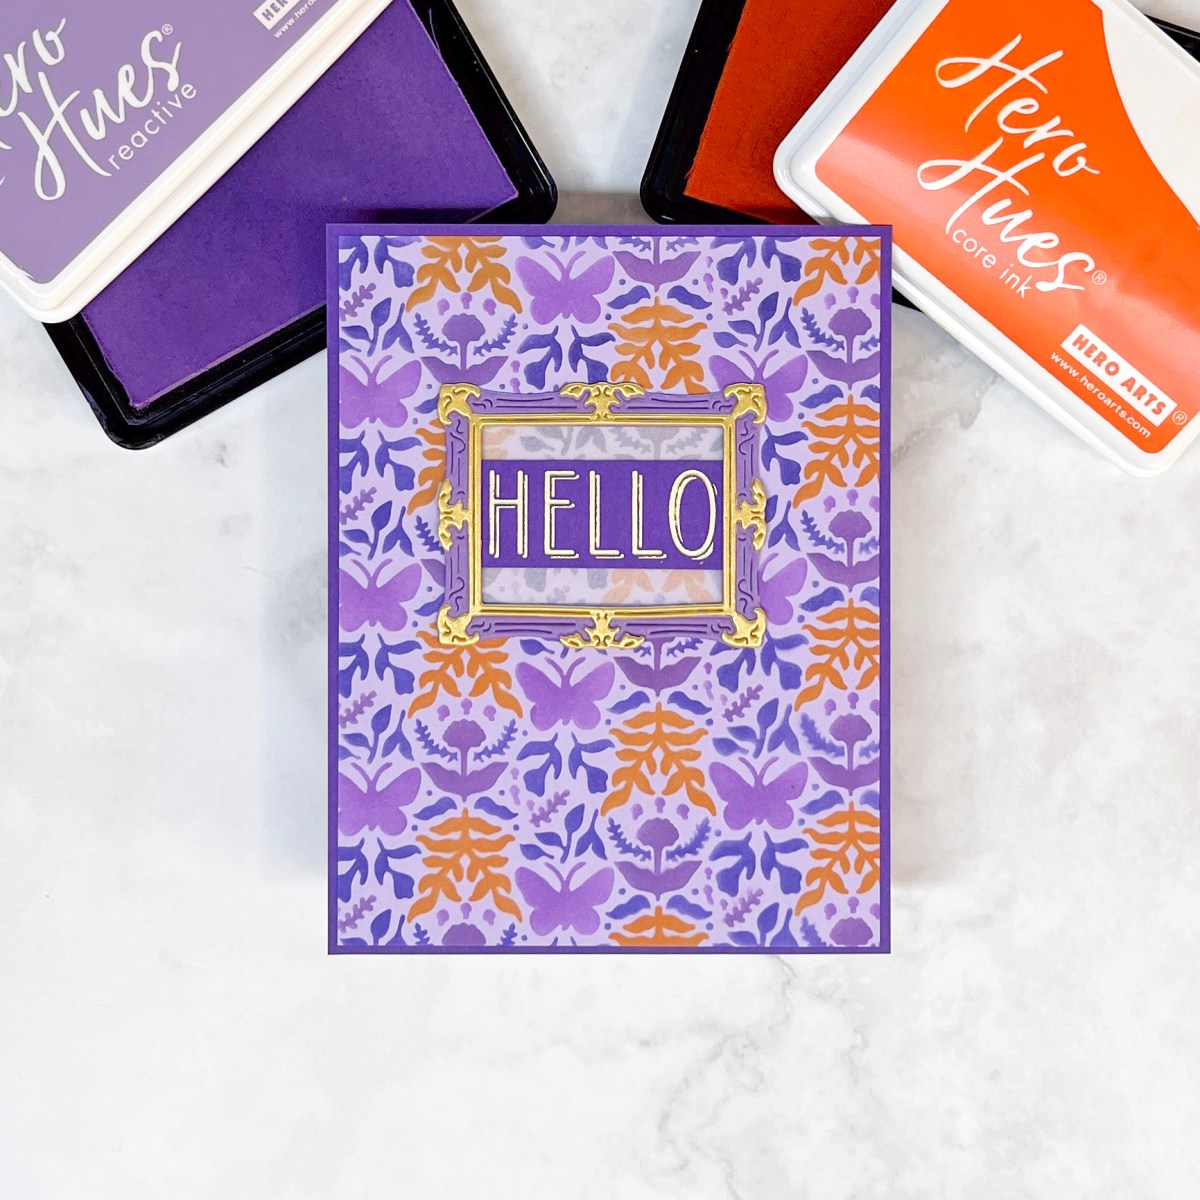
For this version, I created a bold and beautiful palette using three shades of purple and a pop of orange. I started directly on a lavender card base, giving me a built-in fourth shade of purple before I even began inking.
2. Secure the First Stencil
Place Layer 1 over your cardstock and secure it using low-tack tape or a sticky mat to keep everything from shifting. Hero Arts Stencils have great square guides in the four corners so each layer lines up perfectly everytime! I take a pencil and mark each square before I begin.
If you’d like to see this process in one of my How to Stencil Videos, click HERE.
3. Blend Your First Ink Color
Using a blending brush, apply your first ink (I used Thistle). Blend evenly and lift the stencil carefully once done.
4. Repeat for Each Layer
Align Layer 2 (they’re clearly numbered on the lower left) and easy to line up with the square guides or by eye).
I built a three-layer frame using elements from the August Card Kit:
Bottom: Vellum
Middle: Lavender cardstock
Top: Matte Gold cardstock
The card has a soft shimmer, deep contrast, and that quiet elegance that stenciling always brings. I find stenciling to be my Zen moment—and this one was so satisfying.
Interested in more August Club Kit Cards, you can read my August 2025 Release Day Blog Post HERE.
If you’re looking for a beginner-friendly but artistically satisfying project, this one is for you.
Stenciling has become my go-to technique for beautiful, relaxing cardmaking. The Sunnyside Manor Layering Stencil is especially satisfying—the layers line up easily and the design allows for infinite color combos. Whether you go soft and serene or bold and whimsical, this stencil adapts beautifully.
Interested in seeing some other layering stencils…..click HERE.
The Hero Arts August 2025 Release is here, and it’s packed with creative possibilities—from interactive Halloween tags to dreamy stenciled scenes and mystical vibes. I had so much fun with these kits and created two very different but equally inspiring projects.
🕷️ Project 1: Light-Up Spider Web Halloween Tag – August Card Kit
Let’s start with a spooky showstopper! This interactive Halloween tag uses elements from the August Hero Arts Card Kit, including the spider web stamp and Press One Light that lights up the tag.
Here’s how it came together:
I white heat embossed the spider web on black cardstock, die cut it, and positioned one of the included Press One Lights behind the center.
When you press the hidden button—the web lights up! 🕸️✨
The top tag is watercolor paper with Yellow and Orange Liquid Watercolors—so vibrant and bold!
The bottom tag is purple cardstock with a Hero Transfer from Collage Backgrounds 2—the script texture gives a haunting Halloween vibe.
I finished it off with a heat-embossed “Boo to You” sentiment from the kit and a touch of black hemp cord. This tag is spooky, clever, and totally kid-approved.
What’s Included in the August Card Kit?
Abraham and Katrina 6×8 Stamp Set (used on tag)
Abraham and Katrina Coordinating Die (used on tag)
Stamping Guide for stamp set
Victorian Frame Die Set (used on card 2)
Pear Blosson Press-One Light 2 Pack (used on tag)
10 Sheets of Cardstock- 1 of each color, 5.5″ x 8.5″ (Cinnamon, Terra Cotta, Carrot, Coral, Bellini, Tuscan, Mint, Waterfall, Blue Spruce, Raven)
Holographic Rainbow Film, 1 sheet – 5.5″ x 8.5″
Acetate, 1 sheet – 5.5″ x 8.5″ (used on card 3)
Receive a FREE Magic Mist Stencilwhen you purchase The Whole Studio!
Hero Arts has many different Monthly Kits that you can subscribe to including:
The WHOLE Studio – All 5 Kits (a 40% savings: $130 subscription + Free Shipping)
From light-up tags to dreamy stenciling and crystal energy, the August kits are perfect for stretching your creativity into fall. Which kit are you reaching for first?
Pack your crafty bags, because this month Hero Arts is taking us on a road trip! I’m thrilled to be part of the July 2025 Club Kit Blog Hop where we celebrate this month’s travel-inspired theme. The kits are full of scenic surprises, clever sentiments, and summery fun—and I’m here to show you four creative ways to use them.
You might also be interested in my VIDEO using the July Layering Stencil Kit.
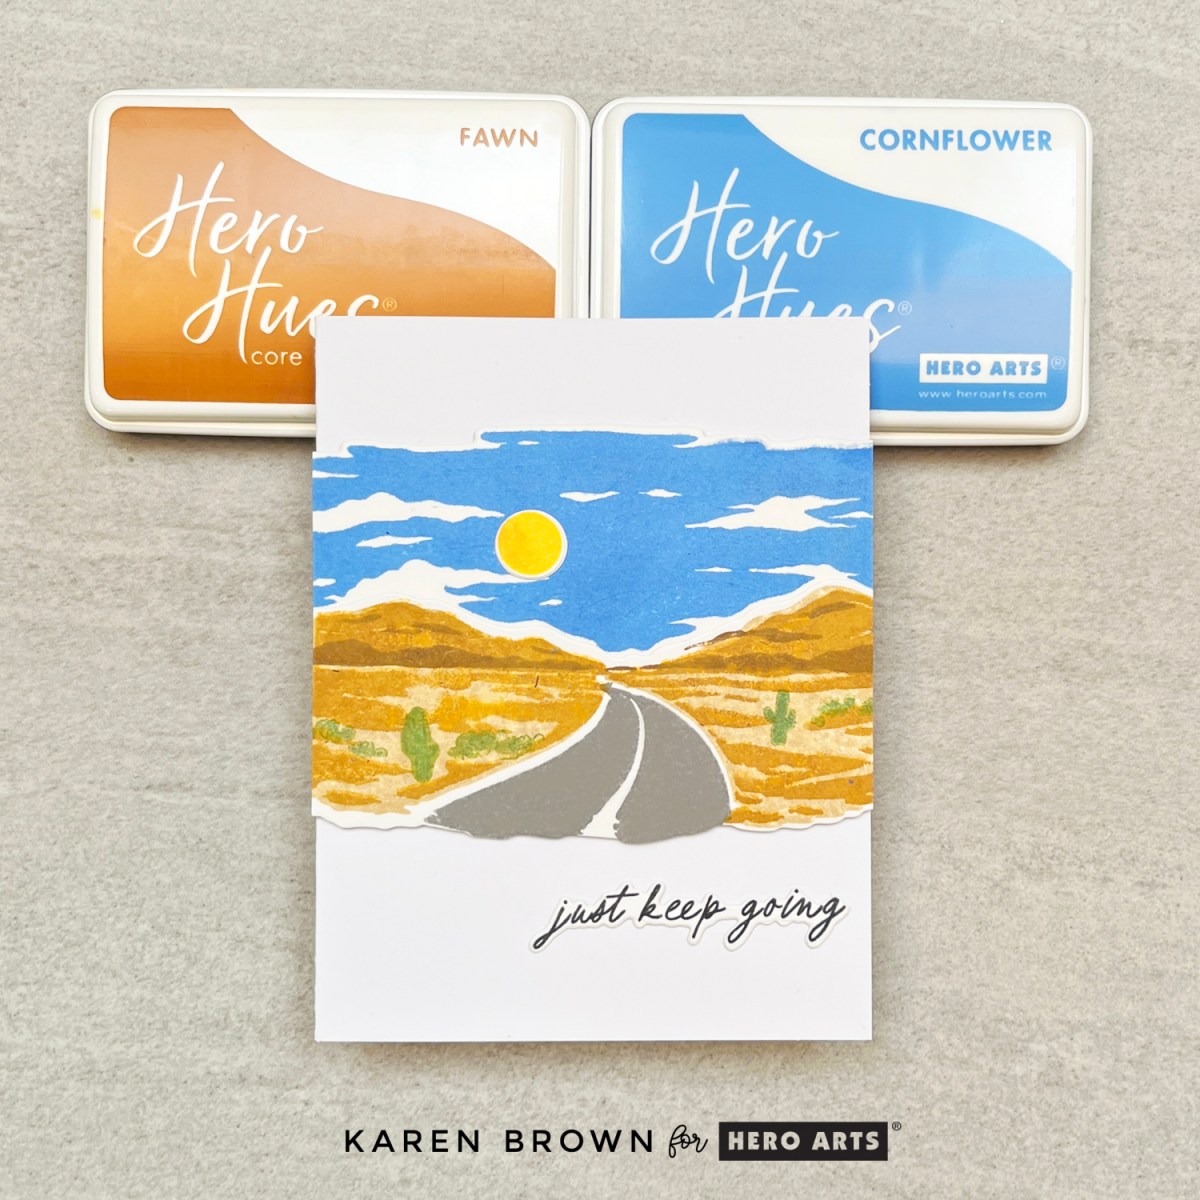
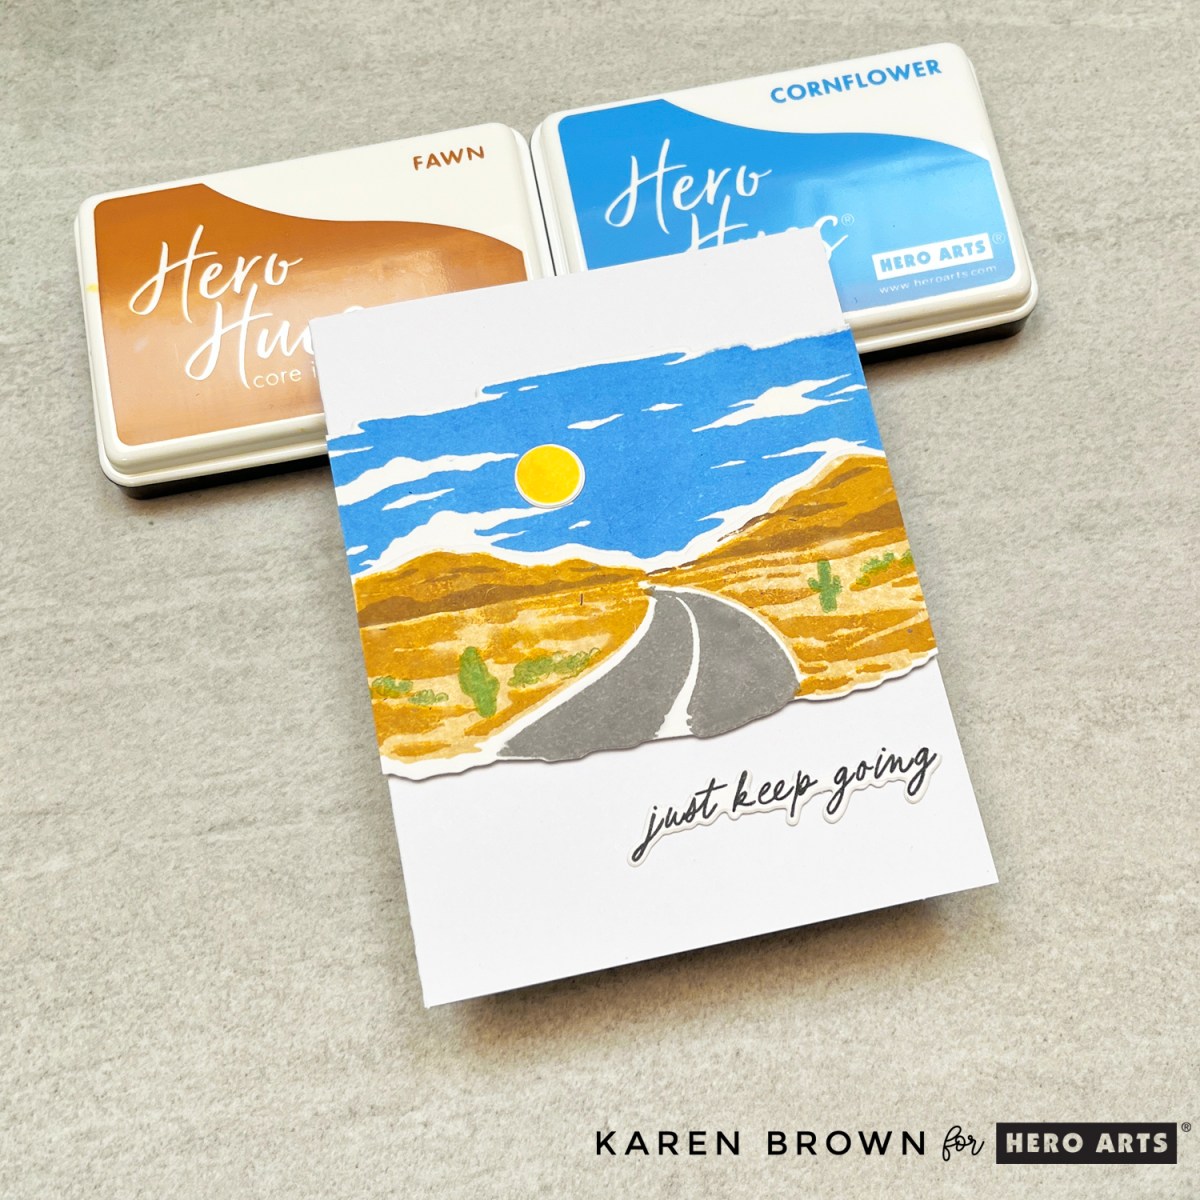
Card 1: Desert Dreams Heroscape
I started with the Card Kit of the Month, which features a stunning “On the Road” Heroscape. Imagine a desert road winding into the distance with low-slung mountains and a bright blue sky. These Heroscapes are layered stamps that create dimension and realism with every step.
I kept the palette natural and sun-drenched, and chose the sentiment “just keep going” — a perfect message for road trips and life journeys alike. Heroscapes are always crowd-pleasers and this one is no exception!
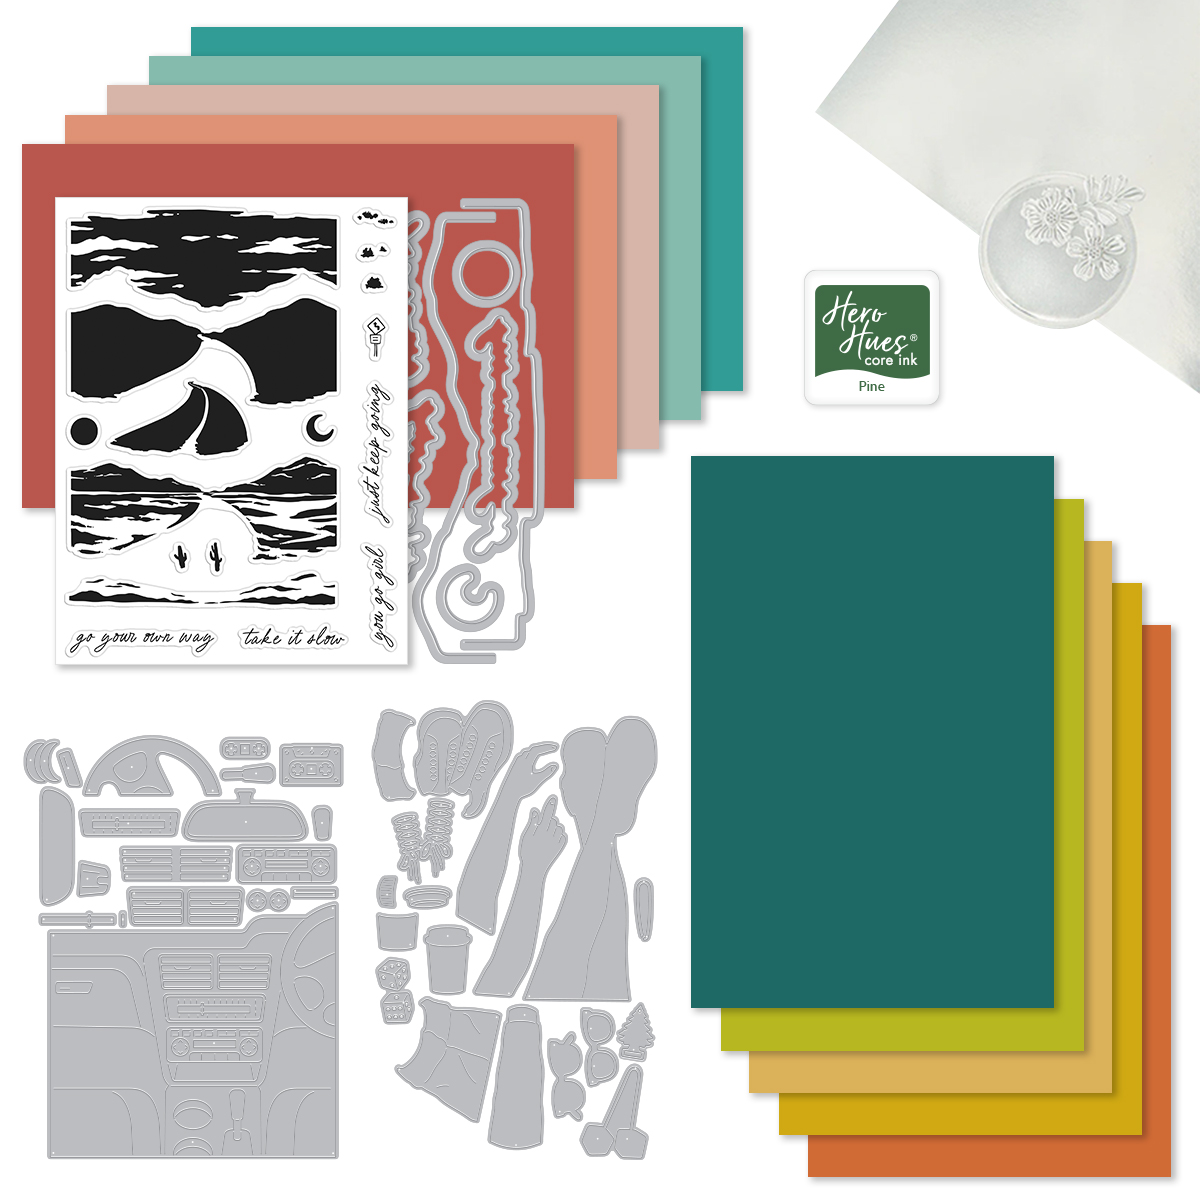
What’s Inside the July 2025 Hero Studio Card Kit?
On the Road HeroScape Coordinating Dies
On the Road HeroScape 6×8 Stamp Set
Let’s Go Die Set
Pine Core Ink Cube
10 Sheets of Cardstock (1 of each color), 5.5″ x 8.5″ (Sicily, Coral, Bellini, Waterfall, Teal Topaz, Blue Spruce, Peridot, Beeswax, Saffron, Carrot) These are some of my absolute favorite cardstock colors and I used Carrot and Teal Topaz on two cards below.
Mirror Paper, 1 sheet – 5.5″ x 8.5″
The Whole Studio includes ALL 5 of the monthly subscriptions in one discounted bundle. Cling of the Month, Stamp & Cut of the Month (new name for the subscription!), Layering Stencil of the Month, Fancy Dies of the Month, and the Card Kit of the Month.
Receive a FREE Everything’s Pine stamp & die set when you purchase The Whole Studio!
Hero Arts has many different Monthly Kits that you can subscribe to including:
The WHOLE Studio – All 5 Kits ($130 subscription + Free Shipping)
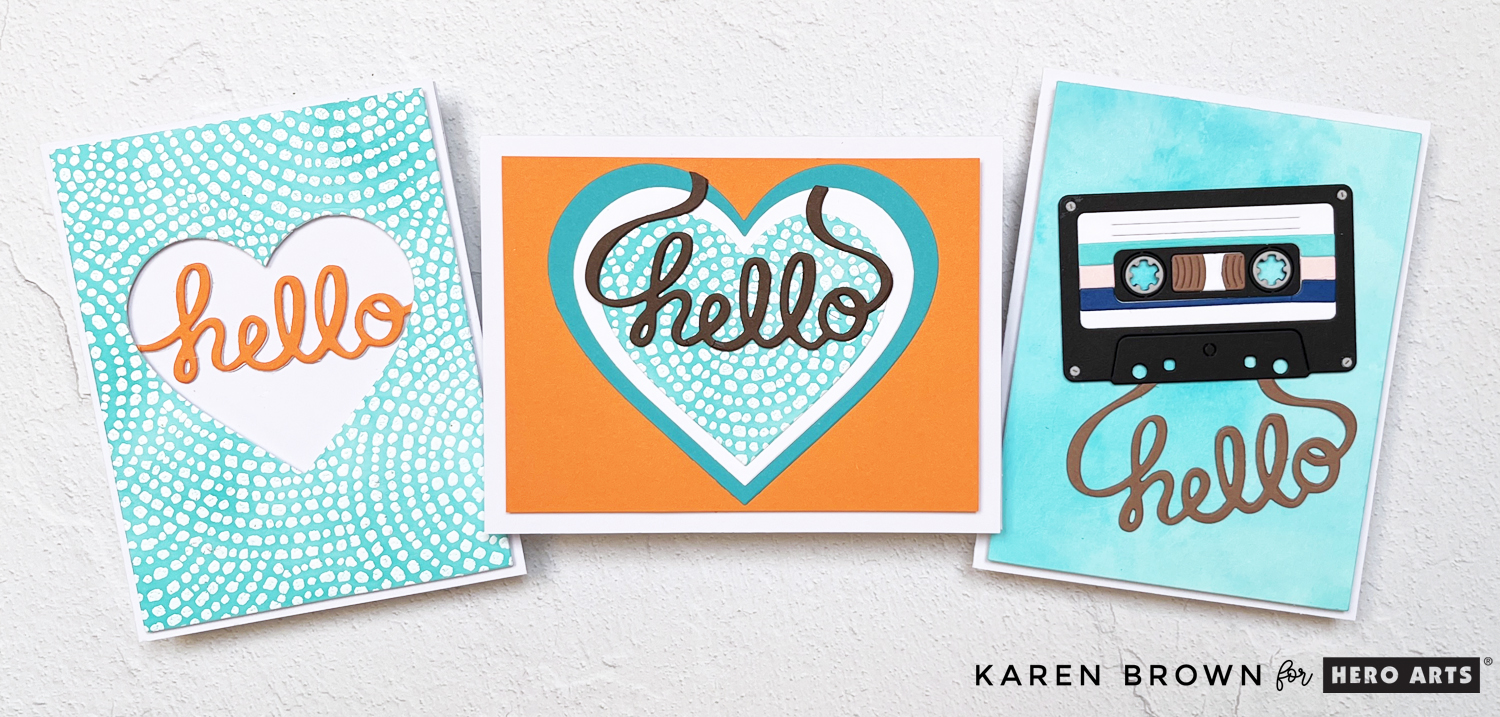
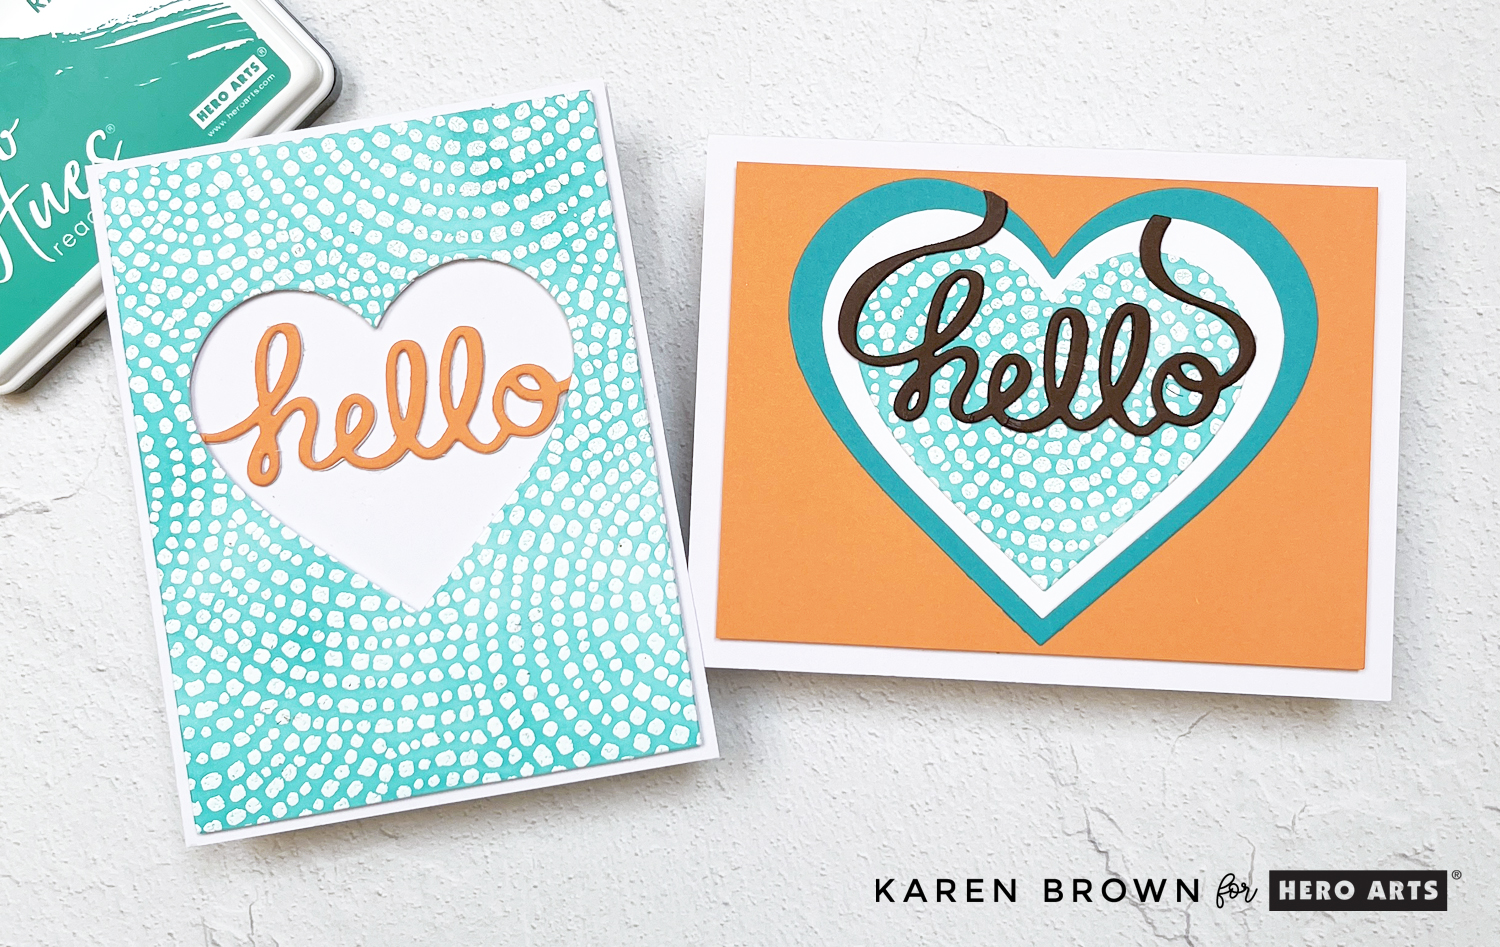
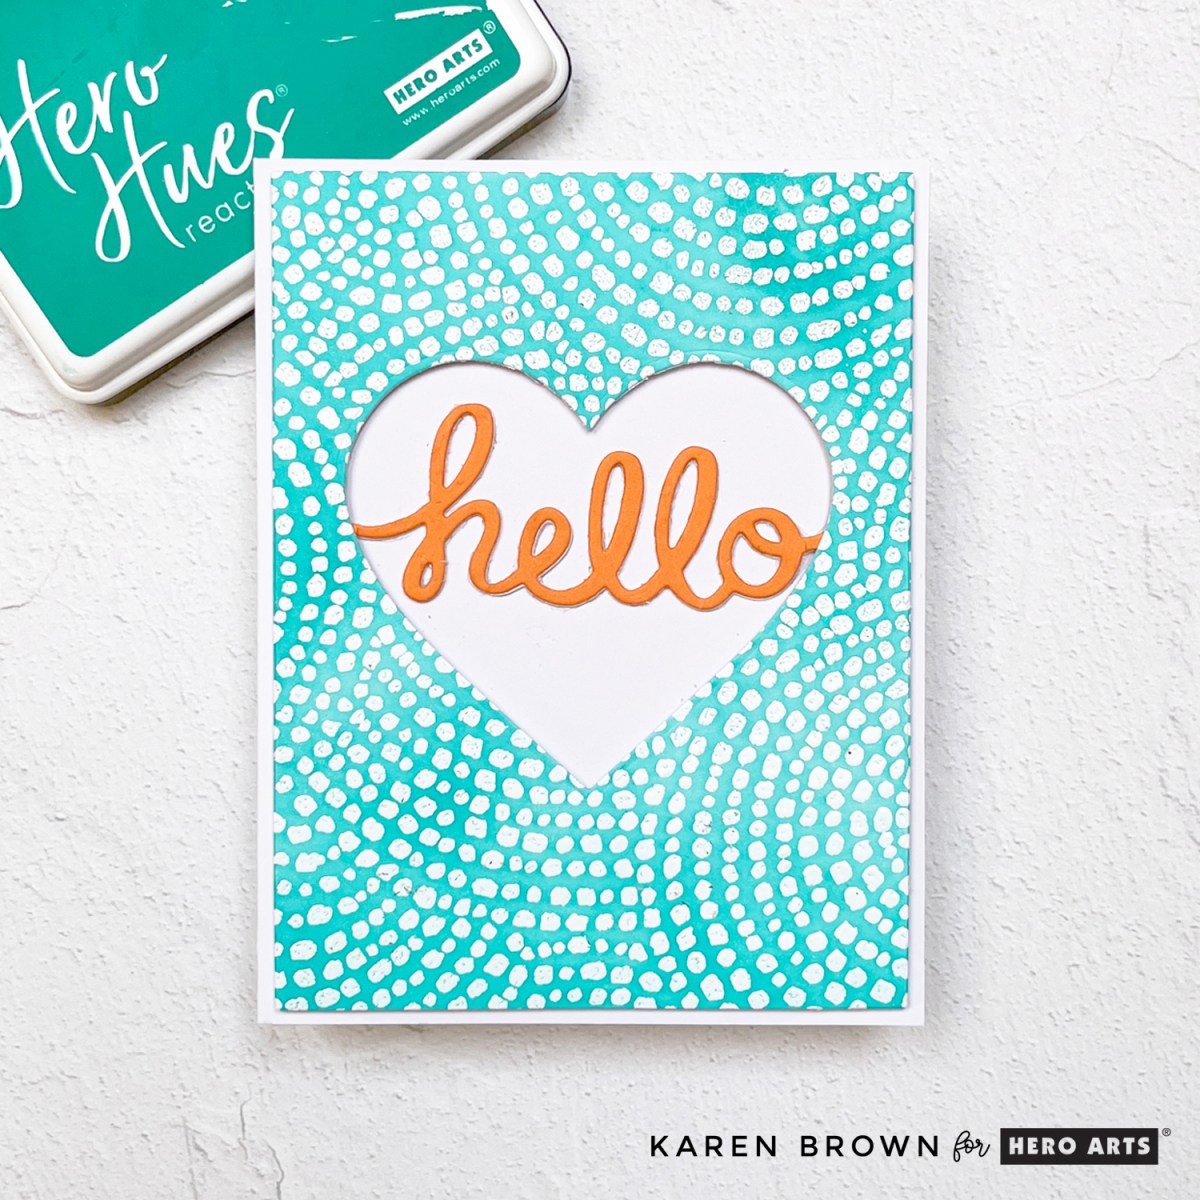
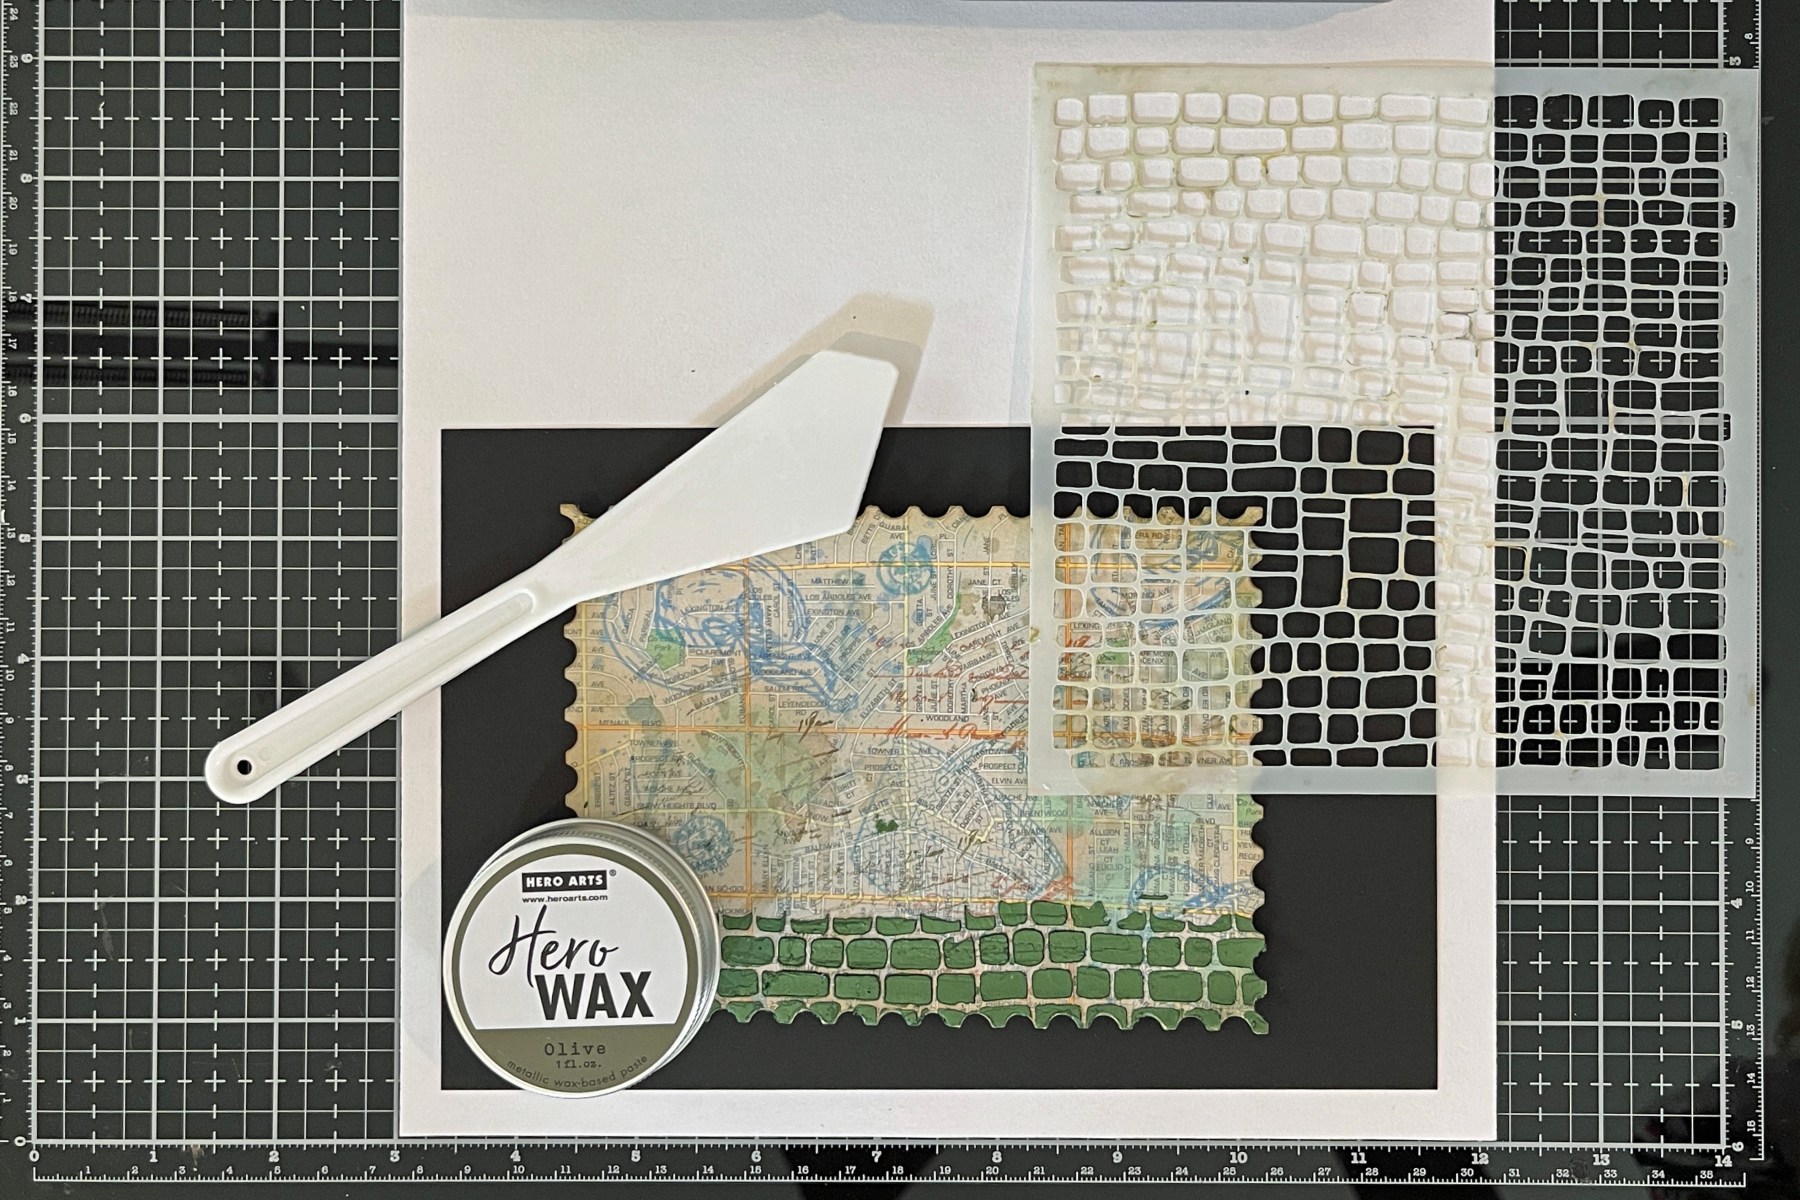
Next up is what may be my favorite Cling of the Month EVER: Cobblestone Courtyard. This rubber background stamp is a pattern of concentric circles that looks like a cozy plaza or mosaic.
For my first card, I stamped it in Unicorn White Pigment Ink and heat embossed with White Embossing Powder on Bristol Smooth cardstock. Then I ink blended over the top using Blue Raspberry ink to create a vibrant turquoise and white background. I polished the embossing with a microfiber cloth, and the crisp, clean results had me swooning.
For the second card, I used the leftover heart die cut and layered it over a Teal Topazheart, then a smaller white heart, and finally topped it with the turquoise Cobblestone heart. Another “hello” sentiment (this time in Woodland cardstock) finishes the look. The swooping tails of the sentiment are so charming! Two cards with a fresh, summery vibe!
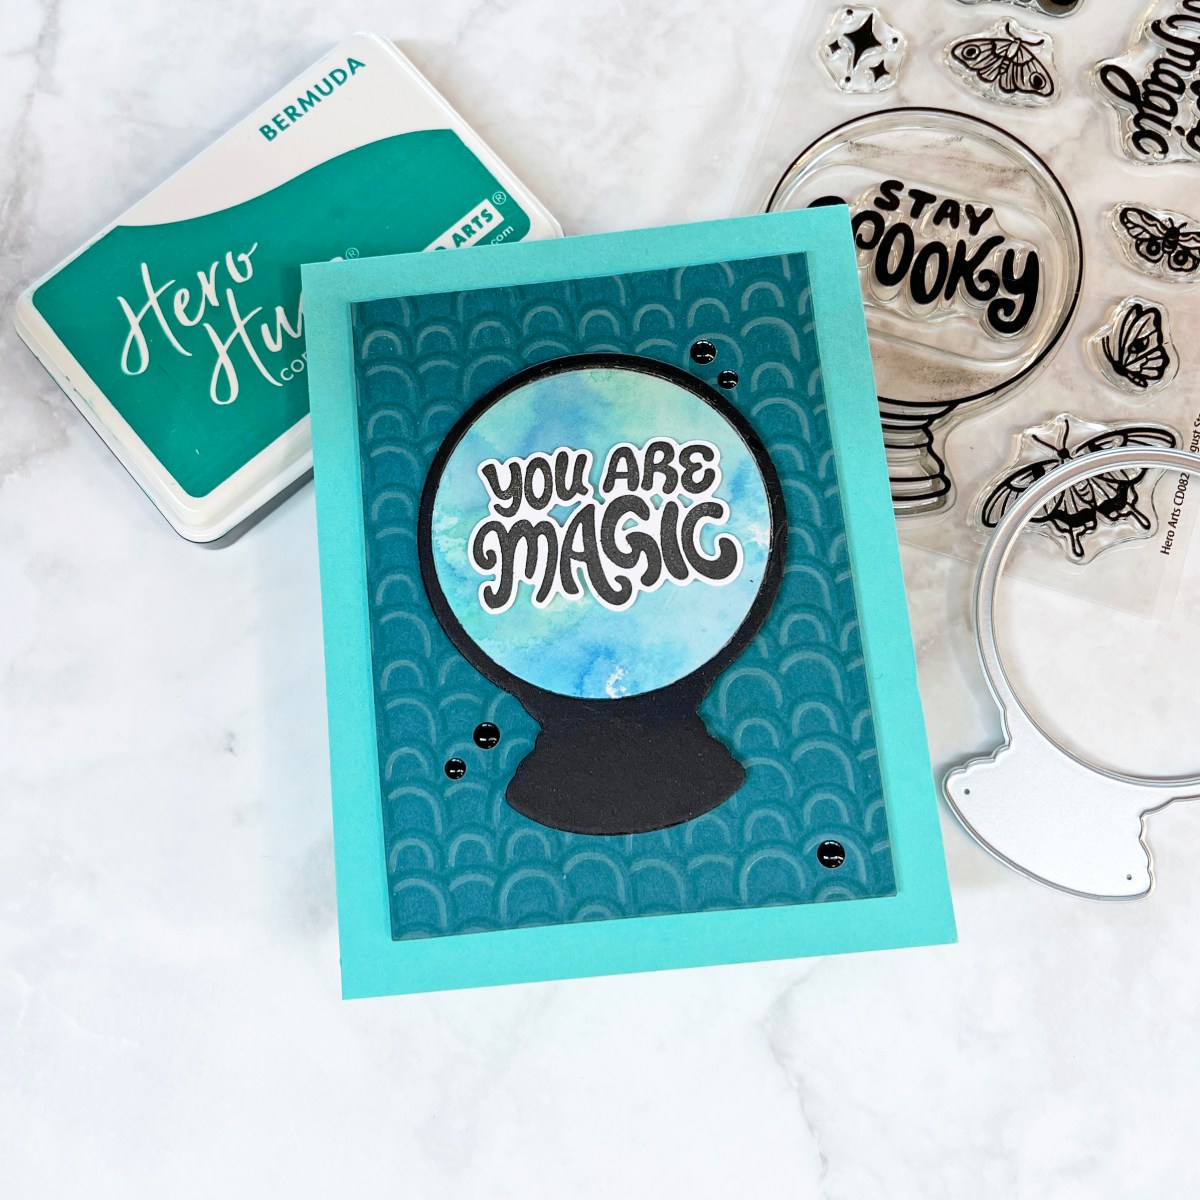
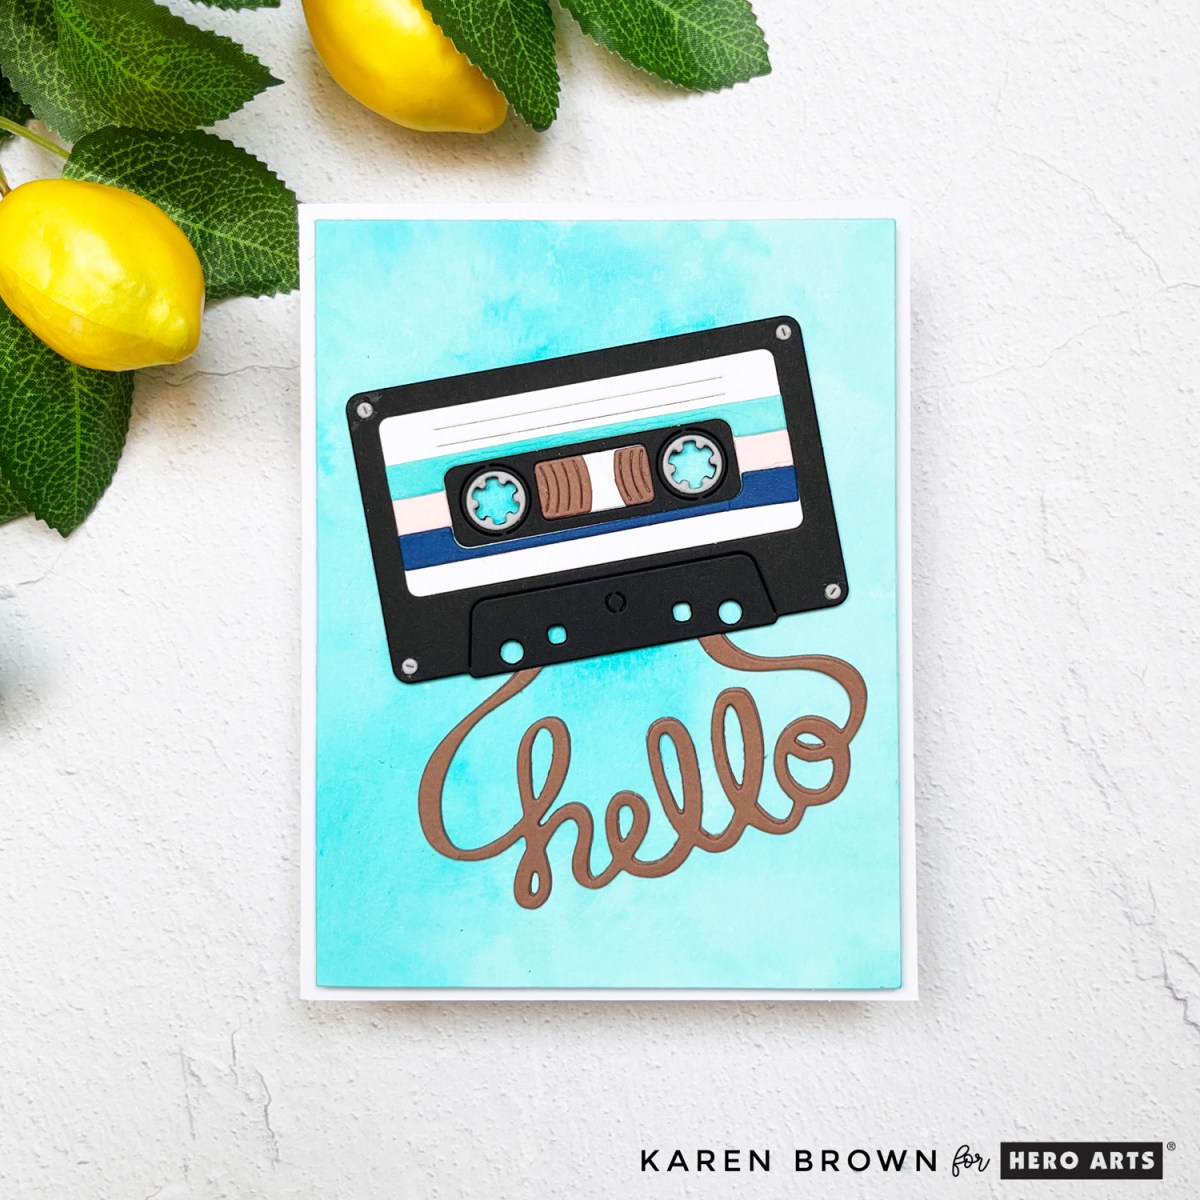
📼 Card 4: Mix Tape Magic
For my final card, I had fun with the Fancy Die of the Month: Mix Tape. This playful set includes a cassette tape die with the word “hello” cleverly shaped from the tape itself. I used this hello sentiment on three of my cards today.
I placed the cassette on a handmade ink-smooshed background using Blue Raspberry, Splash, and Pool Party inks. I wanted my background to look like a shimmery swimming pool. Want to try ink smooshing? Here’s how:
Ink Smooshing Quick Steps Tutorial:
I liberally inked a 6×6″ acrylic block with Blue Raspberry, Pool Party and Splash inks. This is the panel I used for my background.
I spritzed the ink with water and “smooshed” the block onto a piece of watercolor paper
I weighted the inked block with a book for 5 minutes
I uncovered my panel. If the ink pooled, I dabbed with a paper towel.
I made a “second generation” panel for a future project by taking a piece of Bristol Cardstock and soaking up the excess ink on my work space. So this is another Two-Fer!
The retro vibe of the tape plus the dreamy summer colors made this card a total blast to create.
Hero Arts will give away a $50 gift card, drawn from the comments left across the hop. Enter by Saturday, July 5th at 11:59pm PT, and the winner will be announced on the Hero Arts blog the following week. Leave a comment on all stops for more chances to win!
Whether you love to layer, emboss, smoosh or die cut, the July 2025 Hero Arts Club Kitshave something inspiring for every type of cardmaker. Don’t forget to follow along the Blog Hop to see even more road trip-ready inspiration. Thanks for stopping by—and remember: Just keep going!
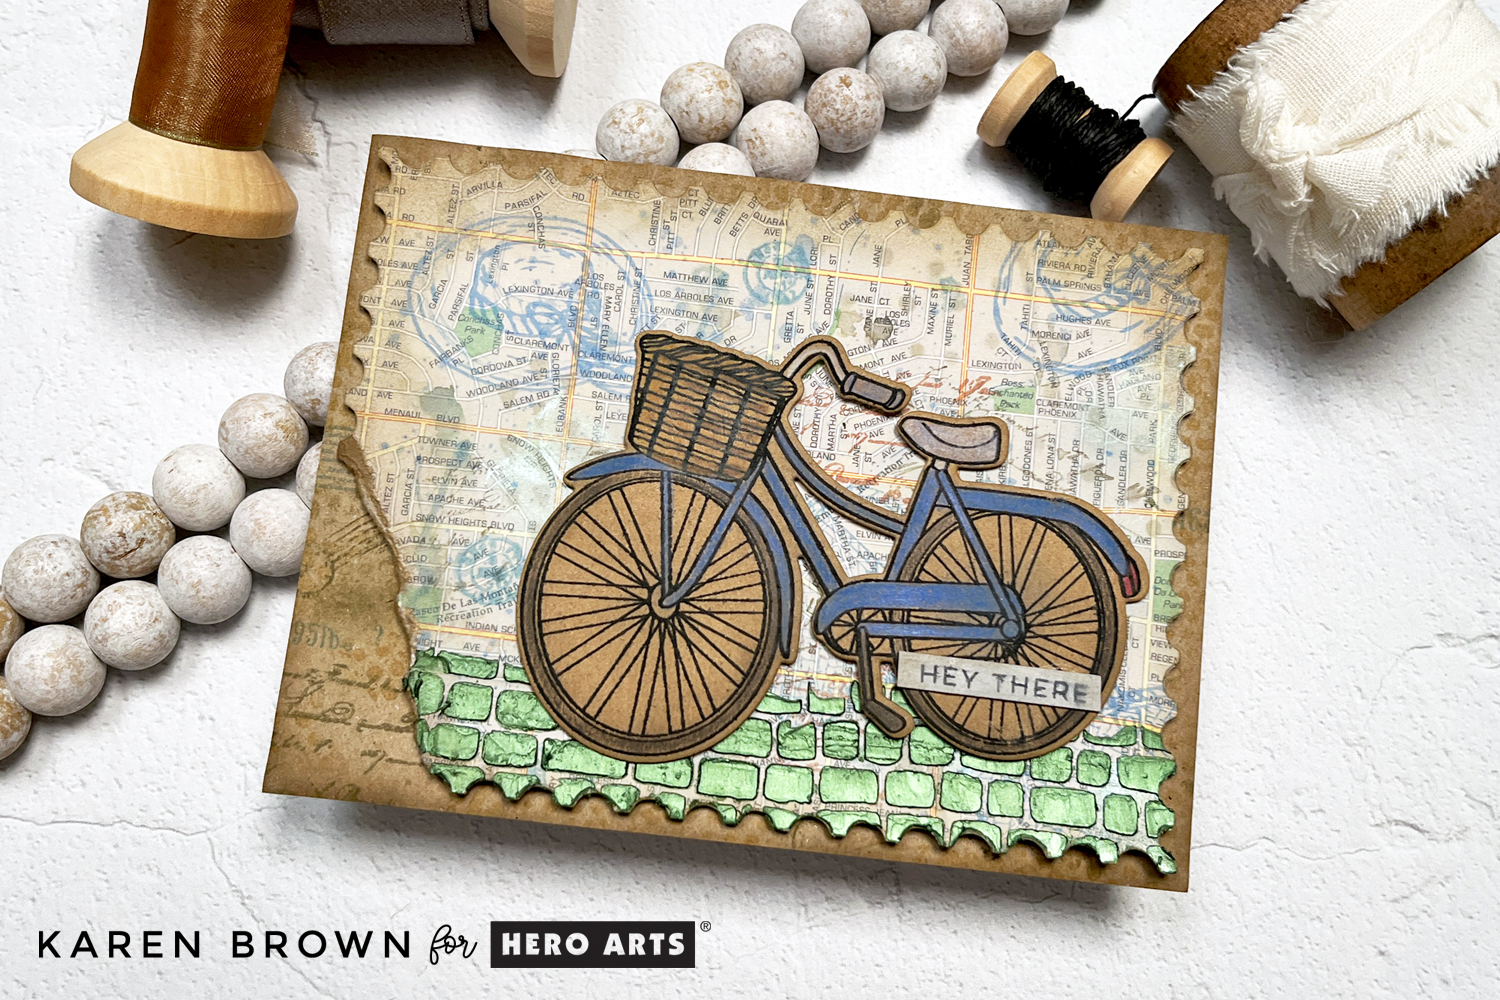
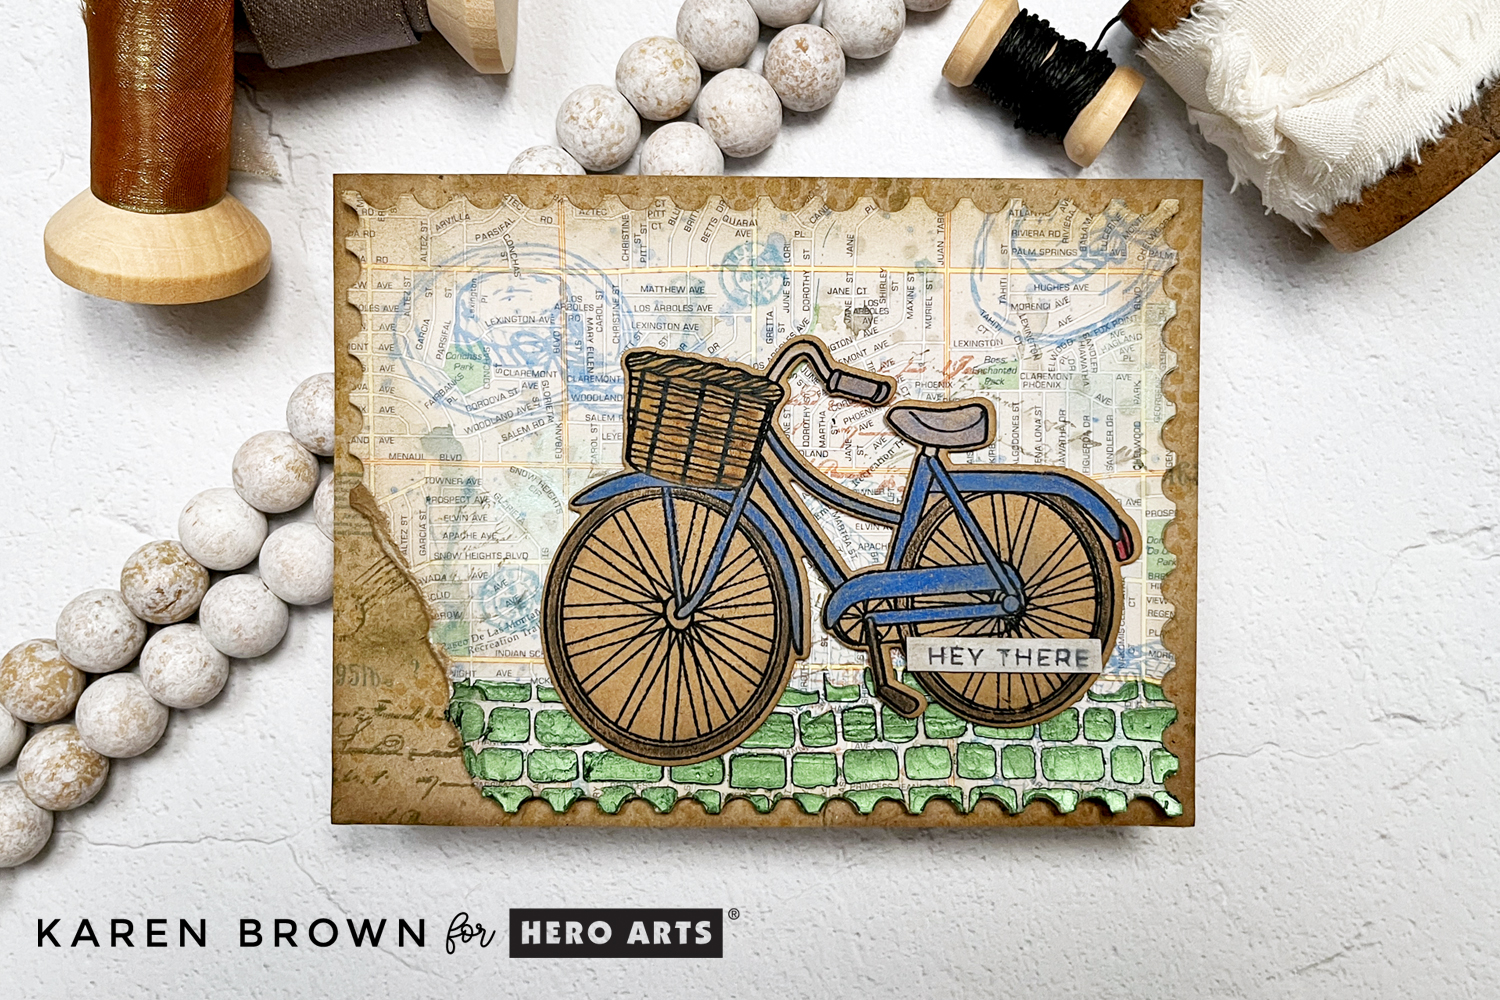
Today, I want to show you how to repurpose and upcycle paper to create a mixed media card. I started with a map from an old Atlas and a brown paper shopping bag. I used the bike stamp and die from Hero Arts June card kit as my focal point which I stamped on a panel cut from the shopping bag.
How to Create Mixed Media Cards Step-By-Step:
Above, you can see the repurposed papers that I used on my card. Here was my process:
I attached a piece of watercolor cardstock to the back of the Atlas page so that I would have a more substantial panel to work on. I used Matte Medium to adhere the two pages together. Dry.
To make sure there was no shine and to have the right surface texture for my mixed media project, I applied a layer of Gesso Acrylic Paint to the map. Dry.
I die cut the panel with a Nesting Postage Stamps Infinity Die and then ink blended Fawn and Root Beer along the corners and edges. I wanted a grungy vintage look.
I added watered down blots of Periwinkle and Root Beer. Dab some ink on acetate, spritz with a bit of water and dab on the panel. Tilt a bit to make it run. Blot up if you have more ink than you want.
Add ink splatters with a fan brush with the same inks used above, which adds color and depth.
I did second generation stamping (ink stamp, lightly stamp on scratch paper and then stamp background) with Root Beer ink. You can see I keep adding layers.
Tear the bottom left corner off the panel for a really old and tattered look. Ink blend along the tear line.
After looking at my panel I decided I wanted to darken the edges even more, so I added additional ink blending around the edges and corners.
Bicycle Focal Point:
On a panel from the brown paper shopping bag, I stamped the bike from the Hero Studio June card kit. I left it in the stamp positioner and colored with InkTense colored pencils. Then I restamped the bike for a crisp black look.
Die cut bike
Ink edges with root beer ink.
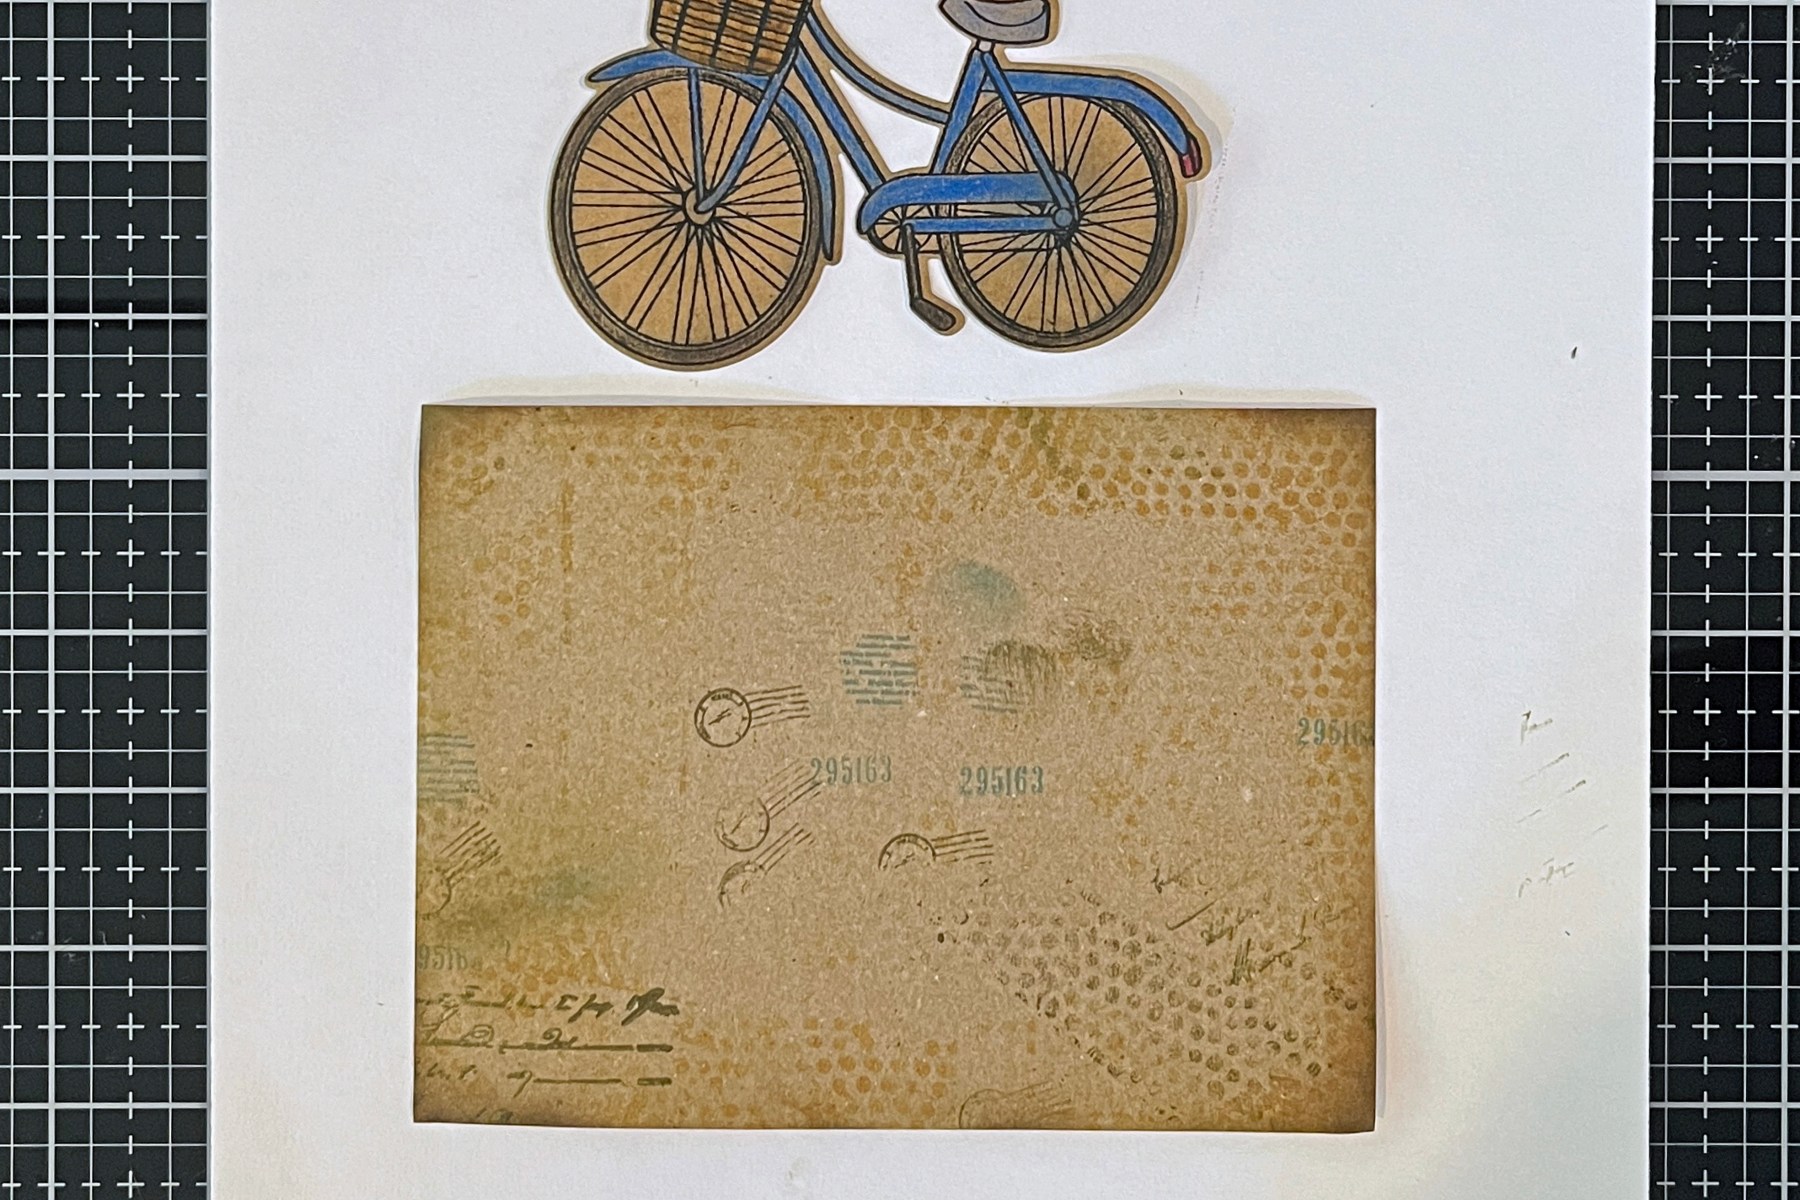
Tattered and Worn Base Mat:
Cut a second panel from the brown paper bag to act as a base mat.
Using the Rough Dot Bold Prints Stamp, stamp with Root Beer ink and Fawn Ink on the second panel (which is slightly larger than the map panel). Dab a bit here and there, heavier in some places, lighter in others for a vintage look.
In the bottom left corner add some text stamping for interest. This is where the torn edge will be positioned, so this area of the base will be more visible. I Used Vintage Postmarks and Tickets and Vintage Maps and Ledgers again and randomly added numbers etc around the perimeter of the card base.
Use What You Have! Old maps, shopping bags, sewing patterns, dictionary pages, music books—they all bring unique texture and charm to your cards. Mixed media is about building interest through layers, so don’t be afraid to play!