Hero Arts has NEVER offered a discount on their My Monthly Hero Subscriptions, but for a limited time, the Creative Team is able to pass on a Coupon Code to our dedicated followers.
After your subscription is in the cart, click “Checkout” without entering your discount code.
On the NEXT page, enter the discount code: KarenBrownSubscribe2024. So to recap, enter the discount code on the second check out page.
Note: this discount code is not valid with any other offers.
Hero Art My Monthly Hero Kits are just wonderful and now is the perfect time to give them a try. Subscribe for one month…or longer…you still get 15% off.
Masculine cards can be tricky, but when I saw Hero Arts Ramen Stamp and Die Bundle, I knew it would be the perfect set for my son-in-law’s birthday. He is a real foodie and I love the fun sentiment included!
How to Make an Ink Smoosh Background
I started by making my “Ink Smoosh” background. I dabbed Fawn, Papaya, Fog, Paradise and Pool Party inks in separate pools on my craft mat and spritzed with water. I then dipped a piece of watercolor paper in the puddle and let it dry. I did this four times.
Next, I stamped my images and then colored in with Artist Alcohol Markers. Die cutting was next. I also used my Rounded Rectangles Infinity dies to trim my background, mat and card base. The final step was to assemble my card.
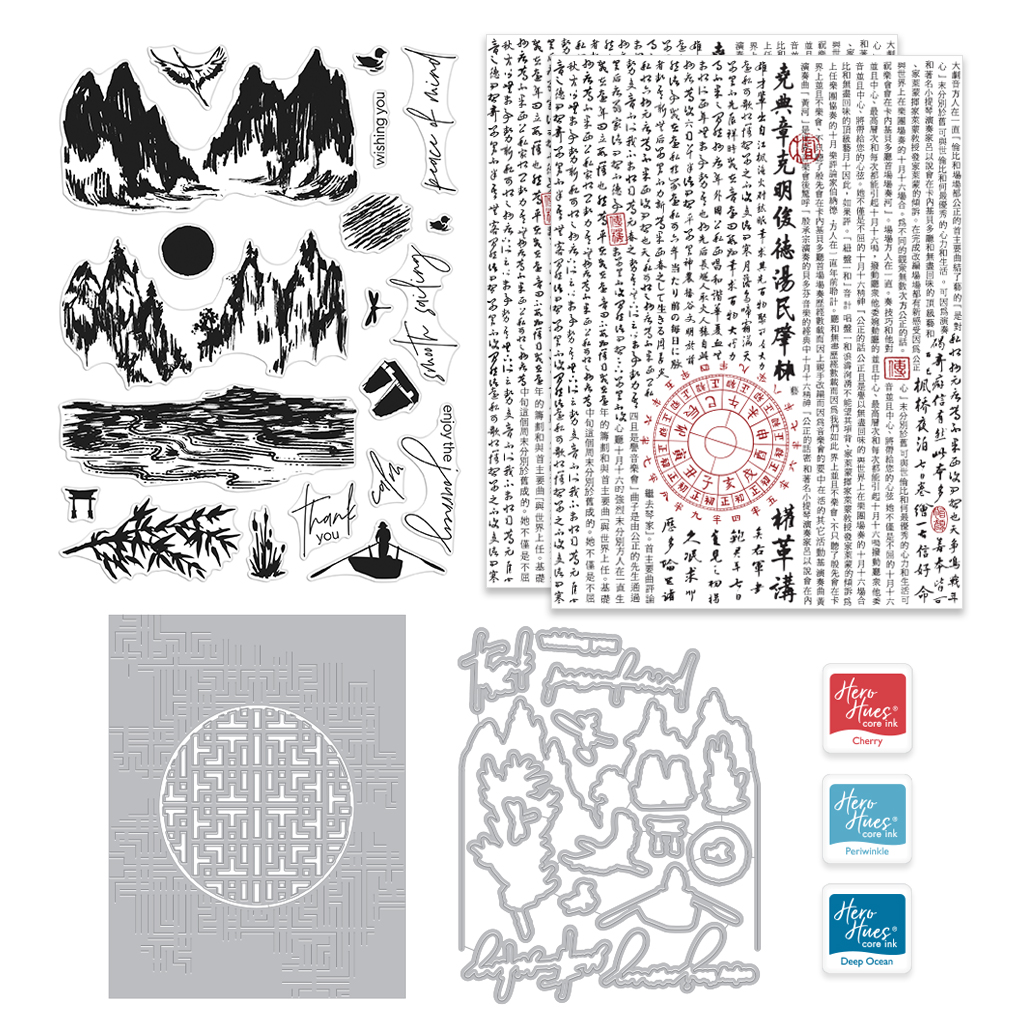
Boy do I love this March 2024 My Monthly Hero kit! I am sharing three cards today and they were all so fun to create. I think the Classic Kit is going to be wonderful for mixed media projects.
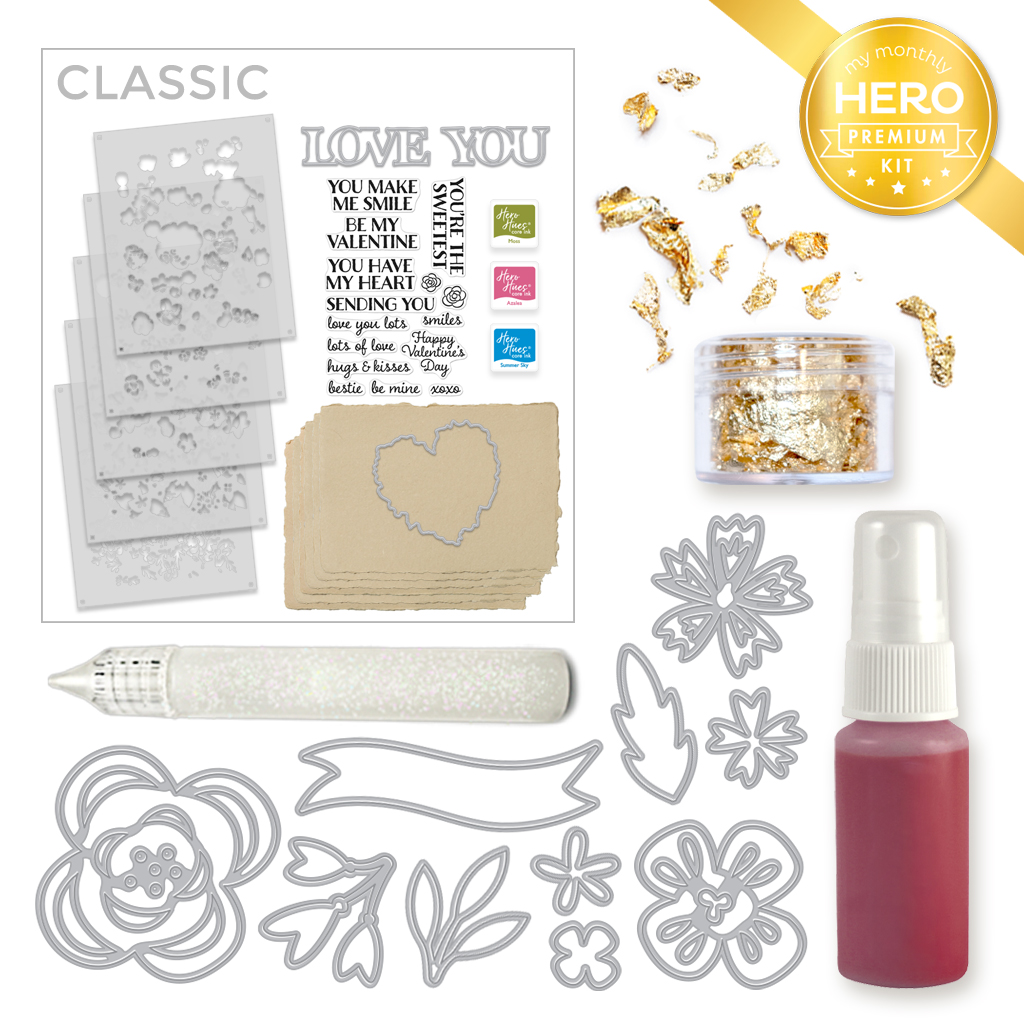
Classic Kit
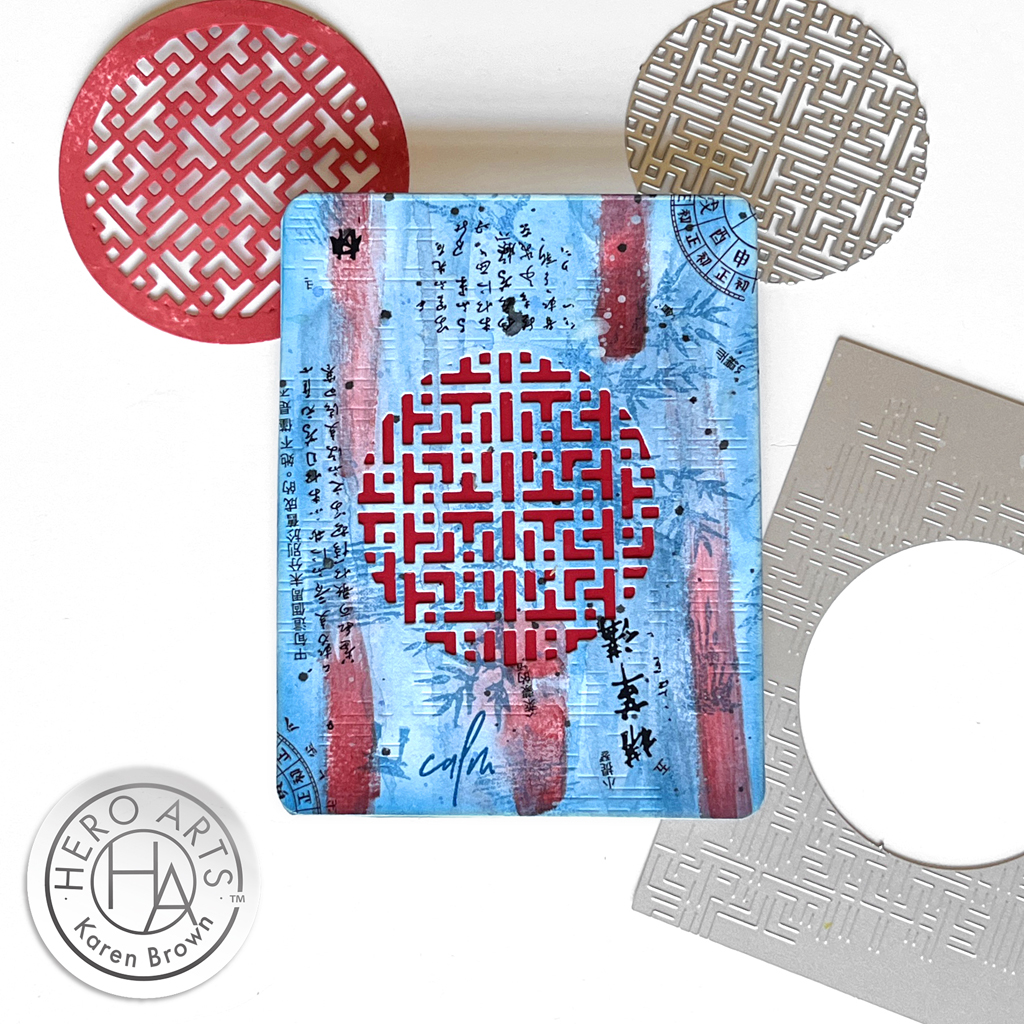
For today’s post, I created two cards using the Classic Kit. I recently discovered the wonderfulness of liquid watercolors and WOW, WOW WOW! What took me so long? So, Card #1 has a background created with the Classic Kit + three liquid watercolor colors.
My Process:
I added a small amount of Dandelion, Orange and Bright Pink liquid watercolor to my paint palette. With a wet brush, I painted bold strokes on my Luxe watercolor paper. I also added some drips to the panel. I dried and repeated the process one more time. I also put a large acrylic block on top for a bit so my panel would be nice and flat.
The Classic Kit contains two sheets of Rub-On transfers and I added portions of the transfers randomly to my background. Remember to leave a space for your sentiment.
I added a minimal amount of watercolor paint spatters.
Using Taffy and Fruit Punch inks, I stamped my sentiment and some images (crane, scribbles, bamboo leaf, character and reeds) from the included stamp set.
Next, I separated the circle inset from the rectangular plate with my snippers
Using just the rectangular plate (without the circle) I embossed my background and I love the subtle embossing and texture that it adds.
I painted a second piece of watercolor paper with just orange liquid watercolor. In some places I diluted the watercolor more and in others I added very saturated color so there was variation in my orange color. I dried and then weighted with an acrylic block.
I die cut my orange circle with the cover plate inset + a Circle Infinity Die for a medallion look. I liked this medallion so much that I created a few extras to have on hand for future mixed media projects. You can see one of them in the next photo.
This card reminds me of summer and orange sherbet and I love how happy and bright it is.
Classic Kit Card Using the Included Ink Cubes
For my second card, I followed the same process as Card #1, except I used the 3 ink cubes included in the Classic kit. I smooshed the ink on my craft mat and used a wet brush to paint my background. I also used the cover plate as it was designed and die cut the entire background panel, including the circular inset, at one time. I then backed the opening with a red panel that I created by going “direct to paper” in a circular motion with the Cherry ink cube.
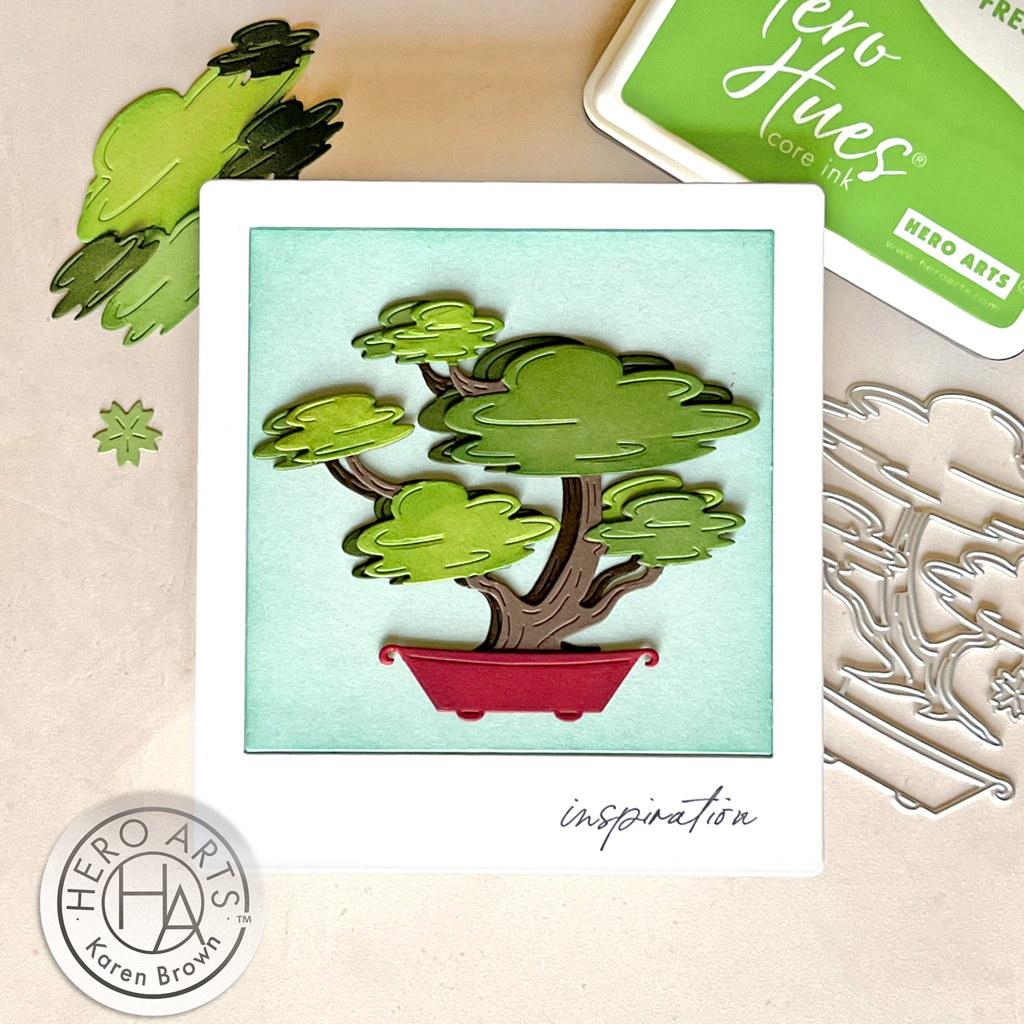
I LOVE die cutting so I really enjoyed making my third card featuring The Bonsai Fancy Die, which is March Add-On product. I die cut my components, ink blended a bit and popped onto a panel made using a favorite of mine, the Journaling Photo Frame Infinity Die Set. The sentiment is from the Ornate Frames Hero Transfer . If you’d like to see an additional card I made using the Photo Frame Set, click HERE.
We will give away a $50 gift card, drawn from the comments left across the hop. Enter by Sunday, March 10th at 11:59pm PT, and the winner will be announced on the Hero Arts blog the following week.
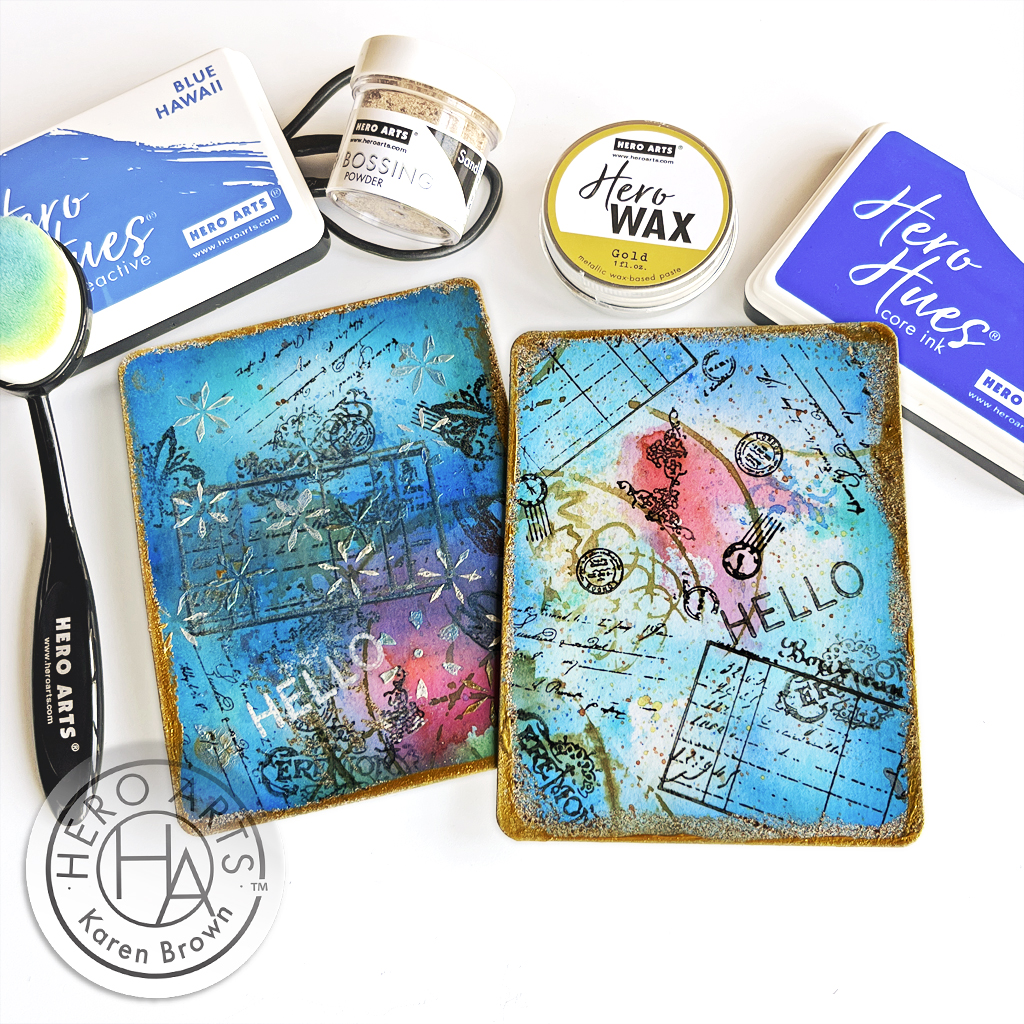
Hero Arts Spring Catalog Release is live and I love all the new Mixed Media products that they added to their line. I used a bunch of them on these two cards.
Today is the last day for Hero Art’s Blog Hop, which you can find HERE.
My Recipe:
I ink smooshed several layers onto my Luxe Watercolor Paper background, drying in between each layer. See colors below.
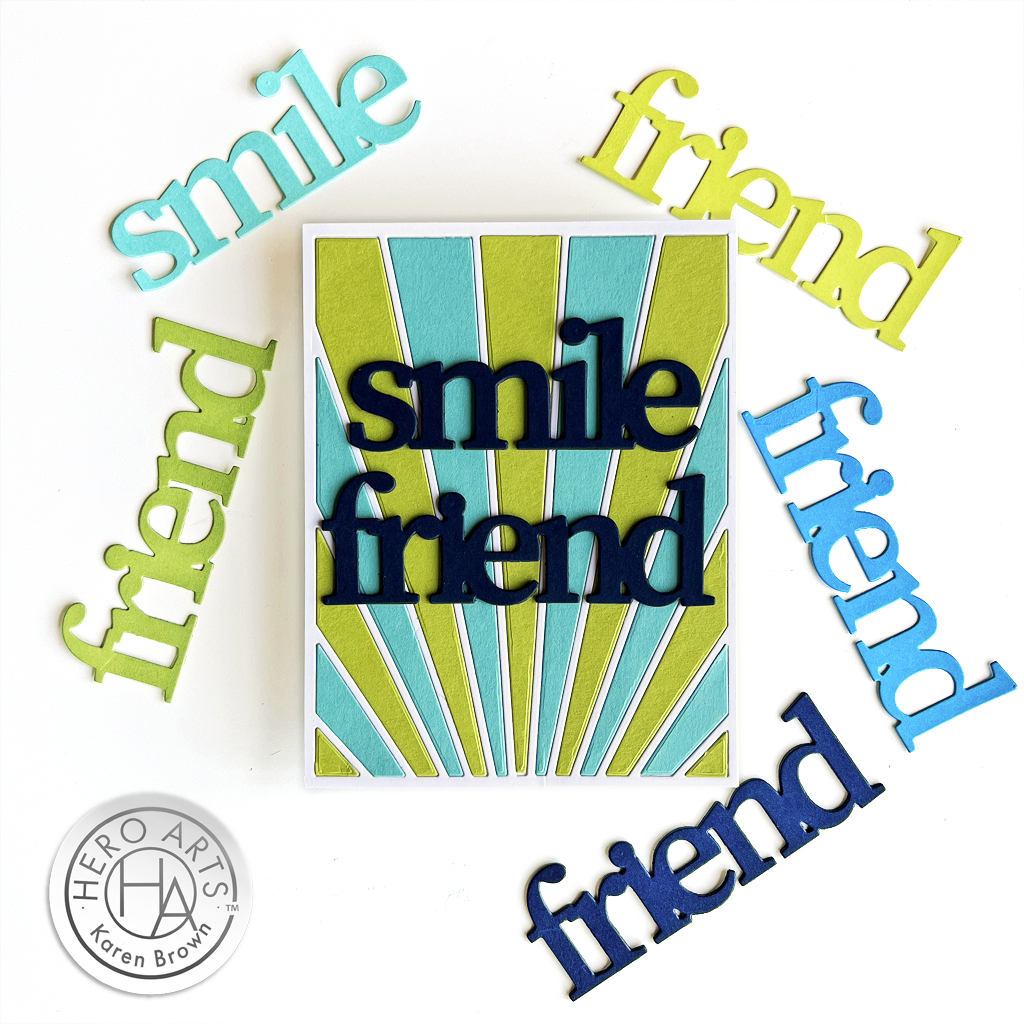
I wanted to start off with two fabulous new sentiment dies that I just love from Smile Friend Stamp and Cut XL. I went crazy die cutting a bunch so I will have them on hand for future cards.
DI945 Rays of Color Window Fancy Die (recently sold out)
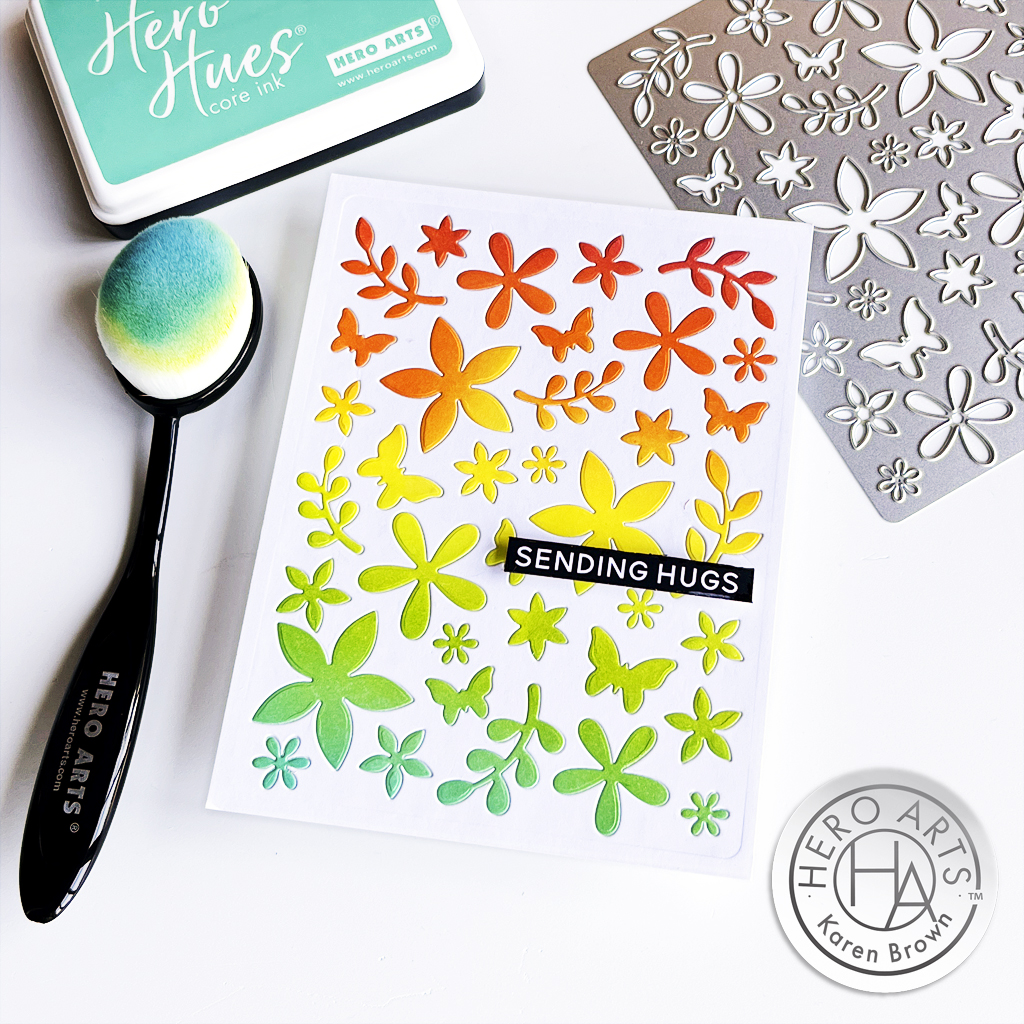
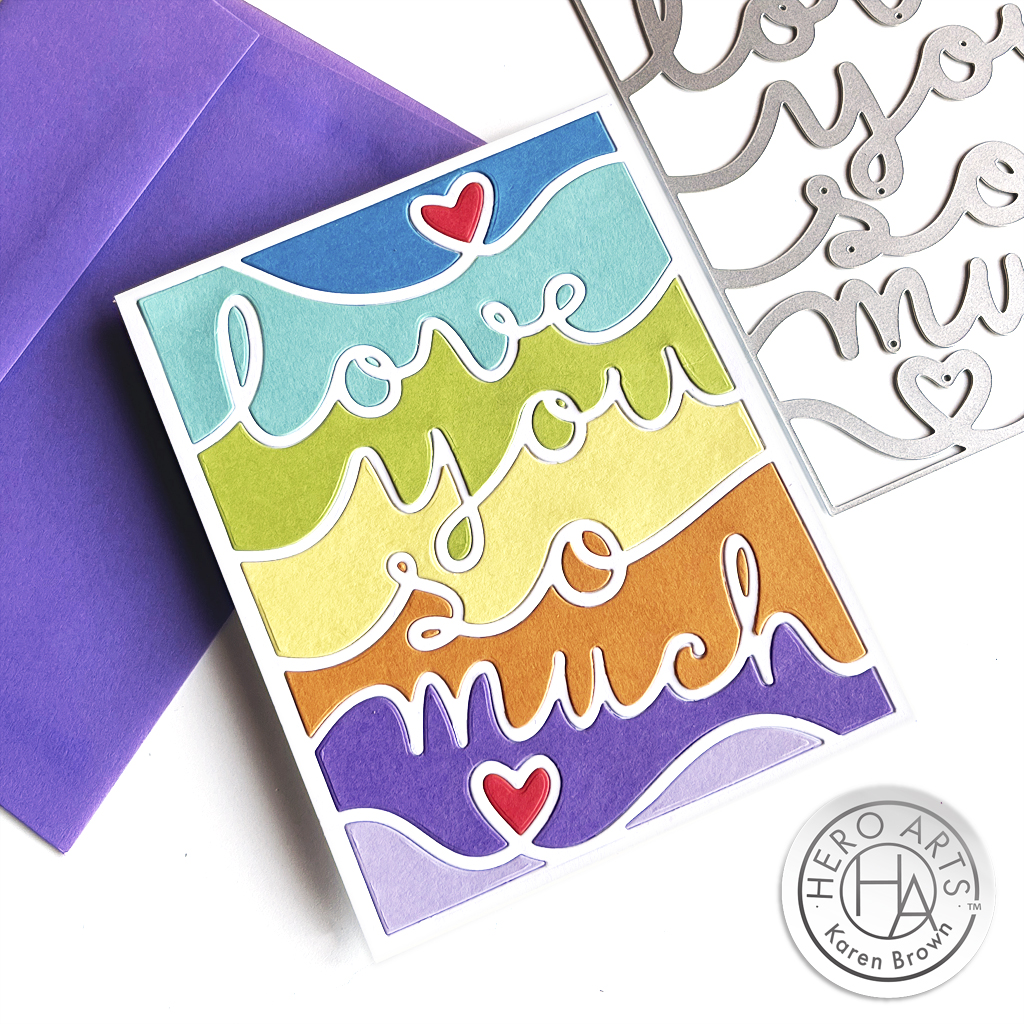
Flower Pattern Cover Die
I LOVE cover dies so I was excited to create with this Flower Pattern Cover Die, which is perfect for Spring and Summer. I started by ink blending a rainbow panel which I then die cut with the cover plate and then used the inlay technique to create a one layer background. This went more quickly than you would think because the die cuts fit like a good quality puzzle. My placement and gluing took about 20 minutes.
TIP: Keep your die-cuts in the panel until you start gluing so you know the orientation and position on your background.
Products Used on My Flower Pattern Cover Die Card:
Birthday Animals Stamps + Pointed Arches Infinity Dies
Isn’t this Alligator the cutest? He is one 7 animal stamps included in the Birthday Animals Bundle. The set also includes 8 birthday/everyday sentiments. I combined the stamps with the Pointed Arches Infinity Dies. Infinity Dies are definitely staples in my craft room and I like the interest the arches add to projects.
I love everything about Rub-on transfers. I love how easy they are to use, the look they add to projects and how fun they are to apply! This Spring, Hero Arts included “Sympathy Transfers” in their release. I did some quick ink blending on my background and then added my Hero Transfers for a quick and easy card.
Hero Arts will be giving away two $50 gift cards, drawn from the comments left along the hop. Comment on all the blogs for more chances to win! You have until Wednesday, February 21st at 11:59pm to enter. The winners will be announced on the Hero Arts blog.
Kailash Naidoo is next on the hop and I have links to everyone below.
I recently attended Hero Arts Mixed Media Stamp Along and found it so informative! This card was inspired by @cheiron and her wonderful class. I used different products and colors so my card doesn’t look anything like Cheiron’s, but her class gave me the creative spark for my card. Sometimes it is fun to get inky and messy!
For this card, I was trying to simulate a Dove flying over a city at sunrise. I knew I wanted a bold background to contrast with the white Dove.
My Process:
I put 5 sunrise colors of reactive ink (colors listed below) on my craft mat and spritzed with a bit of water and then painted bands of vertical color all over my watercolor cardstock panel. There is no right or wrong way just start painting! I dried and repeated two more times. During the process I also added drips of color.
I love Hero Rub-On Transfers and I added parts of the city map from Collage Backgrounds to three spots on my background.
I added texture with the Cobblestone Stencil. In some places I used just Gold Hero Paste and on others I rubbed just a bit of Black Hero Wax on the Stencil and then added Gold Hero Paste. I really love the black wax and gold paste combined together.
Using a splatter box (for me a repurposed cardboard box) I added three layers of splatters and dried in between each color. White, Blue Shimmer and Orange Shimmer. I love the complexity the shimmer splatters add!
Hello and welcome to the February 2024 My Monthly Countdown! I must say, this kit is full of wonderful products that I know you will love. The kit goes live tomorrow, Monday, February 5th, so stay tuned. Meanwhile, sit back and enjoy some inspiration, sneak peeks and giveaways.
WIN A KIT BEFORE YOU CAN BUY IT: Just leave a comment on this (and every) Countdown to Creativity post. Hero Arts will randomly draw one lucky winner from comments left across all countdown posts on the Hero Arts blog. The winner will be announced first thing Monday morning, February 5th, before the kit launches at 10am Pacific. The more you comment, the more chances you have to win!
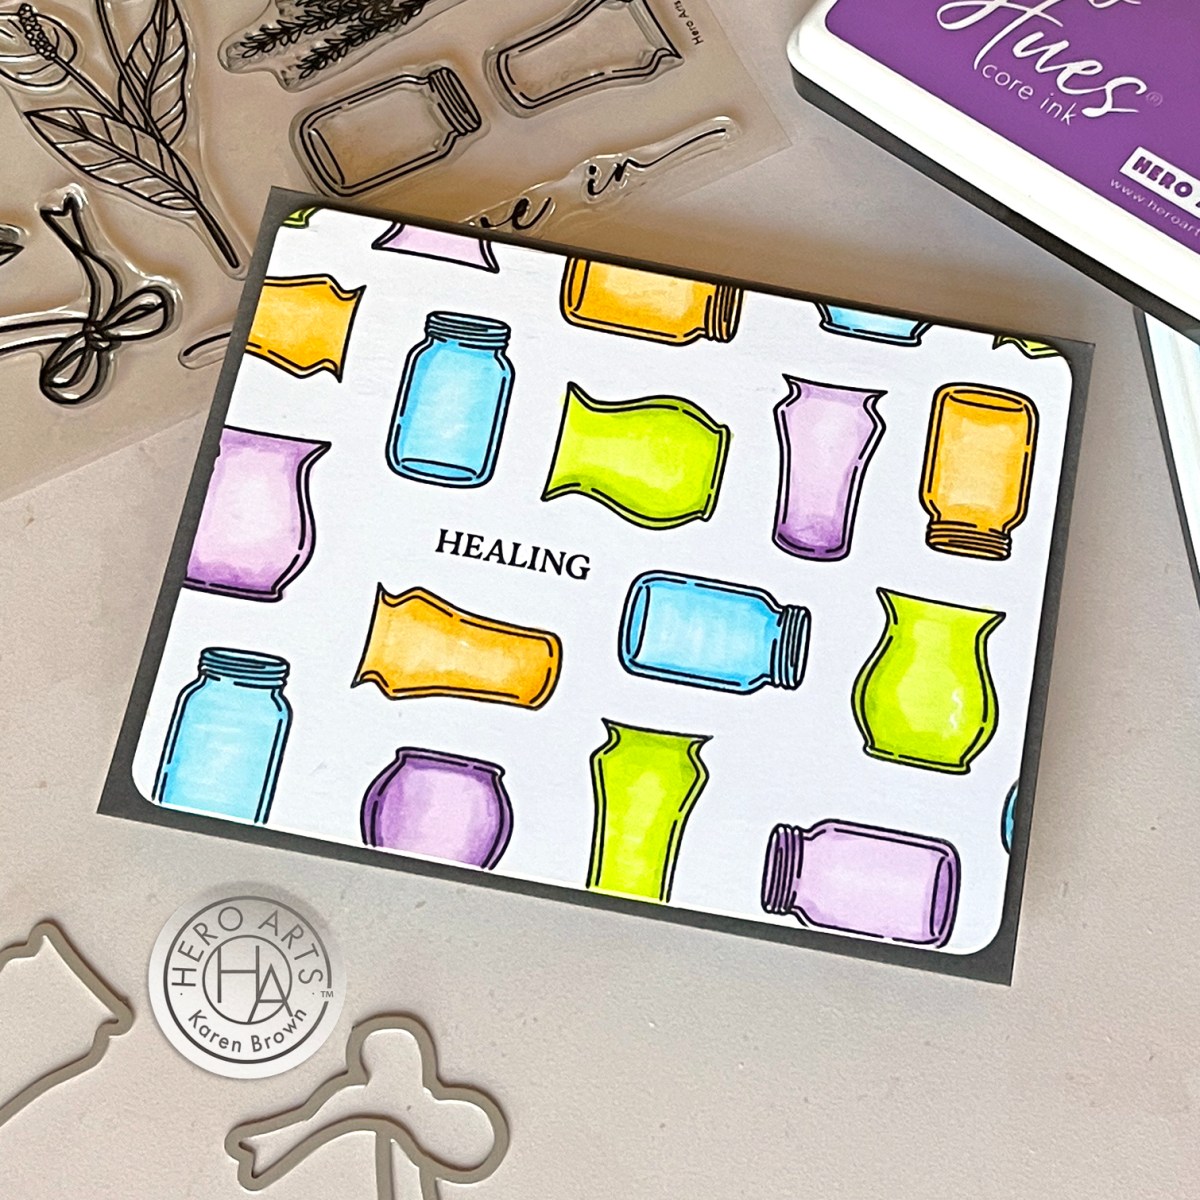
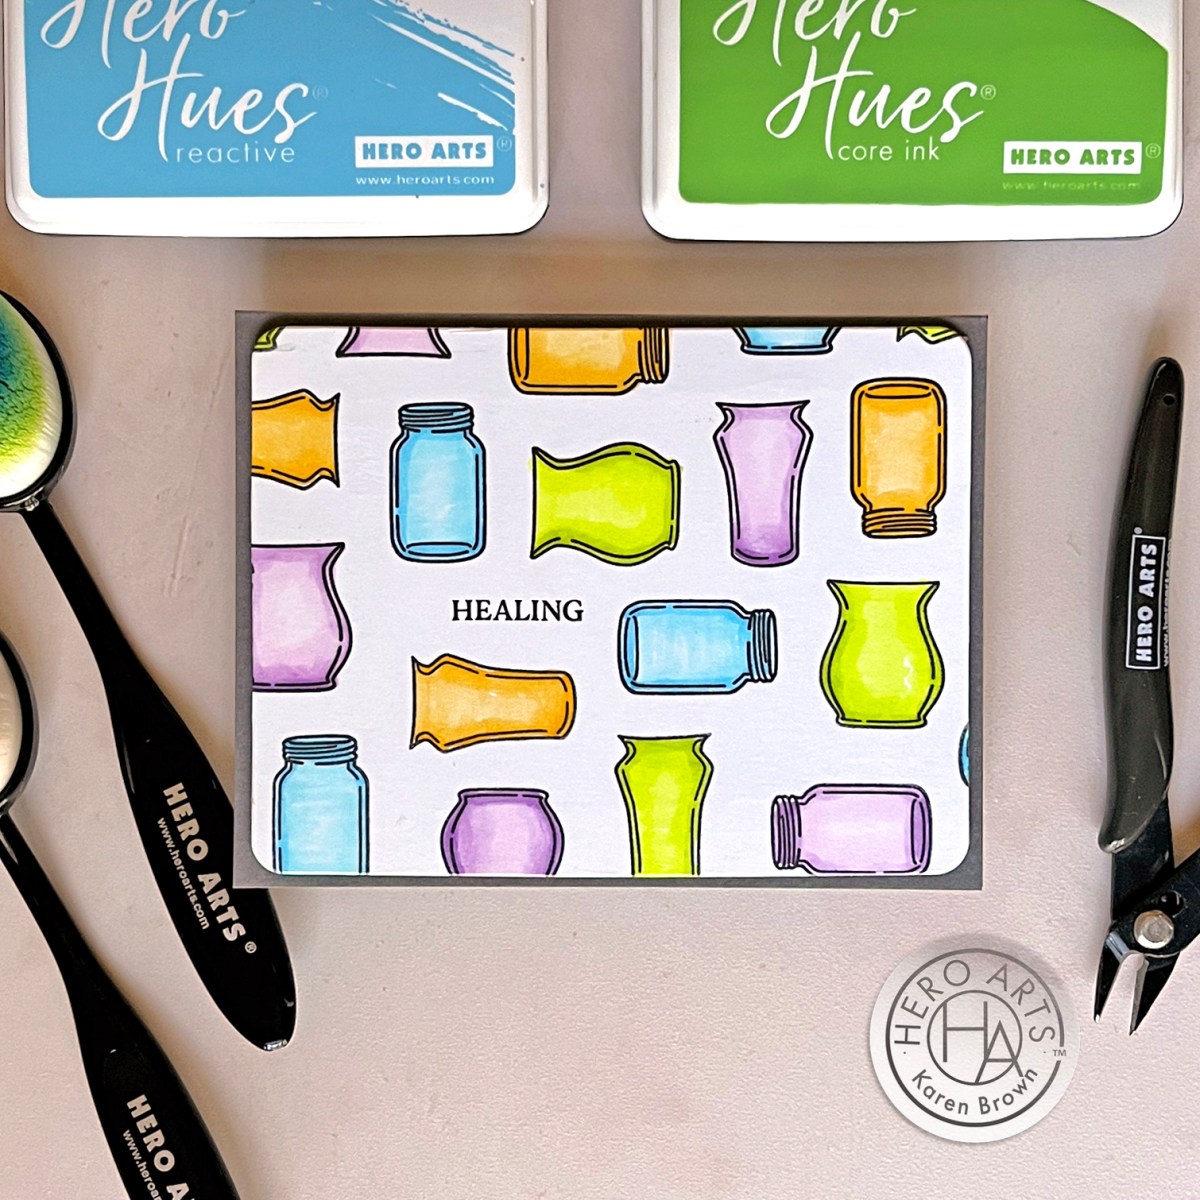
Pattern Stamping
I really enjoy pattern stamping and the stamps in the Classic Kit are just perfect for this technique. There is something so therapeutic about coloring glass jars and vases.
Be sure to stop by and visit the Hero Arts Blog for more inspiration and then I will be back on Monday with another post featuring the Classic Kit + some great Add-On Products.
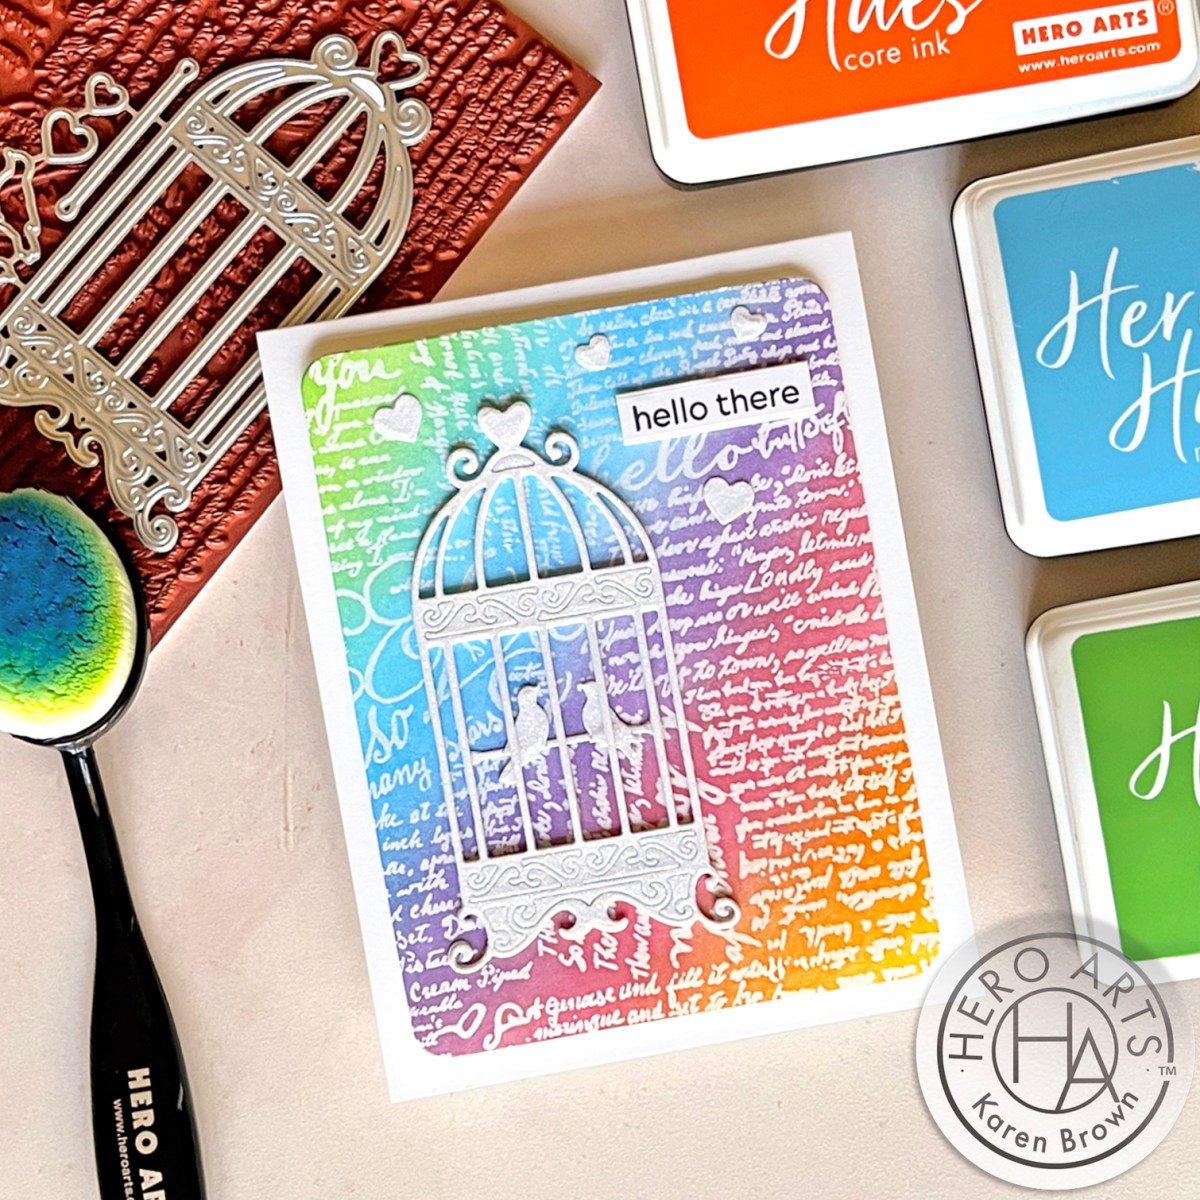
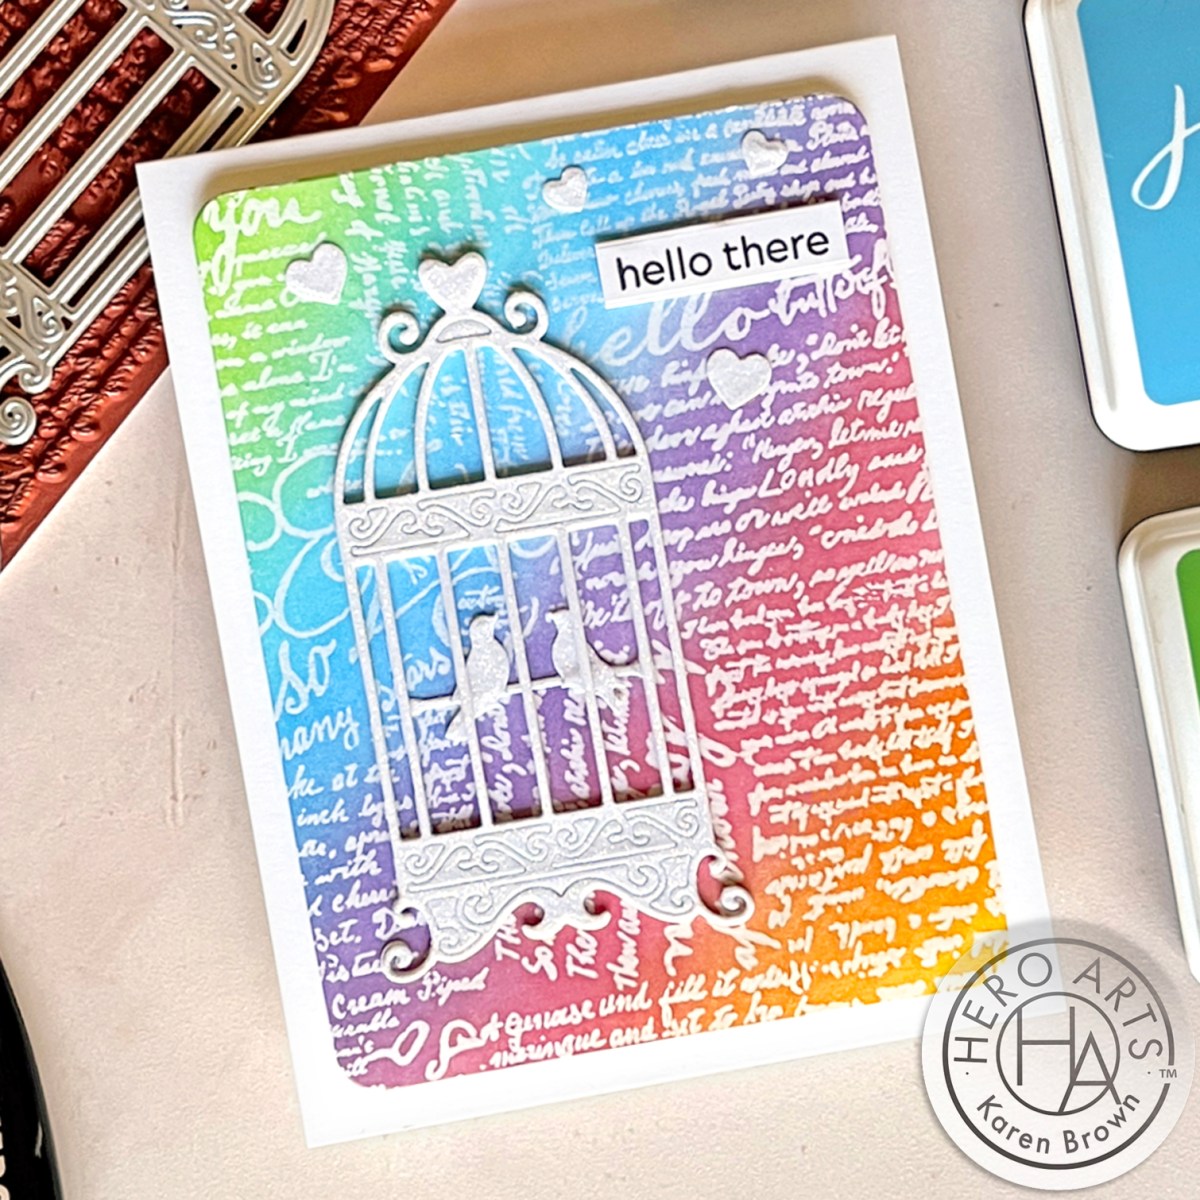
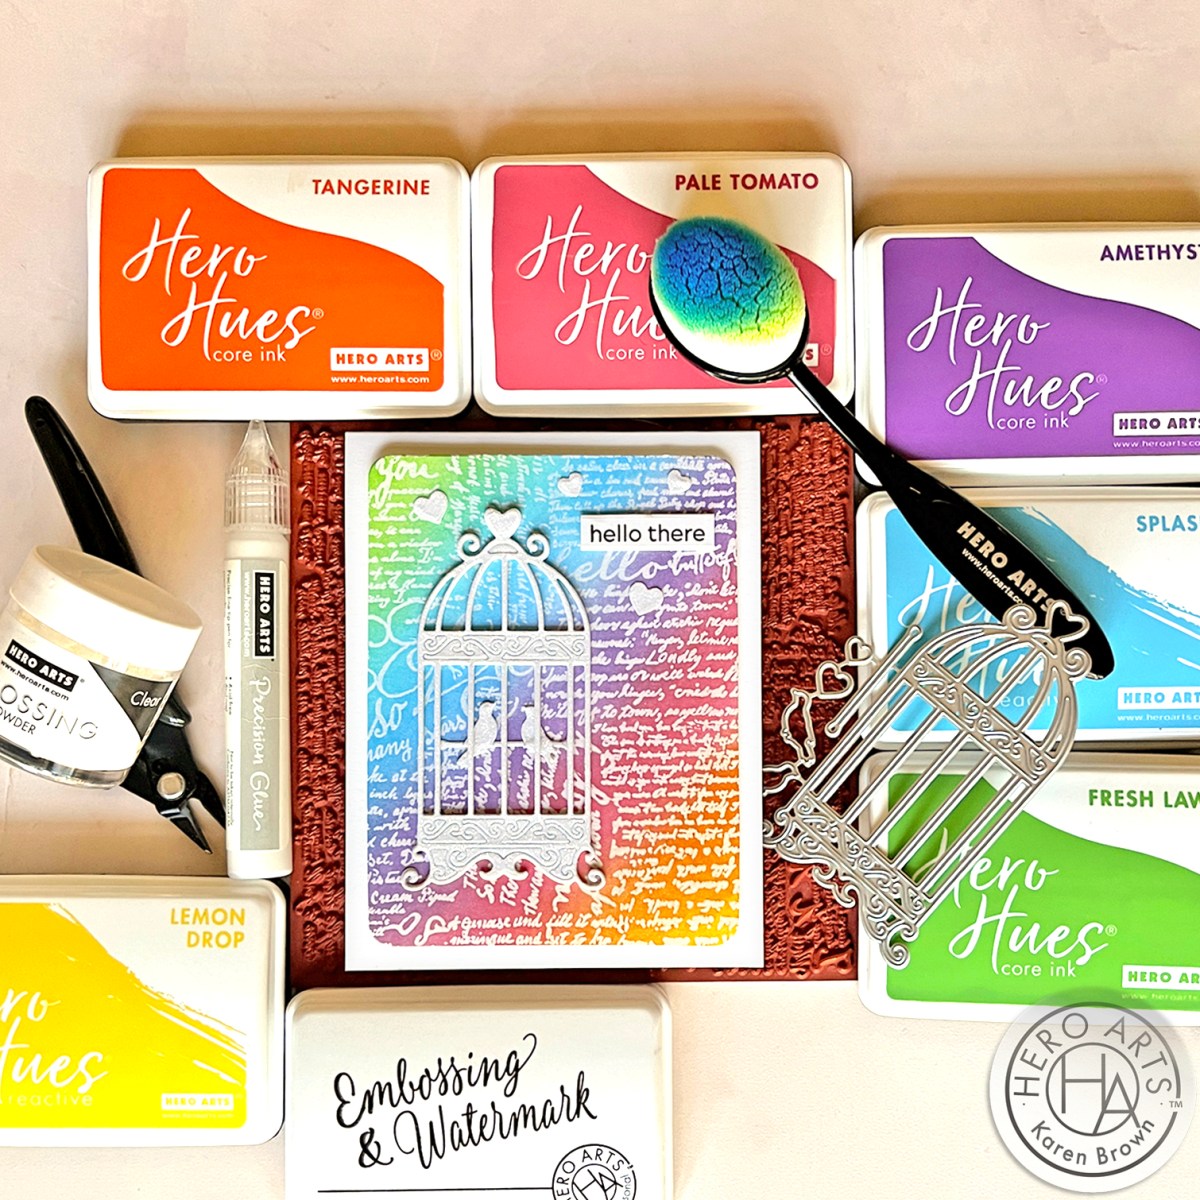
Hello and welcome! Karen Brown here and I have a very fun project to share with you today featuring this delightful Vintage Birdcage die. I love color and texture and I used lots of both on this card.
I buffed the embossed script with a microfiber cloth so the embossing was ink free.
I die cut the birdcage 3 times. Twice from Deluxe Smooth Cardstock and once from White Glitter Cardstock. This white is my absolute favorite glitter cardstock. It is hard to photograph but is so beautiful in person. I also cut 2 birds and 4 hearts from glitter cardstock.
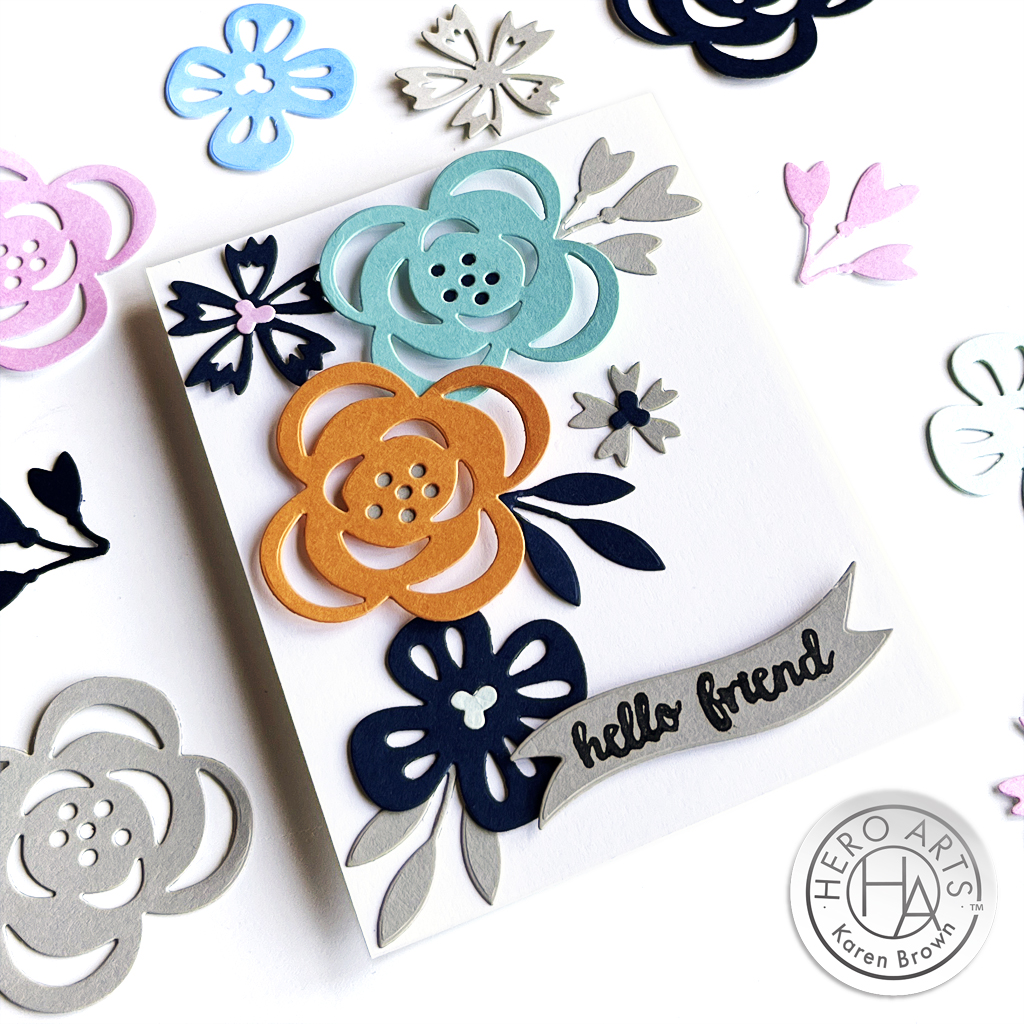
I can’t seem to get enough of the fun florals in this month’s Premium Kit! (If you would like to see my first card featuring these dies, click HERE. ) I love the fresh look of these blooming dies and I so enjoyed creating and working on the layout for this card.
This Valentine Wreath die is SO beautiful! It has the simple yet elegant look of Letter Press and I thought it would be quite striking with a fresh bright blue and clean white color palette. I stamped the wreath with Indigo Core Ink and then die cut the wreath, an extra floral cluster (which I added to the bottom of the wreath) and the sentiment. I cut down an A2 Top Folding Card Base to 4 1/4 x 4 1/4″ and adhered my die cuts with foam adhesive squares.
Hero Arts will give away a $50 gift card, drawn from the comments left across the hop. Enter by Sunday, January 14th at 11:59pm PT, and the winner will be announced on the Hero Arts blog the following week.
Hello and welcome to the January My Monthly Countdown as we approach Hero Arts first kit release for 2024! I must say, this kit is a beauty full wonderful products that I know you will love. The kit goes live tomorrow (Monday, January 8th) so stay tuned. Meanwhile, sit back and enjoy some inspiration, sneak peeks and giveaways.
WIN A KIT BEFORE YOU CAN BUY IT: Just leave a comment on this (and every) Countdown to Creativity post. Hero Arts will randomly draw one lucky winner from comments left across all countdown posts on the Hero Arts blog. The winner will be announced first thing Monday morning, January 8th, before the kit launches at 10am Pacific. The more you comment, the more chances to win. Good luck!
MMH January 2024 Premium Kit
My project today features The Premium Kit and boy did I have fun playing with it! I started off by die cutting this delightful breezy flower in five of my favorite colors and then I lined them up in a row so they formed a border at the bottom of my card. Clean and simple die-cutting, but I think it has a lot of interest.
Be sure to stop by and visit the Hero Arts Blog for more inspiration and then I will be back on Monday with another post featuring the Premium Kit + some great Add-On Products.