The December 2025 Hero Arts Stamp & Die Kit of the Month is called Cup of Love, and it’s perfect for creating quick, modern, and heartfelt get well cards. I always need get well cards on hand, so I love having clean and simple designs that I can mass produce—and this one definitely delivers.
This month’s kit features a charming soup cup, chopsticks, labels, and warm “feel better” sentiments that make it easy to whip up comforting cards for friends and family who need a little cheer.
Clean + Modern Design With Easy Stamping
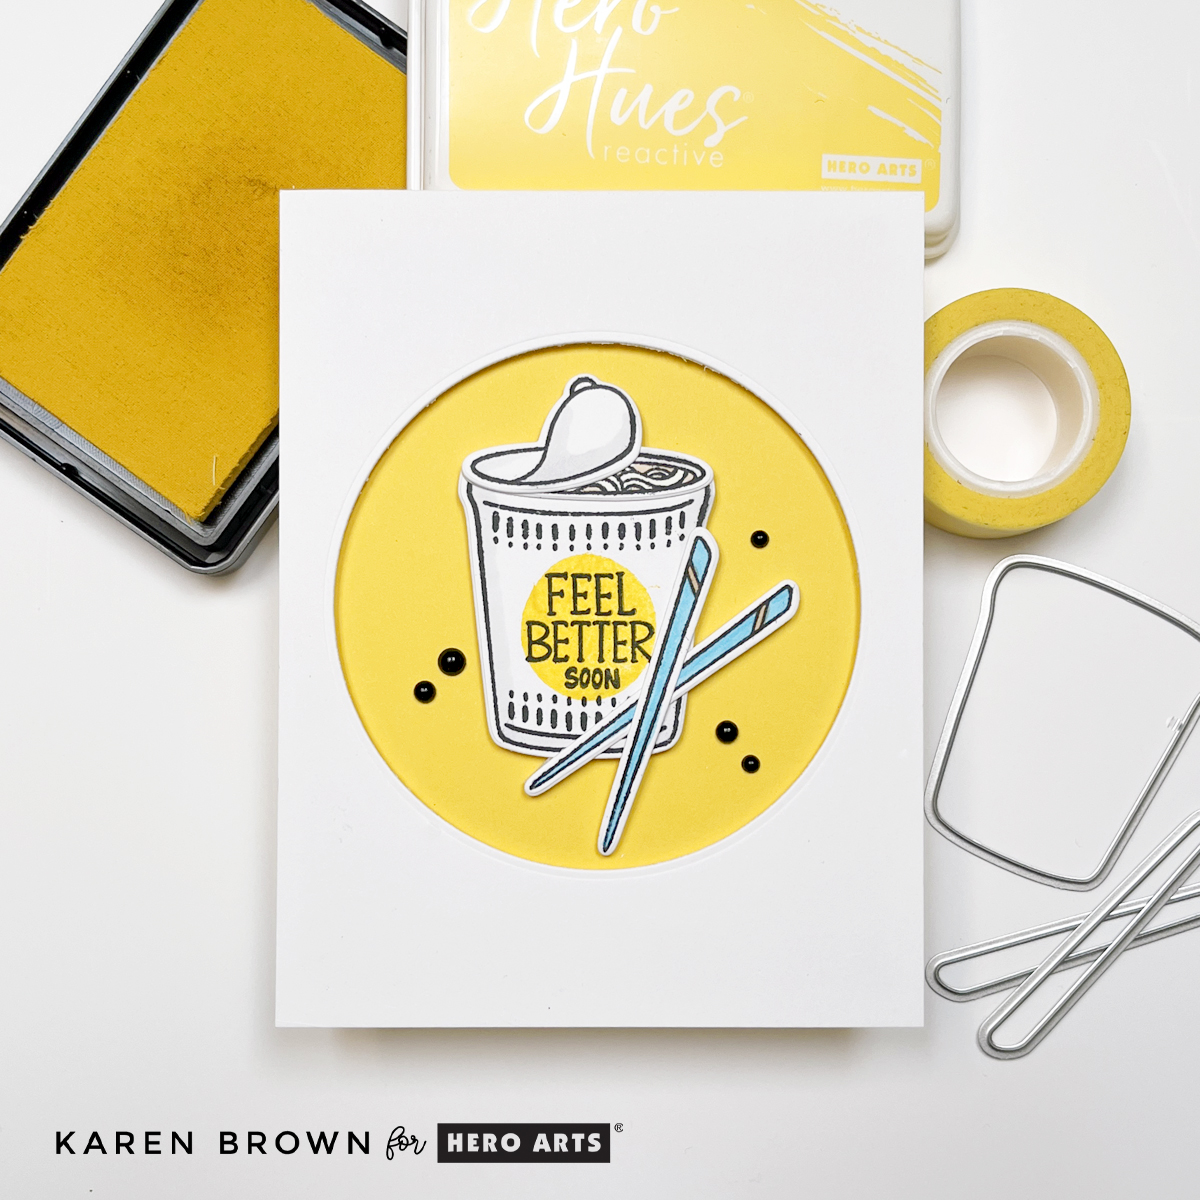
For today’s card, I leaned into a fresh white and yellow color palette with pops of crisp black stamping and a hint of blue. The combination feels clean, modern, and cheerful—just the mood you want in a get well card.
Next, I stamped the round yellow label with Lemon Drop Ink. I waited a minute for the ink to dry, stamped the sentiment “feel better soon” and die cut the image.
I stamped and colored the blue chopsticks, die cut them, and crossed them for a playful finishing touch.
For the background, I die cut a circle from the center of a white A2 cardstock panel using my Hero Arts Nesting Circle Dies.
I layered this white panel over a yellow A2 card base, popping it up with craft foam for dimension.
In the recessed yellow circle, I glued the soup cup and chopsticks.
Finally, I added five black enamel dots. These tiny accents brought so much contrast and visual interest to the finished design.
The result? A clean and cheerful get well card with modern charm and just enough shading and dimension to feel special—without slowing you down.
Interested in two other recent Get Well Cards I created? Click HERE.
Tip for Mass Production
If you want to make a full batch of these cards (and I definitely recommend it!), simply die cut a yellow circle and adhere it directly to a white card base. Or alternatively, you could ink blend a yellow circle. You can skip the popped-up window panel and still get the same bold pop of color.
Hello friends! Karen Brown here, and today I’m sharing two cards for the Hero Arts December 2025 Release + Blog Hop. This month’s theme—Soup There It Is—is warm, clever, and absolutely perfect for building a stash of Get Well cards. I don’t know about you, but I always seem to need get well cards, and this release is packed with comforting imagery and punny sentiments that make them so fun to create.
Hero Arts just announced a fantastic price drop on their subscription programs, making this the perfect time to sign up if you’ve been on the fence. The Monthly Card Kit is now $45 instead of $60, and the Whole Studio Subscription dropped from $75 to $55. That’s a big monthly savings and an incredible value considering how many products, techniques, and creative opportunities you get in each box. If you love building your stash, trying new tools, and being inspired each month, this is truly the best time to jump in.
My two cards today both feature the December Cling Stamp of the Month: Dotty—a fantastic, versatile background stamp that deserves a spot in every crafter’s studio. To help you get the most out of this staple, I’m showing two completely different background styles: ✨ Clean, fresh, and modern 🎨 Easy, layered mixed media
Let’s jump in!
Card 1 – A Clean & Modern Background Using Pigment Ink
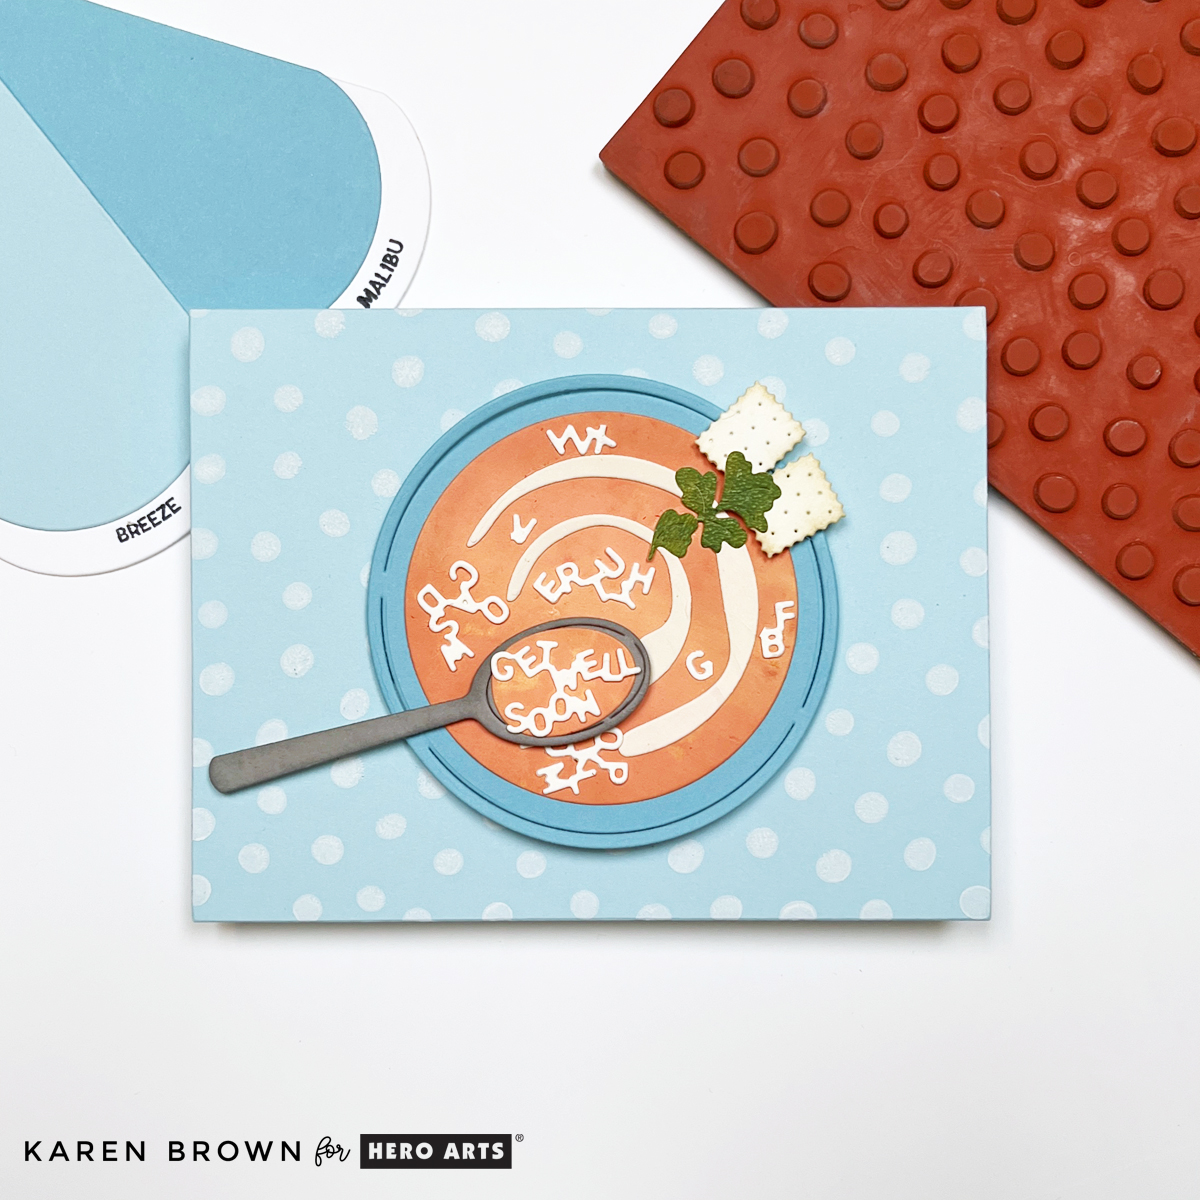
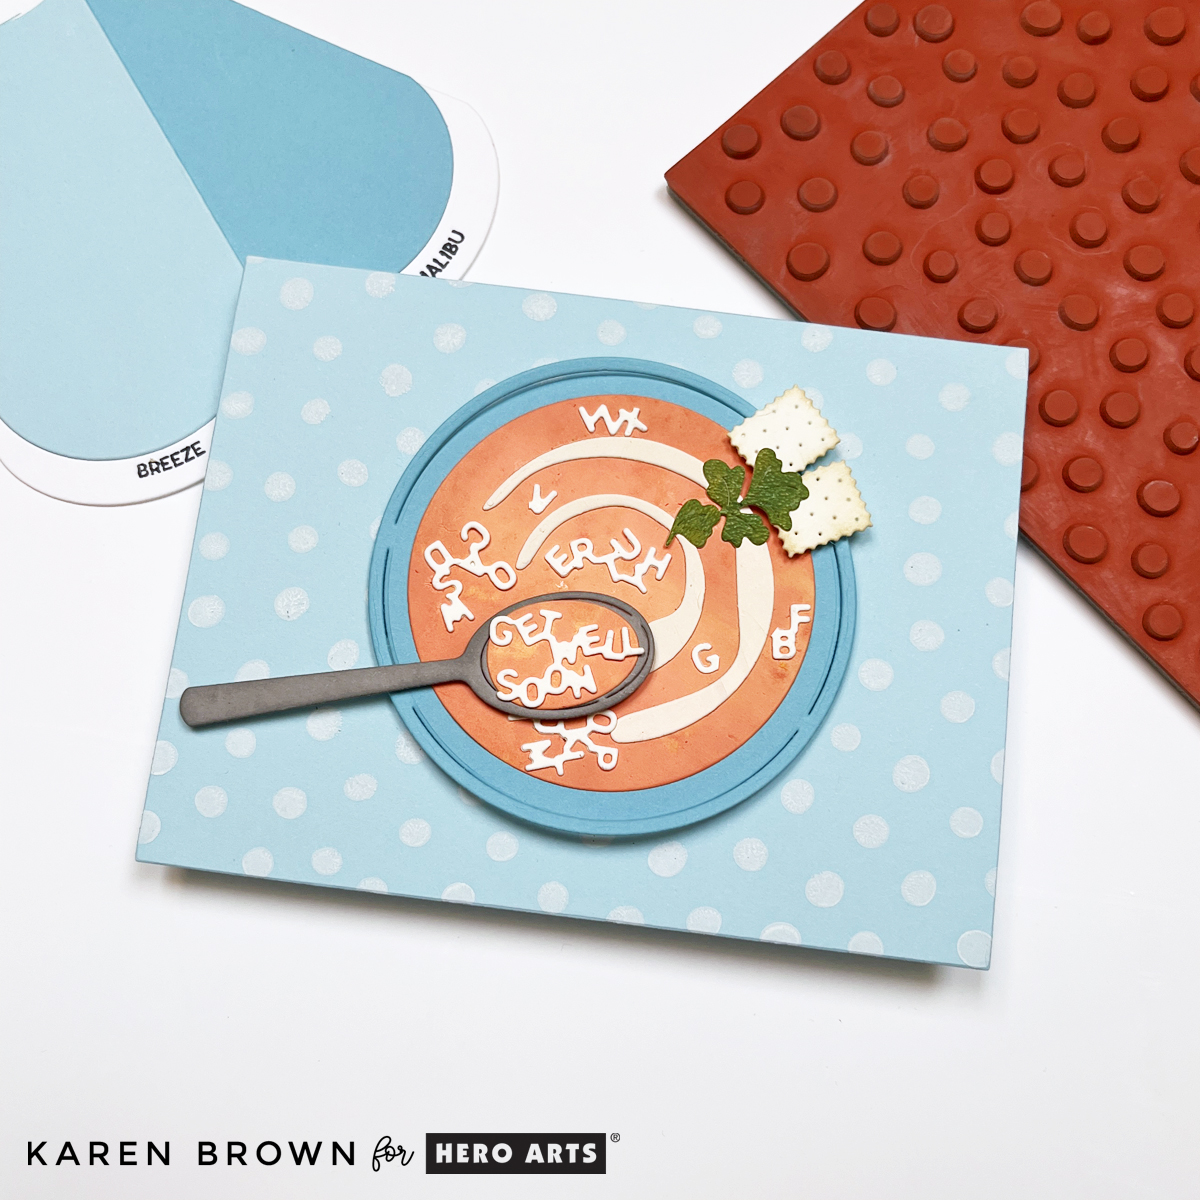
For my first card, I created a crisp and contemporary background using the Rubber Cling Dotty stamped in Unicorn White Pigment Ink on Breeze Cardstock. This combination creates a soft, airy polka dot look that works for any occasion, but feels especially soothing for a get well theme.
Background Tips:
Pigment ink gives gorgeous coverage, but it dries slowly.
Speed things along with a quick blast from your heat tool.
Try this technique on any mid-tone cardstock—it’s a great way to stretch your ink stash.
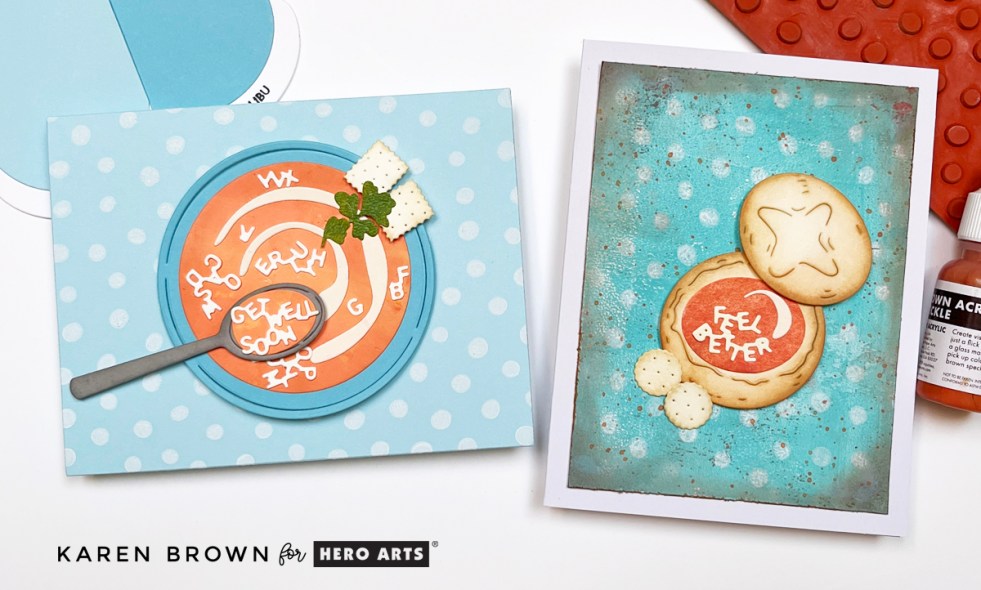
For the focal point, I used the December Die of the Month: Alphabet Soup to create an adorable soup bowl, complete with: 🥣 a spoon 🍘 cracker-style accents 🌿 sprigs of parsley …and swirling alphabetical noodles!
The spoon cleverly spells out “Get Well Soon”—such a comforting detail. This card feels clean, uplifting, and perfect for sending warm wishes to someone who needs a little TLC.
>>> Receive a FREE Bread Bowl Stamp and Cut (see card #2) when you purchase The Whole Studio!
Hero Arts has many different Monthly Kits that you can subscribe to including:
The WHOLE Studio – All 5 Kits (a 40% savings: $55 subscription + Free Shipping)
Card 2 – Easy Mixed Media Using Dotty + Gel Press Print
For my second card, I wanted to show the versatility of the Rubber Cling Dotty stamp by pairing it with a mixed media background.
I pulled a Gel Press print from my stash—a great way to use your pre-made backgrounds—and stamped Dotty over the top with Unicorn White Pigment Ink. After drying with my heat tool, I:
Distressed the edges using a distressing tool
Ink blended around the outer edges for depth and warmth
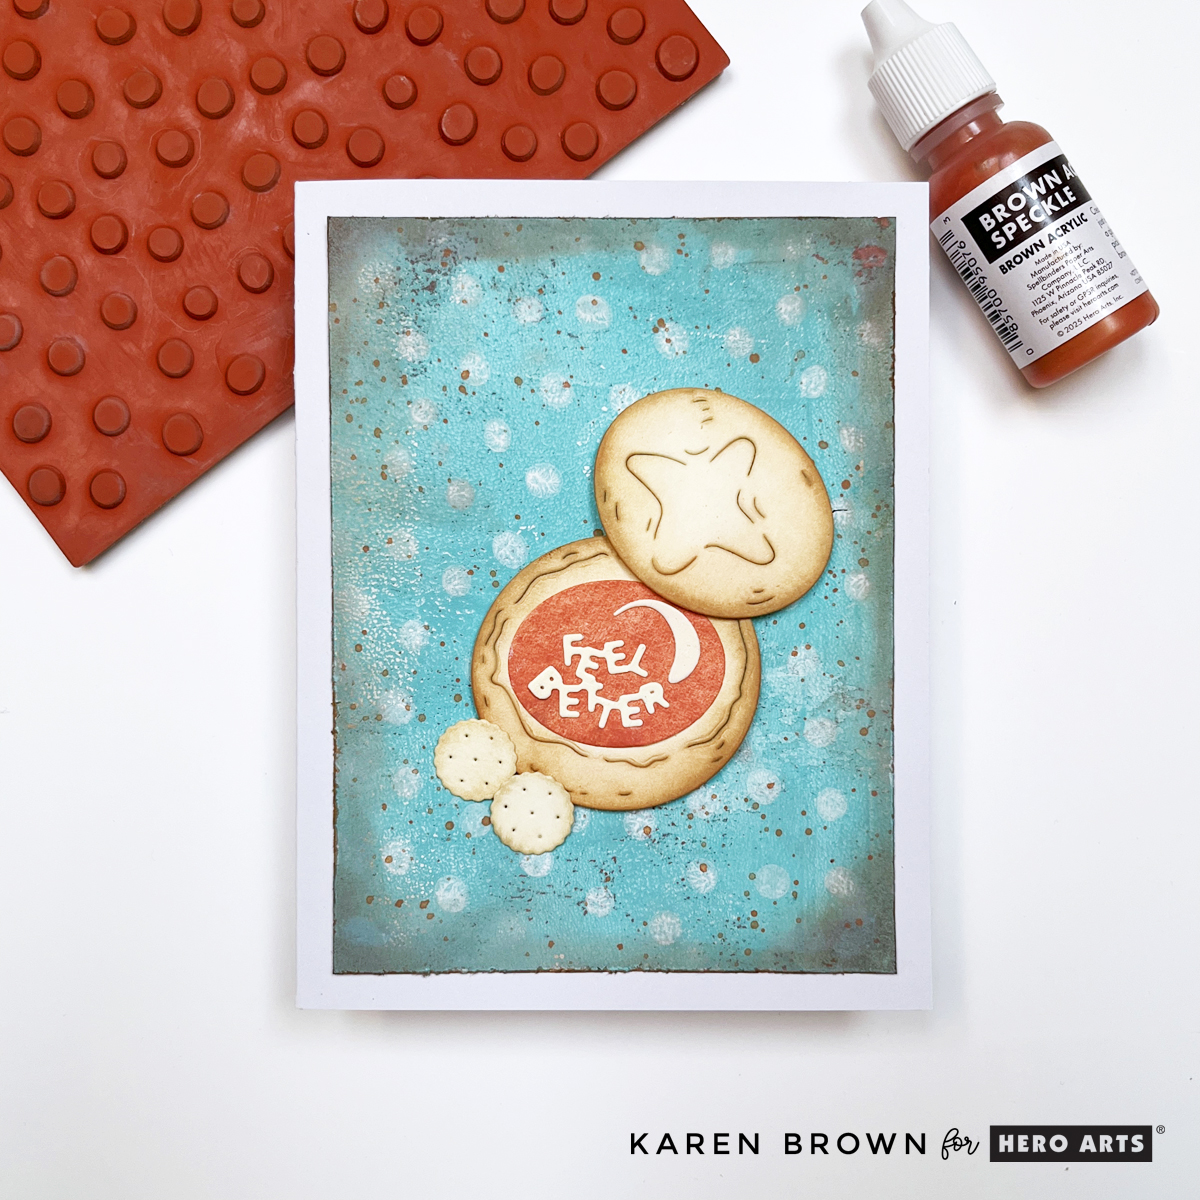
Added Brown Acrylic Speckle (from the December Card Kit) for texture and personality. I like to use a fan brush and rotate my background for even distribution.
My focal point is the die cut from the December Whole Studio Bonus Gift: Bread Bowl, shaded with inks to mimic the look of warm crusty bread. The “Feel Better” sentiment ties the whole card together in the coziest way.
This mixed media-style card is earthy, rich, and full of character—but still incredibly easy to make.
Blog Hop and Giveaway:
Hero Arts will give away a $50 gift card, drawn from the comments left across the hop. Enter by Sunday, December 7th at 11:59pm MT, and the winner will be announced on the Hero Arts blog the following week. Leave a comment on all stops for more chances to win!
Whether you prefer clean and modern or layered and artsy, the Dotty Cling Stamp opens up endless background possibilities. Paired with this month’s heartwarming soup-themed dies, you can build a versatile stash of Get Well cards to share comfort all year long.
Be sure to hop along with the rest of the designers—there are prizes to be won and loads of inspiration waiting for you! Happy crafting, friends. ❤️
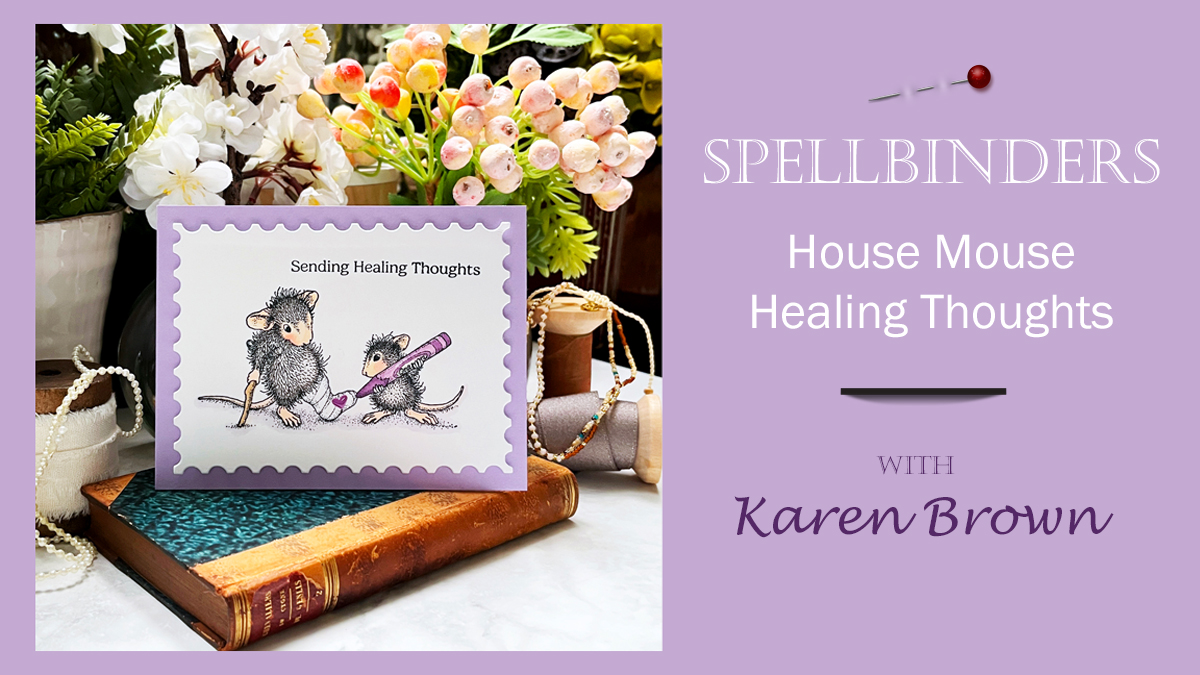
There’s nothing quite like sending a little handmade kindness when someone isn’t feeling their best. Today’s card features the always-adorable House Mouse stamps in a sweet and simple Healing Thoughts Get Well design. With its soft monochromatic colors and heartwarming scene, this card is as charming as it is easy to make!
A Look at the Design
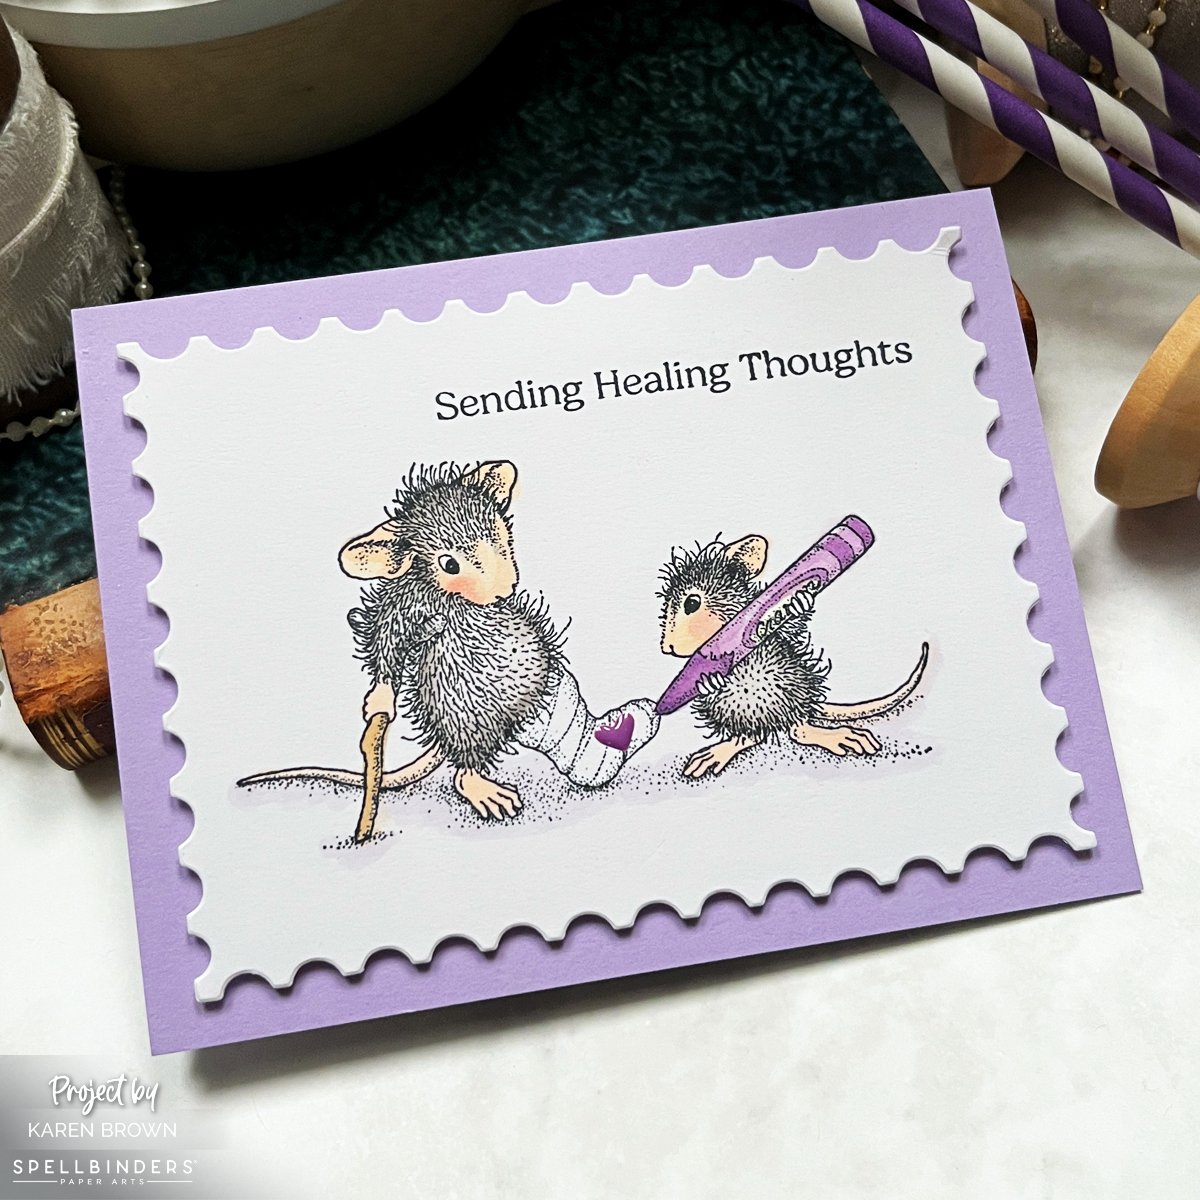
The stamped image showcases an adult mouse with a cast on his left leg, while a juvenile mouse signs the cast with a giant purple crayon—adding a little heart for extra love. It’s a scene that captures both the innocence and warmth of these stamps so well!
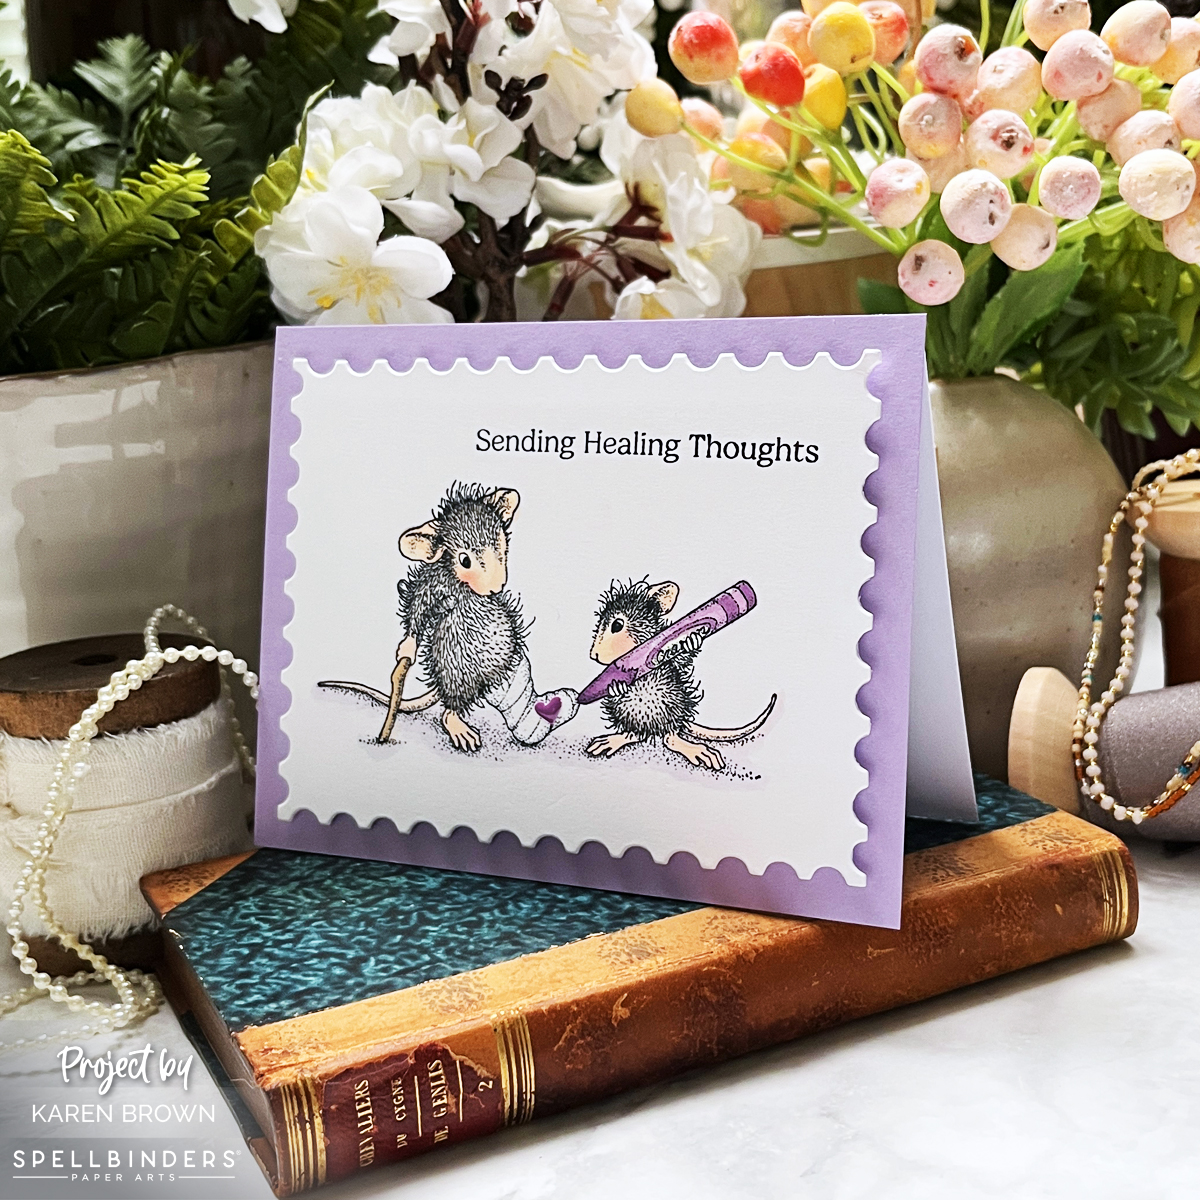
To keep the design clean and simple, I used the Nesting Postage Stamp Infinity Die to cut out the panel and mounted it on a Passion Flower lavender card base. The soft lavender hue adds a soothing touch, making this card perfect for lifting someone’s spirits.
The sentiment, “Sending Healing Thoughts,” ties everything together beautifully—because sometimes, a thoughtful card is just the thing to brighten someone’s day.
Why I Love House Mouse Stamps
There’s just something irresistible about House Mouse stamps! 🐭💜 These little critters bring so much warmth, charm, and personality to every card. Whether they’re getting into mischief, sharing a sweet moment, or—like in today’s card—spreading a little cheer, they always manage to bring a smile.
I love how these stamps work for so many occasions. Their soft, sketchy details make them a joy to color, whether you go for bold tones or a simple, monochromatic look like I did here.
House Mouse cards are always a hit with recipients, and I can’t wait to share more of my little mousey creations with you!
Copic Colors Used
Mice: W0, W3, W5, E00, E50, R000, R20
Crayon: V01, V15, V17
Cane: E31
Shadows: BV0000
Final Thoughts
Having a few Get Well cards on hand is always a great idea, and this quick and easy House Mouse design is perfect for the job! Sometimes simple is best, and this card proves that a heartfelt sentiment and a sweet image can go a long way in brightening someone’s day.
Do you love House Mouse as much as I do? Let me know in the comments! And if you’re looking for more inspiration, check out these previous House Mouse creations:
Get ready to fall in love with theSpellbinders February 2025 Club Kits! This month’s releases are packed with charm and creativity, and I’m thrilled to share two whimsical scene cards that will have you reaching for your die-cutting machine in no time.
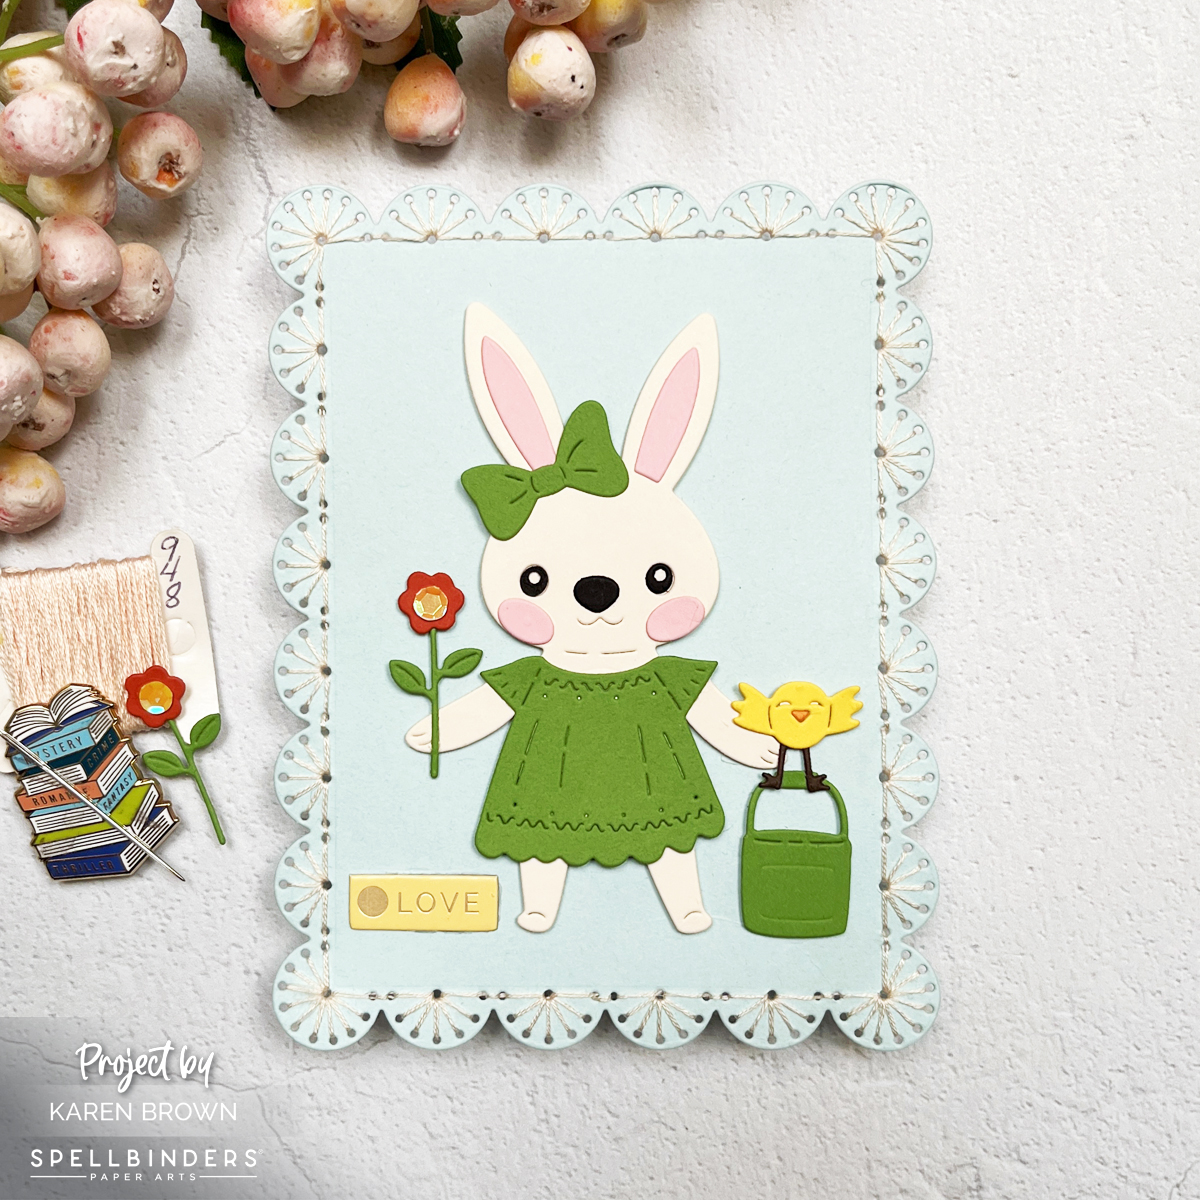
Easy Stitched Die Cut Bunny Card Full of Charm
This first card features the Stitching Die of the Monthpaired with the Large Die of the Month, creating a darling stitched frame. Inside the frame, a sweet die-cut bunny dressed in a spring green dress steals the spotlight. She’s holding a delicate flower, making this design ideal for Easter, baby showers, or even get-well cards. The soft blues, vivid greens, and warm yellows lend a fresh spring vibe, while the stitched frame adds texture and an elegant touch.
The second card takes a playful turn with a pair of olive green shoes, complete with stylish blue and olive anklet socks. The SmallDie of the Month works its magic, letting you create a unique scene where die-cut flowers are tucked into the patterned socks. You’ll spot the calves of a lady walking confidently into spring, and the sentiment “Hello” ties everything together. Perfect for birthdays, get-well wishes, or just saying hi, this design showcases the versatility of these dies.
Quick Notes About This Card:
I started by looking through my patterned paper for some fun “sock material”. I chose this eye-catching circular pattern, but a small floral or plaid would also work great!
Once I had my socks, I pulled together other colors that would work well for my scene. I frequently use my Color Cubes when selecting my color palette.
Both cards highlight the magic of die-cutting, with intricate details and stitching that bring each scene to life. Whether it’s the textured frame around the bunny or the whimsical floral shoes, these designs are sure to inspire intermediate and advanced crafters alike.
Few things evoke a sense of nostalgia and warmth quite like the timeless charm of Winnie the Pooh. Using Spellbinders new Friendly Moments BetterPress letterpress plates, I created three unique hello cards that capture moments from the Hundred Acre Wood. Each design features a distinct artistic style, from sepia simplicity to watercolor wonder, and they’re all perfect for sending a heartfelt note.
I have links to the key products at the bottom of this blog post.
Now let’s take a closer look at these enchanting creations!
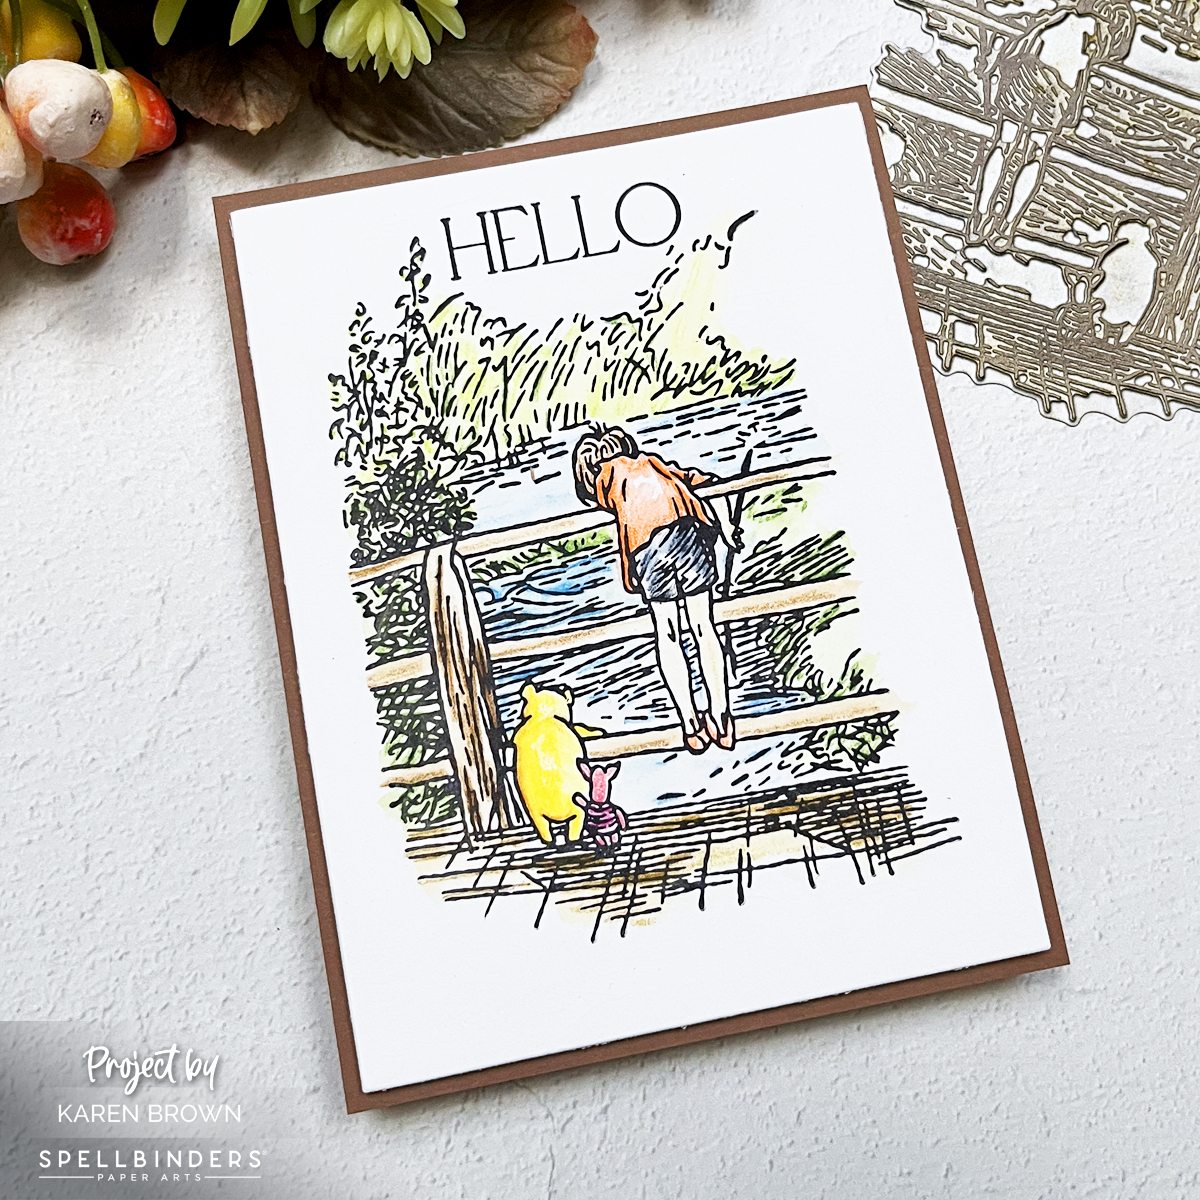
Card 1:Watercolor Wonder
I used a heartwarming scene of Christopher Robin and Pooh on the bridge and added a pop of color with Inktense Watercolor Pencils and a damp round paint brush. Pressed with Black ink on Watercolor Paper, the BetterPress impression provides crisp lines that beautifully anchor the soft, vibrant hues of the watercolors. And there was no ink bleeding when watercoloring with the BetterPress Inks! The river sparkles in shades of blue, the bridge has rustic wooden tones, and Pooh’s honey-yellow fur shines against the greenery. The Hello Sentiment is from A Friend Like You set. The card base is Cup O Joe, which is a perfect pairing for this scene. This card is a great way to add touch of whimsy and joy to someone’s day.
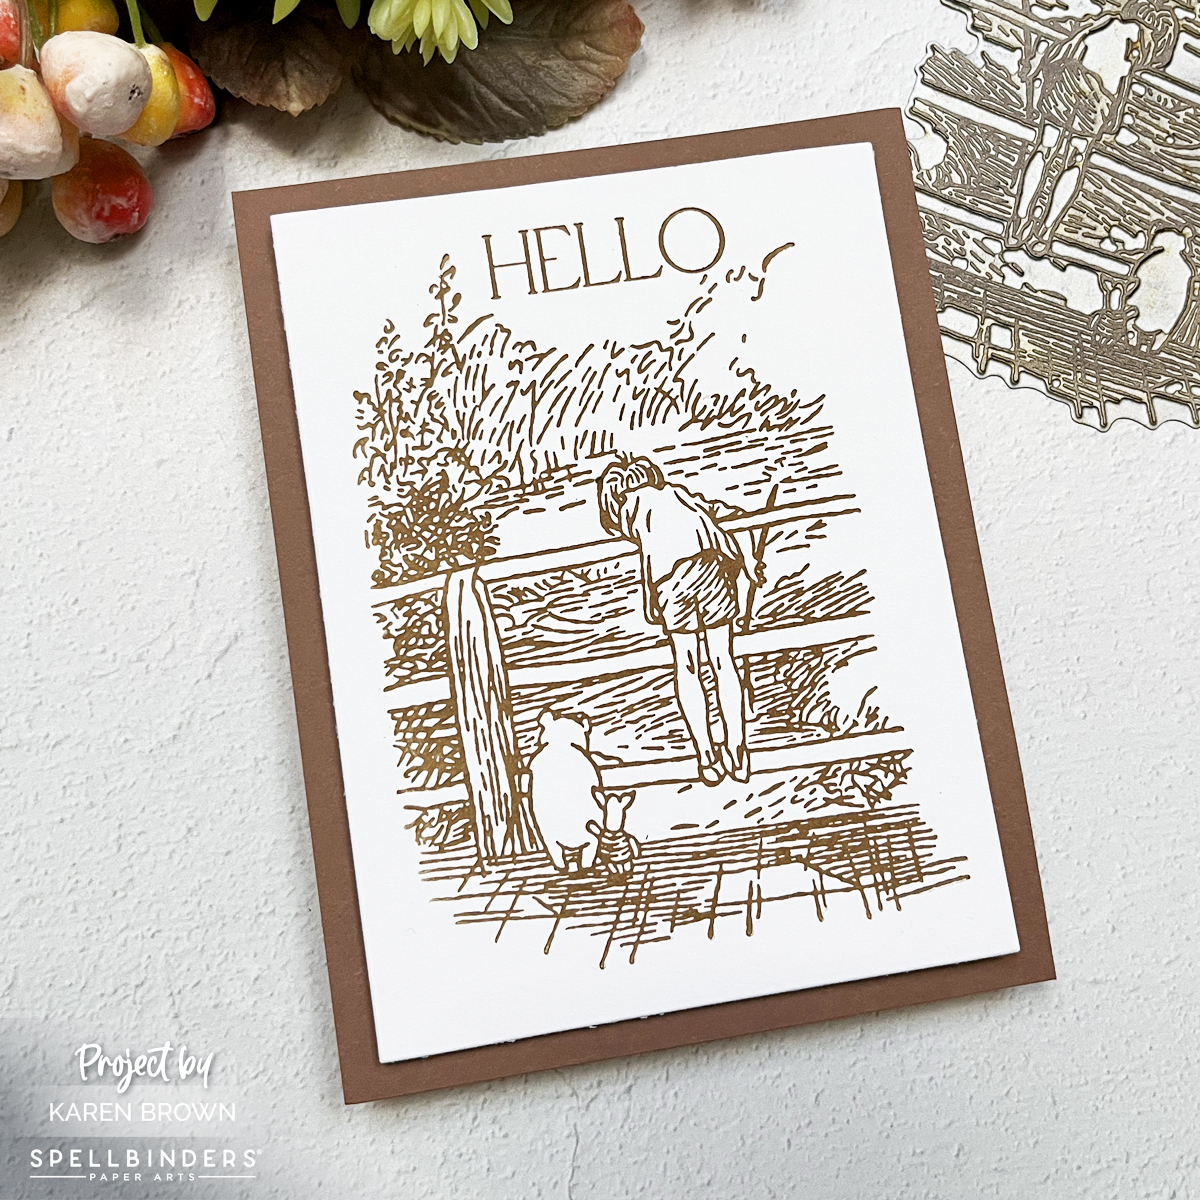
Card 2: Sepia Simplicity…So Quick and Easy to Make!
This second card exudes vintage charm with a sepia-inspired look. The scene of Christopher Robin and Winnie the Pooh on a bridge, gazing at a flowing river, is pressed with Bark brown ink for a classic, monochromatic feel. The texture and detail of the BetterPress plate truly shine, creating a design that’s simple yet sophisticated. Paired with a Cup O Joe card base, this card is a perfect nod to Pooh’s timeless stories.
This second card was so quick and easy to create and I think it would make a wonderful set of notecards to give as a gift.
Card 3: Polaroid Nostalgia
The third card captures a tender moment of Winnie the Pooh and Piglet walking down a quiet road, their backs turned to the viewer. To frame this scene, I used a Polaroid-style die cut frame and label, which adds a playful, nostalgic touch. After pressing the scene in Black ink onto Watercolor Paper, I brought it to life with Derwent Inktense Watercolor Pencils, creating a soft, storybook aesthetic. The vivid colors and the Polaroid look make this card feel like a treasured memory captured in time.
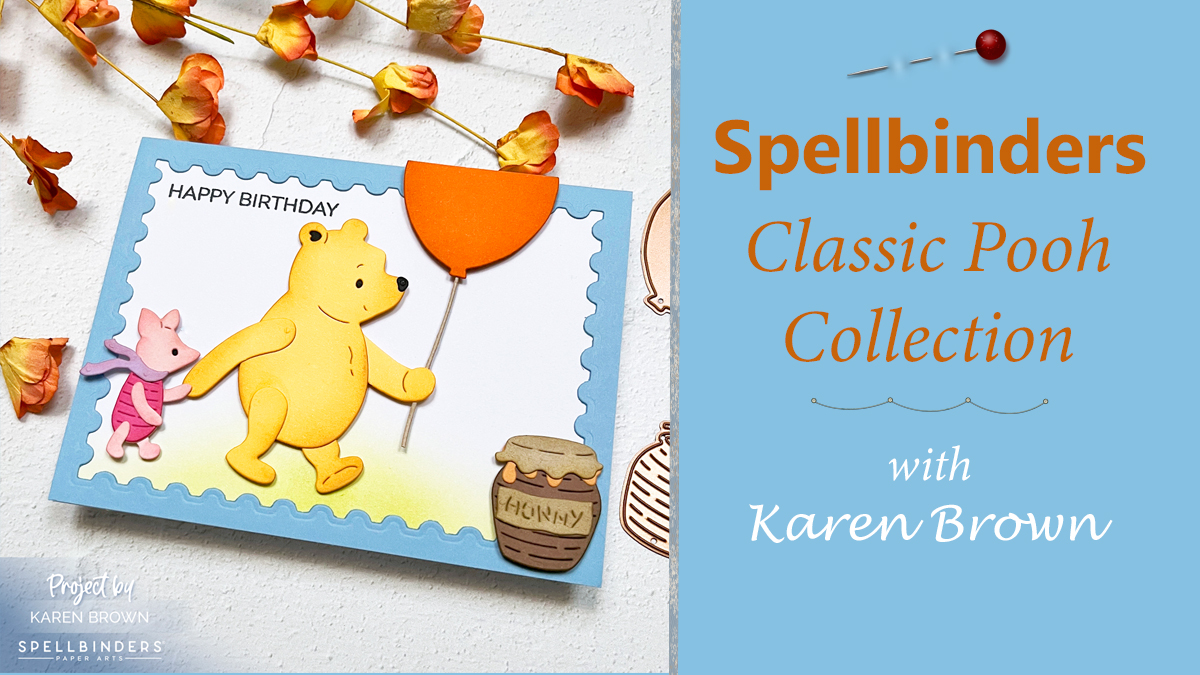
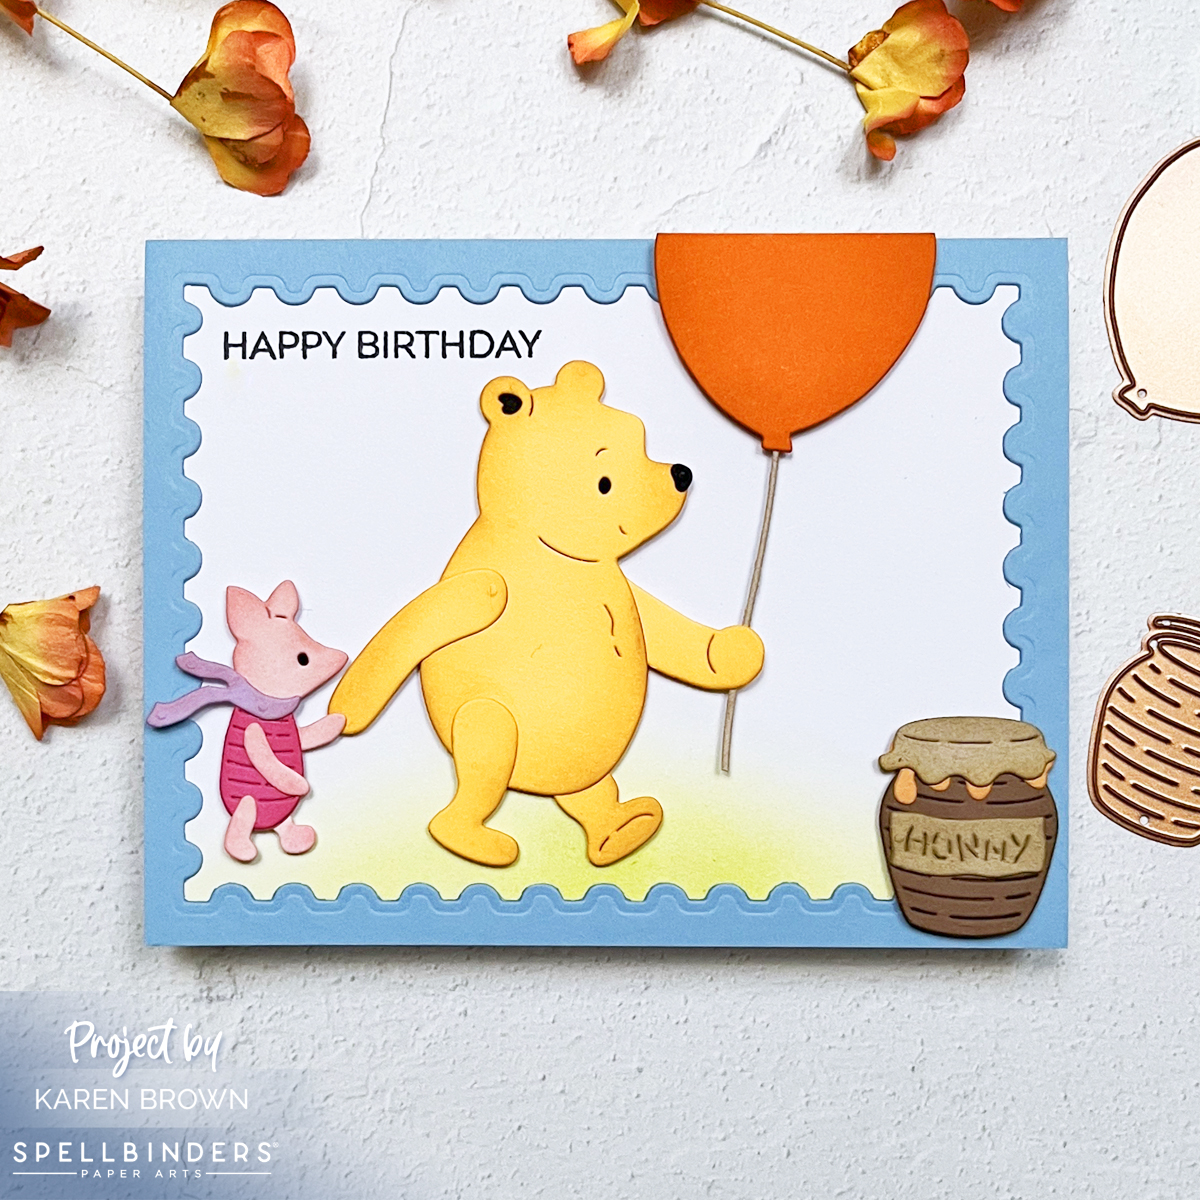
Sometimes, a handmade card can transport us to a place of pure nostalgia and joy. That’s exactly what this Winnie the Pooh-inspired birthday card does! With die cuts, soft ink blending, and a cheerful color palette, this whimsical creation captures a moment straight out of the Hundred Acre Wood.
This card brings to life a heartwarming scene of Winnie the Pooh and Piglet holding hands, walking side by side. The duo is accompanied by a playful orange balloon on a string, gently floating above. A honey pot rests on the ground, completing the sweet and simple vignette. The background features softly ink-blended green grass, framed by a charming postage stamp-style border in periwinkle blue, adding just the right touch of whimsy.
Techniques for Dimension and Charm
The die cuts are the stars of this card, and a touch of light ink blending adds depth and dimension to each element. Winnie the Pooh’s honey-colored body gets a subtle gradient to make him pop, while Piglet’s pink details are gently shaded for softness. The balloon shines bright in orange, with its string creating a delightful sense of movement.
The grass is ink blended in gentle greens, giving the scene a soft, storybook feel. Meanwhile, the periwinkle frame ties everything together with its postage stamp shape, reminiscent of a cherished letter from the Hundred Acre Wood.
Why This Card is a Classic
This Pooh-themed birthday card is more than just a greeting; it’s a tiny piece of nostalgia wrapped in creativity. Perfect for anyone who loves the timeless tales of Winnie the Pooh, this card is sure to bring a smile to their face and a touch of magic to their special day.
Today’s card is for a friend’s birthday, but I think it would also be great as a Get Well Card.
In this post/video, we’re spreading our creative wings and sharing three unique ways to stencil butterflies that’ll make your cards flutter with charm. From bold and dramatic to soft and dreamy, these techniques will have your projects soaring to new heights! 🦋✨
The butterfly outline is layer one and then there are 3 additional detail layers to add on top to customize your projects. I show you how to use all three top layers in the video.
I thought it would be fun to make some non-traditional Christmas cards featuring butterflies AND pastel colors. I always love to stretch my supplies beyond the predictable!
I also think the duo pictured above would make great Get Well, Thinking of You or Sympathy cards.
Let Your Creativity Soar
And, I had to make at least one traditional green and red Christmas butterfly card. I stenciled with Fresh Lawn and Cherry Ink, matted with Crimson cardstock and added a sentiment from the Swirly Christmas Tree Bundle.
With just a stencil and a splash of creativity, you can bring butterflies to life in endless, colorful ways. So, go ahead—spread your crafting wings, experiment with colors, and let your cards shine as bright and beautiful as a butterfly in full flight. Happy stenciling! 🦋✨
Hello and welcome to the February 2024 My Monthly Countdown! I must say, this kit is full of wonderful products that I know you will love. The kit goes live tomorrow, Monday, February 5th, so stay tuned. Meanwhile, sit back and enjoy some inspiration, sneak peeks and giveaways.
WIN A KIT BEFORE YOU CAN BUY IT: Just leave a comment on this (and every) Countdown to Creativity post. Hero Arts will randomly draw one lucky winner from comments left across all countdown posts on the Hero Arts blog. The winner will be announced first thing Monday morning, February 5th, before the kit launches at 10am Pacific. The more you comment, the more chances you have to win!
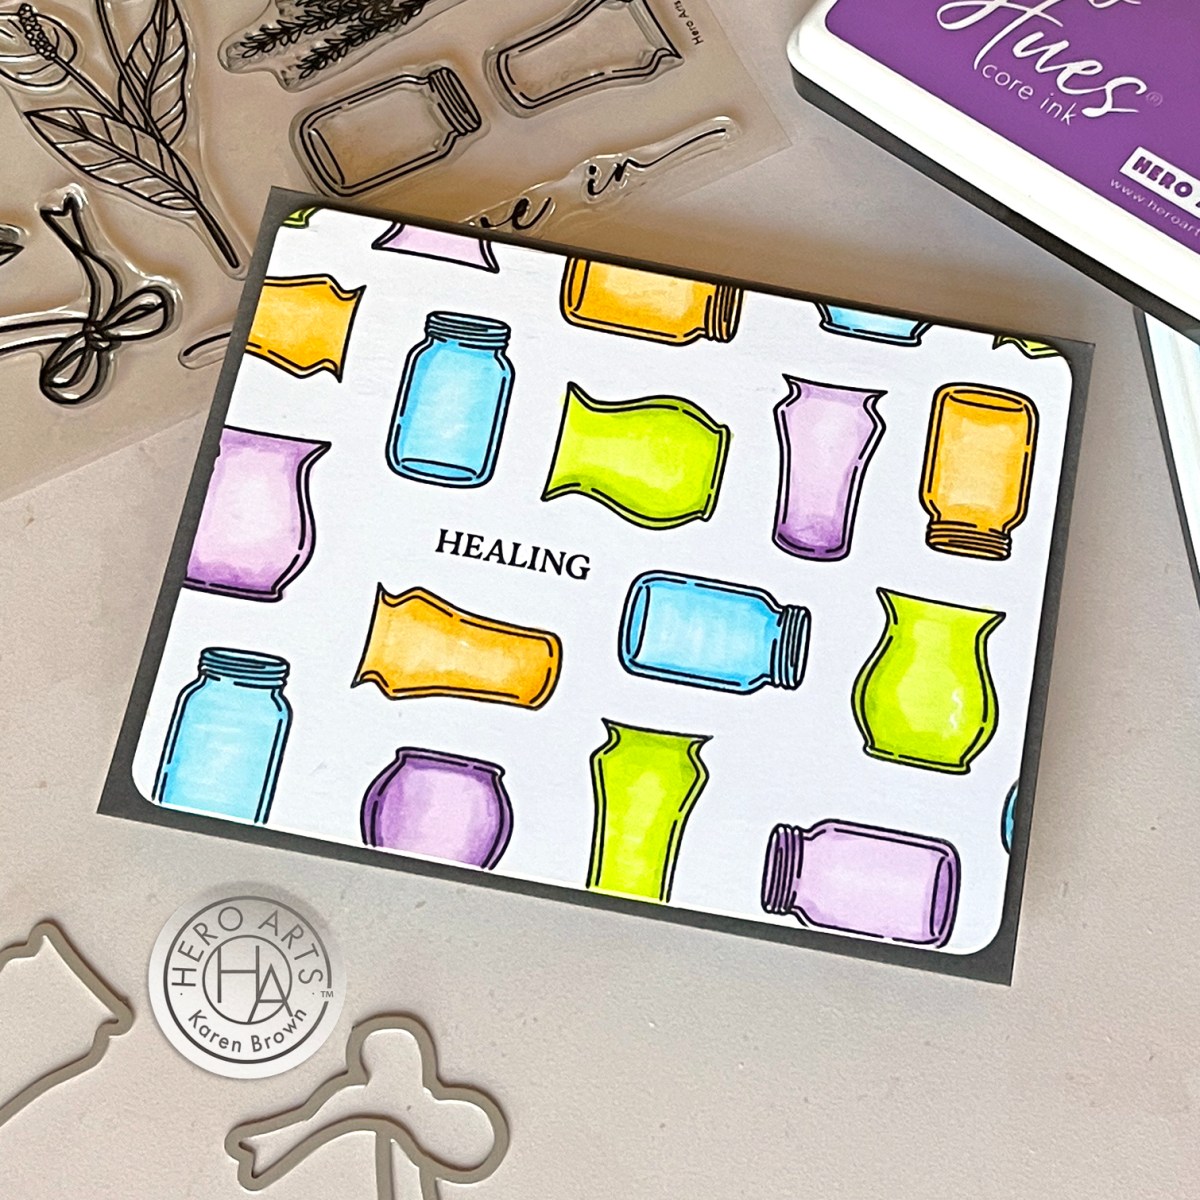
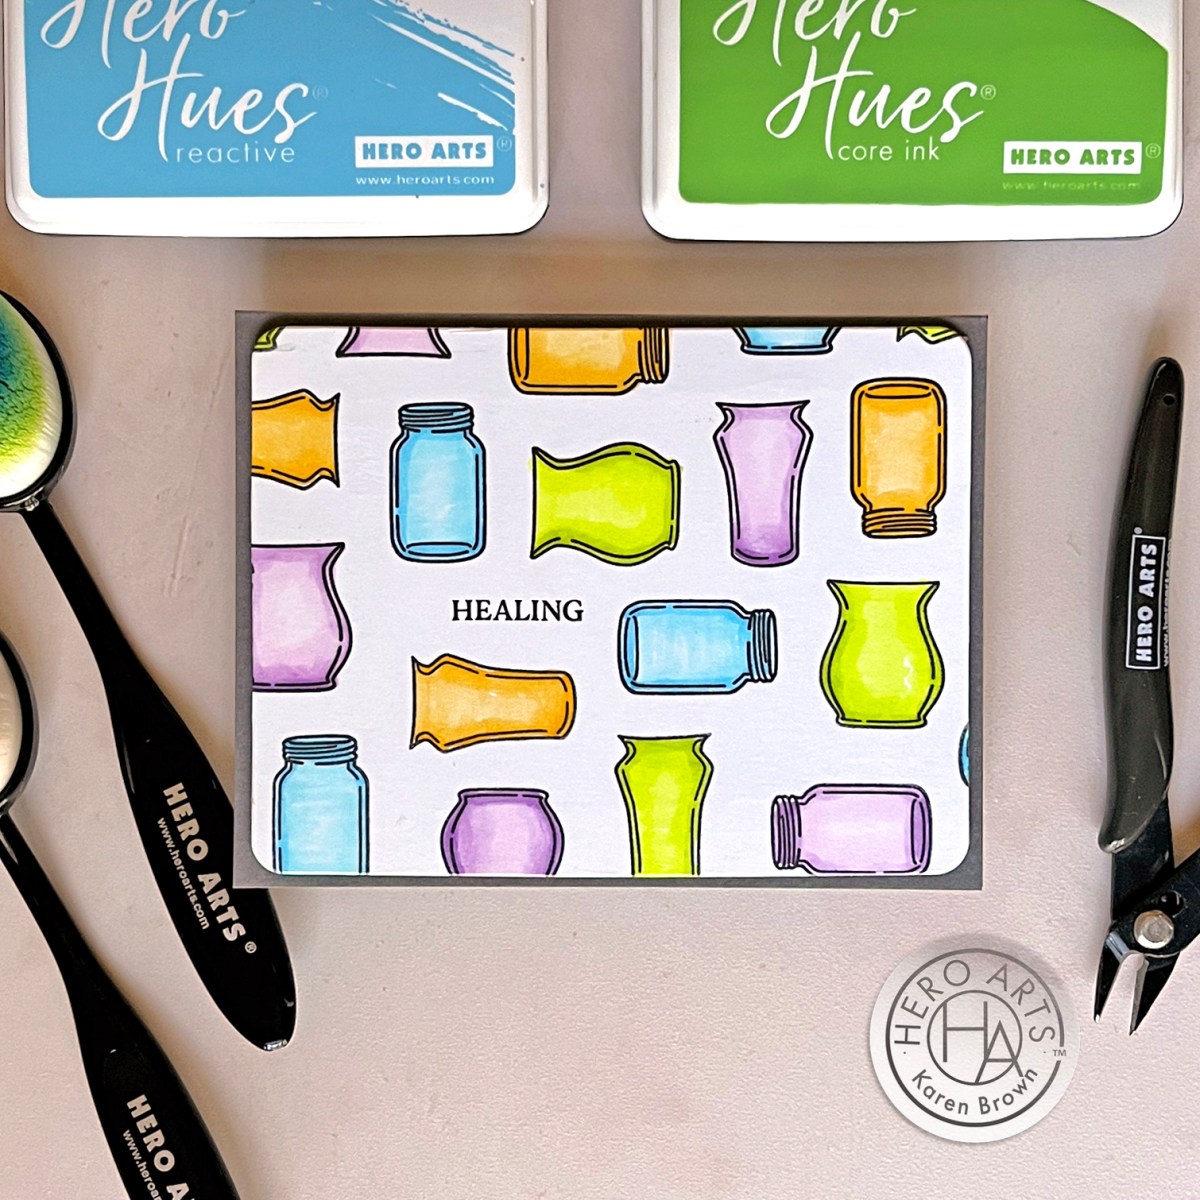
Pattern Stamping
I really enjoy pattern stamping and the stamps in the Classic Kit are just perfect for this technique. There is something so therapeutic about coloring glass jars and vases.
Be sure to stop by and visit the Hero Arts Blog for more inspiration and then I will be back on Monday with another post featuring the Classic Kit + some great Add-On Products.
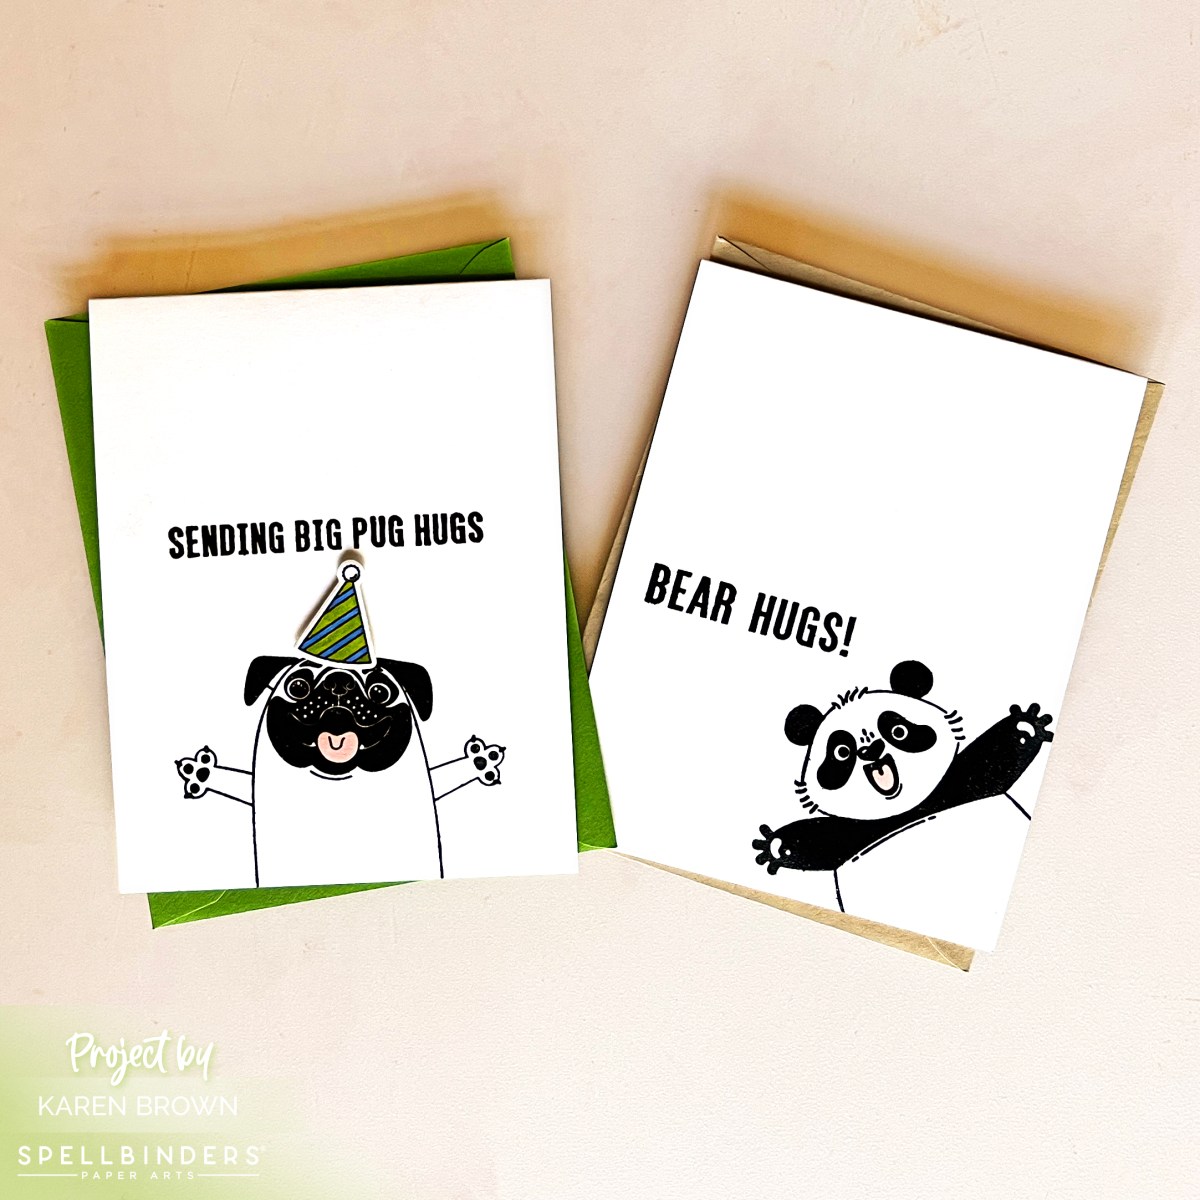
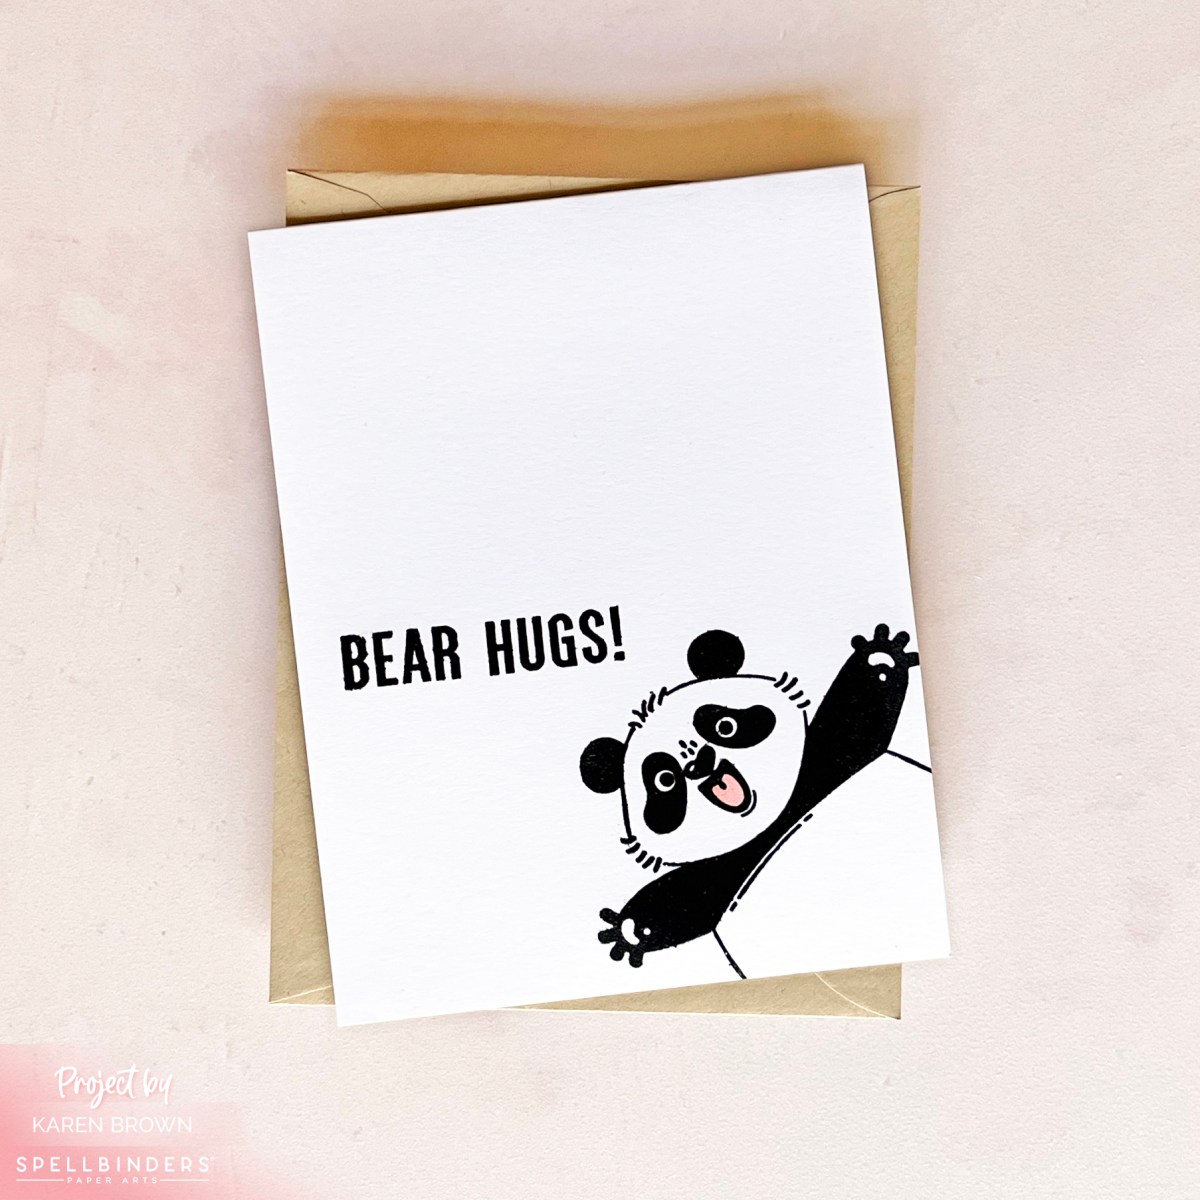
Can you have too many dog stamps? I think not! I am loving Spellbinders + Simon Hurley’s new Big Hugs stamp and die bundle. These cute critters – Pug dog, Panda bear and Zebra – are sure to be favorites in my family. I love this set so much I went a little crazy making cards!
Pug Dog Masculine Birthday Cards
My first card is for my husband and I wanted to make a quick little scene. I stamped and Copic colored my Pug (complete with a festive party hat), embossed a brick wall, ink blended a background and heat embossed a cute sentiment.
I like to keep Get Well cards on hand and this card is sure to make the recipient smile. This card came together very quickly. I stamped and Copic colored my Pug and added a blue mat for interest. Just two Copic markers!
I am so happy you stopped by! Spellbinders new Floral Reflections Collection is live and I LOVE how fresh the collection is. I made two cheerful cards, one for a friend’s birthday the second is ready to send for a get well.
For my first card, I used the Sealed Wildflower die kit (S4-1255). I felt like clean and simple was the way to showcase these lovely die cuts so I selected Waterfall cardstockfor my backdrop. I kept my color palette simple: aqua, melon, dark green and white and added coordinating enamel dots to my flower centers. My sentiment was hot foiled and die cut using GLP-260: Mini Everyday Sentiments. Using an A2 top folding card base, I added my waterfall panel with craft foam for a bit of dimension.
All I needed was one sweet grouping of flowers to embellish the tag and I again used the Sealed Wildflowers die kit. My base is an A2 top folding card and then I added a kraft background mat and enamel dots to the flower centers and mounted my tags using foam tape for dimension.
I love the texture that the embossing folder adds to the card, but by using a tag, the overall feel is still clean and simple.
I like to keep Get Well cards on hand so they are ready to send when the need arises. This card is in my desk drawer ready to go.
Thanks for stopping by and taking a peek at my die cut cards.