Watch above OR click HERE to watch video on YouTube.
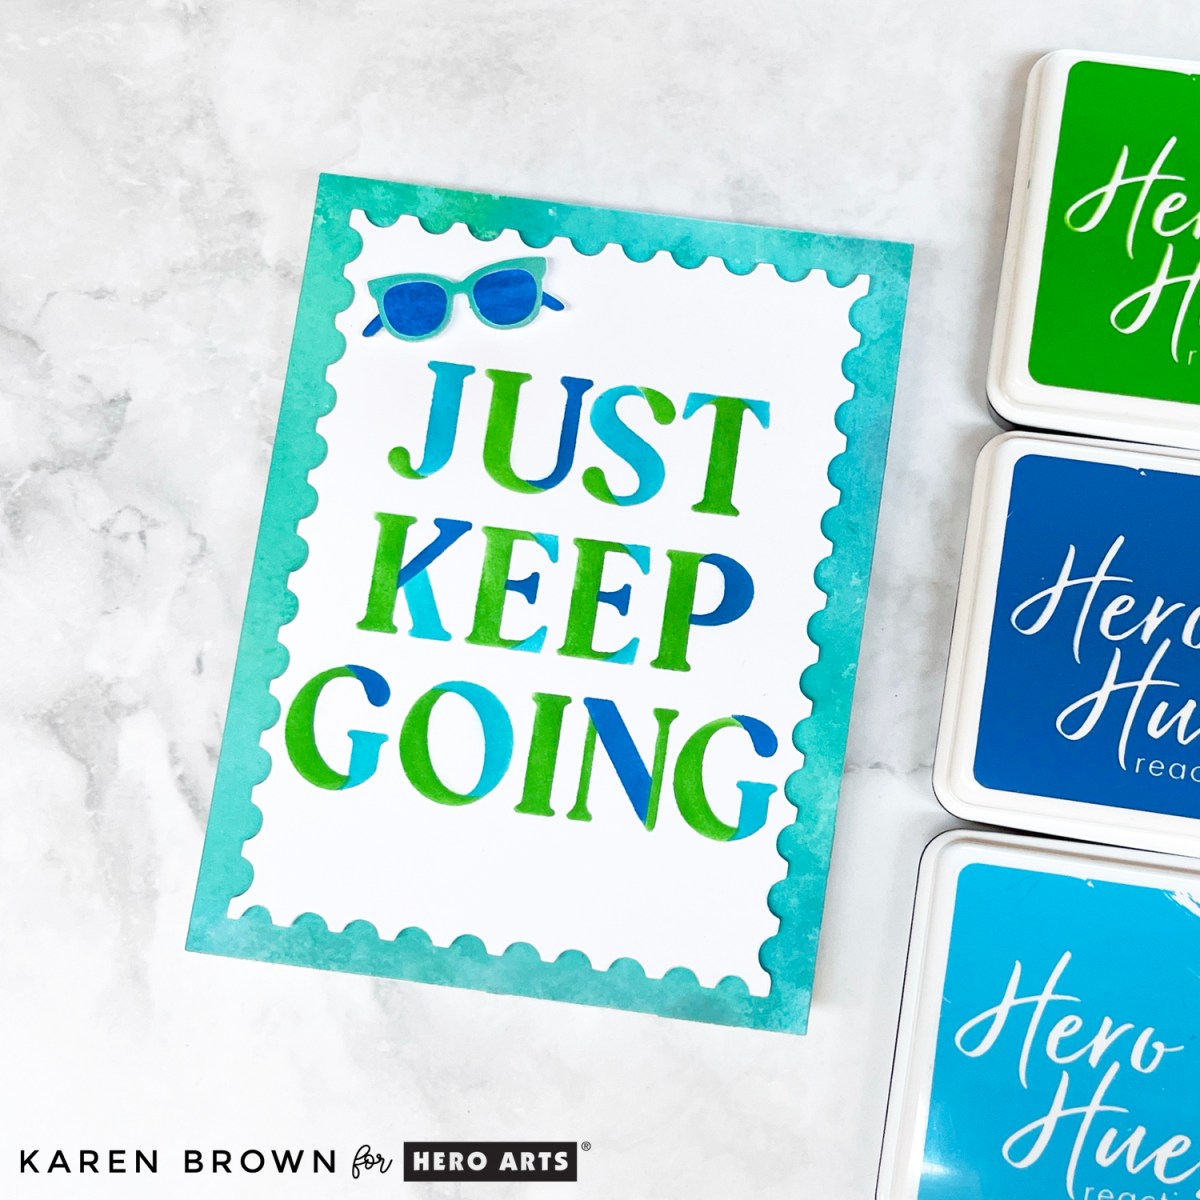
Looking for an easy, beginner-friendly card idea that makes a big impact? Today I’m sharing a project using the Hero Studio July 2025 “Just Keep Going” Layering Stencils—a bold, three-layered sentiment that I paired with a coordinating ink smooshed background for a clean, summery design.
Supplies & Theme
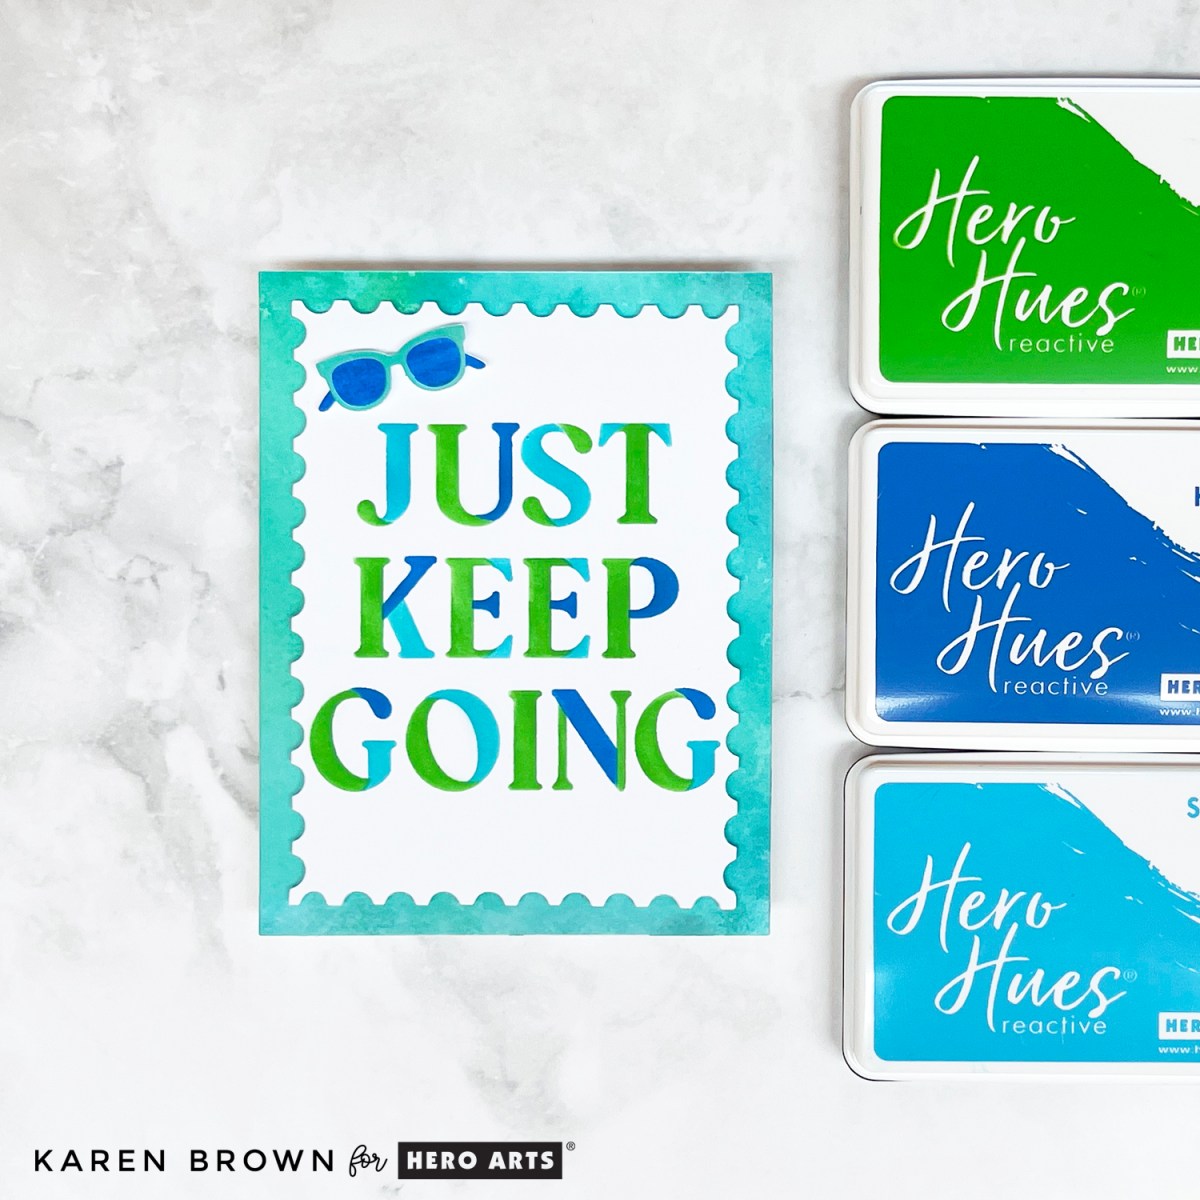
The “Just Keep Going” stenciled sentiment is built up with three perfectly aligned stencil layers. For the sentiment and the coordinating background, I used the following Reactive Inks:
These bright, analogous colors are side-by-side on the color wheel and blend beautifully together for a unified, harmonious look.
The Background: Ink Smooshing
To complement the stenciled panel, I created an ink smooshed background using the exact same three ink colors. Ink smooshing is one of my favorite techniques—just dab ink onto a 6 x 6″ acrylic block, spritz with water, and press your watercolor paper onto the color. I flip my block and weight down with a book for 5 minutes. If there is a puddle, I dab it with a paper towel. The result? A gorgeous, watercolor-style background that’s one of a kind.
This technique is fantastic for beginners and gives your cards a fun, organic texture. It’s also a great way to bring all the color elements of your project together.
Finishing Touches
I die cut my stenciled sentiment panel using a nesting postage stamp die for extra polish. As a playful embellishment, I added a pair of sunglasses from the Hero Studio July 2025Card Kit. The frames are cut from leftover inked cardstock, and the lenses from another panel inked with Blue Hawaii—just another way to tie everything together!
Why It Works
This card’s cohesive look comes from intentionally choosing analogous colors and using them across both the background and focal elements. Whether you’re just starting out or want a quick, cheerful design, this is a project anyone can enjoy!
Choosing the right colors for your handmade cards can feel like a creative puzzle—fun but sometimes a little overwhelming. Whether you lean toward classic Christmas colors or love a bold non-traditional palette, color selection sets the tone for your entire project.
Today, I’m sharing two recent cards using the Spellbinders July 2025 holiday releases, and both were inspired by two different color systems: the Color Cubes and the Spellbinders Color Deck System. Each approach helped me craft a distinctive look—from rustic purple barn stars to pastel hot cocoa mugs. Let’s dive into the color magic!
The Barn Star is a beautiful layered die cut—mine has a deep purple top layer with delicate flourish cutouts over a lavender base. I added die cut lavender greenery and an orange accent for contrast. The background features a BetterPress Script Text Platepressed in Thistle Reactive Ink on white watercolor paper (yes—it worked beautifully even without BetterPress ink!).
This card includes a little of everything: ✔ Die cutting ✔ Bold Colors ✔ BetterPress background ✔ Glimmer Hot Foiled sentiment
With Color Cubes, you can search by Color, Keyword or Collections. For this card I looked at cards that had the color orange and used the keyword “fruit”. Card #255 was just the non-traditional look I was going for!
Color tip: Don’t be afraid to break the “holiday rules” with color. Purple and orange may not scream Christmas—but together they create a rustic, modern, and cozy vibe.
Cocoa Cups – Inspired by the Spellbinders Color Deck
My second card showcases Spellbinders’ beautiful Color Deck System and Color Deck Bundle, specifically the Holiday Expansion Pack. These 5″ x 4.5″ cards are packed with inspiring palettes—each one practically begging to be turned into a card!
I paired this with Spellbinders’ Color Swatch Petal Stack, which helped me identify and swatch my main colors. The cardstock came from the Color Wheel Sampler: 🌸 Chiffon 🎀 Tutu 🌞 Beeswax 💧 Cascade 🌿 Lavender 🌸 Orchid 🍂 Fawn 💜 Mulberry 🌌 Cosmic Sky
My layout features a pattern of repeating die cut cocoa mugs (from the July 2025 Large Die of the Month Kit) in these pastel shades, each topped with a sparkly glitter snowflake. It’s a playful winter card that also works perfectly for a cozy coffee theme year-round!
Color tip: Using a pre-designed color system (like Spellbinders’ Color Deck or a sampler set) takes the guesswork out of color combos. It’s especially helpful when mixing a lot of hues on one card.
🧠 Other Color Selection Tips:
🎨 Google Image Search Search terms like “Christmas color palettes” or “winter pastel colors”, then switch to the “Images” tab. Seeing real-life examples can help spark ideas.
🎨 Color Wheel Strategies
Analogous Colors: Colors next to each other (e.g., blue, teal, green) for a harmonious look.
Complementary Colors: Opposites on the wheel (e.g., purple + yellow) for bold contrast.
🎨 Neutrals When in doubt, mix brights with soft neutrals like kraft, white, cream, or gray for balance.
Whether you’re swatching, color-scheming, or just winging it, choosing colors can be one of the most satisfying parts of cardmaking. Try something unexpected—you might just love the results!
It’s Christmas in July, and the Spellbinders July 2025 Club Kits are brimming with cozy, colorful holiday cheer! This month’s kits are full of winter charm—perfect for kicking off your holiday cardmaking early. I had such a blast creating with these kits, and I’m excited to share four festive cards with you today.
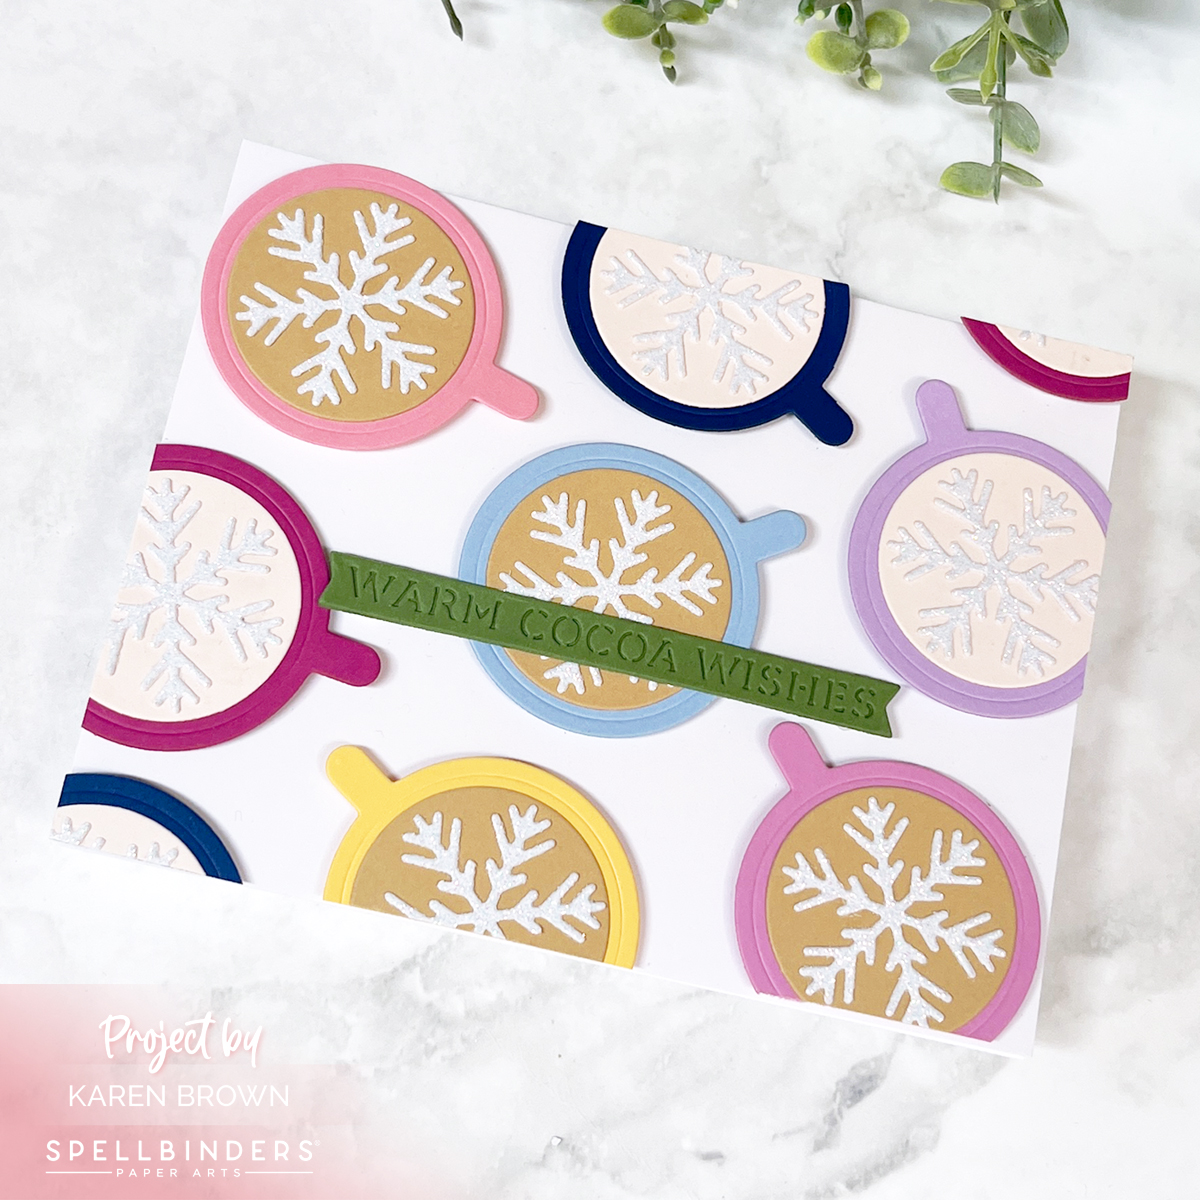
Card 1 – Large Die of the Month: “Warm Cocoa Wishes”
Spellbinders Large Die of the Month Kit had me smiling from the start. I created a festive card featuring a rainbow of die cut cocoa mugs, each one topped with glittery snowflakes and arranged in a playful display across the card front. The mugs have adorable little handles—some hanging over the edges for a casual, cozy feel.
Each mug is a different bright color, bringing a fun and modern twist to the wintery theme. The sentiment “Warm Cocoa Wishes” ties everything together. This card feels like a cheerful hug in mug form!
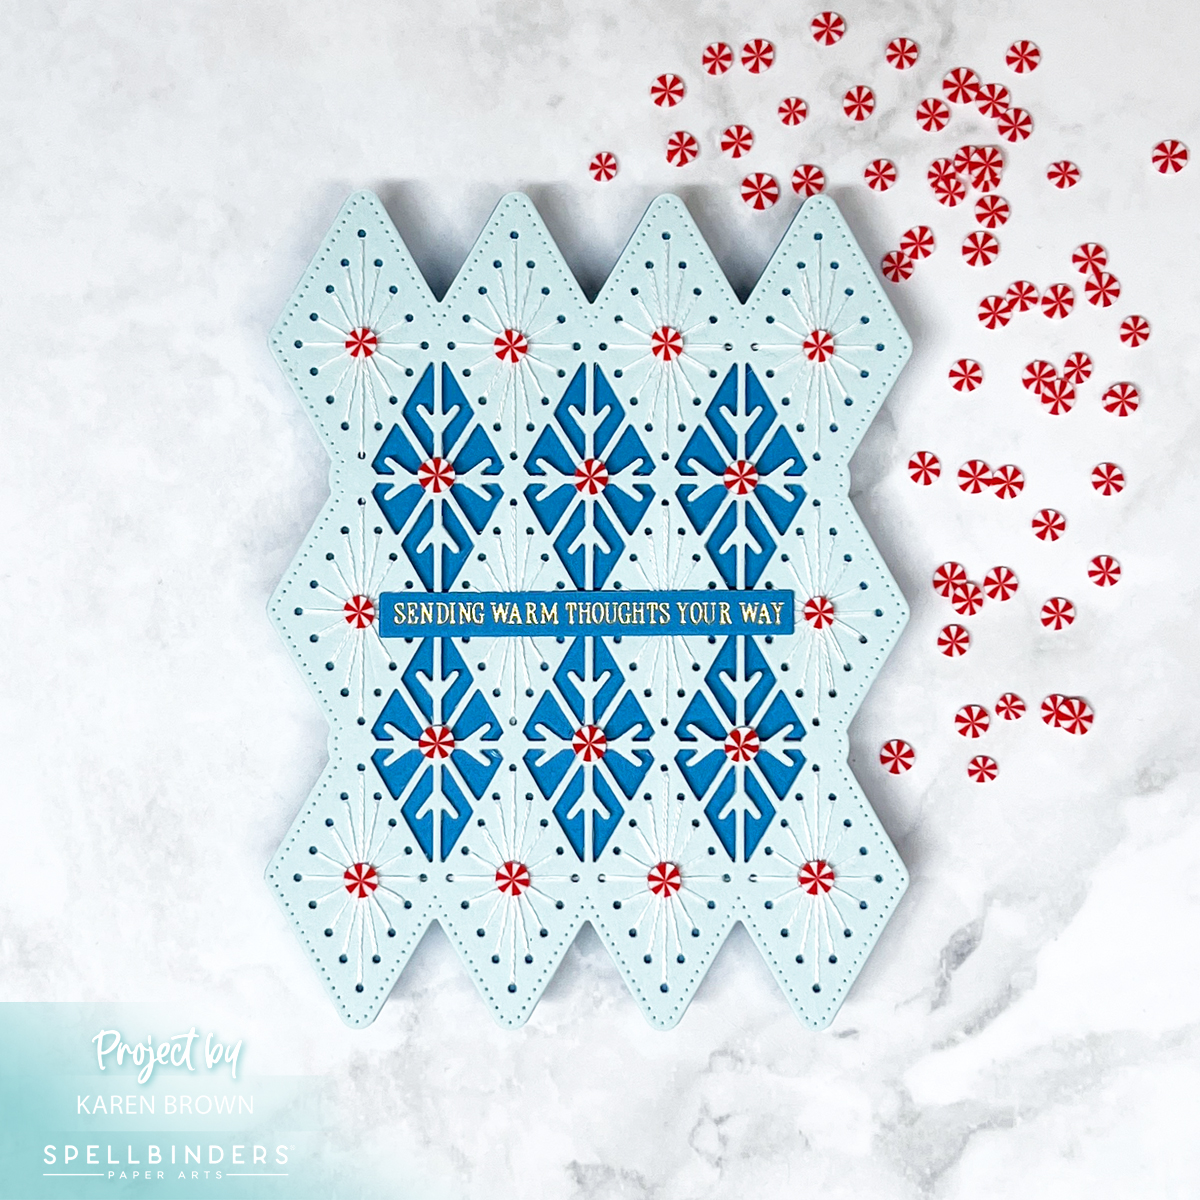
Card 2 – Stitching Die of the Month: Peppermint Diamonds
The Stitching Club this month features a lovely geometric diamond design that reminded me of snowflakes and vintage quilting. I stitched the design on a frosty blue overlay using two strands of white floss. Underneath, a teal base peeks through, adding subtle contrast.
For embellishments, I added peppermint candies for a sweet holiday touch. A foiled gold glimmer sentiment—“Sending Warm Thoughts Your Way”—adds shine and warmth. This card would be perfect tucked in with a winter care package.
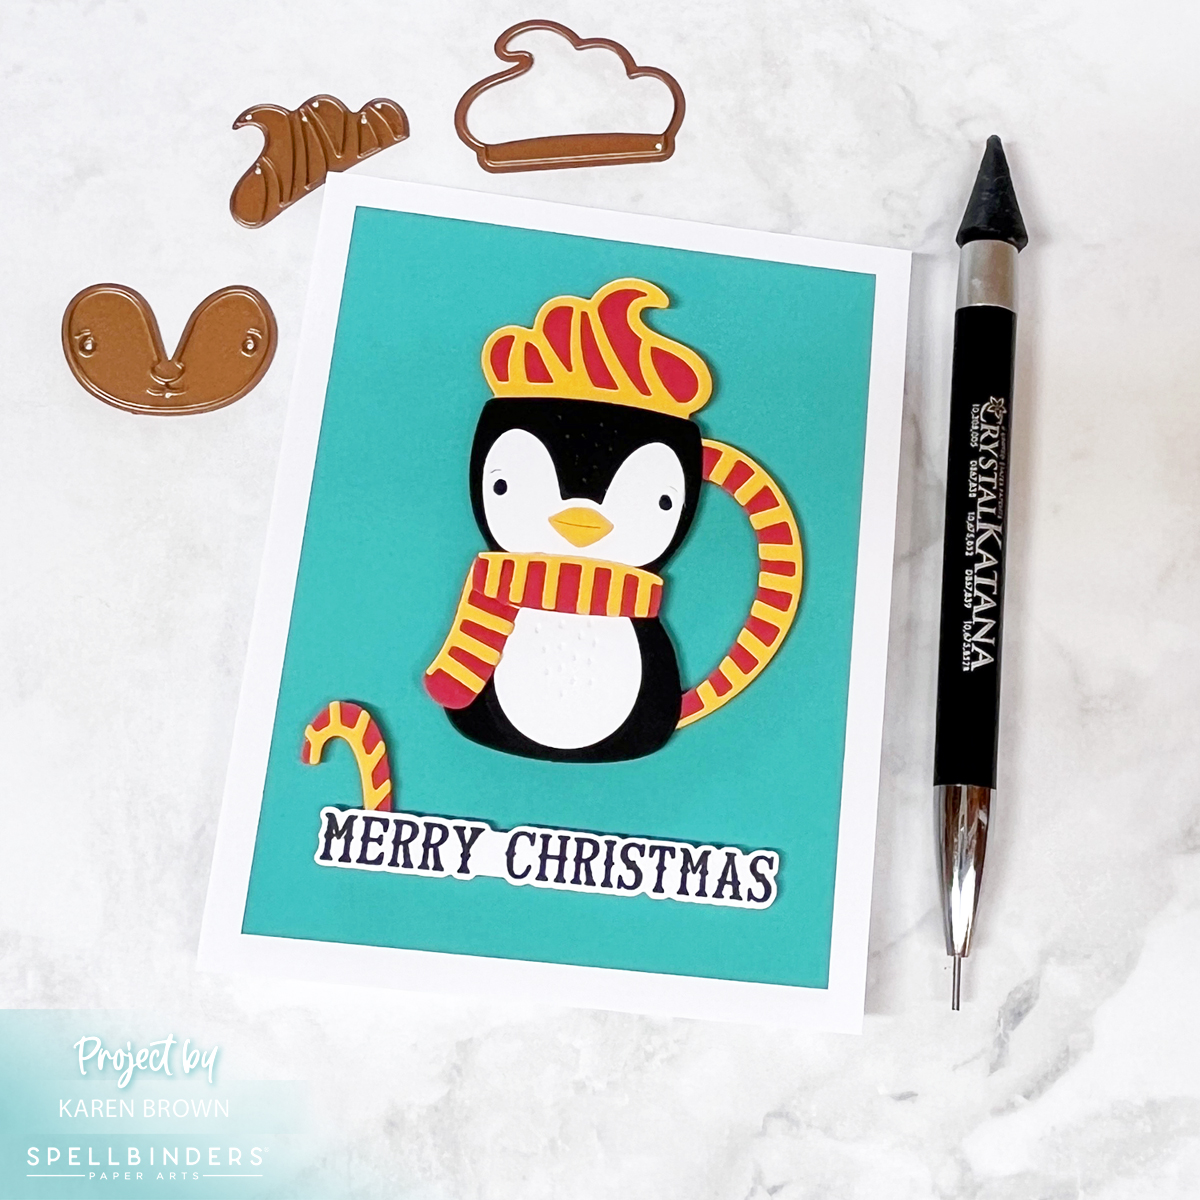
Card 3 – Die of the Month: Penguin Mug
Next up is the absolutely adorable Spellbinders Small Die of the Month Kitpenguin mug die. I went bold with my color palette to create a graphic, eye-catching card. The black and white penguin sits against a rich Teal Topaz background, with accents of Wild Berry (hot pink) and Saffron (yellow) for a fun pop.
The whipped cream topper adds texture and playfulness, and a bold “Merry Christmas” sentiment finishes it off. This little guy is equal parts charming and striking—a new favorite!
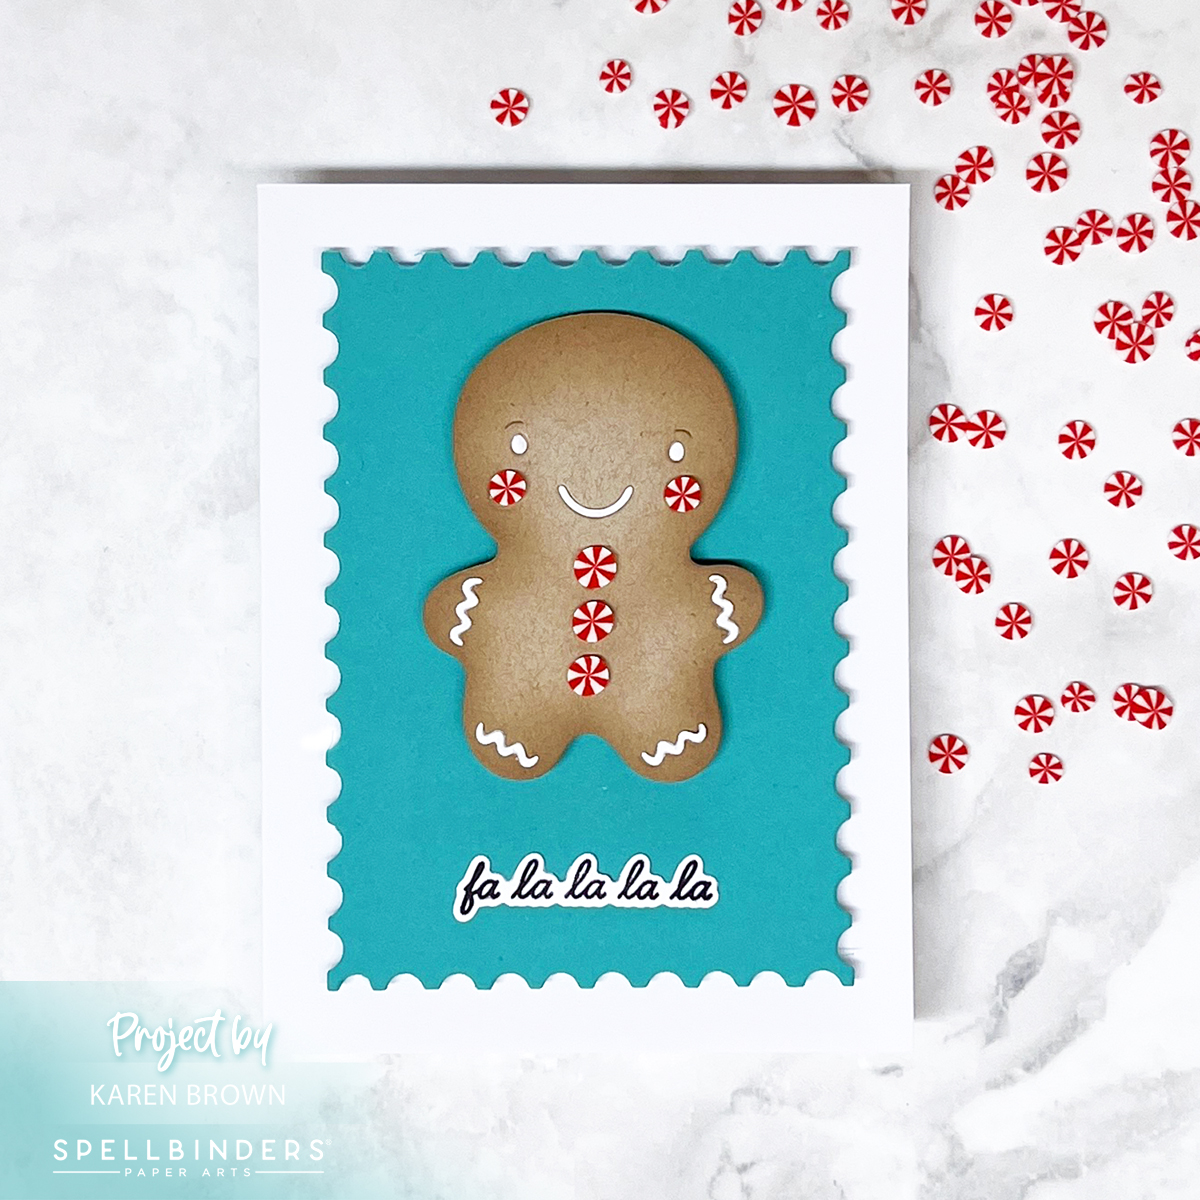
Card 4 – Bonus Caboodle: Gingerbread Man Postage Card
And finally, I couldn’t resist using the Caboodle Bonus Gift—a gingerbread man die that’s almost too cute to handle. I gave him white piped icing details, and the peppermint cheeks and buttons add whimsy and color.
He’s layered on a Teal Topaz nesting postage stampdie cut background, mounted on a clean white A2 base. The sentiment “Falalalala” adds just the right festive flair to finish off this cheerful design.
Each of these kits brought something fresh and delightful to my crafting table this month. Whether you’re a cocoa-lover, penguin fan, or peppermint enthusiast, there’s something in July’s kits to spark your holiday creativity.
Which one is your favorite? Let me know in the comments—and don’t forget to grab your kits before they melt away!
Pack your crafty bags, because this month Hero Arts is taking us on a road trip! I’m thrilled to be part of the July 2025 Club Kit Blog Hop where we celebrate this month’s travel-inspired theme. The kits are full of scenic surprises, clever sentiments, and summery fun—and I’m here to show you four creative ways to use them.
You might also be interested in my VIDEO using the July Layering Stencil Kit.
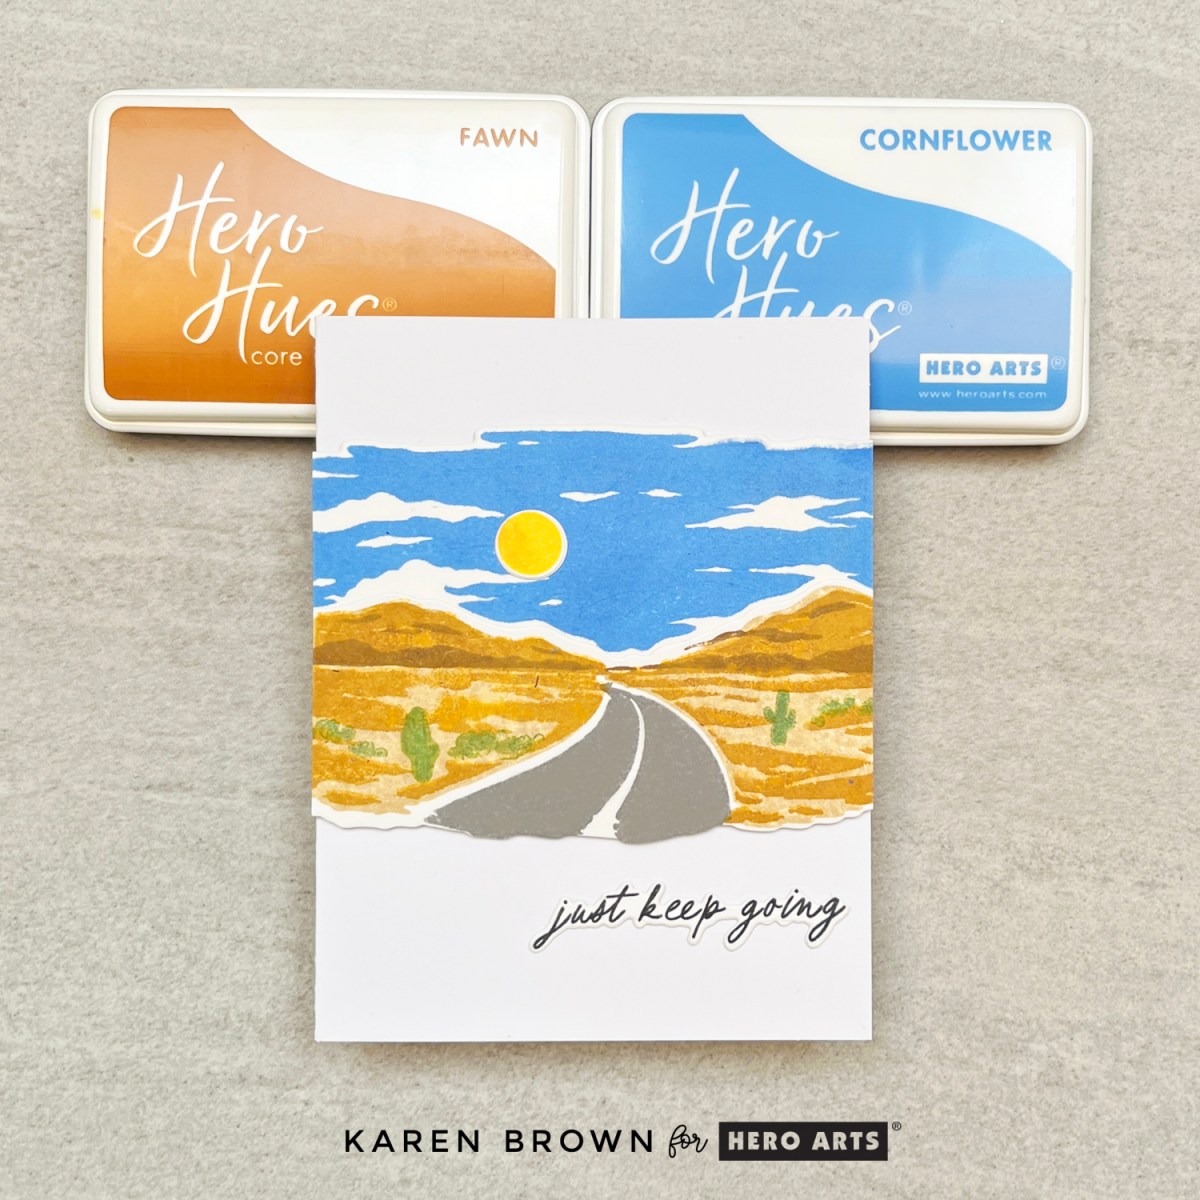
Card 1: Desert Dreams Heroscape
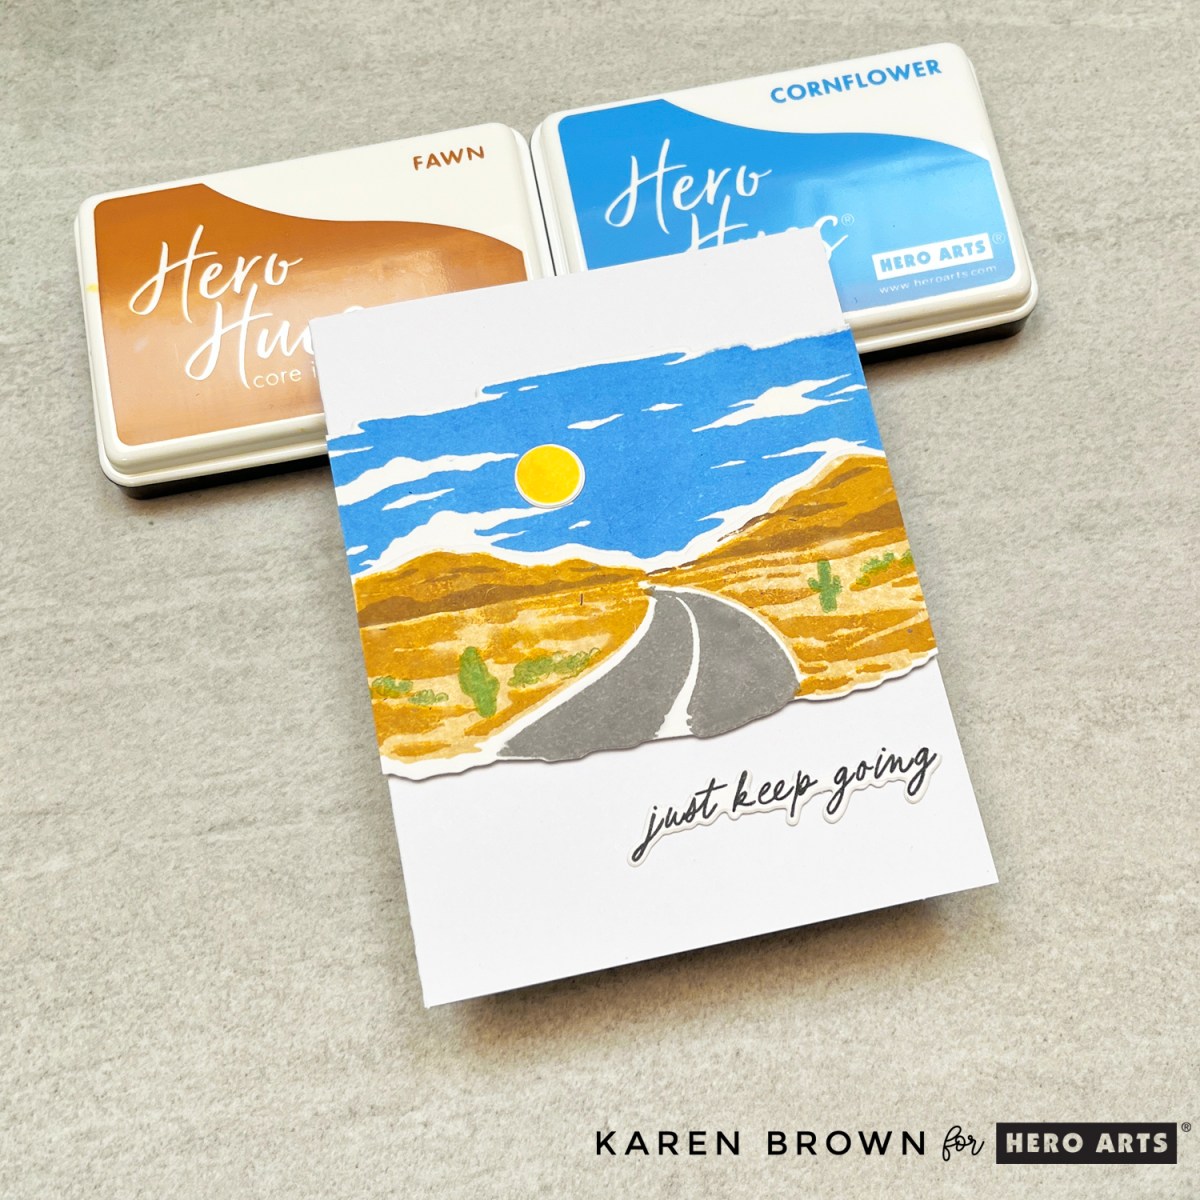
I started with the Card Kit of the Month, which features a stunning “On the Road” Heroscape. Imagine a desert road winding into the distance with low-slung mountains and a bright blue sky. These Heroscapes are layered stamps that create dimension and realism with every step.
I kept the palette natural and sun-drenched, and chose the sentiment “just keep going” — a perfect message for road trips and life journeys alike. Heroscapes are always crowd-pleasers and this one is no exception!
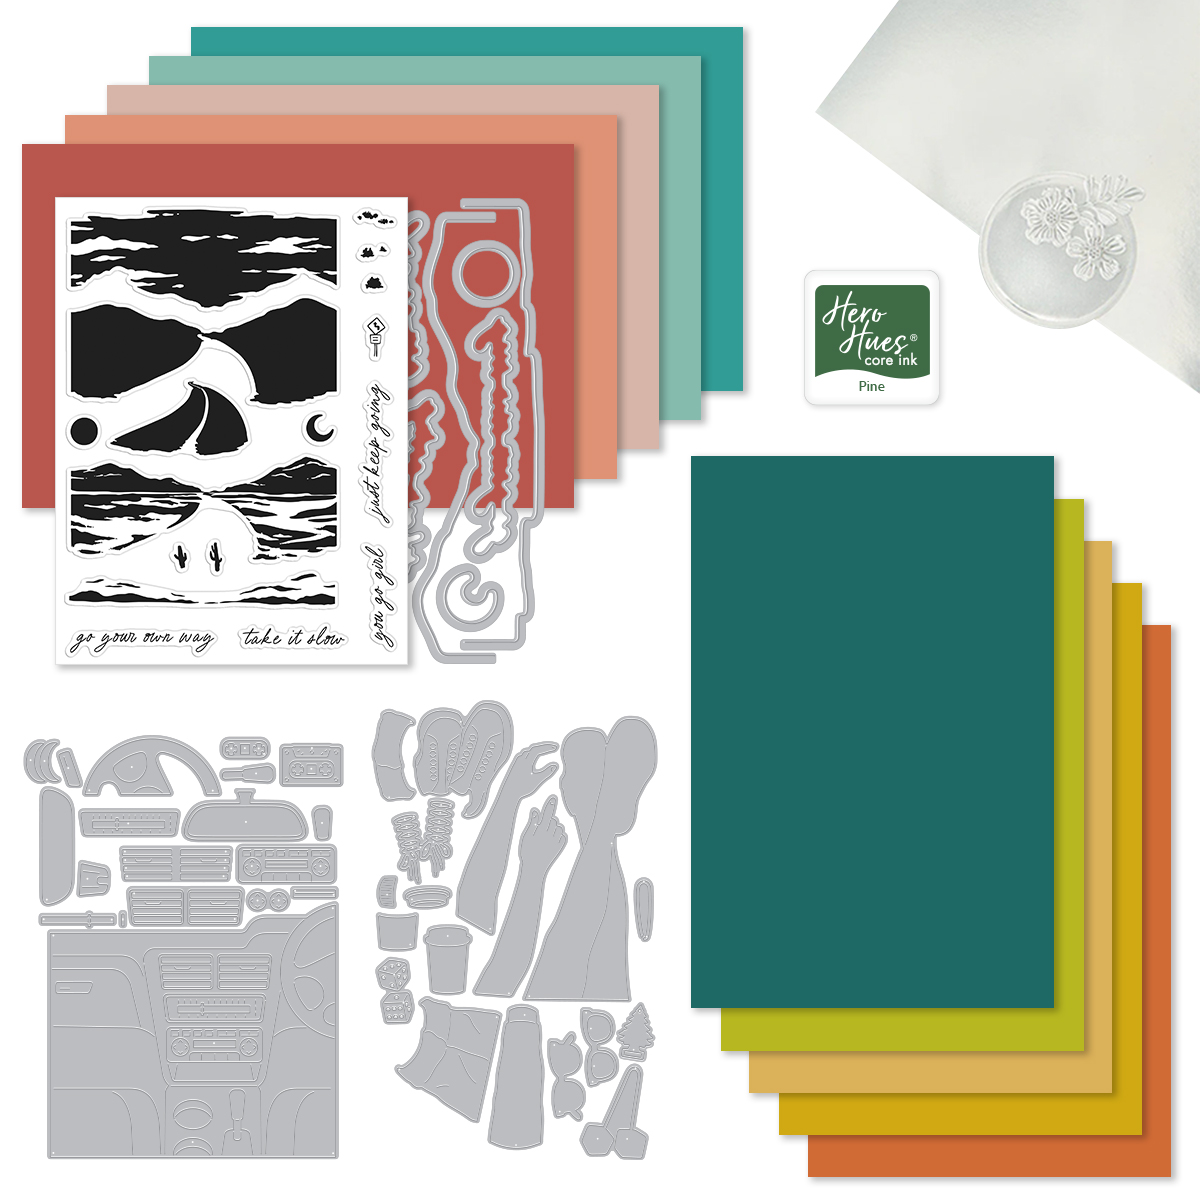
What’s Inside the July 2025 Hero Studio Card Kit?
On the Road HeroScape Coordinating Dies
On the Road HeroScape 6×8 Stamp Set
Let’s Go Die Set
Pine Core Ink Cube
10 Sheets of Cardstock (1 of each color), 5.5″ x 8.5″ (Sicily, Coral, Bellini, Waterfall, Teal Topaz, Blue Spruce, Peridot, Beeswax, Saffron, Carrot) These are some of my absolute favorite cardstock colors and I used Carrot and Teal Topaz on two cards below.
Mirror Paper, 1 sheet – 5.5″ x 8.5″
The Whole Studio includes ALL 5 of the monthly subscriptions in one discounted bundle. Cling of the Month, Stamp & Cut of the Month (new name for the subscription!), Layering Stencil of the Month, Fancy Dies of the Month, and the Card Kit of the Month.
Receive a FREE Everything’s Pine stamp & die set when you purchase The Whole Studio!
Hero Arts has many different Monthly Kits that you can subscribe to including:
The WHOLE Studio – All 5 Kits ($130 subscription + Free Shipping)
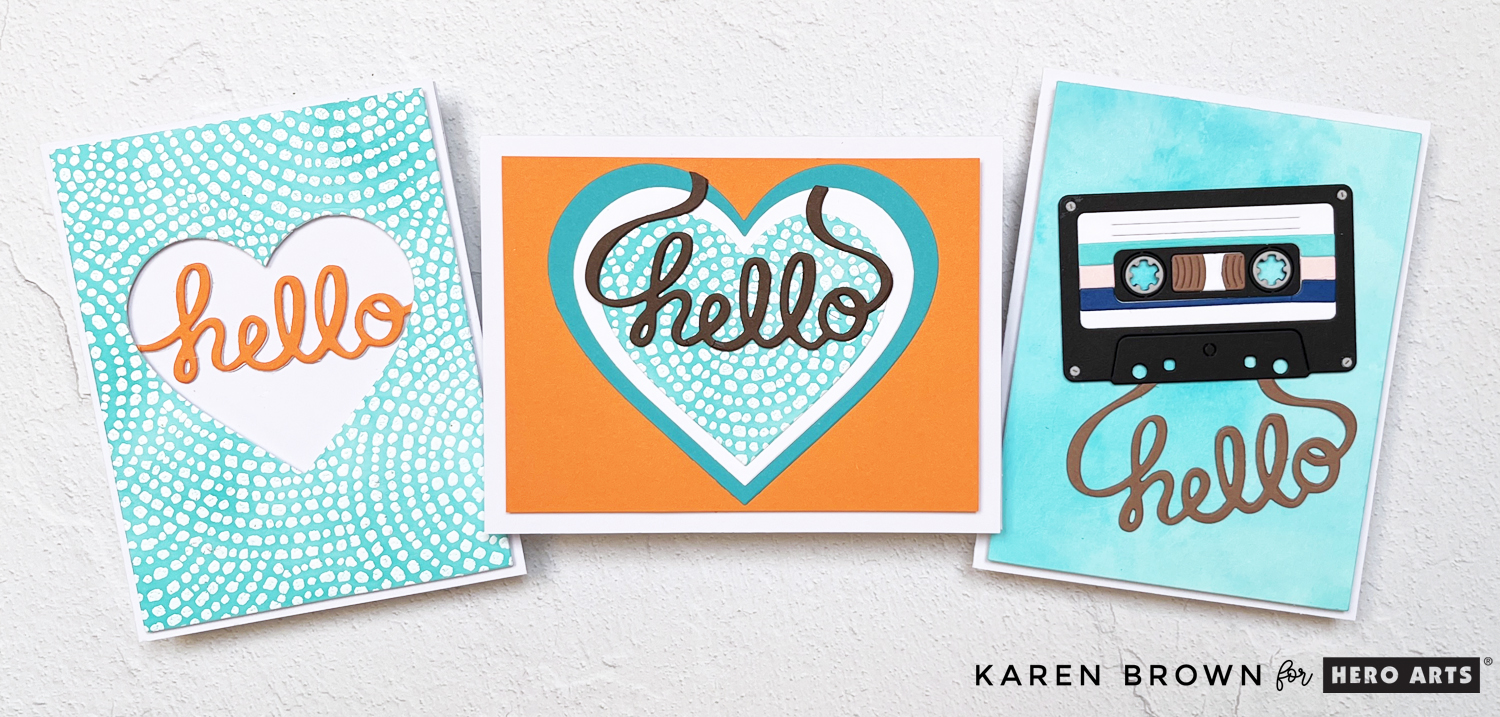
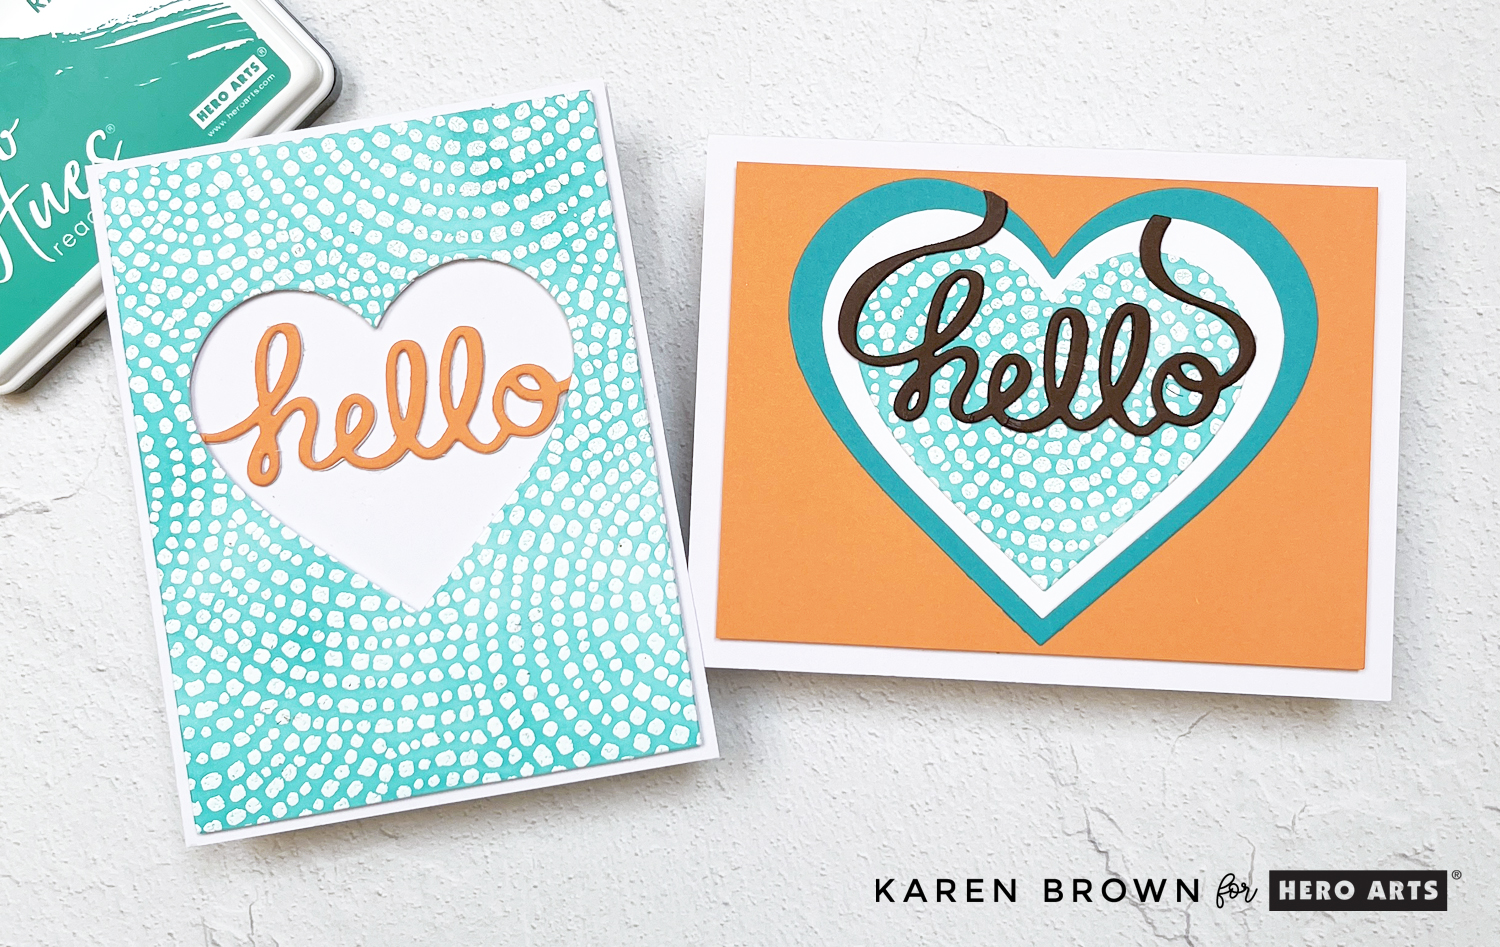
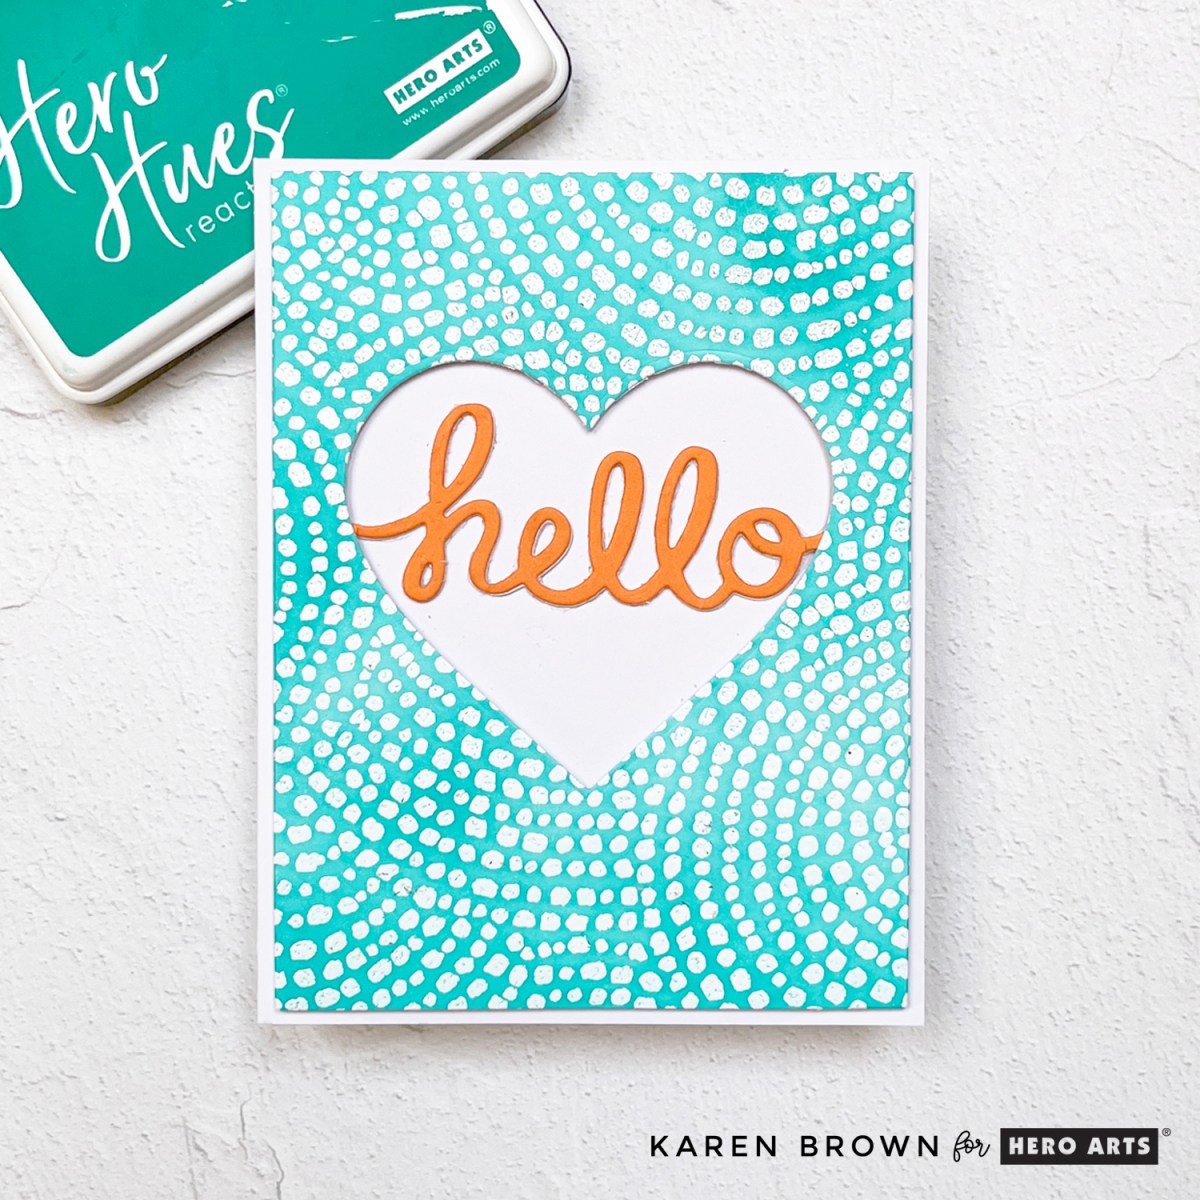
Next up is what may be my favorite Cling of the Month EVER: Cobblestone Courtyard. This rubber background stamp is a pattern of concentric circles that looks like a cozy plaza or mosaic.
For my first card, I stamped it in Unicorn White Pigment Ink and heat embossed with White Embossing Powder on Bristol Smooth cardstock. Then I ink blended over the top using Blue Raspberry ink to create a vibrant turquoise and white background. I polished the embossing with a microfiber cloth, and the crisp, clean results had me swooning.
For the second card, I used the leftover heart die cut and layered it over a Teal Topazheart, then a smaller white heart, and finally topped it with the turquoise Cobblestone heart. Another “hello” sentiment (this time in Woodland cardstock) finishes the look. The swooping tails of the sentiment are so charming! Two cards with a fresh, summery vibe!
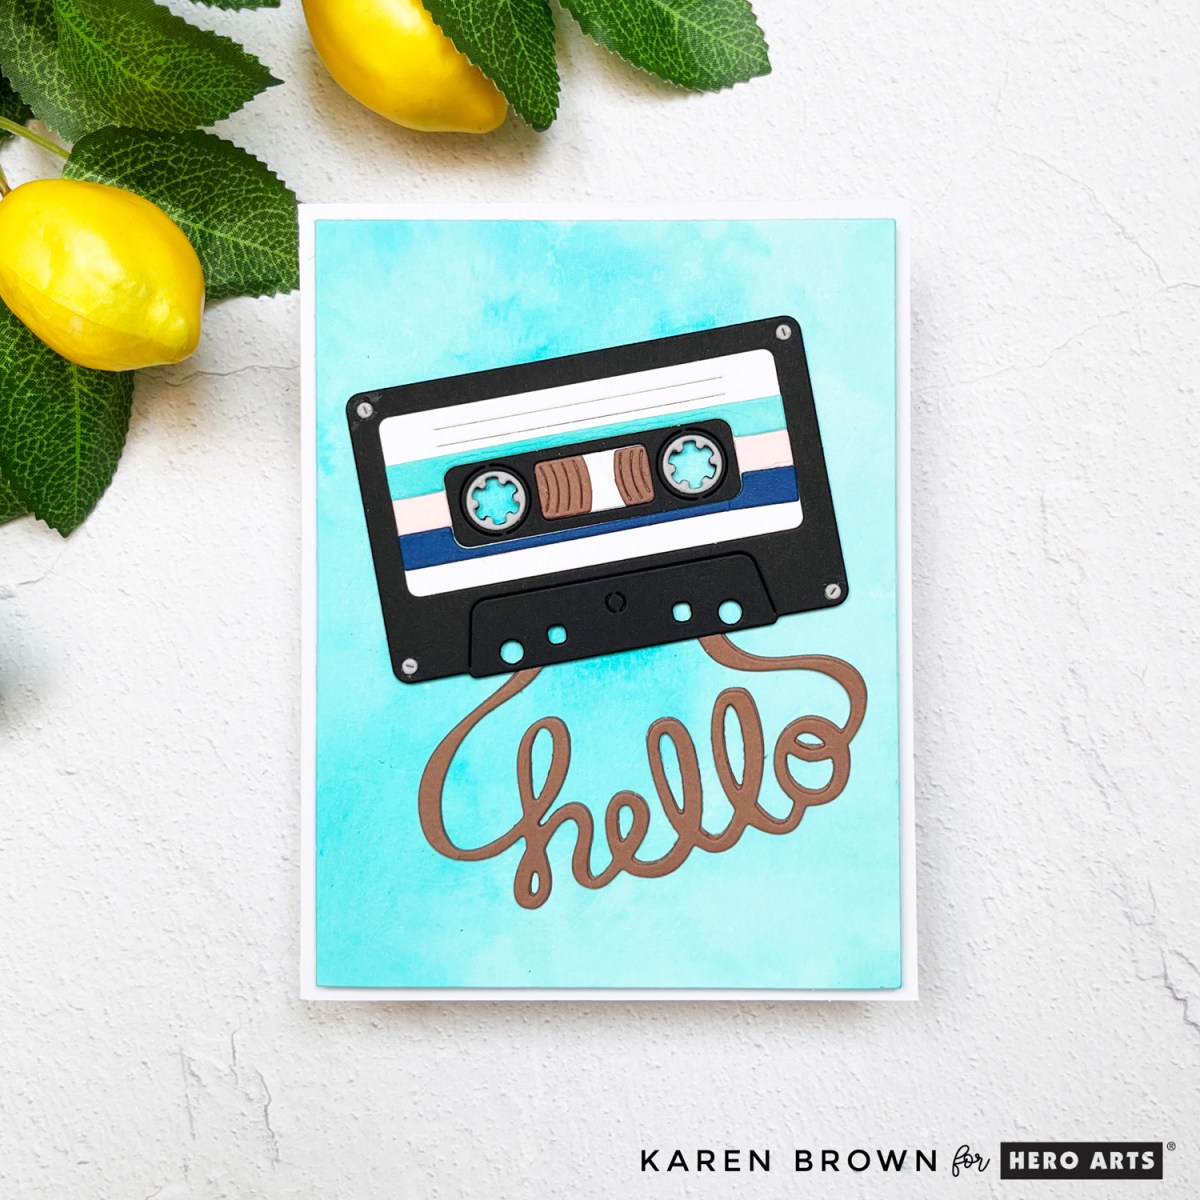
📼 Card 4: Mix Tape Magic
For my final card, I had fun with the Fancy Die of the Month: Mix Tape. This playful set includes a cassette tape die with the word “hello” cleverly shaped from the tape itself. I used this hello sentiment on three of my cards today.
I placed the cassette on a handmade ink-smooshed background using Blue Raspberry, Splash, and Pool Party inks. I wanted my background to look like a shimmery swimming pool. Want to try ink smooshing? Here’s how:
Ink Smooshing Quick Steps Tutorial:
I liberally inked a 6×6″ acrylic block with Blue Raspberry, Pool Party and Splash inks. This is the panel I used for my background.
I spritzed the ink with water and “smooshed” the block onto a piece of watercolor paper
I weighted the inked block with a book for 5 minutes
I uncovered my panel. If the ink pooled, I dabbed with a paper towel.
I made a “second generation” panel for a future project by taking a piece of Bristol Cardstock and soaking up the excess ink on my work space. So this is another Two-Fer!
The retro vibe of the tape plus the dreamy summer colors made this card a total blast to create.
Hero Arts will give away a $50 gift card, drawn from the comments left across the hop. Enter by Saturday, July 5th at 11:59pm PT, and the winner will be announced on the Hero Arts blog the following week. Leave a comment on all stops for more chances to win!
Whether you love to layer, emboss, smoosh or die cut, the July 2025 Hero Arts Club Kitshave something inspiring for every type of cardmaker. Don’t forget to follow along the Blog Hop to see even more road trip-ready inspiration. Thanks for stopping by—and remember: Just keep going!
There’s nothing quite like the smell of fresh espresso…unless it’s crafting with Hero Arts’ new What’s Brewing Collection! This month’s release is a caffeine-lover’s dream and I was thrilled to join the Instagram Hop celebrating this clever and super-popular theme in the cardmaking world.
Coffee Theme Card
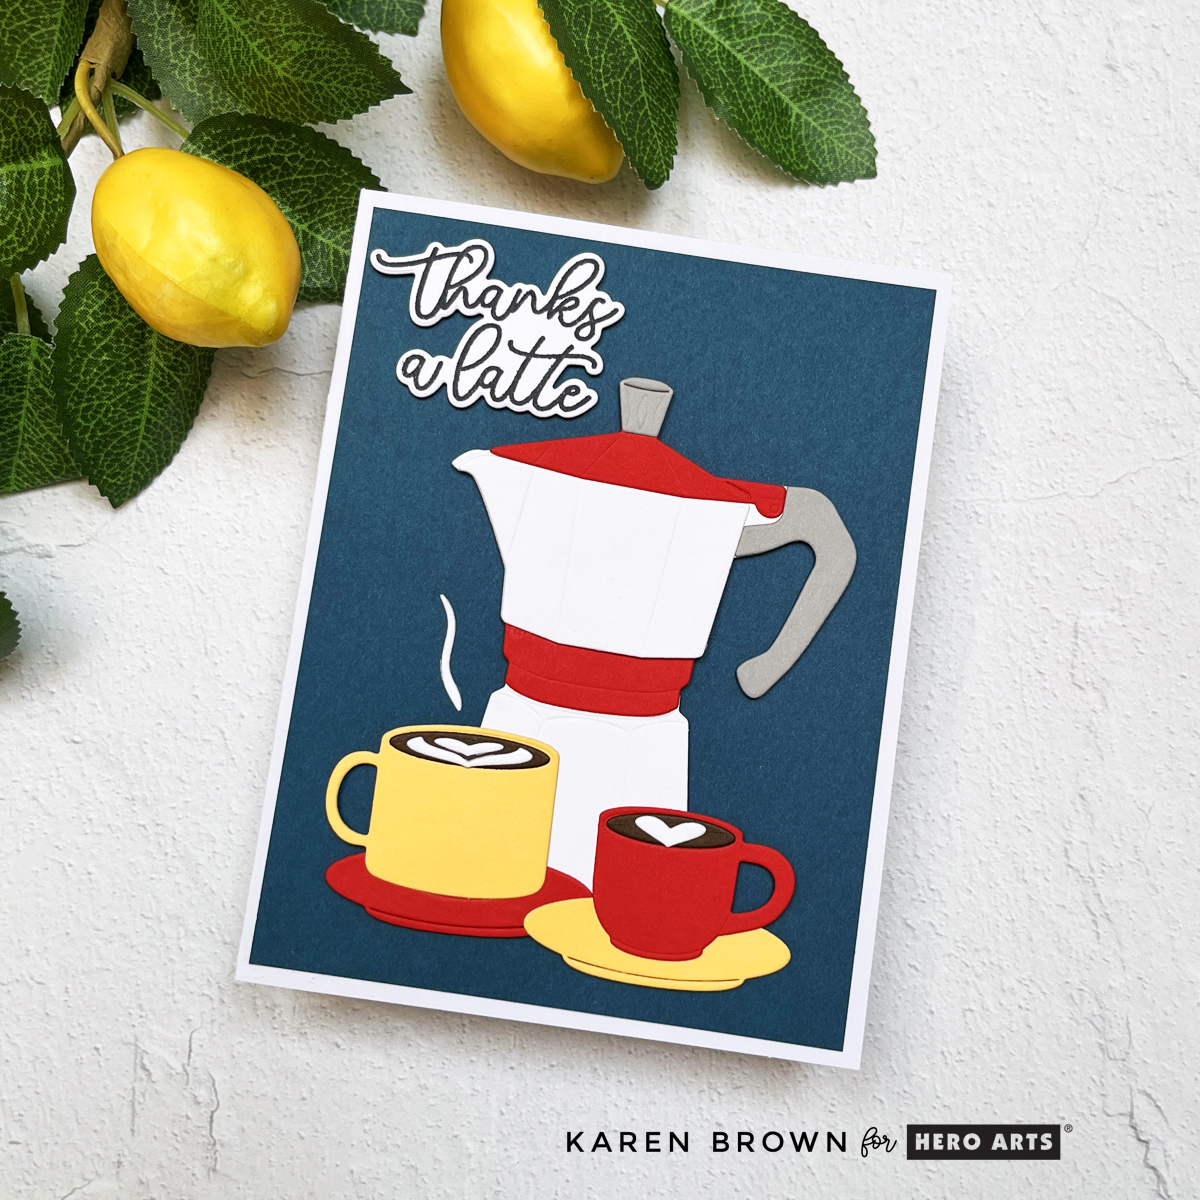
For my card, I embraced the bold graphic aesthetic of classic kitchen coffeeware with a clean, eye-catching design. I started with the Stove Top die set, which I cut in bright white with Poppy Red accents and a gray handle. This instantly brought to mind the timeless Moka pots that live on so many stovetops around the world.
To match, I added two sweet little espresso cups and saucers—one in Beeswax Yellow, the other in Poppy Red—inspired by the cheerful espresso set in my own kitchen. I set the whole scene against a rich Oceanside Blue background, which really makes the elements pop.
The sentiment? A classic pun that never fails: “Thanks a Latte” from the Coffee or Espresso Stamp & Cut set. It’s the perfect blend of gratitude and caffeine-love!
This card also has a bit of a personal touch—I make myself a latte every single afternoon. It’s a daily ritual I truly look forward to. In the summer, it’s all about iced lattes. In the winter? A warm, frothy cup is just the thing.
If you like the graphic look of this card you might be interested in reading my post: Under Sea Magic.
This collection has so much heart (and a good jolt of creative energy), and I absolutely loved crafting with it. Don’t miss the Hero Arts Instagram Hop celebrating this release—you’ll find tons of inspiration, fresh ideas, and even giveaways! And look me up on Instagram: Karens_mini
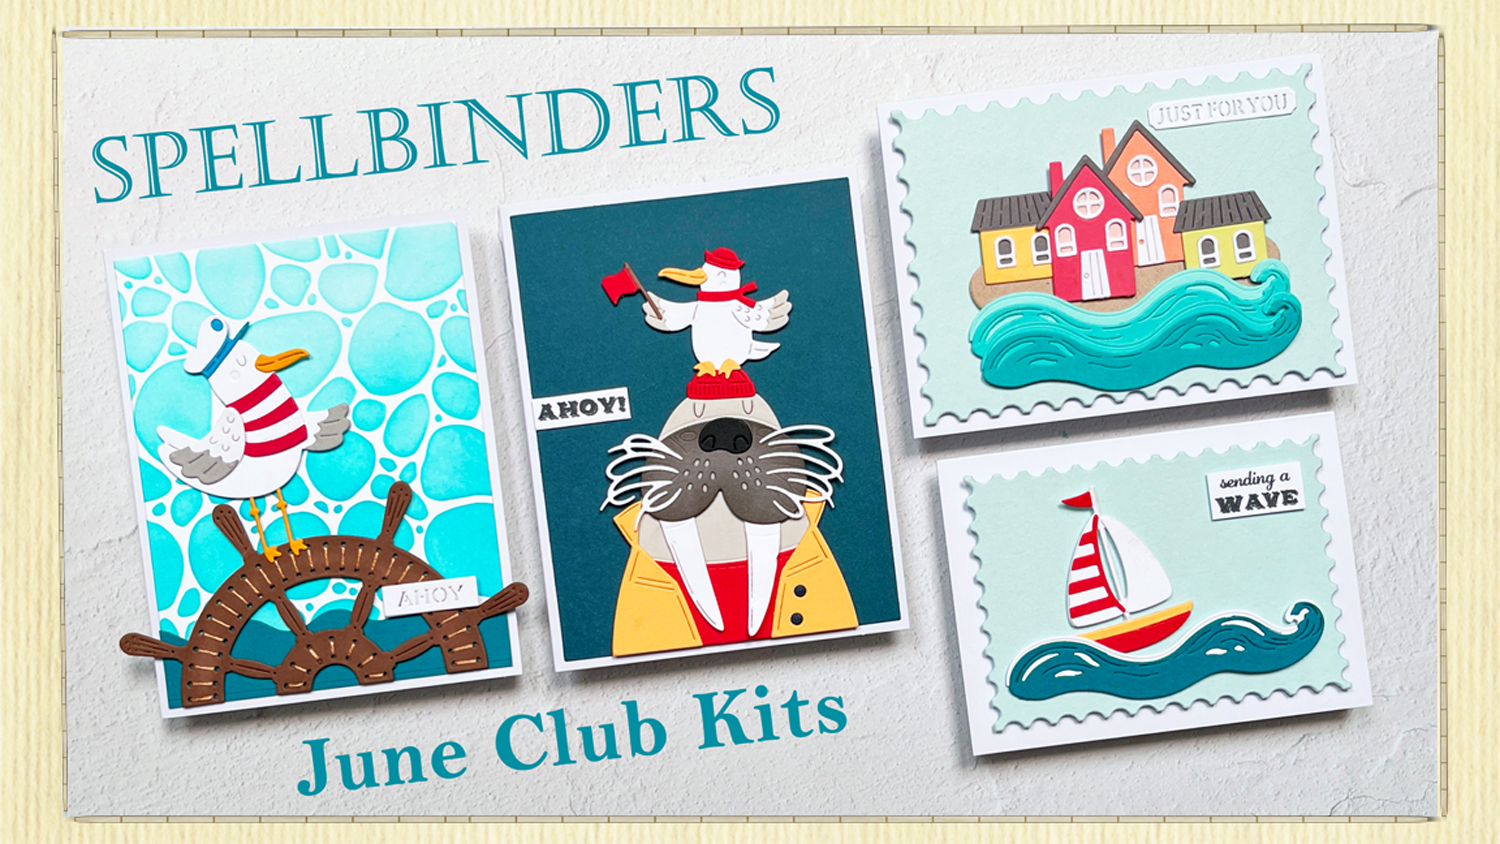
The June 2025 Spellbinders Club Kits are making waves—and honestly, the buzz is real. This release might just be the best in a long time. If you’ve been waiting for the perfect moment to dive into the Deluxe Caboodle (all the kits plus the bonus item and a hefty 58% savings!), now’s the time to anchor your subscription!
Set Sail with the Spellbinders June Club Kits!
This month’s kits are delightfully nautical and full of personality. I had so much fun creating four playful and unique cards that capture everything from charming seaside scenes to silly sea life.
Card 1 – Graphic Nautical with the Die of the Month
Minimal color, maximum charm. I created a bold and graphic card using the Die of the Month kit. The dark Oceanside cardstock background makes the characters pop—a seriously adorable walrus in a bright Beeswax yellow rain slicker and Poppy red beanie, alongside a flag-waving seagull in matching nautical flair. The clean white “Ahoy!” sentiment lets this duo shine.
The walrus was die cut from Fog and Anchor cardstocks and softly ink blended on the muzzle for extra dimension. All the cardstock is from the Color Wheel Sampler Pack.
Who knew a walrus could steal the show?
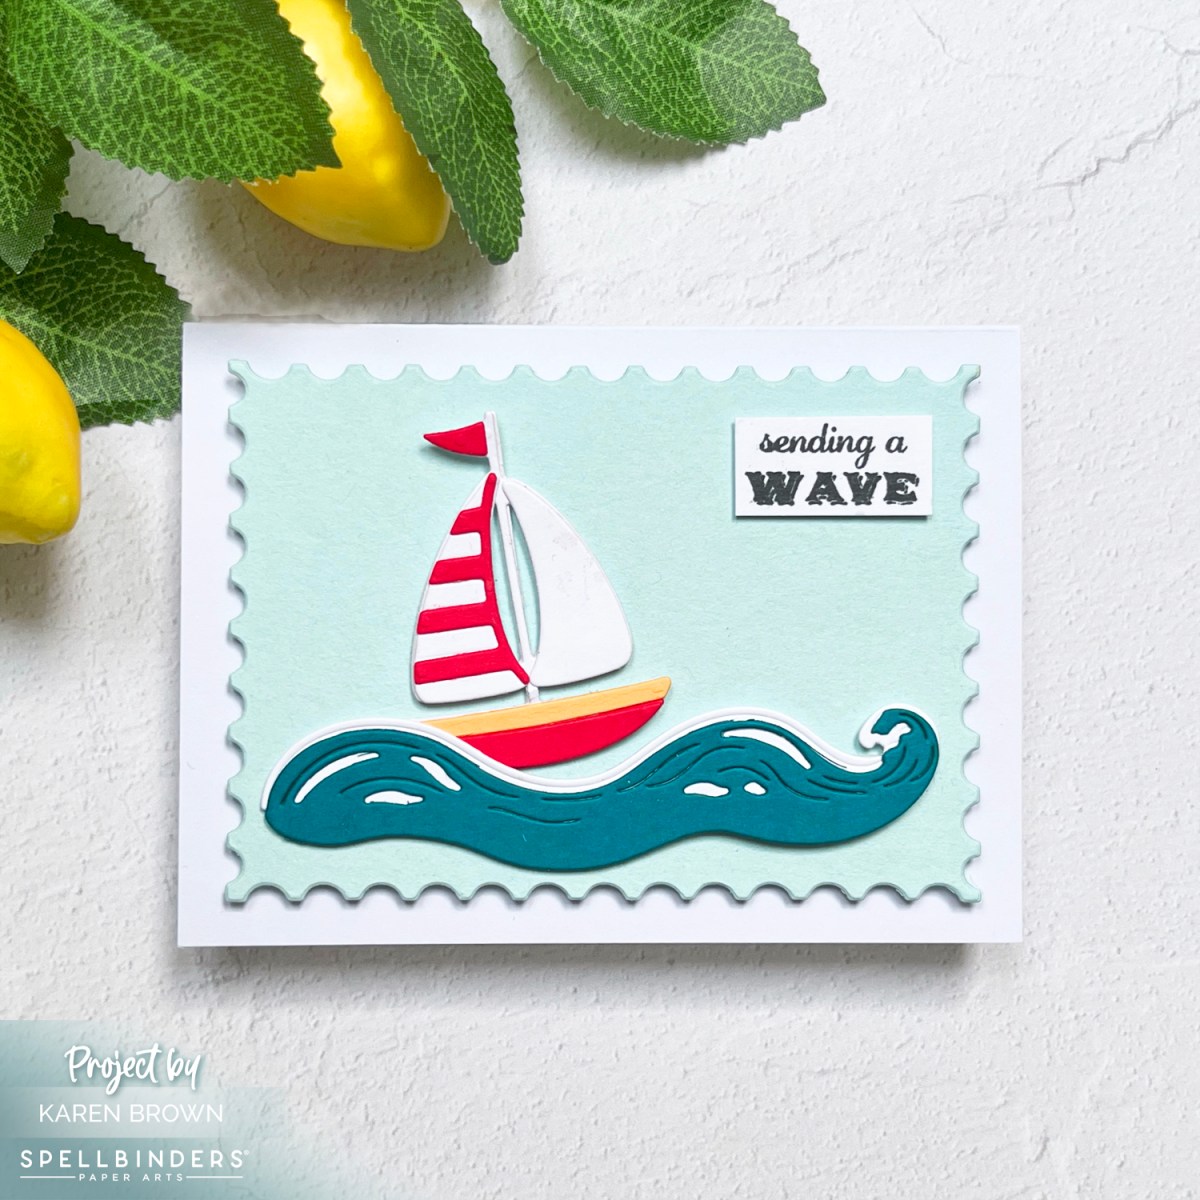
⛵ Card 2 – Cheery Sailboat with the Caboodle Bonus
This month’s Deluxe Caboodle Bonus Gift is a sweet little die cut sailboat, and I couldn’t wait to take it for a spin!
I crafted a bright red, white, and yellow boat cruising on gently layered waves of blue-green and white cardstock. Becuase the mast is somewhat delicate, I die cut the boat twice and glued together for a sturdier focal point. The wave dies are part of the Large Die of the Month Kit. The background is a soft mint green, die cut with my go-to Postage Stamp Infinity Dies. The sentiment, “sending a wave,” perfectly matches the cheerful tone. The card is slightly smaller at 4½ x 5″—perfect for a quick note.
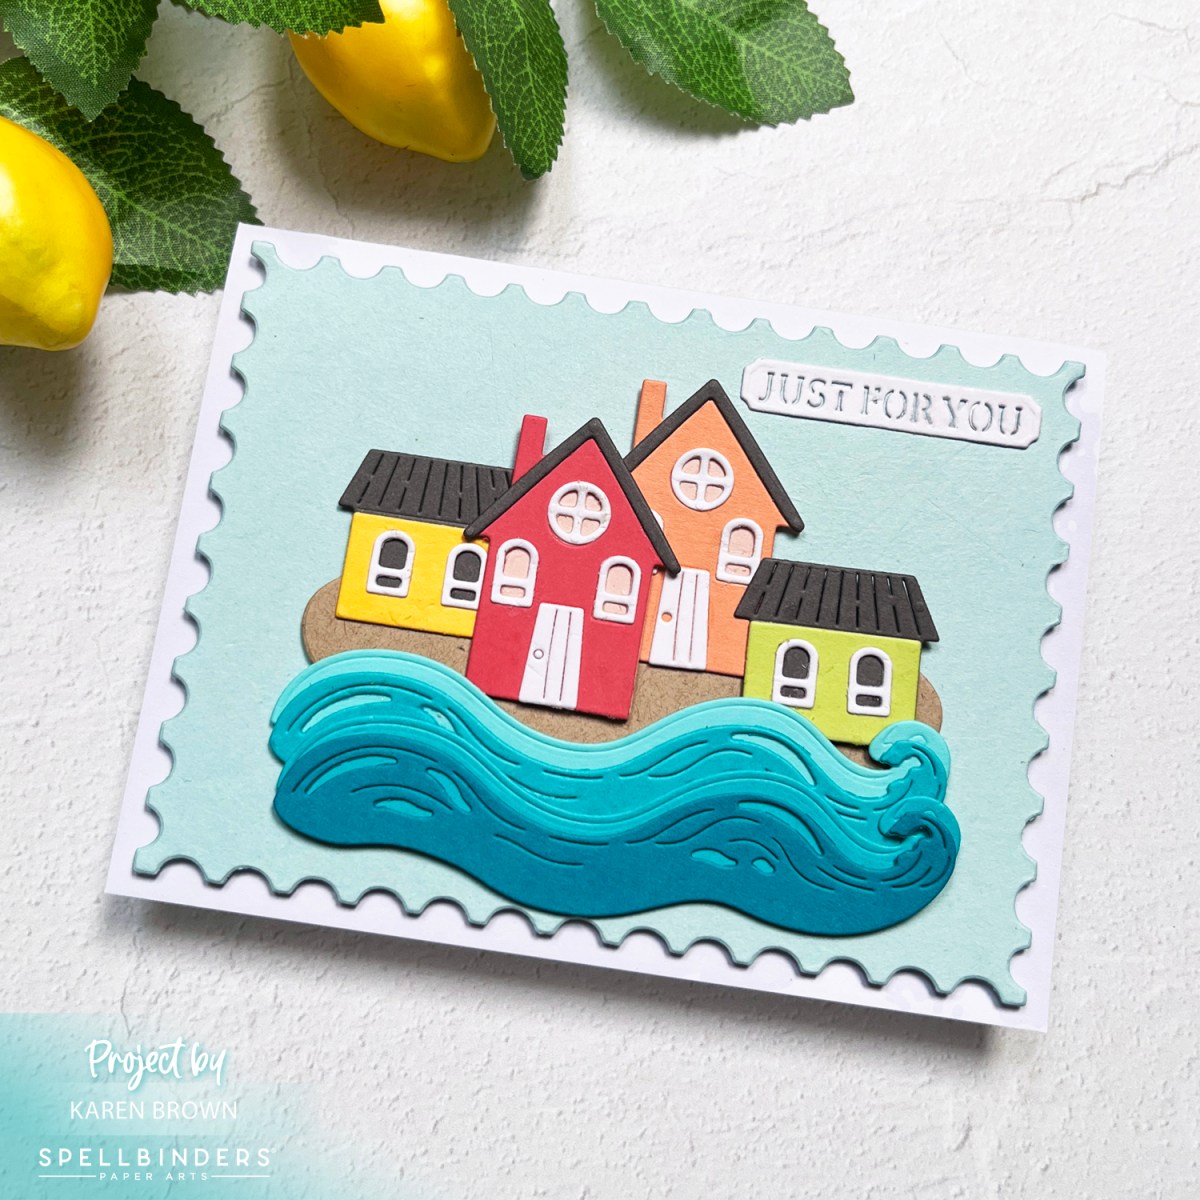
🏠 Card 3 – Rainbow Coastal Village with the Large Die of the Month
Next up: a charming seaside scene built with the Large Die of the Monthkit. I assembled four tiny houses in sunny rainbow sherbet hues nestled beside rolling waves. It’s a joyful and relaxing little coastal village, with a “Just for You” die cut sentiment on top.
Once again, the background is mint green, die cut with my postage stamp die for that crisp framed finish.
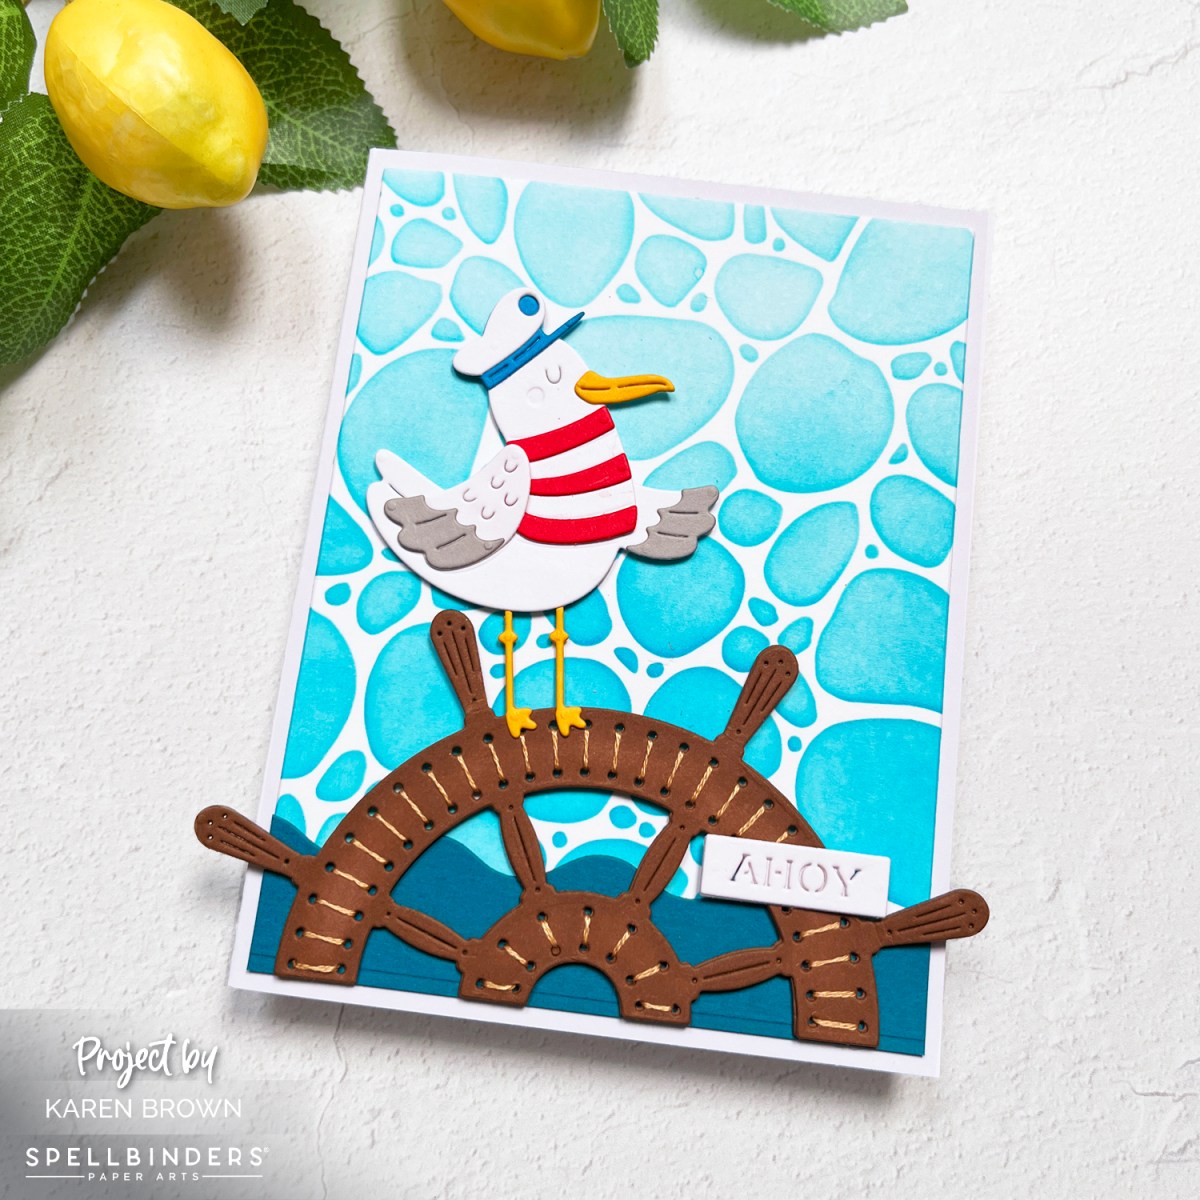
⚓ Card 4 – Stitched Captain’s Wheel with a Playful Seagull
Stitch lovers, you’re going to adore this one! I used the Stitching Die of the Month to create a weathered captain’s wheel, stitched with DMC 437 (tan) using two strands of floss. I doubled up the die cuts for stability before stitching.
The background is stenciled using Hero Arts Pebbles and Stones Stencilwith Splash ink, giving the look of water or bubbling seafoam. A goofy seagull in a red and white shirt and cap is perched just off center on the wheel for a fun focal point. The included “ahoy” sentiment completes the look.
Whether you’re here for the critters, the stitching, the sea breeze vibes—or all of the above—the June 2025 Club Kits deliver something truly special. ⚓💙
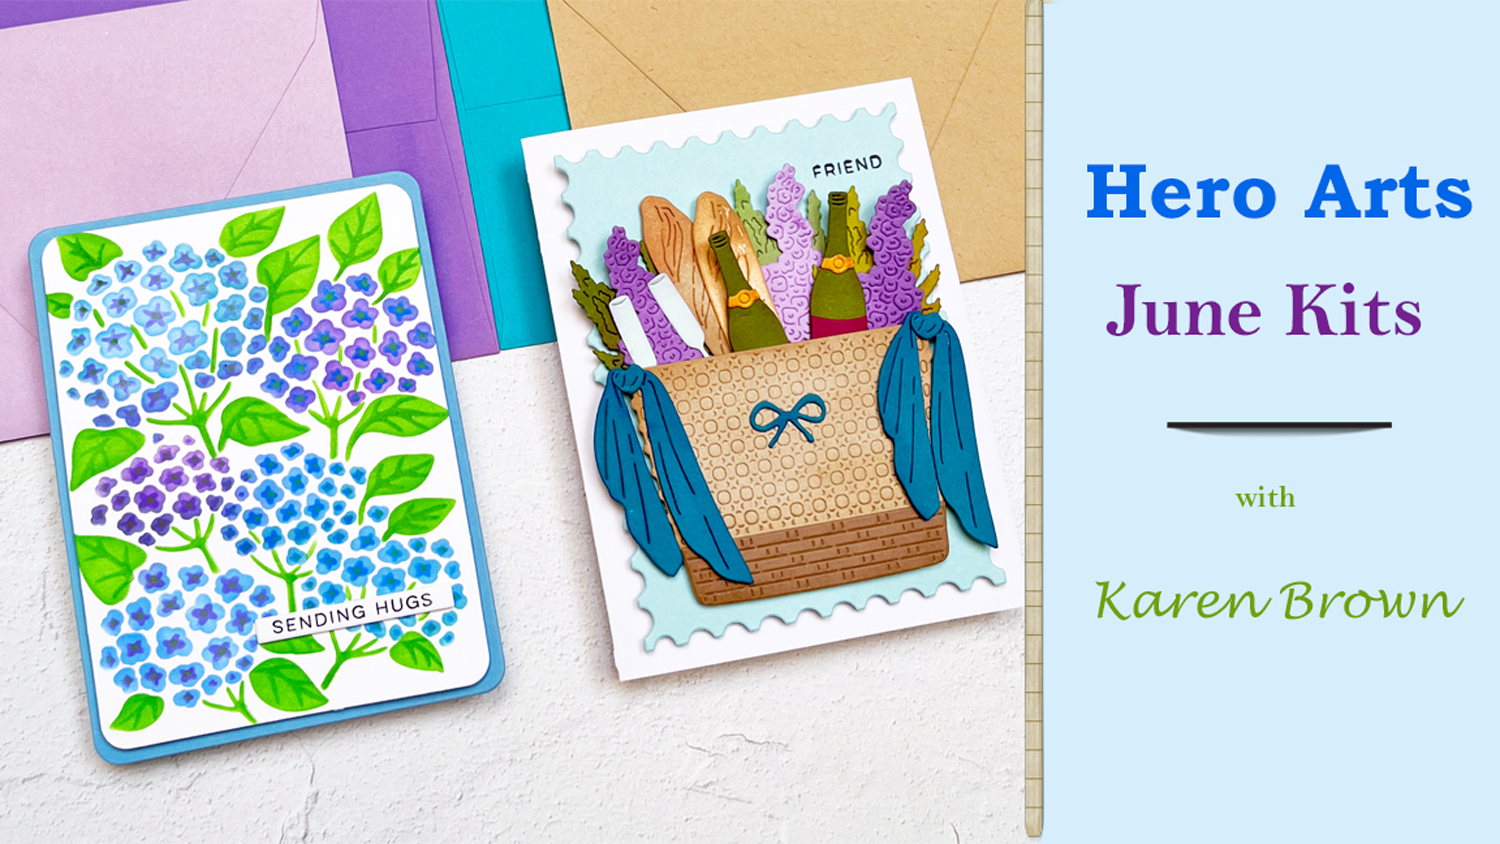
The Hero Arts June 2025 Club Kits are here, and the theme is everything I love about summer: Coastal Vibes! Think breezy afternoons, soft ocean light, and all the charm of an elegant seaside picnic. The kits this month are overflowing with creative possibilities—from charming die cuts to gorgeous stencils. I had so much fun turning these kits into two cards that I’m excited to share with you!
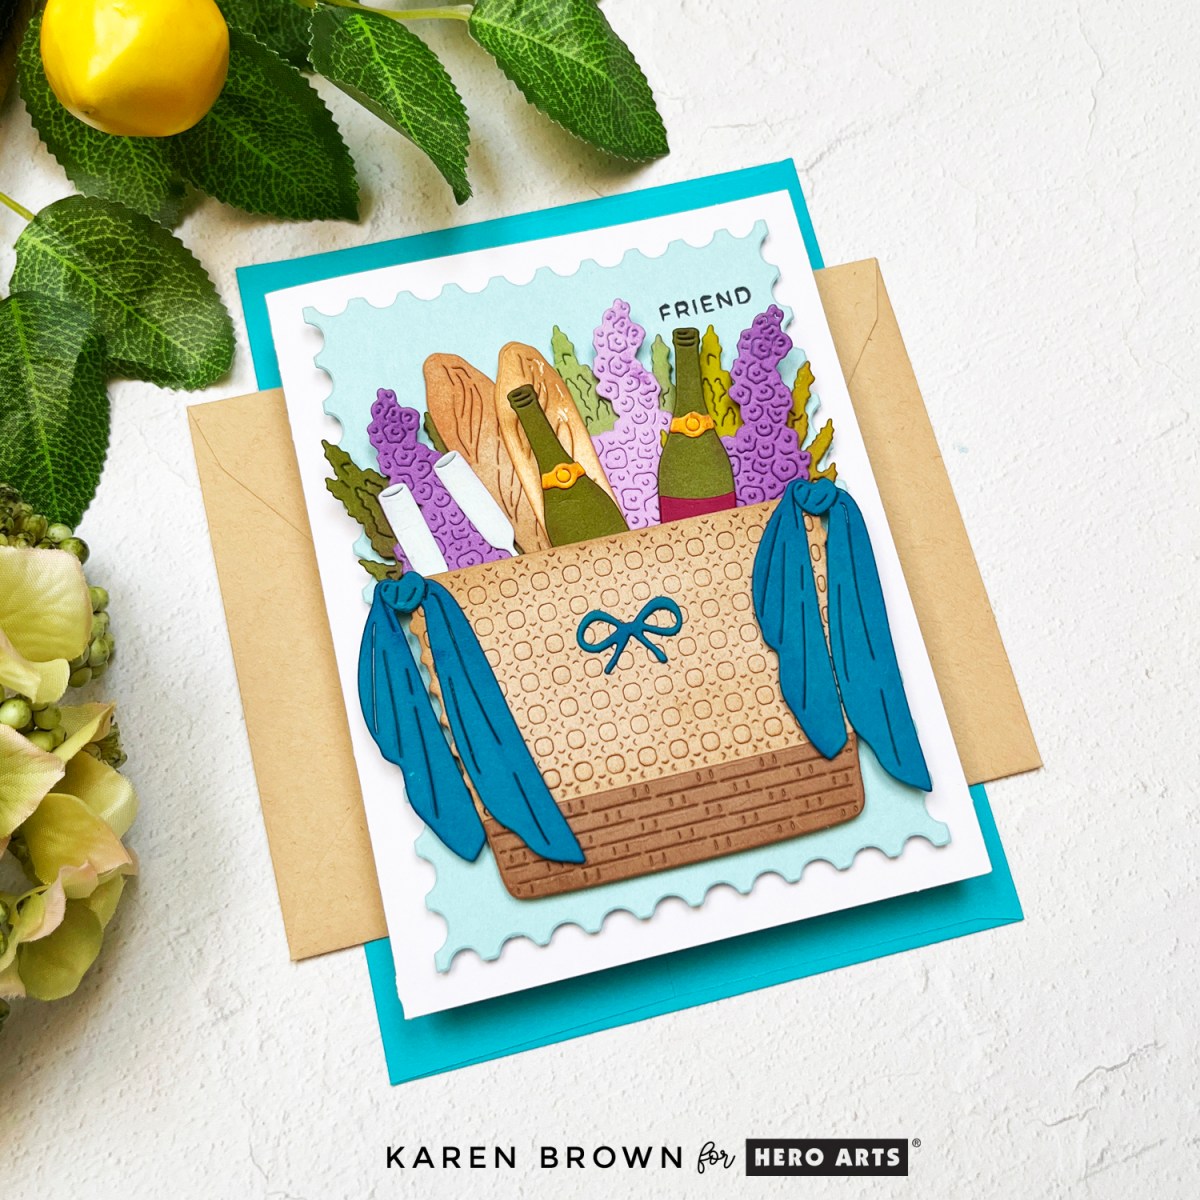
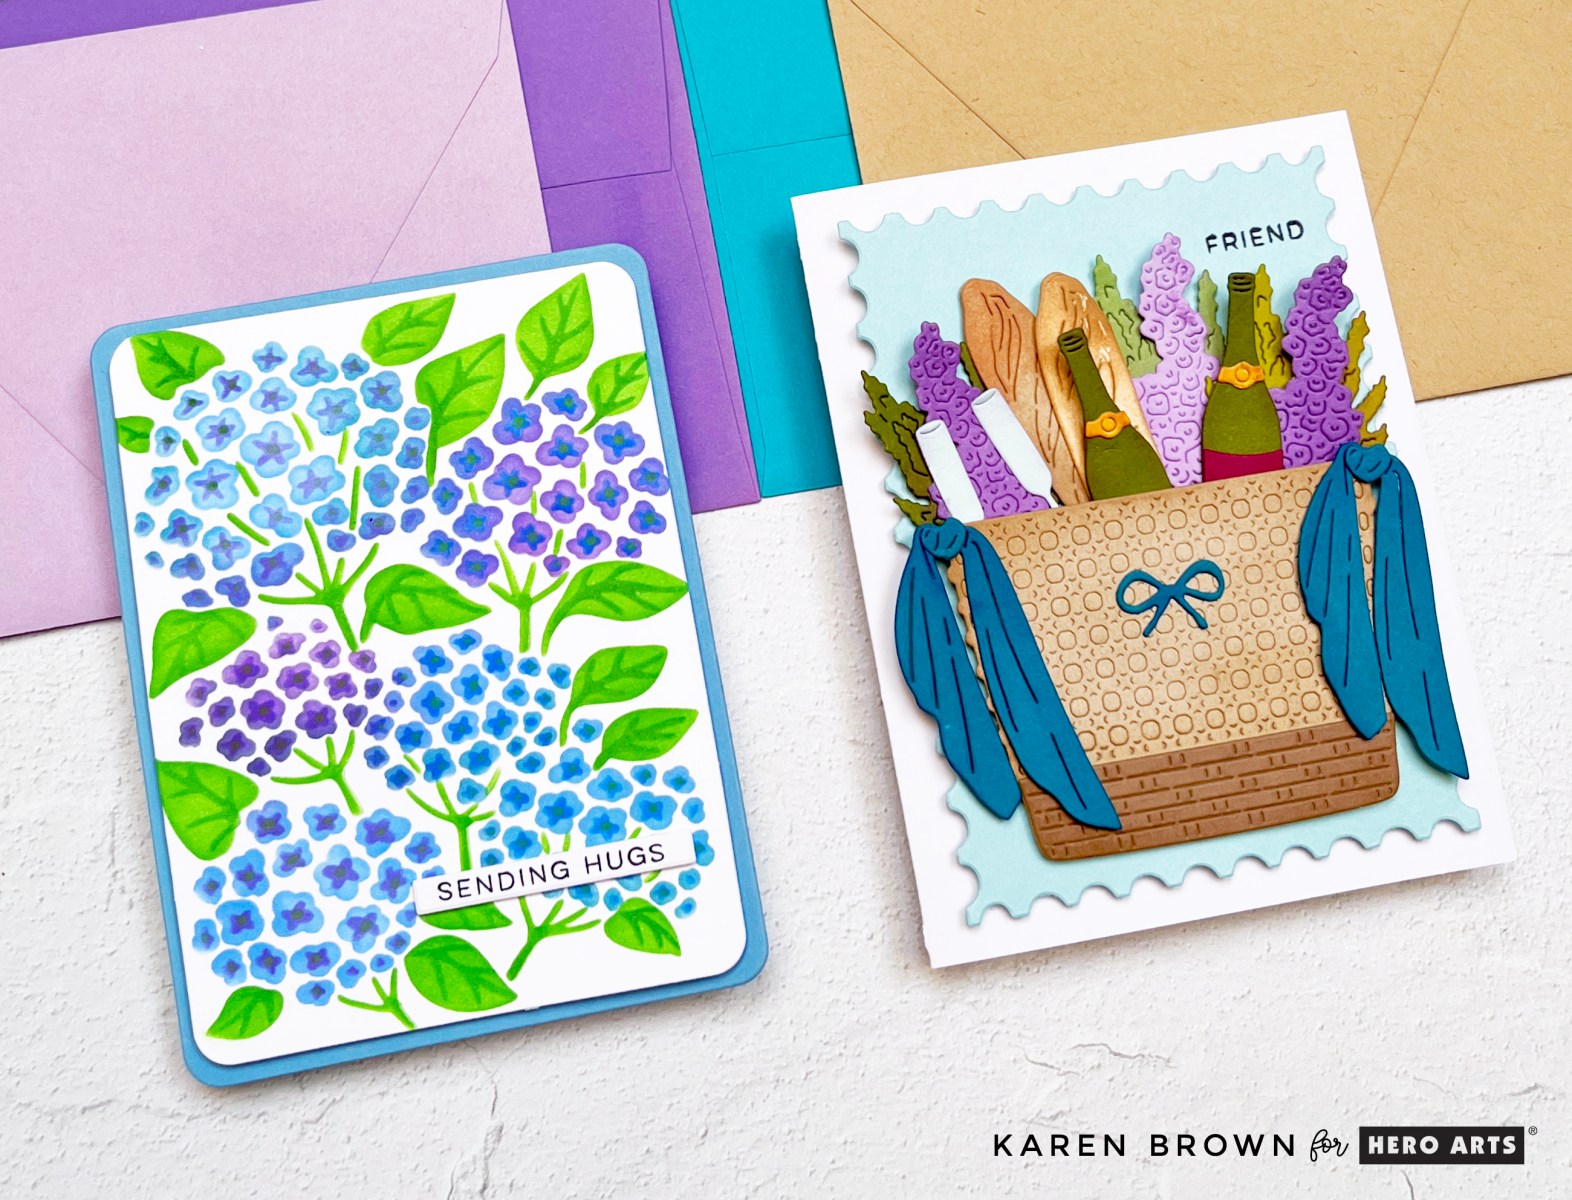
Card 1: A Coastal Picnic Basket
For my first card, I used the June 2025 Card Kit featuring the Beach Bag die set—but instead of a beach bag, I turned mine into a coastal picnic basket bursting with summer goodies!
Inside the basket: 🥖 Baguette-style bread 🍷 Wine bottles and glasses 🌸 Gorgeous Wisteria flowers
To add a bit of flair, I included two flowing scarves draping down the sides of the basket in rich jewel tones, which contrast beautifully with the tan base of the basket. A little light ink blending on all the die cuts added subtle dimension and warmth to the scene. I used the Nesting Postage Stamp Infinity Dies to create my background panel. This die kit is perfect for the foodie in your life or for anyone who enjoys the simple joy of a summer picnic!
What’s Inside the June 2025 Hero Studio Card Kit?
• Summer State of Mind 6×8 Clear Stamp Set • Summer State of Mind Coordinating Dies • Beach Bag Die set • Sand Embossing Powder, 0.5oz • 10 Sheets of Cardstock- 2 of each color, 5.5″ x 8.5″ (Fawn, Coral, Seaside, Waterfall, Blue Spruce)
The Whole Studio includes ALL 5 of the monthly subscriptions in one discounted bundle. Cling of the Month, Stamp & Cut of the Month (new name for the subscription!), Layering Stencil of the Month, Fancy Dies of the Month, and the Card Kit of the Month.
Receive a FREE Hiya Friend Sentiment stamp & die set when you purchase The Whole Studio!
Hero Arts has many different Monthly Kits that you can subscribe to including:
The WHOLE Studio – All 5 Kits ($130 subscription + Free Shipping)
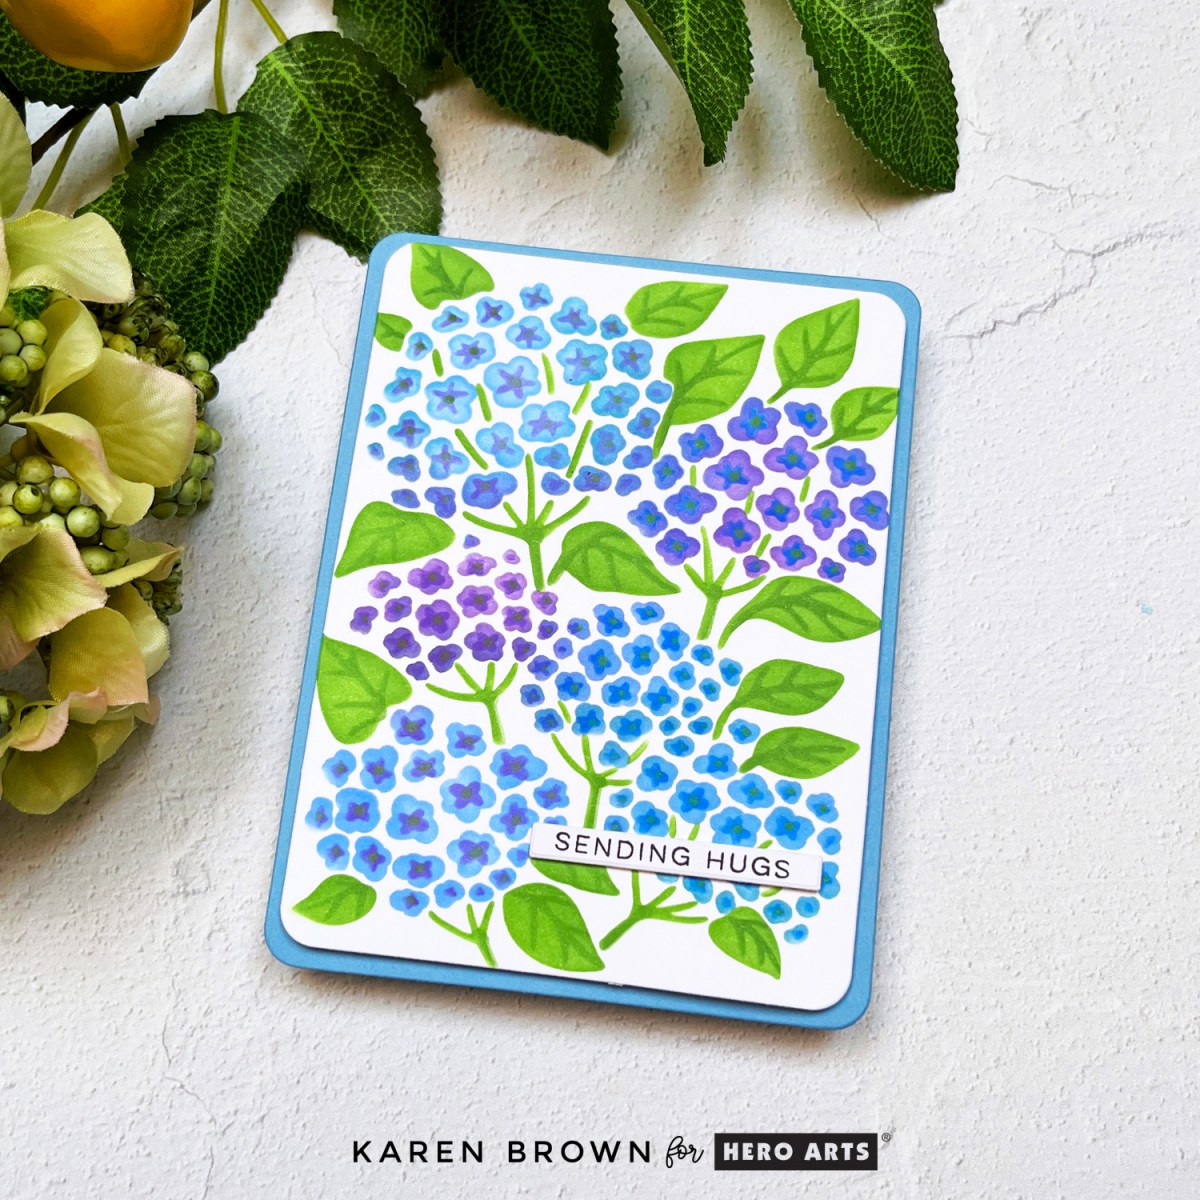
For my second card, I turned to the stunning new June 2025Layering Stencils – Hydrangea. I blended blue and purple Hero Arts Inks to create a lush hydrangea bloom that nearly steals the show.
After stenciling, I used my Rounded Rectangle Infinity Dies to trim the panel neatly, and mounted it on a lovely Periwinkle card base. The sentiment is a clean and simple “sending hugs”—just enough to send a warm message without distracting from the florals.
This layering stencil set is so versatile—you could use it for a Get Well, Sympathy, Birthday, Thank You, or even a Mother’s Day card. It’s a floral design that truly fits any occasion.
This post is part of the Hero Arts June Release Blog Hop, so be sure to check out the inspiration from other designers and leave comments for a chance to win a $50 gift card!
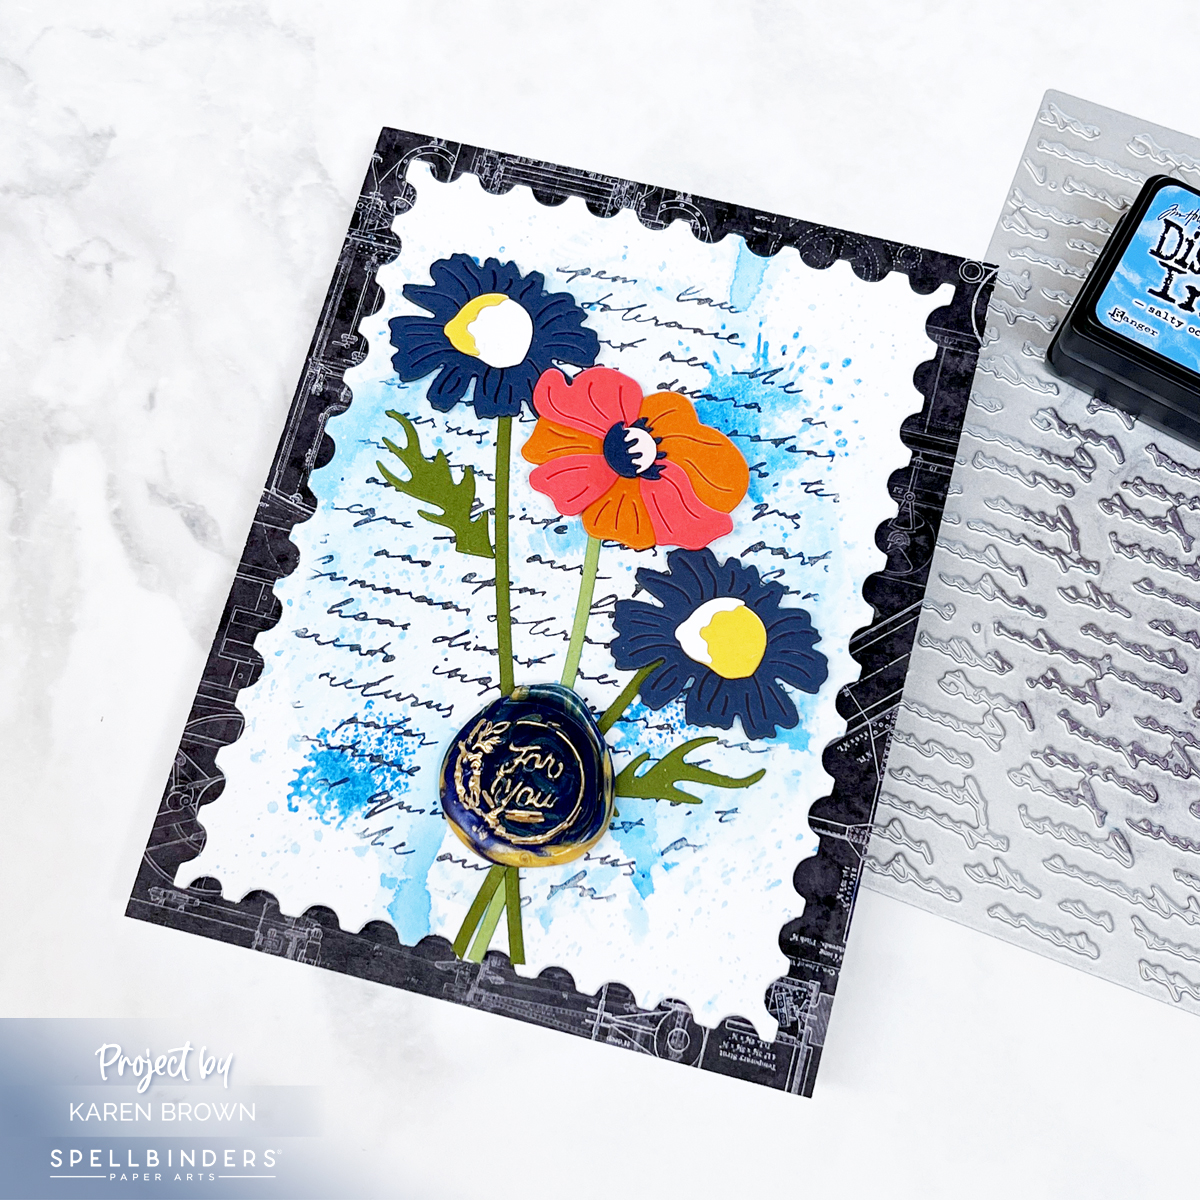
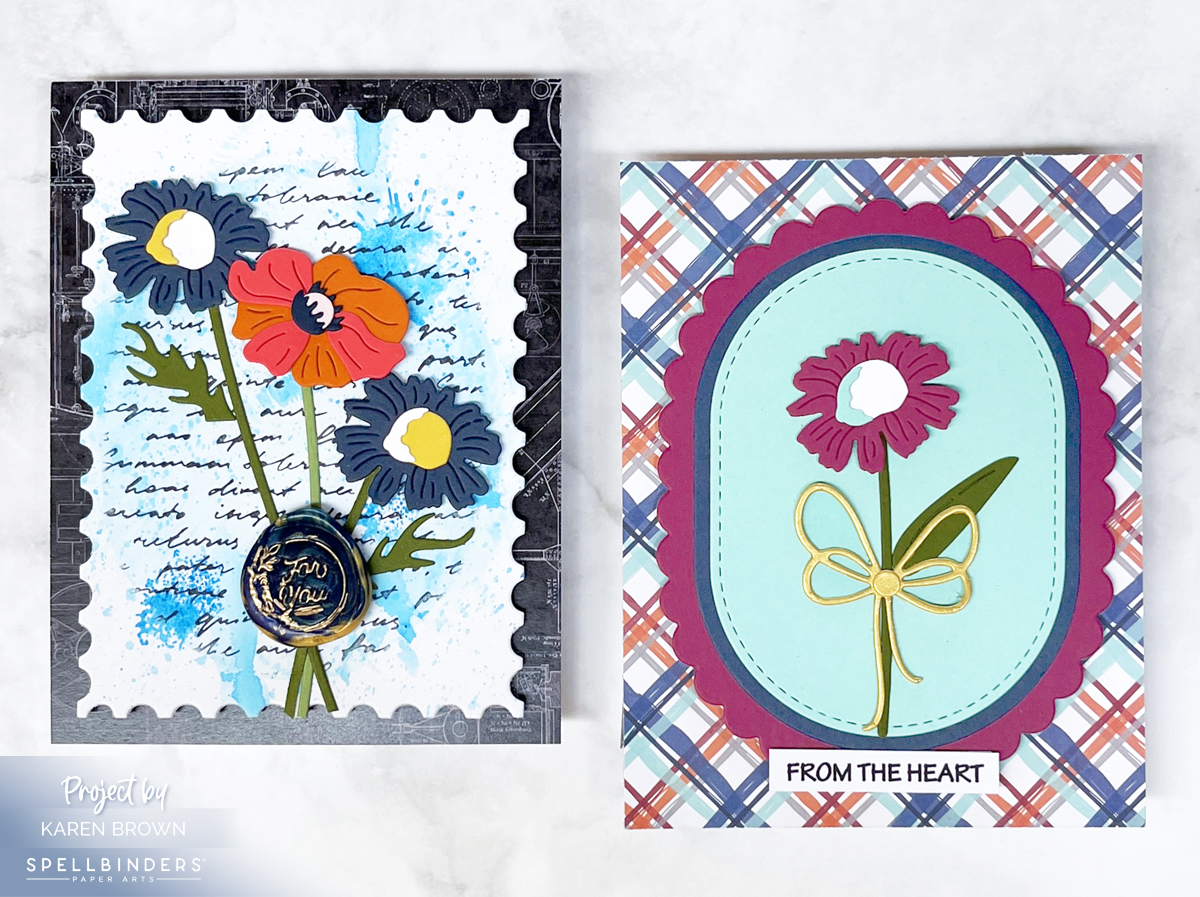
Creating mixed media backgrounds is one of the most fulfilling ways to express creativity in cardmaking, and it’s a fantastic way to showcase your favorite tools and techniques. In this project, I flipped my usual process by starting with the background, rather than the focal point. The emphasis here is on the Script Text BetterPress Plate, an intricate design with a vintage, not-quite-legible script that adds the perfect textured backdrop.
🛠 Step-by-Step Instructions
Start with the Background: For this project, the focus was the Script Text BetterPress Plate. Begin by die cutting an oval template using the Scallops and Stitched Edge Ovals die set. Save the oval itself, but use the negative panel (with the oval opening) as an inking guide.
Important: Remove the inking guide before running the plate through your Platinum 6 machine.
🐢 Tip: Use “SUPER SLOMO” speed to get the best letterpress impression.
Add a Watercolor Wash: Apply a light Salty Ocean watercolor wash to the center oval portion of your letterpressed background. Let dry completely.
Stamp Texture: Using Hero Arts Mixed Textures Stamp Set, ink up some paint splatter stamps with Salty Ocean and lightly mist the stamp with water for a more vintage look. Stamp the background 3-4 times.
Add Paint Splatters: Use a fan brush to add Salty Ocean paint splatters for added depth.
Distress the Panel Further:
Dilute Salty Ocean on your craft mat.
Dab a small portion the background panel into the ink pool 3–4 times.
Let the ink run slightly for an authentic mixed media effect.
Die Cut Blooms: Use the Layered Wildflower die set by Lisa Horton to create floral accents. This entire project features elements from Lisa Horton’s Wildflower Collection.
Last night, I had the pleasure of joining the very first Hero Arts Craft Lounge, a FREE virtual crafting event that brought together so many creatives for an evening of inspiration, tips, and fun. If you missed it, don’t worry—you can catch the replay and enjoy the session at your own pace!
And if you haven’t joined yet, look into the newHero Arts Collective on Facebook.
During the event, Channin Pelletier, Rosie Lopez, Michelle Luptonand I each created a unique custom card using the new Case Closed Collection. I opted for a FAST and easy card that anyone can recreate in less than an hour! And you can watch 4 different cards being created at the same time!
I used the Collage Backgrounds Hero Rub-On Transfers to create a dramatic yet effortless background. These rub-ons add instant texture and layered interest—perfect when you’re short on time but still want a showstopper.
For the focal point, I die cut elements from the Magnifying Glass Die Set and added the sentiment: “The Evidence is Clear – You’re Incredible.” The lens was die cut from vellum.
This card came together so quickly and has a sleek detective-style vibe thanks to the mix of vintage background and bold elements from the new Hero Arts release.
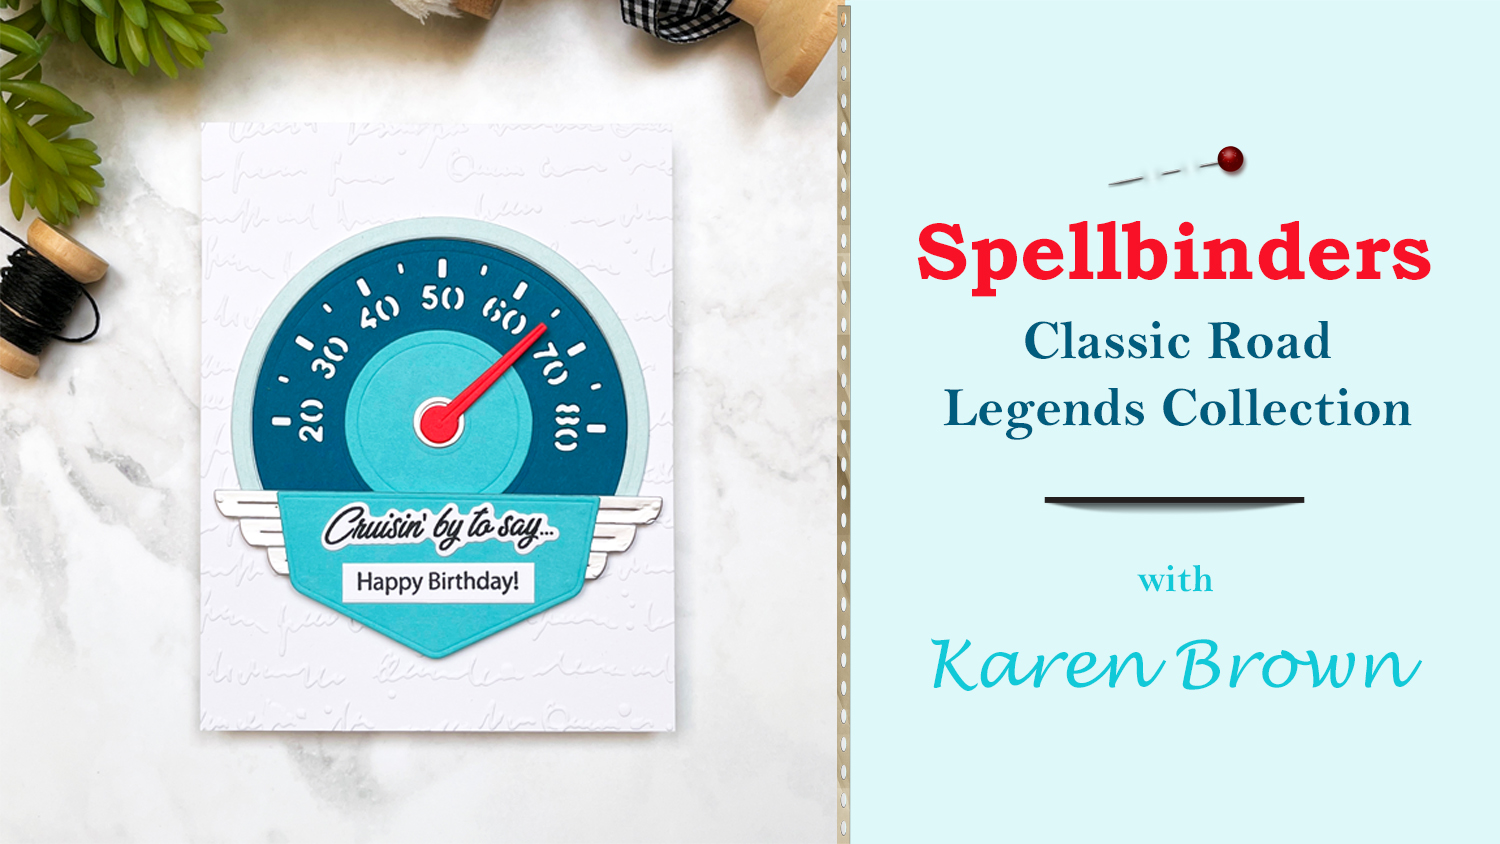
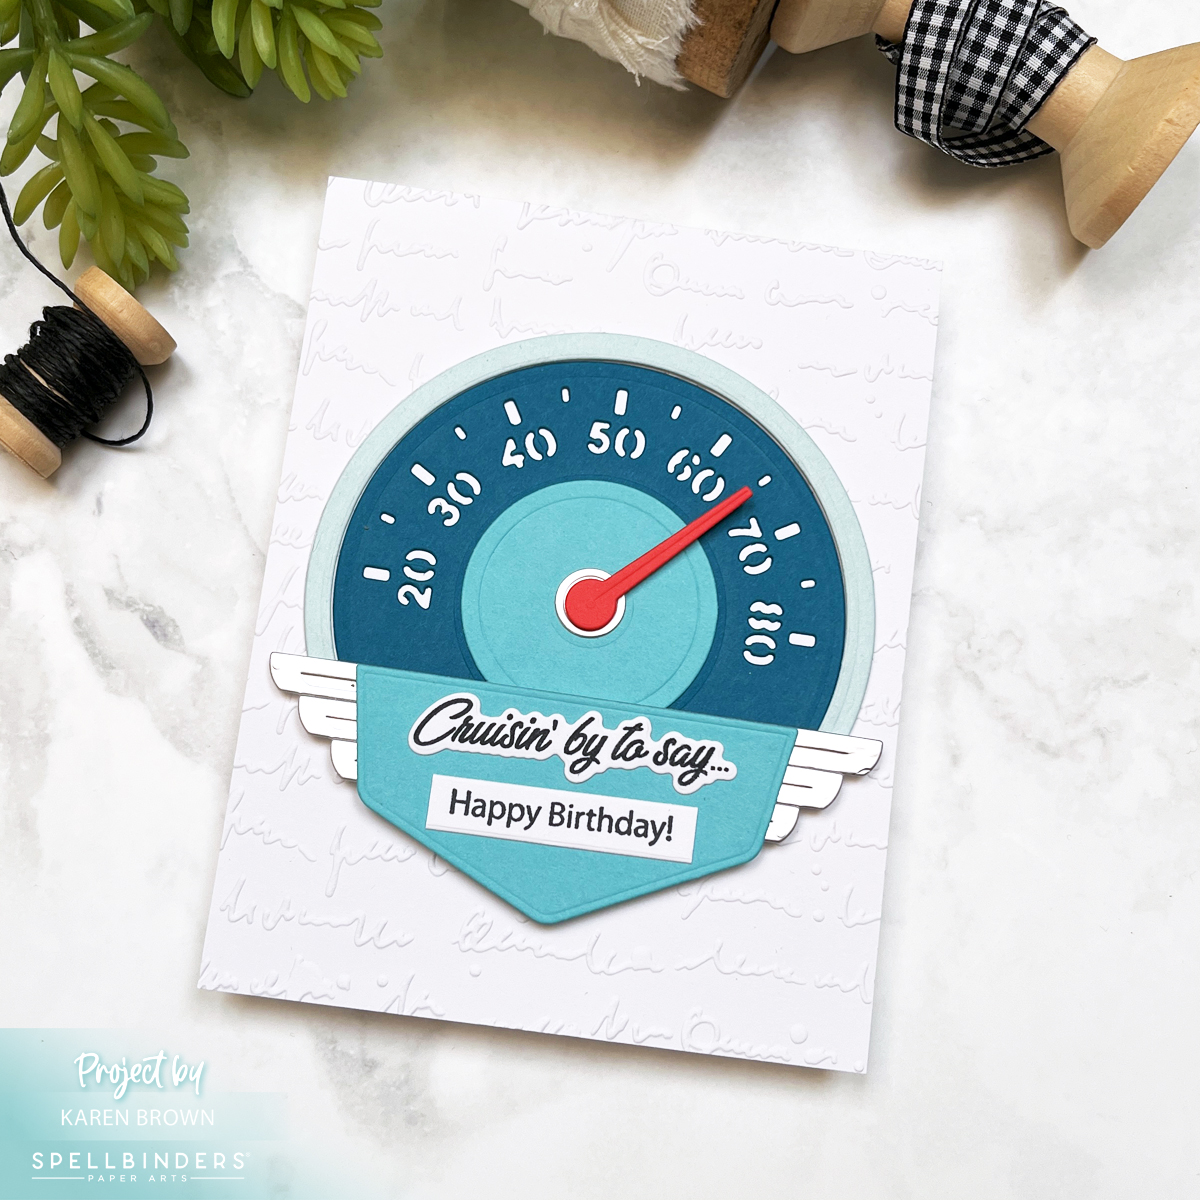
Buckle up, cardmakers—because today we’re putting the pedal to the cardstock with a sleek and fun masculine birthday card featuring the Speedometerfrom the Classic Road Legends collection by the incredibly talented Mindy Eggen! This is Mindy’s debut collection with Spellbinders, and it’s already racing to the top of my favorites list.
The star of the card? A bold, retro-inspired die cut speedometer with some of the coolest sentiments I’ve seen in a while.
🛠️ Building this Masculine Birthday Card
I wanted to create something unique and masculine with a fresh, modern color palette—so I went with monochromatic aquas and teals, using Adriatic, Paradise, and Arctic cardstocks from Hero Arts. To give the speedometer some shine and dimension, I added silver cardstock accents, and then for a bit of unexpected flair, I die cut the needle in coral cardstock—it’s just the right pop of contrast!
This die set includes tons of clever sentiments like:
“Have a Classic Day”
“Another Year in the Fast Lane”
“Enjoy Your New Adventure”
I chose “Cruisin’ by to say Happy Birthday” for this card
Perfect for Father’s Day, birthday cards, or anyone who appreciates a good throwback moment.
Once I finished assembling the speedometer, I mounted it onto a clean white background embossed with the Spellbinders Scribbled Letters Embossing Folder. The subtle texture adds just enough interest without taking the spotlight off the die cuts.
This card is headed straight to my brother for his birthday—he’s a car guy, and I think he’s going to love it!
💬 Why I Love It
Masculine cards can be a bit of a creative challenge, but this design was a total joy to put together. The bold shapes, retro vibes, and clever details made this one of my favorite guy cards I’ve ever made!