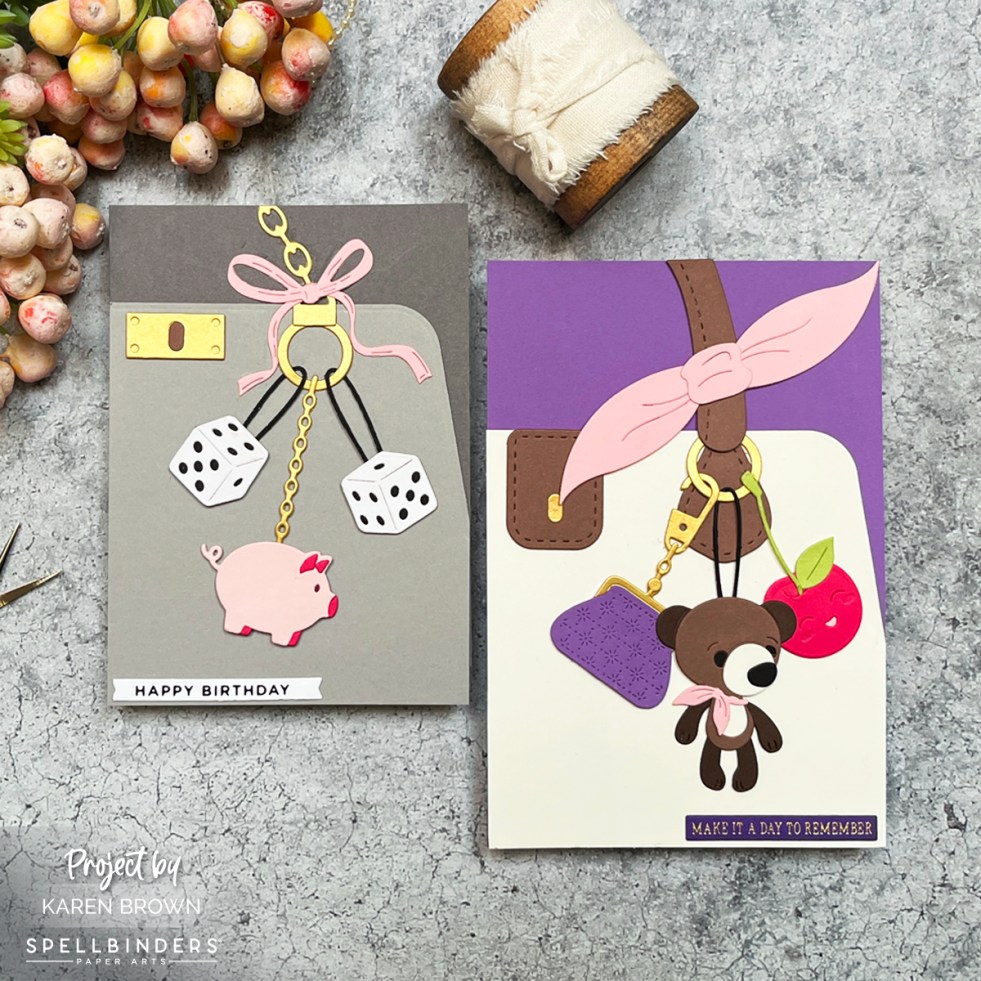
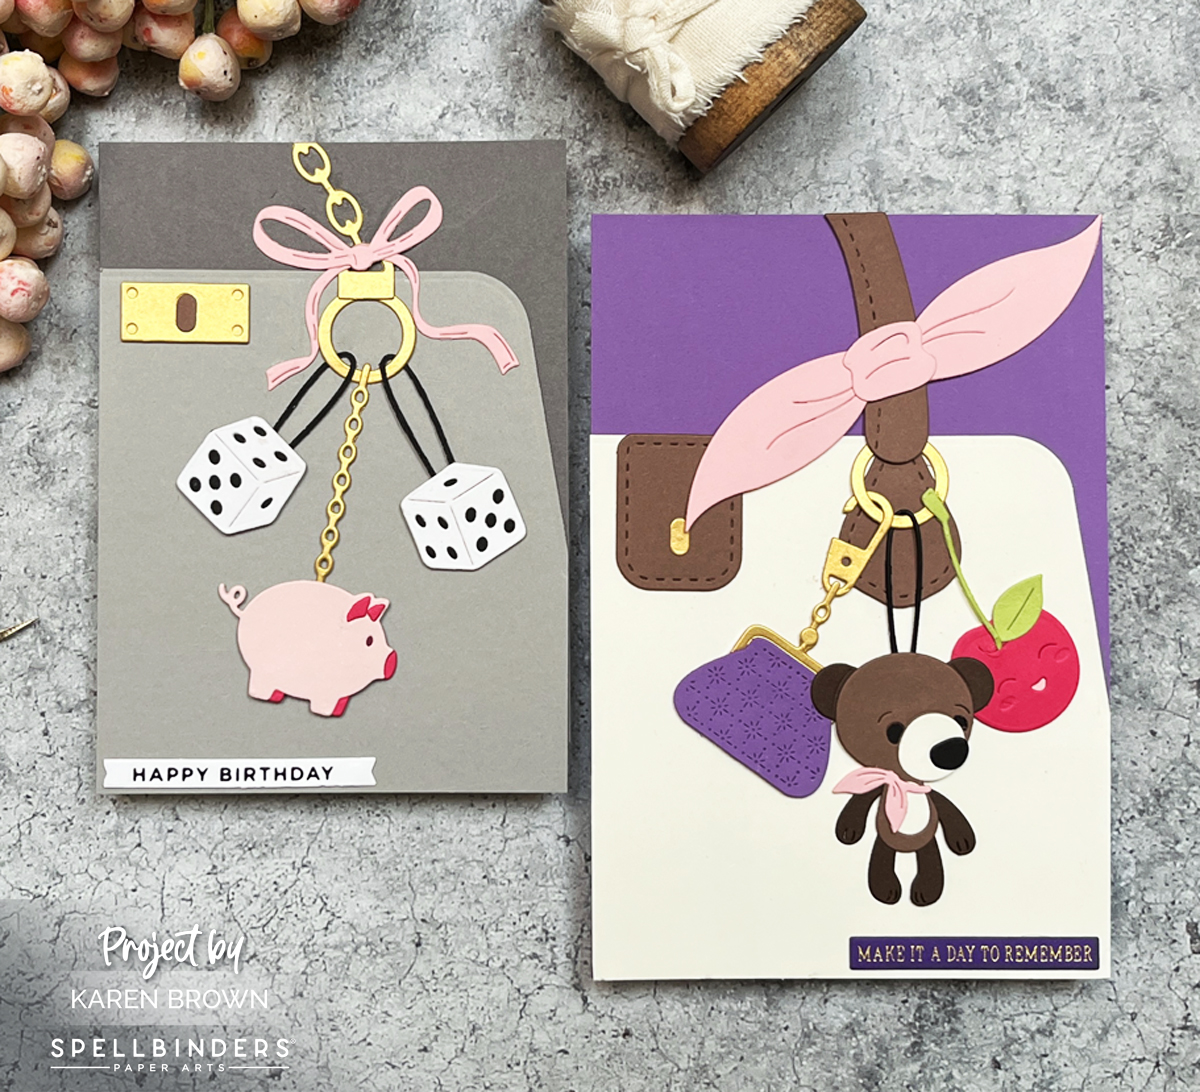
Today I’m sharing two darling purse-themed cards using the Spellbinders November 2025 Large Die of the Month Kit – Charmed to Know You. This set is pure cuteness with so many ways to personalize your bag design. Think mini luxury handbag boutique… but in cardstock form!
This die kit creates a fabulous purse with dangling charms, handles, layered details, and all the embellishments your fashionable heart could want. While it’s designed for 5” x 7” cards, I also made a 4” x 6” version because these purses are just too cute not to size-down and play.
💡 Crafter tip: I keep a clear pouch full of scrap cardstock and it was PERFECT for cutting the tiny charms. Little paper leftovers finally had their big couture moment!
💜 Card 1 – Cream & Lilac Glam
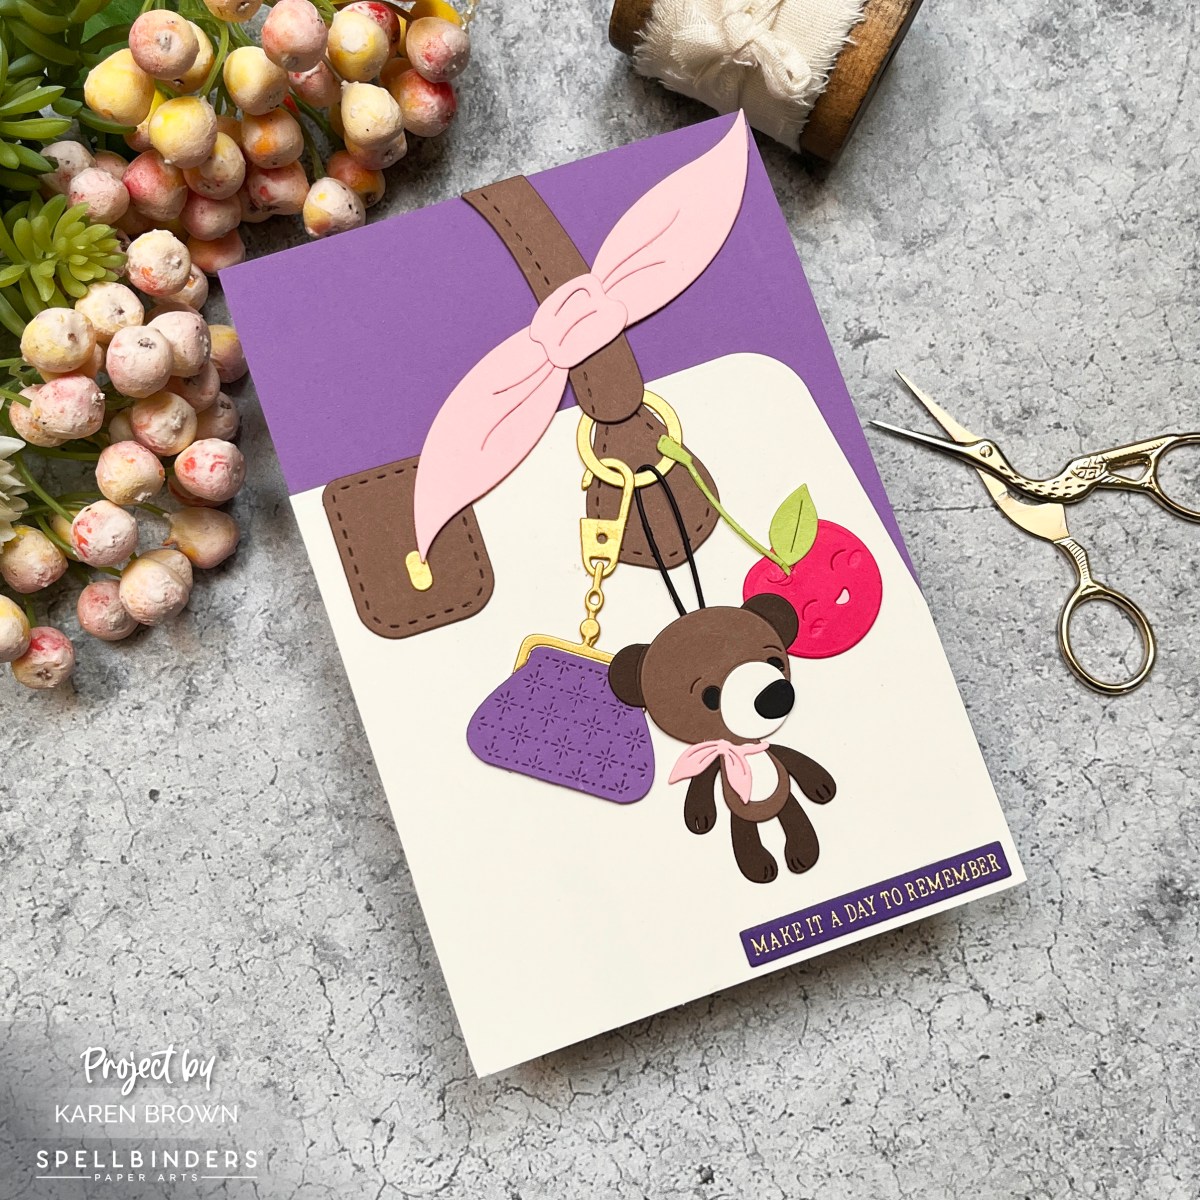
For my first card, I created a Alabaster cream purse with brown leather straps and brushed gold hardware — classic and chic!
I paired it with a lilac background (ColorWheel cardstock) and added a darling mini change purse, a pink scarf, and two charms:
✨ a sweet little bear with a matching pink neck kerchief
🍒 happy smiling cherries
The finishing touch? A gorgeous La Dolce Vita hot foil sentiment on lilac cardstock:
Make it a Day to Remember
And yes — this purse absolutely feels like it’s ready for brunch, shopping, and maybe a macaron or two.
🖤 Card 2 – Chic Neutrals & Lucky Charms

My second purse fits a 4” x 6” card base and features granite and anchor gray cardstock with a brushed gold chain handle — sleek and modern!
I got playful with my charms:
🐷 I turned the Caboodle Bonus Gift pig into a charm
🎲 and added two dangling dice on each side
A sweet mini pink bow sits above all three — because even edgy handbags deserve a touch of sweetness.
The sentiment is a dainty Glimmer-foiled “Happy Birthday” — perfect for the girly-girl in your life who loves a little luxury and whimsy.

🌟 Final Thoughts
This month’s Large Die of the Month is a handbag lover’s dream — charming (pun absolutely intended), customizable, and so much fun to style. Try different color palettes, charm combos, and sizes to create purses for every personality.
Interested in my other November Card Kit Creations?
- Link to November Stitching Die of the Month Post My favorite stitching kit of 2025! ….and it is also purse themed. 🙂
- Link to November Die of the Month Post
Helpful Links:
- Spellbinders Small Die of the Month Kit – $30 value for just $17.50!
- Spellbinders Large Die of the Month Kit – $40 value for just $27.50!
- Spellbinders Stitching Die of the Month – $35 value for just $25!
- Spellbinders Deluxe Caboodle Kit – Get All 10 Kits, $315 value for just $130!
- Spellbinders Monthly Club Kits
- Platinum 6 Die-Cutting System
- ColorWheel Cardstock Sampler
- Spellbinders Cardstock
- Stitching Accessories
- Bearly Glue, Foam Squares and Craft Foam
- Crystal Katana pick up tool
- Club Overview and Club Options
- Past Club Kits
- Spellbinders Shop
- Sarah Renae Clark’s Color Cubes