I love a good scene card and when I saw Tina Smith’s Windows With A View Collection, I was immediately smitten! I needed a baby shower card and I knew the tire swing in this kit would be perfect.
Special Scene Card for a Baby Shower
Spellbinder’s Backyard Haven View has 16 adorable dies that include the tree, tire swing, squirrel, owl, bird house, fence, bird bath + some other adorable details. So many possibilities that allow you to design a card for most any occasion….baby shower, new home, friendship, birthday etc.
I made a second friendship card and used a “Friend” chipboard sentiment from Autumn Chipboard Stickers that I thought went well with my scene. I love this chipboard set with its beautiful substantial elements.
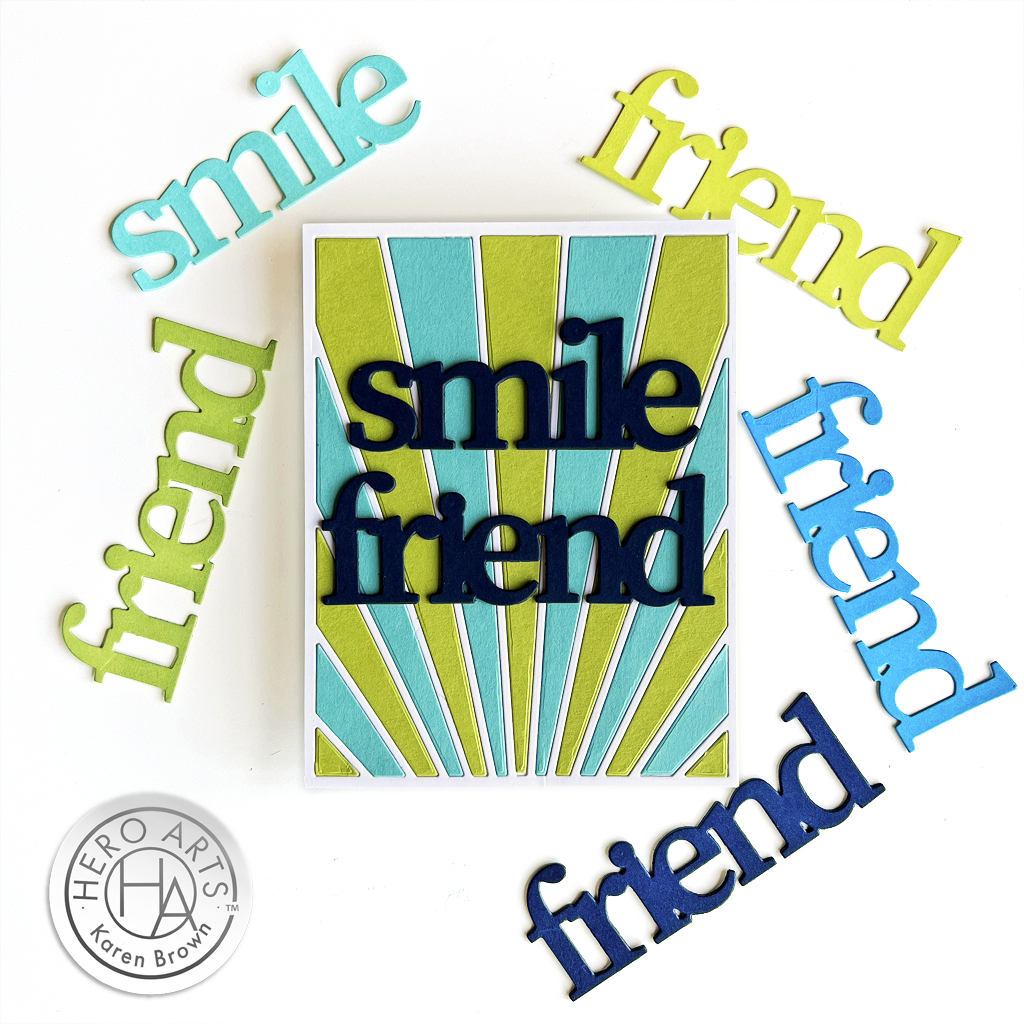
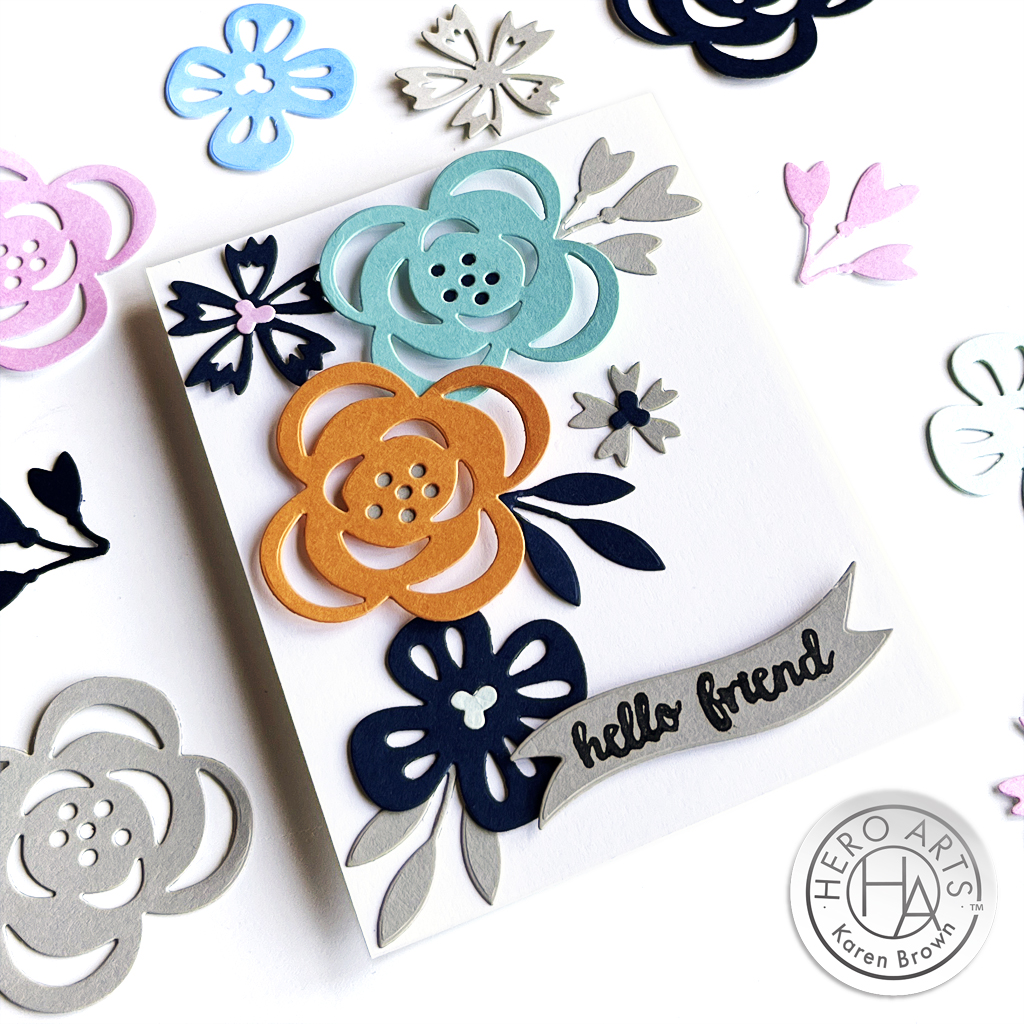
I wanted to start off with two fabulous new sentiment dies that I just love from Smile Friend Stamp and Cut XL. I went crazy die cutting a bunch so I will have them on hand for future cards.
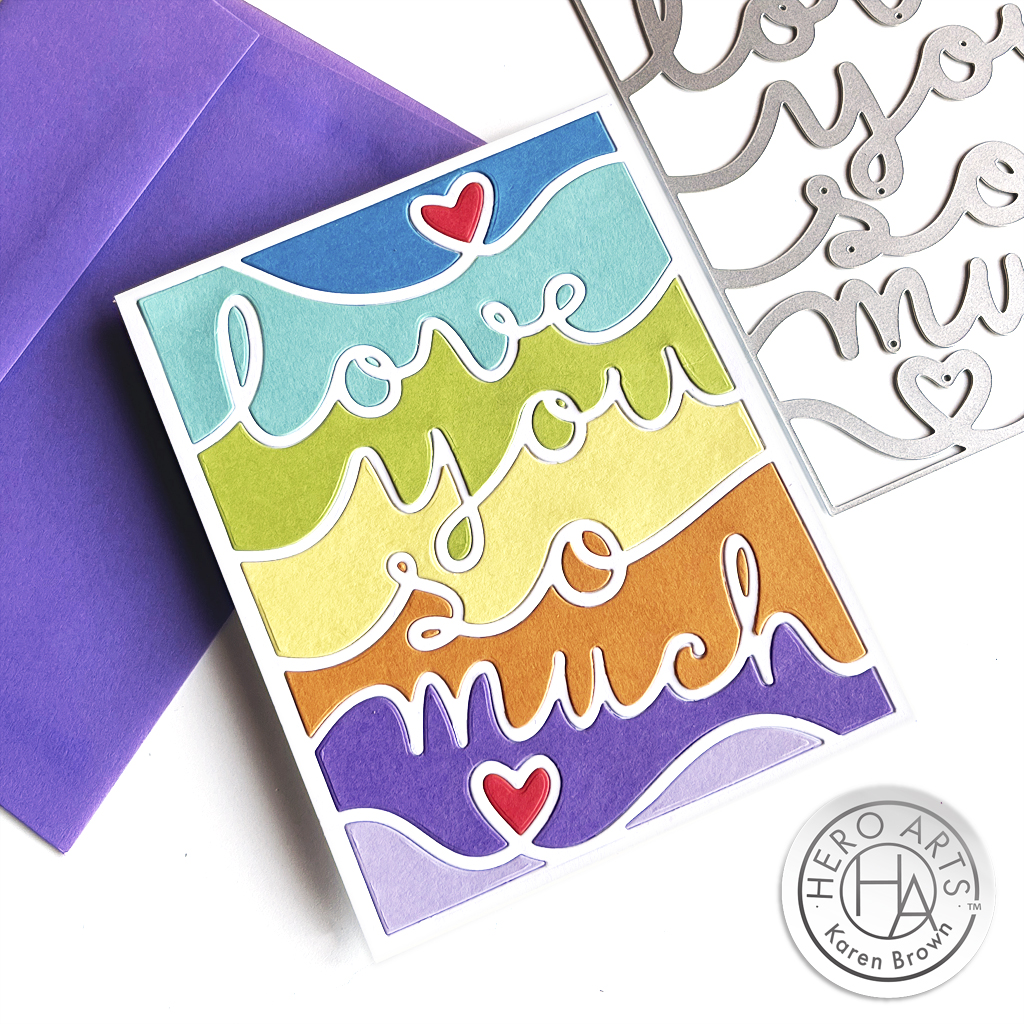
DI945 Rays of Color Window Fancy Die (recently sold out)
Flower Pattern Cover Die
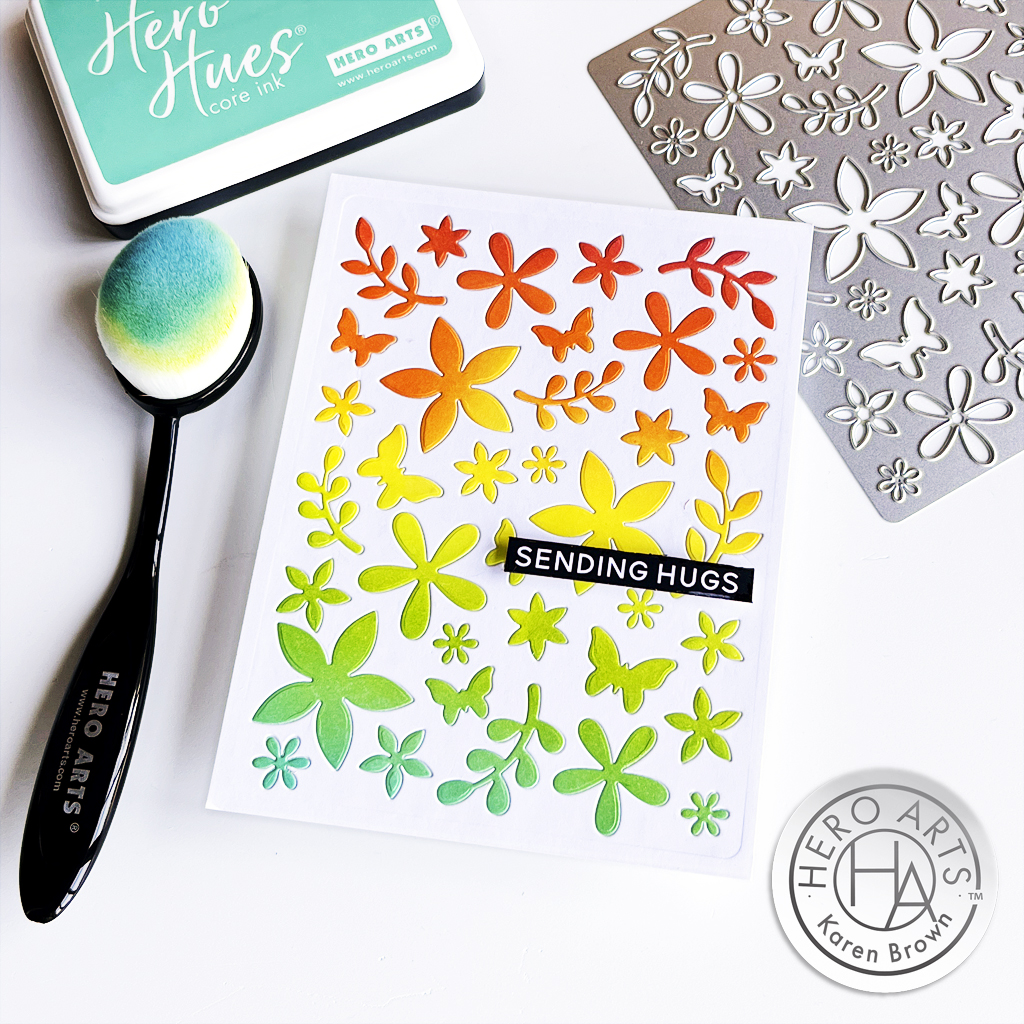
I LOVE cover dies so I was excited to create with this Flower Pattern Cover Die, which is perfect for Spring and Summer. I started by ink blending a rainbow panel which I then die cut with the cover plate and then used the inlay technique to create a one layer background. This went more quickly than you would think because the die cuts fit like a good quality puzzle. My placement and gluing took about 20 minutes.
TIP: Keep your die-cuts in the panel until you start gluing so you know the orientation and position on your background.
Products Used on My Flower Pattern Cover Die Card:
Birthday Animals Stamps + Pointed Arches Infinity Dies
Isn’t this Alligator the cutest? He is one 7 animal stamps included in the Birthday Animals Bundle. The set also includes 8 birthday/everyday sentiments. I combined the stamps with the Pointed Arches Infinity Dies. Infinity Dies are definitely staples in my craft room and I like the interest the arches add to projects.
I love everything about Rub-on transfers. I love how easy they are to use, the look they add to projects and how fun they are to apply! This Spring, Hero Arts included “Sympathy Transfers” in their release. I did some quick ink blending on my background and then added my Hero Transfers for a quick and easy card.
Hero Arts will be giving away two $50 gift cards, drawn from the comments left along the hop. Comment on all the blogs for more chances to win! You have until Wednesday, February 21st at 11:59pm to enter. The winners will be announced on the Hero Arts blog.
Kailash Naidoo is next on the hop and I have links to everyone below.
I recently attended Hero Arts Mixed Media Stamp Along and found it so informative! This card was inspired by @cheiron and her wonderful class. I used different products and colors so my card doesn’t look anything like Cheiron’s, but her class gave me the creative spark for my card. Sometimes it is fun to get inky and messy!
For this card, I was trying to simulate a Dove flying over a city at sunrise. I knew I wanted a bold background to contrast with the white Dove.
My Process:
I put 5 sunrise colors of reactive ink (colors listed below) on my craft mat and spritzed with a bit of water and then painted bands of vertical color all over my watercolor cardstock panel. There is no right or wrong way just start painting! I dried and repeated two more times. During the process I also added drips of color.
I love Hero Rub-On Transfers and I added parts of the city map from Collage Backgrounds to three spots on my background.
I added texture with the Cobblestone Stencil. In some places I used just Gold Hero Paste and on others I rubbed just a bit of Black Hero Wax on the Stencil and then added Gold Hero Paste. I really love the black wax and gold paste combined together.
Using a splatter box (for me a repurposed cardboard box) I added three layers of splatters and dried in between each color. White, Blue Shimmer and Orange Shimmer. I love the complexity the shimmer splatters add!
I am so excited about today’s share, Spellbinder’s Stitched Floral Card Front. I used the February Stitching Club Kit, which is beautiful, and I think the finished card is so very special. This card is going to one of my closest friends for her upcoming birthday.
The kit has 5 dies and I started by cutting all my pieces. The flower center is pink, the flower is papaya, the background is waterfall and the overlay is blue. There is a lot of stitching this month, so I die cut all the elements twice and then glued them together for a sturdy substantial panel. This die cutting didn’t take long, but I think the extra effort was worth it. I recently purchased a Platinum 6 die cutting machine, and I have to say, I pull it out instead of my Gemini Junior. I wish I had bought one earlier.
Spellbinders has a nice selection of stitching accessories in their shop that you can find HERE.
When I started stitching, I took two strands of floss, separated them one at a time, brought them together and then stroked and lengthened them until they seemed tame and ready to use. I used DMC Aqua 598, Orange 741 and Pink 818.
When I move from one area to the next, I run the floss through the just finished stitched area to keep the thread secure. This gives a nice look on the finished project.
Don’t stitch with threads that are too long or they are likely to knot.
When I was done, I added a bit of Bearly Glue to the ends so that they would stay in place.
A Few Notes About Spellbinders Club Kits
Clubs Preview on the 1st of each month.
Club members can cancel, upgrade or change clubs from the 1st-5th of each month. Popular Clubs frequently sell out during this period so club members get first dibs on everything.
NEW for 2024: Club Members get EARLY access to new releases on the 6th!
On the 6th, Clubs become available to non-members.
On the 27th, Club registration closes for the current month.
If a club did not sell out, you can buy under “Shop Past Clubs”. Past kits are available on the 10th of the FOLLOWING month.
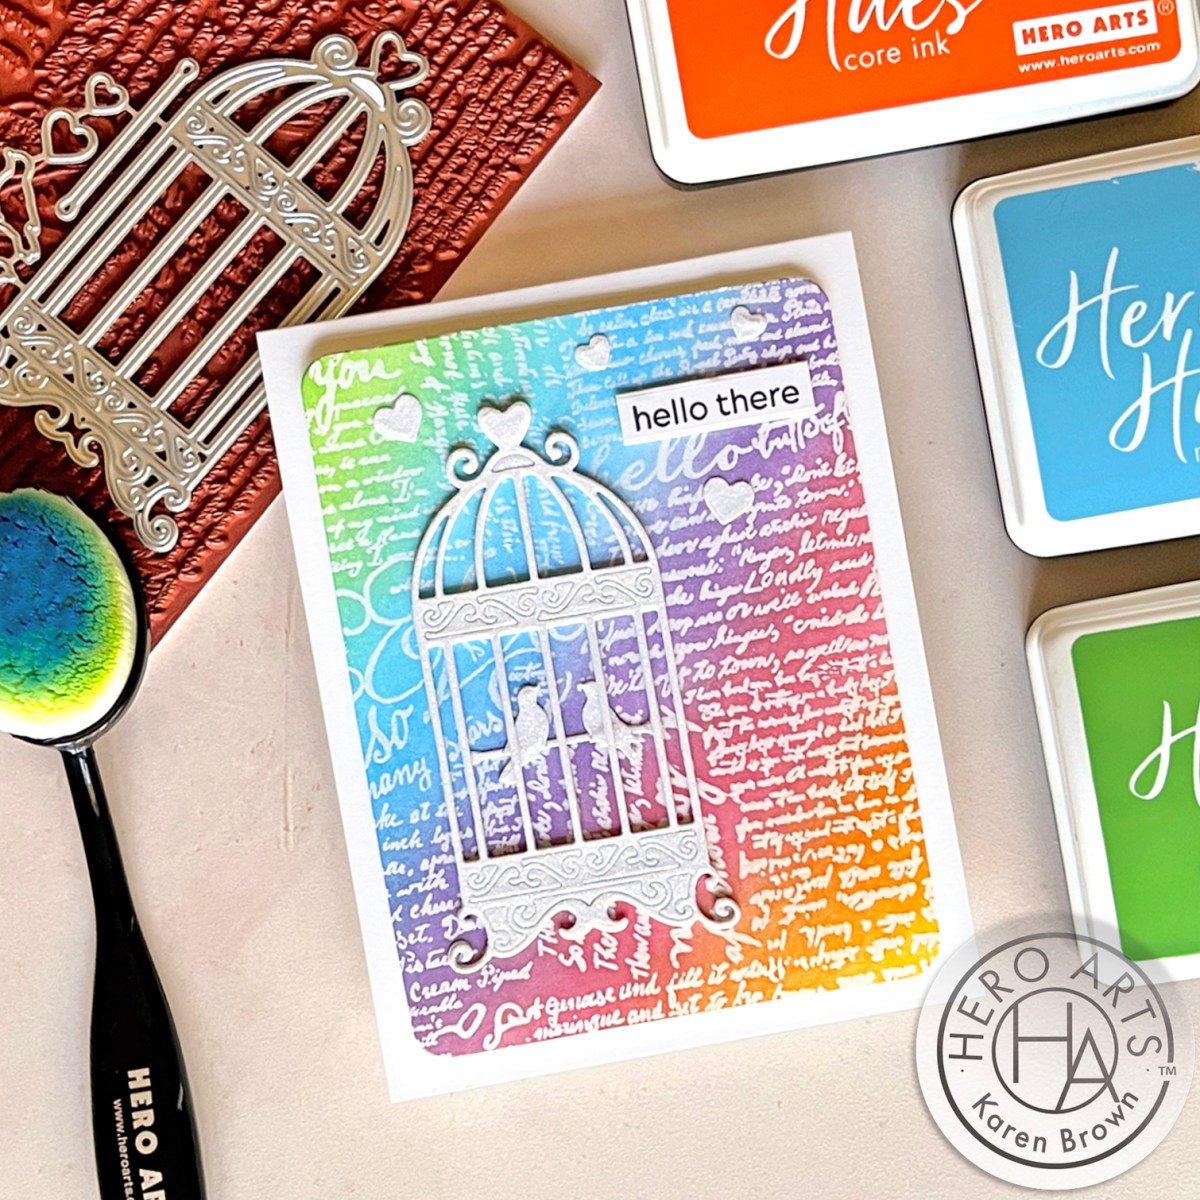
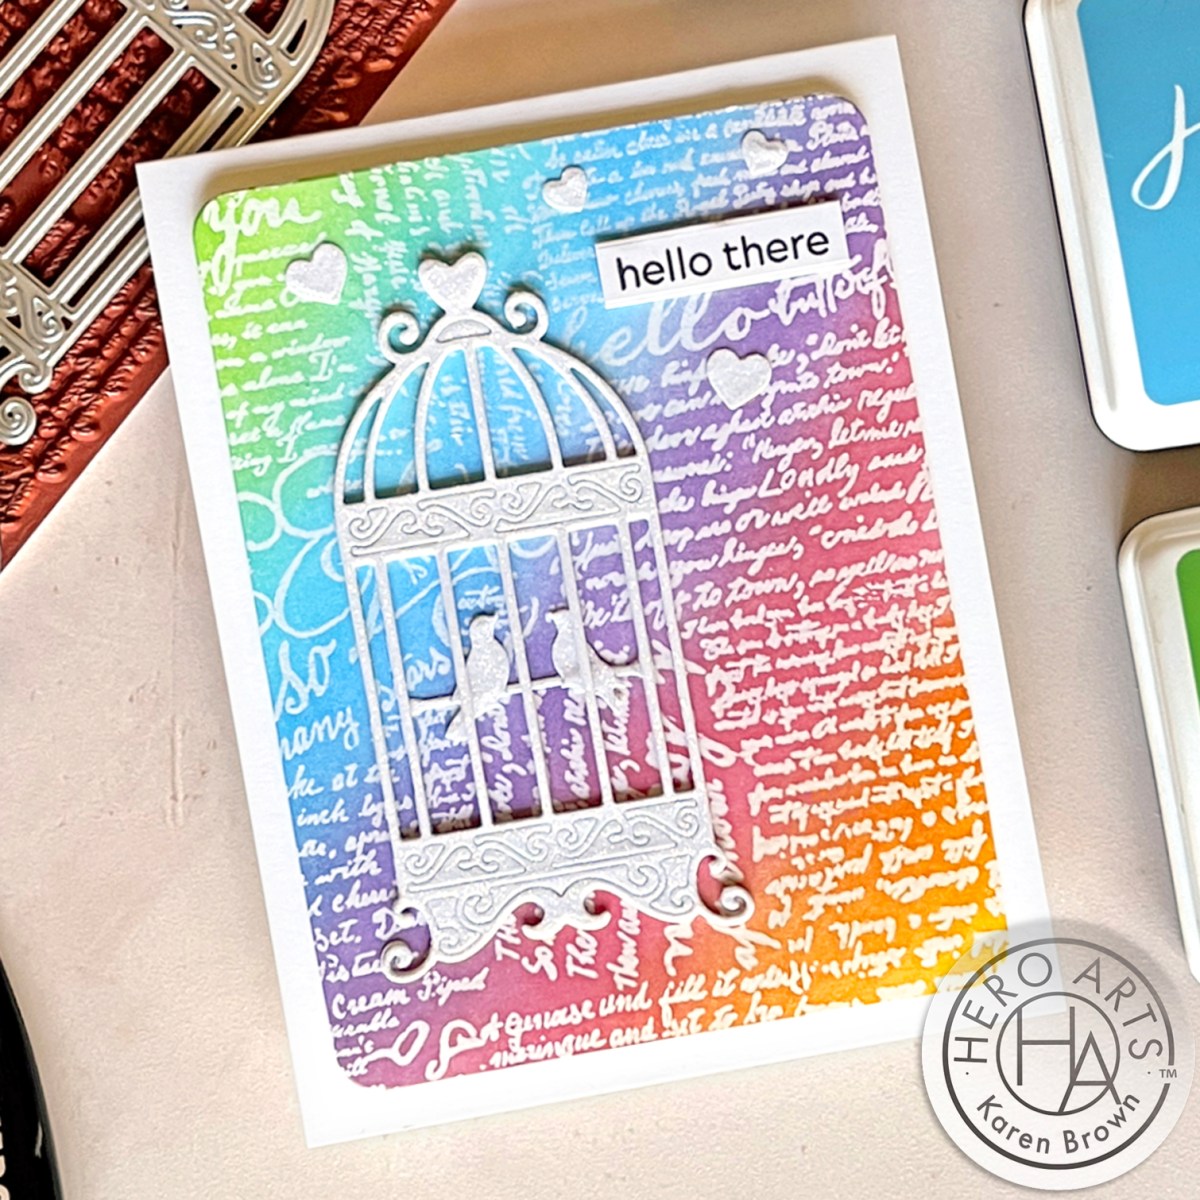
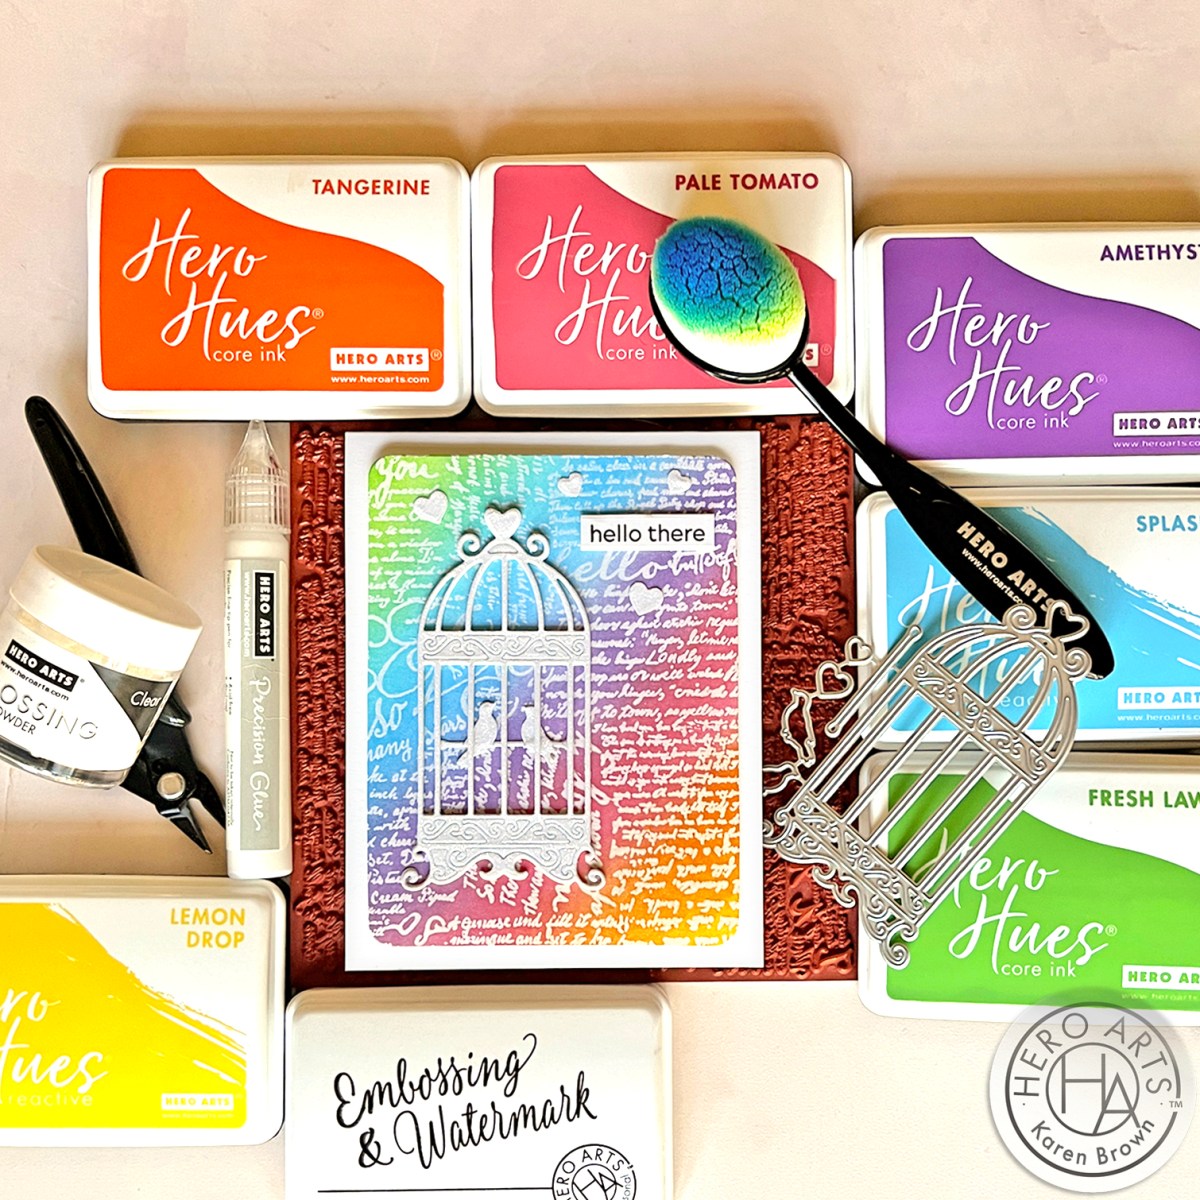
Hello and welcome! Karen Brown here and I have a very fun project to share with you today featuring this delightful Vintage Birdcage die. I love color and texture and I used lots of both on this card.
I buffed the embossed script with a microfiber cloth so the embossing was ink free.
I die cut the birdcage 3 times. Twice from Deluxe Smooth Cardstock and once from White Glitter Cardstock. This white is my absolute favorite glitter cardstock. It is hard to photograph but is so beautiful in person. I also cut 2 birds and 4 hearts from glitter cardstock.
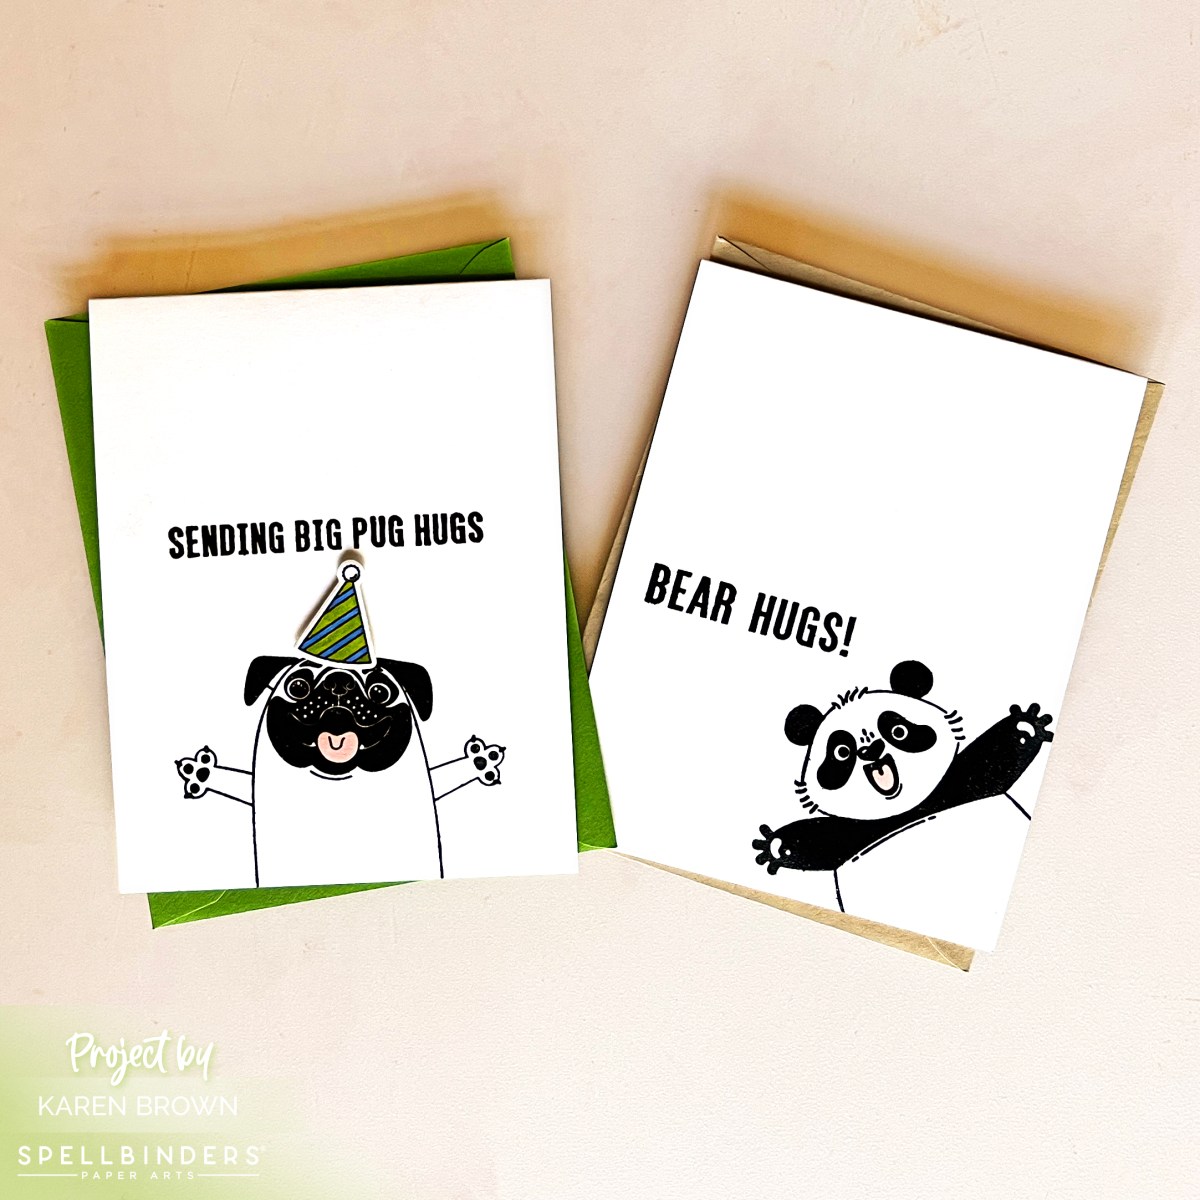
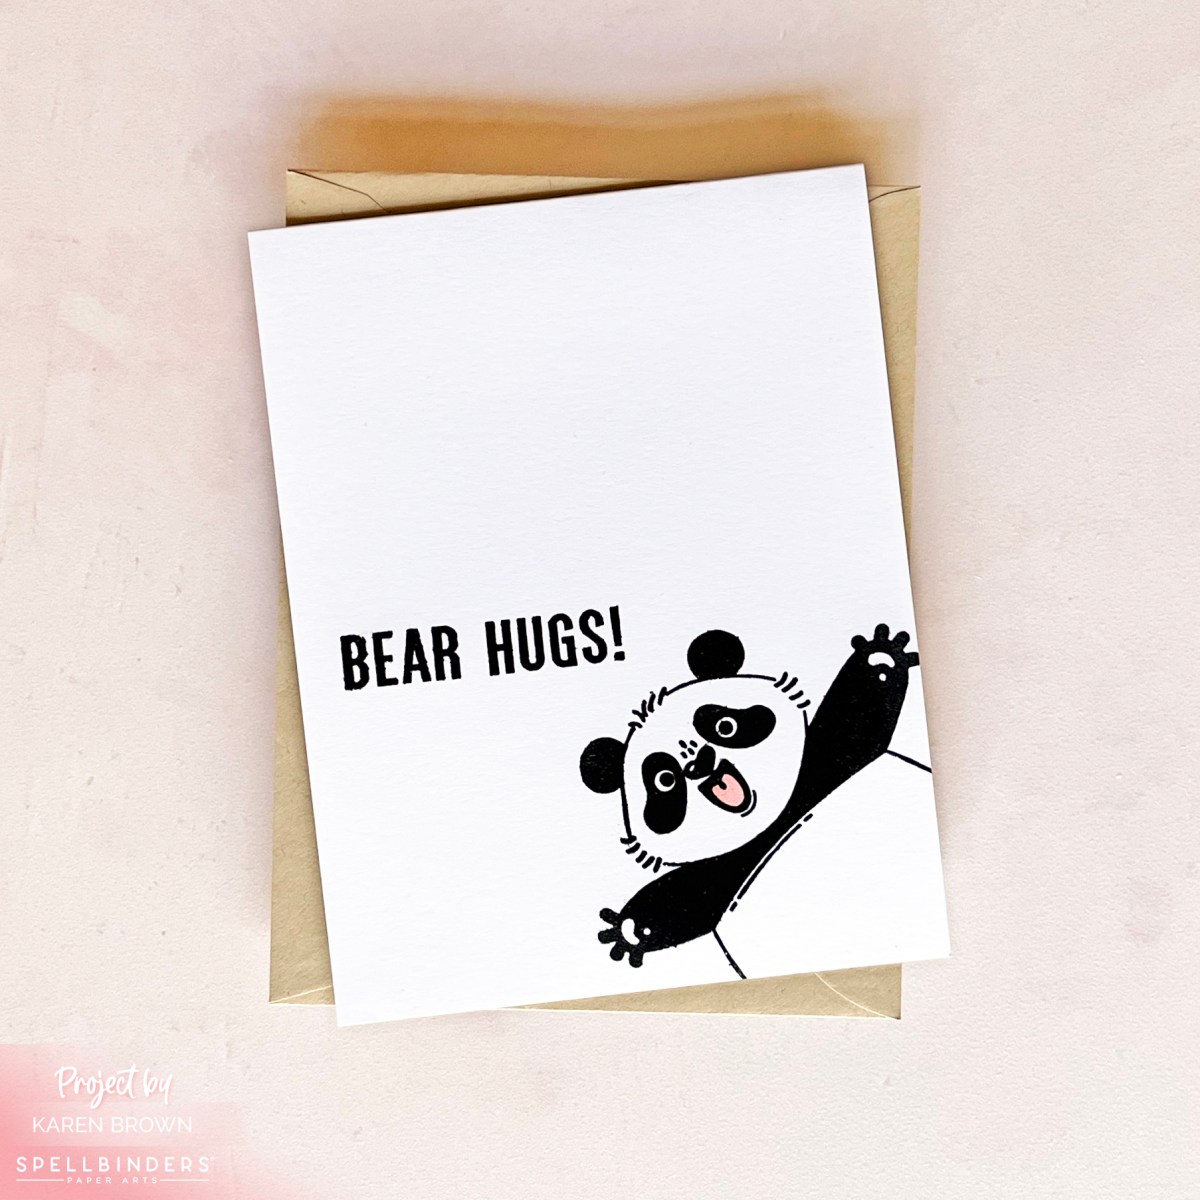
Can you have too many dog stamps? I think not! I am loving Spellbinders + Simon Hurley’s new Big Hugs stamp and die bundle. These cute critters – Pug dog, Panda bear and Zebra – are sure to be favorites in my family. I love this set so much I went a little crazy making cards!
Pug Dog Masculine Birthday Cards
My first card is for my husband and I wanted to make a quick little scene. I stamped and Copic colored my Pug (complete with a festive party hat), embossed a brick wall, ink blended a background and heat embossed a cute sentiment.
I like to keep Get Well cards on hand and this card is sure to make the recipient smile. This card came together very quickly. I stamped and Copic colored my Pug and added a blue mat for interest. Just two Copic markers!
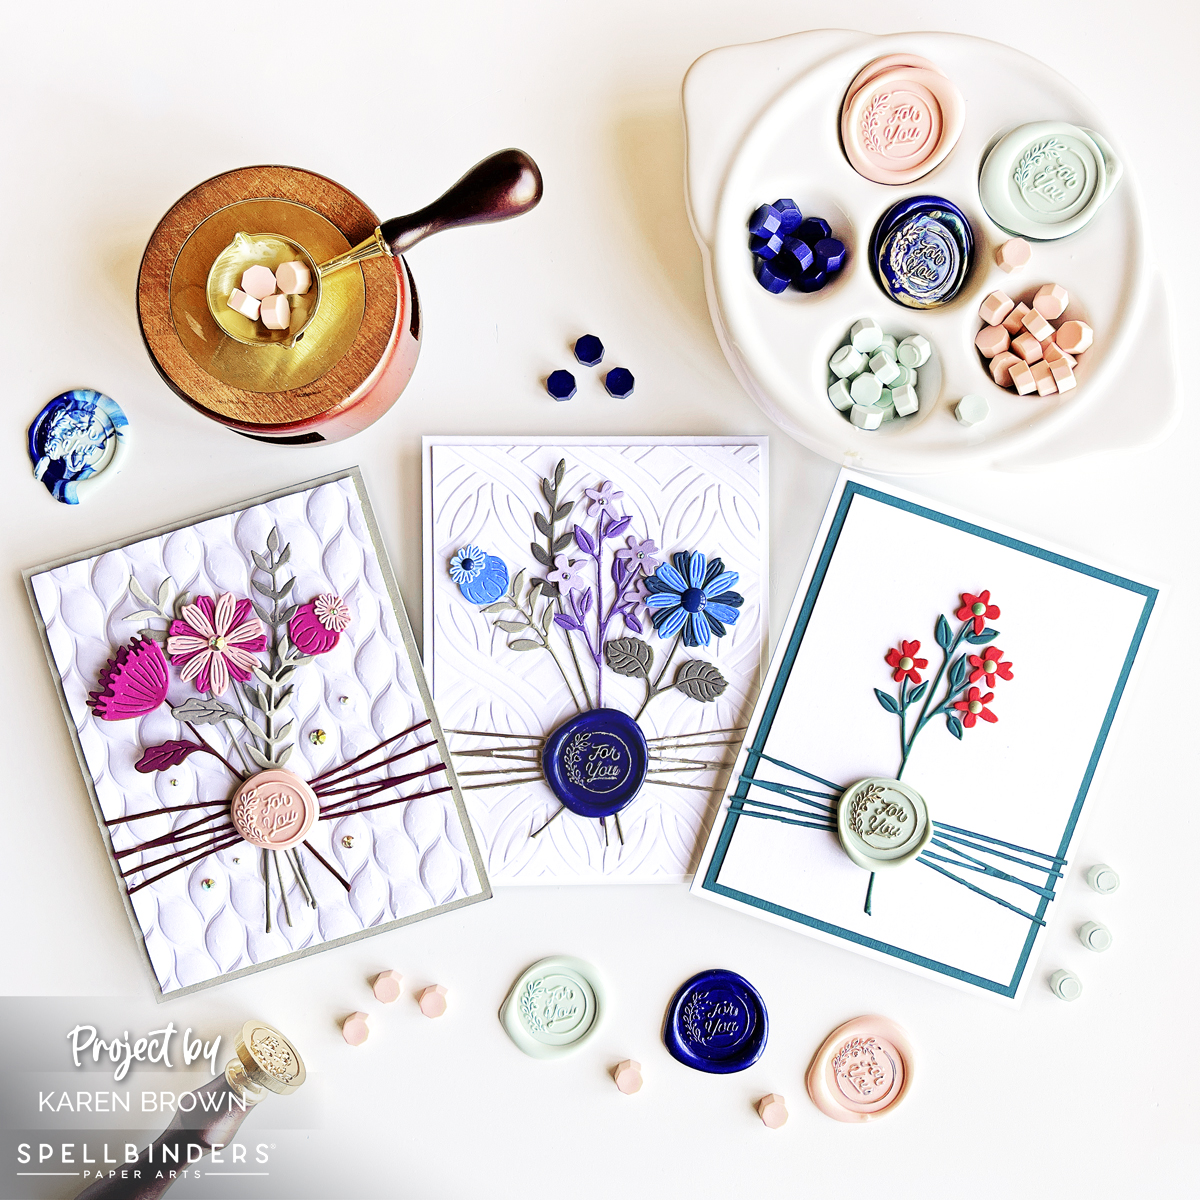
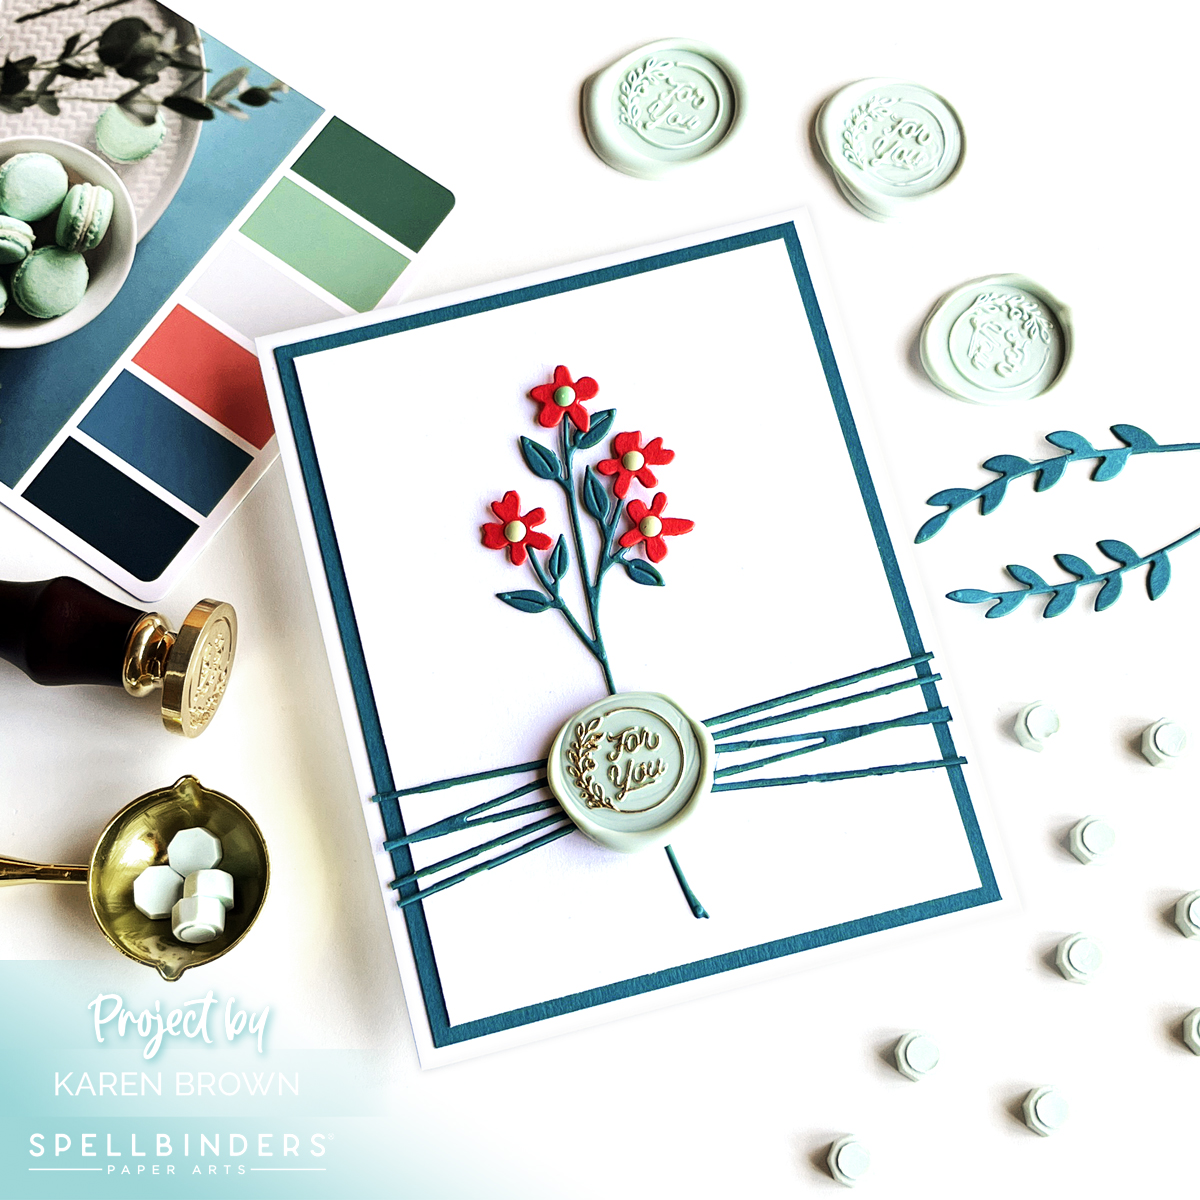
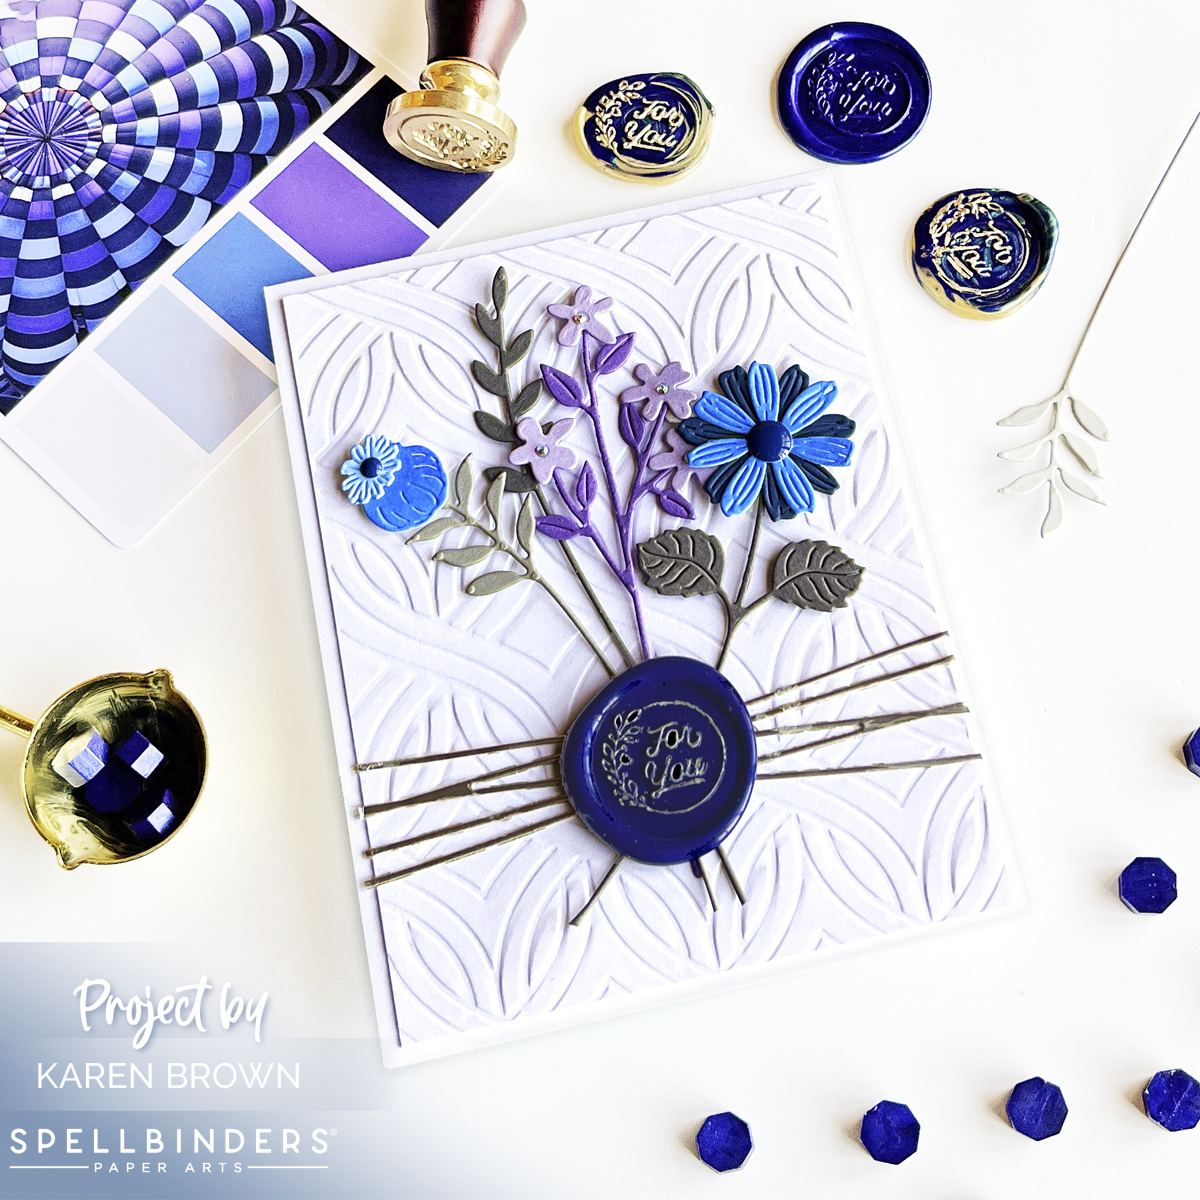
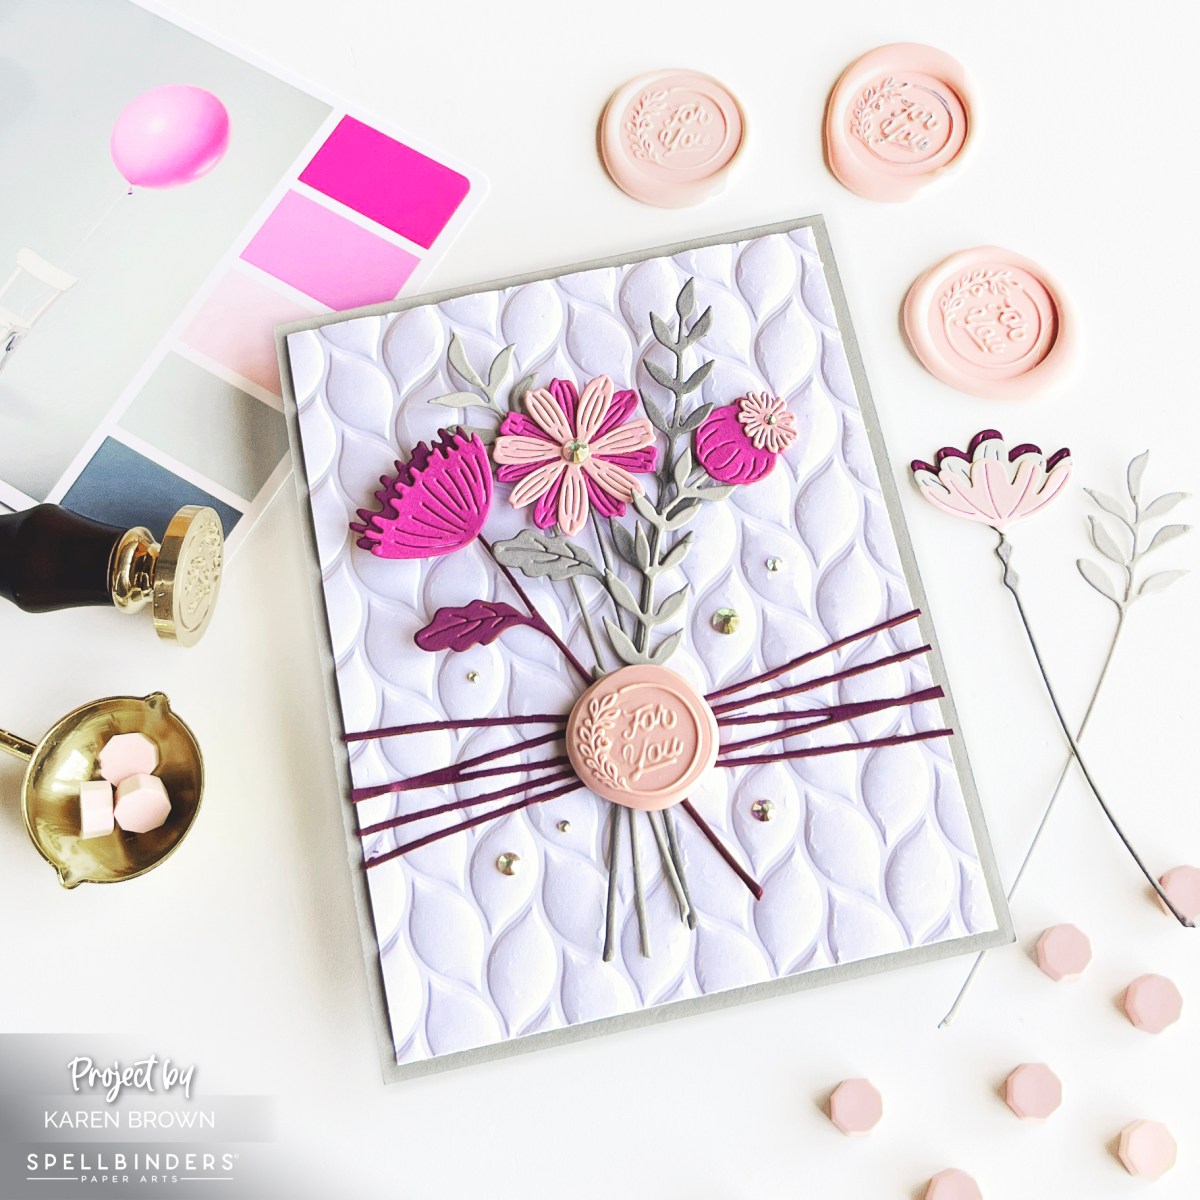
Tutorial + 18 Tips and Tricks for Making Wax Seals:
With a Sharpie marker, I put a dot on my seal so it was easy to keep track of where the top of the design is.
I read that it helps reduce soot if you trim your tea candle wick, so I did this.
I put 4 beads in the warming spoon and it took 2 minutes to melt.
I poured the wax and found it is easy to make a circle pattern, but I do like seals that aren’t perfectly round.
Don’t press the seal into the wax, just gently position and allow gravity to work.
After experimenting, I found that if I wanted a thicker, more button like seal you should pour the wax and then wait 15-30 seconds before gently dropping the seal into the wax. The card with the pink seal was done this way.
If you like a thinner seal with a higher rim then place the seal immediately after pouring.
I found if I used just my thumb and pinky or middle finger that I was better able to center the seal more precisely.
I left the seal in the wax anywhere from 15 to 90 seconds. The time didn’t seem to matter and no wax was ever left on the seal itself.
I also found it helps to move your pours around on the silicone mat so you don’t get warm spots on your work surface.
I also let my seal cool in between pours.
If you don’t like a seal, you can remelt it.
You can mix colors for a lovely marbled look. I really love the blue and green combination that I made which is shown in the upper left of the first photo. I also love blue and gold together and you can see two with that combination in the upper right corner on the blue card.
You can add flakes, glitter or pearls to the melted wax.
I used a paper towel to clean the spoon when changing wax colors.
I used a Decocolor marker on some of my seals (see the card with the green seal). I have Gold but wish I had bought silver too. Just lightly go over the raised ridges.
I experimented using Posca Pens too. They work, but I did like the result of the Decocolor markers better. The navy wax seal was highlighted with a silver Posca.
I can’t seem to get enough of the fun florals in this month’s Premium Kit! (If you would like to see my first card featuring these dies, click HERE. ) I love the fresh look of these blooming dies and I so enjoyed creating and working on the layout for this card.
This Valentine Wreath die is SO beautiful! It has the simple yet elegant look of Letter Press and I thought it would be quite striking with a fresh bright blue and clean white color palette. I stamped the wreath with Indigo Core Ink and then die cut the wreath, an extra floral cluster (which I added to the bottom of the wreath) and the sentiment. I cut down an A2 Top Folding Card Base to 4 1/4 x 4 1/4″ and adhered my die cuts with foam adhesive squares.
Hero Arts will give away a $50 gift card, drawn from the comments left across the hop. Enter by Sunday, January 14th at 11:59pm PT, and the winner will be announced on the Hero Arts blog the following week.
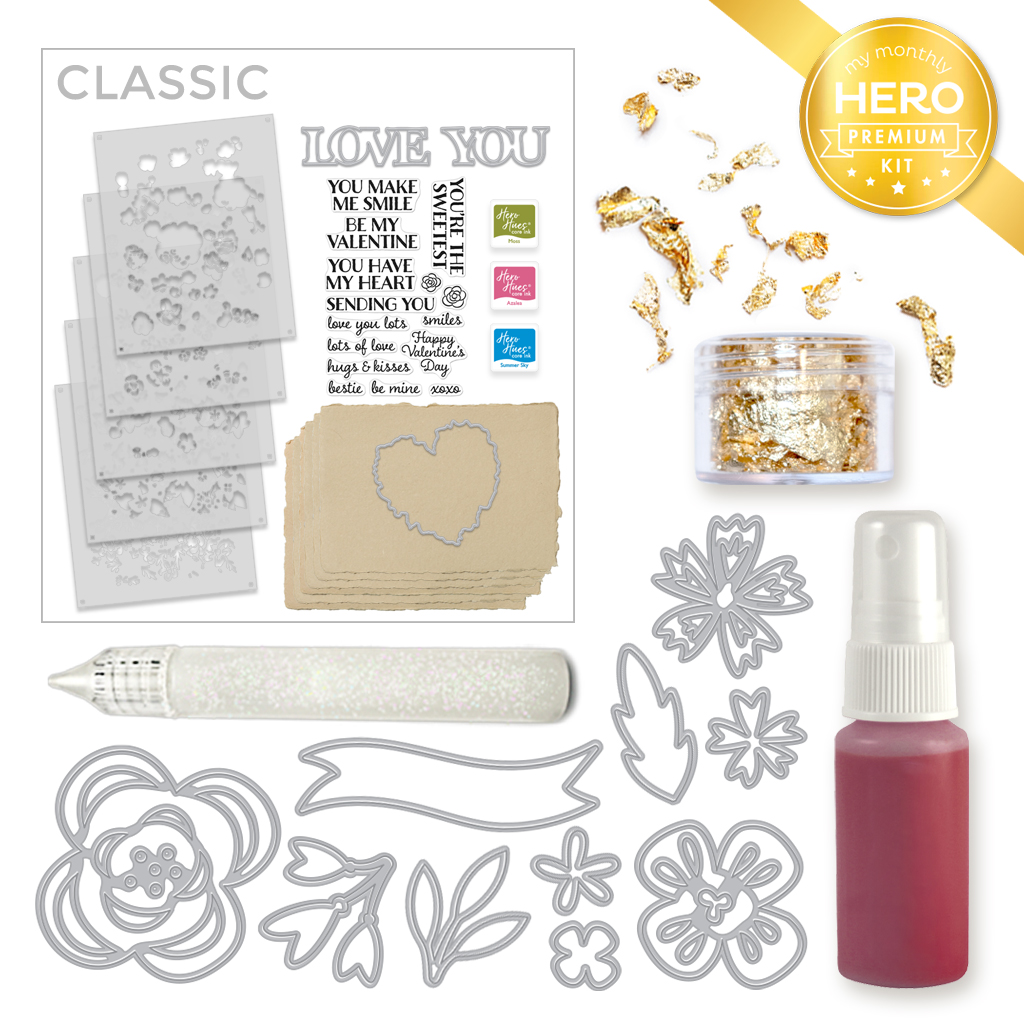
Hello and welcome to the January My Monthly Countdown as we approach Hero Arts first kit release for 2024! I must say, this kit is a beauty full wonderful products that I know you will love. The kit goes live tomorrow (Monday, January 8th) so stay tuned. Meanwhile, sit back and enjoy some inspiration, sneak peeks and giveaways.
WIN A KIT BEFORE YOU CAN BUY IT: Just leave a comment on this (and every) Countdown to Creativity post. Hero Arts will randomly draw one lucky winner from comments left across all countdown posts on the Hero Arts blog. The winner will be announced first thing Monday morning, January 8th, before the kit launches at 10am Pacific. The more you comment, the more chances to win. Good luck!
MMH January 2024 Premium Kit
My project today features The Premium Kit and boy did I have fun playing with it! I started off by die cutting this delightful breezy flower in five of my favorite colors and then I lined them up in a row so they formed a border at the bottom of my card. Clean and simple die-cutting, but I think it has a lot of interest.
Be sure to stop by and visit the Hero Arts Blog for more inspiration and then I will be back on Monday with another post featuring the Premium Kit + some great Add-On Products.
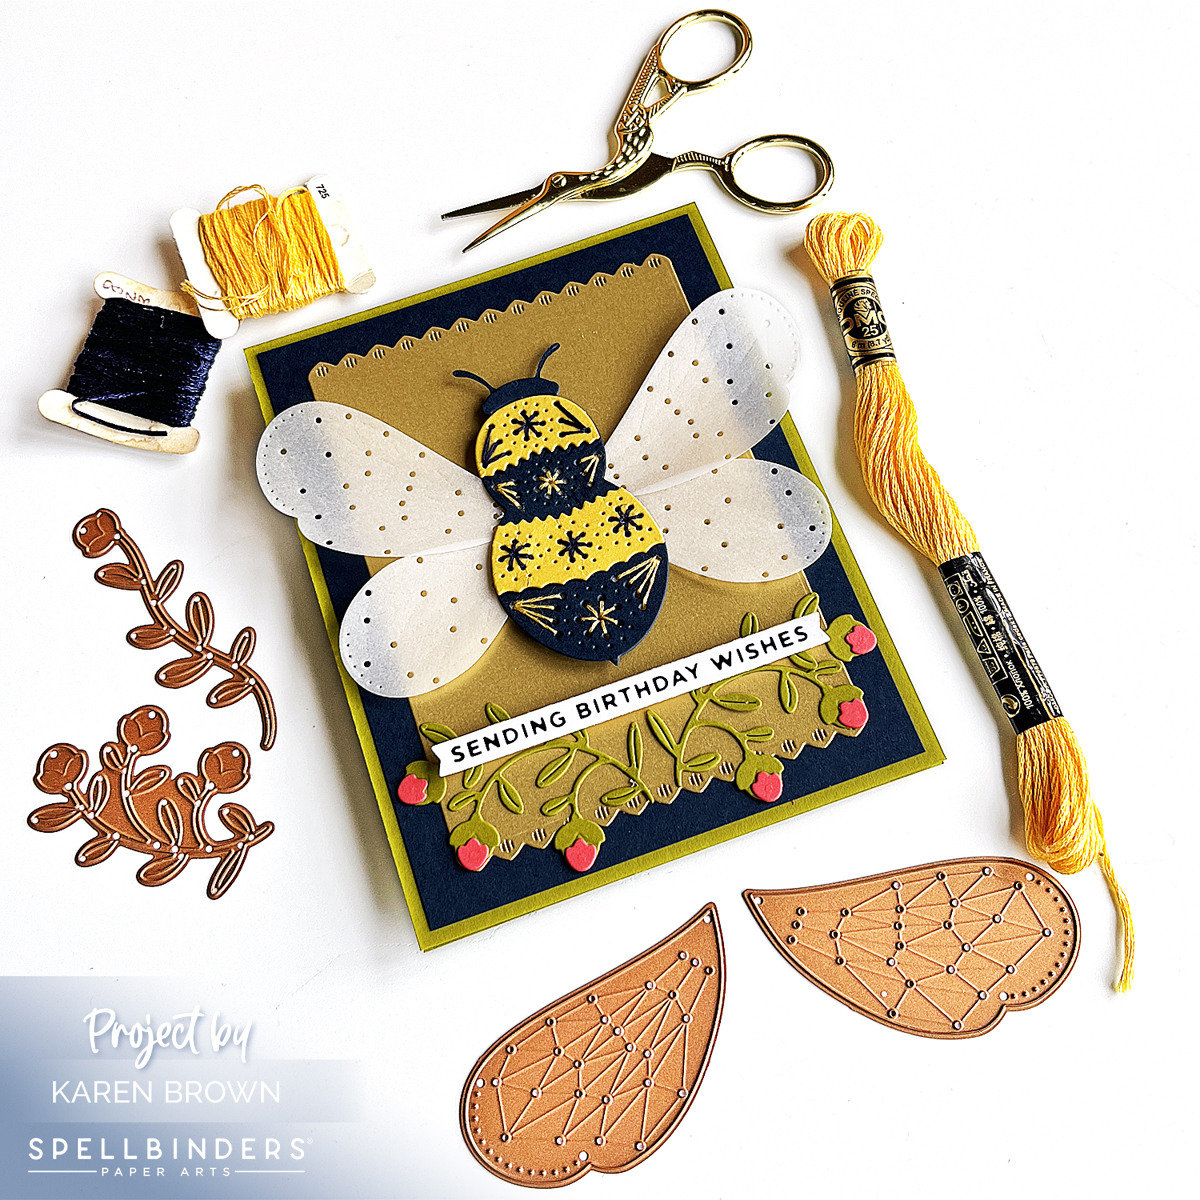
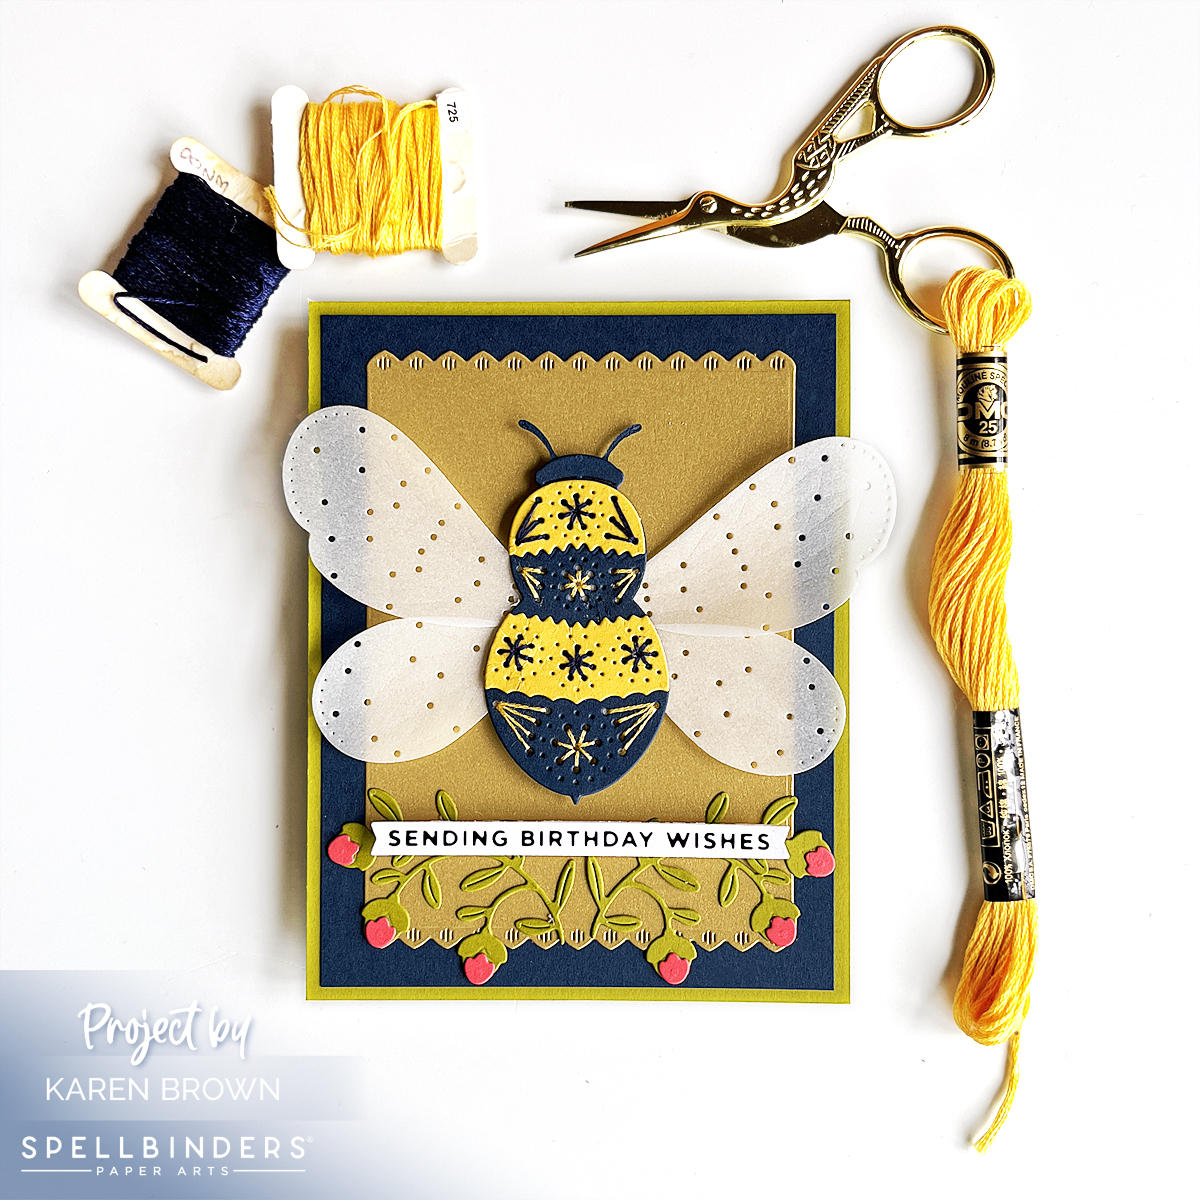
I am so excited about the 2024 Spellbinders Clubs! Today I am sharing a fun Bumble Bee themed card using the January Stitching Die Club Kit and it is perfect for Spring, Birthdays, Get Well and Hello cards…I think it is so fresh and fun! This Club Kit is now available for individual purchase HERE.
I created this card over the holidays and it was ideal to work on while I sat around the fire and visited with family.
Spellbinders has a nice selection of stitching accessories in their shop that you can find HERE.
When I started stitching, I took two strands of Gold Floss (DMC 725), separated them one at a time, brought them together and then stroked and lengthened them until they seemed tame and ready to use.
When I move from one area to the next, I run the floss through the just finished stitched area to keep the thread secure. This gives a nice look on the finished project.
Don’t stitch with threads that are too long or they are likely to knot. This is a lesson I relearned on this card.
When I was done, I added a bit of Bearly Glue to the ends so that they will stay in place. You can also add a backing by die cutting another Bee body. Your backing can be a different color to add more interest.
A Few Notes About Spellbinders Club Kits
Clubs Preview on the 1st of each month.
Club members can cancel, upgrade or change clubs from the 1st-5th of each month. Popular Clubs frequently sell out during this period so club members get first dibs on everything.
NEW for 2024: Club Members get EARLY access to new releases on the 6th!
On the 6th, Clubs become available to non-members.
On the 27th, Club registration closes for the current month.
If a club did not sell out, you can buy under “Shop Past Clubs”. Past kits are available on the 10th of the FOLLOWING month.