cardmaking · Mixed Media

Spellbinders | House Mouse Designs Collection 3 Ways

Spellbinders House Mouse Designs | Daisy Mouse | Mixed Media handmade card.

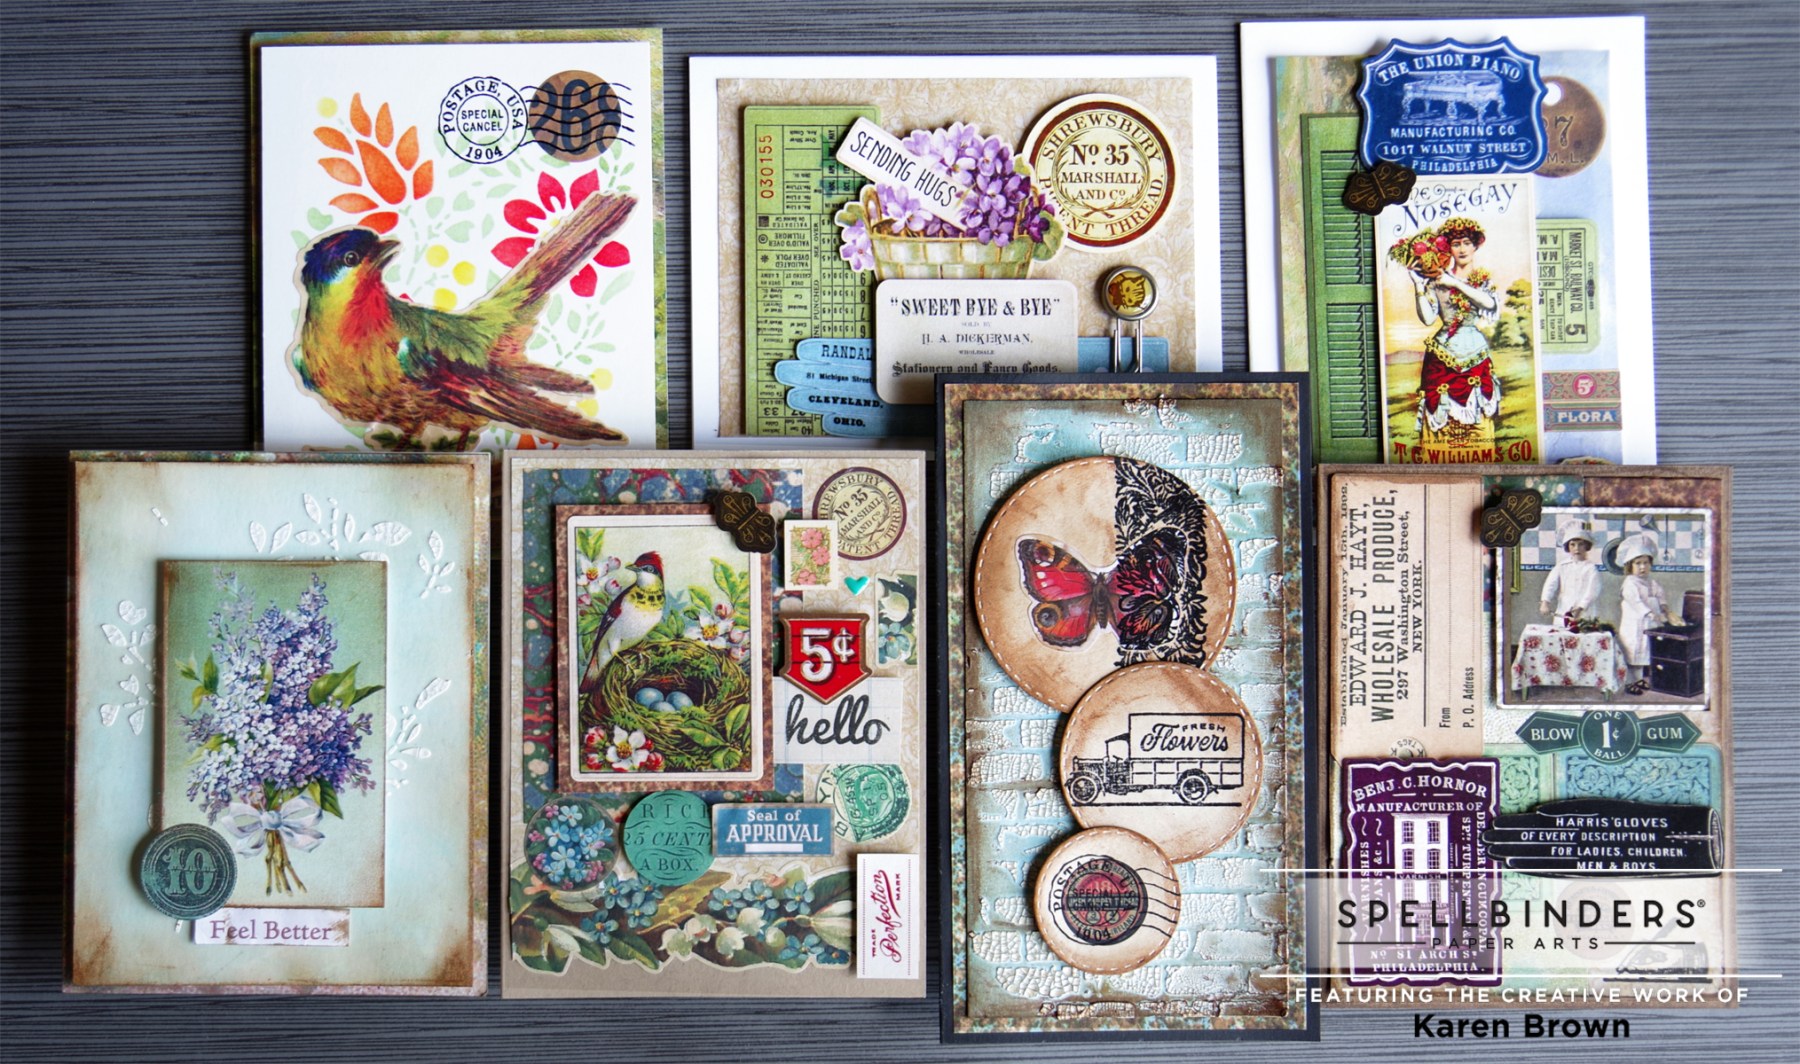
Spellbinders just released 6 adorable House Mouse Designs Rubber Cling Stamp Kits + a bundle of the entire collection. The whimsical stamps are all so fun and today I am sharing three cards that I created.

Vintage Look Mixed Media Tutorial + Daisy Mouse (RSC-002)

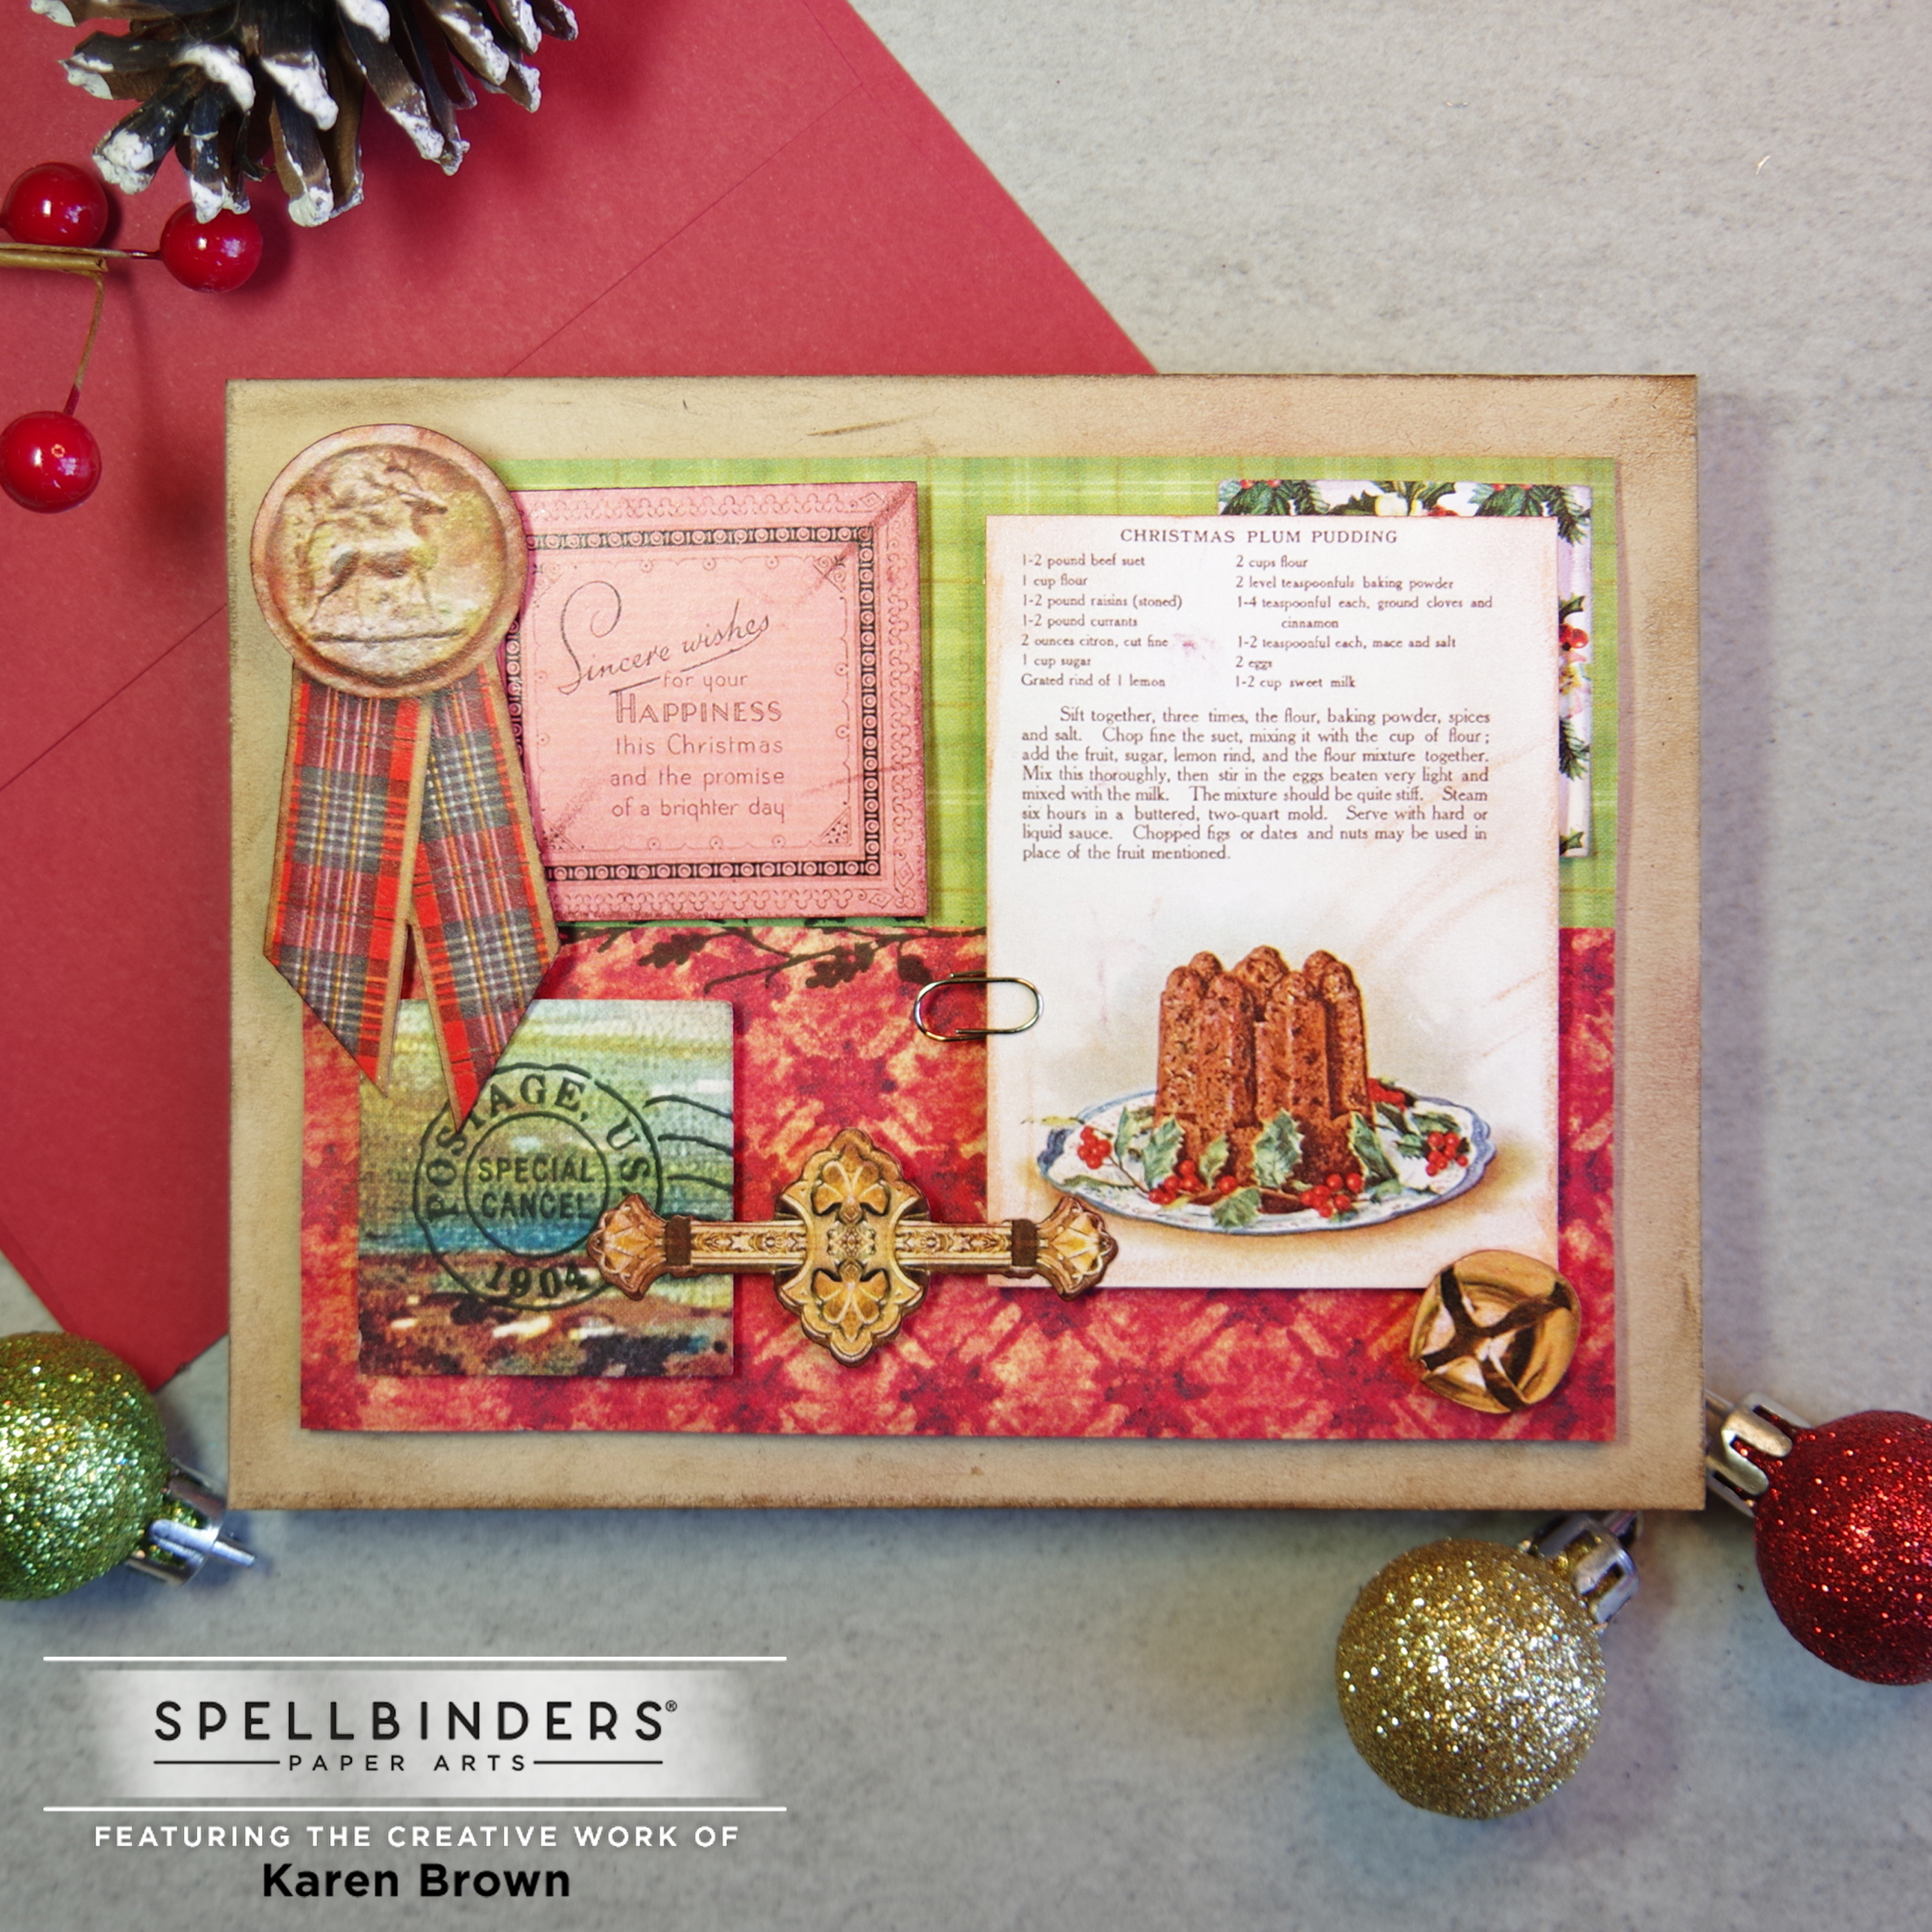
Mixed Media cards have so much interest and I thought the technique would work perfectly with this Daisy Mouse (RSC-002) stamp set.

My Process:

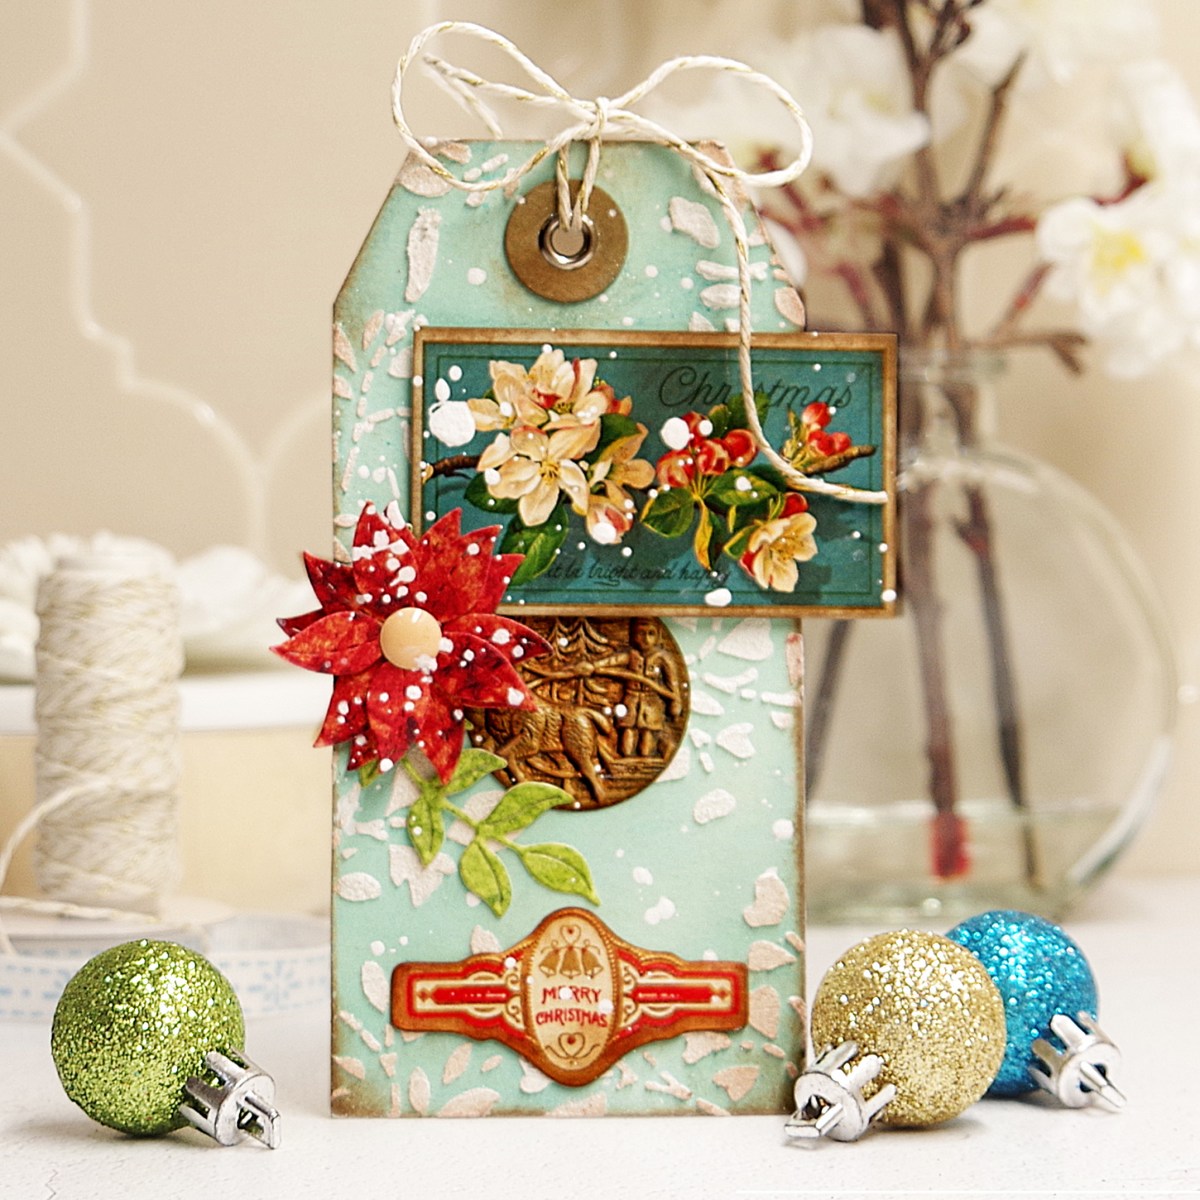
  • I started by creating my background. I masked off a border and then used two shades of tan to ink blend my background. (Antique Linen and Frayed Burlap)
  • With the masking tape still on the cardstock, I then used the same tan inks to stencil and stamp bits and pieces on the background. Most of the stamping was “second generation” where I stamped first on a scrap and then onto my background so that the pattern would be subtle. Cathe Holden has some great stamps (Handle with Care: STP-093 and Friendly Society: STP-094) that I added here and there. I also used a bit of stamping with white pigment ink, but it is hard to see in the photograph.
  • Carefully remove your masking tape. I used Post It Tape, which is the best!
  • After my background was dry, I stamped The Daisy Mouse with Versafine Black Pigment Ink.
  • PRO TIP: For a crisp look, keep the stamp in your Misti stamping platform and restamp the image after you are done coloring. You won’t believe how much this one step will elevate your project!
  • I used Faber Castell Polychromo Colored Pencils to color the mouse and daisy. I used white, 2 shades of gray, 3 shades of yellow, orange, 2 shades of green, blue and coral.
  • PRO TIP: A bit of blue colored pencil was the secret ingredient!
  • Remember to restamp the image and let dry.
  • I also added a few white Posca Paint Pen (.9-1.3mm) dots.
  • The adorable Special Delivery sentiment is included with the stamp set.
  • I mounted my card panel on a navy card base and the finished card is 7″ x 4 3/4″. I usually add lots of foam tape, but I kept this card simple and just used Bearly liquid glue.
Spellbinders + House Mouse Designs | Daisy Mouse (RSC-002) two handmade cards

I loved the Daisy Mouse stamp so much that I made a second Copic colored version.

House Mouse Designs + Copic Coloring Tutorial

Spellbinders + House Mouse Designs | Daisy Mouse (RSC-002) Copic colored handmade card.

The detail on these stamps is so well done that coloring is so easy! I used the following Copic Colors:

  • E50, E40, E00, R20 (face, hands and tail)
  • BV0003 (shadows)
  • W0, W3, W5 (mouse body)
  • YG01, YG03 (stem and flower)
  • Y00, Y06, YR04, YR07 (flower)
Spellbinders + House Mouse Designs Collection Copic colored handmade  cards.

My final card uses Tea for Two (RSC-005). I am a tea drinker so this stamp set definitely called to me!

I used the following Copic colors:

  • E50, E40, E00, R20 (face, hands and tail)
  • BV0003 (shadows)
  • W0, W3, W5 (mouse body)
  • RV00, RV02, RV04 (teacups)
  • YG03 (stems)
  • BG05. B05 (flowers)

I wanted to add a small little sentiment in the middle of the scene, so I stamped the Hello from Fill My Heart Sentiments (STP-183)

Spellbinders + House Mouse Designs Tea for Two (RSC-005) Copic colorered handmade card.

Products Used:

Items Available at Amazon:

Faber Castell Polychromos Colored Pencils
Mixed Media · papercrafting

Spellbinders | Mixed Media Gift Tags with Cathe Holden’s Christmas Flea Market Finds

Spellbinders | Mixed Media Gift Tags with Cathe Holden's Christmas Flea Market Finds

Vintage Vibe Mixed Media Christmas Gift Tags

Hello! My post today features a favorite new Spellbinders collection from Cathe Holden called Christmas Flea Market Finds. Cathe included stamps, printed die cuts, paper and stickers and they are SO fun to create with!

Using printed die cuts in cardmaking.

I created three mixed media tags with a vintage vibe. For all three tags, I created backgrounds using ink sprays. I mixed Ocean Waves aqua, Shimmer Spray for extra sparkle and a little water spray to slightly dilute the color. I dabbed my tag in the mixture, dried and then repeated two more times.

Next, I worked on my layouts. I knew I wanted to stencil grit paste on one card and I wanted all of the tags to be distressed.

Vintage look Christmas Gift tag with stenciled grit paste background.

I love the texture and interest that the grit paste adds to the tag.

Adding texture and interest with grit paste and a stencil in cardmaking.

Two of the cards also include stamps. To get the vintage-look inky blue, I combined denim and brown inks. White paint splatters were added to two of the cards and I thought they added a wintry look.

Distressed Christmas gift tag with pre-printed die cuts, stamp and stickers with a hand dyed aqua background.

When I create this type of mixed media project, I love to pull out all my supplies and just start playing. I made a huge fun mess!

How to get a vintage look when stamping papercrafts.

Spellbinders/Cathe Holden Supplies Used:

Other Supplies:

Cathe Holden Christmas Flea Market Finds Vintage look distressed gift tags.

Last week, I added a post with Cathe Holden Christmas cards which you can read HERE.

Thanks for stopping by!

Karen

cardmaking · Mixed Media · papercrafting

Spellbinders + Cathe Holden Christmas Flea Market Finds Cards

Spellbinders + Cathe Holden Christmas Flea Market Finds Card.

Quick and Easy Vintage Look Christmas Card

Hello! Spellbinders and Cathe Holden just came out with a Christmas Edition of her Flea Market Finds and it was so fun to create with! Today, I used her Home for the Holiday’s paper pad: (CH-021) and Jingle Bells Miscellany die cuts (CH-019). I had fun laying out each item and then coming up with combinations for my cards.

The first card was quick and easy but I love result. My background is made from 2 pages from the paper pad that I combined at the midpoint. Using craft foam for dimesion, I attached the background to an A2 card base. Then, I just popped on the Christmas Tree and sentiment with foam tape.

Vintage Look Christmas card made with die cut ephemera.

Cardmaking with Vintage Ephemera

Cardmaking with Vintage Christmas Ephemera from Spellbinders + Cathe Holden

My second card is a collage style pieced together with designer paper, printed die-cuts and stamps. I used 2 rectangles and two 1.25″ squares of paper cut from the Home for the Holidays paper pad for my background. I distressed my kraft card base, background panel and the die cuts with 3 different Distress Crayons (bronze, gathered twig and aged mohogany) and then added lots of ephemera from the Jingle Bells Miscellany die cut pack. I also used 2 stamps from Cathe Holden’s previously released stamp kit called Handle with Care and added a tiny little paper clip.

Grunged Up  Mixed Media Vintage Collage and Ephemera Christmas card.

Thanks for stopping by!

Karen

cardmaking · Mixed Media · papercrafting

Spellbinders + Cathe Holden’s Flea Market Finds

Quick and Easy Vintage Card featuring Cathe Holden's Flea Market Finds Ephemera, printed die cuts and stamps.

Cathe Holden’s “Flea Market Finds” Ephemera

Hello! I am so excited to show you Spellbinders new product line from Cathe Holden called Flea Market Finds. Cathe is a well known fabric designer and collector of vintage miscellany and she just released a wonderful assortment of printed die-cuts, paper samplers, stamps and stencils in collaboration with Spellbinders. Cathe put so much thought into every product and they all work SO well together.

For the past week, I have been playing in my craft room and I’d like to show you what I created. Hold on, becuase I have seven cards to share with you today. The card above was so fun to make!

My Recipe For Card 1:

On this card, I used all the products “as is” with no distressing. I started with the background where I layered 2 different papers, one from the neutral palette and one from the Blue Green pack. Next, I started adding stickers and diecuts. The bird image is framed with a third paper from Cathe’s Neutral Sampler.

Vintage Shabby Chic Card

Vintage Shabby Chic handmade card using Spellbinders Cathe Holden stencil and die cut ephemera.
Vintage Shabby Chic Handmade Get Well Card

For my Shabby Chic card, I started by ink blending Tumbled Glass Distress Ink on my panel. I added Frayed Burlap Ink around the ages for a vintage feel. I let the panel dry and then added Grit Paste through stencil #1 of the Layered Vintage Floral Stencil. I really like how the background turned out. I wanted an even more vintage look so I ran my Tea Dye Distress Crayon around the edges of the background and die cut and then blended the pigment with my fingers. The card base was covered with paper from the Blue Green Paper Palette.

Cardmaking With Ephemera

Vintage Collage Style Card using Spellbinders Flea Market Finds die cuts, stamps and stickers.
Aren’t the little bakers just the cutest?

My third card is a collage style card pieced together with designer paper, printed die-cuts and stamps. I used 1.25″ squares of paper cut from the Neutrals and Blue Green Samplers for my background. I distressed my background panel and the die cuts with a Distress Crayon and then added lots of ephemera.

Grunged Up Vintage Look Card

Grunged up Mixed Media Card using Spellbinders Flea Market Finds Stamps and Stickers.

I started my grunged up card by making a background panel. I blended tumbled glass distress ink and then added a bit of frayed burlap. I then ink blended a second panel for my die cut circles. I used Antique Linen Distress Ink and then added a bit of frayed burlap. I let the panels dry and then added Distress Grit Paste through my bricked stencil. I wanted it to look rough and old so I didn’t cover the entire stencil. After the grit paste was dry, I rubbed a Distress Crayon around the edges and blended it out onto the panel with my finger. I also gently rubbed some on the top of the panel so you could really see the crackle finish. Next, I die cut my circles and rubbed distress crayon around the edges and then blended onto the top with my fingers. I added two stickers to two of the circles and then stamped over them. The middle circle is just the roughly stamped cute flower truck. The matting is from the blue green sampler.

Quick and Easy Vintage Look Card

Quick and Easy Vintage Look Handmade Card using Flea Market Finds Printed Die Cuts.

This was the fastest and easiest card to make. I started with a page from the Neutral Sampler for my Background. I then layered on 3 Happy Thoughts and 2 Home Arts printed die cuts. I stamped a sentiment onto the flower basket and added a fun little paper clip from my stash.

Stenciled Background on Vintage Look Card

Spellbinders + Cathe Holden Layered Vintage Floral Stencil for Card Background,
Stenciled Background

Cathe Holden included a beautiful stencil in her collection and I used it for my background on this card. I added 2 stickers and 1 stamp to complete the card.

Using Printed Die Cuts in Cardmaking

Using Cathe Holden's Flea Market Finds in cardmaking

This was another card that came together very quickly using die cuts and stickers.

Using Flea Market Finds Miscellany on handmade cards.

Here is a group photo of the seven cards I created.

Cathe Holden Flea Market Finds handmade cards.

I had so much fun creating these cards. If you have a moment, let me know which is your favorite.

Thank you!

Karen