papercrafting · Rainbow Colors

Exploring Spellbinders’ 48 Colors – A Swatching Adventure!

Swatching Spellbinders 48 colors of cardstock was relaxing and stimulated my creativity.

Oh my goodness, I just got my new Spellbinders Color Wheel Cardstock, and I am having so much fun! If you’ve ever wanted to truly get to know your cardstock colors, swatching is the way to go. Not only is it an incredibly helpful reference for future projects, but I also found the process to be calming, relaxing, and—bonus!—it sparked my creativity in ways I didn’t expect.

Products Used:

48 hues of Spellbinders cardstock awatched and organize on a ring in rainbow order.  Also shown: 
 a card created using my new inspirational cardstock swatches.

Swatching Setup: Let the Color Journey Begin!

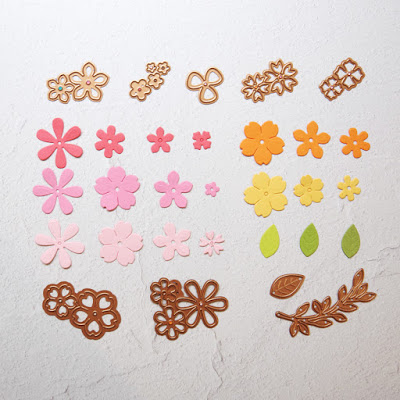
I ordered the 48-pack sampler to start, and I used the Spellbinders Color Swatch Petal Dies along with color name stamps to create my swatches. I decided to organize them in rainbow order, making it easy to compare shades and find the perfect hues for my future projects. There’s something so satisfying about seeing all the colors lined up in perfect harmony!

For organization, I put my swatched colors on a ring, which makes flipping through them a breeze. I also documented my process in a reel showing my die-cutting, stamping, and assembly. If you’re on the fence about swatching, trust me—it’s worth it!

New Friends & Old Favorites

There are some shades I already know and love, but this swatching process introduced me to some stunning new favorites. I’m still deciding whether to order the 5-pack of each shade or just stock up on my must-haves. Either way, I now have a better sense of which colors I’ll be reaching for the most!
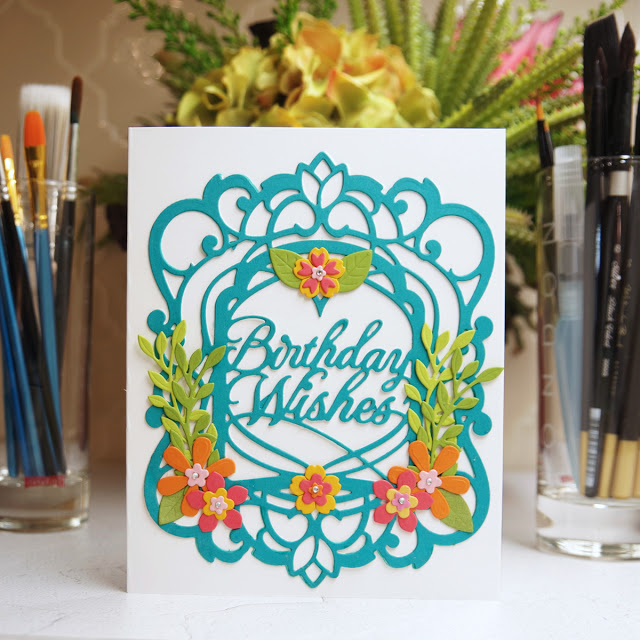
A Fun Card Example

Vintage mixed media handmade card with a lovely die cut hat box luggage piece.  Travel theme, hello card with floral accents.

To put my swatches to use, I created a card using my newly organized colors. You might recognize this one—it’s the Hero Arts Suitcase & Florals Card that I recently shared in another blog post. Seeing the colors in action really drives home how valuable swatching is!

Click HERE to read my blog post about creating this Vintage Suitcase & Florals Card. 
Process photo showing how I created my Spellbinders Color Wheel Cardstock swatches with my Platinum 6 die cutting machine.

Final Thoughts

Swatching might seem like a simple task, but it’s an absolute game-changer for crafting. Not only does it help you choose colors with confidence, but it also makes designing so much easier. Have you ever done a cardstock swatch? If not, I highly recommend it! Let me know in the comments which Spellbinders colors are your favorites!

Happy crafting! 🎨✨

Cardmaking Kit · Die cutting · papercrafting

Spellbinders | Large Die of the Month Kit | Colorful Floral Card

Hello, hello! Today’s card features Spellbinders Large Die of the Month Kit for January 2025. The Botanical Atrium, is a die-cut lover’s dream with gorgeous floral details, a luxurious gold frame, and a fresh aqua-and-coral palette.

Creating With the Large Die of the Month Kit | January 2025

I used shiny gold cardstock to make the atrium stand out against a crisp white background, and wow—does it ever pop! Inside the frame, delicate coral and aqua florals cascade in a lush arrangement, creating a playful yet refined design. I’ll be using the florals on loads of future cards!

Key Products Used:

It’s a great time to buy paper because Spellbinders is having a Paper Party Sale until January 26th!

Textured Touches: The Brick Background

To add a subtle yet striking detail, I stenciled a brick pattern on the white background using grit paste. Just here and there, mind you—like peeking through a garden wall. This little bit of texture gives the card depth without taking attention away from the gorgeous die-cut elements. It’s understated but oh-so-effective!

January 2025 Papercrafting Kits and Blog Posts

This year, I’ll be creating with 3 Spellbinders Kits each month. I’ve already published two posts that you might enjoy reading:

  1. Hello Gorgeous! Crafting with Spellbinders Die of the Month Kit (Dragonfly)
  2. Spellbinders | Stitching Die of the Month | Ladybug

Helpful Product Links:

If a club did not sell out, you can buy under “Shop Past Clubs”. Past kits are available on the 10th of the FOLLOWING month.

The January Card Kit is both timeless and modern, and is a must-have for your stash. I hope you enjoyed my little creation!

cardmaking · papercrafting

Help Me Craft an Amazing 2025—Your Ideas Wanted!

Hey there, crafty friends! 👋

Can you believe 2025 is just around the corner? I’m over here surrounded by paper scraps, embellishments, and a ton of ideas—but I want your input to make next year truly magical.

What types of blog posts, techniques, and projects do you want to see in 2025? Whether you’re a beginner still figuring out how to not glue your fingers together (been there) or a seasoned pro with a stash that could rival a craft store, I want to know what inspires you.

Here are a few questions to get those creative juices flowing:

  • Are there any papercrafting techniques you’ve been itching to learn?
  • What’s your favorite type of project—cards, scrapbook pages, 3D crafts, or something totally out of the box (literally)?
  • What is your favorite technique?
  • Would you like to see more tips, tutorials, or behind-the-scenes peeks into my crafting chaos?
  • What is your favorite: Blog Posts, Videos, Reels, Instagram Post?
  • Are there themes or occasions you want more ideas for—birthdays, holidays, just-because days?
  • Any products or tools you’re curious about that I could spotlight?

Drop your comments and let me know what would make 2025 your best crafting year yet. Your ideas help shape this space, and I can’t wait to hear them! Or, if you prefer, leave a comment on my coordinating post on Instagram: karens_mini

Let’s dream big, get messy, and make this our most creative year ever! 💖

Thanks for your input!

Karen

cardmaking · Die cutting · papercrafting

Opening Day 1 of the Crafty Advent Calendar | Spellbinders

Opening Day 1 of Spellbinders Crafty Advent Calendar and making a handmade card with the included dies.

December is finally here, and I couldn’t be more excited to kick off the festive season with my Spellbinders Paper Arts Crafty Advent Calendar! If you’re anything like me, the thought of crafting something new each day leading up to Christmas brings so much joy—and this year, the fun starts with a surprise die inside Day 1. Let’s open it together and make a holiday card!

Spellbinders 2024 Advent Calendar Options:

What’s Behind Door #1?

The anticipation is real. As I carefully peel open Day 1, I reveal… a beautiful hot air balloon die! It’s intricate yet versatile, perfect for adding that extra touch of winter magic to any holiday card.

Spellbinders trio of colorful die cut hot air balloons on a handmade card.

This balloon die is just adorable with tons of detail! So here is a quick tutorial on how I created this bright happy card:

  • I started by die cutting my balloon 3 times in the following combinations: orange and hot pink, aqua and lime, lavendar and purple. This project is perfect for my compact desk top Scout Die Cutting Machine.
  • I used Brushed Gold cardstock for the sentiment and accents.
  • The only die I added is the cloud from the Fly Away die set. I use this cloud on a lot of projects and find it is a great accent to have in my craft room.
  • My background panel is 4 1/4″ x 6″. I little longer than an A2 card but I like the layout better with a bit more vertical space.
  • I adhered my elements with Craft Foam and Bearly Glue.
  • My card base is charcoal grey for a bit of lovely contrast.

And There You Have It!

I can’t wait to see what’s behind the other doors! Stay tuned for more crafty inspiration as we count down to Christmas together. I will be back in a few days with more Crafty Advent Inspiration.

Happy crafting! ❄️🎄

Karen

Cardmaking Kit

Spellbinders | Stitching Die of the Month | April 2024

Spellbinders April 2024 Stitching Die of the Month handmade card.

It’s that time of the month again….time for Spellbinders April Club Kit releases. Today, I am sharing my floral stitched card. I know I always say this, but the April Stitching kit is a real beauty.

One of the things I like about stitching is that the project is transportable. I stitched my flowers in a doctor’s waiting room and I completed the leaves in my backyard on a beautiful Spring day (see photo below).

The Deluxe Caboodle

I also wanted to mention what a wonderful deal the Deluxe Caboodle Kit is. You save 60% off all TEN kits for the month + you get a bonus gift. So, if you are thinking about multiple kits, consider the Caboodle. The current cost is $160 but the kit value is $315.

Spellbinders Stitched Wall Hanging Kit

Spellbinders Hand Stitched Card using Die of the Month Stitching Club Kit.

My Stitching Process:

  • The kit has 18 dies and I started by cutting all my pieces with my Platinum 6 die cutting machine.
  • Spellbinders has a nice selection of stitching accessories in their shop that you can find HERE. I used DMC Gold Thread, #818 Soft Pink, #772 Light Yellow Green and #922 Light Copper for this project.
  • When I started stitching, I took two strands of floss, separated them one at a time, brought them together and then stroked and lengthened them until they seemed tame and ready to use.
  • I usually stitch with size 22 Tapestry needles.
  • I like to use 1/8th inch double sided liner tape to attach my floss to the die cut.
  • Remember to keep your floss taught as you stitch.
  • When I move from one area to the next, I run the floss through the just finished stitched area to keep the thread secure. This gives a nice look on the finished project.
  • Don’t stitch with threads that are too long or they are likely to knot. 
  • When I was done, I added a bit of Bearly Glue to the ends so that they would stay in place.
  • To finish my project I embossed white cardstock with the my longtime favorite embossing folder: Intertwined Lattice.
  • I used the Press and Seal method to keep my elements together after I arranged them. Place Press and Seal over arrangement, flip them over, apply glue, flip back over and adhere to card.

Other Supplies and Products Used:

Isn’t this a great place to stitch?

Handmade stitching card showing you can work on your stitching card anywhere including vacation or your backyard.

A Few Notes About Spellbinders Club Kits

  • Clubs Preview on the 1st of each month.
  • Club members can cancel, upgrade or change clubs from the 1st-5th of each month. Popular Clubs frequently sell out during this period so club members get first dibs on everything.
  • NEW for 2024: Club Members get EARLY access to new releases on the 6th!
  • On the 6th, Clubs become available to non-members.
  • On the 27th, Club registration closes for the current month.
  • If a club did not sell out, you can buy under “Shop Past Clubs”. Past kits are available on the 10th of the FOLLOWING month.

Helpful Links:

Thanks for stopping by!

Karen

BetterPress · cardmaking · Tutorial

9 Tips, Tricks and Insights for Spellbinders BetterPress Machine

9 Tips, Tricks and Insights for Spellbinders BetterPress Letter Press Machine System.

Hello! I am so excited about my new BetterPress Letter Press machine! I had a very crafty Christmas and received a BetterPress Letter Press System, Wax Seal Starter Kit and a new Platinum 6 die cutting machine. Today I want to share two cards I made with the BetterPress. I feel like I am gushing, but I LOVE the look and results I achieved with my new toy. I adore the lovely elegant high-end stationary look. You get an engraved like impression combined with ink stamping. 

I wanted to share a few of my insights:

9 Tips, Tricks and Insights for BetterPress Printing

  • I started by using Best Ever Craft Tape to attach my BetterPress card panel to the top plate.
  • I tried several types of paper (BetterPress, Watercolor and Cardstock) and they all worked with the BetterPress. I liked cottony paper the best. My preferred paper would be the BetterPress cotton paper or a watercolor paper. 
  • The magnetic lower plate works really well to hold the BetterPress impressing plate in place. 
  • I was careful to ink the impressing plate really well. I did a “Tap and Twist” technique where I tapped the ink on the plate and then twisted the ink pad a few degrees. Don’t smash and smoosh or you will wind up with little pieces of ink pad on your plate and project. I ink well because I only like to roll through the press once for each panel.
  • For smaller sentiment plates, I tapped but didn’t twist. When I twisted smaller plates they tended to move out of alignment. If the plate moves it is easy to reposition with a pair of tweezers.
  • Roll your sandwich slowly through the die cutting machine. I think “Super Slo-Mo” while doing this to help me remember to go VERY slowly. 
  • You will want a good stamp cleaner for the BetterPress and plates. I’ve used Hero Arts Ultra Clean for years and it worked great.
  • Waterproof or Hybrid inks well. I used the specially formulated BetterPress Inks. Pigment ink is not recommended. You want a faster drying ink. 
  • I found that my guillotine paper trimmer worked better than my Fiskar’s SureCut on cotton paper.

Better Press Kaleidoscope Garden Cards – BP-119

Spellbinders Kaleidoscope Garden Better Press plate + Bark ink on a letter press handmade card..

Products Used:

Using Spellbinders BetterPress letter press system on regular cardstock.

Products Used:

Thanks for stopping by!

Karen

cardmaking · Mixed Media · papercrafting

Super Easy Cut Collage Birthday Cards | Minimal Supplies Needed

Cut Shapes Paper Collage Birthday Cards

Hello, I have a super quick post today sharing two fun collage birthday cards that I created by cutting wonky shapes from paper. So easy, anyone can make them and they require minimal supplies. I think they are so cheerful and happy.

I started by going through my acrylic gel press and scraped scraps but you could just as easily use ready made paper. I picked out some melon (just made these for my last post on covering journal covers: read HERE), green, blue and gray. After I was done sorting I decided to add some red to the mix too. I then cut out silly whimsical shapes and glued them onto an A2 notecard. I handlettered a quick sentiment to complete the card. Nothing precise or perfect here!

Easy DIY collage style birthday card made by cutting shapes from colored paper.

Now that I see card #2 finished, I think it has a real Eric Carle vibe.

Supplies:

  • Colored Paper or Mixed Media Scraps
  • Scissors
  • Glue (I used UHU stic glue)
  • Card Base
  • Black pen (for sentiment)

I found this cardmaking session very satisfying. What do you think? Would you try this?

Karen

cardmaking · papercrafting

Easy Mixed Media Cards

Easy Mixed Media Cards

Last week, I taught a workshop on creating Easy Mixed Media cards. The participants had never done Gel Press printing before so I guided them through the printing process.

Gel Press Printing

And then we turned the prints into cards.

Some of the participant cards
Lots of decisions to make in cardmaking
Brainstorming
Working on the layout
Easy Mixed Media Cards featuring Altenew Doodle Blooms, Enamel Dots, Painted Grid Washi Tape and Gel Press Prints.

Supplies used:

Altenew Doodle Blooms Bundle

Altenew Enamel Dots

Altenew Bird of the Woods Stamp Set, Die Set and Bundle

Altenew Rounded Rectangles Die Set

Altenew Painted Grid Washi Tape

Ranger Paint Pens

Misti Stamp Positioner

Gel Press

cardmaking

Spellbinders Beautiful Sentiment Vignettes Die Cut Cards

Hi there, Karen Brown here and I am so excited to be on The Spellbinders Blog today!  I have three projects from The Beautiful Sentiment Vignettes Collection by Becca Feeken.  This is a lovely set and each card makes such an elegant statement.  The projects would be so pretty in gold and white, but I went a bit more bold with black and teal frames and then mixed in colorful floral die cuts. 

Spellbinders Amazing Paper Grace Beautiful Sentiment Vignettes Die Cut Cards


BIRTHDAY WISHES VIGNETTE
I used the Birthday Wishes Vignette Etched Dies on this first card and I went with fun summery colors.   I die cut the frame twice using Teal Topaz cardstock.  I then  stacked the die-cuts and glued them together to add a bit more dimension.  
Using Petite Floral Potpourri Etched Dies, I die cut a bunch of flowers and leaves in a variety of colors from Spellbinder’s Assorted Cardstock Pack and then started trying different layouts. 

    I layered different sizes and types of petals and like the effect.  I love that there are so many beautiful combinations.  To finish the card, I added some small crystal gems to the flower centers. 

I used an A7 card base that I made out of white cardstock.   This is a big showy card and I can’t wait to send it!

ROMANTIC CHARGEOUR VIGNETTE

Waterfall aquaa cardstock

I went for a dramatic look on my second card.  This Romantic Changeour Die has such lovely detail and I think the black frame over the Waterfall cardstock is very striking.  The card base is 5 x 7”. 

The Petite Floral Potpourri flowers and greenery are the perfect accents for the frames.  I added some enamel dots to the flower centers for additional interest and dimension.  I love the sentiment from Sugar Coated Sentiments.

BLESS YOUR HEART STAINED GLASS INLAY DIECUTTING

Blue, Pink and Yellow stained glass inlay die cutting

As soon as I saw the Bless Your Heart Vignette, I knew I wanted to do some inlaid die cutting.  I was going for a stained glass effect.

I die cut the frame in black and then again in Rainbdrop blue, Haystack yellow and Dahlia pink.  I used the outer frame to die-cut my white base  so I could inset the black frame for my inlay.  Next, I inlaid the pink heart, blues and yellow.  Initially, I had more yellow in my design, but decided I wanted more of the serene blue so I ended up using just six accent pieces of yellow for a bit of contrast.  

I am so pleased you stopped by!   If you have another moment, I would love to hear which is your favorite card. Happy crafting!

Karen