cardmaking · Video

Video: Crafting with Color | Selecting Fabulous Color Combinations for Ink Blending

Hero Arts Color Layering Tile Stencil handmade cards in 2 Analogous color palettes (yellow, orange and coral) and (aquas, blues and greens).

Hello fellow crafters, Karen Brown here with a new How-To Video!  I am excited to dive into the world of layering stencils, specifically focusing on how to select analogous colors that will bring harmony to your designs.  Do you struggle selecting colors?  Taking a quick peek at your color wheel can assist in making cardmaking projects that are both visually pleasing and polished.  So let’s get started!

If you are having trouble viewing the video, please click HERE.

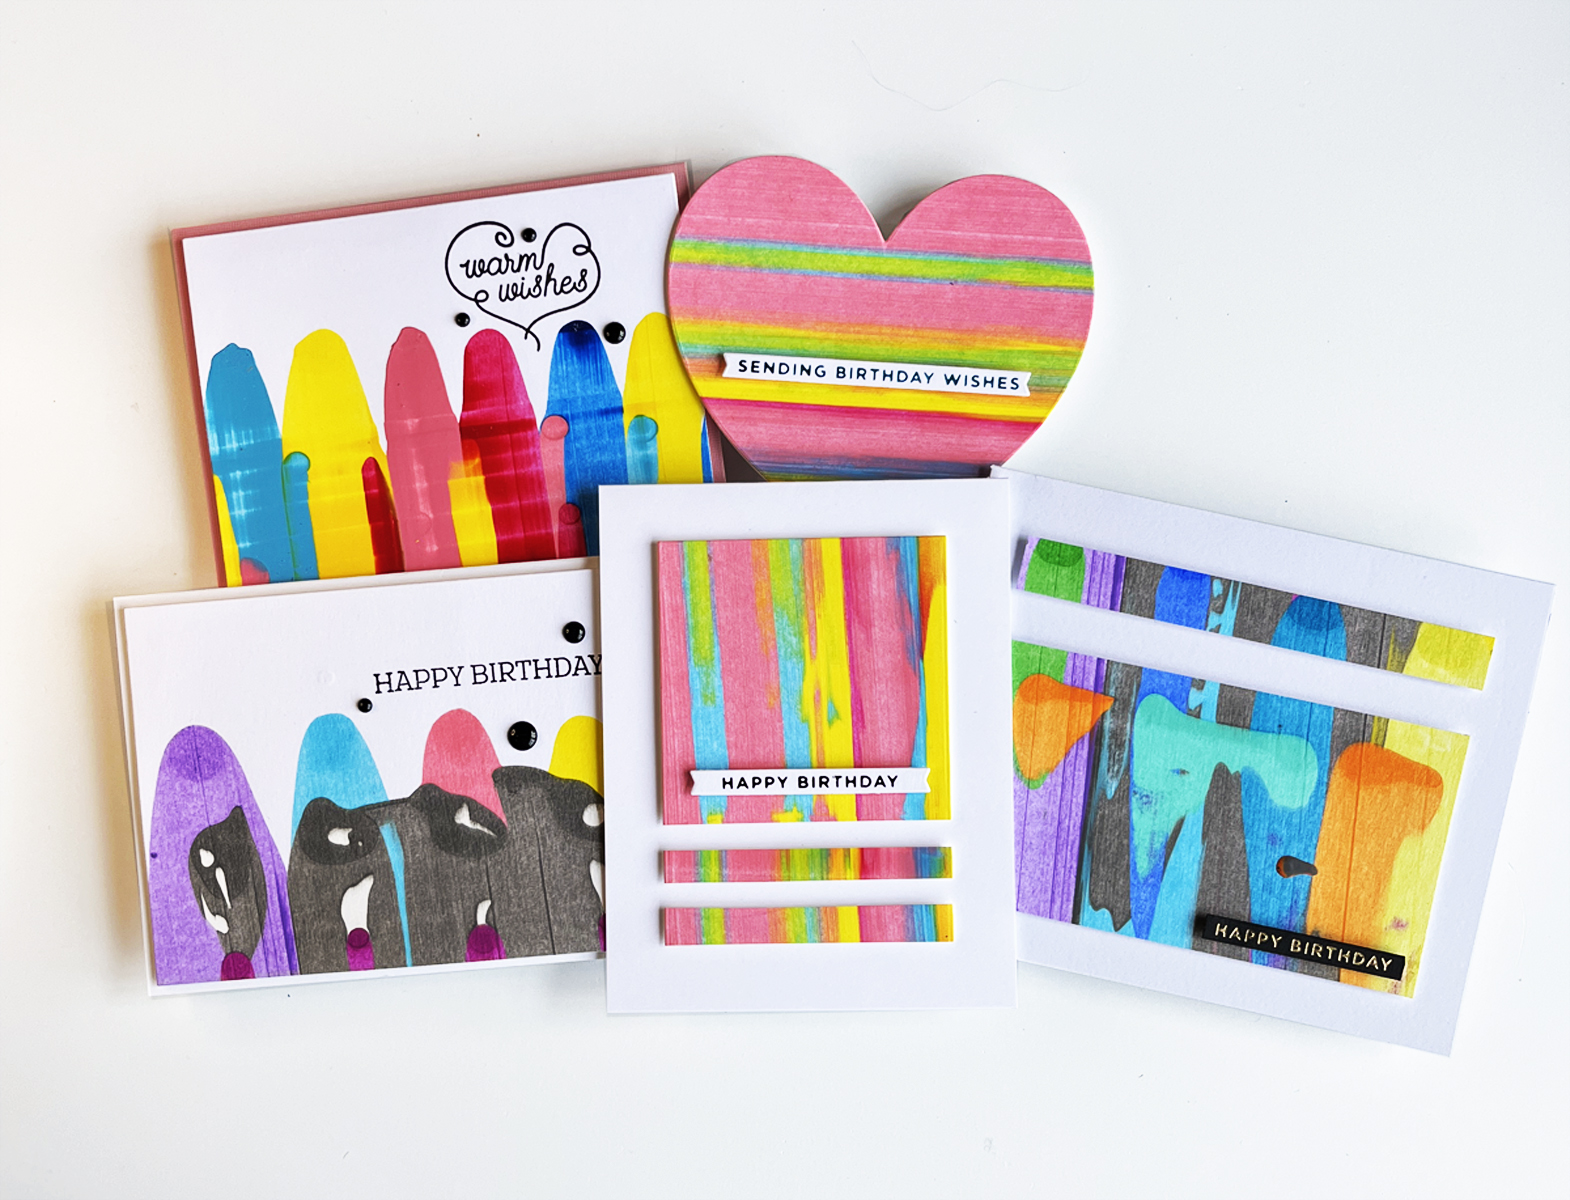
Today we will be using Hero Arts beautiful new Color Layering Tile Stencils.  This set comes with 4 stencils that are extremely easy to line up.  I thought it would be fun to use two different analogous color palettes and I added in some Hero Paste for added interest.  

Layering stencil tutorial with Hero Arts new Color Layering Tile Stencils + Gold Hero Paste.

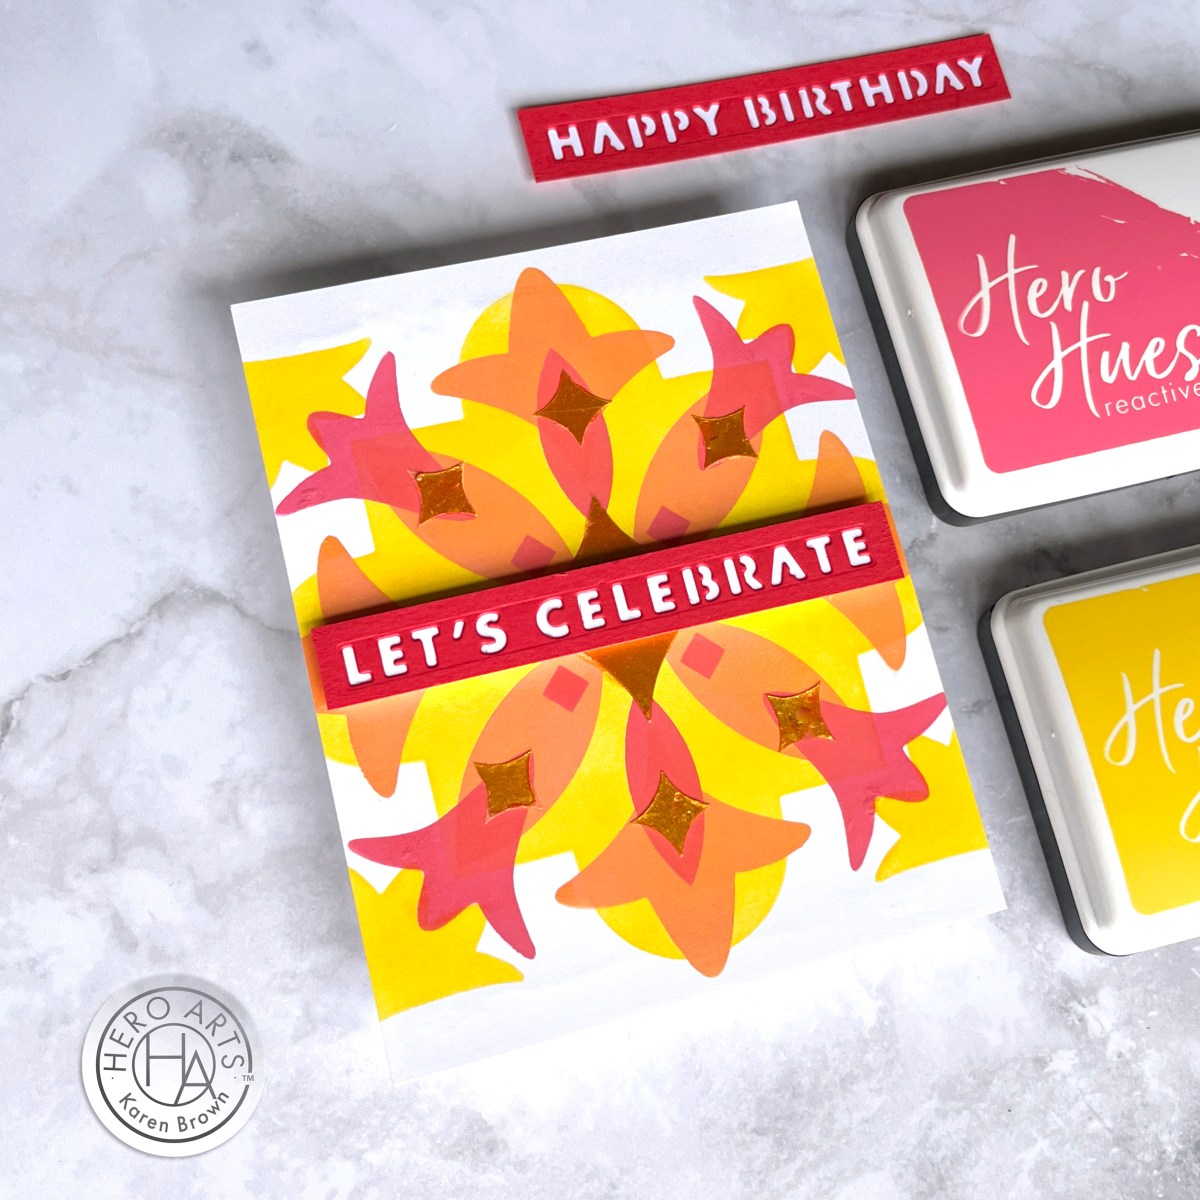
I started with a 5 1/2″ x 5 1/2″ panel of Deluxe Smooth Cardstock.  For Card #1 I used Lemon Drop, Creamsicle and Taffy inks. For my top layer, I applied Hero Gold Paste for a pop of shine and shimmer. 

Handmade birthday layering stencil card in aquas, blues and greens + a custom blended Hero Paste accent layer.

On Card #2, I selected Pool Party, Splash and Blue Hawaii. For my top layer, I custom blended White Hero Paste with a combination of Blue Hawaii and Pool Party.

Both cards are perfect for summer!  Card 1 is bright and festive and Card 2 is calm and serene. It’s interesting how color selection can change the tone of your cards.  To see all my tips and process details, please watch the video.

My sentiments were die cut using two sentiment strips from the Hooray Birthday Cover Plate.  I used Nautical and Coral cardstock.

Other helpful supplies were my Palette Knife, Blending Brushes, Compact Cutter, Precision Glue  and Magnetic Storage Envelops

Happy crafting everyone!

cardmaking · Die cutting · Give Away

My Monthly Hero | Countdown to Creativity

My Monthly Hero January 2024 Premium kit card with clean and simple die cut flowers in blue, orange, gray, aqua and pink.

Hello and welcome to the January My Monthly Countdown as we approach Hero Arts first kit release for 2024! I must say, this kit is a beauty full wonderful products that I know you will love. The kit goes live tomorrow (Monday, January 8th) so stay tuned. Meanwhile, sit back and enjoy some inspiration, sneak peeks and giveaways.

WIN A KIT BEFORE YOU CAN BUY IT: Just leave a comment on this (and every) Countdown to Creativity post. Hero Arts will randomly draw one lucky winner from comments left across all countdown posts on the Hero Arts blog. The winner will be announced first thing Monday morning, January 8th, before the kit launches at 10am Pacific. The more you comment, the more chances to win. Good luck!

Clean and Simple Die Cut Floral Birthday Card.

MMH January 2024 Premium Kit

My project today features The Premium Kit and boy did I have fun playing with it! I started off by die cutting this delightful breezy flower in five of my favorite colors and then I lined them up in a row so they formed a border at the bottom of my card. Clean and simple die-cutting, but I think it has a lot of interest.

I’ve listed the products used on card below:

Be sure to stop by and visit the Hero Arts Blog for more inspiration and then I will be back on Monday with another post featuring the Premium Kit + some great Add-On Products. 

cardmaking · Mixed Media · Video

Using Squeegee “Scraped” Acrylic Art Panels in Cardmaking

Squeege Scraped Acrylic Art + handmade cards.

Recently, some friends and I got together to experiment with “Squeegee Art”, which I find just mesmerizing. I love to watch @sharecestudios on Instagram! Sharece is an artist but I am just an experimenter, as you can see in my photos.

Squeegee Art (also known as “Scraped Art”) is created by putting acrylic paint (dots, squiggles, lines, shapes…) on cardstock and then pulling the paint down with a shower squeegee. I posted a short video below showing how I created one of the panels.

Quick Video Showing My “Squeegee Art” Process

Video: creating a squeegee scraped art panel

You know me, once I was done, I took three of my panels and made them into contemporary art cards.

Summery Acrylic Art Birthday Card

Contemporary Acrylic Squeegee Art Birthday card

I love how bright and happy this card is! This panel was from a second generation “scrape”. The first generation panel is on card #3 below. After I created panel one, I scraped the leftover paint that was on the squeegee onto a second piece of cardstock and I love how the colors blended.

Card #2 was die cut from the same panel as card #1, and it is so adorable in person!

Acrylic "Scraped" art birthday card.

Below, is a photo of the paints and supplies that I used.

Acrylic Paint + Shower Scraper + Squeegee Scrape Technique

Card #3 (shown below) was created from the “1st generation” scrape that I talked about above.

Squeegee Scraped Acrylic Art handmade card.

Contemporary Masculine Birthday Cards

Cards 4 and 5 were made from the panels created in the video above.

Contemporary Masculine Acrylic Birthday Cards.

Supplies Used:

(Affiliate links are provided below but there is no additional cost to you. For more information please see the Affiliate Programs info to the right or click on the link at the top of my blog. I purchased all the products used in this blog post, with the exception of the 2 * items from Spellbinders.)

Products Available at Amazon:

Liquitex BASICS Acrylic Paint – lots of colors and several sizes

Squeegee for Acrylic Scrape Painting

Plastic Squeeze Bottles for Acrylic Paint – 2 ounce

Tonic Studios paper trimmer

So what do you think?

Karen

cardmaking · papercrafting

Altenew | Mini Stamps

CAS Clean and Simple card using Altenew's Typewriter Flowers mini stamp and die bundle.

Using Mini Stamp Sets in Cardmaking

Hello and welcome! I think mini stamps can make such fun cards! This set, called Typewriter Flowers, is my new favorite mini stamp and die set. I wanted to create a clean and simple card and I like how this technique focuses on the whimsical typewriter.

I used my Altenew Artist Alcohol Markers to do some simple coloring. In addition to the regular brush, Altenew markers have a second fine coloring head for small areas. I used the fine nib a lot on this card and it is one of the reasons I usually reach for Altenew markers over other brands.

Altenew's Typewriter Flowers mini stamp and die bundle + handmade card.

My second card uses Altenew’s Letter Flowers Stamp and Dies. I again colored with Altenew Artist Alcohol Markers and made a simple background using three strips of coordinating washi tape. I die cut the letter and adhered to my background with Instant Dimension Foam Tape.

This set makes such a bright cheerful card.

Altenew Letter Flowers mini stamp and die bundle.

My last card uses Altenew’s Journal Flowers Bundle. I did some quick coloring and made a background with Altenew’s Playful Circles Embossing Folder. I adhered the book with Instant Dimension Foam Tape and then added a pink Enamel Dot to the center of the Turquoise flower.

Altenew's Journal Flowers mini stamp and die bundle + handmade card.

I like the texture that the embossing adds to this card.

Altenew's Playful Circles 3D Embossing background + Journal Flowers mini stamp.

Thanks for stopping by!

Karen