Spring is in the air, and so is a burst of bold color and whimsy! Today, I’m taking a closer look at the new Hero Arts Spring Whimsy Collection with four vibrant cards featuring hot foiling, ink smooshing, ink blending, heat embossing, and die cutting. Let’s get crafty!
>>> You may also be interested in my recent video and blog post: Easy and Festive Cardmaking <<<
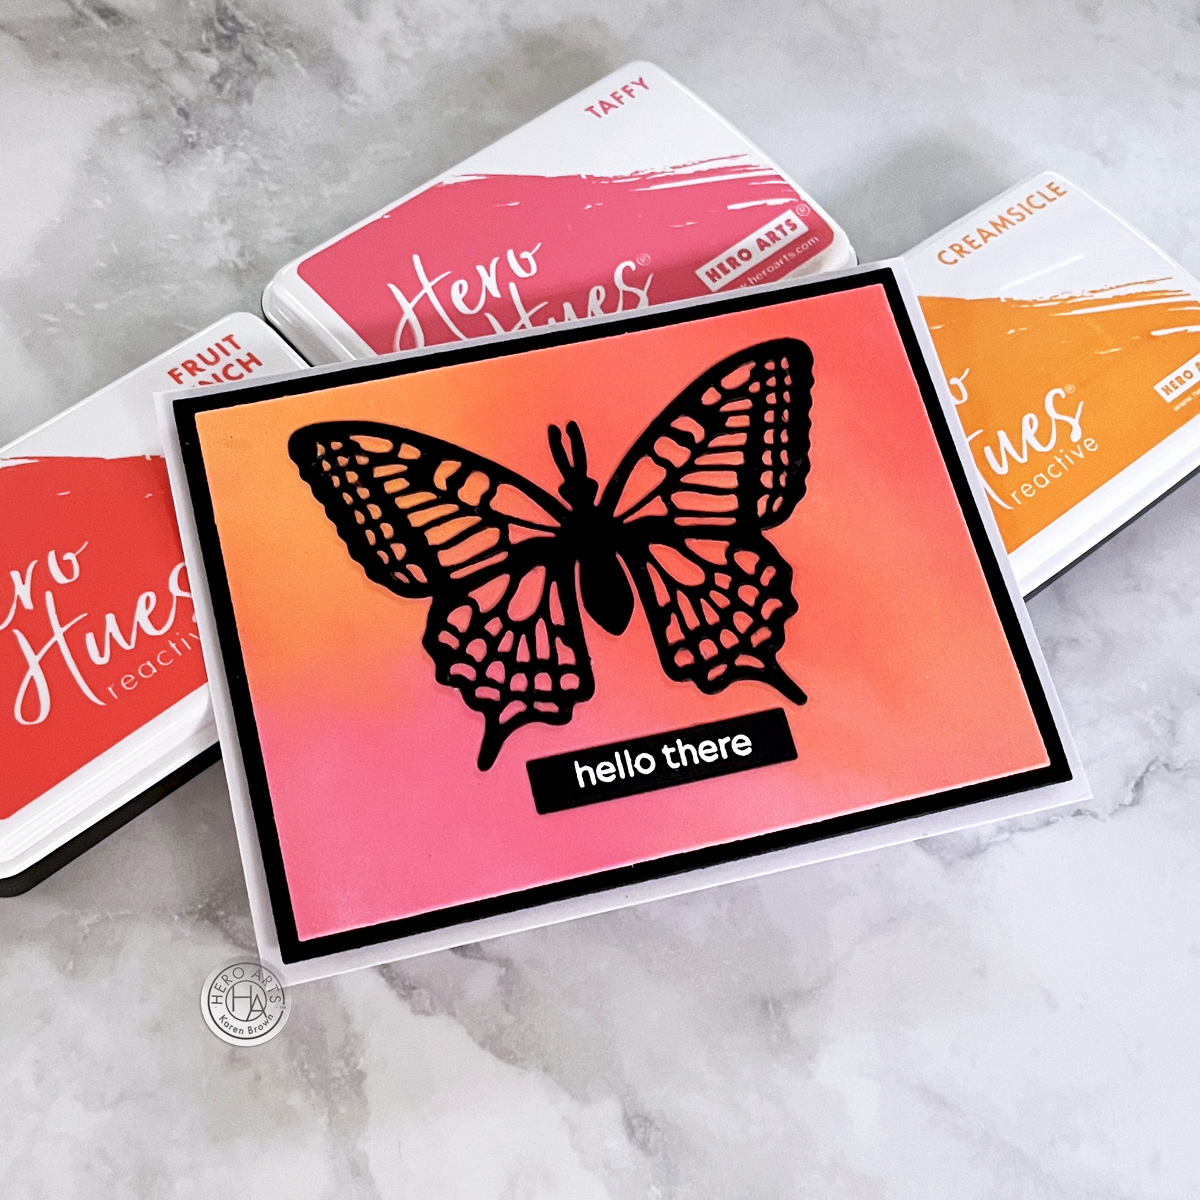
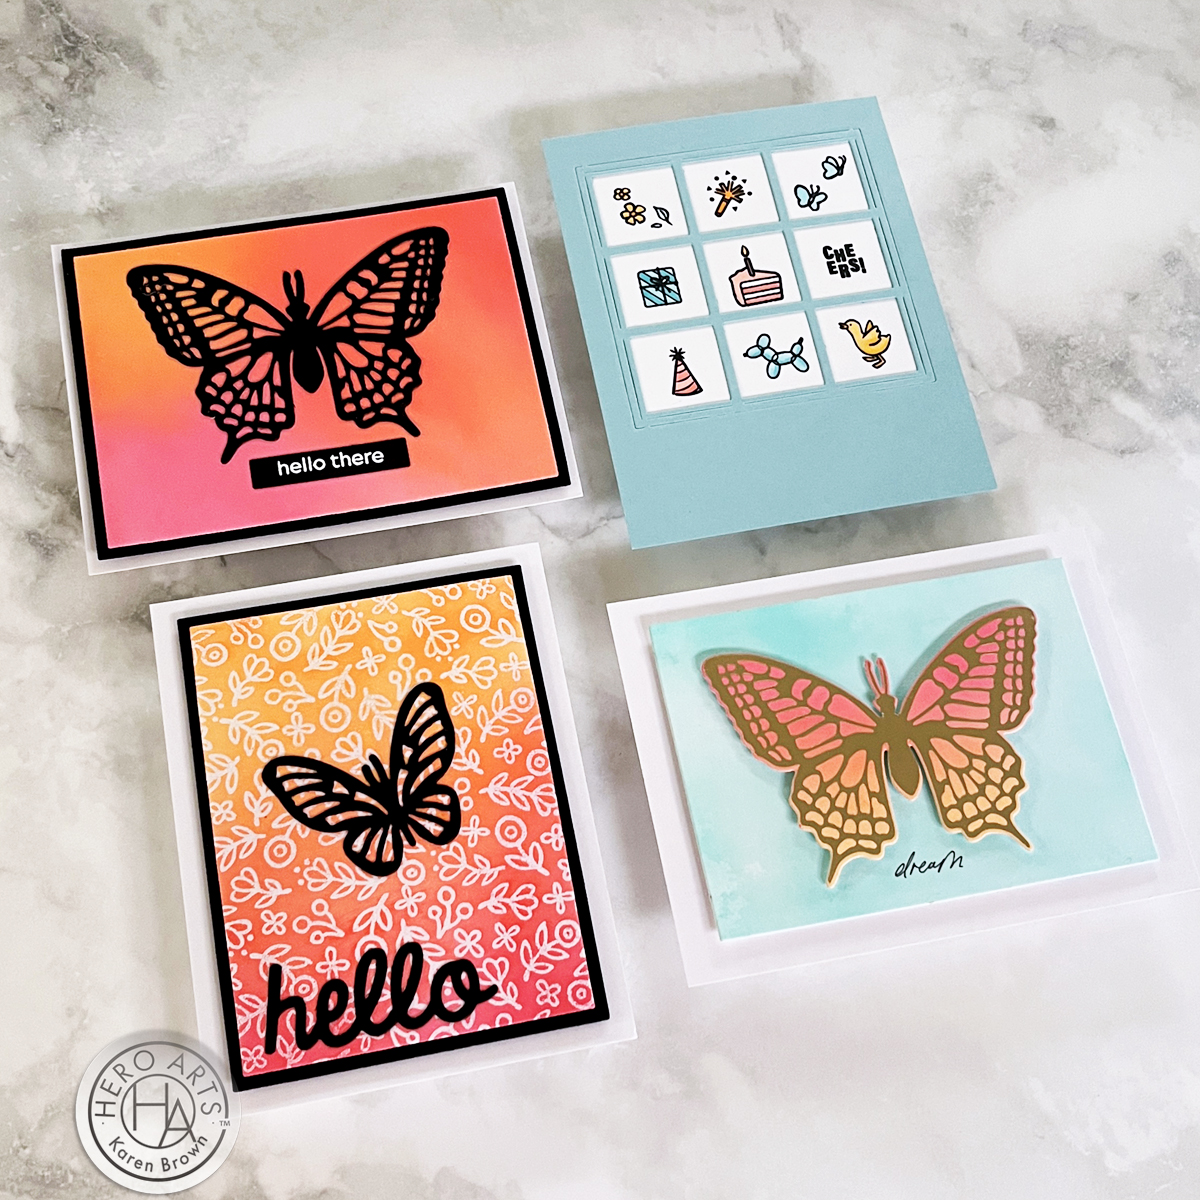
Card 1: Hot Foil Butterfly Elegance
This card is all about shimmer and movement! I started with an aqua ink-smooshed background—the perfect backdrop for a gorgeous, hot-foiled butterfly. The butterfly itself was hot foiled onto an ink-blended panel of soft pinks, corals, and oranges before being die cut and centered on the background.

My Process for Creating This Foiled Butterfly Card:
- I started by ink blending Fruit Punch, Taffy and Creamsicle Inks on Deluxe Smooth Cardstock with a large blending brush. This is the background for the butterfly panel.
- Then, using my Spellbinders Glimmer System, I foiled the Butterfly Hot Foil Plate with Spellbinders Satin Metallics Foil.
- I die cut with the Delicate Butterfly Fancy Die.
- Ink Smooshing Technique for the Background
- I liberally inked an 6×6″ acrylic block with Pool Party and Paradise inks. This is the panel I used for my background. I was going for a sky-like background and I like the color variation you achieve with ink-smooshing.
- I “smooshed” the block onto a piece of Luxe watercolor paper
- I weighted the inked block with a book for 5 minutes
- I uncovered my panel. If the ink pooled, I dabbed with a paper towel.
- I made a “second generation” panel for a future product by taking a piece of Bristol Cardstock and soaking up the excess ink on my work space.
- I assembled my card with foam squares and craft foam.
✨ Pro Tip: Ink smooshing is a great way to create organic, watercolor-like backgrounds.

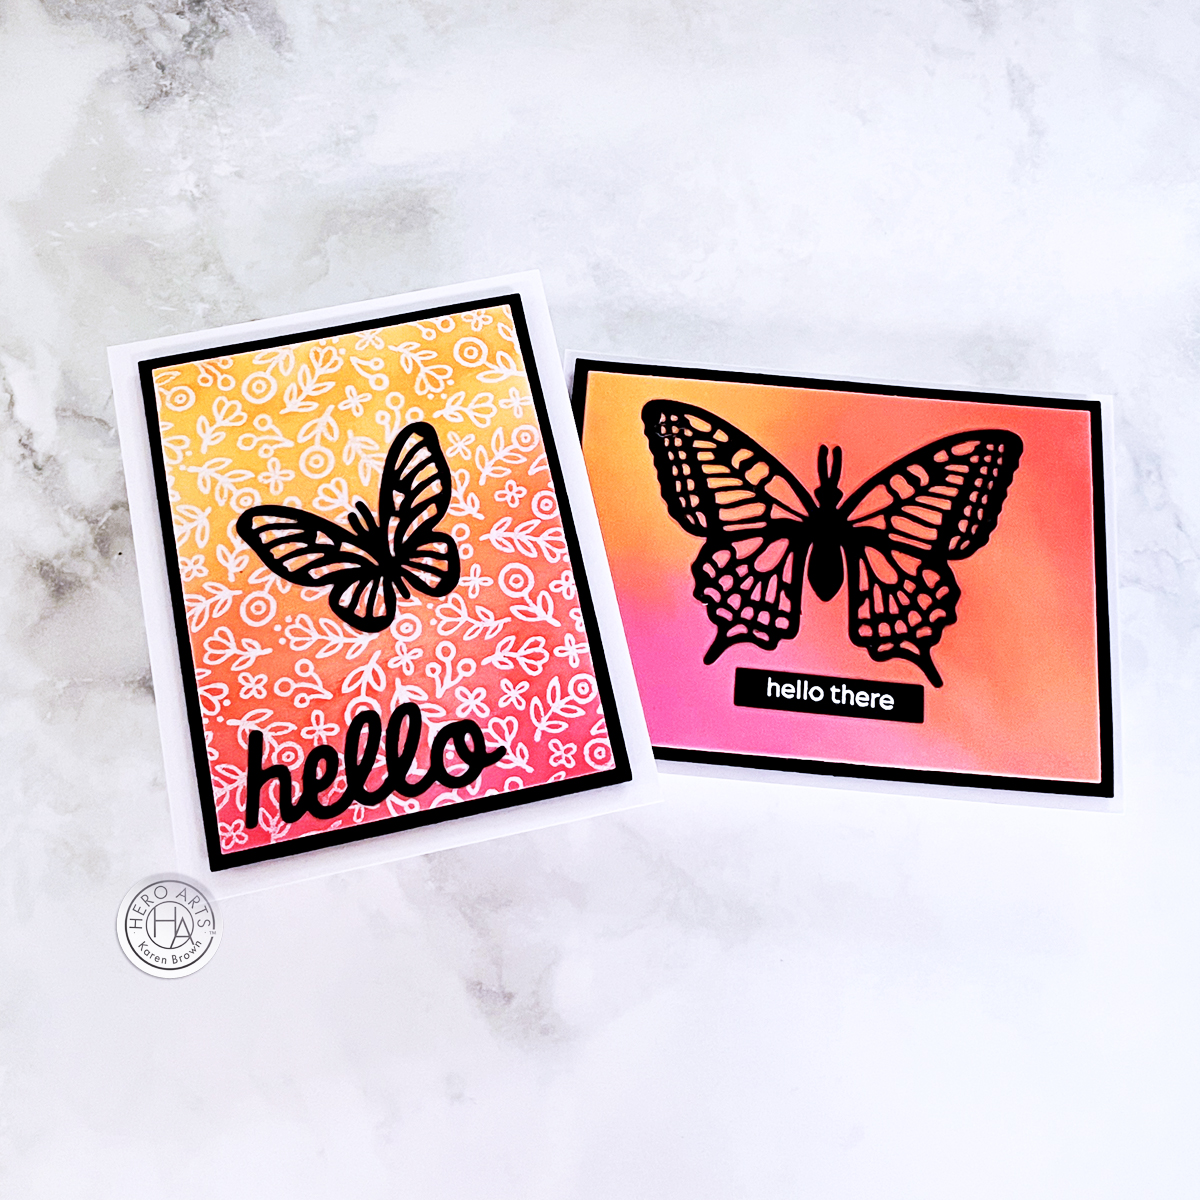
Card 2: Striking Ink-Blended Background & Black Butterfly

For a dramatic look, I ink blended a bold background using Fruit Punch, Creamsicle, and Taffy inks. These warm hues set the stage for a striking black die-cut butterfly, creating a high-contrast, modern design.
Key Product: Delicate Butterfly Fancy Die (also used on card #1 and #3)
Card 3: Heat Embossed Floral Background + Die Cut Butterfly

This card keeps the same coral, pink, and orange hues but introduces texture with the Whimsy Floral Bold Print background stamp. I heat embossed the pattern in white over my ink-blended panel and added a small black die-cut butterfly and a “hello” sentiment for balance.
Key Products Used:
- Whimsy Floral Bold Print
- Delicate Butterfly Fancy Die (also used on cards #1 & #2)
- Fruit Punch, Creamsicle, and Taffy inks
- Friend Word Dies

This next photo shows two cards I created with the Delicate Butterfly Fancy Die.
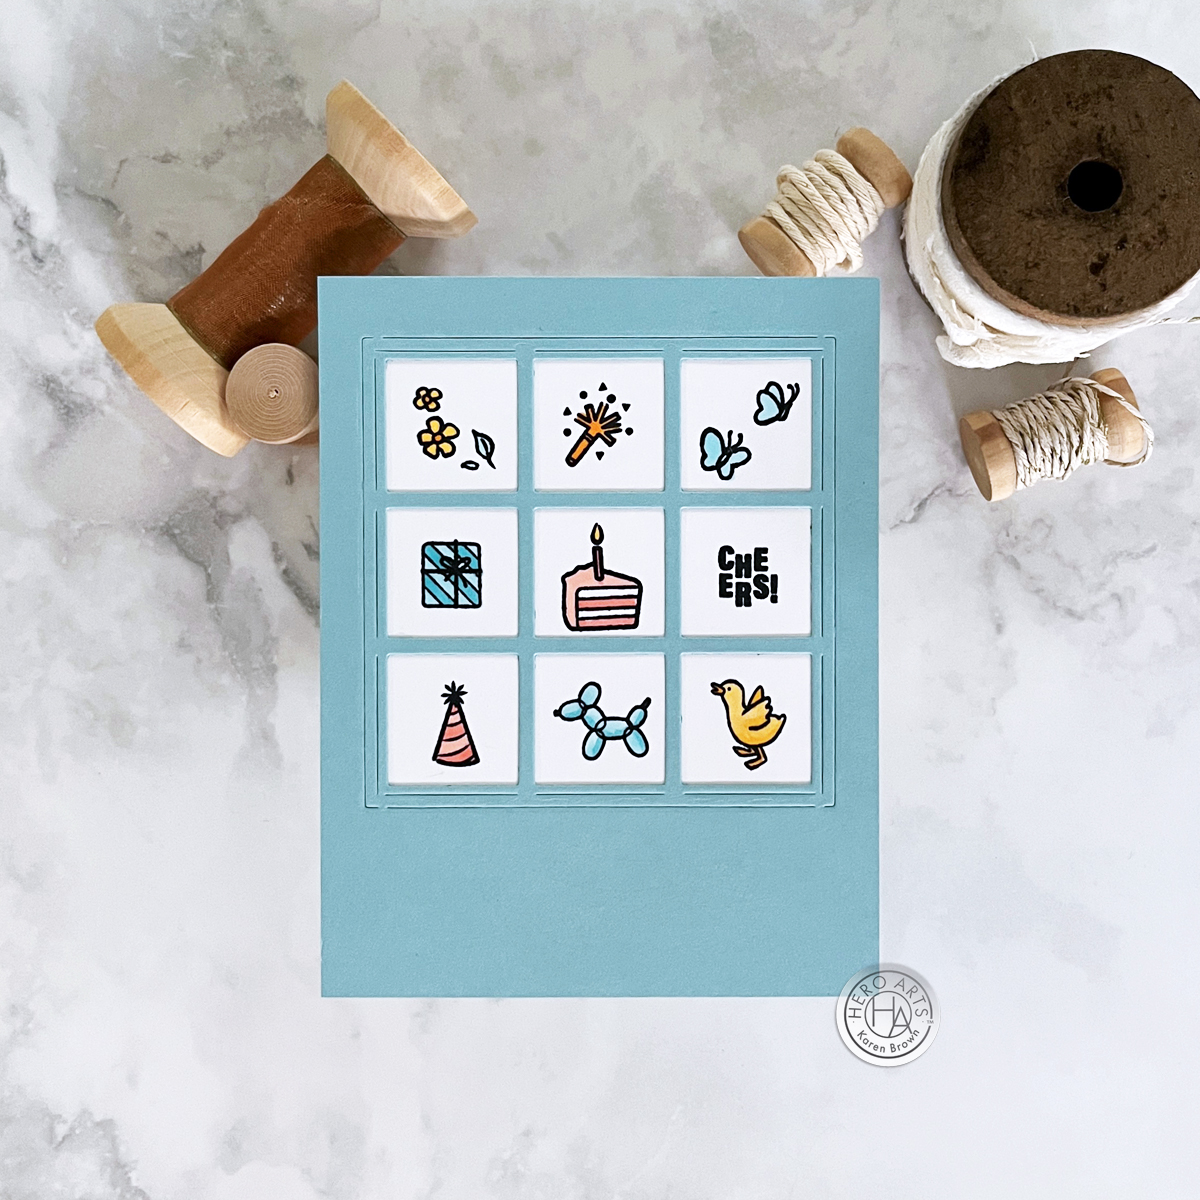
Card 4: Elegant Window Birthday Card

For a completely different vibe, I created a charming birthday card using the Elegant Window Fancy Die. The die creates a beautiful 9-pane window, which I die cut from Mist cardstock. Each pane features a tiny, Copic-colored stamped image from the Spring Bunny Stamps, Our Day Messages, and Birthday Animal stamp sets. A simple “cheers” sentiment ties it all together.
This collection is packed with so much creative potential! Whether you love hot foiling, ink blending, or stamping, there’s something here for every cardmaker. I hope these designs inspire you to play with color and try new techniques!
Thank you for stopping by!