Uncategorized

WWC285 – Karen\’s Challenge: Anything Goes with a Masculine Twist

Hello and welcome!  I am so pleased to be hosting this week\’s \”Masculine Challenge\” at the Watercooler Wedenesday Challenge. My husband\’s birthday is coming up and this is the card I created for him. I was going for a playful summery card.  
My process:
  • I started out by inkblending over a stencil to create the background panel.
  • I then ink blended another small panel for the circle die-cut inserts.  I let both panels dry for a few hours.
  • I die cut the decorative wave border and then three circles from a piece of white card stock.
  • I then die cut three ink-blended circles from the small panel.
  • I stamped, Copic colored  and die cut the animals.
  • I adhered the white panel to the blue background using foam tape. I also used foam tape to add the colored circle inserts for an inlaid look.  I popped on the animals with foam squares and added the sentiment.
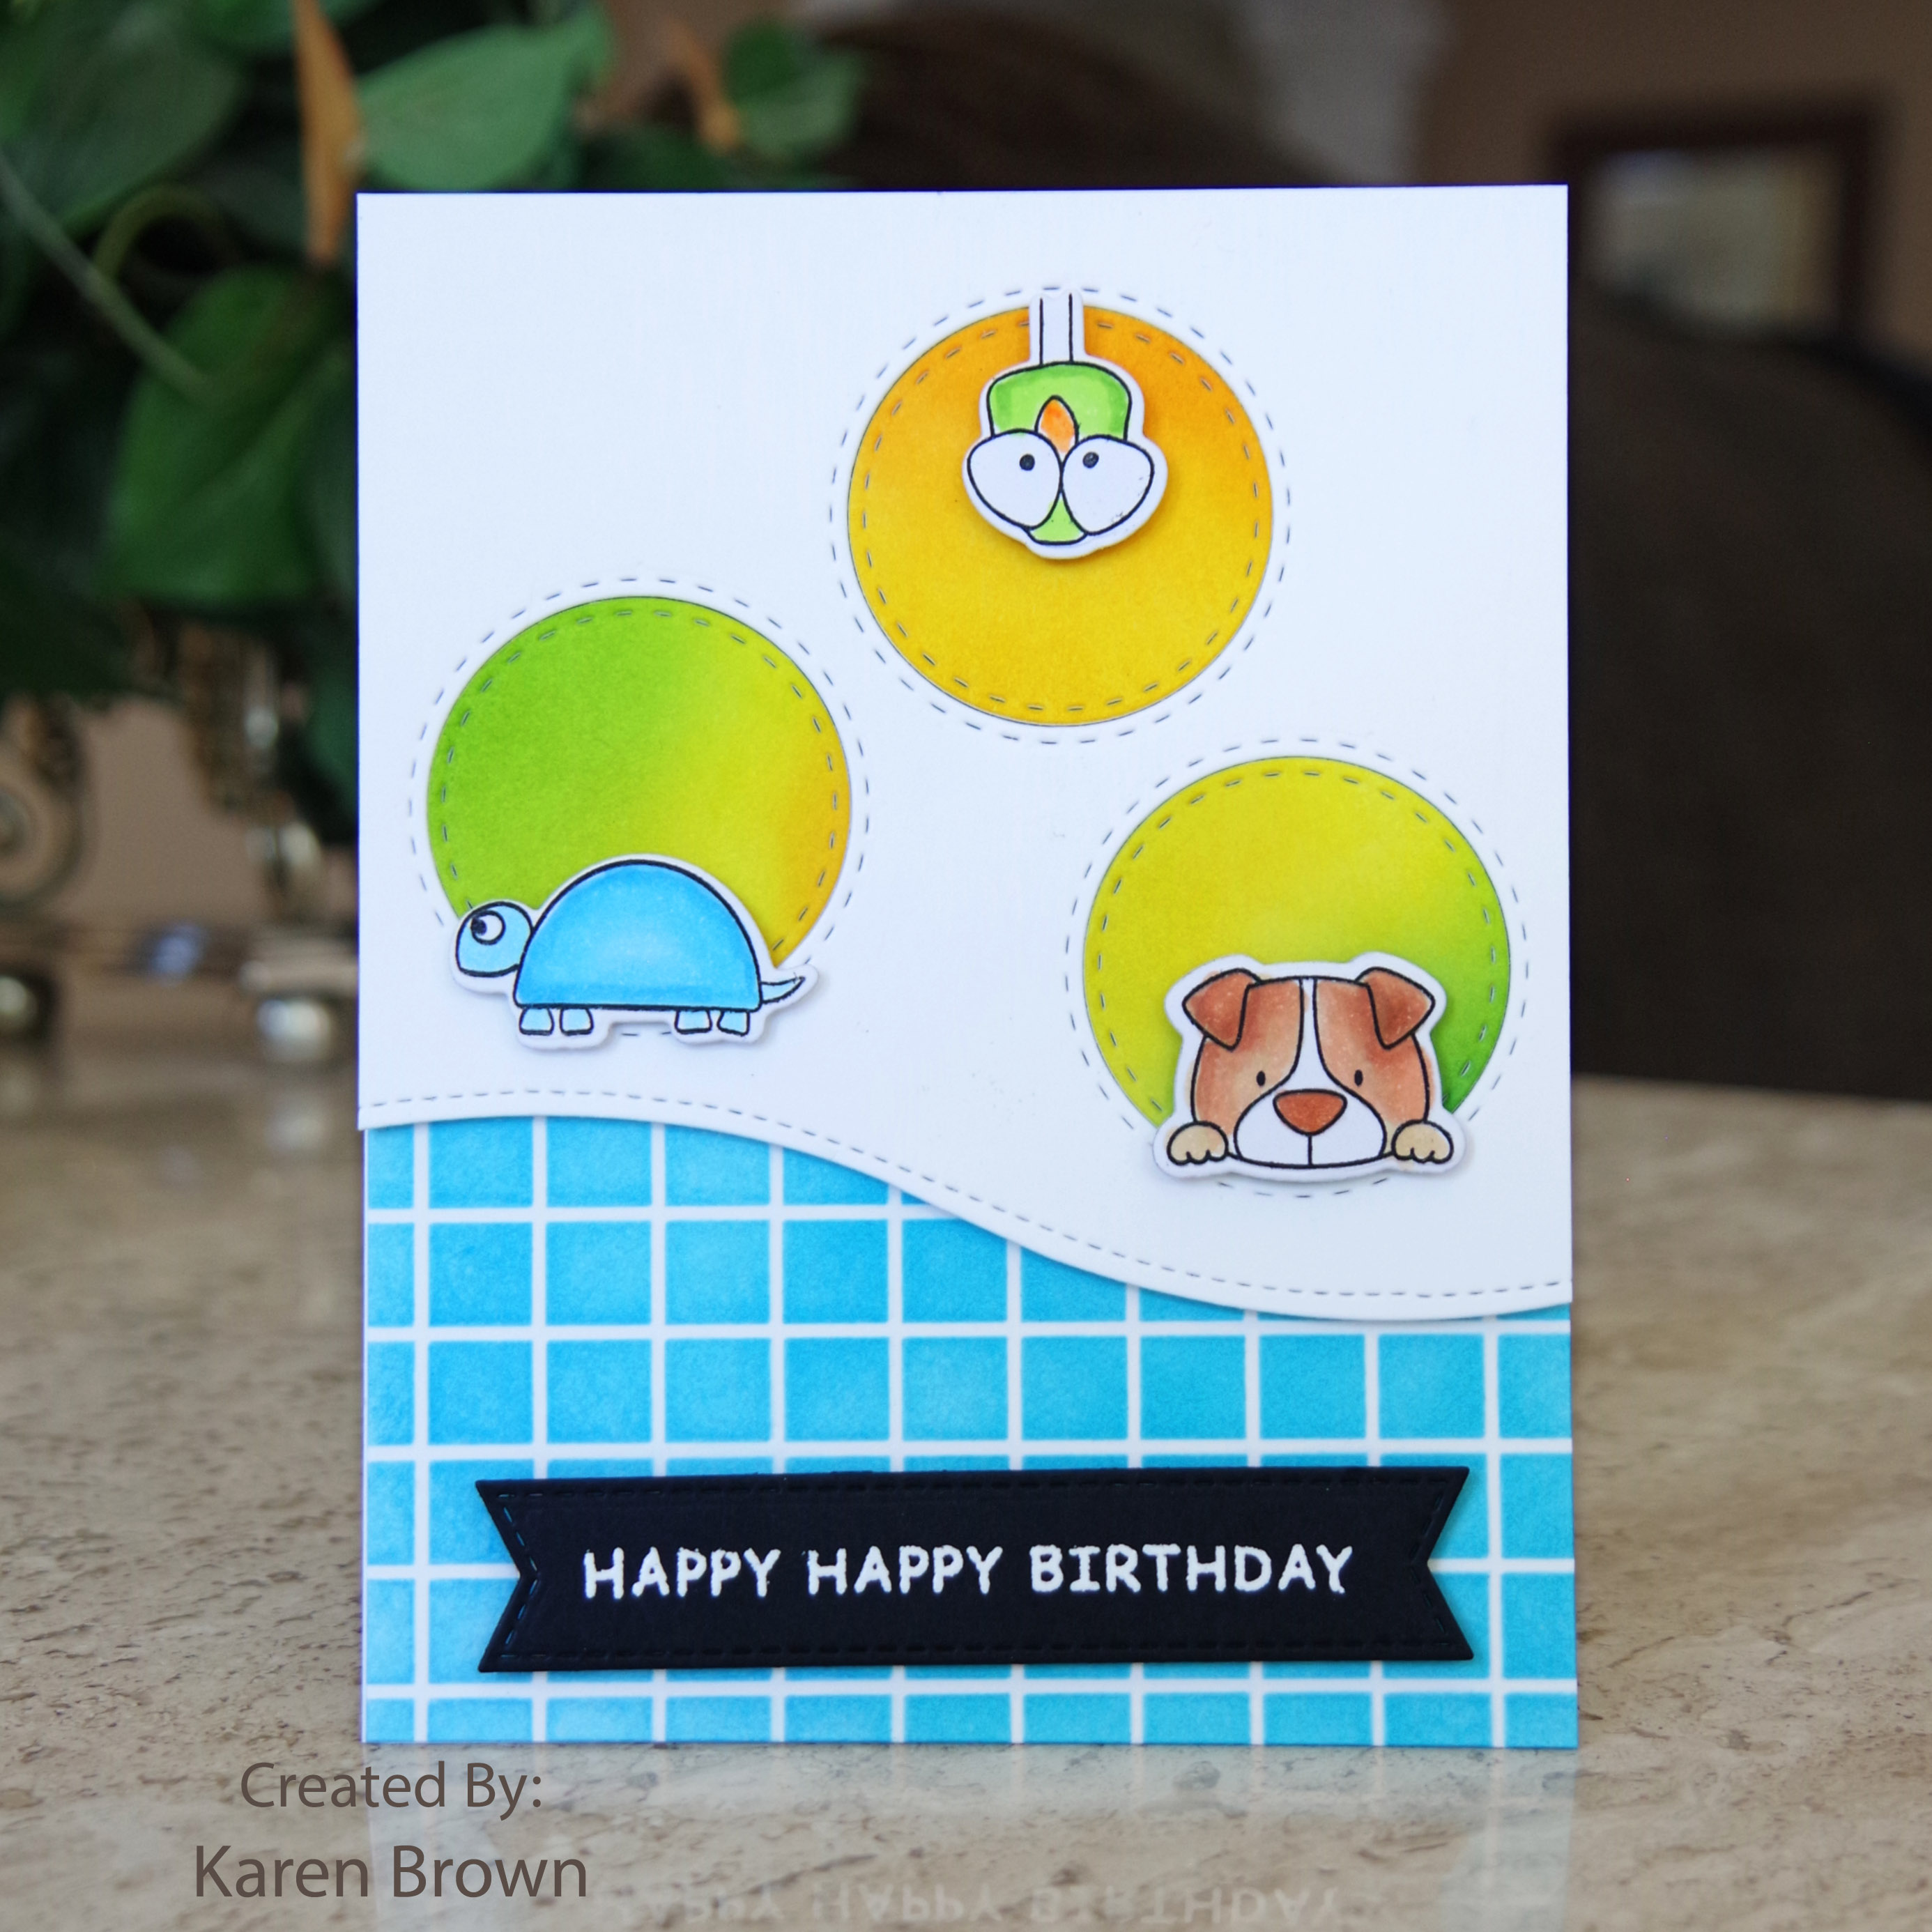
My husband loves animal die-cuts so I think he will really like the card. 

Supplies Used:
My Favorite Things Lucky Dog
Simon Says Stamp Stacking Animals
Sugar Pea Designs Element Builder (wave border)
Simon Says Stamp Grid Stencil
Simon Says Stamp Stitched Circle dies
Distress Ink
Bristol Card Stock for ink blending
XPress It Card Stock for the animals
Copic Markers

I am also playing along with:
Inspired By “Critters” Challenge My husband loves critters, dog etc. so that is the theme of my birthday card.

AAA Birthday “Tic Tac Toe” I went with bright (summery colors), embossing (sentiment) and masculine (for my husband).

UPDATE:  I was so pleased to see my card was selected \”Top 3\”  at The AAA Birthday Challenge. 

I am so pleased that you stopped by!
Karen
Uncategorized

Altenew Academy – Masking Unleashed

Hello!  Well, I am still camping out while work continues on my house, but it left me plenty of time to finish my next Altenew class called Masking Unleashed. I did have to run home to get my inks and blending brushes.  Svitlana Shayevich taught us loads of useful tips and techniques.
 For this card, I chose to work on negative masking.  In the past, I’ve done positive masking where you cover the image you are working on.  With negative masking, you cover the area surrounding an image.  In lesson 4, Svitlana also taught us how to ink blend with  Negative Masking.

 I decided Altenew’s Mega Alphaget “T” die would work well and started planning a thank you card.

My Process:
  • I trimmed a piece of masking paper to 4 1/4” x 5 1/2”,  taped the die in the center and then ran it through my die cutting machine. I then carefully adhered it to a Bristol Cardstock panel.  
  • Next, I lightly blended four shades of Distress Ink from the bottom to the top.
  • I taped the stencil at an angle over the “T” and blended 5 shades over the stencil using a much heavier hand.  I carefully peeled back the masking paper, trimmed the panel down, attached some craft foam to the back and added it to a top folding A2 panel.
  • I die cut a sentiment from navy Cardstock and glued it to the panel.  I also added three enamel dots in coordinating colors.
Pro Tip: Make sure the masking paper is firmly in place before you start ink blending so you have sharp clean lines.  I used a bone folder.
Featured Supplies:
Altenew Mega Alphabet “T” die
Altenew Watercolor Stripes stencil
Altenew Thanks die
Altenew New Day Enamel Dots
Just Add Ink “T” Challenge. My card is T for thanks.
I am so pleased that you stopped by!
Karen

Uncategorized

Altenew Academy – Magical Markers

Hello!  A little update….I haven’t made a card in the past two weeks because we moved out of our house so some renovations could be done. I did pack up a few crafting supplies and had time to finish another Altenew Academy class.  This one was called “Magical Markers” and it was taught by Sara Naumann. Sara had lots of great lessons, but I wanted to show my homework assignment from Lesson One, Metal and Alcohol Markers.  

I had never used alcohol markers on metal, but I LOVED the result.  In lesson one we used markers on Alcohol Ink Foil Tape Sheets.    

My Process:
  • Sara told us to use our alcohol markers and scribble with the broad tip on the foil. Next we spritzed the foil with rubbing alcohol.  Sara used a spray bottle but I used a paint brush dipped in rubbing alcohol.  We waited, turned the panel and spritzed/splattered again.
  • When the panel was dry, I trimmed a 1” strip and die cut some greenery and small circles.  The colored foil is bright and shiny and oh so fun to use on a card!
  • I knew bright yellow daisies would contrast nicely with the shiny green so I stamped and colored three blooms.

I made a top folding A2 card base and stamped a sentiment I thought went well with the foiled accents. The foil is great because you just peel off the backing and the adhesive sticks well to the Cardstock.  I used foam tape for the daisies for a bit of added dimension.

Pro Tips:
  • The foil cuts well with both dies and guillotine style paper trimmers.  
  • The ink color will be lighter and much brighter on the foil than it will be on Cardstock.
I think this photo captures the beautiful shine from the foil.
Altenew Featured Products:  Smile More stamp and die bundle (for flowers and sentiment)
I am so pleased that you stopped by!
Karen

Uncategorized

WWC284 – Dawn\’s Challenge: All About Occasions

Hello and Happy Wednesday!  I created a card for my daughter, who is moving into a new home, and thought it would be perfect for this week\’s Watercooler Wednesday All About Occasions Challenge.  There are so many different cardmaking occasions and we would love to see your card in our gallery.

Supplies Used:
Altenew Garden Grow stamp and die bundle
leftover handstamped scrap
Washi Tape
WPlus9 New Home sentiment
Copic Markers
Foam Tape
I am also playing along with:
Shopping Our Stash KISS. I’ve had this Washi tape for years but this is the first time I’ve incorporated it into a card.  I also used a leftover hand stamped scrap and one of my oldest stamp sets.

UPDATE:  I was so pleased to see my card was recognized as a \”Top 3\” by Shopping Our Stash!

Thanks for stopping by!
Karen
Uncategorized

Altenew Academy – Impressive Heat Embossing

Hello!  I just completed another course at Altenew Academy called Impressive Heat Embossing.  So many great cardmaking techniques from Svetlana Marchenko!


This card is from lesson #3, Heat Embossing for Resist.

I love to ink-blend so I chose to ink blend over my embossing.  For ink blending it is best to start with light colors and then add the darker tones.  I started with my palest yellow, then added sunshine yellow and finished up with orange highlights.  For the stem I used two shades of green.  I die-cut my \”thanks\” from aqua paper and I like the big showy sentiment.  I love how bright and cheery this card turned out.

Altenew Supplies:
Altenew Inked Lotus
Altenew Thanks die

I am so pleased that you stopped by!
Karen

Uncategorized

Altenew Academy: Color Your Day

I just finished this card for Altenew Academy\’s Color Your Day and I wanted to share it.  This is the second class I\’ve taken with Therese Calvird, and she is an excellent instructor!  She is creative, calm and explains her lessons well.


Today\’s card was inspired by Lesson #1. Therese showed us some loose watercoloring and I loved the color blue she used (Tombow #493).  She also suggested that we leave a little white around the edges and I really like that look.
My process:  I stamped my blooms and leaves on watercolor paper with Versafine Onyx black ink.  I then partially colored the images and then used a wet brush to move the color around.  I was sure to leave a bit of white around the edges.  Therese also suggested using just a hint of neutral for the flowers center, which is really pretty. Normally I would color the centers yellow.  I added some clear glossy accents to the flower centers.  
Supplies:
Altenew Smile More stamp and die bundle
Versafine Onyx Black Ink
Watercolor Paper
Tombow Markers:  493, 443, N45, 173, 133
Nuvo Crystal Glaze
Spellbinders Essential Rectangles for the frame
Foam tape for the three blooms and sentiment
Liquid glue for the other elements.

I also wanted to play along with:

I am so pleased that you stopped by!
Karen
Uncategorized

Altenew Academy: Beautiful Details

Hello!  I just finished the Altenew Academy Class \”Beautiful Details\”.  I have to say our instructor, Marika Rahtu, is quite the artist and her cards are amazing!  Marika taught us that adding details can elevate our cards.


My style is more colorful and bold, but I incorporated several of her suggestions into my card.

Details I added to make this card special:

  • I love ink blending so I ink blended a complimentary background.  I reversed the colors from the floral images so I started blending from the bottom right in yellow (top flower) then added 5 other colors so that I finished with purple to get the gradient that I wanted.  I laid down a lot of ink and think this gives a bold and cohesive look to the card.  
  • I masked the left side (1\”) of the card to give contrast to the bold colors.
  • I used foam adhesive to give dimension to the focal point.
  • I added some shimmer pen to the flowers for a bit of subtle shine.
This Altenew Weekend Doodles stamp and die bundle may be my favorite set from Altenew.  I Copic colored the blooms and arranged them where the ink blending meets the white edge. 
I am also playing along with:
 Festive Friday FF0064.  I\’ve used  pink, a sweet sentiment, die cuts and colored my card for \”summer fun\”.
Little Red Wagon #560 Give Us Your Background  I used loads of distress ink to make this bold background.  
UPDATE:  I am so please that this card was chosen as a Festive Friday Fave!


Karen
 
Uncategorized

Altenew Academy: Polychromatic

Hello!  I just completed the Polychromatic Class at Altenew Academy and I have some cards I would like to share.  Our instructor, Nina Marie Trapani, taught us about color and  color combinations.  The cards in this post are from lesson #4 \”Watercoloring with Similar Colors\”.  I will say this monochromatic look is difficult to photograph because of the minimal contrast.

For my first card, I heat embossed the spray in white and then colored the blooms and leaves with Zig markers and a wet paint brush.  I used 5 similar shades ranging from light blue to aqua to turquoise to teal.  I made an A2 card base from watercolor paper and heat embossed some leaves for the background.  I took the same five colors and scribbled in the leaves, sprayed with water and dried. The next round I added scribbles of color in the leaves and on the background, sprayed and dried.  I repeated one more time and then added paint splatters in the same five colors.  The background is subtle but really adds dimension to this monochromatic card.
I decided to create the card again but with similar colored embossing powder for a bit more definition.  The Zig colors ranged from Blush for the leaves to Sugared Almond, Light Pink, Peach Pink and Dark Pink.  On this card, I did not emboss the background but just scribbled color, sprayed and dried and repeated a couple of times. I finished with pink paint spatters.  
Altenew Supplies Used:
Altenew Best Mom stamp and die bundle
Altenew Mini Branch stamp (for blue background)
Altenew Golden Peach Embossing Powder

I would love to hear which card you like best.  Thanks for stopping by!
Karen