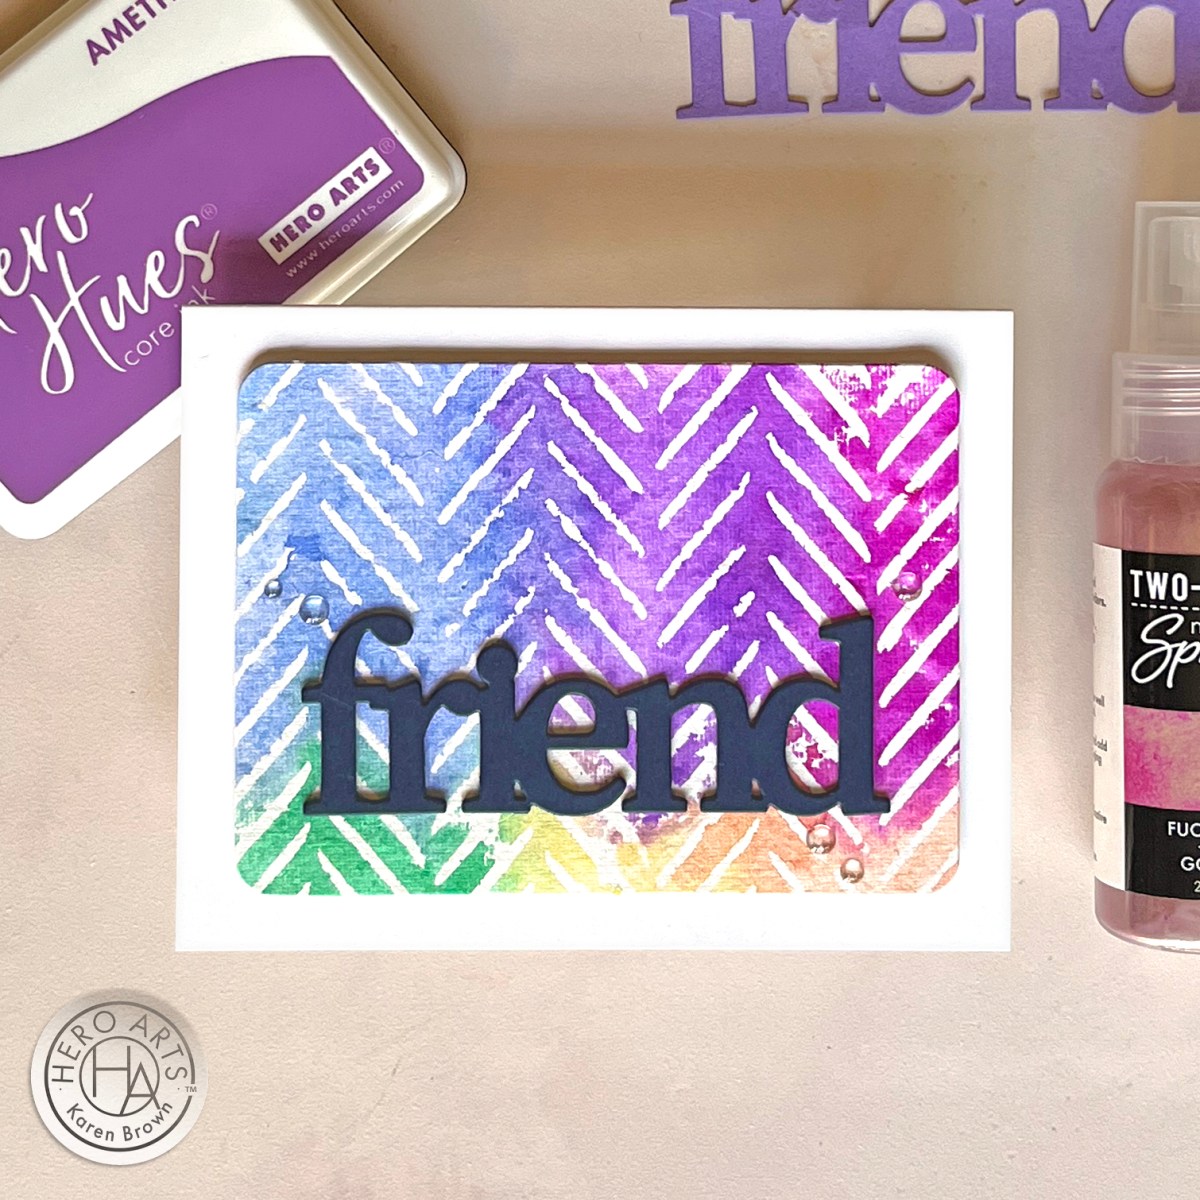
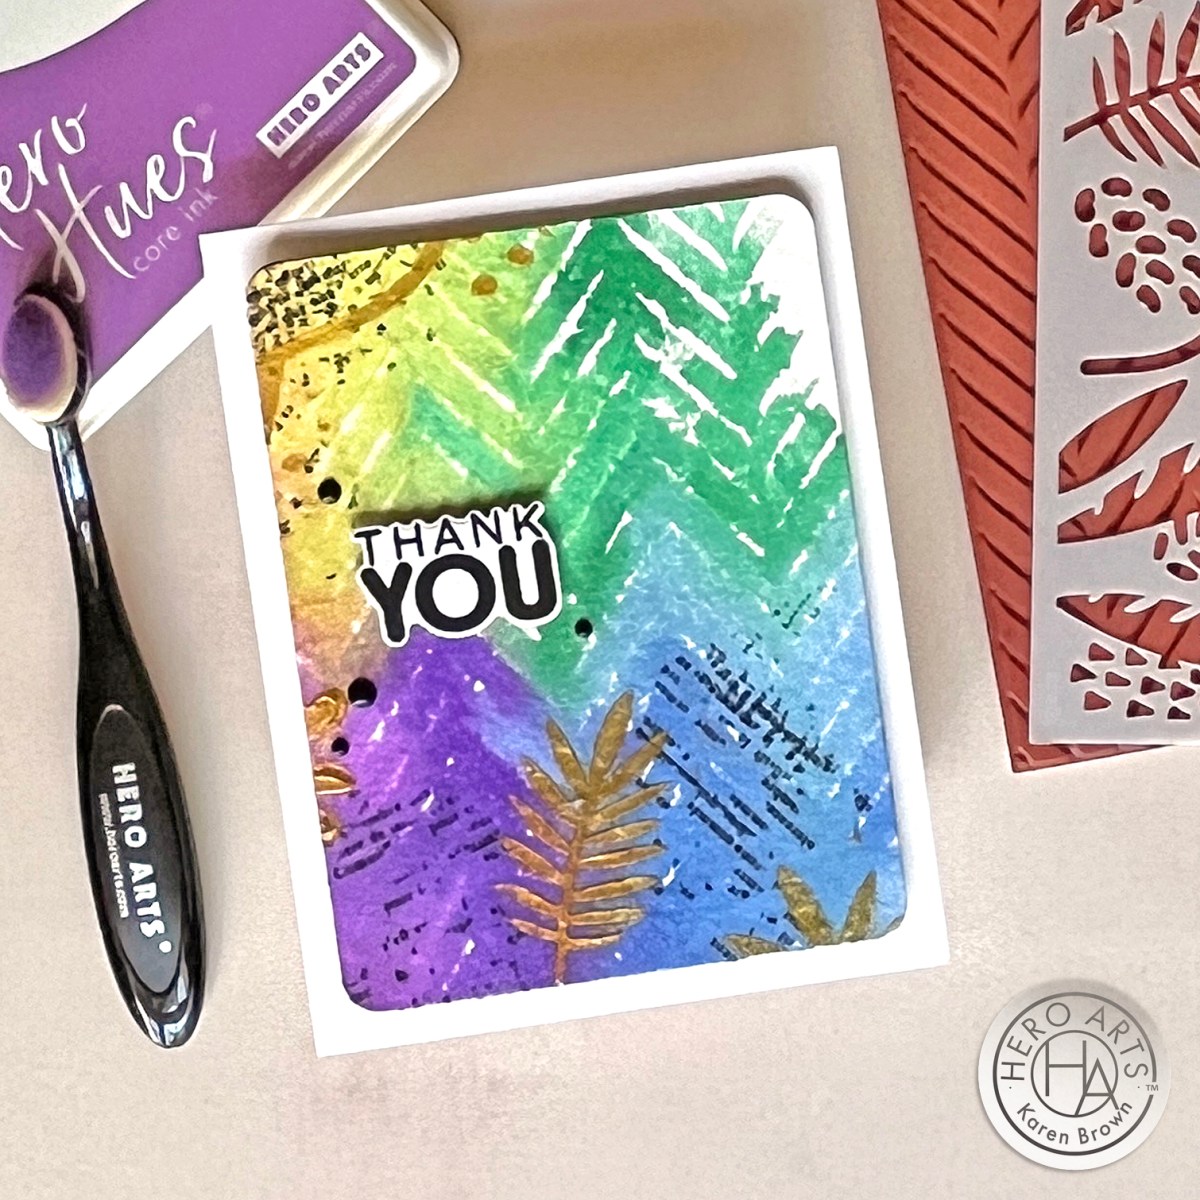
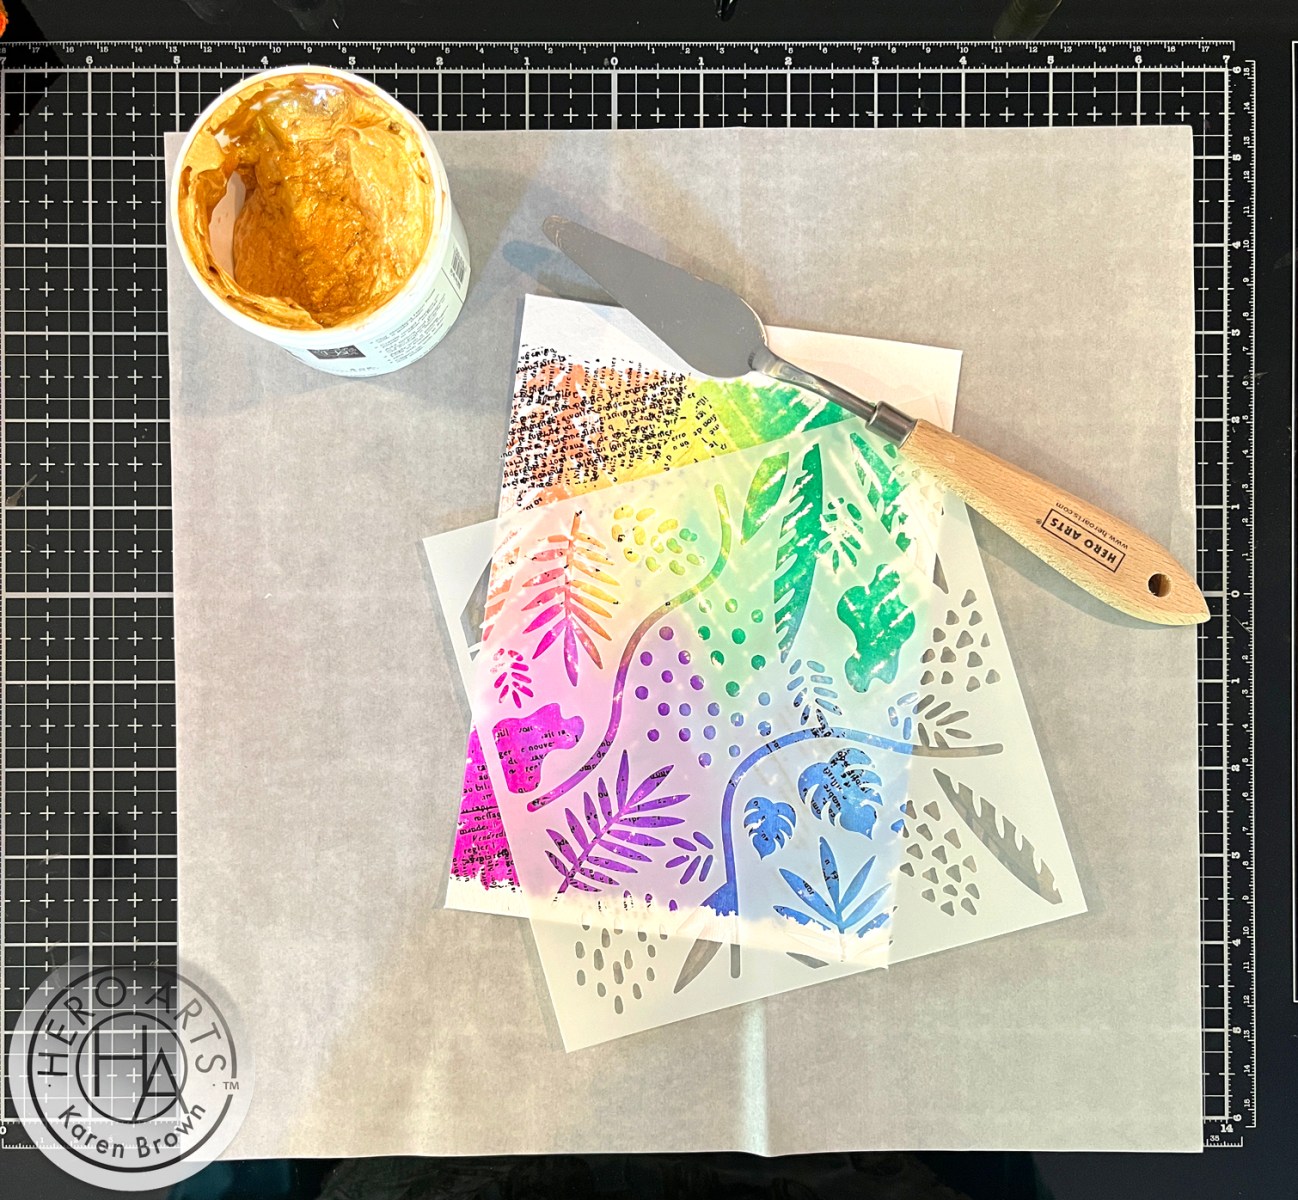
Do you ever find yourself craving a burst of color and creativity in your life? Look no further than the art of stenciling! It’s a simple yet profoundly satisfying technique that allows you to transform a background into a cardmaking masterpiece. And what better way to dive into stenciling than with the vibrant hues of the rainbow? Today I am using Hero Arts wonderful new Floral Trove Stencil (SA-274), and it is stunning in rainbow colors!
Hero Arts Floral Trove Stencil Design Ideas:
This stencil is 6″ x 6″, so it is large enough to make most any card size you desire, but one portion is perfect for A2 cards.
I created a short reel showing my process that you can VIEW HERE:
Tips and Tricks for Stenciled Card Designs:
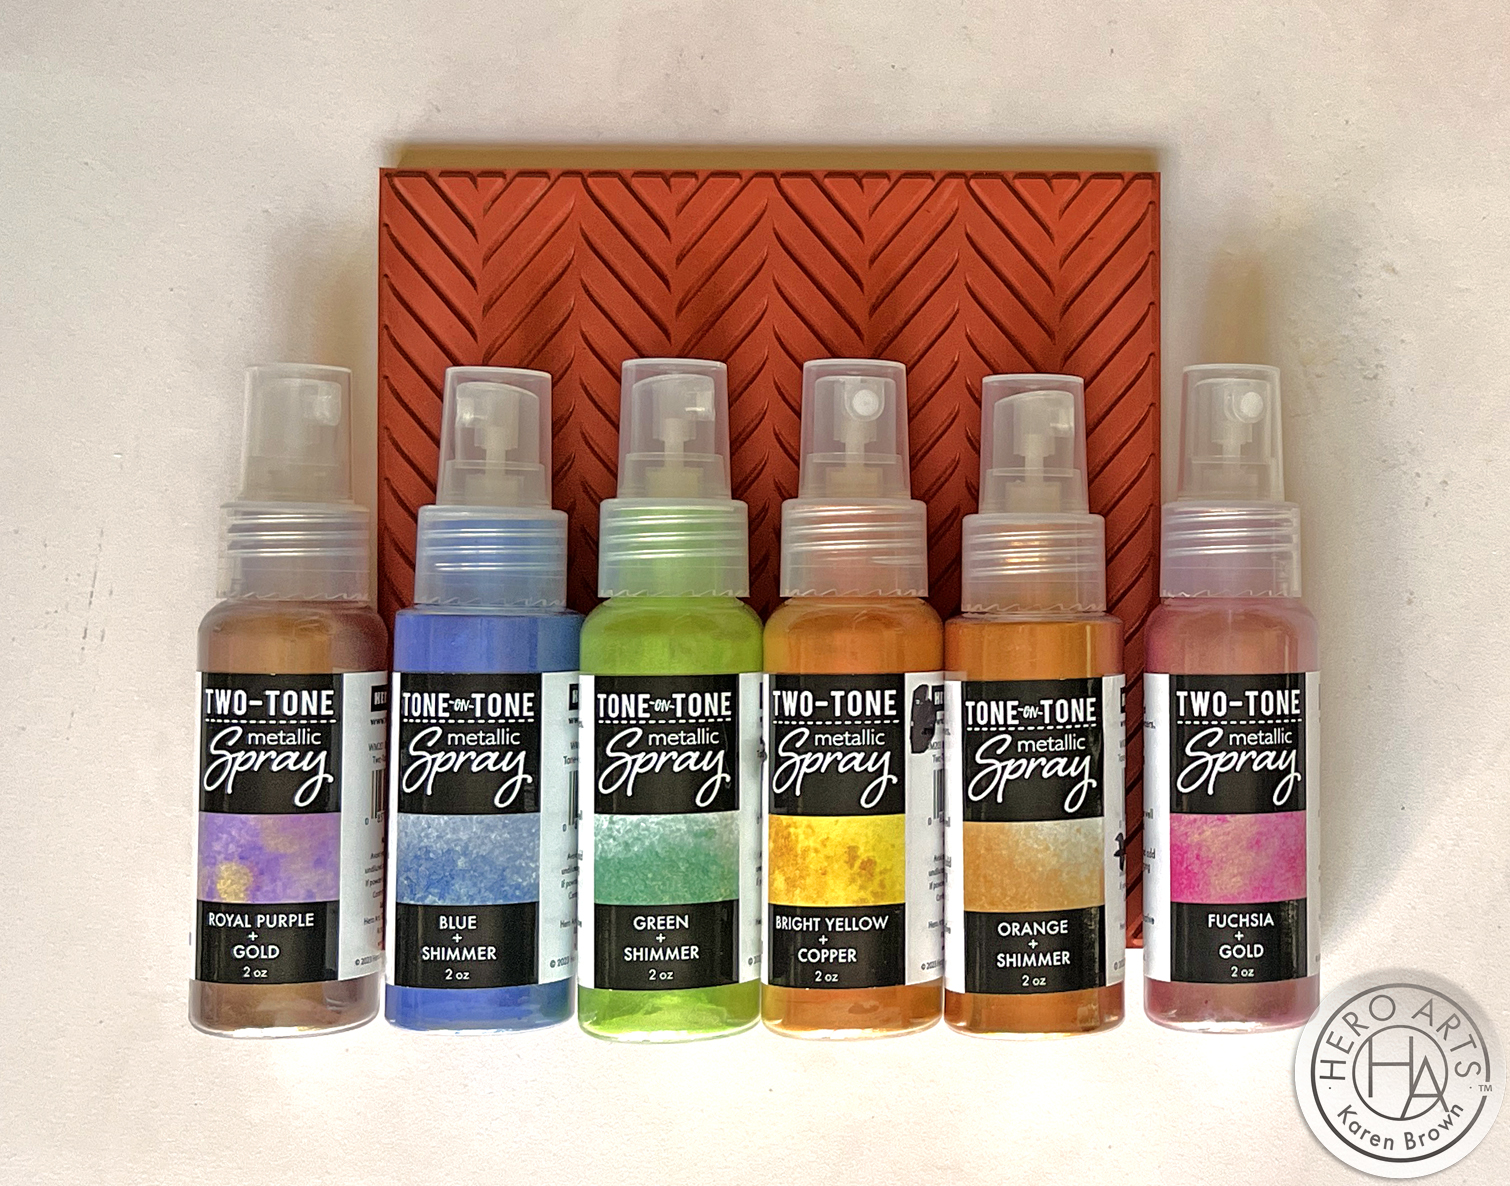
- I almost always start my cardmaking process with color selection. Today, I knew I wanted to use bright rainbow colors so I grabbed my color swatches and began picking. I chose Amethyst, Taffy, Creamsicle, Lemon Drop, Green Apple, Pool Party and Blue Hawaii.
- I used an A2 size panel of Deluxe Smooth Cardstock as my base. I placed this on the sticky mat of my StampWheel, so the cardstock would not shift.
- In rainbow order, I rotated around the Floral Trove stencil, starting in the top left hand corner with Amethyst. I went left to right, dropped down a row and went right to left, dropped a row and finished going left to right again.
- To keep from inadvertently stenciling in the wrong section, I masked off with Post-It Note squares. You can see the process in the Instagram reel I referenced above.
- I experimented with all my blending brushes using small, medium, large and XL to see which size worked best on my project. My choice was medium, but they all worked just fine, so use what you have. Hero Arts does sell a blending brush sampler pack, which is so handy to have in my craft room.
- I trimmed my background down and mounted on a Peacock A2 cardbase that I created.
- I added my Friend sentiment, which I die-cut 3 times and glued together. I also added a stamped Happy Birthday sentiment above the friend.

Products Used:
- Floral Trove Stencil
- Amethyst Core Ink
- Taffy Reactive Ink
- Creamsicle Reactive Ink
- Lemon Drop Reactive
- Green Apple Core Ink
- Pool Party Reactive
- Blue Hawaii Reactive Ink
- Smile Friend Stamp and Cut XL
- Message Strips Stamp and Cut XL
- Blending Brush Sampler Pack (all 4 sizes)
- Medium Blending Brush
- Small Blending Brush
- Large Blending Brush
- XL Blending Brush
- Deluxe Smooth Cardstock
- Peacock Cardstock
- Precision Glue
- Compact Cutter Desktop Die Cutting Machine
- StampWheel
There’s no limit to what you can create with a little imagination and a splash of color!
Karen