Hey there, crafty friends! Karen here and today, we’re diving into the magical world of metallic shimmer sprays and how you can incorporate them into your cardmaking and papercrafting projects. Whether you’re a seasoned crafter or just starting out, these shimmer sprays are sure to add a touch of fun and sparkle to your creations.
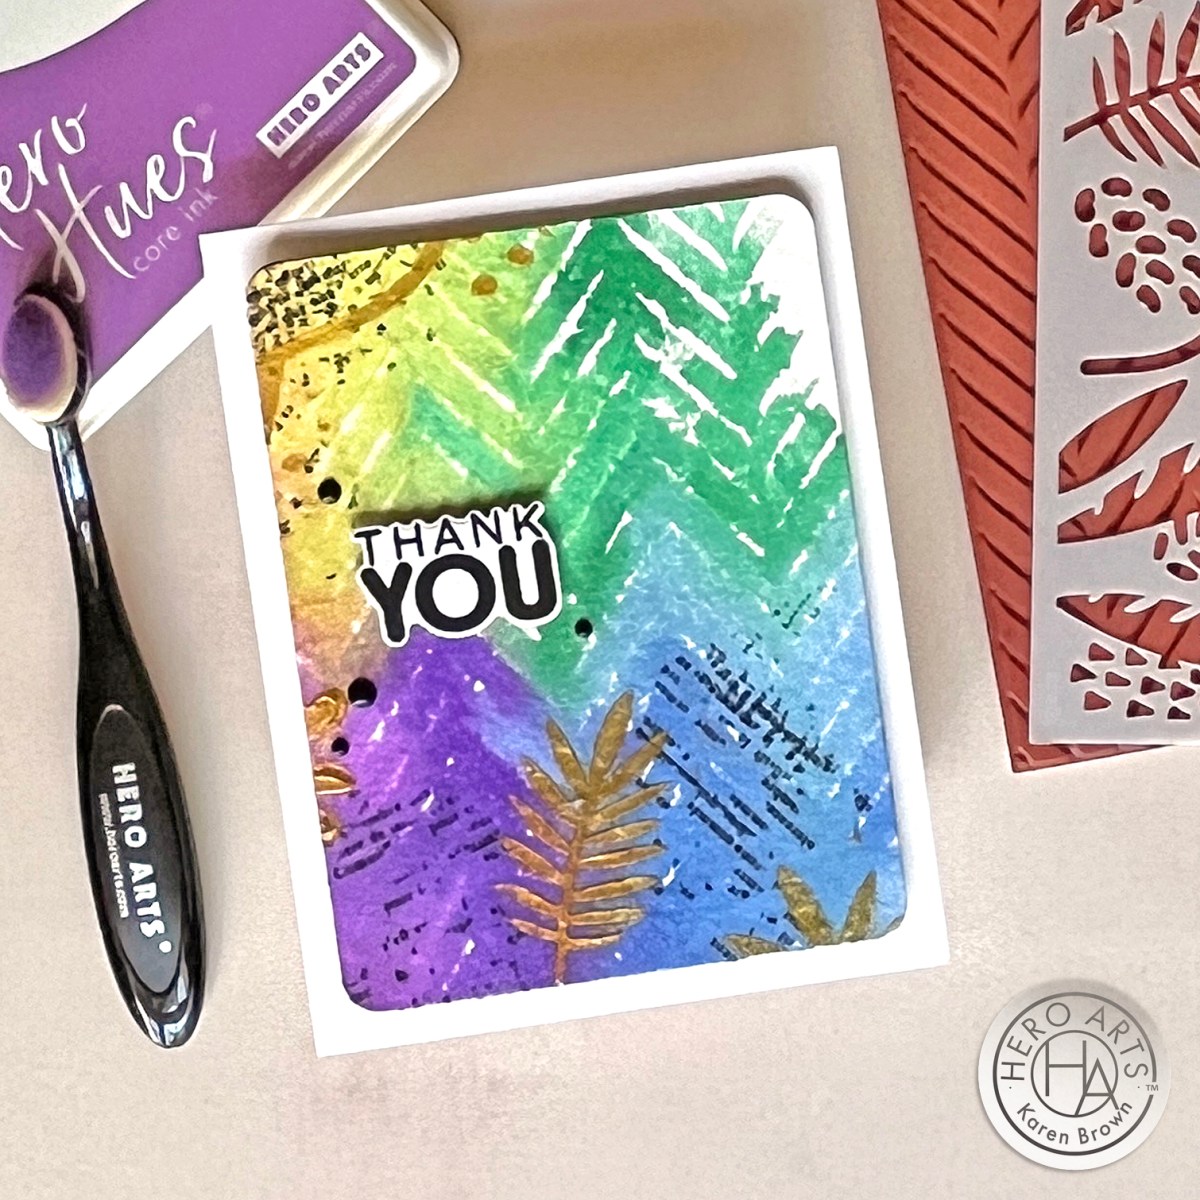
Today I am sharing several colorful cards. It was a play day for me as I experimented with ink sprays and a fresh new background stamp called Abstract Feather Bold Print.
Rainbow Color Shimmer Cards
My Process:
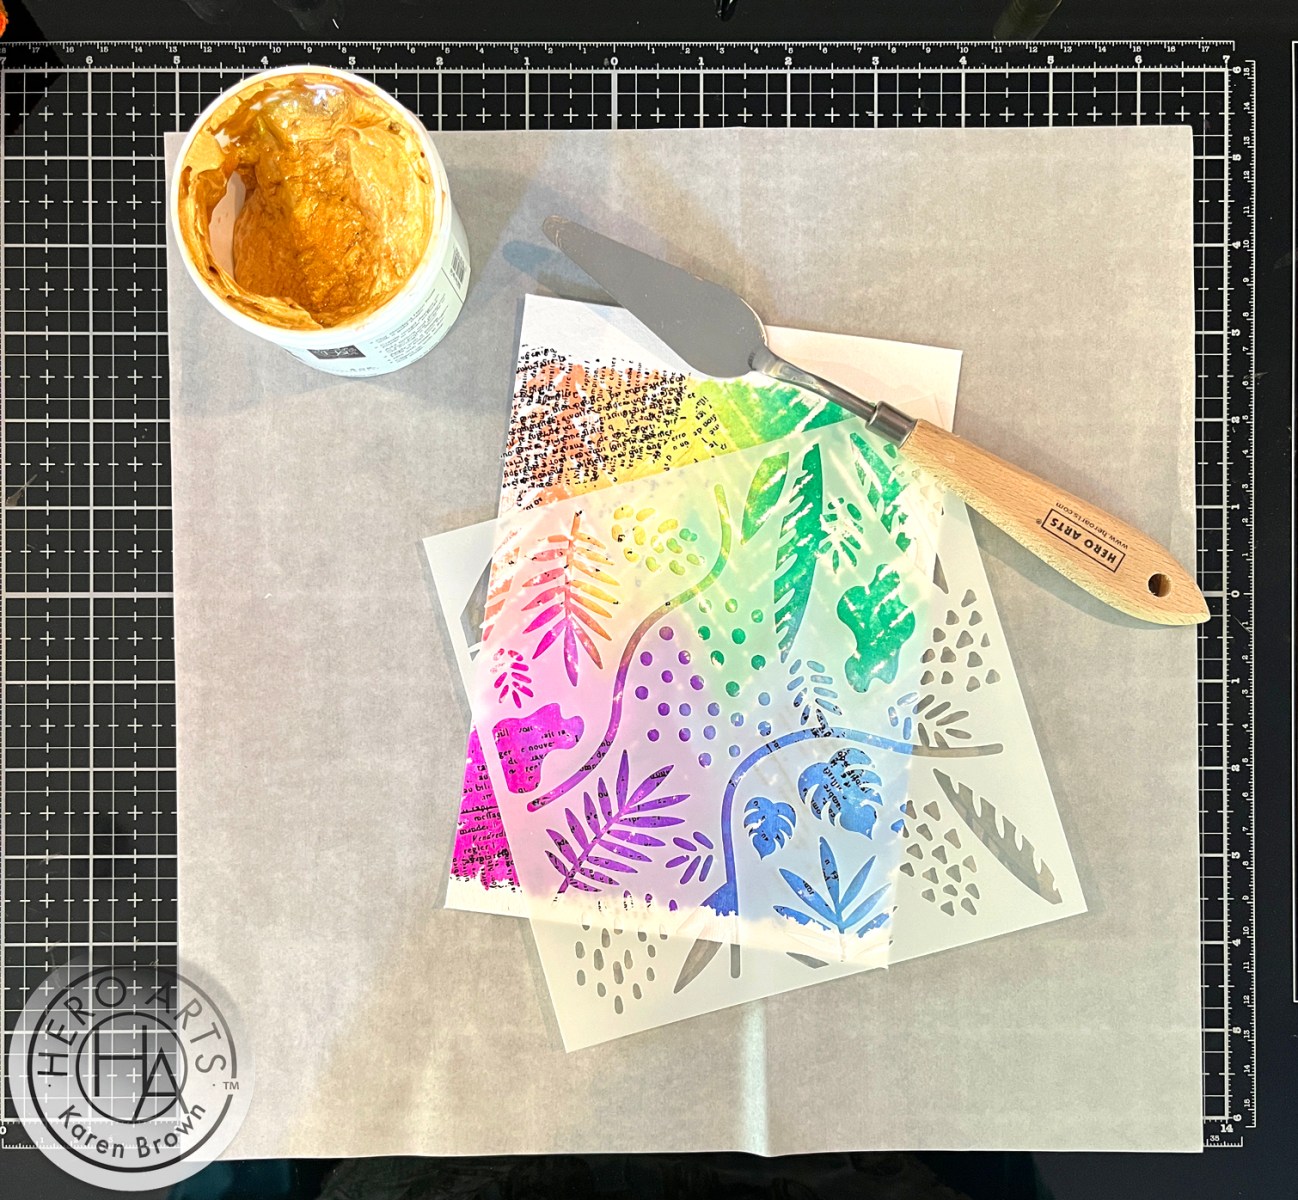
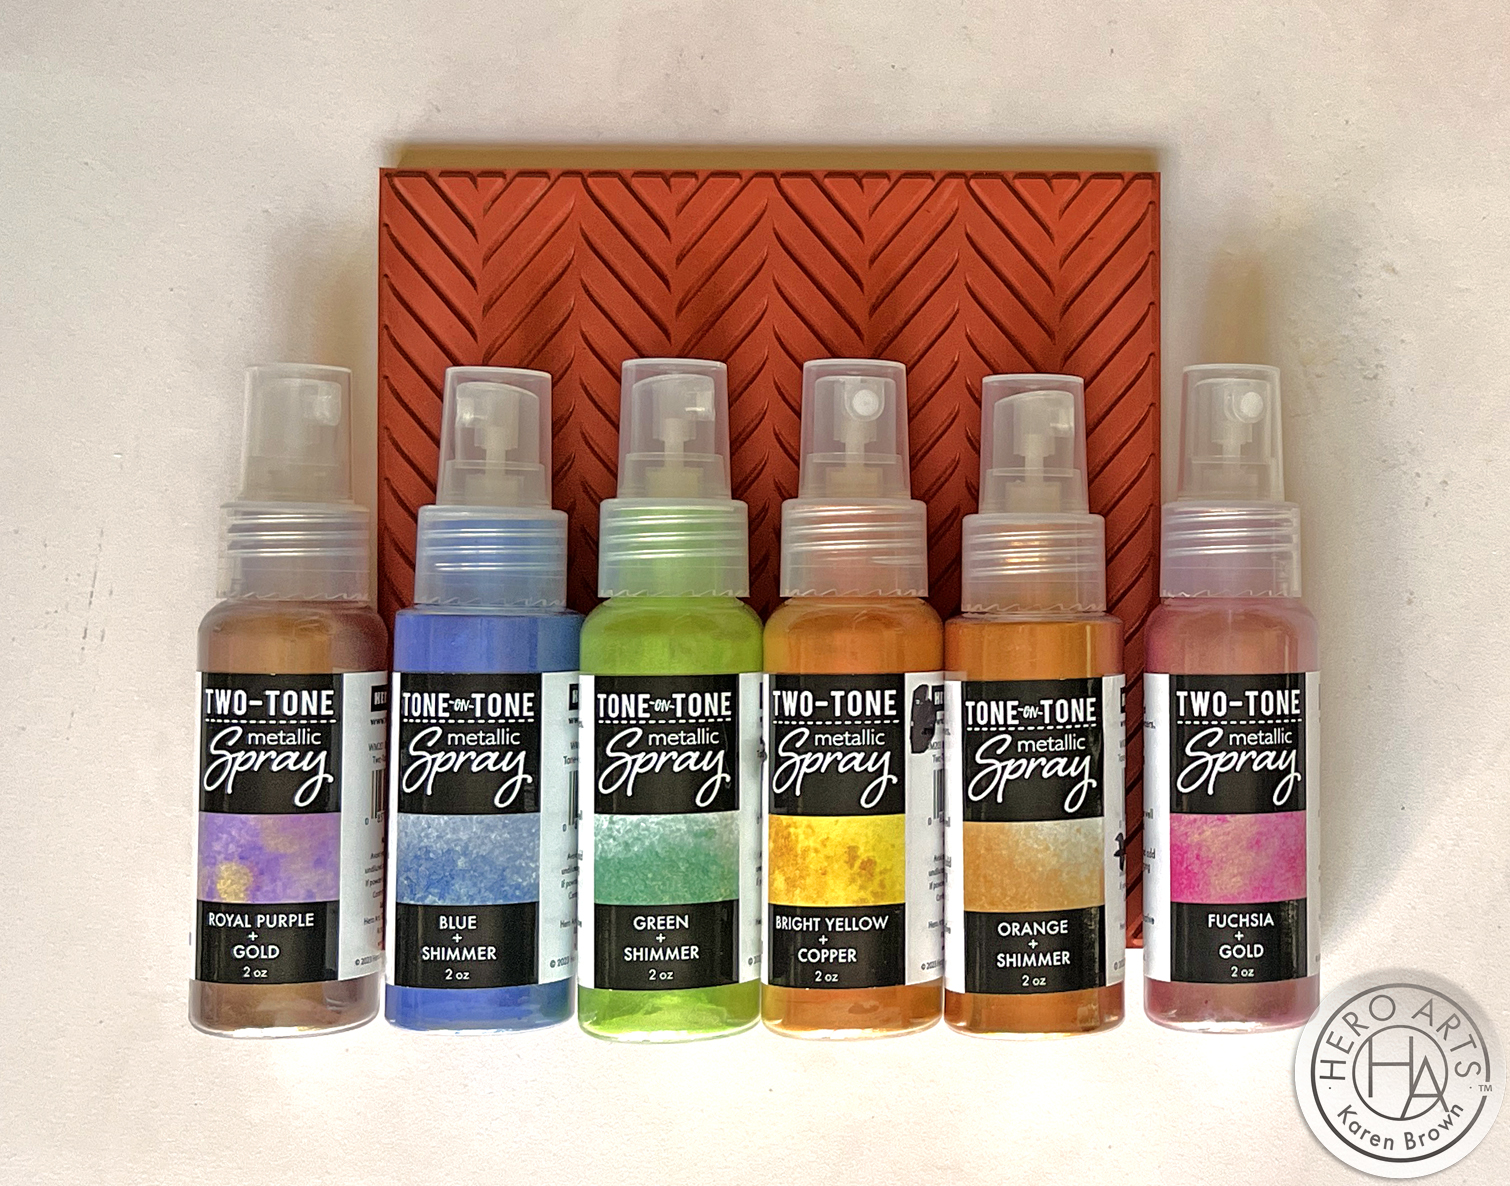
I added 6 colors of Metallic Spray to the wells of my paint palette. I’ve listed the colors used below. Add more water for a softer more water-color look.
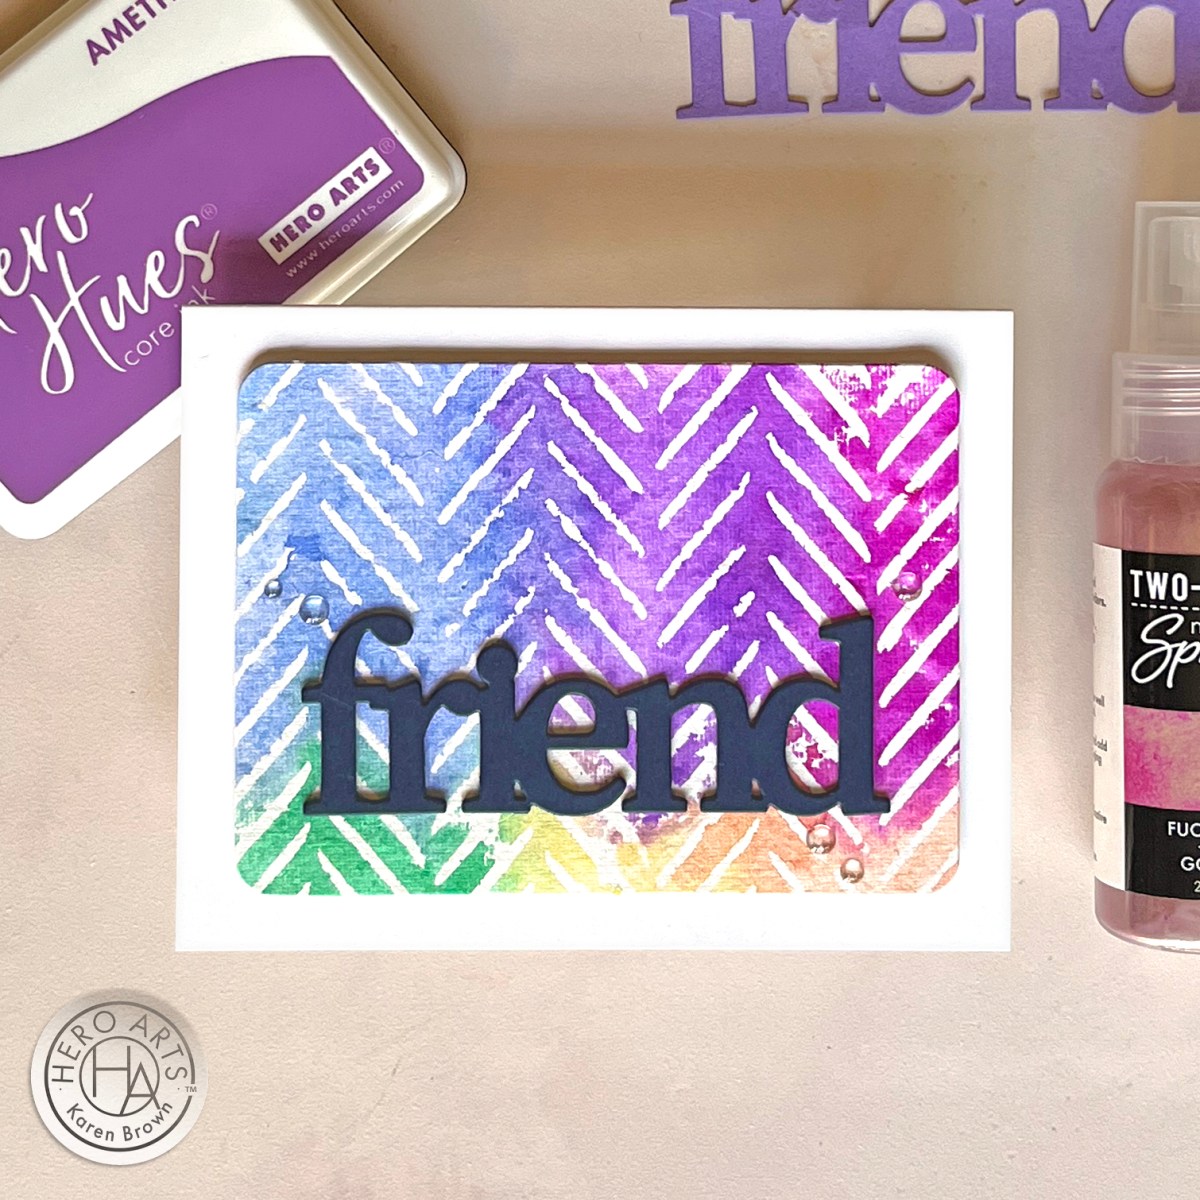
With my Flat Water Brush, I brushed paint onto my stamp and then stamped on my watercolor paper. For the “Smile” card I wanted a softer watercolor look so I brushed water on the stamp and then brushed on 6 colors of pigmented spray.
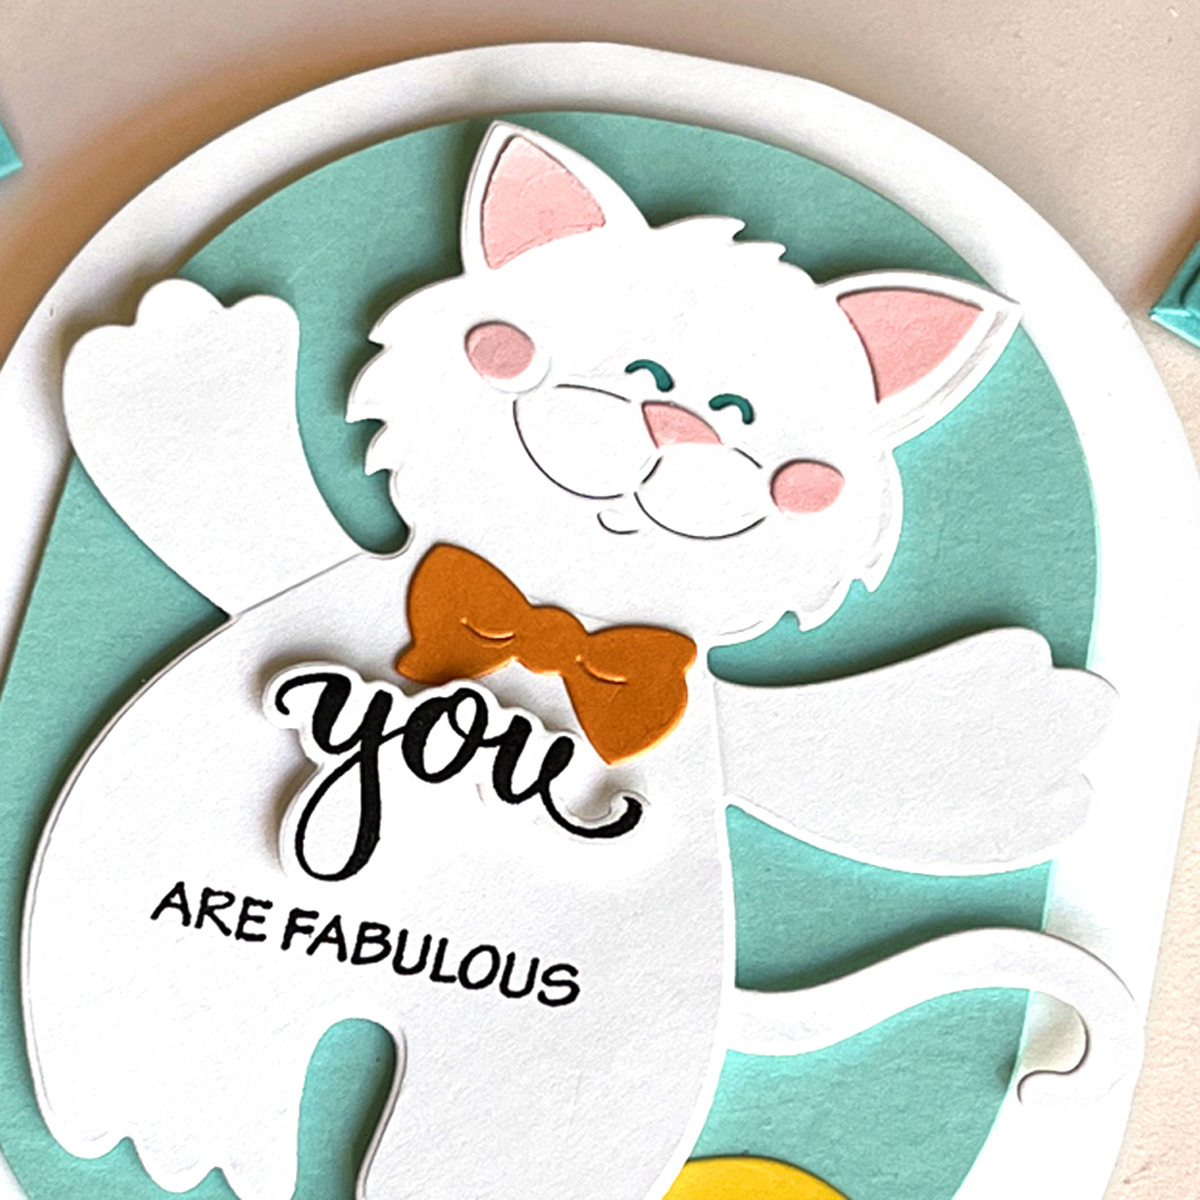
I finished by adding my sentiments and embellishments, which I detail below.
All of my die cut sentiments were cut 3 times, stacked and glued together.
As I stated above, I wanted to try a softer watercolor look for my “Smile” card and in person, this card seems to have the most shimmer and shine. After trimming my card, I lightly ink blended the edges with Amethyst Core Ink and added my sentiment, which was die cut from Amethyst cardstock. I added Translucent Pink Enamel Dots for a little added interest.
Card #2 was made the same way as Card 1, except I did NOT brush water on my stamp before painting my stamp. You can really see how the amount of water used can change your project.
PRO TIP: Protect your work surface with a piece of deli paper when working with messy media. It makes for a quick and easy cleanup.
What are Metallic Shimmer Sprays?
Metallic shimmer sprays are versatile crafting tools that contain finely milled metallic pigments suspended in a liquid base. They come in a variety of metallic shades and below, you can see the six I used on my cards today. When sprayed or brushed onto paper, these shimmer sprays impart a beautiful shine and metallic sheen, adding depth and dimension to your projects.
Don’t you just love this shimmery rainbow of metallic sprays? I can’t decide which is my favorite!
Stamping with metallic shimmer sprays is a fun and easy way to elevate your cardmaking projects and add a touch of shine to your designs. Whether you’re crafting for a special occasion or just because, these metallic sprays are sure to make your creations shine bright. So, grab your stamps and start sparkling!
I hope you found this tutorial helpful and inspiring. Happy crafting!
Hello, fellow crafting enthusiasts! Let’s explore one of the most versatile and exciting elements of the craft: printed paper. Whether you’re a seasoned cardmaker or just starting out on your creative journey, printed paper can add depth, texture, and personality to your handmade cards.
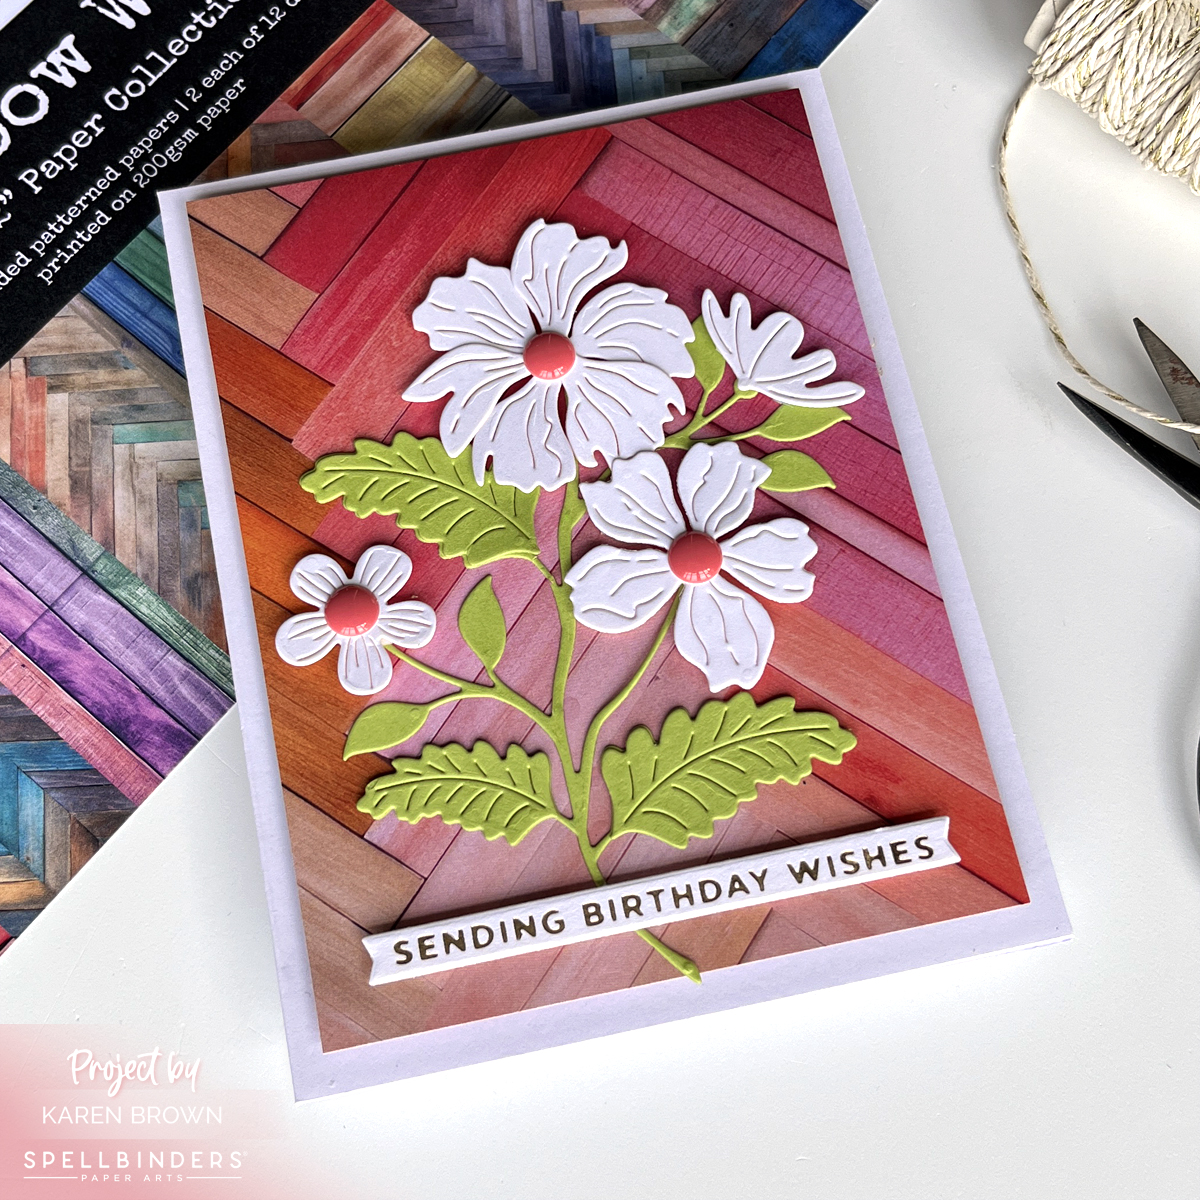
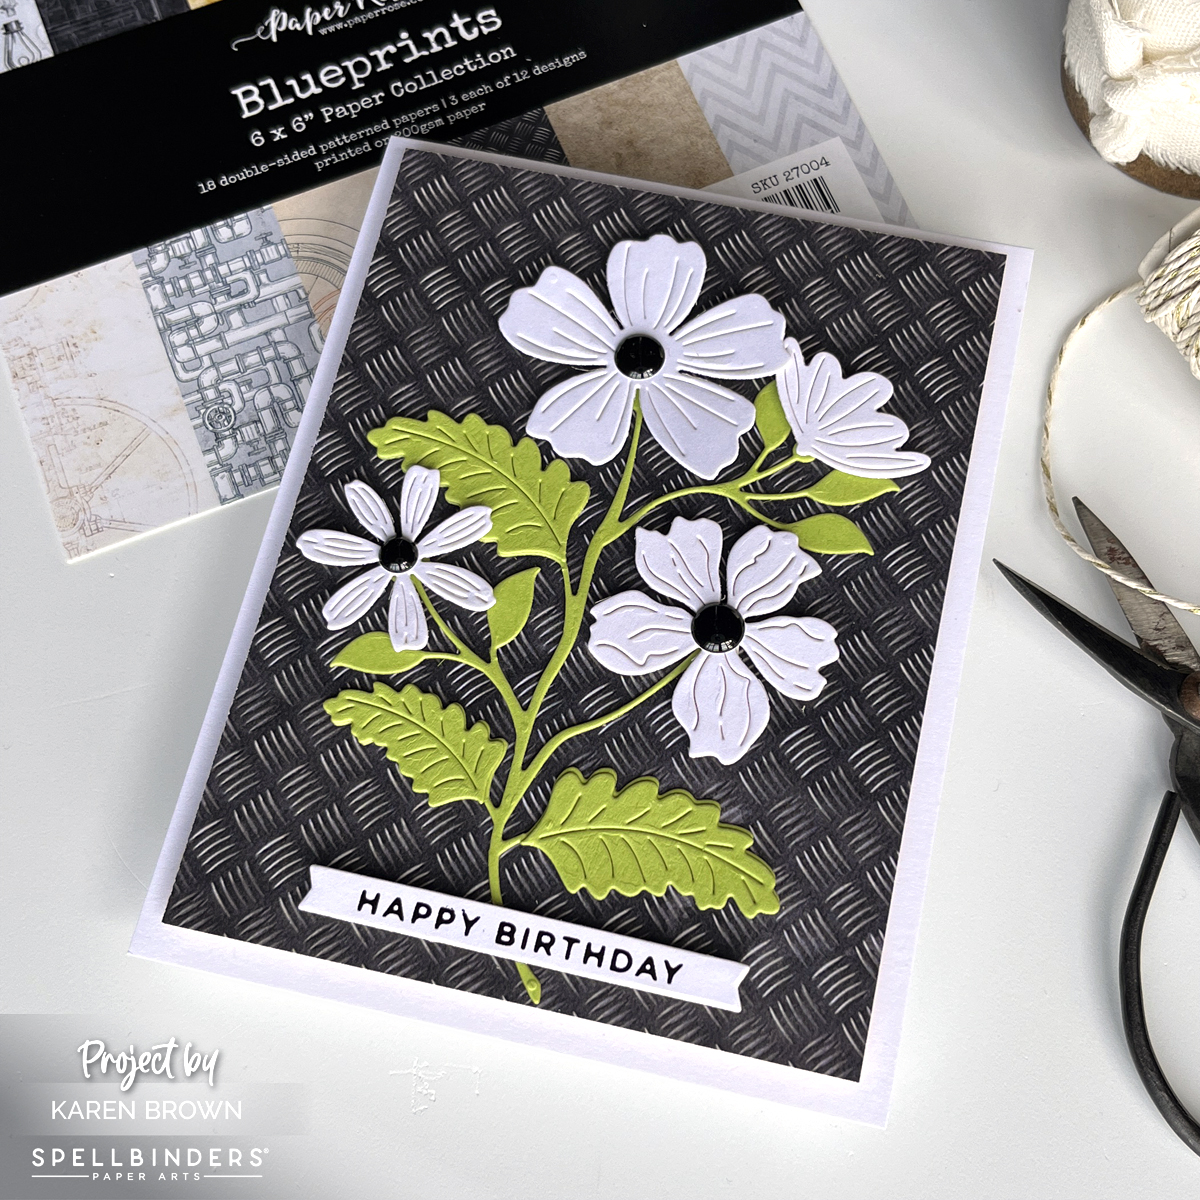
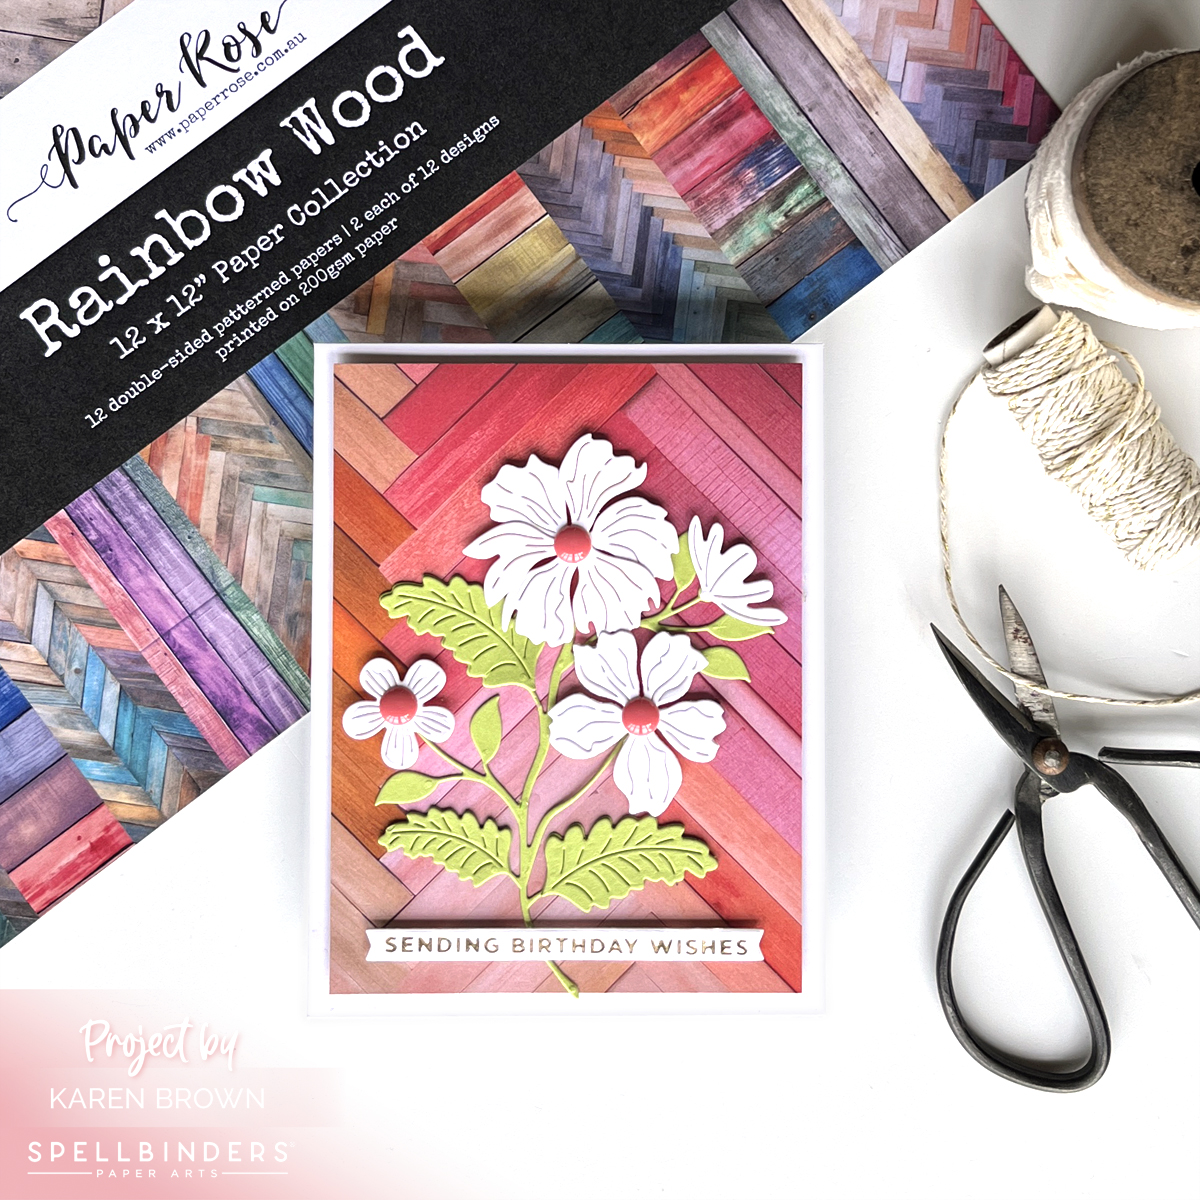
Today, I am using two beautiful Paper Collections from Paper Rose that Spellbinders recently started offering on their website. The Rainbow Wood pack is colorful and vibrant and the Blueprintscollection is funky, interesting and adds an edgy vibe. I used similar die cut focal points for each card but changed the background to illustrate how easy it is to alter the tone of your card.
Unleash Your Creativity: The Art of Using Printed Paper in Cardmaking
Printed paper, also known as patterned paper or designer paper, comes in a vast array of colors, patterns, and themes. From elegant florals to whimsical polka dots, there’s a printed paper to suit every style and occasion. But why incorporate printed paper into your cardmaking projects?
Instant Visual Appeal: Printed paper instantly adds visual interest to your cards, making them stand out and catch the eye.
Time-Saving: Using printed paper as a background or focal point can save you time compared to stamping or hand-coloring intricate designs.
Endless Variety: With so many designs to choose from, you can easily find printed paper to match any theme or mood, whether it’s a birthday, wedding, holiday, or just because.
Versatility: Printed paper can be used in a variety of ways, from backgrounds and borders to die-cut shapes and embellishments, giving you endless creative possibilities.
Now that we’ve covered why printed paper is a must-have in your cardmaking stash, let’s explore some fun and creative ways to incorporate it into your projects.
How to Use Pattern Paper
1. Background Bliss
One of the simplest yet most effective ways to use printed paper in cardmaking is as a background element. Choose a pattern that complements your card design, trim it to size, and adhere it to your card base for an instant burst of color and pattern. Whether you opt for bold stripes, delicate florals, or playful geometrics, a patterned background adds depth and dimension to your cards without overwhelming the overall design.
2. Focal Point Fun
Additionally, you can die-cut or fussy-cut designs from your favorite patterned paper and use them as the centerpiece of your card. Whether it’s a stunning floral cluster, a charming critter, or a bold sentiment, a printed paper focal point adds visual interest and personality to your handmade creations.
3. Layering Love
Layering printed paper is a great way to add depth and dimension to your cards. Mix and match coordinating patterns and colors to create eye-catching backgrounds, borders, or mats for your focal elements. Experiment with different combinations until you find the perfect balance of prints and solids to make your designs pop.
4. Embellishment Extravaganza
Printed paper isn’t just for backgrounds and layers—it also makes fabulous embellishments! Use punches, dies, or scissors to cut out shapes, borders, or accents from your favorite patterned paper and use them to embellish your cards. From flowers and leaves to banners and borders, printed paper embellishments add charm and whimsy to your handmade creations.
5. Theme Time
Take your cardmaking to the next level by choosing printed paper that fits a specific theme or occasion. Whether it’s a holiday, a season, or a special event, themed patterned paper sets the tone for your cards and ties your design together beautifully. From spooky Halloween motifs to festive Christmas patterns, themed printed paper adds instant flair and personality to your handmade creations.
In conclusion, printed paper is a cardmaker’s best friend, offering endless possibilities for creativity and expression. Whether you’re looking to add color, pattern, or texture to your cards, printed paper is sure to inspire and delight. So next time you sit down to create, don’t forget to reach for your favorite patterned paper and let your creativity soar!
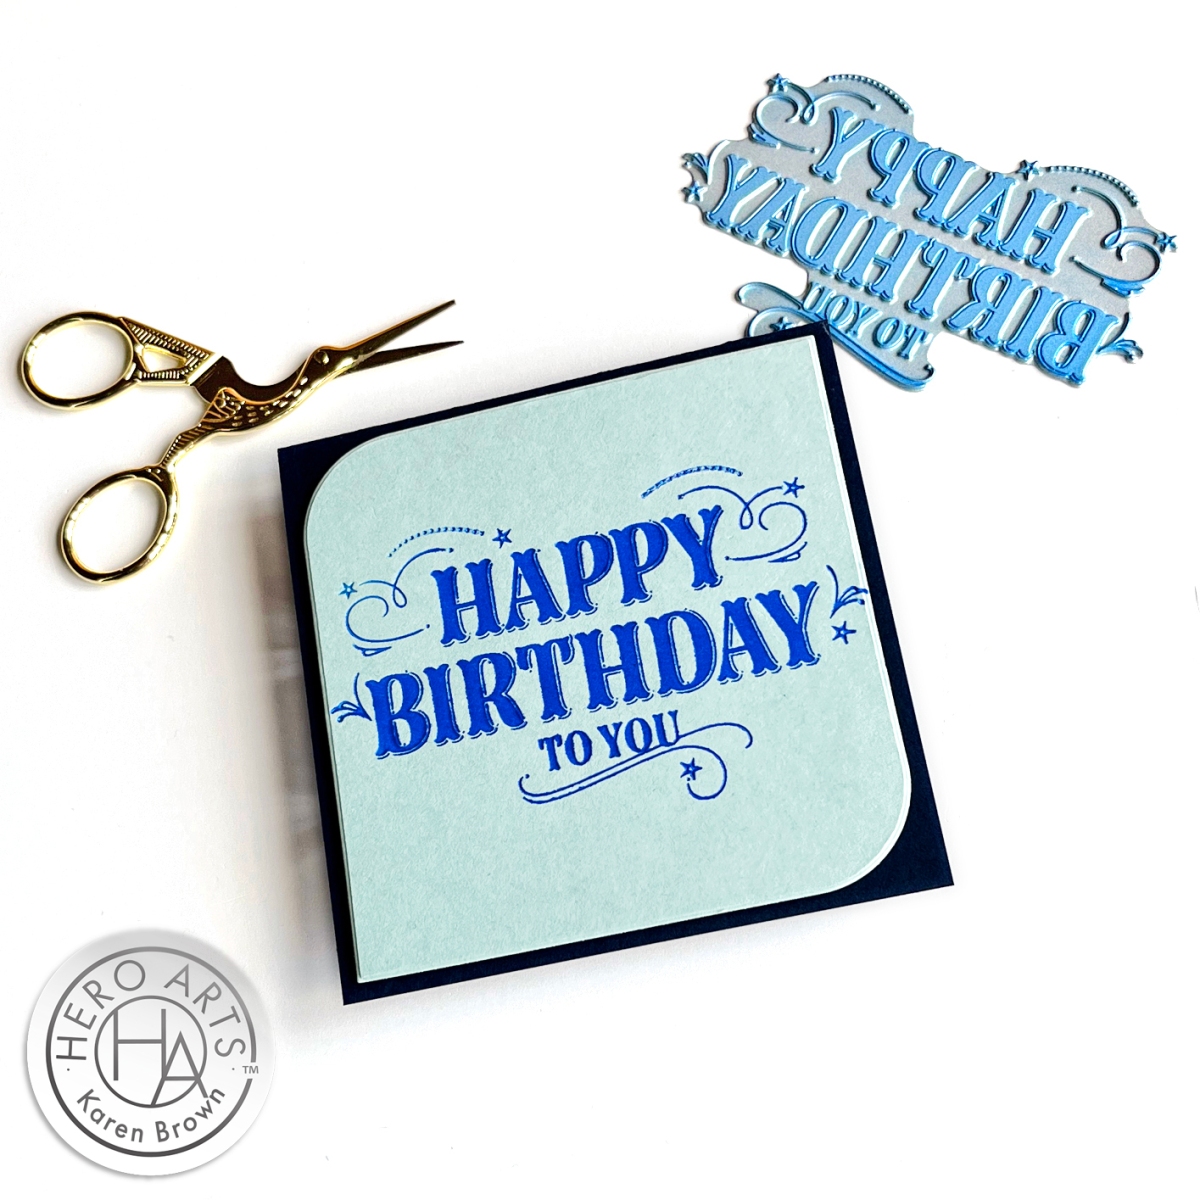
I make a LOT of cards, but I never seem to have enough masculine cards, so…..here is a wonderful one suitable for anyone! I love the classic look of letter press and was pleased to see Hero Arts new Letter Press/Foil Plates. For this card I used their new Happy Birthday plate.
I did not use special paper or inks but I still think I got a good result on my card. Next, I want to try the birthday plates with my foiling machine.
I love a good scene card and when I saw Tina Smith’s Windows With A View Collection, I was immediately smitten! I needed a baby shower card and I knew the tire swing in this kit would be perfect.
Special Scene Card for a Baby Shower
Spellbinder’s Backyard Haven View has 16 adorable dies that include the tree, tire swing, squirrel, owl, bird house, fence, bird bath + some other adorable details. So many possibilities that allow you to design a card for most any occasion….baby shower, new home, friendship, birthday etc.
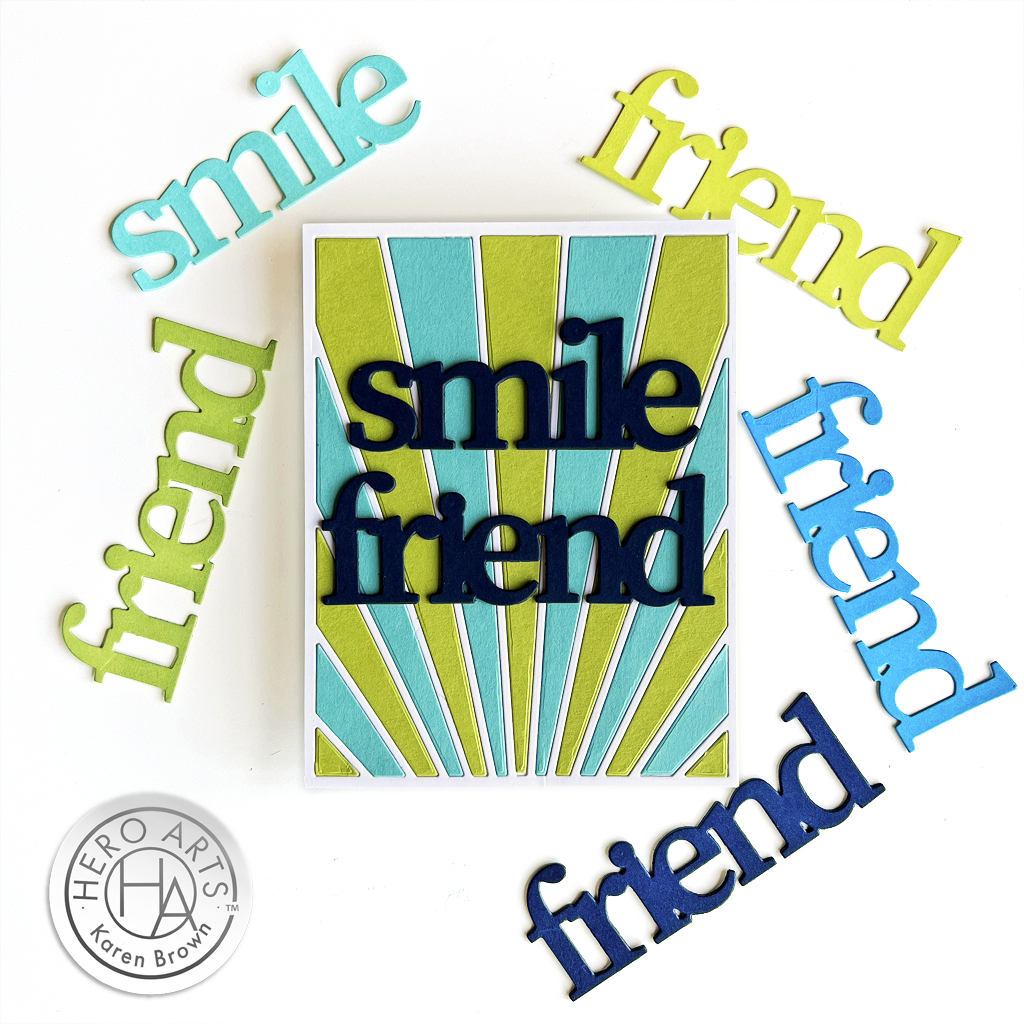
I made a second friendship card and used a “Friend” chipboard sentiment from Autumn Chipboard Stickers that I thought went well with my scene. I love this chipboard set with its beautiful substantial elements.
I wanted to start off with two fabulous new sentiment dies that I just love from Smile Friend Stamp and Cut XL. I went crazy die cutting a bunch so I will have them on hand for future cards.
DI945 Rays of Color Window Fancy Die (recently sold out)
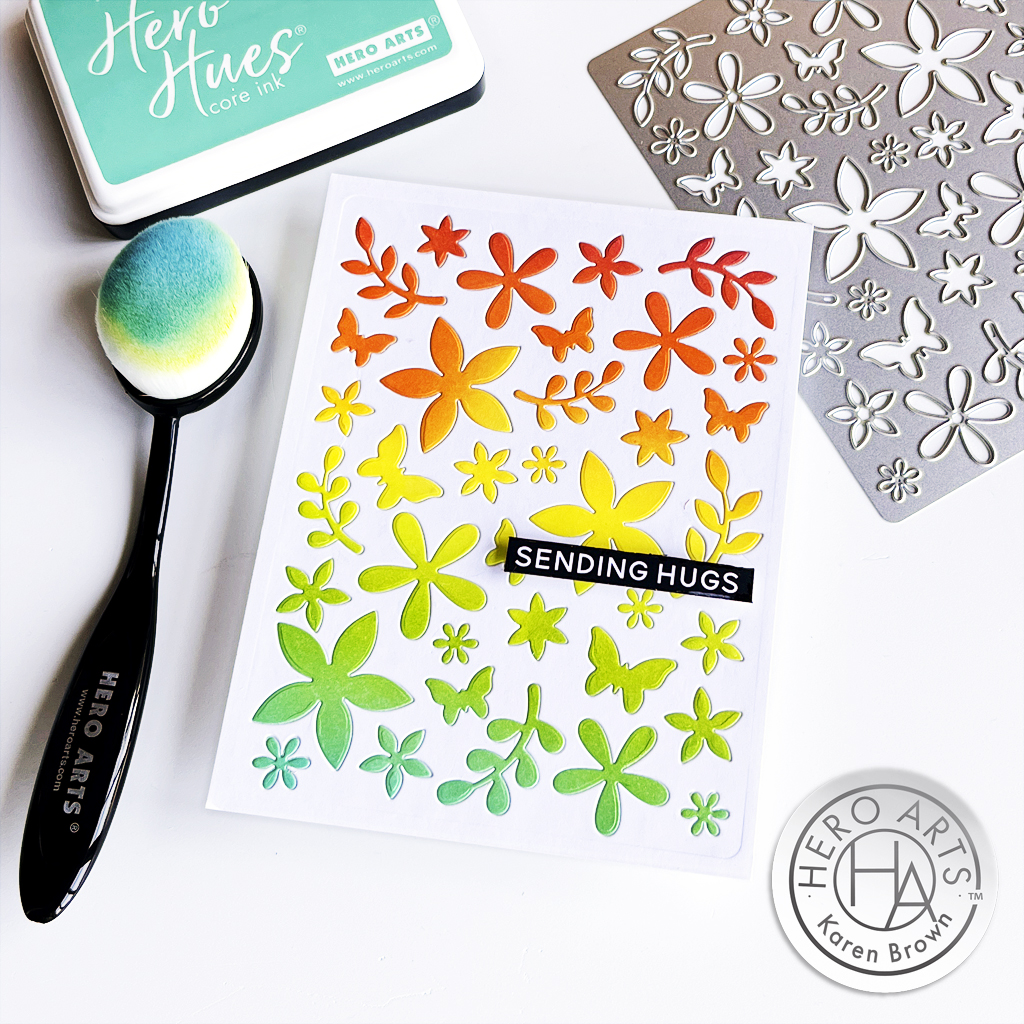
Flower Pattern Cover Die
I LOVE cover dies so I was excited to create with this Flower Pattern Cover Die, which is perfect for Spring and Summer. I started by ink blending a rainbow panel which I then die cut with the cover plate and then used the inlay technique to create a one layer background. This went more quickly than you would think because the die cuts fit like a good quality puzzle. My placement and gluing took about 20 minutes.
TIP: Keep your die-cuts in the panel until you start gluing so you know the orientation and position on your background.
Products Used on My Flower Pattern Cover Die Card:
Birthday Animals Stamps + Pointed Arches Infinity Dies
Isn’t this Alligator the cutest? He is one 7 animal stamps included in the Birthday Animals Bundle. The set also includes 8 birthday/everyday sentiments. I combined the stamps with the Pointed Arches Infinity Dies. Infinity Dies are definitely staples in my craft room and I like the interest the arches add to projects.
I love everything about Rub-on transfers. I love how easy they are to use, the look they add to projects and how fun they are to apply! This Spring, Hero Arts included “Sympathy Transfers” in their release. I did some quick ink blending on my background and then added my Hero Transfers for a quick and easy card.
Hero Arts will be giving away two $50 gift cards, drawn from the comments left along the hop. Comment on all the blogs for more chances to win! You have until Wednesday, February 21st at 11:59pm to enter. The winners will be announced on the Hero Arts blog.
Kailash Naidoo is next on the hop and I have links to everyone below.
I recently attended Hero Arts Mixed Media Stamp Along and found it so informative! This card was inspired by @cheiron and her wonderful class. I used different products and colors so my card doesn’t look anything like Cheiron’s, but her class gave me the creative spark for my card. Sometimes it is fun to get inky and messy!
For this card, I was trying to simulate a Dove flying over a city at sunrise. I knew I wanted a bold background to contrast with the white Dove.
My Process:
I put 5 sunrise colors of reactive ink (colors listed below) on my craft mat and spritzed with a bit of water and then painted bands of vertical color all over my watercolor cardstock panel. There is no right or wrong way just start painting! I dried and repeated two more times. During the process I also added drips of color.
I love Hero Rub-On Transfers and I added parts of the city map from Collage Backgrounds to three spots on my background.
I added texture with the Cobblestone Stencil. In some places I used just Gold Hero Paste and on others I rubbed just a bit of Black Hero Wax on the Stencil and then added Gold Hero Paste. I really love the black wax and gold paste combined together.
Using a splatter box (for me a repurposed cardboard box) I added three layers of splatters and dried in between each color. White, Blue Shimmer and Orange Shimmer. I love the complexity the shimmer splatters add!
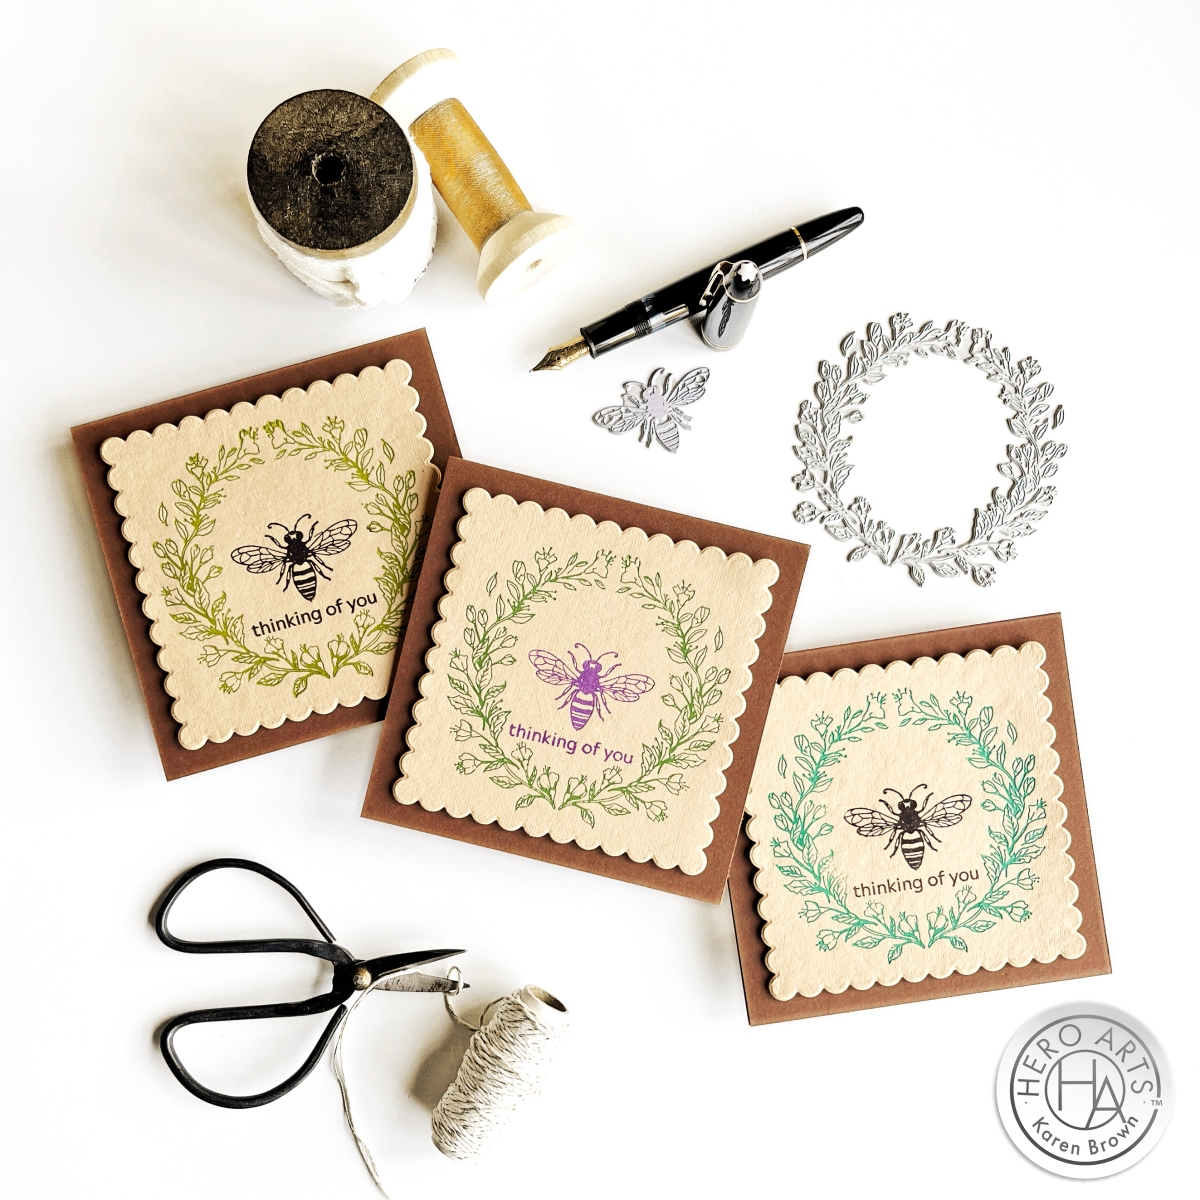
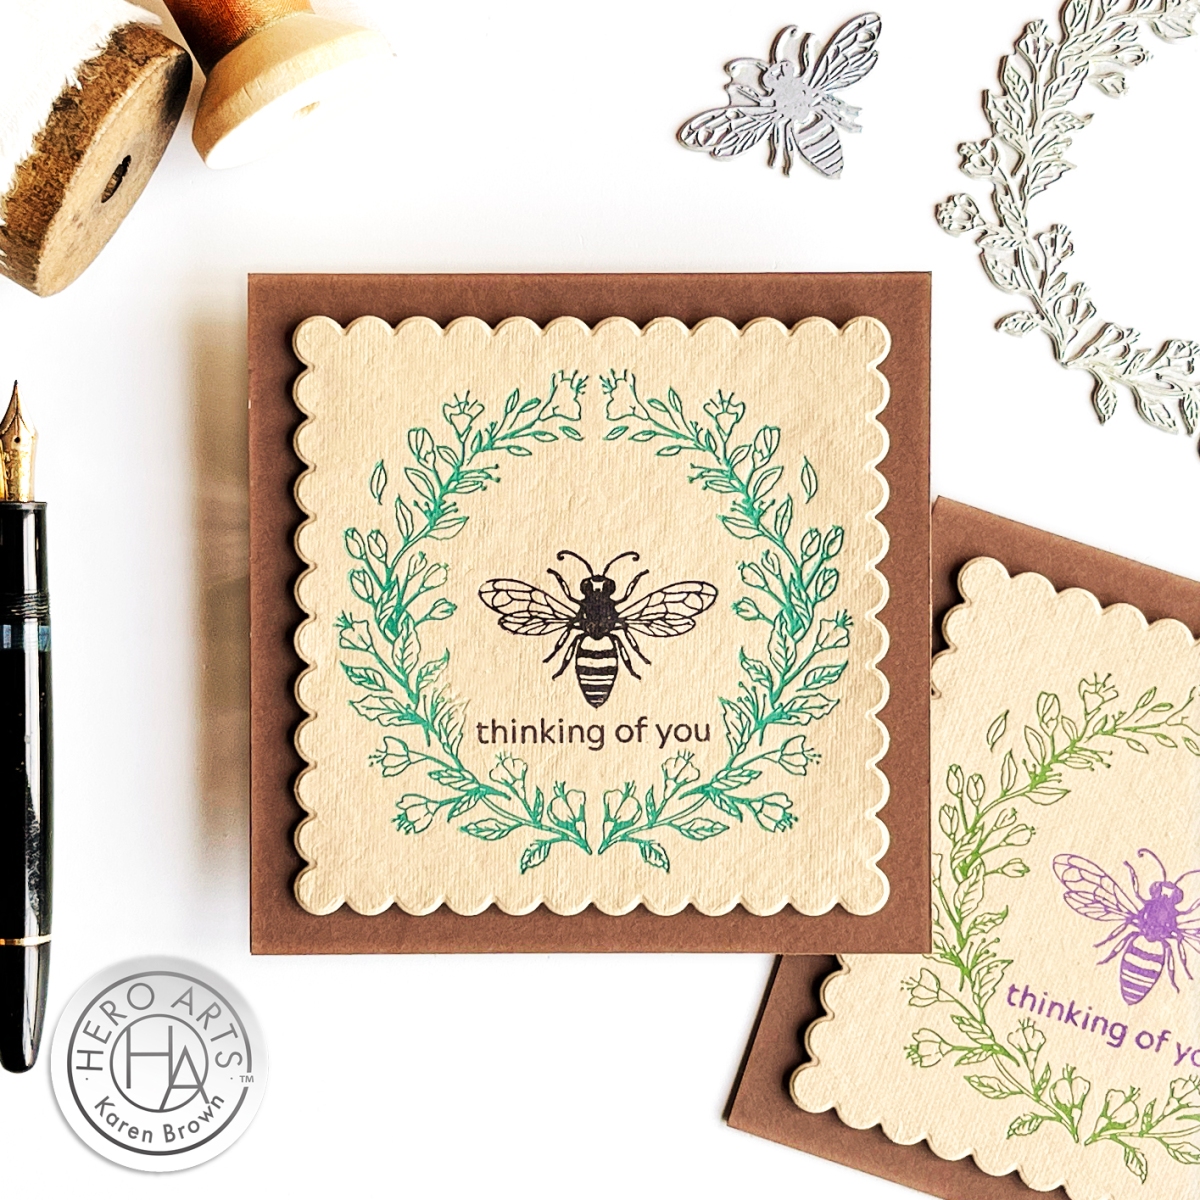
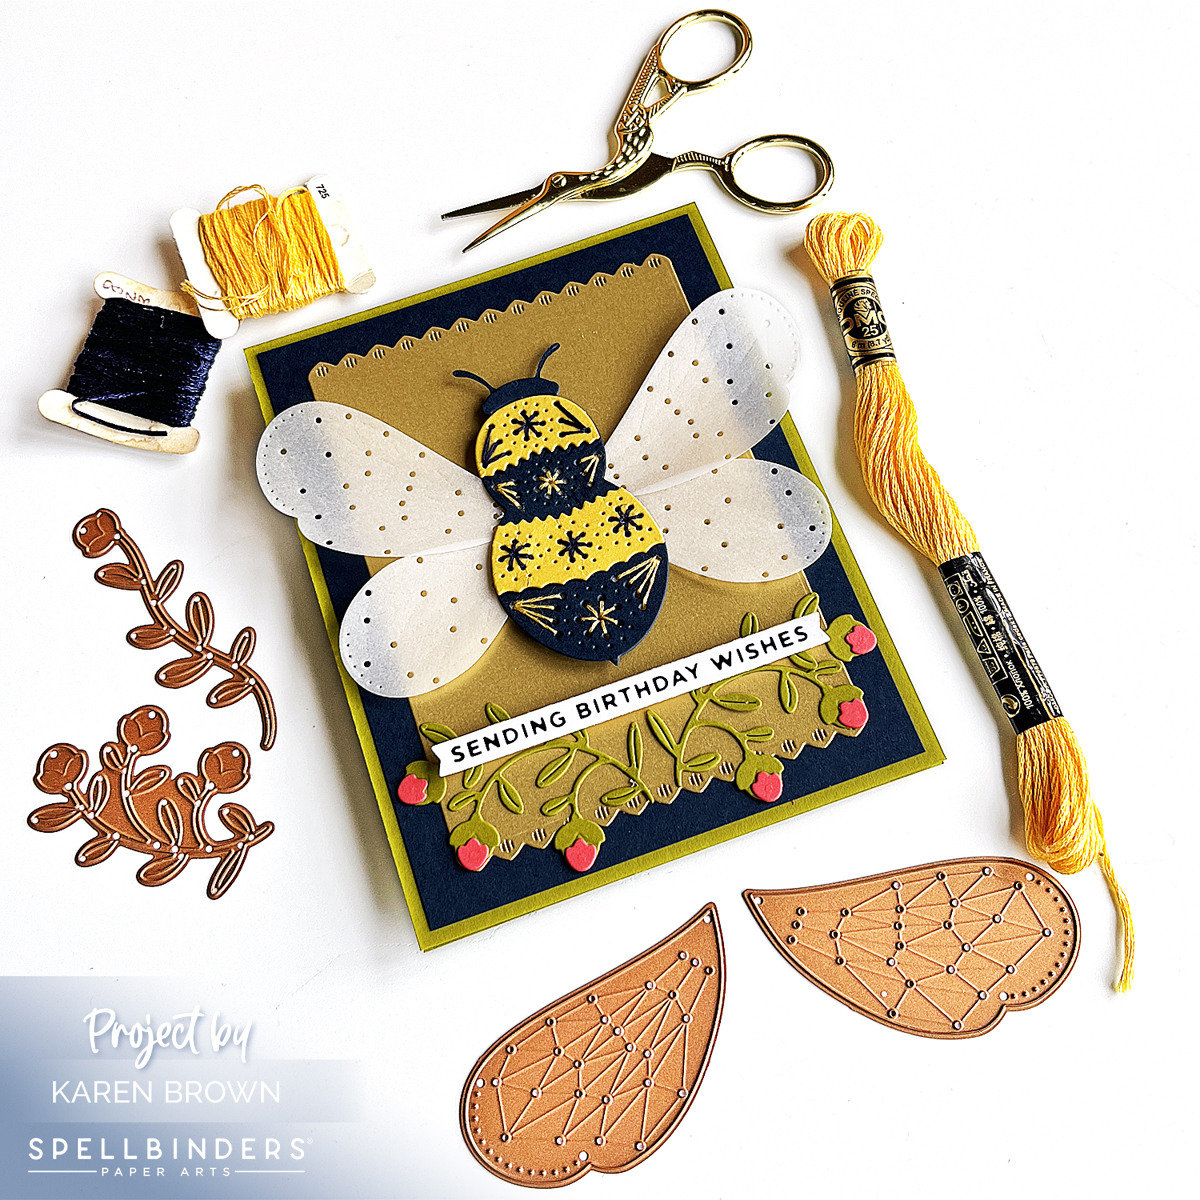
I am so excited about the 2024 Spellbinders Clubs! Today I am sharing a fun Bumble Bee themed card using the January Stitching Die Club Kit and it is perfect for Spring, Birthdays, Get Well and Hello cards…I think it is so fresh and fun! This Club Kit is now available for individual purchase HERE.
I created this card over the holidays and it was ideal to work on while I sat around the fire and visited with family.
Spellbinders has a nice selection of stitching accessories in their shop that you can find HERE.
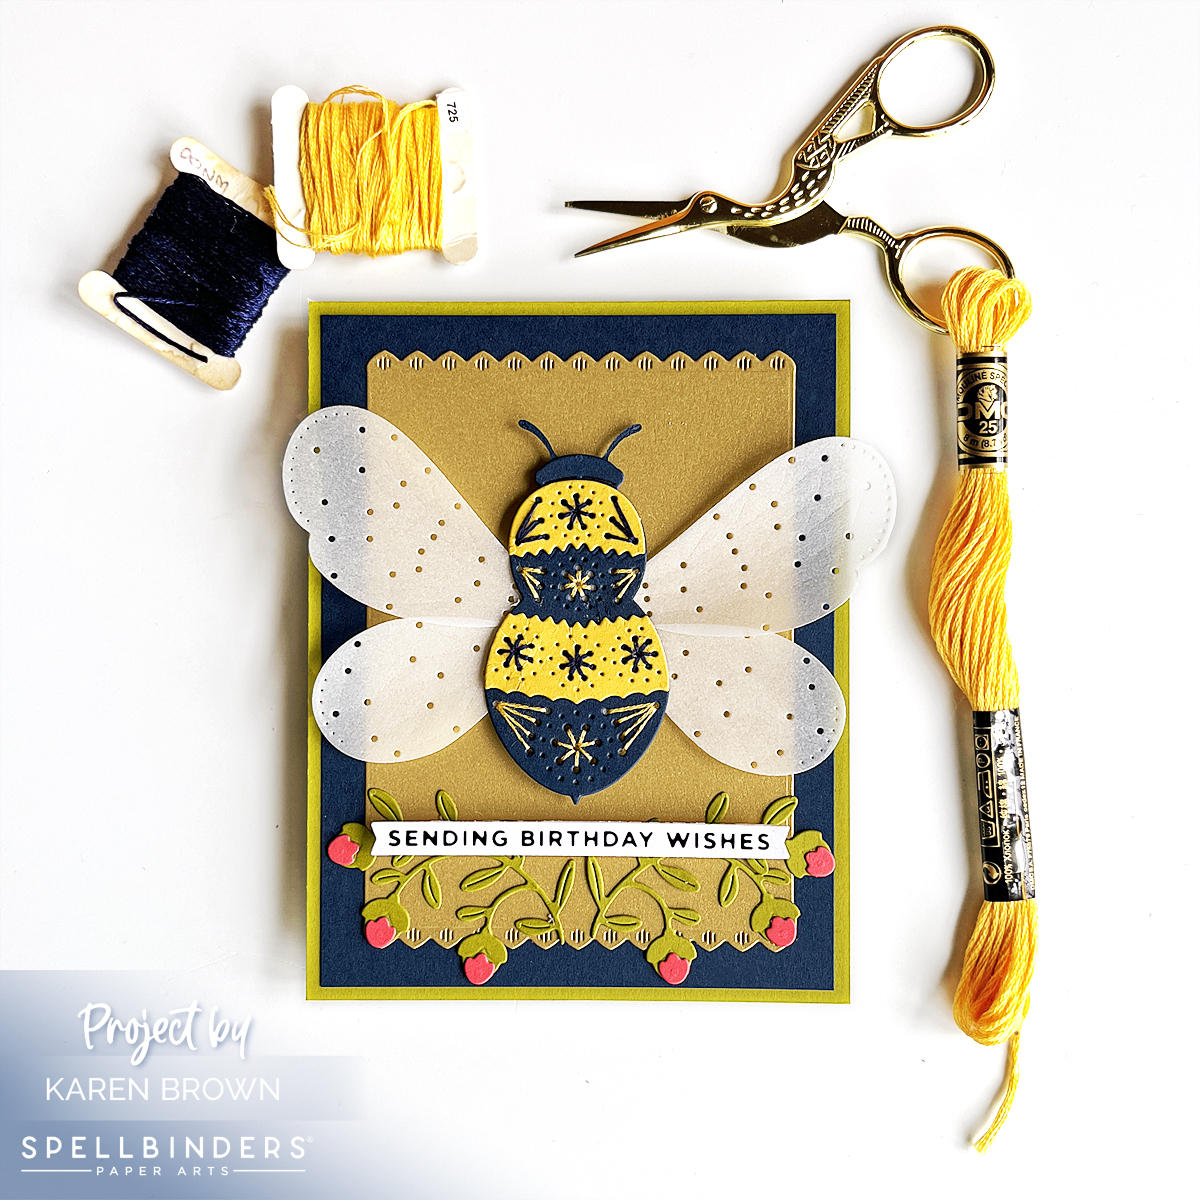
When I started stitching, I took two strands of Gold Floss (DMC 725), separated them one at a time, brought them together and then stroked and lengthened them until they seemed tame and ready to use.
When I move from one area to the next, I run the floss through the just finished stitched area to keep the thread secure. This gives a nice look on the finished project.
Don’t stitch with threads that are too long or they are likely to knot. This is a lesson I relearned on this card.
When I was done, I added a bit of Bearly Glue to the ends so that they will stay in place. You can also add a backing by die cutting another Bee body. Your backing can be a different color to add more interest.
A Few Notes About Spellbinders Club Kits
Clubs Preview on the 1st of each month.
Club members can cancel, upgrade or change clubs from the 1st-5th of each month. Popular Clubs frequently sell out during this period so club members get first dibs on everything.
NEW for 2024: Club Members get EARLY access to new releases on the 6th!
On the 6th, Clubs become available to non-members.
On the 27th, Club registration closes for the current month.
If a club did not sell out, you can buy under “Shop Past Clubs”. Past kits are available on the 10th of the FOLLOWING month.
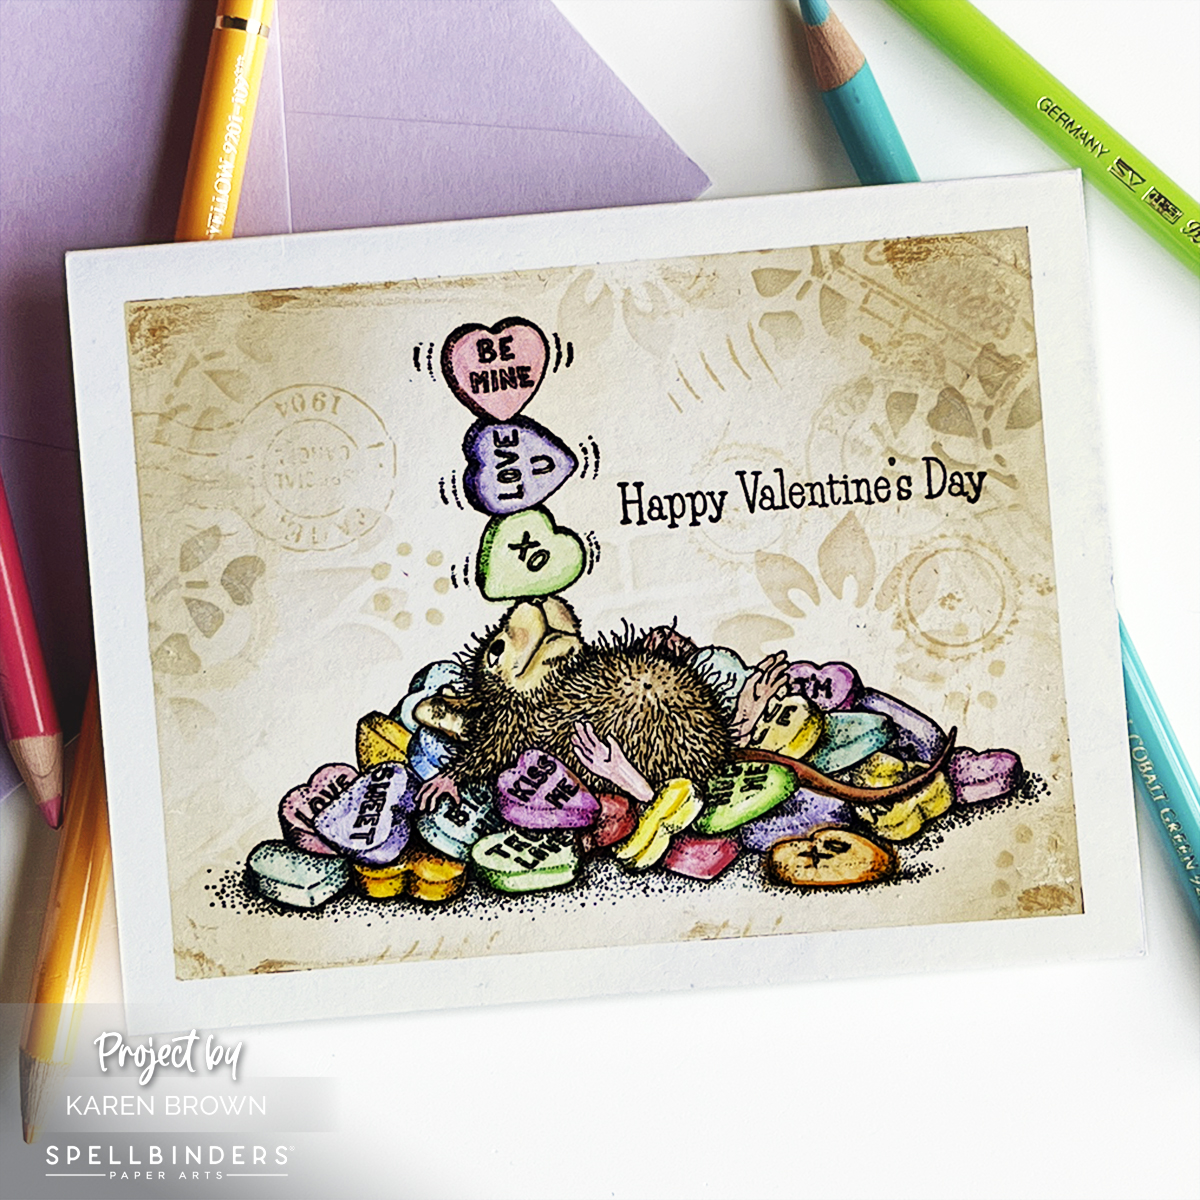
There’s something undeniably captivating about a vintage valentine, where every delicate stroke of ink and carefully chosen sentiment carries a timeless charm. This new House Mouse Candy Hearts rubber stamp had a very retro look to me, so I went with an old-timey mixed media vibe.
Easy One Layer Vintage Look Mixed Media Valentine Tutorial:
I started by creating my background. I masked off a border and then used two shades of tan Distress Ink to ink blend my background. (Antique Linen and Frayed Burlap)
With the masking tape still on the cardstock, I then used the same tan inks to stencil and stamp bits and pieces on the background. Most of the stamping was “second generation” where I stamped first on a scrap and then onto my background so that the pattern would be subtle. I also added light stenciling to the background. Cathe Holden has some great stamps and stencils that I added here and there. I also used a bit of stamping with white pigment ink, but it is hard to see in the photograph. To finish I added a touch of Gold Wax to a few places around the border.
Carefully remove your masking tape. I used Post It Tape, which is the best!
After my background was dry, I stamped the Valentine Mouse with Versafine Black Pigment Ink.
PRO TIP: For a crisp look, keep the stamp in your Misti stamping platform and restamp the image after you are done coloring. You won’t believe how much this one step will elevate your project!
I used Faber Castell Polychromo Colored Pencils to color the mouse and candy hearts.
Remember to restamp the image and let dry.
The cute sentiment is included with the stamp set and finishes off my one layer valentine.