Halloween is creeping around the corner, and it’s the perfect time to brew up some crafty magic with die-cut Halloween scene cards! The September Hero Studio Release is bursting with fun new products + an exciting Blog Hop, so hop along and gather tons of inspiration from some incredibly talented crafters. Let’s dive into the cauldron of creativity and get started!
Witch’s Kitchen | Monthly Mini Clear Stamp and Die Set

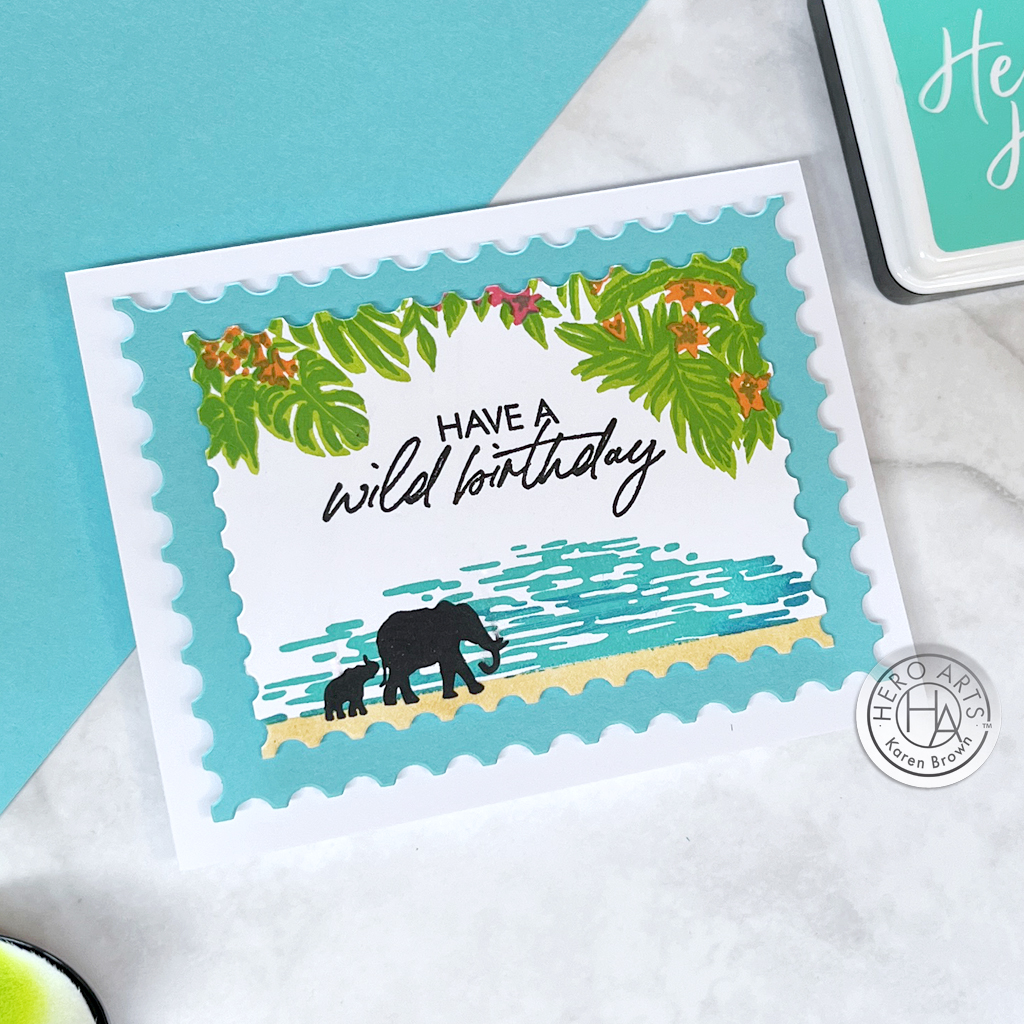
I always love a good scene card, so I had a great time playing with the September Clear Stamps and Dies of the Month. The set is called Witch’s Kitchen and there are so many fun elements to customize your project.
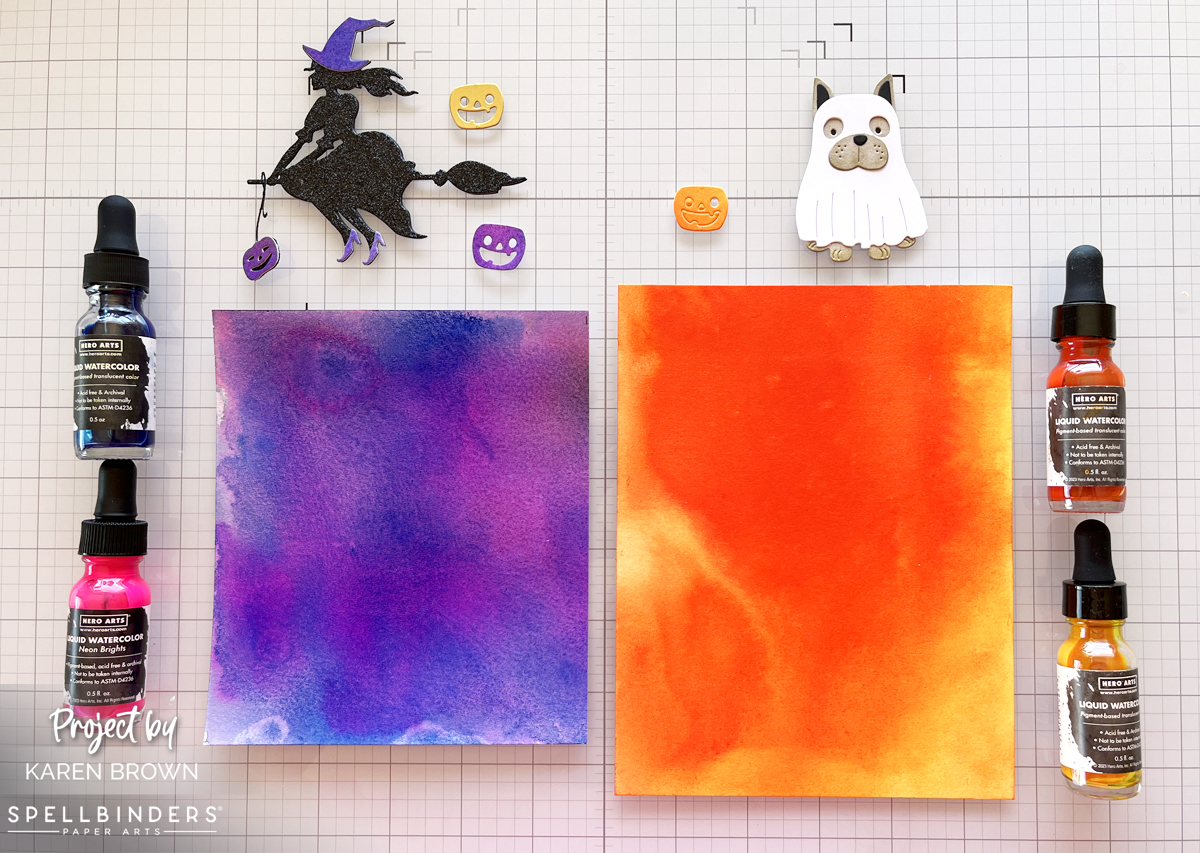
I started by masking 1″ at the bottom of my card. For my floor, I ink blended Granite Core Ink over the Cobblestone stencil. For my wallpaper, I ink blended Thistle Reactive Ink over the Sparkle Weave Stencil.
Next, I stamped all the stamp elements, colored with alcohol markers and then die cut. Then, I played around with layouts until I liked my spooky little scene. A little magic potion anyone???
Witch’s Kitchen: September Clear Stamp and Dies of the Month:
$27.50 with Subscription + FREE SHIPPING
$29.99 One-Time Purchase, While Supplies Last

September 2024 Card Kit of the Month
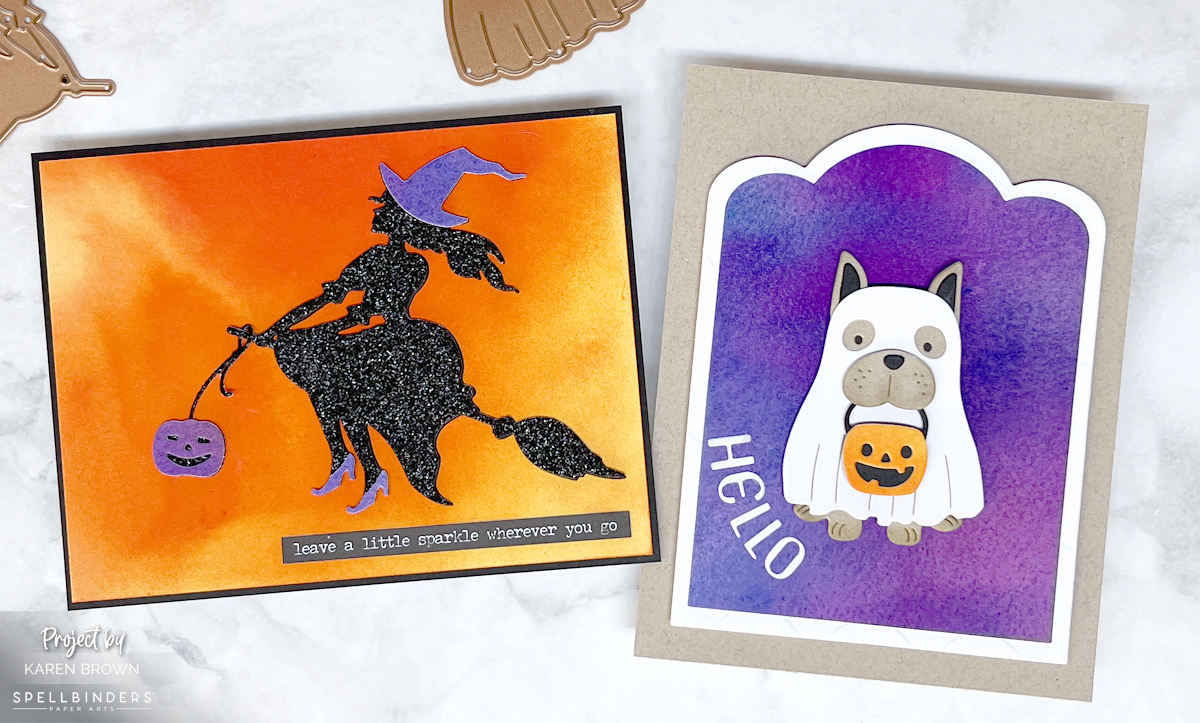
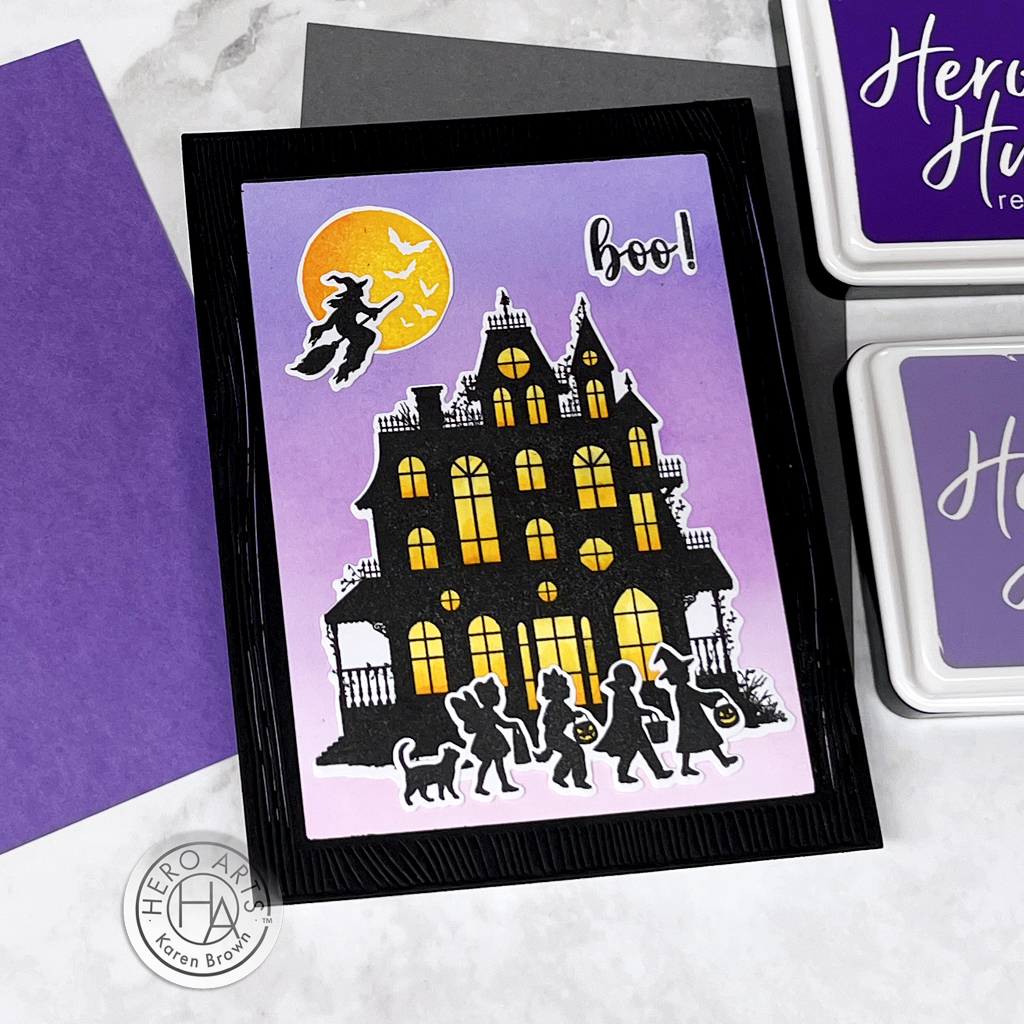
This month’s card kit is so fun! I conjured up a little trick-or-treat scene with stamps and dies included in the kit.

September 2024 Card Kit of the Month
I started by ink blending my background with Taffy, Thistle and Purple Galaxy inks. On a different white card panel I stamped my elements using Intense Black ink. I stamped the black several times for a dark silhouette. I stamped the moon with Lemon Drop and Creamsicle, blending a bit on the stamp before stamping. To “light” my windows, I used a yellow and pale orange alcohol marker. After I completed my little scene, I decided my card needed a frame, so I die cut one from Pitch Black cardstock using my Wood Frame Infinity Dies.
What’s Inside the Kit?
Curious about this month’s kit? Let’s take a peek inside the September Hero Studio Card Kit:

Kit Cost:
$46 with Subscription + FREE SHIPPING
$49.99 One-Time Purchase
While Supplies Last
5 Wonderful Kit Options:
For this blog post, I created with two kits and two Extraordinary Extras, but there there are 5 kits plus 5 Extras available. You can also buy the Whole Studio, which includes all 5 kits at a wonderful savings.
- The Whole Studio ($120 with subscription or $138.95 one-time purchase price)
- Hero Studio Subscription Options
- Hero Studio Card Kit of the Month
- Clear Stamp and Die of the Month
- Cling Stamp of the Month
- Fancy Studio Dies of the Month
- Layering Stencil of the Month
Halloween Words Stencil + Haunted Romance Fancy Dies | Extraordinary Extras

Key Products Used:
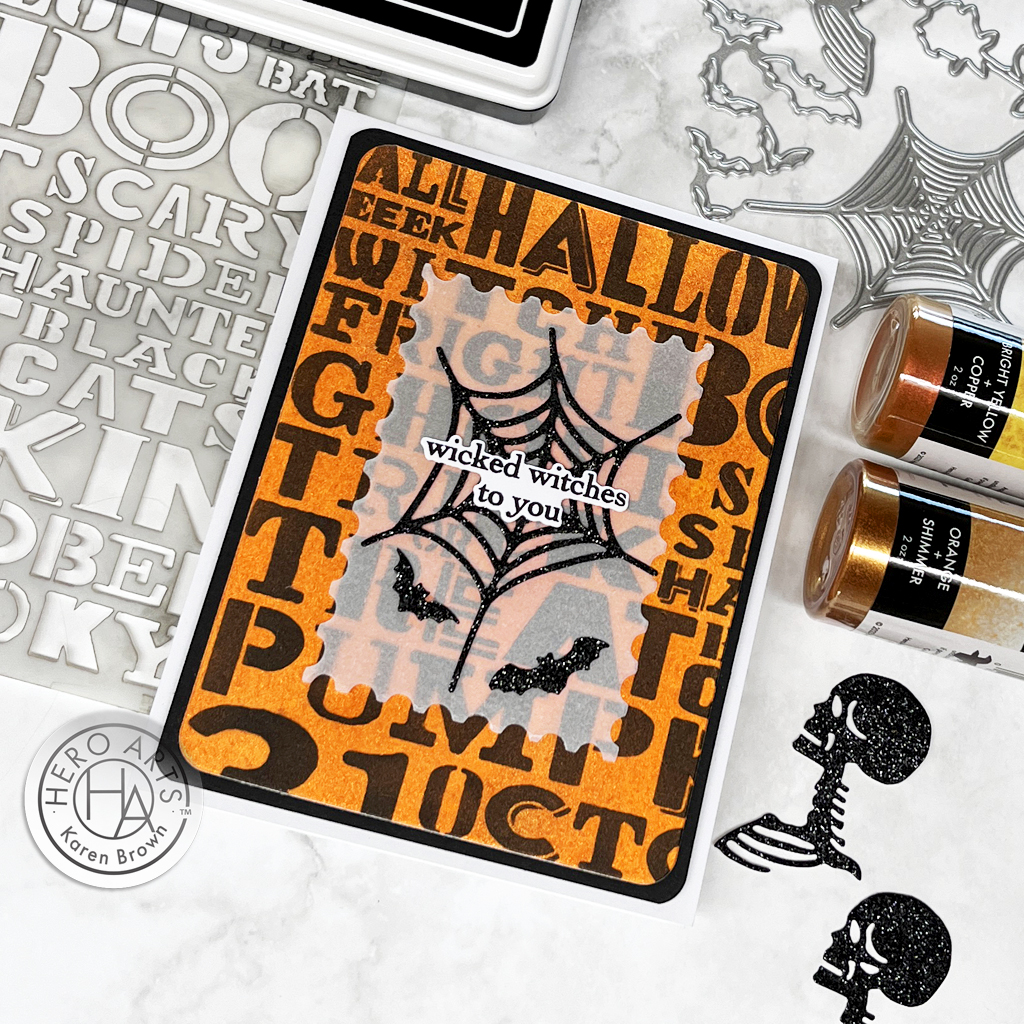
I created a sparkly background by spraying Bright Yellow + Copper and Orange + Shimmer Spray on Luxe Watercolor Paper. I spritzed extra water on the panel and tilted it from side to side to get my color moving and blending.
Once the orange panel was dry, I stenciled Intense Black Ink over the fun Halloween Words Stencil. Using my Rounded Rectangles, I die cut my background and a Pitch Black mat.
I added a Vellum element die cut with a Postage Stamp Infinity Die and added a spider web and bats from The Haunted Romance Fancy Dies. I die cut these from Glitter Black Cardstock. The sentiment is from Witches Kitchen (clear stamp set).
Join the Blog Hop!
Now it’s time for the Blog Hop! What’s a Blog Hop, you ask? It’s a fun, crafty event where you can hop from one blog to another, gathering inspiration, tips, and tricks from different crafters. Each blog in the hop will feature a Halloween project (or two or three!), so you’re sure to leave with your cauldron overflowing with ideas!
| Hero Arts will give away a $50 gift card, drawn from the comments left across the hop. Enter by Sunday, September 8th at 11:59pm Pacific, and the winner will be announced on the Hero Arts blog the following week. |
Here’s how to join:
- Visit the Next Blog in the Hop: Check out the list of participating blogs (links below), and hop to the next one – Lydia Fiedler – to see what spooky creation she has brewed up!
- Leave a Comment: Show some love to your fellow crafters by leaving a comment on their posts. It’s a great way to connect and share the Halloween spirit!
Karen Brown You Are Here!
Special Guests:
Final Thoughts
Creating die-cut Halloween scene cards is a fang-tastic way to get into the spooky spirit and share some handmade love with friends and family. Plus, participating in a Blog Hop is the perfect way to find inspiration and connect with the crafting community. So, grab your dies, fire up your die-cutting machine, and let’s make this Halloween a crafty one to remember!
Happy crafting, and don’t forget to join the Blog Hop! 🎃👻