Hello and welcome! Karen Brown here and I have a very fun project to share with you today featuring this delightful Vintage Birdcage die. I love color and texture and I used lots of both on this card. Here is my recipe: I started with my background. Using Embossing and Watermark Ink and Clear Embossing… Continue reading Hero Arts | Colorful Rainbow Mixed Media Card
Author: Karen Brown
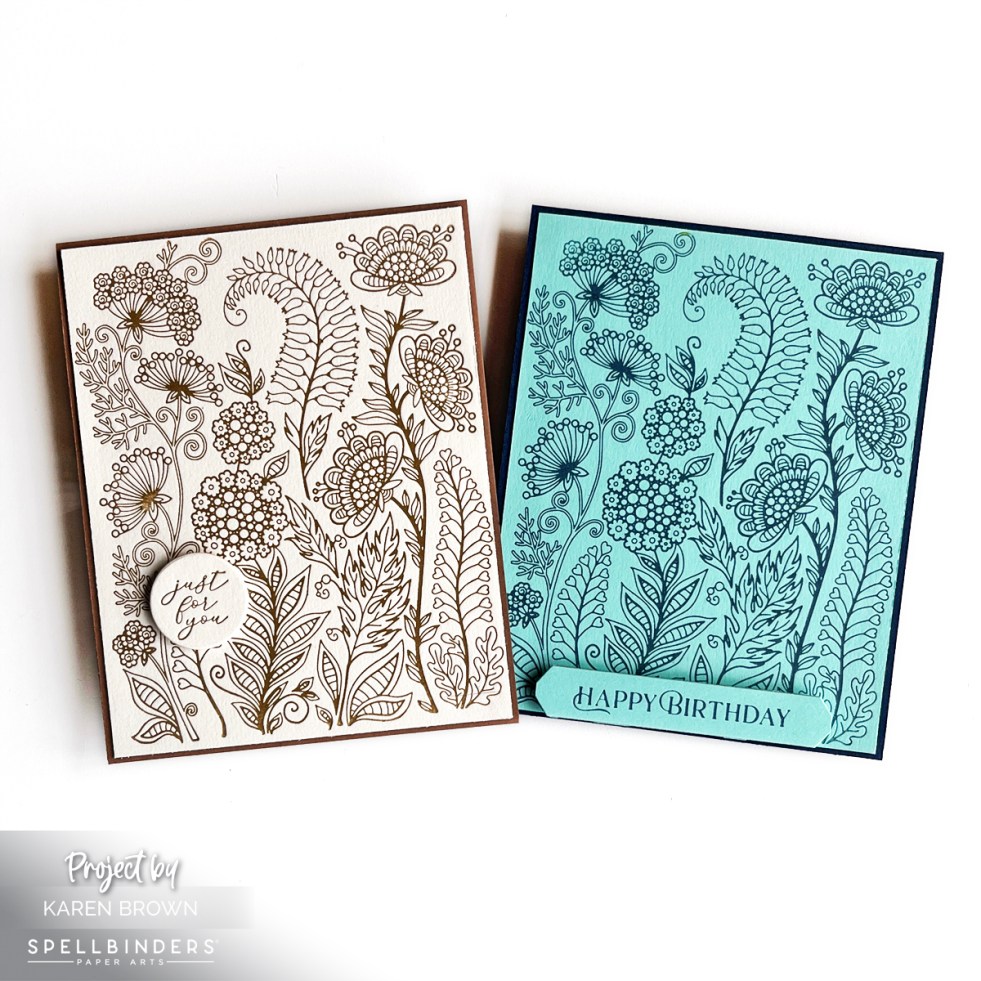
Spellbinders Cards | Better Press Spring Collection
I adore the timeless elegance of BetterPress letter press cards. Today I wanted to share two cards using the press plate - A Friend Like You. One card is pure letter press....no coloring or embellishment. The second card is loosely colored with Zig Watercolor Brush Markers. I love them both! If you'd like to read my post on Tips,… Continue reading Spellbinders Cards | Better Press Spring Collection
Spellbinders | Simon Hurley’s Big Hugs 5 Ways
Can you have too many dog stamps? I think not! I am loving Spellbinders + Simon Hurley's new Big Hugs stamp and die bundle. These cute critters - Pug dog, Panda bear and Zebra - are sure to be favorites in my family. I love this set so much I went a little crazy making cards! Pug Dog Masculine… Continue reading Spellbinders | Simon Hurley’s Big Hugs 5 Ways
9 Tips, Tricks and Insights for Spellbinders BetterPress Machine
Practical advice for getting the best results from your press plates. Hello! I am so excited about my new BetterPress Letter Press machine! I had a very crafty Christmas and received a BetterPress Letter Press System, Wax Seal Starter Kit and a new Platinum 6 die cutting machine. Today I want to share two cards I made with… Continue reading 9 Tips, Tricks and Insights for Spellbinders BetterPress Machine
18 Tips and Tricks for Making Wax Seals | Spellbinders
Tips, Tricks and Tutorial on how to make wax seals with Spellbinders Wax Seal Kit.
Hero Arts | My Monthly Hero January 2024 Release + Blog Hop
Have you seen the wonderful new Hero Arts My Monthly Hero Kit for January 2024? The theme is Love, Flowers and Friendship...so versatile! The Classic Kit is a $70 Value for $36.99The Premium Kit is a $106 Value for $49.99 Premium Subscription Kit I can't seem to get enough of the fun florals in this month's… Continue reading Hero Arts | My Monthly Hero January 2024 Release + Blog Hop
My Monthly Hero | Countdown to Creativity
Hello and welcome to the January My Monthly Countdown as we approach Hero Arts first kit release for 2024! I must say, this kit is a beauty full wonderful products that I know you will love. The kit goes live tomorrow (Monday, January 8th) so stay tuned. Meanwhile, sit back and enjoy some inspiration, sneak peeks and giveaways.… Continue reading My Monthly Hero | Countdown to Creativity
Spellbinders Card | Stitching Die of the Month | January 2024
A stitching tutorial for Spellbinders "Bee Stitched" January 2024 Stitching Die of the Month.
Spellbinders | Best Cards of 2023
I enjoy looking back through my projects, and as we end the year, I wanted to write a post about my most popular Spellbinders cards. I loved so many of my creations, but these are the crowd favorites for 2023. Fan Favorite 2023 Card By far, my most popular card on Instagram, Pinterest and my… Continue reading Spellbinders | Best Cards of 2023
The Best of 2023 | Altenew
Hello friends! I am so excited to be participating again in Altenew’s A Year In Review Instagram Hop. I really enjoyed looking back through my projects and selecting some favorite creations. Rainbow Color Cards Interestingly, all of these cards were in blog posts I created in March! The first three were part of Altenew's March Release, which I… Continue reading The Best of 2023 | Altenew
