Hello and welcome to the April 2024 My Monthly Hero Countdown! I must say, this kit is full of wonderful products that I know you will love. The kit goes live on Monday, April 1st, so stay tuned. Meanwhile, sit back and enjoy some inspiration, sneak peeks and giveaways.
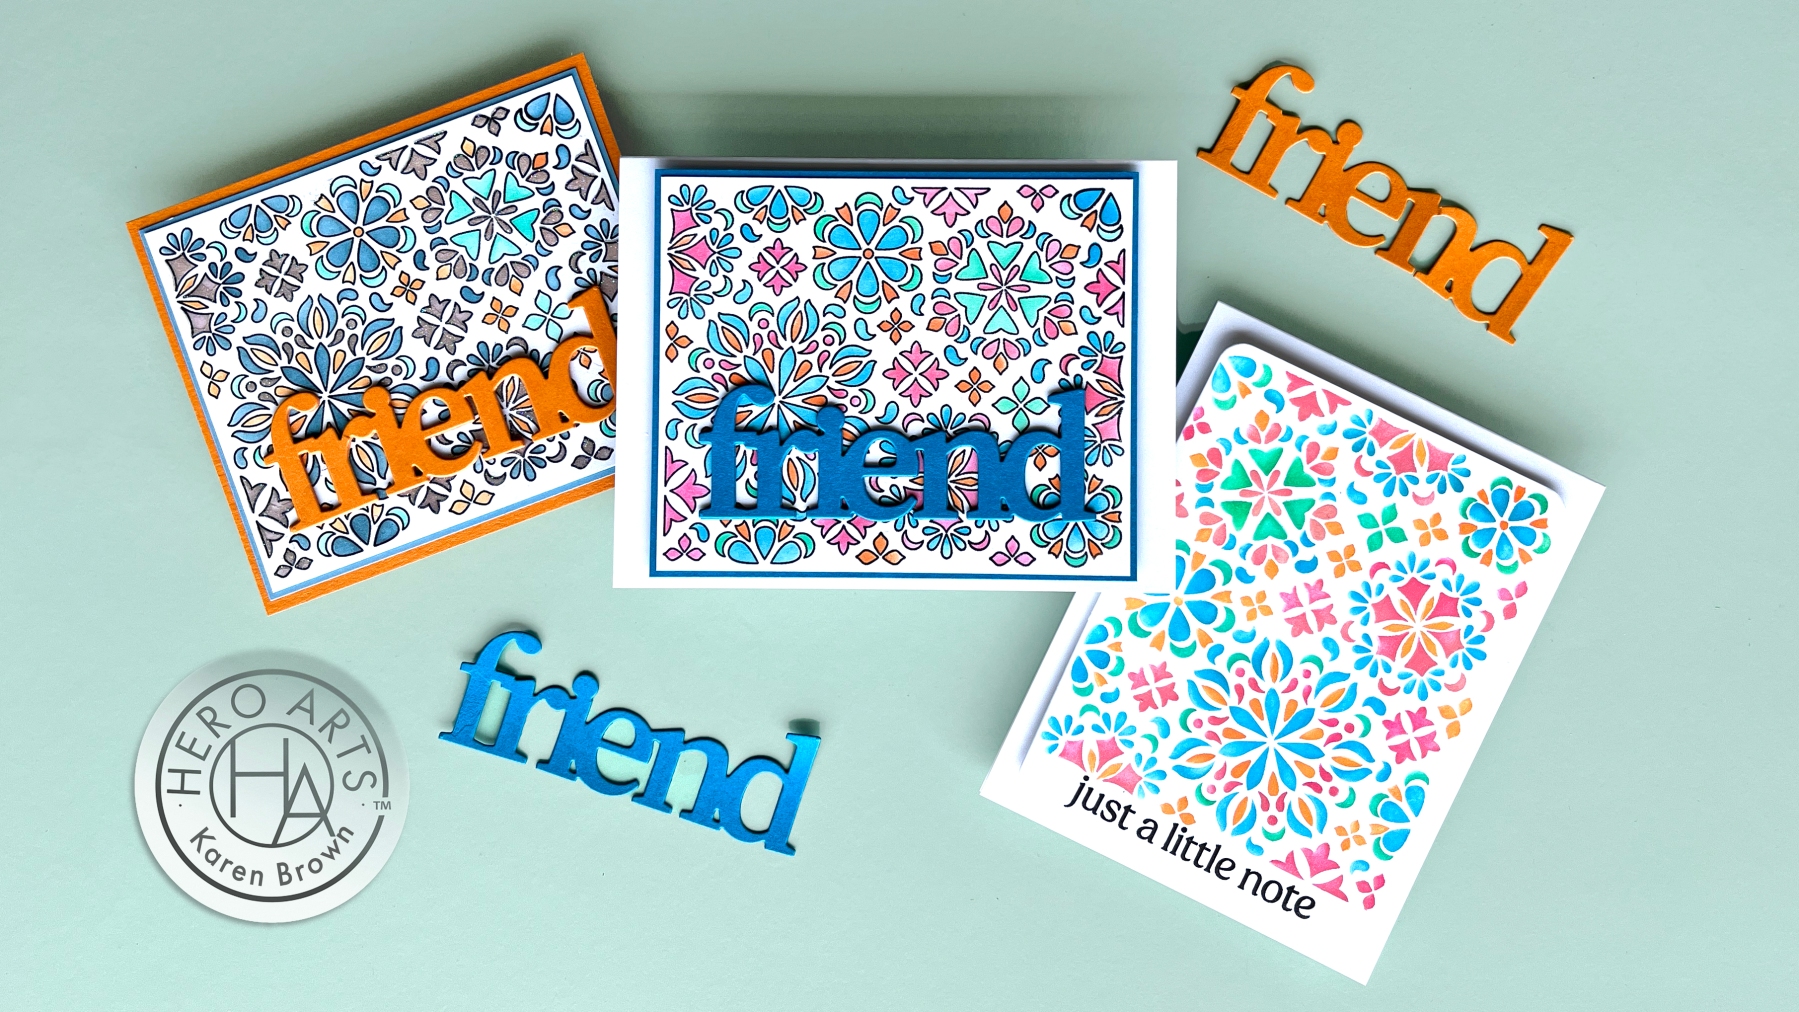
For today’s “peek”, I created a pink, white and aqua folk art scene card that I can’t wait to send!
WIN A KIT BEFORE YOU CAN BUY IT: Just leave a comment on this (and every) Countdown to Creativity post. Hero Arts will randomly draw one lucky winner from comments left across all countdown posts on the Hero Arts blog. The winner will be announced first thing Monday morning, April 1st, before the kit launches at 10am Pacific. The more you comment, the more chances you have to win!
Stop by the other designers blogs for more chances to win:
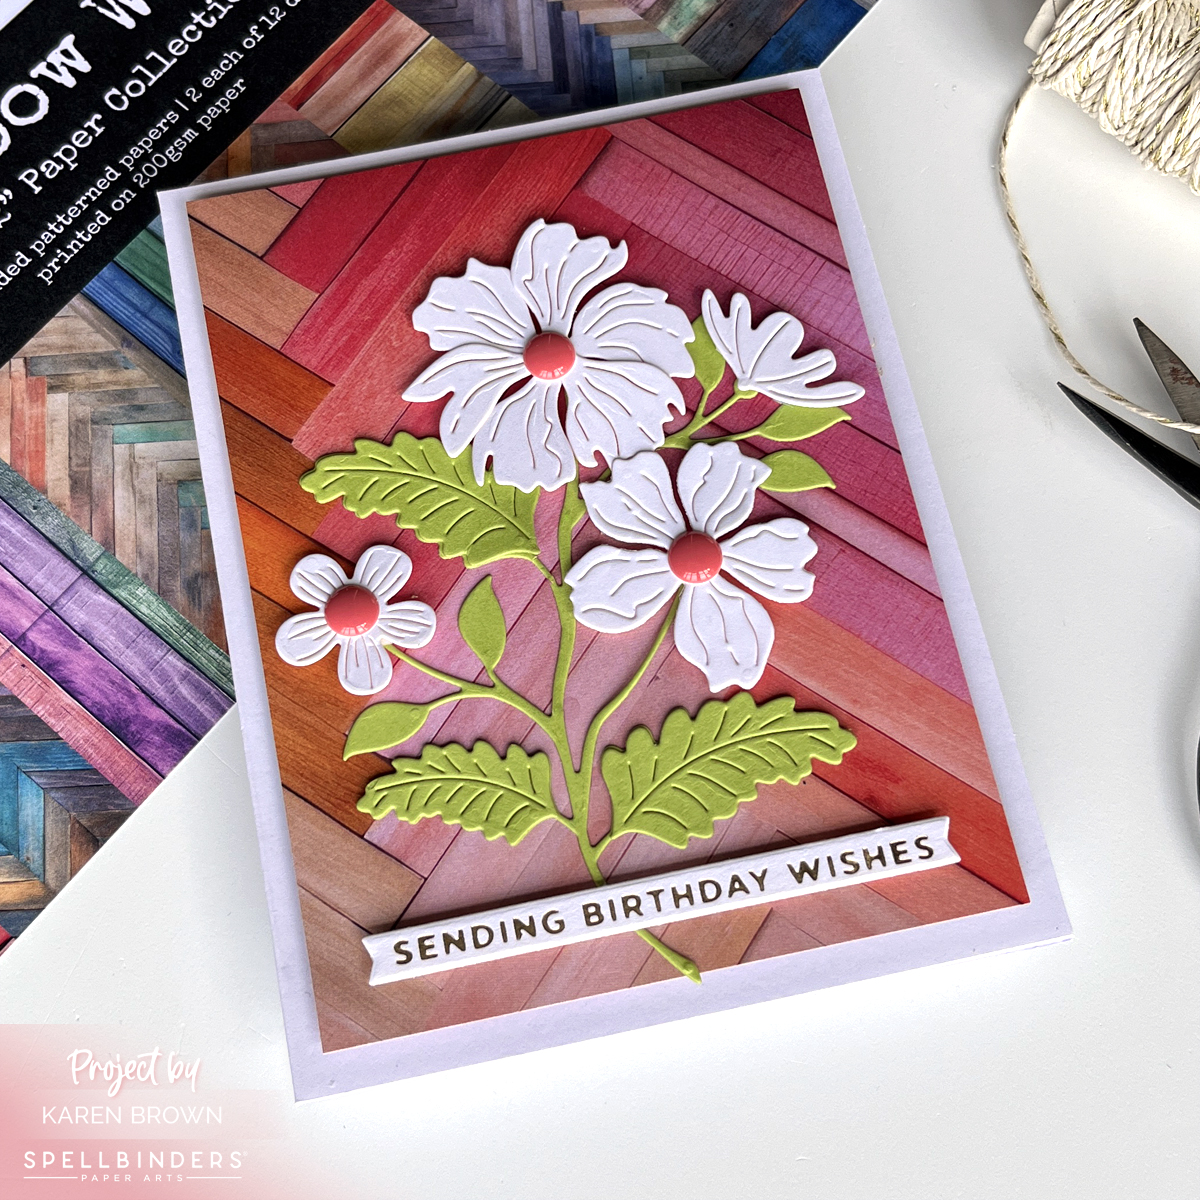
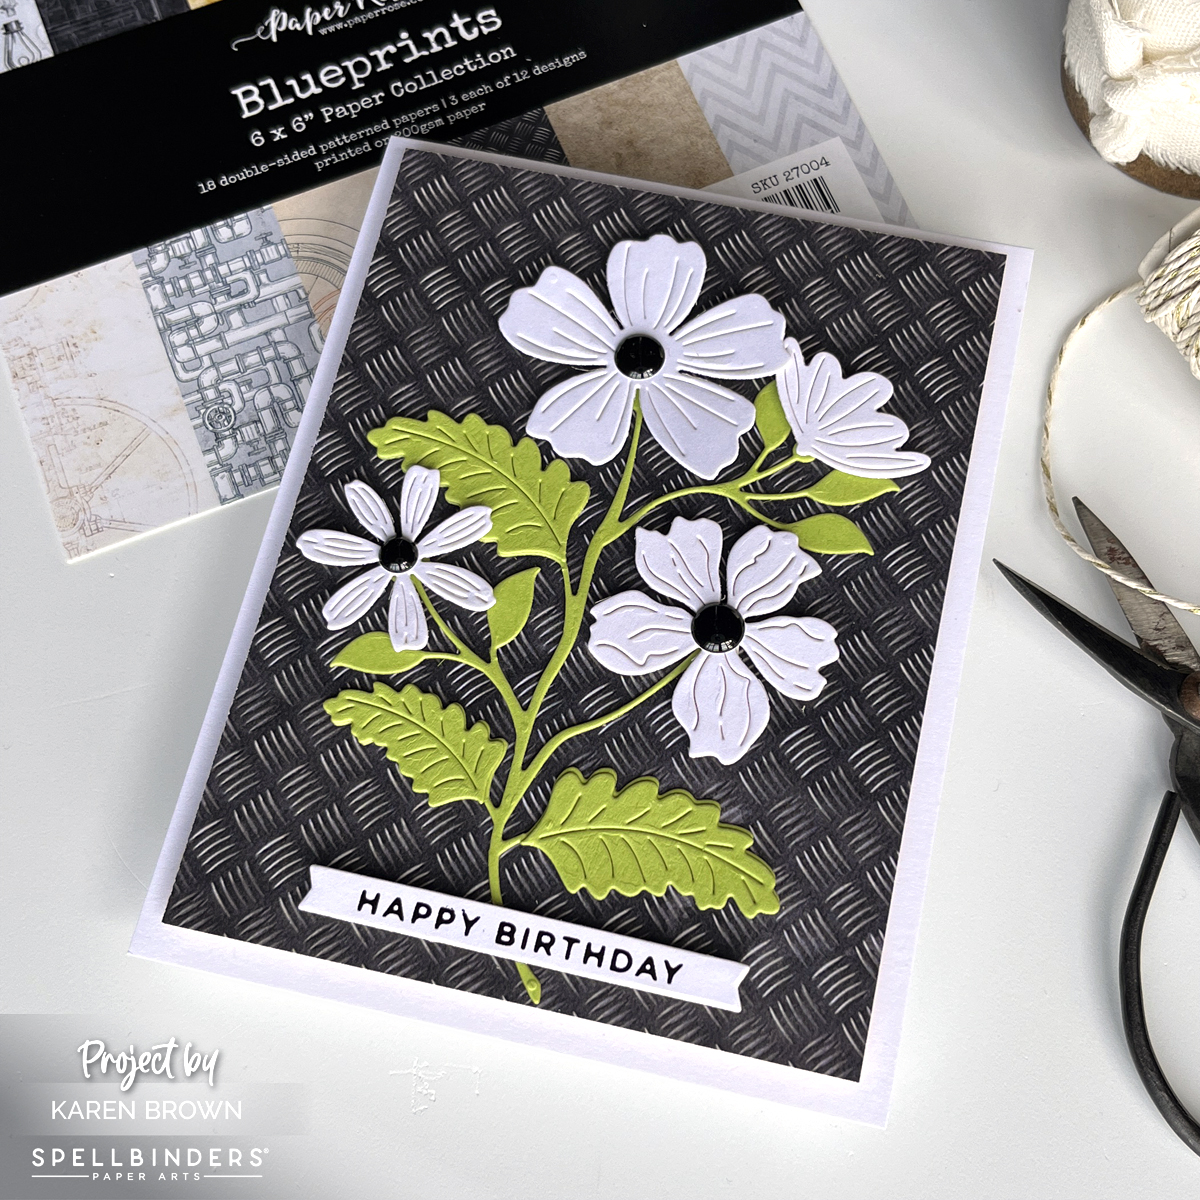
Hello, fellow crafting enthusiasts! Let’s explore one of the most versatile and exciting elements of the craft: printed paper. Whether you’re a seasoned cardmaker or just starting out on your creative journey, printed paper can add depth, texture, and personality to your handmade cards.
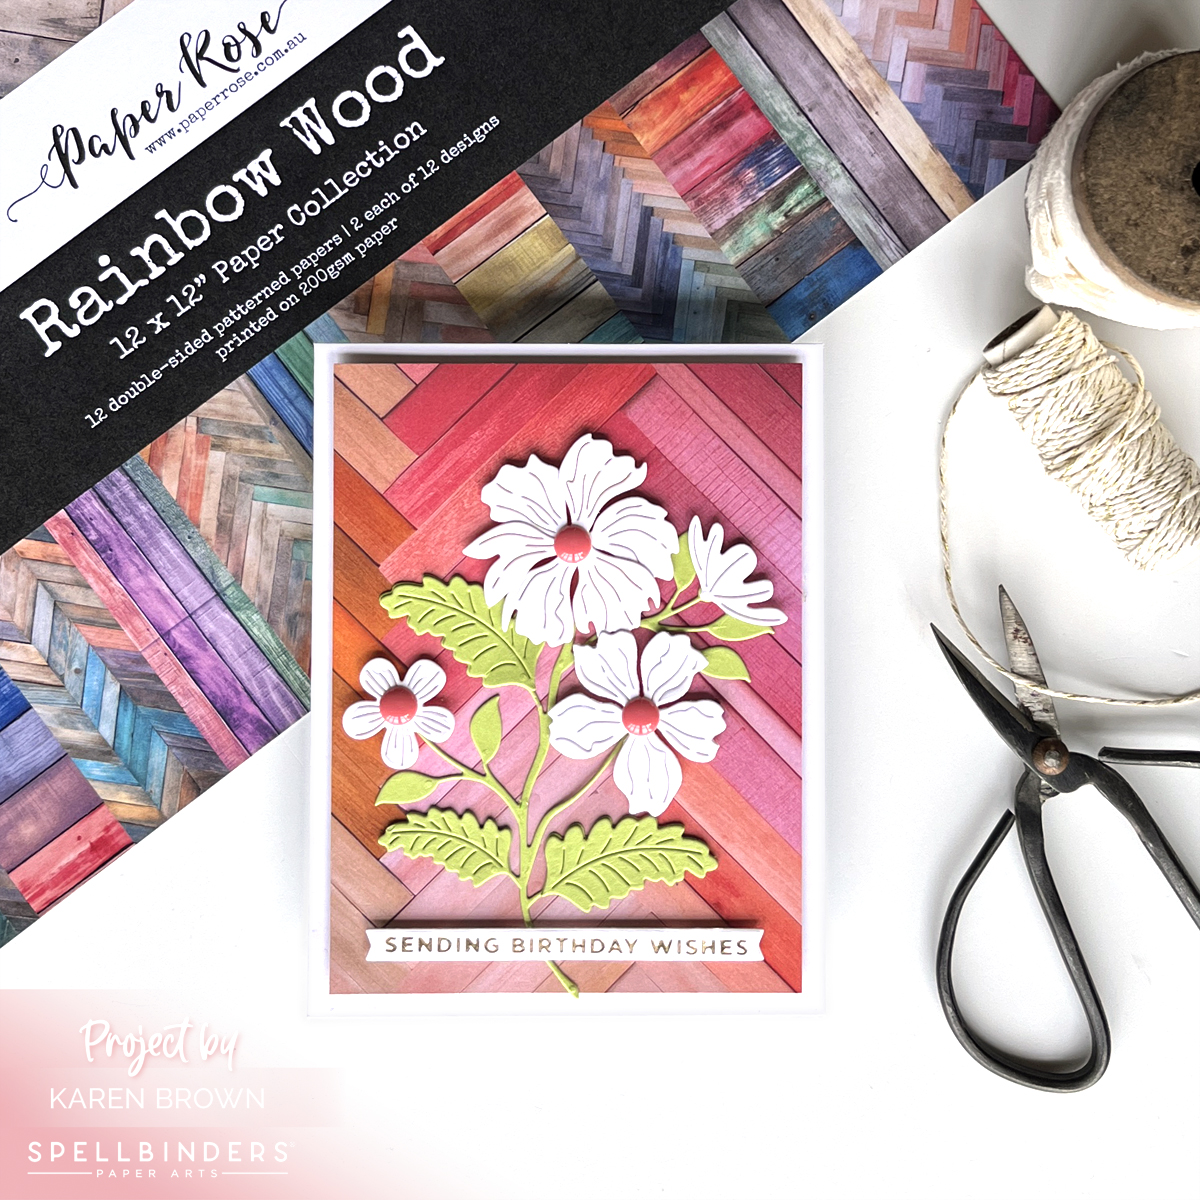
Today, I am using two beautiful Paper Collections from Paper Rose that Spellbinders recently started offering on their website. The Rainbow Wood pack is colorful and vibrant and the Blueprintscollection is funky, interesting and adds an edgy vibe. I used similar die cut focal points for each card but changed the background to illustrate how easy it is to alter the tone of your card.
Unleash Your Creativity: The Art of Using Printed Paper in Cardmaking
Printed paper, also known as patterned paper or designer paper, comes in a vast array of colors, patterns, and themes. From elegant florals to whimsical polka dots, there’s a printed paper to suit every style and occasion. But why incorporate printed paper into your cardmaking projects?
Instant Visual Appeal: Printed paper instantly adds visual interest to your cards, making them stand out and catch the eye.
Time-Saving: Using printed paper as a background or focal point can save you time compared to stamping or hand-coloring intricate designs.
Endless Variety: With so many designs to choose from, you can easily find printed paper to match any theme or mood, whether it’s a birthday, wedding, holiday, or just because.
Versatility: Printed paper can be used in a variety of ways, from backgrounds and borders to die-cut shapes and embellishments, giving you endless creative possibilities.
Now that we’ve covered why printed paper is a must-have in your cardmaking stash, let’s explore some fun and creative ways to incorporate it into your projects.
How to Use Pattern Paper
1. Background Bliss
One of the simplest yet most effective ways to use printed paper in cardmaking is as a background element. Choose a pattern that complements your card design, trim it to size, and adhere it to your card base for an instant burst of color and pattern. Whether you opt for bold stripes, delicate florals, or playful geometrics, a patterned background adds depth and dimension to your cards without overwhelming the overall design.
2. Focal Point Fun
Additionally, you can die-cut or fussy-cut designs from your favorite patterned paper and use them as the centerpiece of your card. Whether it’s a stunning floral cluster, a charming critter, or a bold sentiment, a printed paper focal point adds visual interest and personality to your handmade creations.
3. Layering Love
Layering printed paper is a great way to add depth and dimension to your cards. Mix and match coordinating patterns and colors to create eye-catching backgrounds, borders, or mats for your focal elements. Experiment with different combinations until you find the perfect balance of prints and solids to make your designs pop.
4. Embellishment Extravaganza
Printed paper isn’t just for backgrounds and layers—it also makes fabulous embellishments! Use punches, dies, or scissors to cut out shapes, borders, or accents from your favorite patterned paper and use them to embellish your cards. From flowers and leaves to banners and borders, printed paper embellishments add charm and whimsy to your handmade creations.
5. Theme Time
Take your cardmaking to the next level by choosing printed paper that fits a specific theme or occasion. Whether it’s a holiday, a season, or a special event, themed patterned paper sets the tone for your cards and ties your design together beautifully. From spooky Halloween motifs to festive Christmas patterns, themed printed paper adds instant flair and personality to your handmade creations.
In conclusion, printed paper is a cardmaker’s best friend, offering endless possibilities for creativity and expression. Whether you’re looking to add color, pattern, or texture to your cards, printed paper is sure to inspire and delight. So next time you sit down to create, don’t forget to reach for your favorite patterned paper and let your creativity soar!
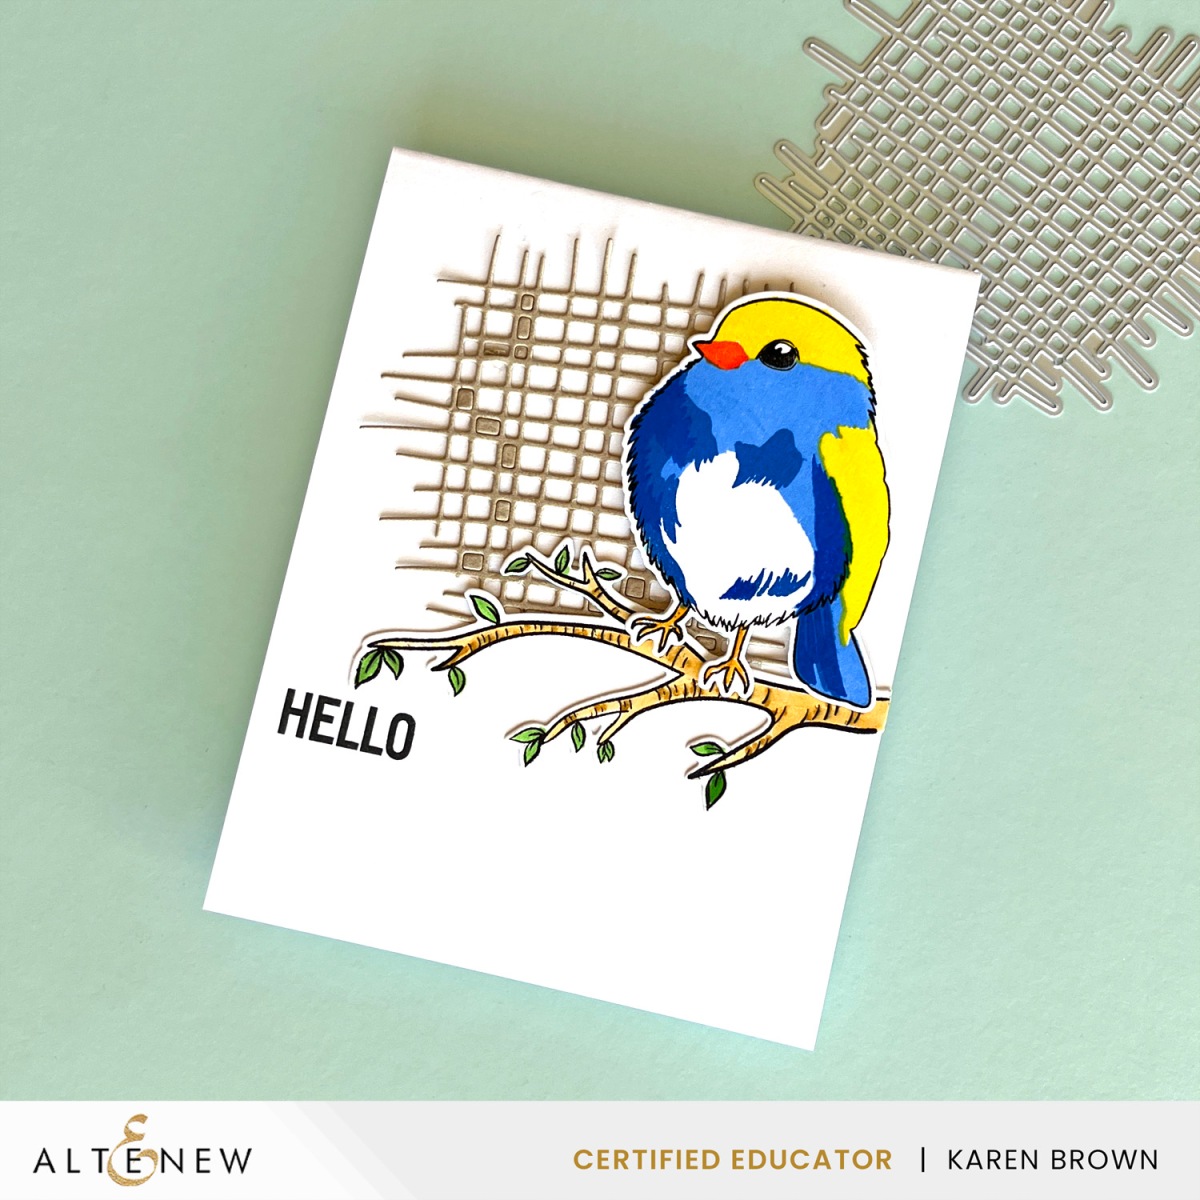
Altenew is hosting an Instagram Hop with loads of prizes and this is the card I made for the Hop. Click HERE if you’d like to join us! The hop ends April 1st.
Altenew’s StampWheel is just perfect for this project because you can easily stamp your outline and then do your layer stamping. The sticky mat holds everything perfectly in place. I put my layered stamps all around the top so that once I had everything positioned, I could set up an assembly line and rotate for multiple cards.
So grab your favorite cardstock, ink pads, and embellishments, and let’s get crafting! Join me as we explore the endless creative possibilities of Altenew’s Bird of the Woods stamp and die kit. Happy crafting!
I used a StampWheel for both my stamping and stenciling.
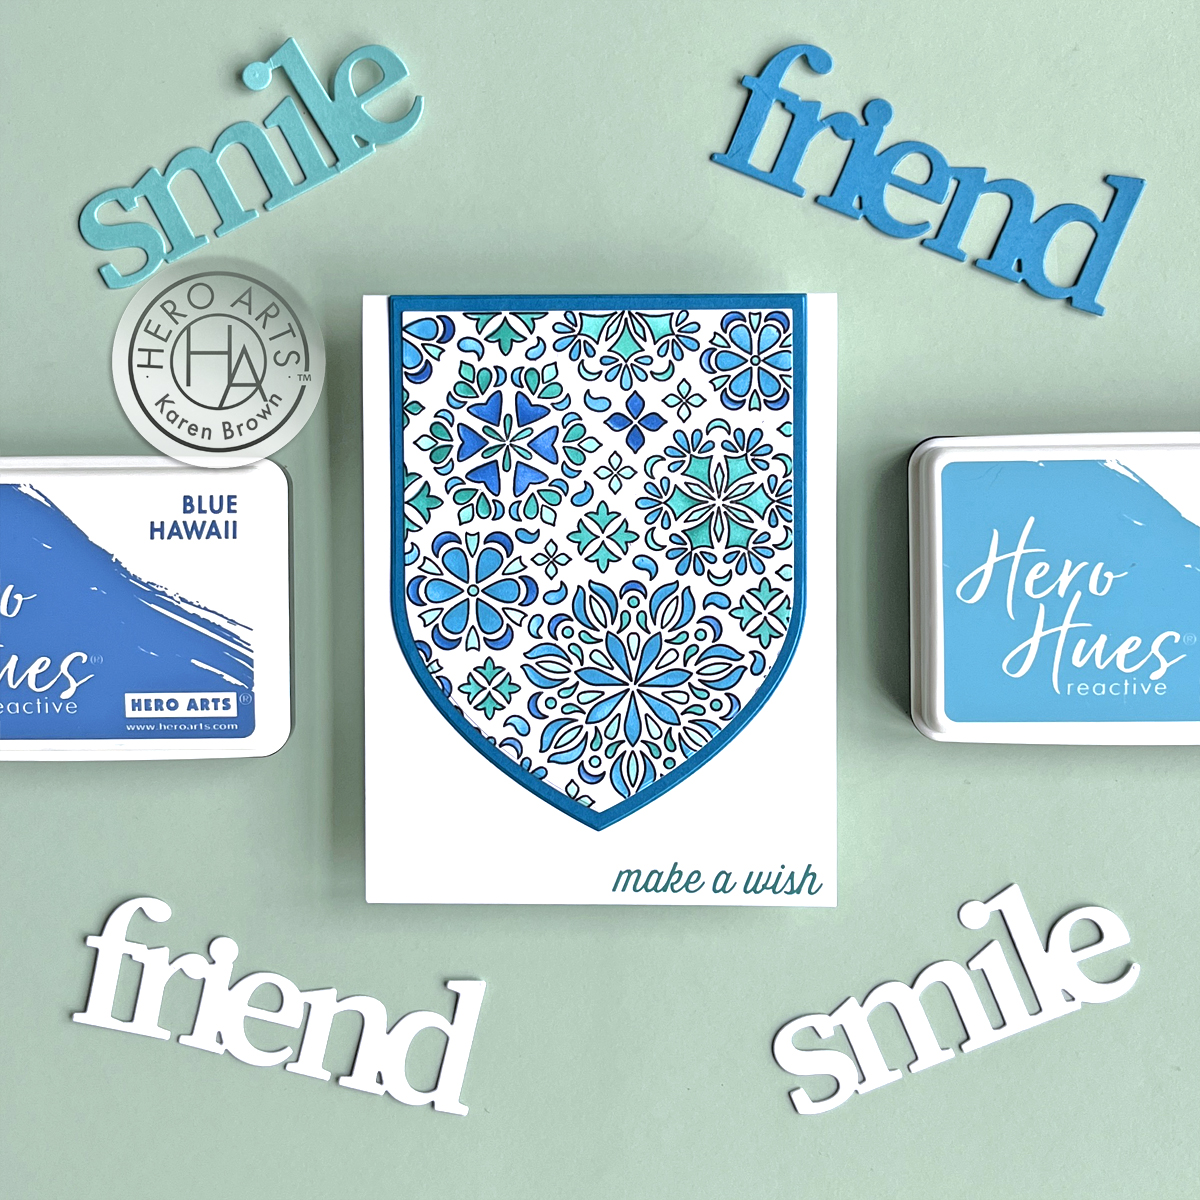
Stenciling with Rainbow Colors
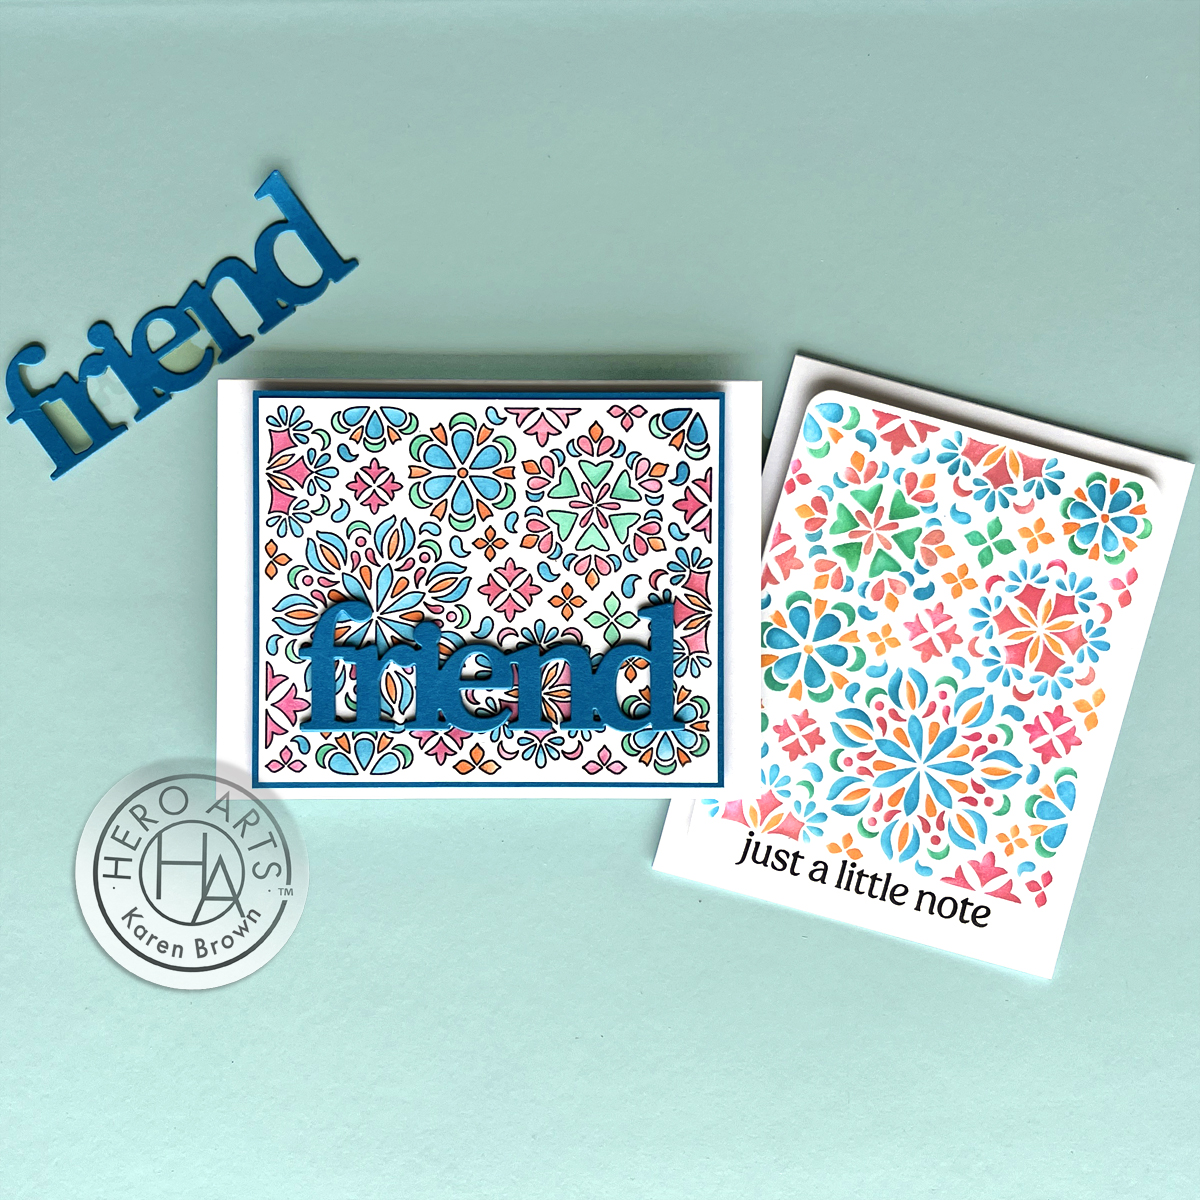
Next, I decided to add rainbow colors to my mandala. I did this two ways….first using the outline stamp and the second using only the stencil. I love both cards but I think the “stencil only” card is a bit more casual.
For the “stencil only” card I also trimmed my Mandala with a Rounded Rectangle Infinity Die and used a sentiment included with the stamp set.
Stenciling with Glitter Paste
For my 4th card, I stenciled a layer of Hero Glitter Paste on my mandala and I love the result.
I recently purchased a GlassBoard Studio craft mat that was the worksurface in my video. I am very pleased with it and I have a 20% coupon code – KENNY20 – for anyone interested in upgrading their craft mat.
Thanks for stopping by….it was so nice to see you!
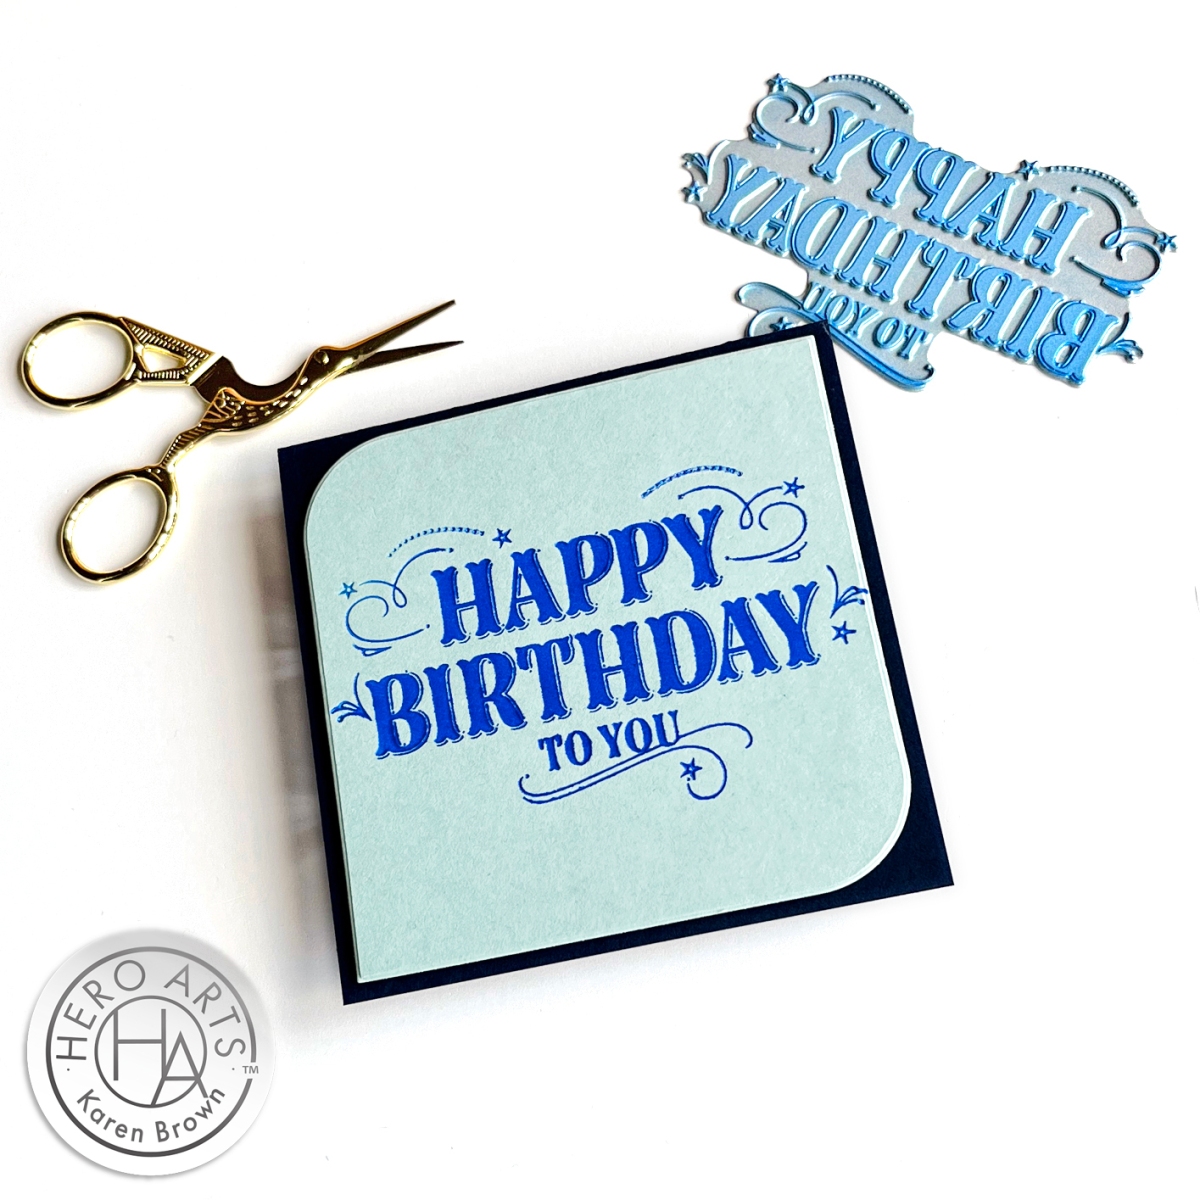
I make a LOT of cards, but I never seem to have enough masculine cards, so…..here is a wonderful one suitable for anyone! I love the classic look of letter press and was pleased to see Hero Arts new Letter Press/Foil Plates. For this card I used their new Happy Birthday plate.
I did not use special paper or inks but I still think I got a good result on my card. Next, I want to try the birthday plates with my foiling machine.
Hero Arts has NEVER offered a discount on their My Monthly Hero Subscriptions, but for a limited time, the Creative Team is able to pass on a Coupon Code to our dedicated followers.
After your subscription is in the cart, click “Checkout” without entering your discount code.
On the NEXT page, enter the discount code: KarenBrownSubscribe2024. So to recap, enter the discount code on the second check out page.
Note: this discount code is not valid with any other offers.
Hero Art My Monthly Hero Kits are just wonderful and now is the perfect time to give them a try. Subscribe for one month…or longer…you still get 15% off.
I used Mulberry and Cosmic Sky inks from The Regal Tones Ink set, Apricot from the Desert set and French Blue, Wild Berry and Saffron from Nature Tones. I didn’t have a green so I used Mowed Lawn Distress Ink and it worked just fine.
The Mirrored Arch Nested Sprigs has one main plate plus three frames that you can use to mix and match. I used all four plates for my card. I inked the plates with all my rainbow colors and ran through my BetterPress machine just once. This ensured there was no shifting. I used Porcelain Better Press paper.
I have a Blog Post titled 9 Tips, Tricks and Insights for Spellbinders BetterPress System that you can read HERE.
Combining BetterPress with Embossing Folders
Spellbinders just introduced an elegant new line called CopperPlate. I love the simplicity of this line and I combined the Hello with a beautiful Emboss and Cut Folder that has two patterns plus an edge cutting die.
I embossed two panels with the Luxe Backdrop and Border folder as I wanted to layer them so I had a second edge peeking out of the bottom. I then cut both panels with the coordinating die. I added some craft foam for added dimension.
Masculine cards can be tricky, but when I saw Hero Arts Ramen Stamp and Die Bundle, I knew it would be the perfect set for my son-in-law’s birthday. He is a real foodie and I love the fun sentiment included!
How to Make an Ink Smoosh Background
I started by making my “Ink Smoosh” background. I dabbed Fawn, Papaya, Fog, Paradise and Pool Party inks in separate pools on my craft mat and spritzed with water. I then dipped a piece of watercolor paper in the puddle and let it dry. I did this four times.
Next, I stamped my images and then colored in with Artist Alcohol Markers. Die cutting was next. I also used my Rounded Rectangles Infinity dies to trim my background, mat and card base. The final step was to assemble my card.
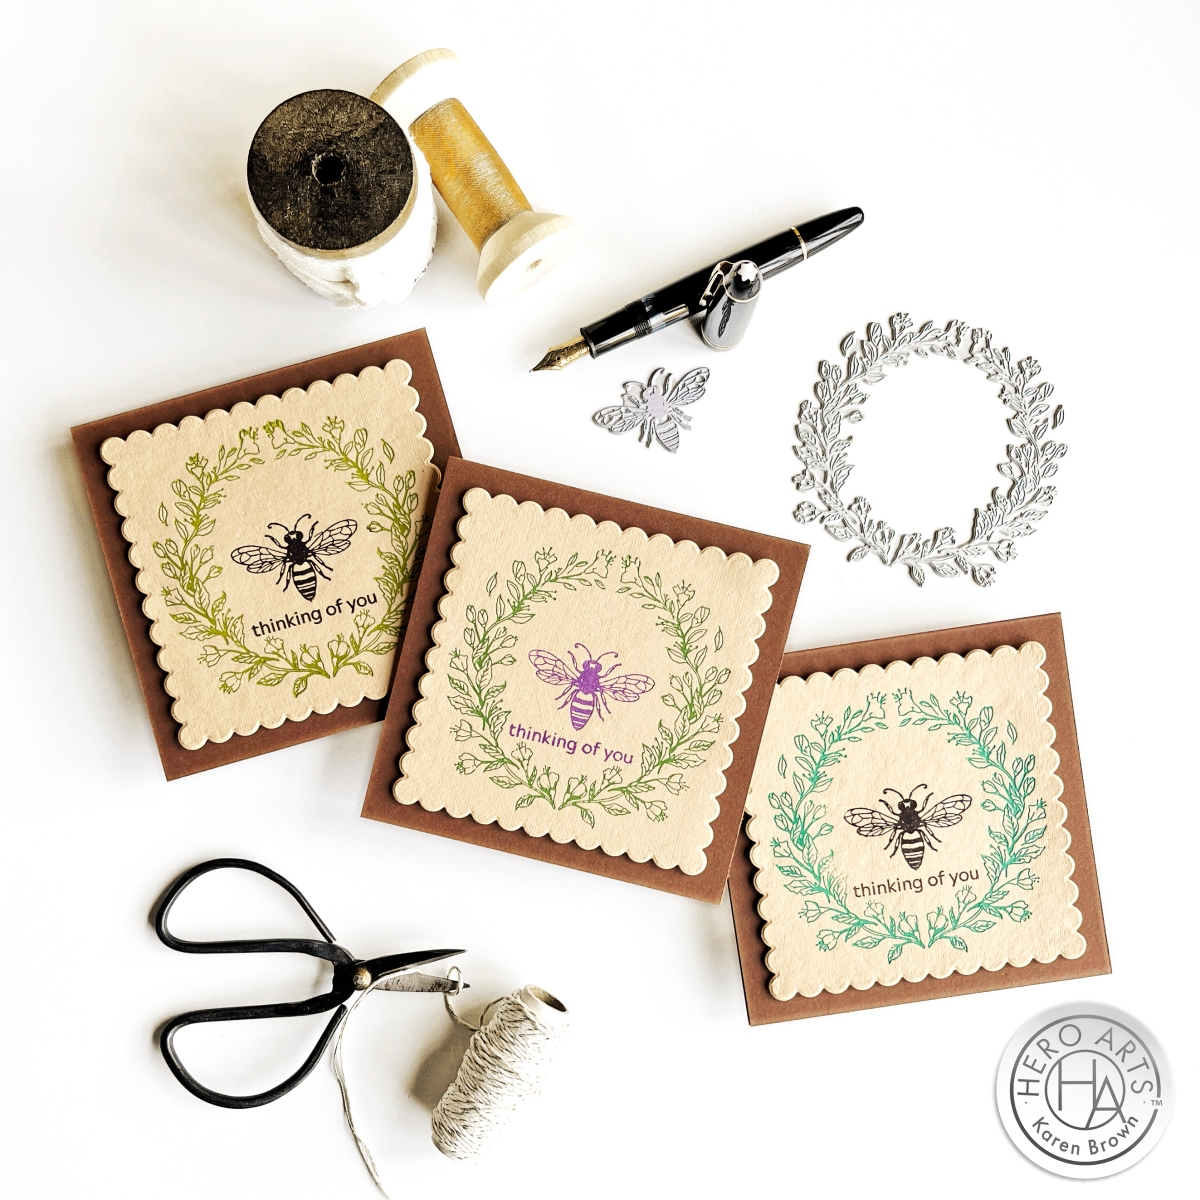
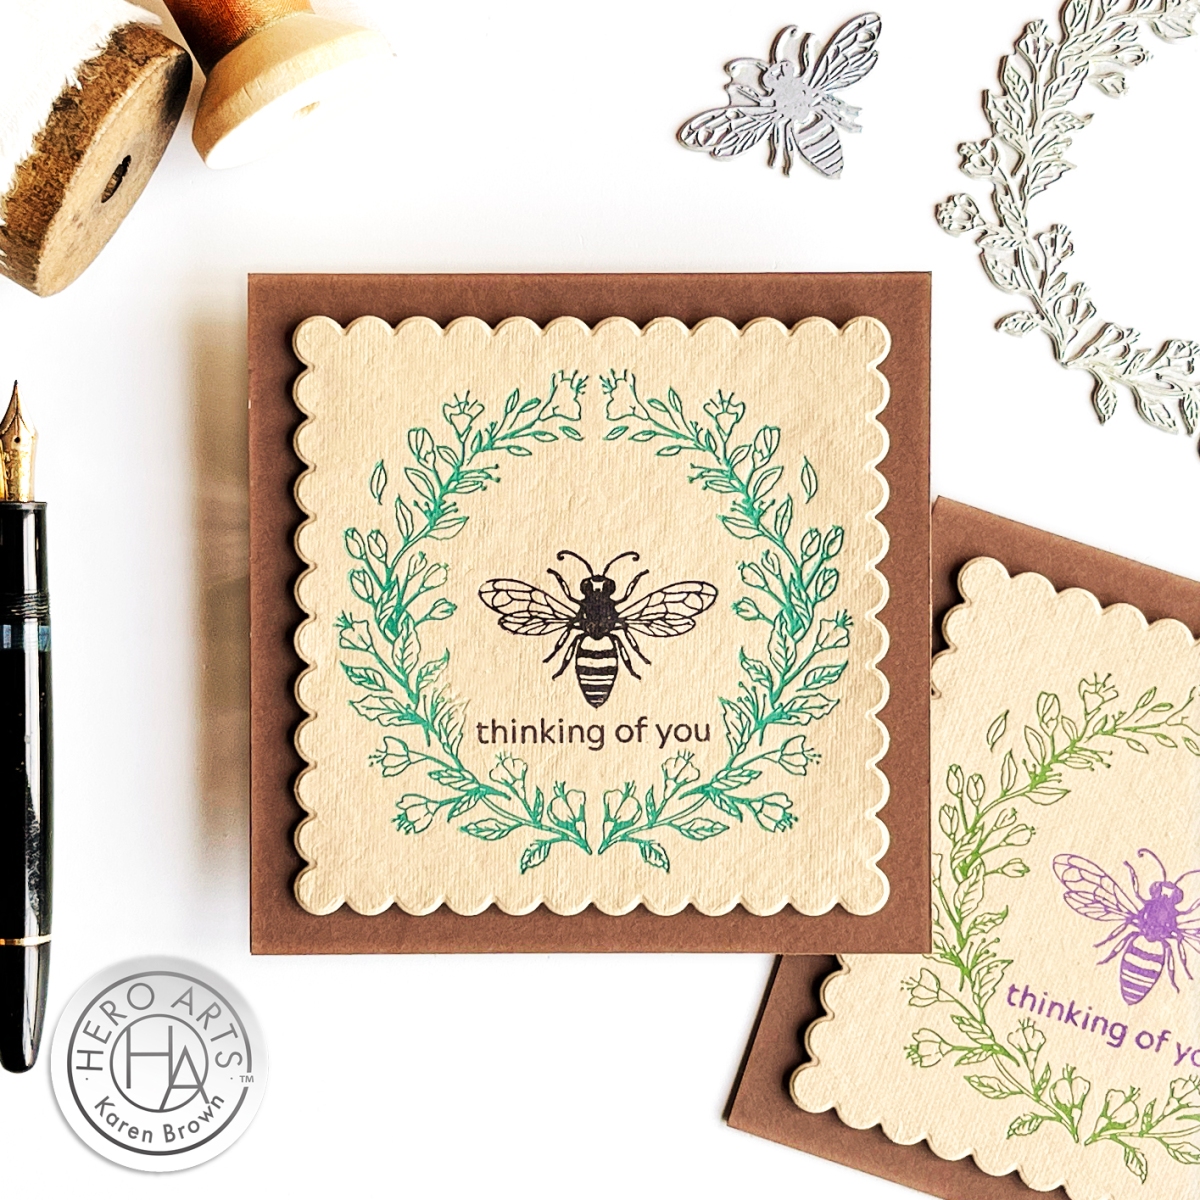
Spellbinders March 2024 Stitching Die Club Kit is another winner! I thought February would be hard to beat, but “Stitched Read and Sip” is a real favorite. I love to read, drink hot tea and stitch so add in some florals and this kit is a keeper. I’ll also be incorporating the versatile elements into future products as well.
Stitched Read and Sip Handmade Card
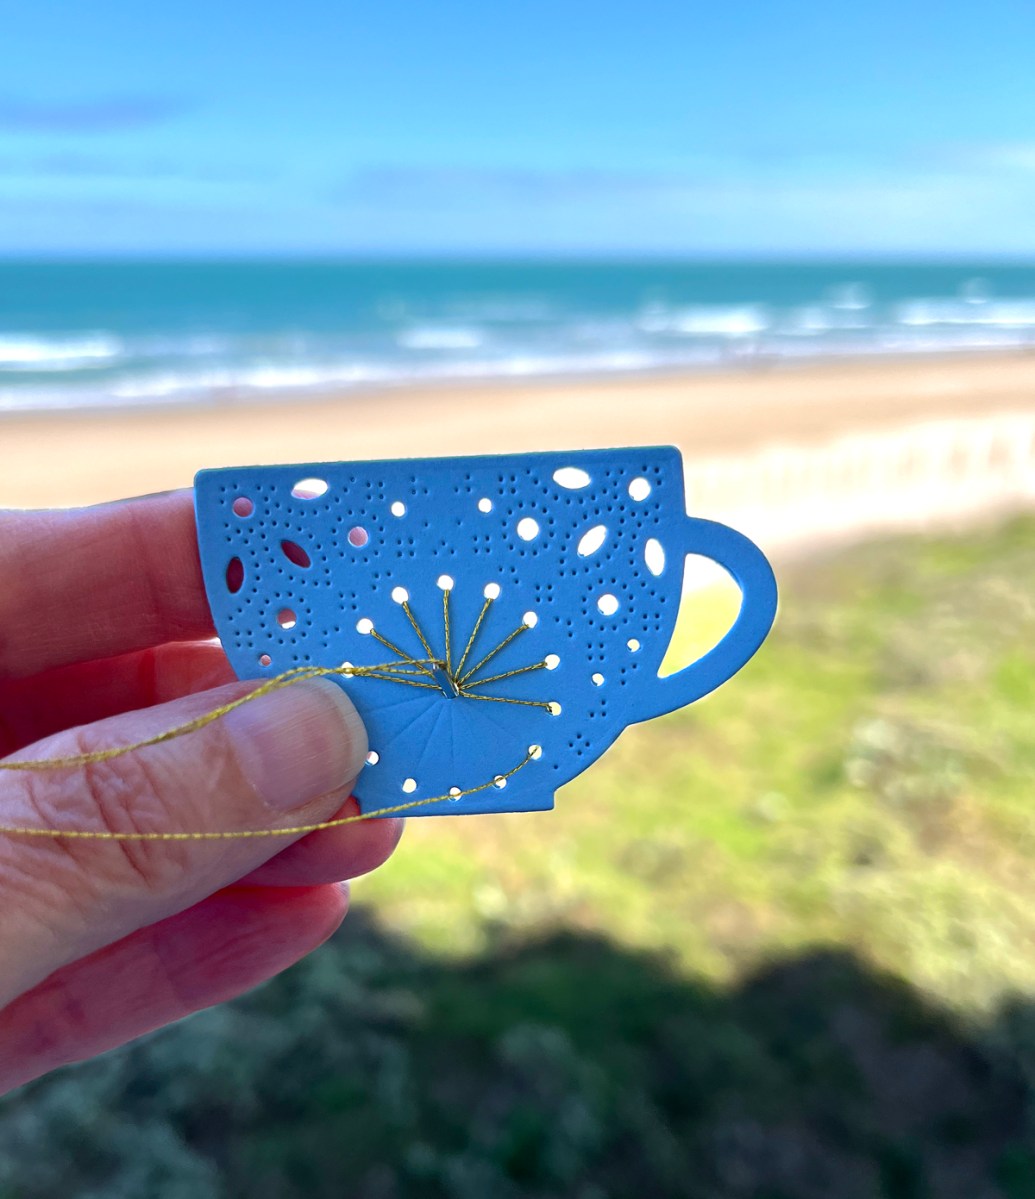
I really enjoyed making this card! I was going to the beach and thought I’d like to stitch this card on our balcony while I listened to the waves. Before we left, I die cut my elements. When stitching, I like sturdy substantial bases, so I die cut the teacup and ornate book two times and then glued them together.
My Stitching Process:
The kit has 17 dies and I started by cutting all my pieces. I die cut the stitching elements twice and then glued them together for a sturdy substantial panel. This die cutting didn’t take long, but I think the extra effort was worth it. I recently purchased a Platinum 6 die cutting machine, and I have to say, I pull it out instead of my Gemini Junior. I wish I had bought one earlier.
Spellbinders has a nice selection of stitching accessories in their shop that you can find HERE. I used DMC Gold Thread for this project.
When I started stitching, I took two strands of floss, separated them one at a time, brought them together and then stroked and lengthened them until they seemed tame and ready to use.
When I move from one area to the next, I run the floss through the just finished stitched area to keep the thread secure. This gives a nice look on the finished project.
Don’t stitch with threads that are too long or they are likely to knot.
When I was done, I added a bit of Bearly Glue to the ends so that they would stay in place.
Club members can cancel, upgrade or change clubs from the 1st-5th of each month. Popular Clubs frequently sell out during this period so club members get first dibs on everything.
NEW for 2024: Club Members get EARLY access to new releases on the 6th!
On the 6th, Clubs become available to non-members.
On the 27th, Club registration closes for the current month.
If a club did not sell out, you can buy under “Shop Past Clubs”. Past kits are available on the 10th of the FOLLOWING month.