cardmaking · Die cutting · Video

Altenew | Sweet Blossoms Floral Die Cut Card With Rainbow Stripe Background + Video

How to create rainbow striped card backgrounds with colored cardstock strips  + Altenew's Sweet Blossoms floral die set.

Die Cutting with Outline Dies

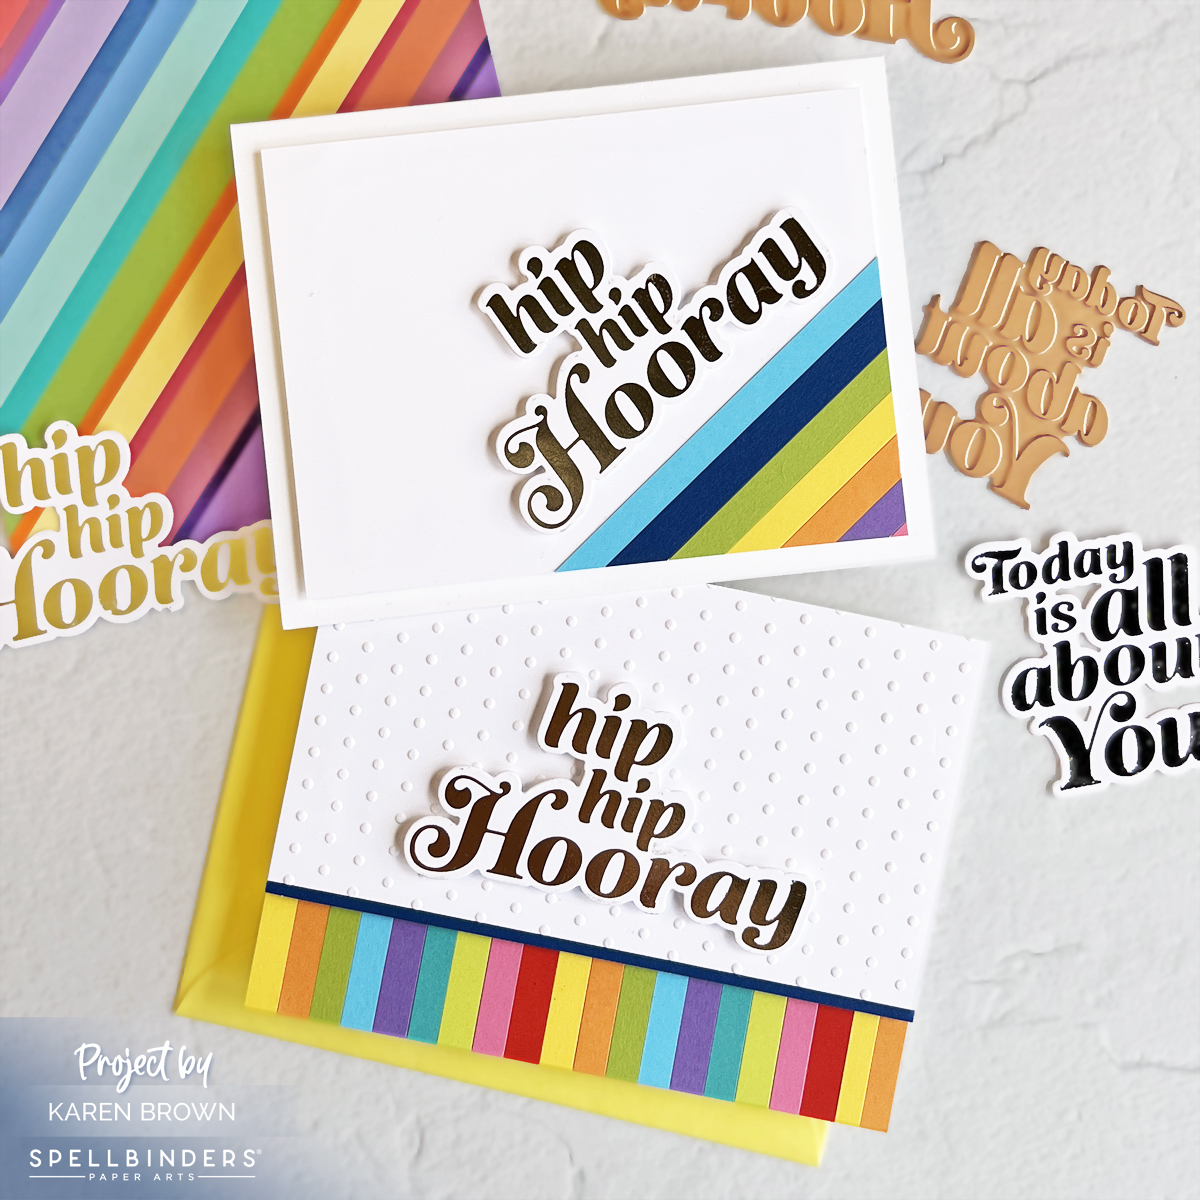
Die cut flower and leaf silhouettes over a rainbow striped background makes for a colorful high impact card. I love Altenew’s Sweet Blossom’s Layering Dies and wanted to play with them again (You can see my first card HERE). This time I wanted to use just the outline dies so you could see the beautiful background I created.

Altenew Sweet Blossoms Layering Die Set handmade card

I created a short video (below) to show how I made my background panel. I love rainbow striped backgrounds so I have two pouches (see final photo) where I keep my pre-cut colored cardstock strips. The pouch on the left has a variety of widths and all the strips in the right pouch are cut to 1/4″ widths. It is easy to take a paper trimmer and cut lots of strips and then it is so quick to make a colorful background. For this card, I used PaperTrey’s Perfect Match Colored Cardstock.

Click HERE to see a card where I used just 1/4″ strips.

For this card, I wanted variety so I used colored cardstock bands from both packets. I like to use Altenew’s Glue Tape Runner when making these types of backgrounds.

I wanted my flower bloom to sit on a stem, so I did a little surgery on the larger leaf die cut, and with scissors, I cut off the top three leaves. This left me with a stem and an additional little leaf cluster to use on my card.

I wanted substantial die cuts, so using the Sweet Blossoms and Vertical Greetings sets, I die cut each element three times and then glued them together.

Quick Video: How I Created This Rainbow Striped Background

Products and Supplies Used on this Card:
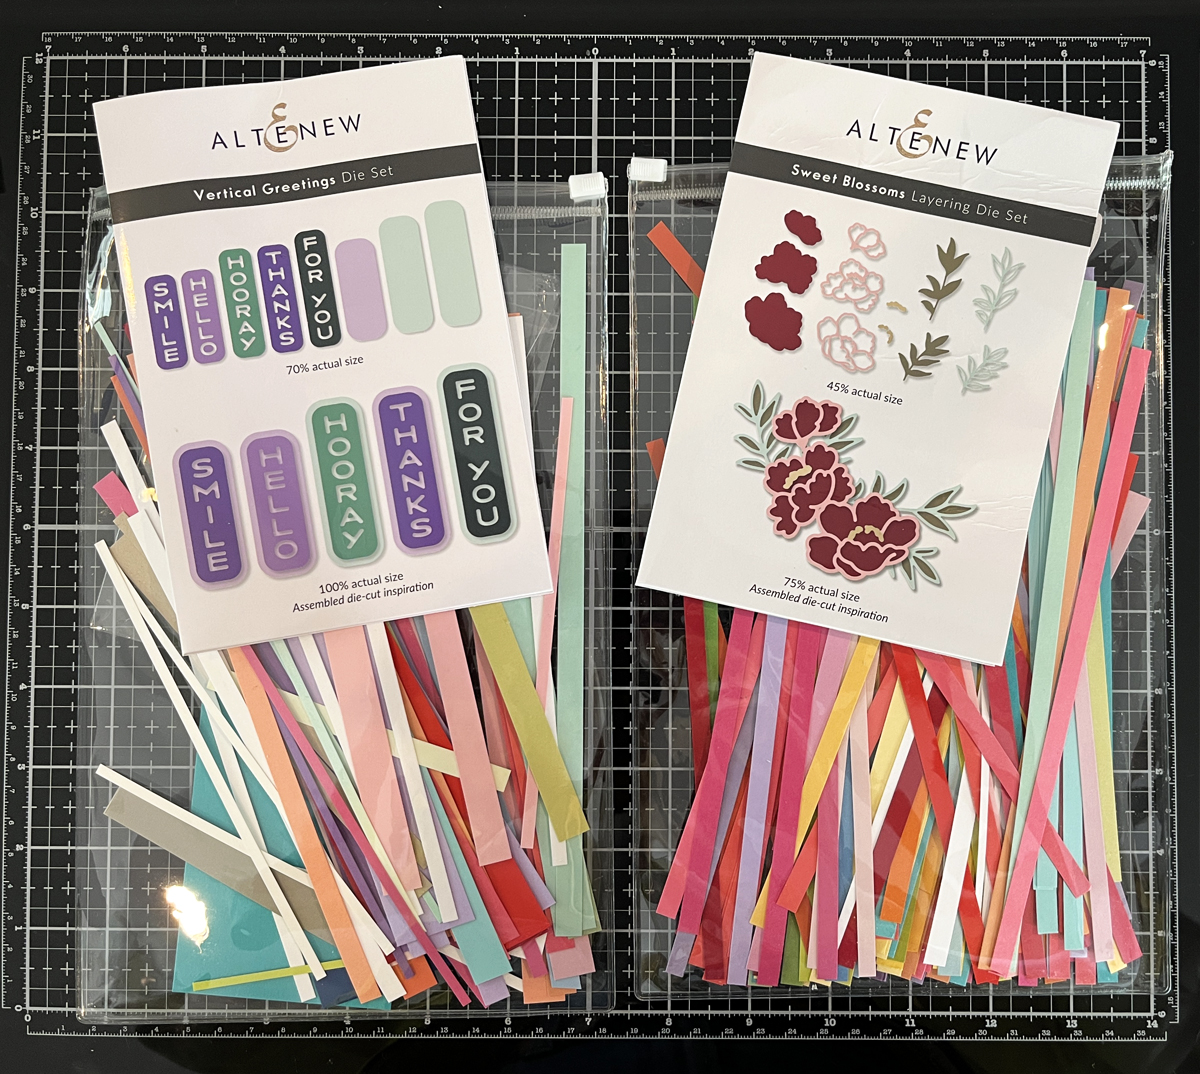
Altenew No Hassle Storage Pouches

Products Available on Amazon:

Tonic Studios paper trimmer

I am SO happy you stopped by today!

Karen

cardmaking · hot foiling · papercrafting

Spellbinders | Its My Party Too Collection: 3 Colorful Rainbow Card Ideas

Spellbinders Hip Hip Hooray clean and simple foil glimmer card.  GLP-388

Clean and Simple Foil Glimmer Card

Today I am sharing some sentiment focused hot foil cards and the first one was so quick and easy! I wanted to spotlight the fun sentiment so I added some 1/4″ paper strips to the bottom right corner and then angled my sentiment. Done!

Products Used:

Paper Trimmer available at Amazon:

Tonic Studios paper trimmer

Spellbinders Glimmering Hooray Hot Foil Plate and Die Set + handmade card | GLP-388

Hot Foil Stamping + Texture + Rainbow Colors

For my second card, I wanted some texture on my background panel and I thought the Tiny Dots Embossing Folder would be perfect. To add fun pops of color, I added a 1″ rainbow accent strip to the bottom of my card. The width of each strip is 1/4″.

Products Used:

Spellbinders Glimmering All About You Hot Foil Plate and Dies Set  GLP-389 + handmade card

Hot Foiling + White and Gold Floral Die Cuts

For card #3, I kept the rainbow color theme but I added lots of white and gold floral elements to emphasize the lovely gold foiled sentiment. I started with the star of the card, which is the gorgeous hot foiled sentiment. Next, I ink blended a rainbow panel that I die cut into an oval shape and then embossed with the Tiny Dots embosssing folder. At this point, I thought the card looked too plain so I die cut a bunch of my favorite flowers and added them around the perimeter of the center oval. I also embellished with some colorful enamel dots. I die cut the card base from an A2 top folding card. To keep the top fold, I positioned the top edge of the die just above the fold.

Spellbinders Glimmering All About You Hot Foil Plate and Dies Set  GLP-389 + Tiny Dots Embossing Folder SES-051.

cardmaking · Mixed Media

Spellbinders | House Mouse Designs Collection 3 Ways

Spellbinders House Mouse Designs | Daisy Mouse | Mixed Media handmade card.

Spellbinders just released 6 adorable House Mouse Designs Rubber Cling Stamp Kits + a bundle of the entire collection. The whimsical stamps are all so fun and today I am sharing three cards that I created.

Vintage Look Mixed Media Tutorial + Daisy Mouse (RSC-002)

Mixed Media cards have so much interest and I thought the technique would work perfectly with this Daisy Mouse (RSC-002) stamp set.

My Process:

  • I started by creating my background. I masked off a border and then used two shades of tan to ink blend my background. (Antique Linen and Frayed Burlap)
  • With the masking tape still on the cardstock, I then used the same tan inks to stencil and stamp bits and pieces on the background. Most of the stamping was “second generation” where I stamped first on a scrap and then onto my background so that the pattern would be subtle. Cathe Holden has some great stamps (Handle with Care: STP-093 and Friendly Society: STP-094) that I added here and there. I also used a bit of stamping with white pigment ink, but it is hard to see in the photograph.
  • Carefully remove your masking tape. I used Post It Tape, which is the best!
  • After my background was dry, I stamped The Daisy Mouse with Versafine Black Pigment Ink.
  • PRO TIP: For a crisp look, keep the stamp in your Misti stamping platform and restamp the image after you are done coloring. You won’t believe how much this one step will elevate your project!
  • I used Faber Castell Polychromo Colored Pencils to color the mouse and daisy. I used white, 2 shades of gray, 3 shades of yellow, orange, 2 shades of green, blue and coral.
  • PRO TIP: A bit of blue colored pencil was the secret ingredient!
  • Remember to restamp the image and let dry.
  • I also added a few white Posca Paint Pen (.9-1.3mm) dots.
  • The adorable Special Delivery sentiment is included with the stamp set.
  • I mounted my card panel on a navy card base and the finished card is 7″ x 4 3/4″. I usually add lots of foam tape, but I kept this card simple and just used Bearly liquid glue.
Spellbinders + House Mouse Designs | Daisy Mouse (RSC-002) two handmade cards

I loved the Daisy Mouse stamp so much that I made a second Copic colored version.

House Mouse Designs + Copic Coloring Tutorial

Spellbinders + House Mouse Designs | Daisy Mouse (RSC-002) Copic colored handmade card.

The detail on these stamps is so well done that coloring is so easy! I used the following Copic Colors:

  • E50, E40, E00, R20 (face, hands and tail)
  • BV0003 (shadows)
  • W0, W3, W5 (mouse body)
  • YG01, YG03 (stem and flower)
  • Y00, Y06, YR04, YR07 (flower)
Spellbinders + House Mouse Designs Collection Copic colored handmade  cards.

My final card uses Tea for Two (RSC-005). I am a tea drinker so this stamp set definitely called to me!

I used the following Copic colors:

  • E50, E40, E00, R20 (face, hands and tail)
  • BV0003 (shadows)
  • W0, W3, W5 (mouse body)
  • RV00, RV02, RV04 (teacups)
  • YG03 (stems)
  • BG05. B05 (flowers)

I wanted to add a small little sentiment in the middle of the scene, so I stamped the Hello from Fill My Heart Sentiments (STP-183)

Spellbinders + House Mouse Designs Tea for Two (RSC-005) Copic colorered handmade card.

Products Used:

Items Available at Amazon:

Faber Castell Polychromos Colored Pencils
cardmaking · Die cutting

Spellbinders | Hugs Collection: 2 Easy Die Cut Cards

Spellbinders Stampendous Hugs Collection handmade card with Kitty Hugs (S5-587) and Bear Hugs (S5-586).

How to Make Easy Die Cut Cards

Simple die-cuts can make high impact creations for cards, scrapbooking or any other papercrafts. Today, I created 2 quick and easy cards using Spellbinders + Stampendous new Hugs Collection.

Spellbinders Stampendous Kitty Hugs (S5-587) easy die cut Get Well card.

For Card #1, I made a Get Well card using the new Kitty Hugs (S5-587) etched die kit . I played around with layouts and in the end decided to keep my card very simple. I die cut my kitty from white card stock and then used my Stylish Ovals nesting dies to make a shaped background and card. The background is my alltime favorite Waterfall cardstock. I added a few pops of color with the facial features, bow tie, star and fish, which are all included with the die kit.

To make my shaped card, I took an A2 top folding card base and taped the top of the largest Stylish Oval die just above the fold, so the card base would remain in one piece, and then ran it through my die cutting machine. I hot foiled a quick sentiment and then assembled with adhessive squares.

Sweet Die Cut Card for a Baby Shower

Spellbinders Bear Hugs (STP-586) easy die card for a baby shower.

I am co-hosting a baby shower this month so Card #2 is for Baby Juliette. This die set is called Bear Hugs (STP-586). I love the simple sweetness of the pinks and whites.

The gift box , ribbon and bow are also from the Hugs Collection and the die set is called Hugs Accessories (S5-590). The set also contains several hearts, envelops, letters and a swag…very cute.

Spellbinders Stampendous Hugs Collection handmade card with Kitty Hugs (S5-587) and Bear Hugs (S5-586).

I can see so many occasions when I will use these sets again!

Products Used:

I am so pleased that you stopped by to see my creations.

Karen