Uncategorized

Altenew Academy: Beautiful Details

Hello!  I just finished the Altenew Academy Class \”Beautiful Details\”.  I have to say our instructor, Marika Rahtu, is quite the artist and her cards are amazing!  Marika taught us that adding details can elevate our cards.


My style is more colorful and bold, but I incorporated several of her suggestions into my card.

Details I added to make this card special:

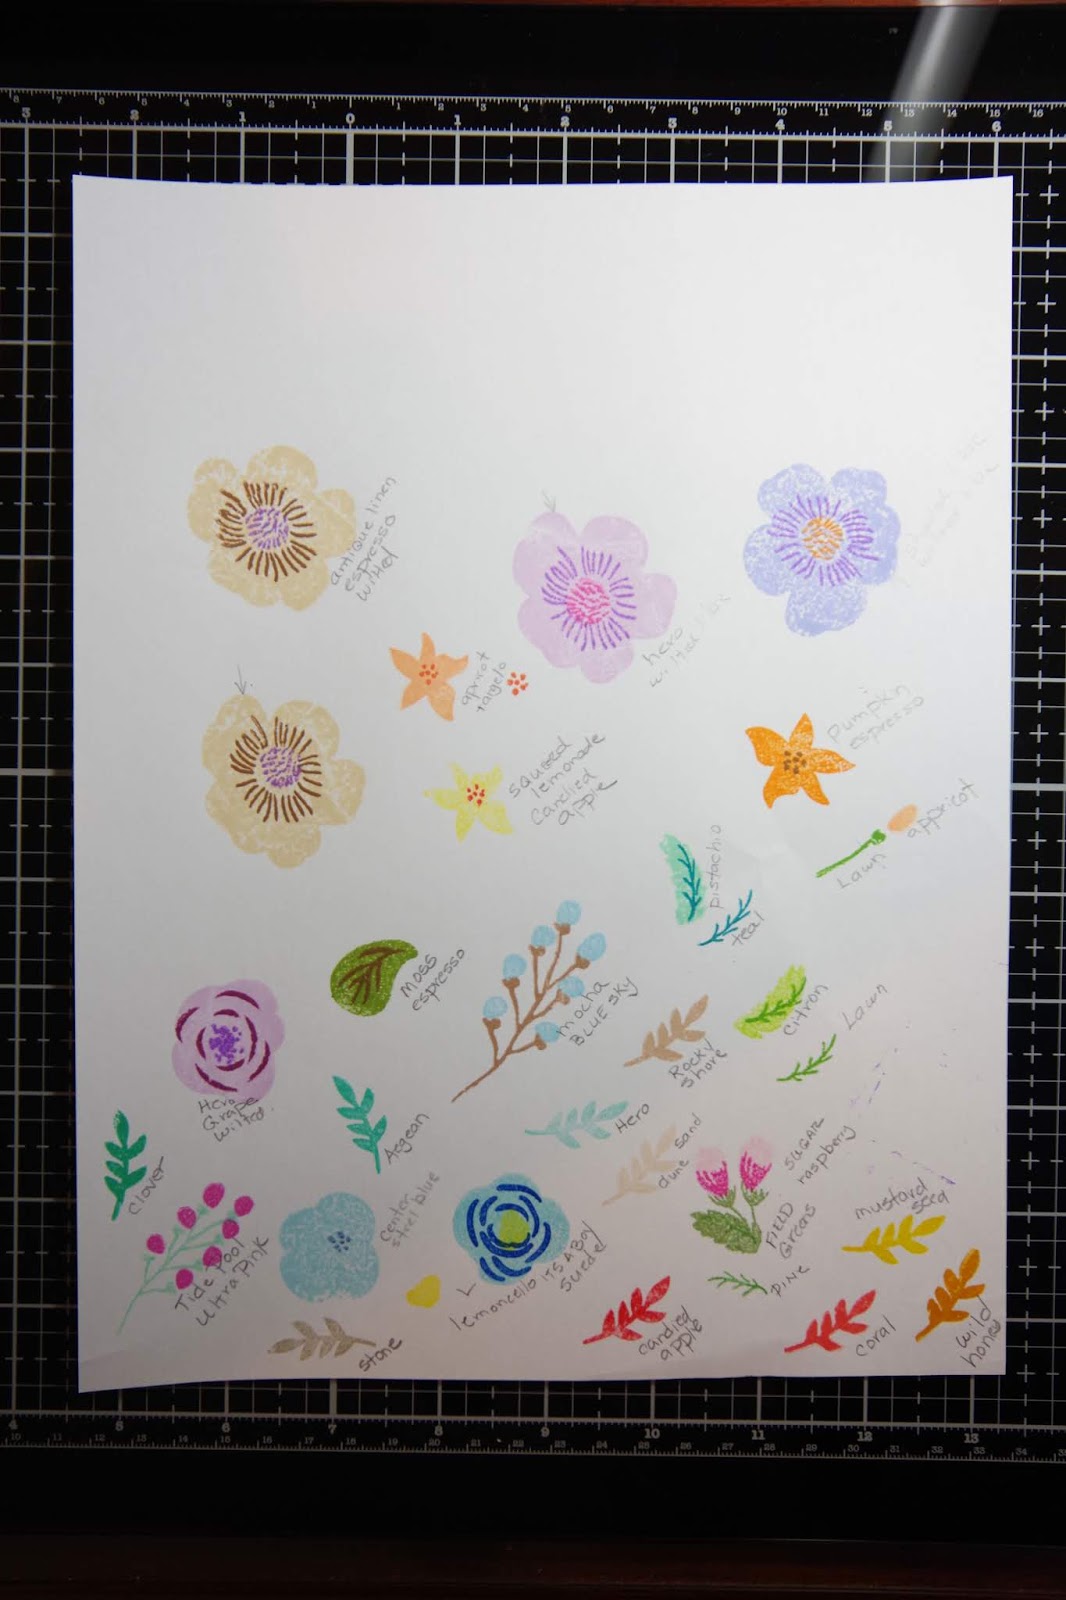
  • I love ink blending so I ink blended a complimentary background.  I reversed the colors from the floral images so I started blending from the bottom right in yellow (top flower) then added 5 other colors so that I finished with purple to get the gradient that I wanted.  I laid down a lot of ink and think this gives a bold and cohesive look to the card.  
  • I masked the left side (1\”) of the card to give contrast to the bold colors.
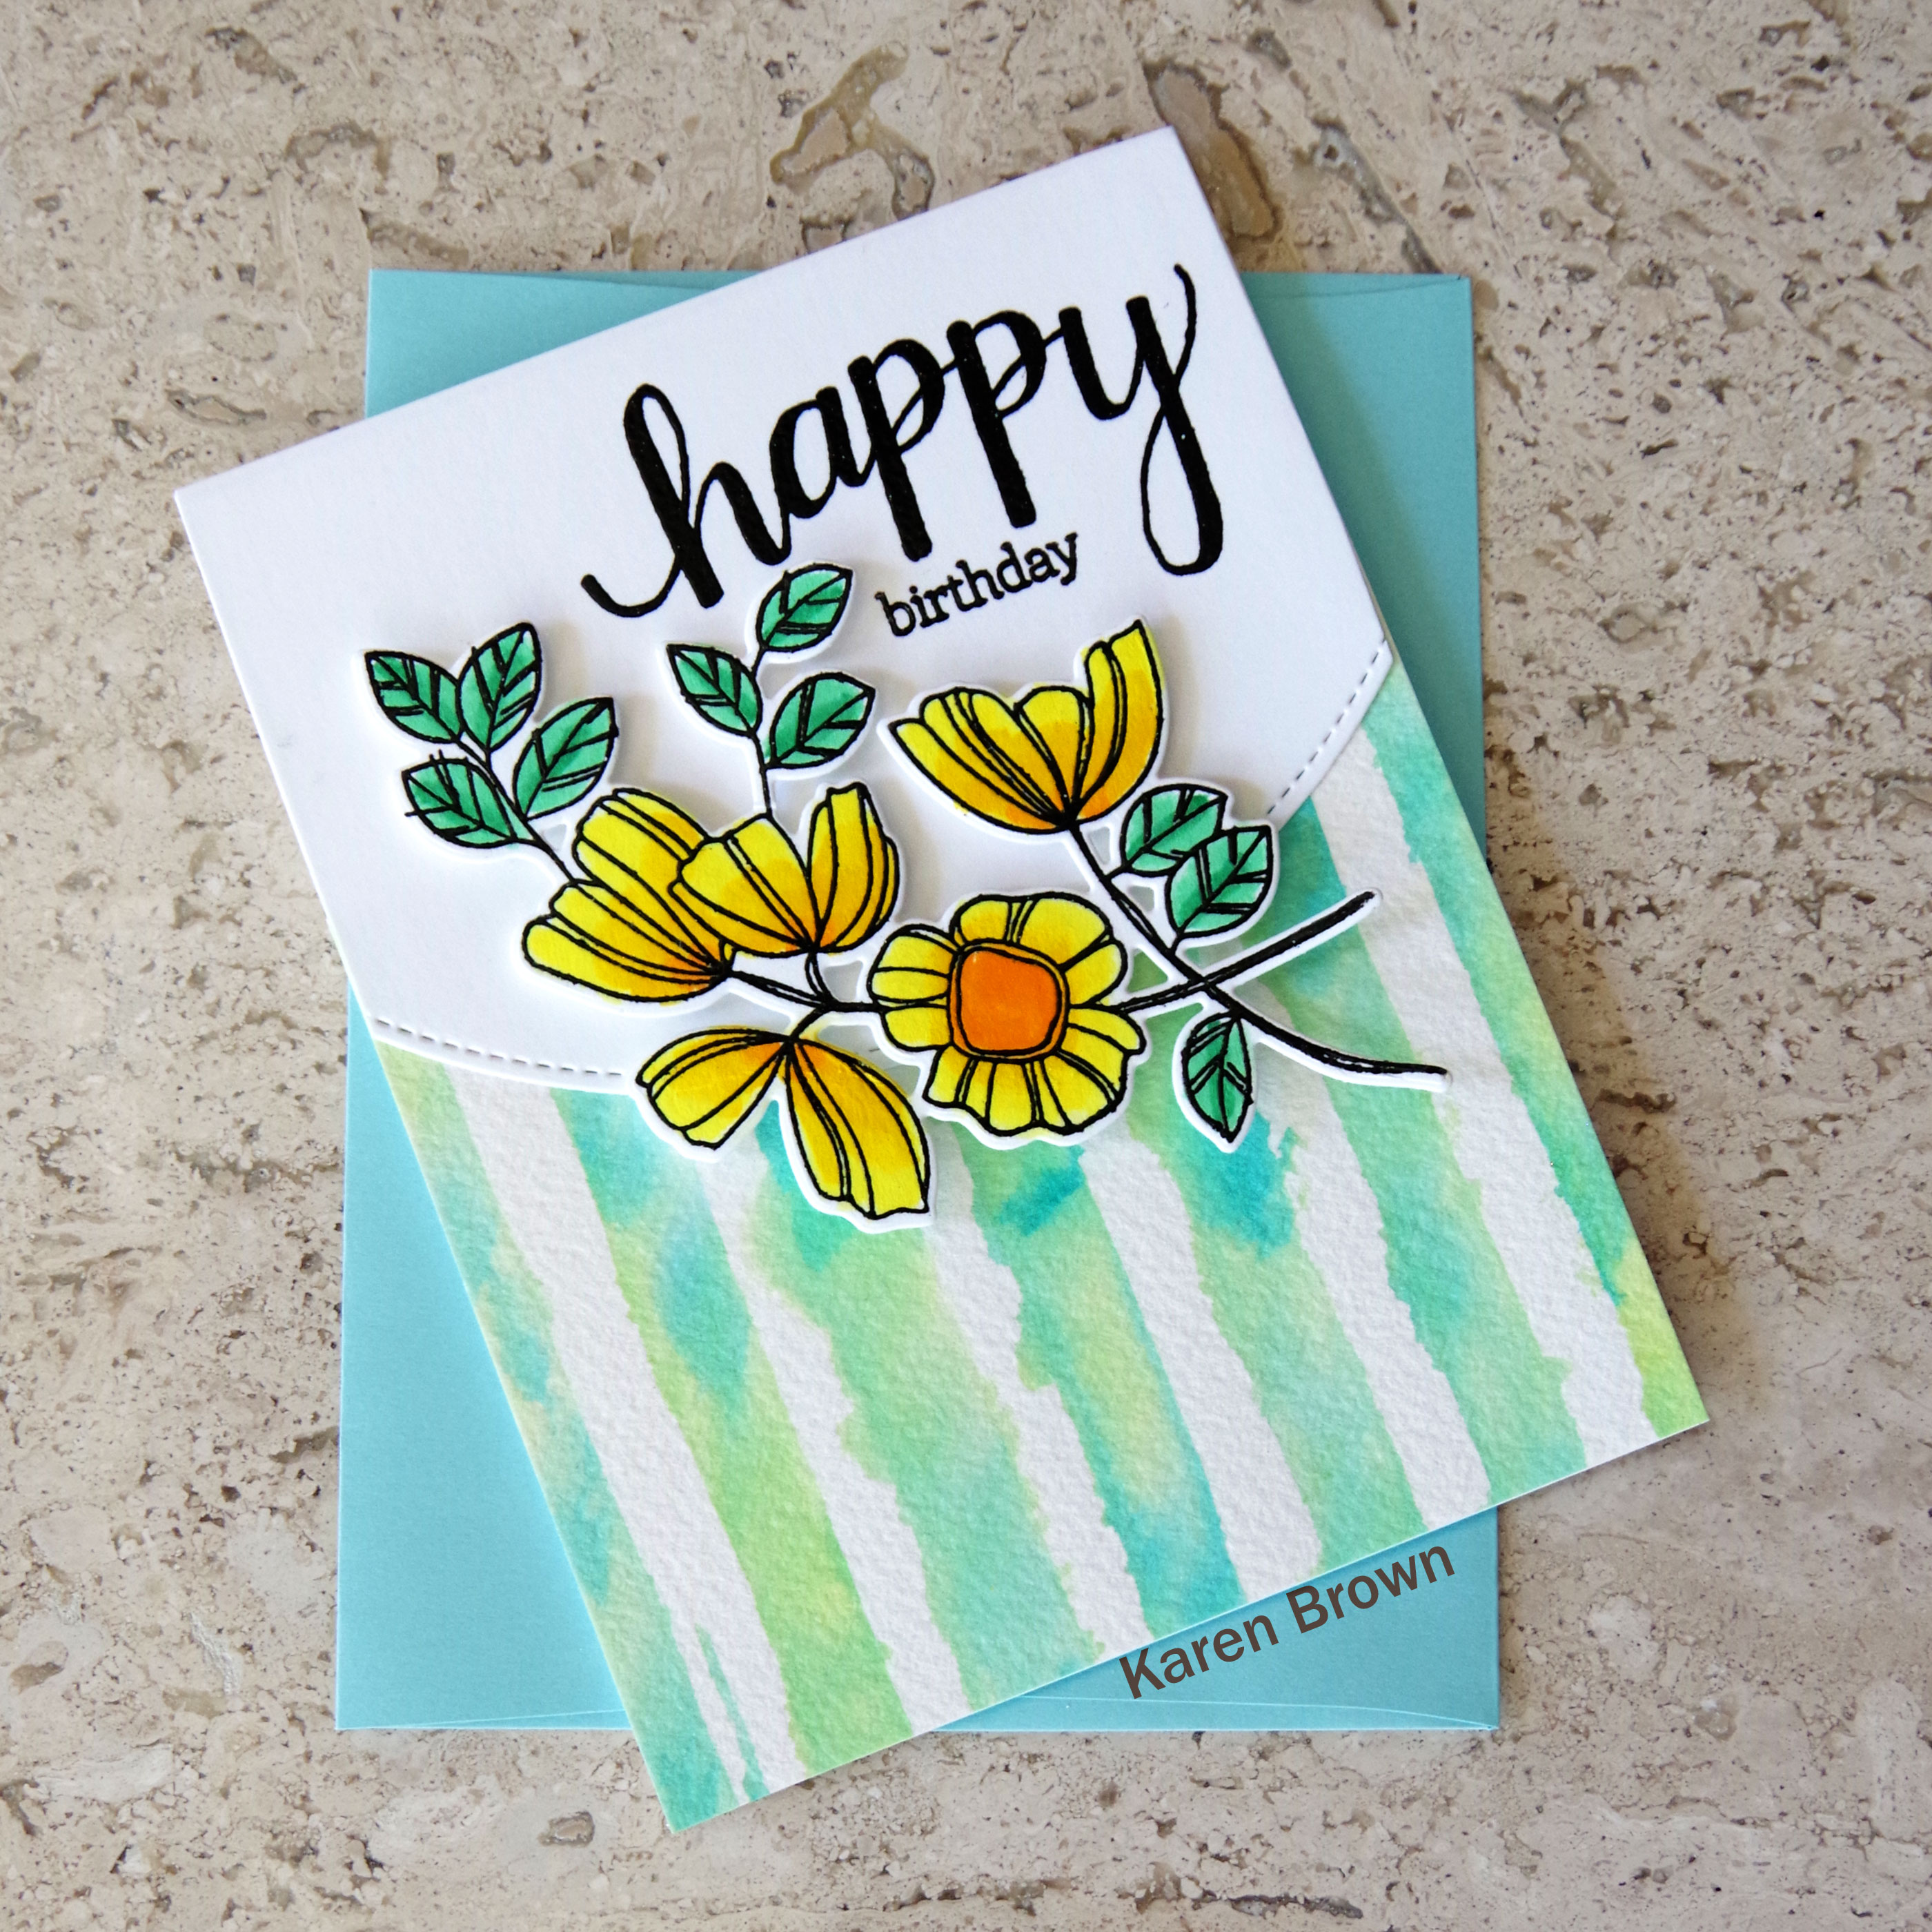
  • I used foam adhesive to give dimension to the focal point.
  • I added some shimmer pen to the flowers for a bit of subtle shine.
This Altenew Weekend Doodles stamp and die bundle may be my favorite set from Altenew.  I Copic colored the blooms and arranged them where the ink blending meets the white edge. 
I am also playing along with:
 Festive Friday FF0064.  I\’ve used  pink, a sweet sentiment, die cuts and colored my card for \”summer fun\”.
Little Red Wagon #560 Give Us Your Background  I used loads of distress ink to make this bold background.  
UPDATE:  I am so please that this card was chosen as a Festive Friday Fave!


Karen
 
Uncategorized

AECP Altenew Academy: In The Mood for Color

In The Mood for Color (taught by Stephanie Klauck) was such an interesting class.  We learned to select colors based on the mood we are trying to convey.  Adding the right color can add depth and nuance to your project.


I chose to make a Thinking of You card and decided to use yellow to project optimism.  

I love the look of colored pencils, but they intimidate me a bit.  Stephanie inspired me to dust off my Polychromos and give them a try.  She walked us through the technique and I was pleased with my coloring. 


My Process:
  • I put my Lotus stamp in my Misti and stamped the bloom and stem on grey paper. I left the stamps in there while I colored.
  • Stephanie taught us to start with our lightest color, then add shadows with  our darker colors and then blend with our medium tones.  The key is to add lots of layers of color.  
  • The lines blur a bit with the pencil coloring so I then put the paper back in the Misti and restamped which resulted in crisp lines.
  • I fussy cut the images and then went around the edges with a black pen.
  • I wanted an accent strip so cut a strip of this designer paper and then mounted it on a piece of the grey Strathmore.
  • I stamped my sentiment on another strip of grey Strathmore so that there was continuity across the card.
  • I made an A2 top folding card, assembled with liquid glue and added some clear drop embellishments.  
Pro Tips:
  • Strathmore Toned Grey paper works great with colored pencils.
  • Keep your stamps in the Misti so you can restamp after coloring. This makes a huge difference!

Supplies Used:
Altenew Inked Lotus stamp
Altenew Jet Black Crisp Ink
Strathmore Toned Grey paper (for flower, border and sentiment strip)
Faber Castell Polychromo colored pencils
Scrap of Designer Paper
Slate cardstock (for A2 card base)
Clear Waterdrop embellishments

I am also playing along with:
Inkspirational #217 Painting or Coloring  I chose coloring with colored pencils.

UPDATE:  I am so pleased that this card was chosen as a Rising Star by A Place to Start!

Thanks for stopping by!
Karen


Uncategorized

WWC278 – Michelle\’s Challenge: Anything Goes with a Feminine Twist

Do you ever have a leftover scrap that you just love?  That is how this card came to be….I made a pretty background  (link to card here) and had a bit left so that was the starting point for this creation.  I thought it was a pretty feminine card so I selected it to be my design team card for this week\’s Watercooler Wednesday \”Feminine\” Challenge.
I added a bold floral focal point, heat embossed a sentiment, created a layered look with foam tape and added a couple of embellishments from my scrapbooking days.  
Supplies Used:
Altenew Watercolor Stripes Stencil
Altenew Smile More stamp and die bundle
Spellbinder\’s Sentiment
Distress Inks (Salty Ocean, Mermaid Lagoon, Twisted Citron)
Zig Markers:  Emerald, Green Shadow, Pale Yellow, Yellow, Bright Yellow
Initial Embellishments

Make My Monday \”Use Stencils\” Challenge My background is watercoloring with distress ink over a stencil.

Festive Friday FF0062  I picked CAS design, birthday theme and floral theme.


I am so pleased that you stopped by!
Karen
Uncategorized

WWC277 – Tristan\’s Challenge: All About Occasions

Hello and Welcome!  This week we are making occasion cards at Watercooler Wednesday and Kath is our hostess.  I\’ve chosen to make a birthday card for my daughter.  Kristen has the most adorable Corgi name Newton, and he was the inspiration for this card.
Lawn Fawn Quilted Backdrop background die

 A while back I saw this Corgi stamp and purchased it right away. I wanted to put together a little birthday scene so I thought a birthday cake on a bench would be cute.  I stamped, Copic colored, fussy cut and die cut the elements.  The background is a pretty cover die.   The sentiment is new to me, but I am really happy with it. I added some Tonic Nuvo glaze to the frosting and candles and I really like the shine it added.

I wanted to make the card extra special, so I put a second \”pop-up\” Corgi inside.

Supplies:
Stamps of Life: Corgis2Stamp stamp
WPlus9 \”New Home\” bench stamp and die
Jane\’s Doodles \”Party Time\” cake stamp
MFT \”Lucky Dog\” stamp and die (pop-up Corgi)
Lawn Fawn Quilted Backdrop die
Sentiment:  Jillibean Soup (heat embossed and die cut)
Tonic Nuvo Glaze
Black Gel Pen for accents
Neenah Paper
Copic Markers

Allsorts \”Pet Challenge\” This birthday card is for my daughter who has a Corgi named Newton.

Cut it Up \”Perfect Pet\” Challenge  Newton the Corgi is the friendliest pet you are sure to meet and he is die-cut twice (front and pop-up inside).
Happy Little Stampers Die Cutting Challenge Lots of die-cutting on this card:  background, sentiments, images and pop-up Corgi.

Try it on Tuesday – Create a Scene a fun little birthday scene.

UPDATE:I was so pleased to discover this card was selected as a \”top cut\”!


I am happy with the card and am looking forward to putting it in the mail to Kristen.  

I am so pleased that you stopped by!
Karen


Uncategorized

Altenew Academy – Seasonal Scene Building

Hello and welcome.  I just finished Nichol Spohr\’s Altenew class on scene building and wanted to share this card.  I love \”scene cards\” so this class was very fun for me.  My card concept was \”coffee in the garden\”.  I was especially inspired by Nicole\’s lessons #1 and #4 on creating scenes and die-cut scenes.  
A scene card featuring Altenew Gardent Grow and Tea Time stamp and die bundles with Watercolor Stripes stencil and texture paste to create the background.
My Process:
Once I came up with my coffee in the garden theme, I started by working on my background.  I wanted to use a stencil technique that I learned in Laurel Beard\’s Stencil Techniques class.  I had never worked with embossing/texture paste and I found I really liked it.  I knew I wanted a subtle plank like background so I made three….a neutral tan, soft blue and light yellow.  I tinted the paste with dye ink and used a palette knife to work it through my stencil. I left the finish a bit rough and rustic and then put the panels aside to dry.  I really like the texture and look of the background.  

Next I stamped, Copic colored and die cut my images.  By this time my backgrounds were dry so I laid the die-cuts on each and decided I liked the neutral tan the best.  I adhered the images with foam tape and popped on a card base.
Supplies Used:
Altenew Garden Grow stamp and die bundle
Altenew Tea Time stamp and die bundle
Altenew Watercolor Stripes Background stencil
Altenew Sand Dunes Crisp die ink (to tint the paste)
Texture paste and pallet knife
Copic markers
Foam tape

I am also joining:
As You Like It Scene Challenge  I enjoy a latte in my garden every afternoon and depicted this scene on my card.  

Time Out Proust Quote Challenge   This is a wonderful quote that speaks to me.  I focused on the gardening aspect of the quote for my card.  

Update:
I was so pleased to learn that my card was selected as a top three at Time Out Challenges. 

I think this is a fun scene card that would work for a man or woman.  Thank your for stopping by!
Karen
Uncategorized

Altenew Academy: Celebration Stencil Techniques

Hello and welcome.  I just finished a wonderful Altenew Academy course and I am excited to share my card with you.   Laurel Beard taught us stencil techniques and I loved them all!  This is my favorite card from the class.  I also used my favorite Altenew stamp and die bundle called Weekend Doodles.
Bright card featuring Altenew Watercolor Stripes Stencil and Weekend Doodles stamp and die bundle.
My inspiration came from lesson 3:  Stamping with Stencils and  I chose to watercolor over my stencil.

My Process:
  1. I taped my stencil to a 6 x  6 piece of watercolor paper.  Next, I wet my watercolor paper well with a brush.  I then \”pounced\” three colors of distress ink onto the wet watercolor paper.  
  2. I haven\’t used my Zig markers in months but they were exactly what I wanted for this project because of their bright vibrant colors.  I heat embossed my floral image, colored with Zigs and then die cut.
  3. I die cut a white panel for the sentiment and to provide some contrast with the bold stripes and then heat embossed the sentiment.  I glued the white panel to the background and then used foam tape to adhere the flowers.
Supplies:
Altenew Watercolor Stripes Stencil
Distress Inks:  Salty Ocean, Mermaid Lagoon and Twisted Citron
Zig Markers:  Emerald, Green Shadow, Pale Yellow, Lemon Yellow, Yellow and Bright Yellow.
Watercolor Paper
Neenah Cardstock
Versafine Onyx Black ink and Clear Embossing Powder
Liquid Glue
Foam Tape

I am also playing along with:


I was so pleased to see this card chosen as a Top 3 at Tuesday Thowdown!


I am so pleased you stopped by and I would love to hear what you think about this card.

Karen


Uncategorized

Altenew Academy – Easy Ink Blending Techniques

Hello and welcome.  I am excited about this new technique I learned at Altenew Academy!  I love ink blending but had never done \”faux watercoloring\” like this.   This is my homework assignment for lesson #5 and I was very inspired by our instructor, Amy Lee, and the process she walked us through. 
 This card has two firsts for me….ink blending on watercolor paper and faux watercoloring over ink blending.  I personally had never considered ink blending on watercolor paper as it is rough, but it worked beautifully! 

 I started by heat embossing 8 images from Altenew\’s Smile More stamp set.     I then inkblended yellow, pink, yellow green and blue over the embossing.  Next,  I dabbed 6 colors of dye ink on my glass media mat.  When my palette was ready, I very lightly spritzed the lower inked panel with water.   With a largish brush, I added contrast using very loose watercoloring (wet on wet). I dried the panel with my heat gun and then added more random color variation using the wet on dry technique.  In total, I used 10 different colors of dye ink to complete my watercoloring. Last, I very lightly added some blue paint splatters.  The watercolor paper warped slightly so I flattened it inside a heavy book.

I finished the card by stamping a large sentiment, mounted on a card base using craft foam for dimension and then added five buttercream jewels.  I will definitely use this technique again in the future.  
Supplies:
Altenew Smile More Stamp Set
Watercolor Paper
White Embossing Powder and Heat Gun
Picket Fence Studio Life Changing Brushes
Black Velvet Brushes (#8 for watercoloring and #2 for paint splatters)
Mini Spray Bottle

I made lots of beautiful ink blended backgrounds during this course, but
 this was my favorite card.

I am playing along at As You Like It \”Favorite Embellishment\” Challenge  I used these buttercream jewels which are my most used embellishment. The color seems to go with everything I create.

UPDATE:  I was so pleased to see my card selected as \”Top 3\” at the As You Like It Challenge.


Thanks for stopping by!
Karen  
Uncategorized

WWC272 – Helen\’s Challenge: Anything Goes with a Masculine Twist

Hello and welcome!  This week we are making masculine cards at The Watercooler Wednesday Challenge and Helen is our hostess.  My son-in-law has a May birthday so this card is for Josh.  Josh is a big dog lover and the dog in the middle is his sweet dog Asuna. 
Ink blended background using Catherine Pooler\'s Blue Suede Shoes.
I started by ink blending a blue background panel which I then put aside to dry.  On a white panel I die cut three windows for my pups and then fussy cut the curved edge.  Next, I stamped, Copic colored and die cut my pups.  Assembly was easy and I used foam tape to attach the white panel to the background and then popped the dogs on.

I saved the die cut circles and used them to make this Encouragement Card.

Supplies:
Mama Elephant Playful Pups stamps and dies
Catherine Pooler \”Its a Boy\” & \”Blue Suede Shoes\” ink
Picket Fence Studios Life Changing Brushes
SSS Stitched Circles
Neenah card stock
Copic markers
Black gel pen accents

I am playing along in:
The Paper Players CAS Men in Mind Challenge (#491)

The Paper Girls #200 \”All About the Boys\” Challenge

Paper Minutes Dog or Cat Challenge #641

I was very pleased to see this card designated \”A Cut Above\” by The Paper Players!

Thank you for stopping by!
Karen 
 

Uncategorized

Altenew Academy All About Layering 1

I\’ve been cardmaking for a little over three years and thought it might be time to see what I could learn at The Altenew Academy Teacher Certification Program.    I applied and was pleased to see that I was invited to join their 17th class.  The first class is \”All About Layering 1\”.  I have actually never used layering stamps so this was a great way for me to start.  I purchased their \”Bride to Be\” stamp and die bundle and started creating.  Since I have never done layer stamping before I thought the best way for me to learn was to just stamp lots of images.
The background, stems and tan flowers were all stamped using Altenew\’s Coffee Break ink cubes.  For the sentiment, I hand inked a  scrap of paper with navy ink and die cut it twice because I wanted the sentiment to coordinate with the blue flowers.  
I normally stamp with a Misti, but the instructor used an acryllic block so I did also.  I think it was good practice to stamp free hand.  
I practiced on scratch paper to see which colors I liked and wound up with a simple tan and blue palette.  

I am also playing along:
Just Add Ink \”Thinking of You\” (#505) During these uncertain times, I\’ve found myself making more hello/thinking of you/encouragement cards.  This card is for a friend who is living alone, which is so hard during the quarantine.  

A Place To Start: Create a Custom Background I handstamped my background for this card.  

I was so pleased to see that this card was selected as \”The Winner\” at Just Add Ink.
I was honored that this card was selected as a \”Rising Star\” at A Place to Start.
Rising Star Badge
I am so pleased that you stopped by!
Karen

Uncategorized

WWC267 – Karen\’s Challenge: Anything Goes With a Masculine Twist

Hello and welcome.  This week we are making \”masculine\” cards at The Watercooler Wednesday Challenge and I am so pleased to be this week\’s hostess.  I needed a card for a friend having cancer surgery and I came up with this design.
 Baby Giraffe by Impression Obsession is one of my all time favorite stamps and I thought the sincere look on the giraffe\’s face could convey my well wishes.

I started by making an A2 top folding card using cold press watercolor paper.  I then heat embossed the giraffe in brown.  I mixed my own water color browns by combining purple with yellow and orange and then went to work painting.  I think the monochromatic colors work well for a man (or woman).   I am pleased with the clean CAS look.

I used a Visible Image sentiment stamp inside \”Life can be tough but darling so are you.\”

UPDATE:  I was so pleased to see that my card was chosen as the \”winner\” for the Addicted to CAS challenge.

Challenges:
As You Like It Challenge: Animals or People  I love to use animals in cards and giraffes are a favorite.  One of my favorite things to do is hand feed giraffes and I have done this at zoos all over the US.  

Always Fun Challenge – CAS  I am excited about this CAS theme!

Simon Says Stamp Monday Challenge – E is for…  Embossing.  I used brown embossing powder for my watercolor giraffe.

I am so pleased you stopped by!
Karen
Image may contain: text