Creating a beautiful handmade card doesn’t require a studio full of supplies, but rather a simple, creative process that turns paper into a work of art.
👉 I wanted to walk you through my inspiration and thought process.
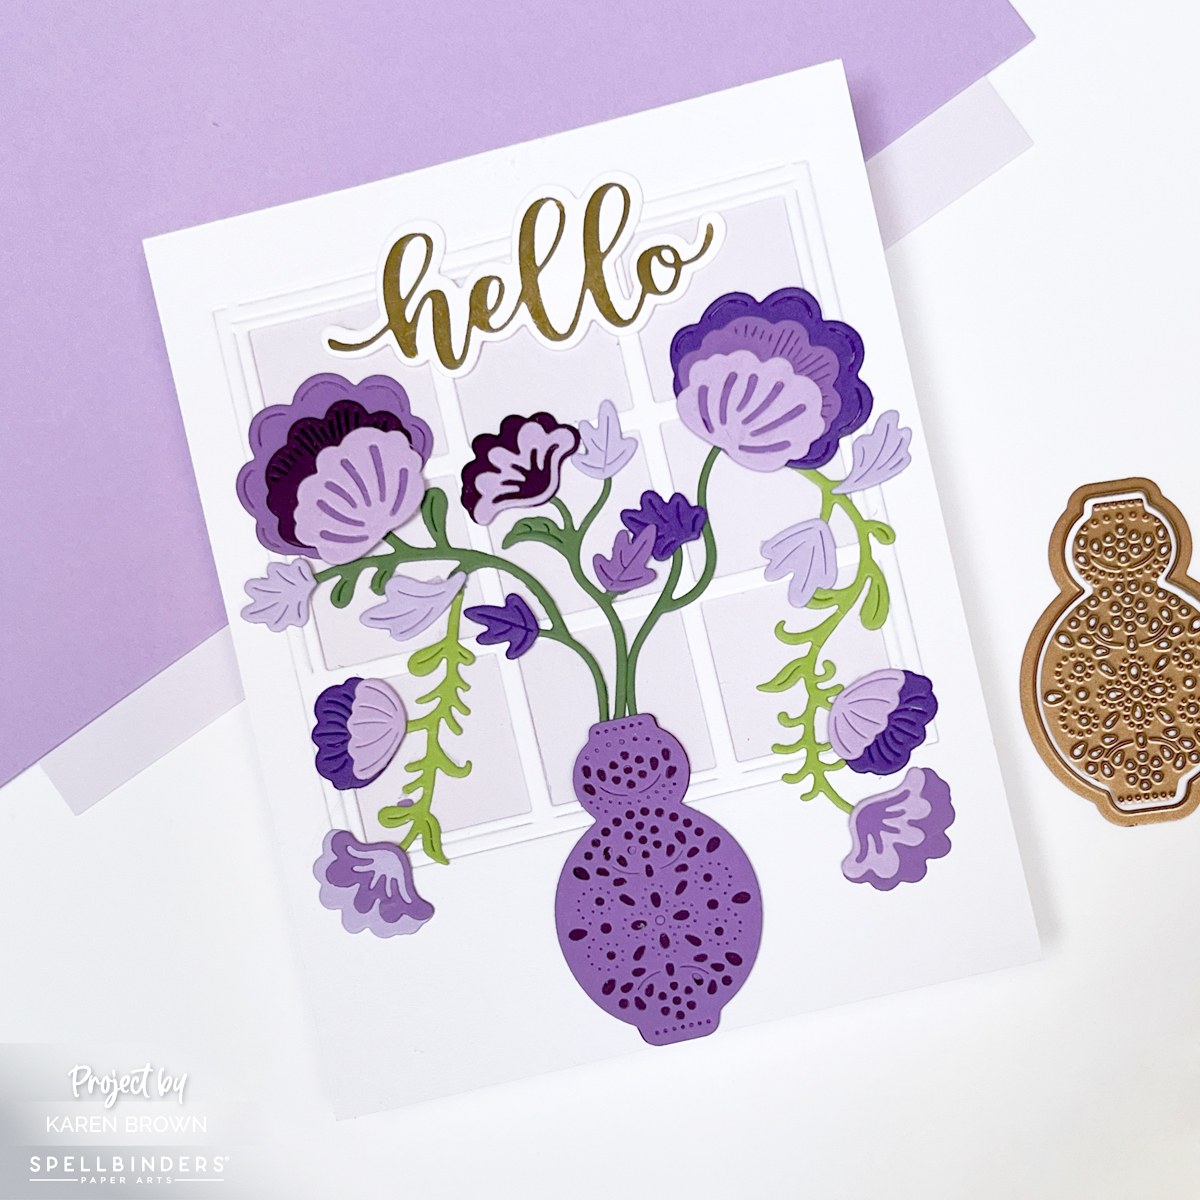
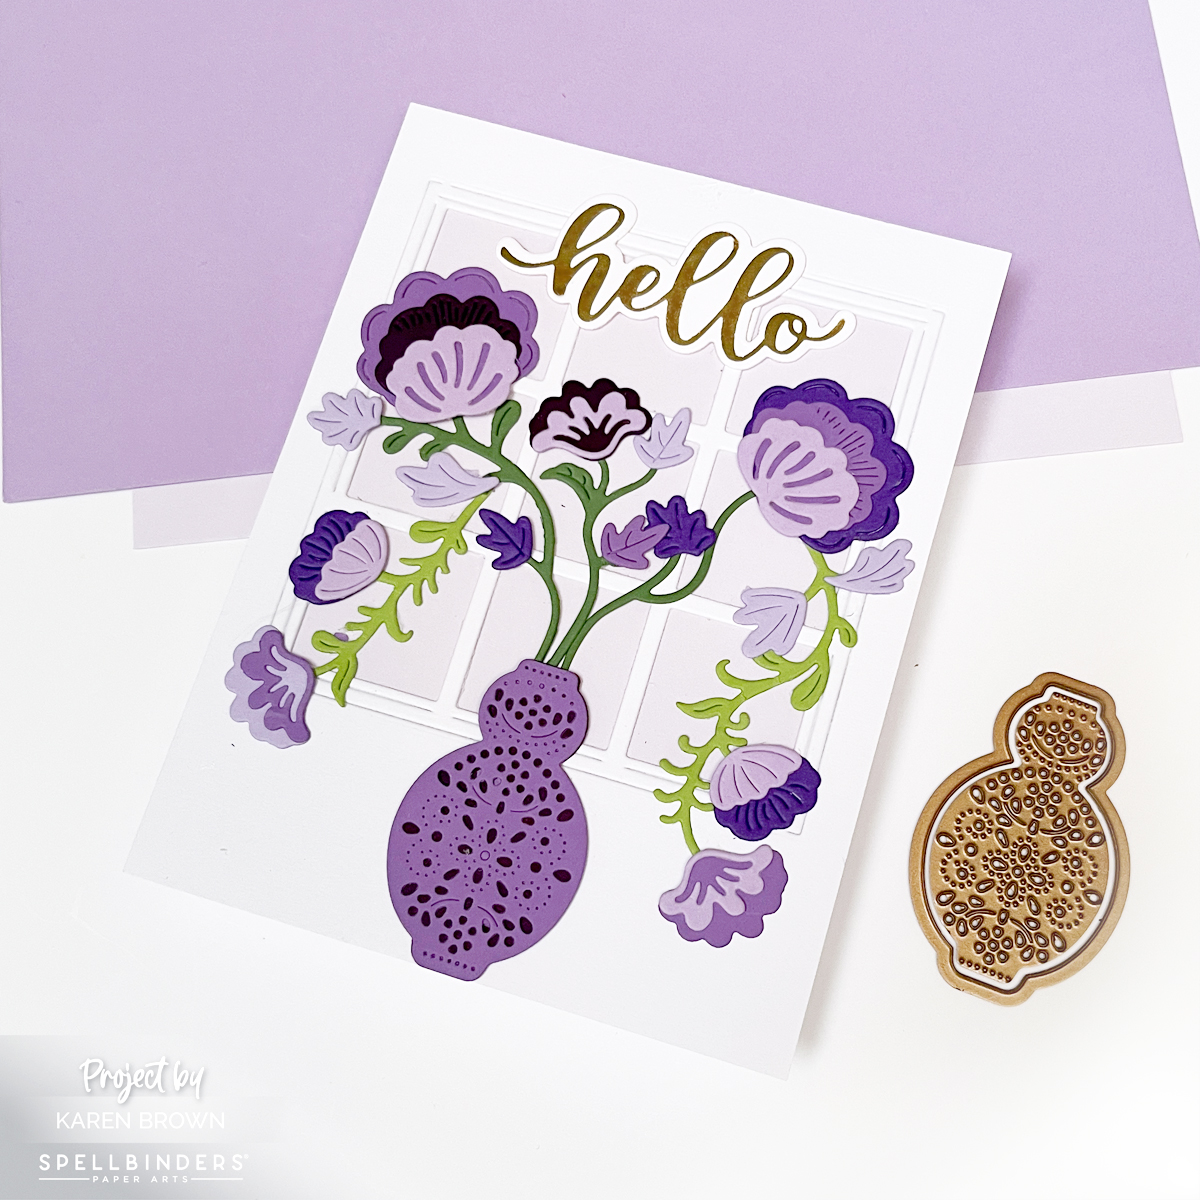
This card features (Spellbinders Regal Blooms die set (S4-1465) and a vase of elegant purple blooms basking in sunlight in front of a nine-pane window, that feels equally perfect for Mother’s Day, birthdays, or a thoughtful get-well card.
You might also be interested in the 14 tools that I use most often in my craftroom and The One Cardmaking Step That Saves Me The Most Time.
Design Inspiration: A Sunlit Floral Scene
For this card, I wanted to create a moment—almost like looking through a window on a quiet afternoon and catching sight of a bouquet glowing in the light. The Regal Blooms dies make that easy. The flowers are graceful, detailed, and feminine, with just the right amount of structure to feel refined without being fussy.
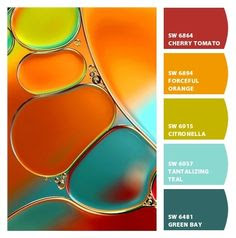
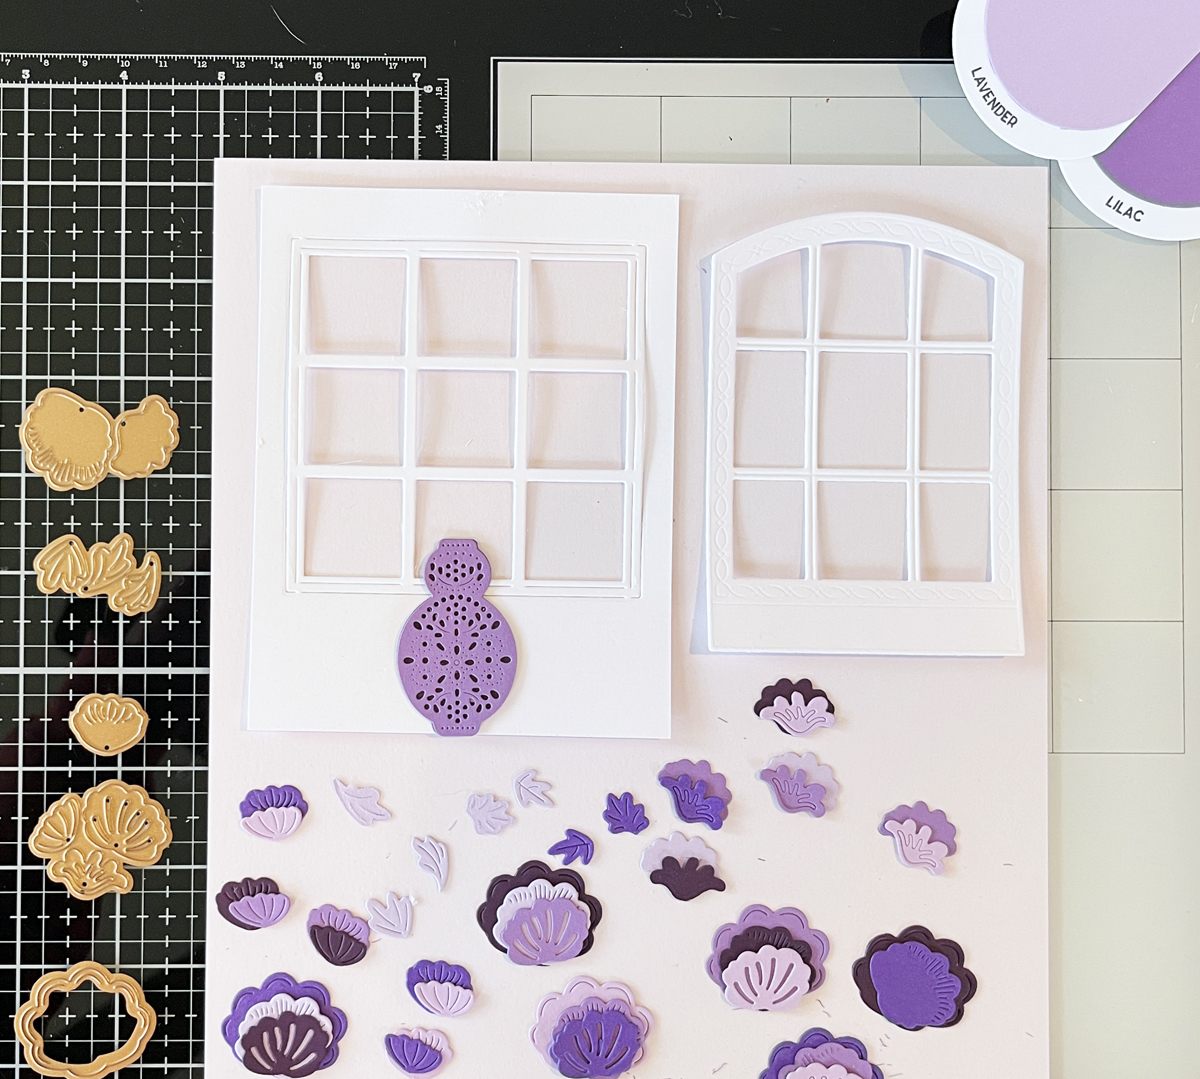
👉 I chose a purple color palette for a soft, girly, and classic look. Using Spellbinders ColorWheel cardstock in Lavender, Lilac, and Fairy Tale, along with a few coordinating purple scraps, allowed me to build beautiful tonal variation throughout the card. Here is how I swatched my cardstock, which is a real time saver when I am planning my color palette.
👉 Mixing multiple shades of the same color family adds richness and depth while keeping the overall design calm and cohesive.
👉 To finish the card, I added a glimmer hot foil sentiment—a scripty “hello”—for a touch of elegance and shine. If you’ve been considering learning to foil, my video is a great introduction.
Thoughts on Creating the Window Backdrop
As I mentioned above, I wanted my flower vase to be sitting in front of a sunny window.
👉 I love that a window instantly adds structure, light, and architectural interest to a card. I had two window dies in mind, but couldn’t decide which one to use:
- Hero Arts Elegant Window Fancy Die (die I used on this card)
- Spellbinders Vista View Window (window on the right)
👉 I am a visual person, so I die cut both and chose to go with Hero Arts Elegant Window.
👉 Behind the window panes, I layered a soft panel of Fairy Tale ColorWheel cardstock. This pale lavender shade helps the purple flowers stand out while reinforcing the gentle, airy mood of the scene. The window gives the card the feeling of an interior moment—flowers sitting quietly in the sunlight.
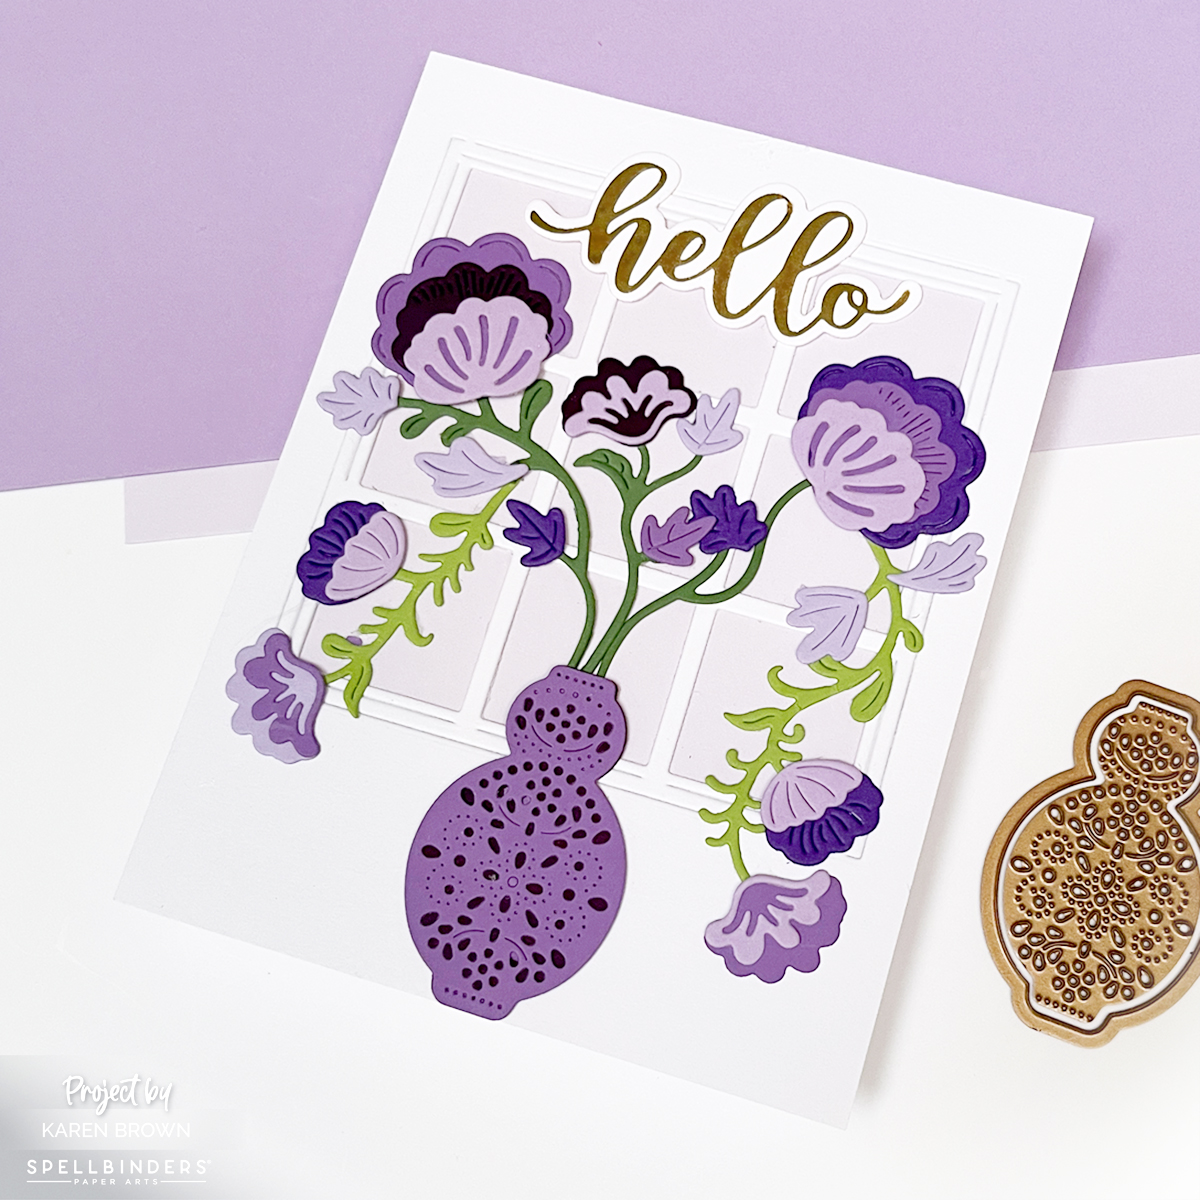
Adding Dimension: Two-Tone Vase Technique
One of my favorite details on this card is the vase. I wanted it to have subtle dimension without overwhelming the florals.
👉 To achieve this:
- I pierced the vase die cut using a pokey tool.
- Then I placed a darker purple shadow layer behind the pierced openings.
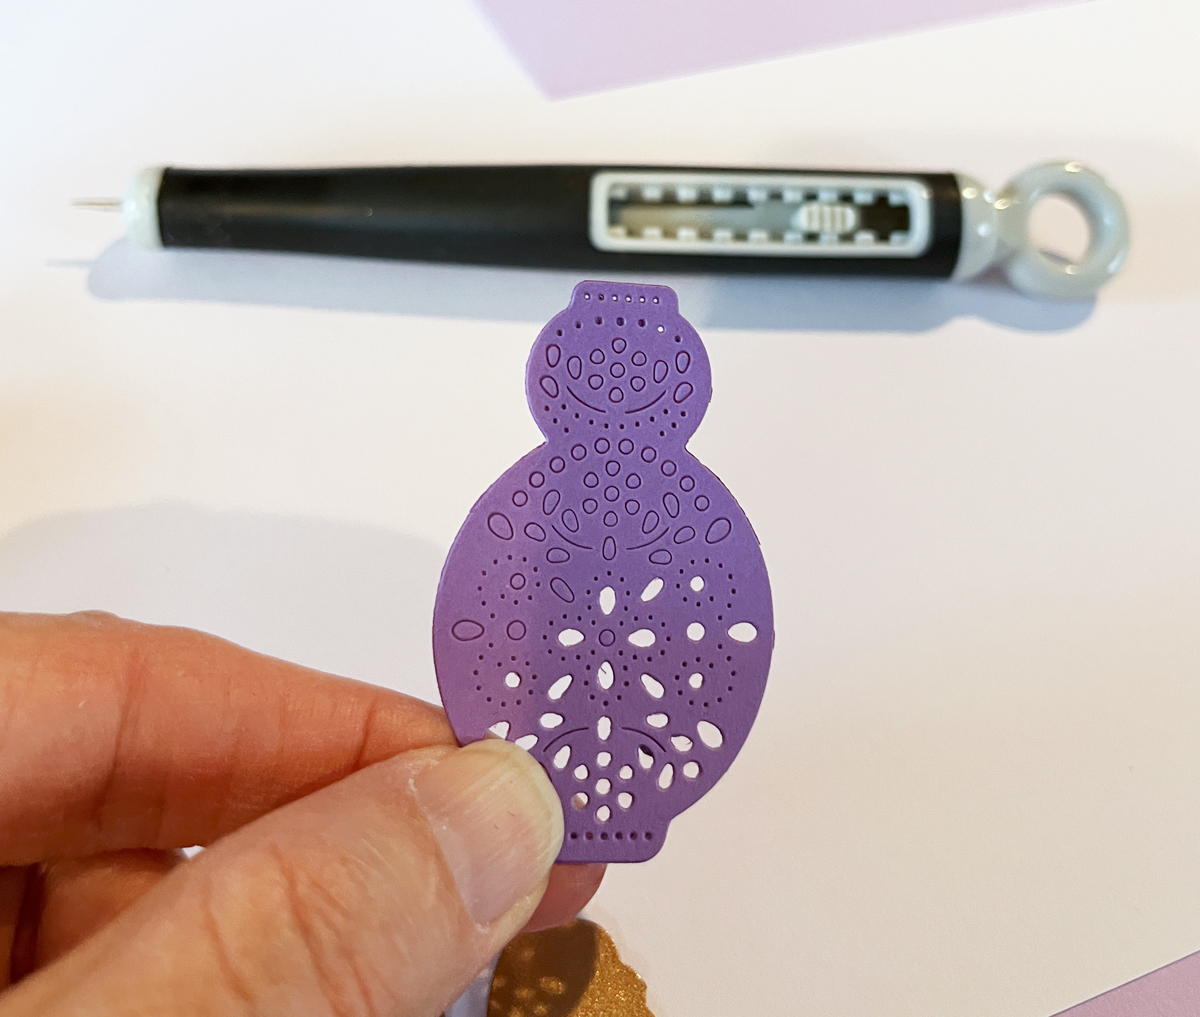
This simple technique creates a two-tone effect that adds depth and interest while keeping the design clean and elegant. I’ve included a process photo above so you can see exactly how this detail comes together.
Why I Love the Regal Blooms Die Set
The Spellbinders Regal Blooms (S4-1465) die set is incredibly versatile. With just a change in color palette or background style, this design could shift from:
- Soft and romantic (perfect for Mother’s Day),
- to fresh and cheerful (great for birthdays),
- to gentle and comforting (ideal for a get-well card).
This card may be purple and feminine, but the structure of the design makes it easy to adapt for many styles and recipients.
Final Thoughts
This floral window card feels cheerful, classic, and heartfelt—the kind of design that never goes out of style. Between the layered purples, the glowing window backdrop, and the elegant foiled sentiment, it’s a project that looks intricate while still being approachable.
Whether you’re creating for a sister, a friend, or someone who simply loves flowers, the Regal Blooms die set is one you’ll reach for again and again.