cardmaking · Stenciling

🧡🩷 Custom Plaid Two Ways with Hero Arts Houndstooth Layering Stencils

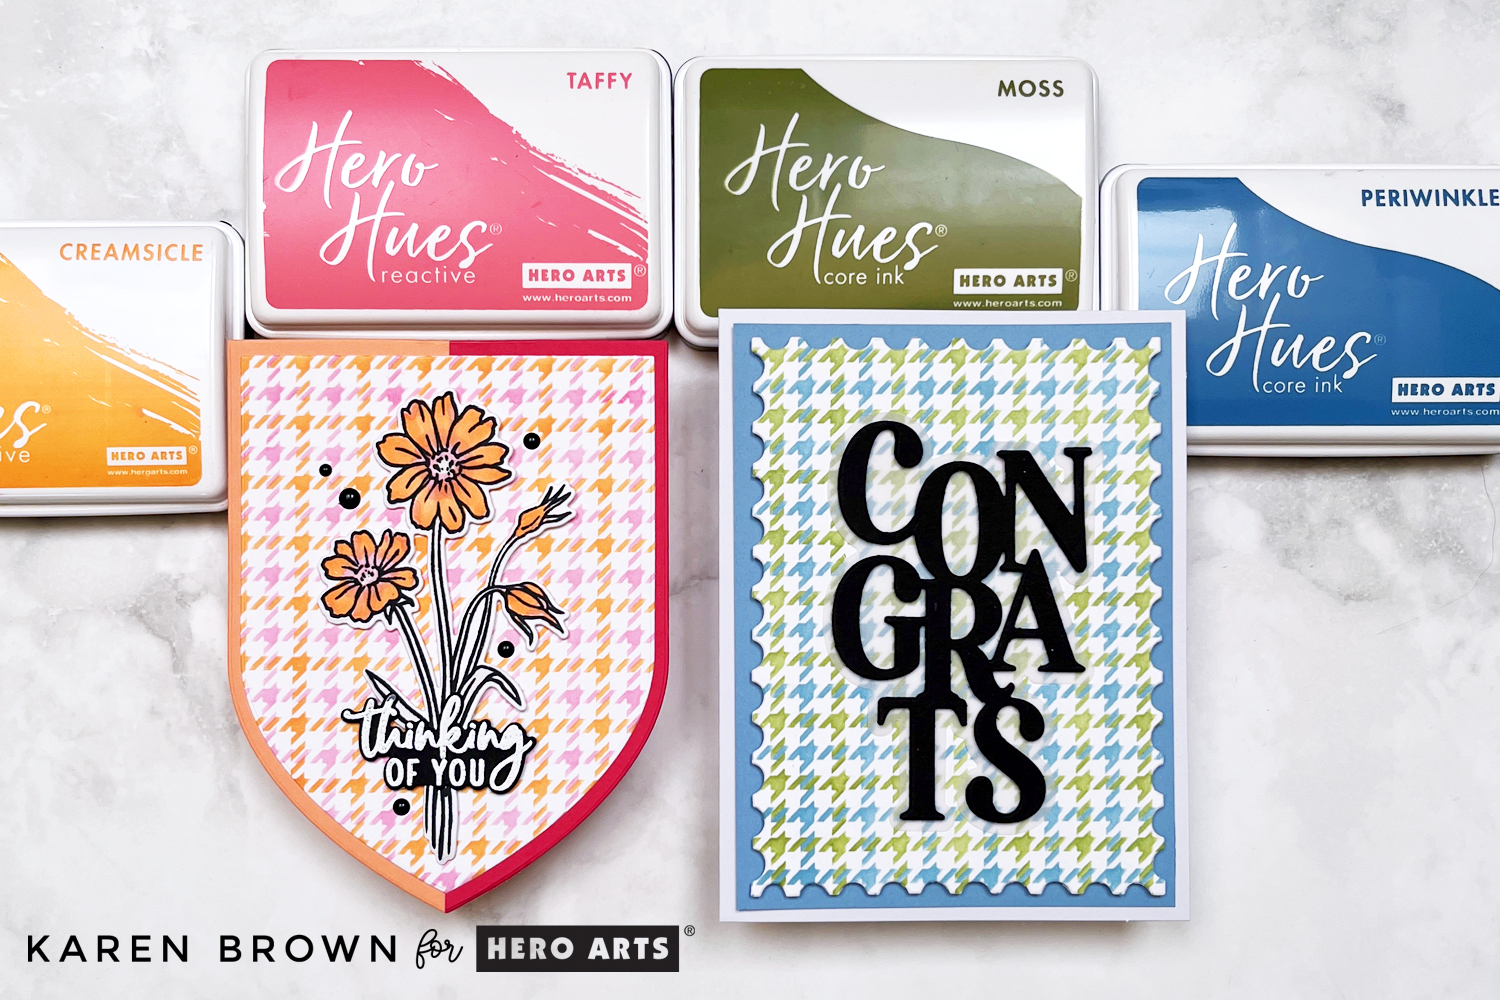
Plaid, but make it personal! Today I’m excited to share two bold and beautifully customized cards using the new Houndstooth Layering Stencils from the Case Closed Collection by Hero Arts.

Click HERE if you’d like to read my companion Case Closed Blog Post.

This two-piece stencil is already becoming one of my favorite backgrounds—it’s quick, clean, and incredibly versatile! Whether you’re going soft and sweet or crisp and classic, this pattern plays nicely with every palette.

2 colorful Houndstooth Plaid cards created with Hero Arts Layering Stencils.

A Few Tips Before You Ink

Here’s what made my stenciling process smooth and successful:

  • Stencil Orientation Matters: Make sure the Hero Arts logo is facing up. To keep my layers aligned even after rotating for even inking, I added a tiny arrow sticker pointing to the logo. It’s a game-changer!
  • Alignment Squares Are Your Friend: I marked the alignment squares lightly in pencil before starting so I could line up both layers of the stencil perfectly—no guessing, just precision.

Feminine Florals in Pink & Orange

Feminine floral thhinking of you card with a pink and orange stenciled Houndstooth plaid background

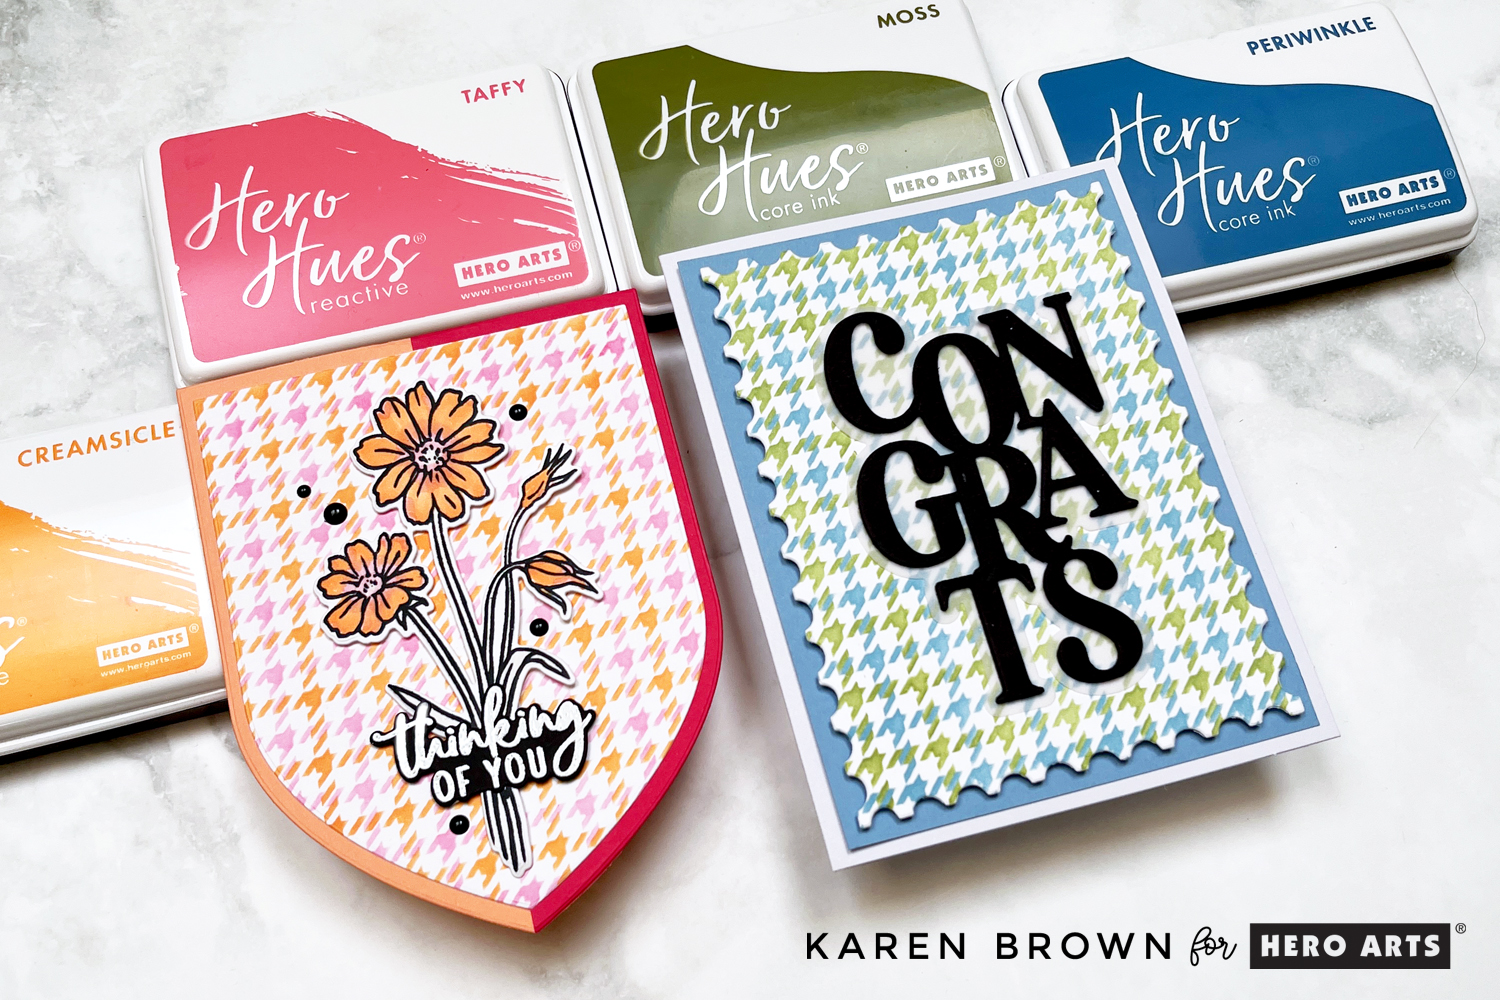
For my first card, I created a lovely pink and orange plaid background using Creamsicle and Taffy inks. I die cut the stenciled background with the Pointed Arches Infinity Dies to create a shaped card—hello, visual interest!

I originally tried a single color mat but it felt flat. Splitting the mat—Coral on the left, Azalea on the right—instantly made the card pop with contrast. I layered on a cluster of Copic-colored florals from the Wild Flower Bundle, a heat-embossed “Thinking of You” sentiment (included in the bundle) in white on black cardstock, and five black enamel dots for a finishing touch.

Copic Colors: YR02, RV11, W0

Handmade card with Hero Arts Houndstooth Plaid layering stencil. The card is shaped with pink and orange color palette.

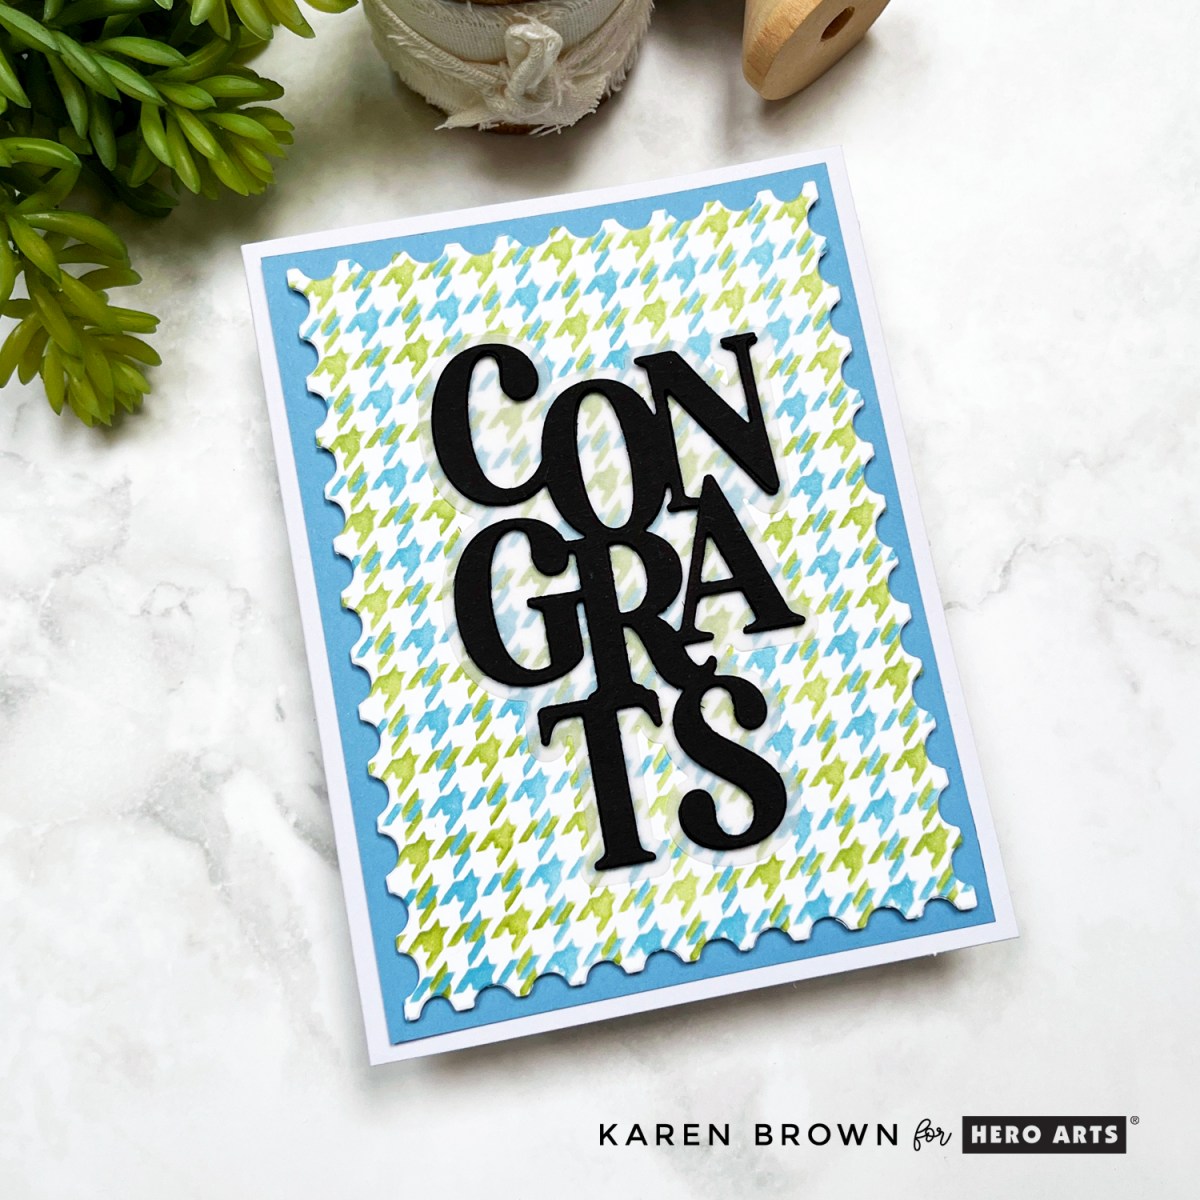
Masculine Congrats in Blue & Green

Masculine Congrats Card in blues and greens with a stenciled Houndstooth Plaid background,

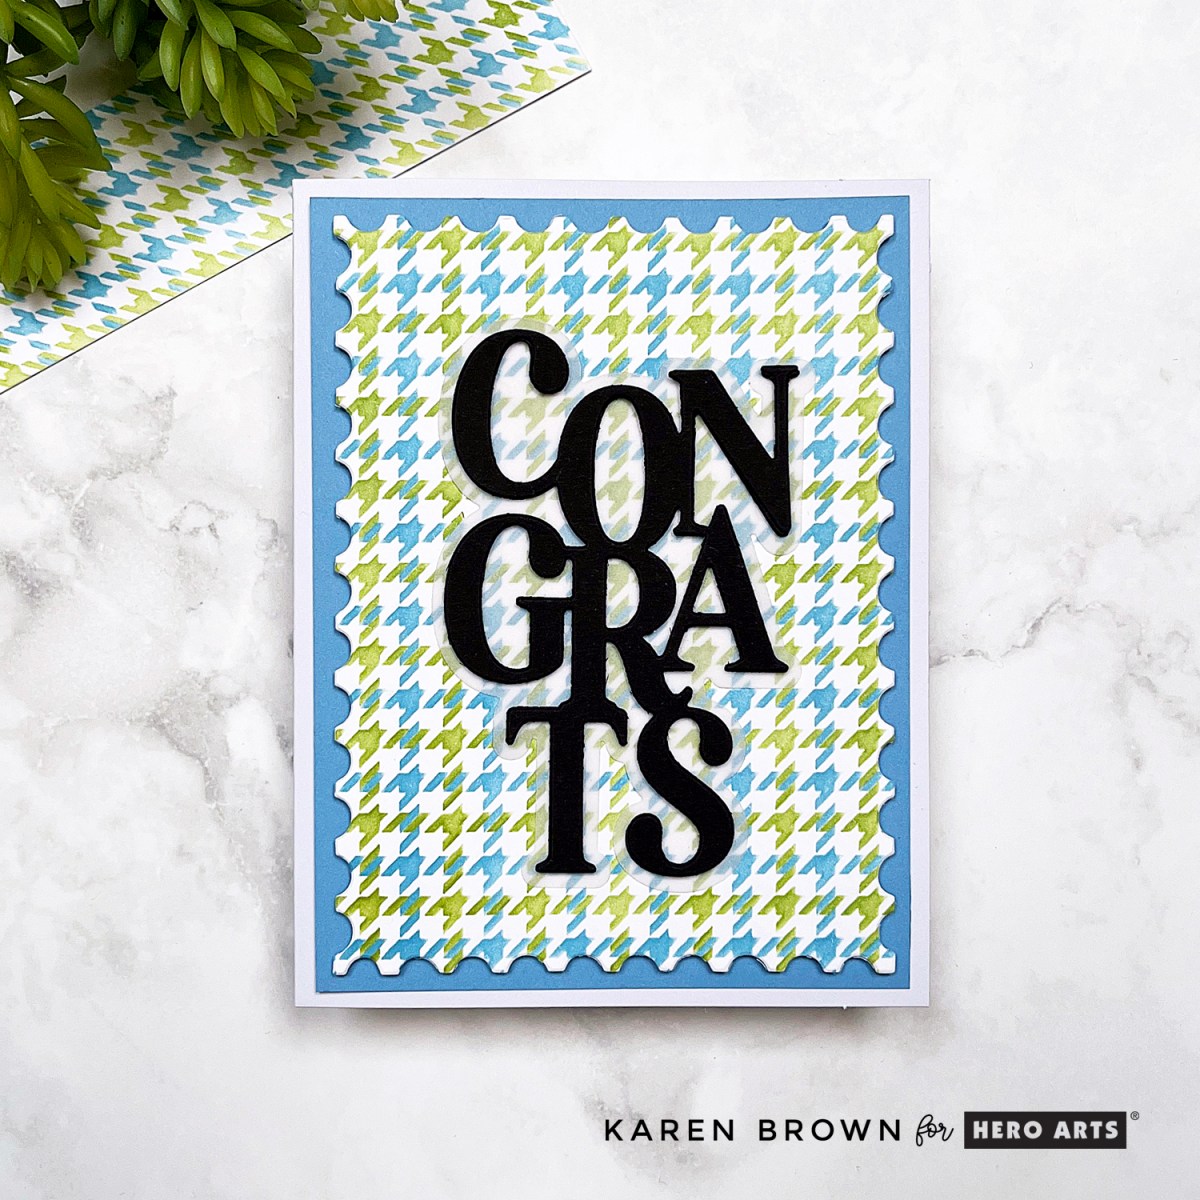
Card two leans cool, classic, and masculine. I used Periwinkle and Moss inks with the Houndstooth stencils for a bold plaid base, and then die cut it using one of my tried-and-true favorites—Nesting Postage Infinity Dies.

I die cut the bold Congrats sentiment from black cardstock three times, stacked and glued for dimension, and added a soft vellum mat underneath to make it stand out. The sentiment comes from the Congrats and Yay Stamp & Cut Set. Everything was mounted on Periwinkle cardstock and attached to an A2 card base.

Hero Arts Houndstooth Plaid stenciled card in masculine blues and greens.

💡 Why I Love These Stencils

The Houndstooth Layering Stencils are officially a staple in my craftroom. They’re:

  • Fast and easy to use ✅
  • Perfectly crisp results ✅
  • Easy to customize with ANY color palette ✅

You can try monochrome, neutrals, school/team colors, or even select the recipient’s favorite colors. The options are endless—and this stencil plays well with nearly every kind of stamp or sentiment.

2 cards with customized Houndstooth plaid stenciled backgrounds.  Card 1 is floral with pink and orange plaid. Card 2 is a masculine Congrats in blue and green plaid.

cardmaking · Die cutting · papercrafting

Spellbinders New Serenade of Autumn | Colorful Die Cut Cards

Colorful Die Cut Autumn Cards using Spellbinders Serenade of Autumn Collection

Hello papercrafters, I am back with some lovely seasonal die-cut cards for Fall! I chose some traditional autumn colors and then added beautiful pops of blue. Spellbinders just released this fun collection called Autumn Serenade and I used the Autumn Sealed Sprigs dies along with the coordinating Chipboard Stickers and pre-printed Die Cut Shapes for my cards. I found the stickers and shapes to be real time savers when assembling my cards.

I just got back from a trip to Colorado, and I found the changing folliage was so inspirational for these projects.

Using Pre-Printed Stickers and Die Cut Shapes for Quicker DIY Cards

For my first card I used the Sprigs die kit and then added a sentiment plus heart die-cuts to finish my card. This Die Cut Shapes Kit includes 138 pre-printed pieces with lots of sentiments, botanicals, pumpkins, butterflies etc.

Seasonal Thinking of You Card with die cut leaves, Wheat and flowers.

For card #2 I used this showy Chipboard Hello Banner Sticker to complete my fall bouquet. The Chipboard set includes 27 chipboard stickers pre-printed with a variety of sentiments, gold embellishments, butterflies, birds, pumpkins, leaves and flowers. I love this little package and will be using it on future projects.

This Sealed Sprigs Collection reminds me of one of my 2022 Favorite Die Sets called Floral Reflections and you can see that Blog Post HERE.

Using Pre-printed Chipboard stickers for Quick Seasonal die cut cards.

My Process:

  • I started by selecting colors for my two cards. I used colored paper from two different sampler packs (listed below).
  • Next, I die cut my leaves and botanicals. I played around with layouts and then used the Press and Seal Method to keep my arrangement in place as I flipped it over and added foam adhessive squares to the back.
  • I knew I wanted a banner across the “crossed stems” on each card. The HELLO is a lovely chipboard sticker and the “Thinking of You” is a preprinted die cut. The gold accents add a nice bit of shine to the cards.

Products Used:

Interested in more…You can also find me at these spots too:

@karens_mini on Instagram

Pinterest: @karenabrown

FaceBook: Karens_Mini

YouTube: Karen Brown

cardmaking · papercrafting

Altenew | Linear Life Tropical Garden

I love the modern look of these loose sketchy outline flower stamps! They are very versatile and would work great on clean and simple projects but I also plan to use it on some mixed media cards.

I started again by ink blending my background. I used the three lightest colors in Altenew’s Glacier Cave Mini Cube Set. I masked off a frame with washi tape and then started in the bottom right with Arctic and then moved darker toward the top left corner. I stamped the flowers and leaves with black pigment ink. Once the outlines were dry, I stamped the flower centers with Caribbean Sky Crisp Dye Ink. I die cut the blooms, assembled with foam tape and then added Glacier Caves Enamel Dots to finish the project.

Altenew Linear Life Tropical Garden Stamp and Dies + Handmade Card
Altenew Carribean Sky Crisp Dye Ink + Ink Blended Background

Thanks for stopping by!

Karen

Uncategorized

WWC308 – Tristan\’s Challenge: All About Occasions

 Hello and welcome!  We are making \”Occasion\” cards this week at Watercooler Wednesday and Tristan is our hostess.

I created a simple silhouette card using Altenew\’s just released Tall Foliage set.  I masked the edges of my slimline panel and then ink blended my background.  After the panel was completely dry I  black heat embossed this pretty sketchy flower.  This is a pretty card that was fairly quick to make.  

We would love to see your card in our GALLERY.

Thanks for stopping by!
Karen
Uncategorized

WWC271 – Kath\’s Challenge: All About Occasions

Hello and welcome!  This week we are making occasion cards at Watercooler Wednesday and Kath is our hostess.  My mother-in-law has been in \”lock down\” at her senior living facility and we have been unable to visit her.  I made this card to try and brighten her day.  
I\’ve always loved cacti and thought this was a cheery little stamp set.  This is my first time to use it.  I also used a new sentiment that I think will be very versatile in the future.  I stamped and Copic colored this foursome.
Supplies:
Fiskars \”Stuck on Each Other\” stamps
Copic Markers
The Greetery Crimped Frame Die
Waffle Flower \”Here For You\” sentiment


I am so pleased that you stopped by!
Karen

Uncategorized

WWC236 – Heidi\’s "All About Occasions" Challenge

Hello and welcome!  This week is all about occasions at Watercooler Wednesday.  Holidays, Birthdays, Weddings, Anniversary, Sympathy, Thank You, Congratulations….your choice.  Heidi is our hostess.  
I white heat embossed a bunch of random botanical images and then ink blended over the embossing.  In person, the blending looks the same color but when I photographed the card, the light played off potions of the card.

I used three inks:  Distress Shaded Lilac, Dare2B Artzy Blue Sky and SSS Steel Blue.  I finished off the cards with a few sequins.

Thanks for stopping by!
Karen
Image may contain: text
Uncategorized

WWC223 – Anything Goes Challenge

Hello there!  So glad you stopped by.  Today is Watercooler Wednesday\’s Special Absolutely Anything Goes Challenge. Dawn is our hostess this week.
Pretty Pink Posh Buttercream jewels.
I needed some Thinking of You cards so I looked through my stamps to find floral images I thought would blend together.  I used stamps from 6 stamp sets:

  • WPlus9 Doodle Buds
  • Photo Play Thinking of You
  • Create a Smile In Bloom
  • SSS Hello Friends
  • Ink Blot Shop This and That 
  • Hero Arts Year Round Sentiments
I stamped a random pattern on Xpress It paper with Memento ink.  I colored with Copic markers:
  • V01
  • YG25
  • YG17
  • Y21
  • Y17
I really like this color combination and will use it again.  I added some Pretty Pink Posh Buttercream jewels. 

Simon Says Stamp Wednesday Challenge

Thanks for stopping by!
Karen
No photo description available.