If you’re looking to add a touch of elegance and sophistication to your handmade cards, incorporating wax seals and infinity dies can elevate your designs to new heights. In this post, we’ll explore how to use these tools to create a stunning floral handmade card.
Today, Spellbinders released a wonderful new collection called Sealed 3D Botanical and I chose Scallop Labels and Tags Infinity Dies and the Forest Mushroom Wax Seal. Infinity Dies are definitely one of my most used craftroom essentials and wax seals are so interesting and fun!

Spellbinders 3D Botanical Collection
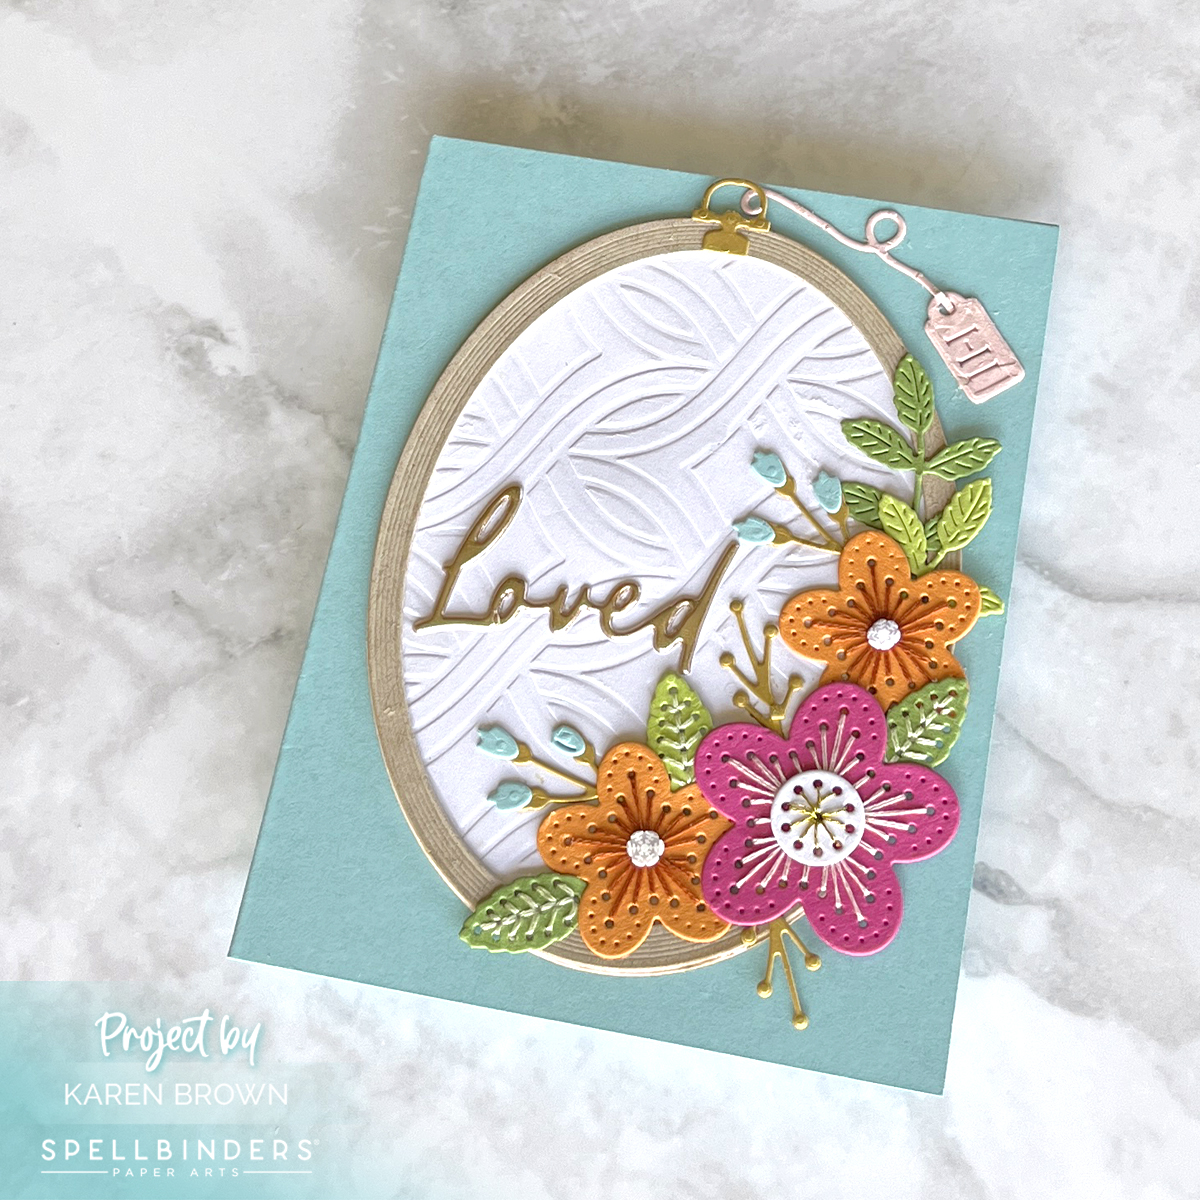
I knew I wanted to make a shaped floral card with a wax seal medallion on my vase. Here are step-by-step directions for this card:
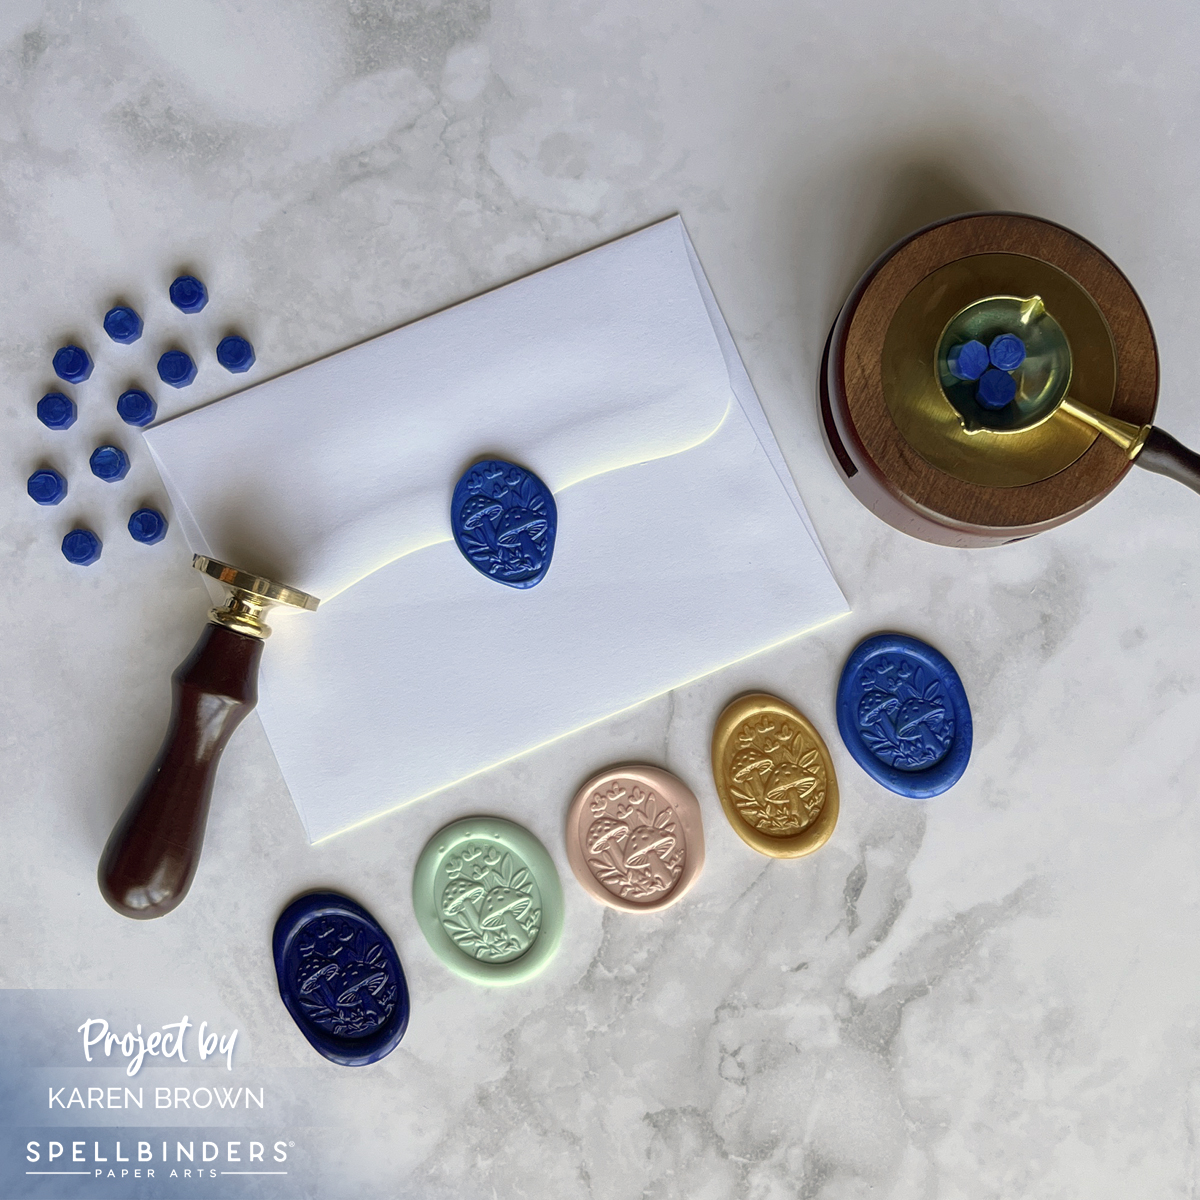
- I started by making a bunch of wax seals, which I really enjoy. If you’d like more details, I have a blog post titled 18 Tips and Tricks for Making Wax Seals that you can read HERE. I decided to use two Royal Blue seals and I planned my color scheme around the two seals. Spellbinders Wax Seal Kit is such a fun addition to any craftroom and I have really enjoyed playing with my kit this year.
- Using my silver Deco Color Paint Pen, I added highlights to the wax mushrooms and foliage. Interestingly, the color looks a little more gold in the photographs, but it is silver in person.
- I die cut my vase and flowers using one of my new favorites: Fresh Picked Vase. I used Cosmic Sky, Periwinkle, Charcoal and Coral cardstocks.
- I wanted a bit more texture so I embossed my vase using my Luxe Backdrop Emboss and Cut 3D folder.
- As I mentioned, I wanted a shaped card so I took an A2 Side Fold Card Base and die cut my white base with the Scallop Labels and Tag die. I made sure that the left cutting edge was to the left of the fold so it would stay intact. Then I cut a Periwinkle and White Mat and assembled my card with Bearly Glue and a few Foam Adhesive Squares.
- I also made a coordinating wax seal envelop for my card that you can see below.
As I said, I really enjoy making wax seals so I made some extras for future projects. The other colors are Indigo Ink, Pistachio, Velvet Rose and Gold.
Conclusion
Using wax seals and infinity dies in your handmade cards adds a level of detail and elegance that will impress any recipient. These tools allow you to create intricate designs and sophisticated touches that make your cards truly stand out. Whether for birthdays, weddings, or just because, a floral handmade card with these elements will be cherished and remembered. Happy crafting!
Karen