Nothing says thoughtful elegance like a handcrafted notecard. I really enjoy the letterpress process and I wanted to create some notecards to have on hand for the coming year. Spellbinders recently released their Florals Through the Year Collection and I think it is quite beautiful. There are 12 plates…one for each month.
I have a detailed tutorial below.
Products Used:
- Florals Through the Year Bundle
- Spellbinders Florals Through the Year Collection
- September Morning Glory
- May Lily of the Valley
- February Violet
- French Blue Ink (Nature Tones Sampler)
- Bisque Cotton Cardstock Panels
- Periwinkle Cardstock from Hero Arts
- Best Ever Craft Tape
- BetterPress Letterpress System
A Year in Bloom
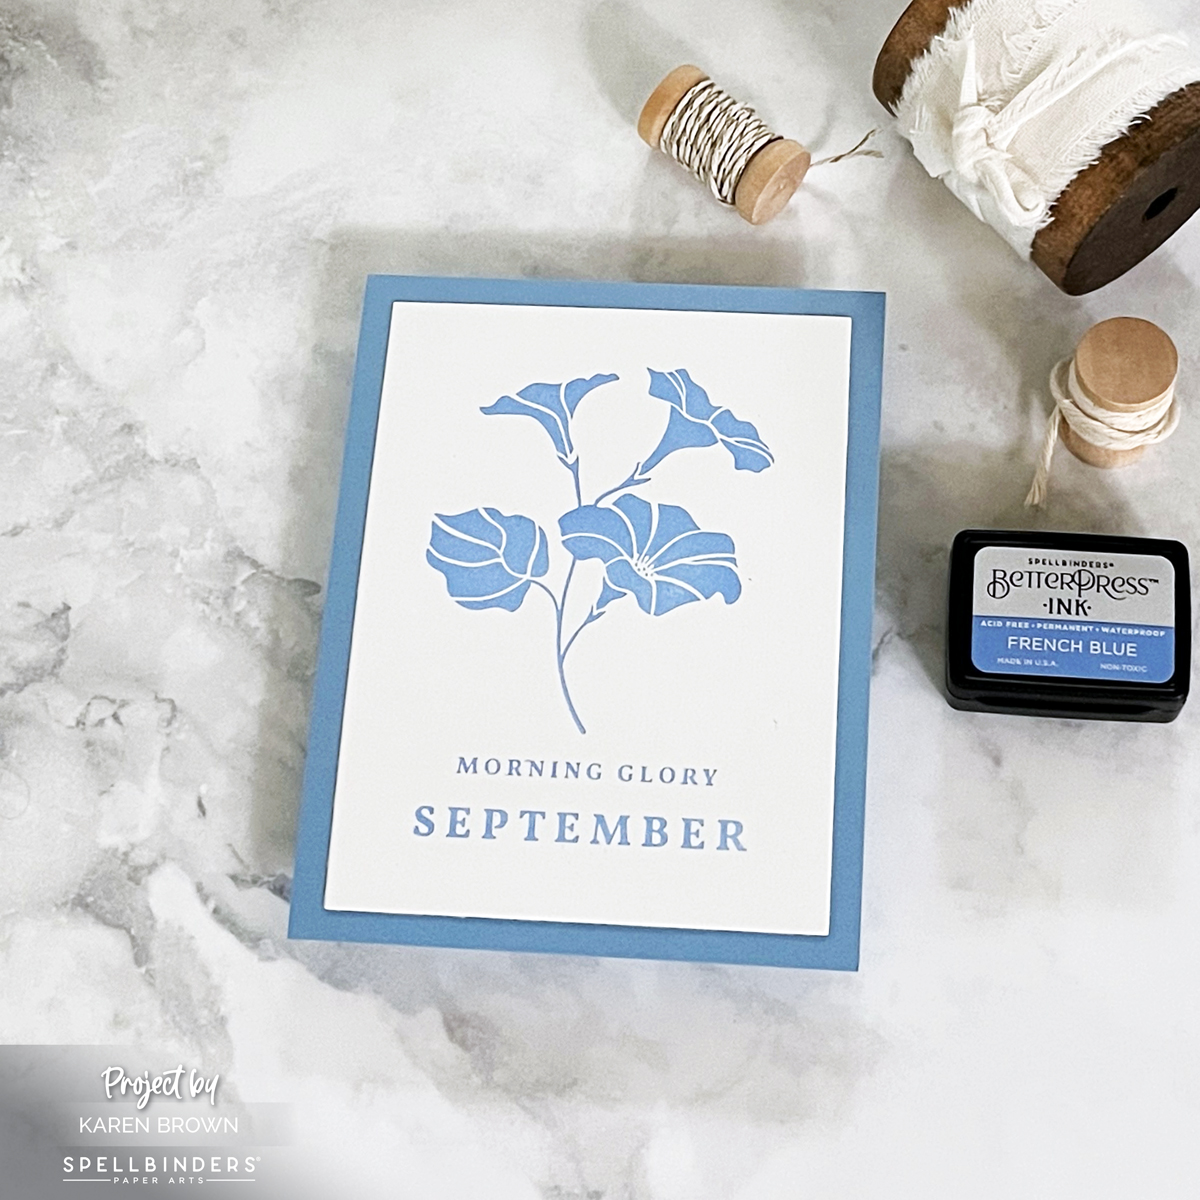
May Morning Glory: Symbolizes love and affection.
BetterPress takes the art of letterpress and makes it accessible for all. Its crisp impressions and sophisticated designs bring timeless beauty to your cards. Plus, the ease of use means you can create a dozen cards in a single sitting—perfect for stocking up or gifting!
Better Press Tutorial:
- I started by using Best Ever Craft Tape to attach my BetterPress card panel to the top plate of my BetterPress System.
- I tried several types of paper (BetterPress, Watercolor and Cardstock) and they all worked with the BetterPress. I liked cottony paper the best. My preferred paper would be the BetterPress cotton paper or a handmade watercolor paper.
- The magnetic lower plate works really well to hold the BetterPress impressing plate in place.
- I was careful to ink the impressing plate really well. I did a “Tap and Twist” technique where I tapped the ink on the plate and then twisted the ink pad a few degrees. Don’t smash and smoosh or you will wind up with little pieces of ink pad on your plate and project. I ink well because I only like to roll through the press once for each panel.
- For smaller sentiment plates, I tapped but didn’t twist. When I twisted smaller plates they tended to move out of alignment. If the plate moves it is easy to reposition with a pair of tweezers.
- Roll your sandwich slowly through the die cutting machine. I think “Super Slo-Mo” while doing this to help me remember to go VERY slowly.
- You will want a good stamp cleaner for the BetterPress and plates. I’ve used Hero Arts Ultra Clean for years and it works great.
- Waterproof or Hybrid inks well. I used the specially formulated BetterPress Inks. Pigment ink is not recommended. You want a faster drying ink.
- I found that my guillotine paper trimmer worked better than my Fiskar’s SureCut on cotton paper.

February Violets: Elegant and full of love for Valentine’s Day
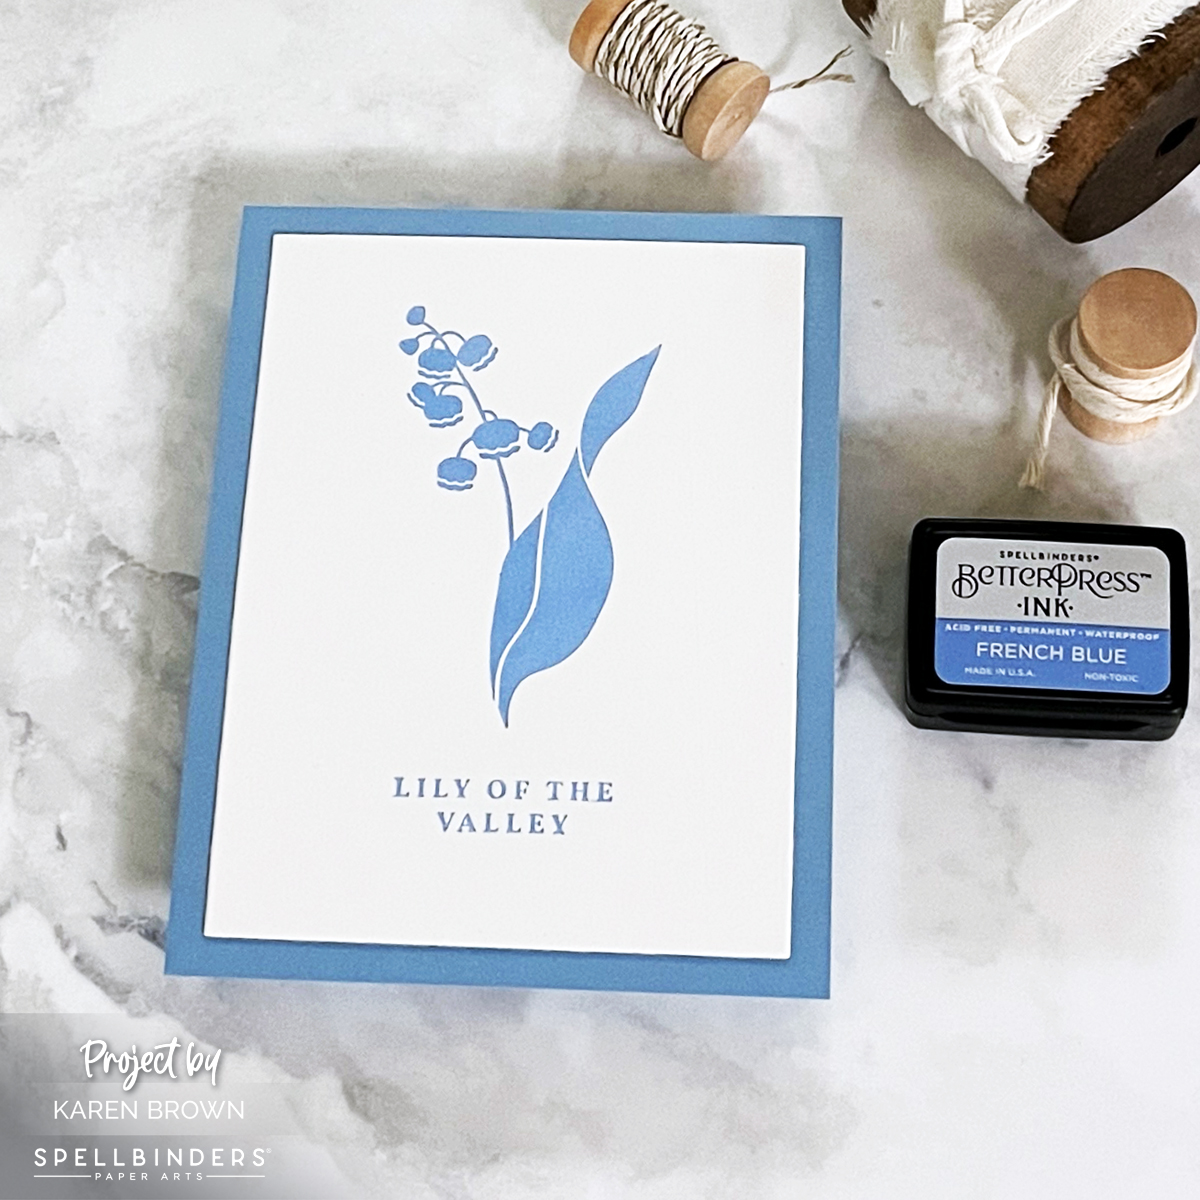
Lily of the Valley: A nod to nature’s beauty in full bloom.
With a unique card for every month, you’ll always have the perfect notecard ready for any occasion. Which month’s design are you most excited to try?
Karen