Aloha! Delight in the sweet essence of tropical charm with my latest crafting adventure using this month’s Spellbinders Stitching kit! I am diving into the art of hand-stitching to create a whimsical pineapple card that’s as vibrant as it is heartfelt. So, grab your needle, thread, and a sprinkle of creativity as we embark on this delightful journey together!
The Deluxe Caboodle
I also wanted to mention what a wonderful deal the Deluxe Caboodle Kit is. You save 60% off all TEN kits for the month + you get a bonus gift. So, if you are thinking about multiple kits, consider the Caboodle. The current cost is $120 but the kit value is $315, which is 60% off!
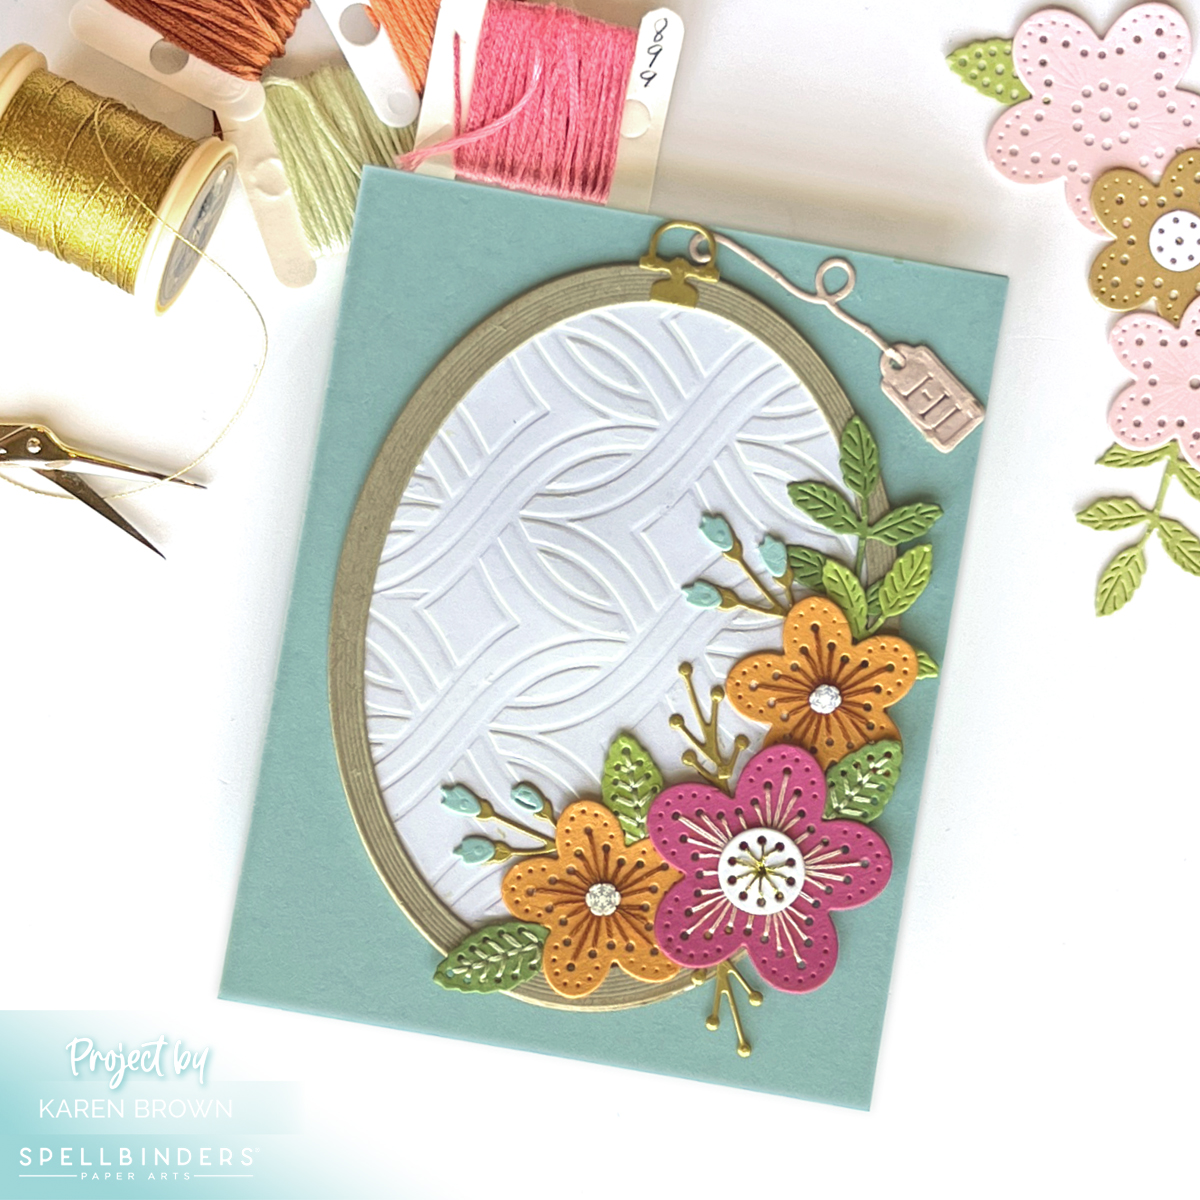
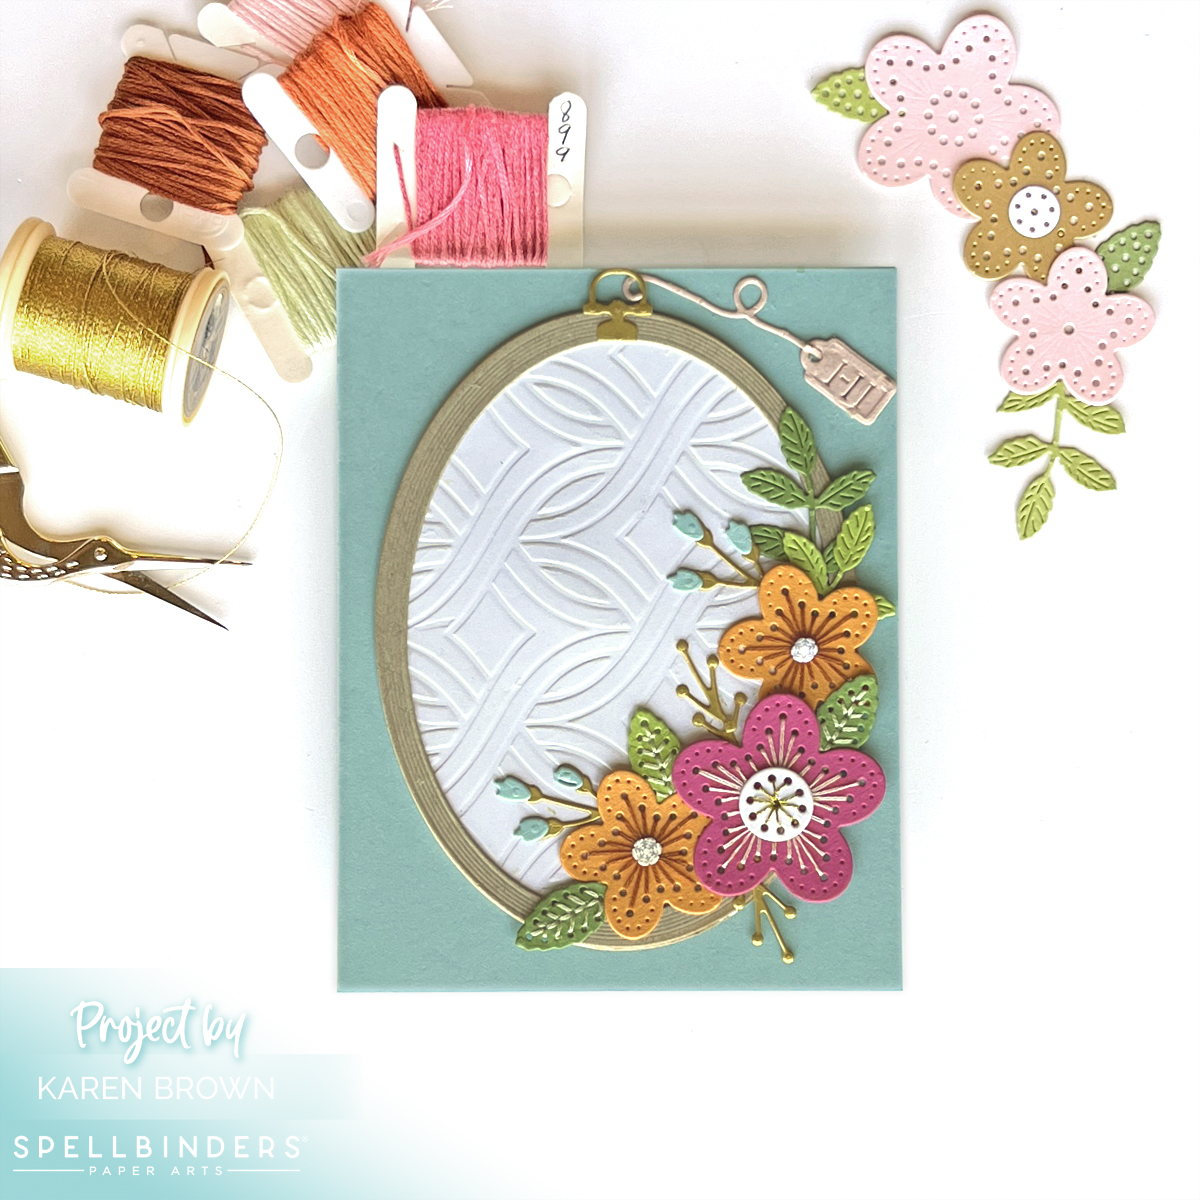
Stitched Pineapple Handmade Card

My Cardmaking Process:
- The kit has 6 cutting dies and I started by cutting all my pieces with my Platinum 6 die cutting machine. I used the Happy Day Assorted Cardstock Pack + a sheet of Pesto for a 4th shade of green.
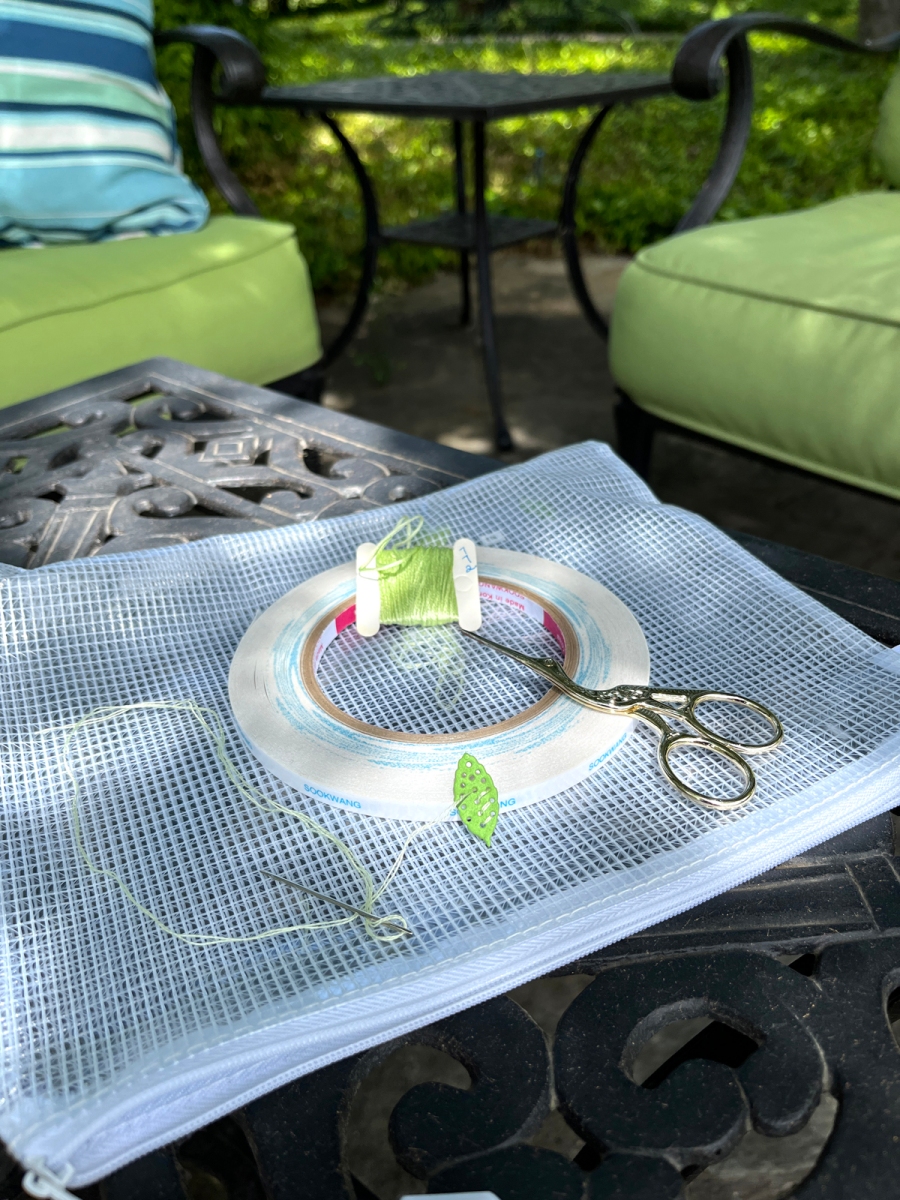
- Spellbinders has a nice selection of stitching accessories in their shop that you can find HERE. I used a bronzy gold thread for my pineapple.
- When I started stitching, I took two strands of floss, separated them one at a time, brought them together and then stroked and lengthened them until they seemed tame and ready to use.
- I usually stitch with size 22 Tapestry needles.
- I like to use 1/8th inch double sided liner tape to attach my floss to the die cut.
- Remember to keep your floss taught as you stitch.
- When I move from one area to the next, I run the floss through the just finished stitched area to keep the thread secure. This gives a nice look on the finished project.
- Don’t stitch with threads that are too long or they are likely to knot.
- When I was done, I added a bit of Bearly Glue to the ends so that they would stay in place.
- To finish my project I embossed white cardstock with the my longtime favorite embossing folder: Intertwined Lattice.
- I hot foiled my sentiment with Yana’s Special Glimmer Sentiments and my Glimmer Hot Foil System.
- I added 6 Opal Gems around the pineapple with my Ninja Pickup Tool.
Helpful Links:
- Spellbinders Stitching Die of the Month
- Spellbinders Deluxe Caboodle Kit – Get All 10 Kits at a Great Value!
- Stitching Accessories
- Club Overview and Club Options
- Past Club Kits
- Spellbinders Shop
Spellbinders Club Info:
- Clubs Preview on the 1st of each month.
- Club members can cancel, upgrade or change clubs from the 1st-5th of each month. Popular Clubs frequently sell out during this period so club members get first dibs on everything.
- NEW for 2024: Club Members get EARLY access to new releases on the 6th!
- On the 6th, Clubs become available to non-members.
- On the 27th, Club registration closes for the current month.
- If a club did not sell out, you can buy under “Shop Past Clubs”. Past kits are available on the 10th of the FOLLOWING month.
Thanks for stopping by!
Karen