cardmaking · Die cutting · Stamping

Best Quick & Easy Get Well Card

Clean and modern handmade get well card featuring a stamped soup cup, blue chopsticks, black enamel dots, and a yellow die-cut circle window.

The December 2025 Hero Arts Stamp & Die Kit of the Month is called Cup of Love, and it’s perfect for creating quick, modern, and heartfelt get well cards. I always need get well cards on hand, so I love having clean and simple designs that I can mass produce—and this one definitely delivers.

This month’s kit features a charming soup cup, chopsticks, labels, and warm “feel better” sentiments that make it easy to whip up comforting cards for friends and family who need a little cheer.

Clean + Modern Design With Easy Stamping

A simple and easy handmade get well card with a die cut yellow recessed circle that showcases and cup of noodle soup, crossed chopsticks and 5 black enamel dots.

For today’s card, I leaned into a fresh white and yellow color palette with pops of crisp black stamping and a hint of blue. The combination feels clean, modern, and cheerful—just the mood you want in a get well card.

Key Products Used:

How I Made the Card

  • I stamped the “cup of noodle soup” image in black ink for sharp contrast.
  • Next, I stamped the round yellow label with Lemon Drop Ink. I waited a minute for the ink to dry, stamped the sentiment “feel better soon” and die cut the image.
  • I stamped and colored the blue chopsticks, die cut them, and crossed them for a playful finishing touch.
  • For the background, I die cut a circle from the center of a white A2 cardstock panel using my Hero Arts Nesting Circle Dies.
  • I layered this white panel over a yellow A2 card base, popping it up with craft foam for dimension.
  • In the recessed yellow circle, I glued the soup cup and chopsticks.
  • Finally, I added five black enamel dots. These tiny accents brought so much contrast and visual interest to the finished design.

The result? A clean and cheerful get well card with modern charm and just enough shading and dimension to feel special—without slowing you down.

Interested in two other recent Get Well Cards I created? Click HERE.


Tip for Mass Production

If you want to make a full batch of these cards (and I definitely recommend it!), simply die cut a yellow circle and adhere it directly to a white card base. Or alternatively, you could ink blend a yellow circle. You can skip the popped-up window panel and still get the same bold pop of color.

Thanks for stopping by!

cardmaking · Die cutting · Video

VIDEO: Quick and Easy Cardmaking

Fast and easy handmade card using Hero Arts Collage Backgrounds Rub-On Transfers and Magnifying Glass Die Set, featuring the sentiment "The Evidence is Clear – You're Incredible."

Hero Arts Craft Lounge Recap

Last night, I had the pleasure of joining the very first Hero Arts Craft Lounge, a FREE virtual crafting event that brought together so many creatives for an evening of inspiration, tips, and fun. If you missed it, don’t worry—you can catch the replay and enjoy the session at your own pace!

📺 Watch the replay here: Hero Arts Craft Lounge – Facebook Event

And if you haven’t joined yet, look into the new Hero Arts Collective on Facebook.

Video of creating a quick, fast and easy card using Run-On Transfers and a quick die cut focal point - a magnifying glass.

During the event, Channin Pelletier, Rosie Lopez, Michelle Lupton and I each created a unique custom card using the new Case Closed Collection. I opted for a FAST and easy card that anyone can recreate in less than an hour! And you can watch 4 different cards being created at the same time!

I used the Collage Backgrounds Hero Rub-On Transfers to create a dramatic yet effortless background. These rub-ons add instant texture and layered interest—perfect when you’re short on time but still want a showstopper.

For the focal point, I die cut elements from the Magnifying Glass Die Set and added the sentiment: “The Evidence is Clear – You’re Incredible.” The lens was die cut from vellum.

This card came together so quickly and has a sleek detective-style vibe thanks to the mix of vintage background and bold elements from the new Hero Arts release.


BetterPress · cardmaking · Tutorial

Quick and Easy BetterPress Notecards | Spellbinders

BetterPress Tutorial detailing how to create easy and elegant letterpress notecards using Spellbinders Florals Through the Year Collection.

Nothing says thoughtful elegance like a handcrafted notecard. I really enjoy the letterpress process and I wanted to create some notecards to have on hand for the coming year. Spellbinders recently released their Florals Through the Year Collection and I think it is quite beautiful. There are 12 plates…one for each month.

I have a detailed tutorial below.

Products Used:

A Year in Bloom

Handmade BetterPress letter press floral Morning Glory card.

May Morning Glory: Symbolizes love and affection.

BetterPress takes the art of letterpress and makes it accessible for all. Its crisp impressions and sophisticated designs bring timeless beauty to your cards. Plus, the ease of use means you can create a dozen cards in a single sitting—perfect for stocking up or gifting!

Better Press Tutorial:

  • I started by using Best Ever Craft Tape to attach my BetterPress card panel to the top plate of my BetterPress System.
  • I tried several types of paper (BetterPress, Watercolor and Cardstock) and they all worked with the BetterPress. I liked cottony paper the best. My preferred paper would be the BetterPress cotton paper or a handmade watercolor paper. 
  • The magnetic lower plate works really well to hold the BetterPress impressing plate in place. 
  • I was careful to ink the impressing plate really well. I did a “Tap and Twist” technique where I tapped the ink on the plate and then twisted the ink pad a few degrees. Don’t smash and smoosh or you will wind up with little pieces of ink pad on your plate and project. I ink well because I only like to roll through the press once for each panel.
  • For smaller sentiment plates, I tapped but didn’t twist. When I twisted smaller plates they tended to move out of alignment. If the plate moves it is easy to reposition with a pair of tweezers.
  • Roll your sandwich slowly through the die cutting machine. I think “Super Slo-Mo” while doing this to help me remember to go VERY slowly. 
  • You will want a good stamp cleaner for the BetterPress and plates. I’ve used Hero Arts Ultra Clean for years and it works great.
  • Waterproof or Hybrid inks well. I used the specially formulated BetterPress Inks. Pigment ink is not recommended. You want a faster drying ink. 
  • I found that my guillotine paper trimmer worked better than my Fiskar’s SureCut on cotton paper.
Handmade BetterPress letterpress Florals Through The Year Violet (Feburary) hand crafted notecard using Spellbinders plates.

February Violets: Elegant and full of love for Valentine’s Day

Spellbinders BetterPress letterpress Floral Through the Year handmade card:  Lily of the Valley for May.

Lily of the Valley: A nod to nature’s beauty in full bloom.

With a unique card for every month, you’ll always have the perfect notecard ready for any occasion. Which month’s design are you most excited to try?

Karen

cardmaking · Hot Foiling

Spellbinders| Glimmer for the Holidays| Swirling Foliage Tree

Quick and easy Christmas cards are my favorite! Today I am sharing three bright colorful DIY cards that came together very quickly.

Glimmer for the Holidays Hot Foil Christmas Cards

Sometimes, it seems that it takes me several tries to get the hot foil result that I am looking for, but this Spellbinders Swirling Tree and Comfort and Joy sentiments came out perfectly everytime!

I did three versions, and I love them all. These glimmer plates would work so well for mass producing Christmas cards. And I love that I get 6 sentiments with every foil and die-cutting pass! I have tons leftover for future cards. Such a time-saver.

For the Rainbow tree I angled the rainbow foil and I really like the end result. I also used the rainbow foil for the sentiment on the blue and amythest cards.

Products Used:

Supplies Available at Amazon:

X-Press It Blending Cardstock For Great Foiling Results

Waffle Flower Foam Strips

6 Inch T Square Ruler
cardmaking · papercrafting

Spellbinders | October 2022 Club Kits

Spellbinders October 2022 Large Die of the Month: watercolored die cut Christms Ornament card

Large Die of the Month – October 2022

Hello! Today is Release Day for the October 2022 Spellbinders Club Kits and I have several cards to share with you. I’ll start with the beautiful Large of Die of the Month, which is a seasonal stitched Christmas ornament. In my mind, I saw a softly watercolored bauble so I die cut the ornament from watercolor paper. Then, using the wet on wet technique, I loosely painted the die cut with three shades of aqua. I also painted a pink and green panel for the poinsettia and greenery. I used the greenery from Stitched Ornament (S4-1231), which was released earlier this year. After allowing the paint to dry, I darkened the edges with a second coat of water color.

I used three strands of blue gray embroidery floss. I created the background (3 5/8″ x 8 5/8″) with this month’s Embossing Folder of the Month. I wanted a showy card, so I used a big slimline card base (8″ x 9″, scored at 4″). I found this card so relaxing to make!

watercoloring die cuts:  Spellbinders stitched Christmas ornament.

Small Die of the Month – October 2022

I created a cheerful Get Well card with the Small Die of the Month (Outlined Christmas Sentiments) kit. I love the ten mix and match sentiments (and shadows): Merry, Greetings, Warm, Christmas, Holiday, Wishes, Cheer, Enclosed, Joyous, Hugs.

Spellbinders October 2022 Small Die of the Month (Outlined Christmas Sentiments) Club Kit card.

I started by embossing my background (September 2022 Embossing Folder of the Month: Scattered Fall) on Waterfall Cardstock, and then used the shadow dies to cut an opening for the words Warm Hugs Enclosed. The sentiment was then die cut from Copper Metallic Cardstock. I’ve found it works well if you attach a sheet of double sided adhesive paper to the cardstock prior to die cutting. After you die cut, just pull away the backing paper and apply! I also die cut the poinsettias (included in this month’s kit) from Teal Topaz and white cardstock. The last step was to assemble the A2 Top Folding card with craft foam behind the background and foam tape squares behind the poinsettias.

Warm Hugs Enclosed Get Well card: Spellbinders October 2022 Die of the Month Club Kit.

Embossing Folder of the Month: October 2022

My last card was quick and easy! Using this month’s Embossing Folder (Scattered Christmas). I created my background with blue cardstock. I wanted the lovely embossing to be the star on this card.

Spellbinders October 2022 Embossing Folder of the Month Club Kit card.

I added a bold seasonal sentiment with three enamel dots and added the components to a top folding A2 card base.

Quick and Easy 3D Embossed Card using Spellbinders October 2022 Embossing Folder of the Month.

I am so glad you stopped by today!

Karen

Uncategorized

Altenew Summer Adventure Stand-alone Dies Collection Release Blog Hop + Giveaway

Hello, I am so excited to introduce you to some of Altenew\’s gorgeous new stand-alone dies!  

Die Cutting with Altenew\’s Tropical Leaf Mix Dies

Altenew\’s Tropical Leaf Mix dies are so beautiful and fun to create with!  I started by cutting a 5 1/2\” square card base and then added some copper paint splatters.
Green, Gold and Copper

Next, I gathered a bunch of gel press prints and started to die-cut and arrange a leaf flower.  Once I started I realized I really liked the green panels with gold and copper.  My flower needed a center so I used the cute little star flower from Altenew\’s Bride To Be Layering Set.  This set makes such a lovely dimensial card.

For my next card, I die-cut leaves from a gold/copper gel print (above) and brown cardstock.  The leaves are  Altenew\’s new Tropical Leaf Mix dies. For the center, I again used the star flower from Altenew\’s Bride to Be Layering Set

Copper, Gold and Brown Metalic Gel Plate Print
I love how you can use the leaves individually or layer them.
Quick and Easy Die Cut Card

The new Peeking Leaves Cover Die is beautiful.  I selected two colors of summery cardstock and die-cut the aqua panel.  I glued the die cut to an A2 card base and used the edge of a ruler to straigthen the sides.  The sentiment is Altenew\’s Simply Hello Die.

Turqouise and Melon cardstock


Giveaway Prizes

$300 in total prizes! To celebrate this release, Altenew is giving away a $50 gift certificate to 2 lucky winners and a $25 gift certificate to 8 winners! Please leave a comment on the Altenew Card Blog and/or each designer’s blog post on the blog hop list below by 06/23/2021 for a chance to win. 

Altenew will draw 10 random winners from the comments left on each stop of this blog hop and announce the winners on the Altenew Winners Page on 06/25/2021.


Blog Hop: 

Altenew Blog

Jennifer McGuire

Vicky Papaioannou 

Norine Borys

Jenny Colacicco

Erum Tasneem

Seeka

Nicole Watt

Simon Hurley 

Therese Calvird 

Amanda Baldwin

Tania Ahmed

Verity Biddlecombe

Emily Midgett

Bridget Casey

Virginia Lu

Victoria Calvin

Tenia Nelson

Colleen Balija 

Nathalie DeSousa

LauraJane

Maryam Perez 

Karen Brown                      You Are Here!

Michelle Short

Agnieszka Małyszek

Patricia Roebuck

Carol Hintermeier

Zinia Redo

Sandhya Iyer

Terri Koszler

Kelly Griglione

Mindy Eggen

Natasha Davies

Joylita Dsouza

Anna Mahtani

Keren Baker

Laura Bassen

Sande Woodson

Raquel Bowman

FREE GIFT PROMOTION:


Here are THREE ways to get a FREEBIE to kickstart your creativity! Free gift will be added to cart automatically. 

  • Get a FREE brand new Summer Adventure Release Inspiration Guide (worth $5.99) with every order of high-value Summer Adventure release bundles. Shop Here! *Exclusions apply.

  • Get a FREE brand new Summer Adventure Release Mini Inspiration Guide with every order from 06/17/2021 through 06/19/2021. Shop HERE.


READY TO SHOP?

Link To Altenew Summer Adventure Stand Alone Die Collection.


I am honored that you stopped by my blog…thank you!  If you have another moment, I would love to hear which card you like best.

Karen 


Uncategorized

Altenew Adventures Ahead Stamps/Dies/Stencils/More Collection Release Blog Hop + Giveaway

Hello!  I was so excited and inspired by Altenew\’s June Adventures Ahead Stamp and Die Collection that I created 8 cards!  So many ideas!

Die Cutting With Scraps

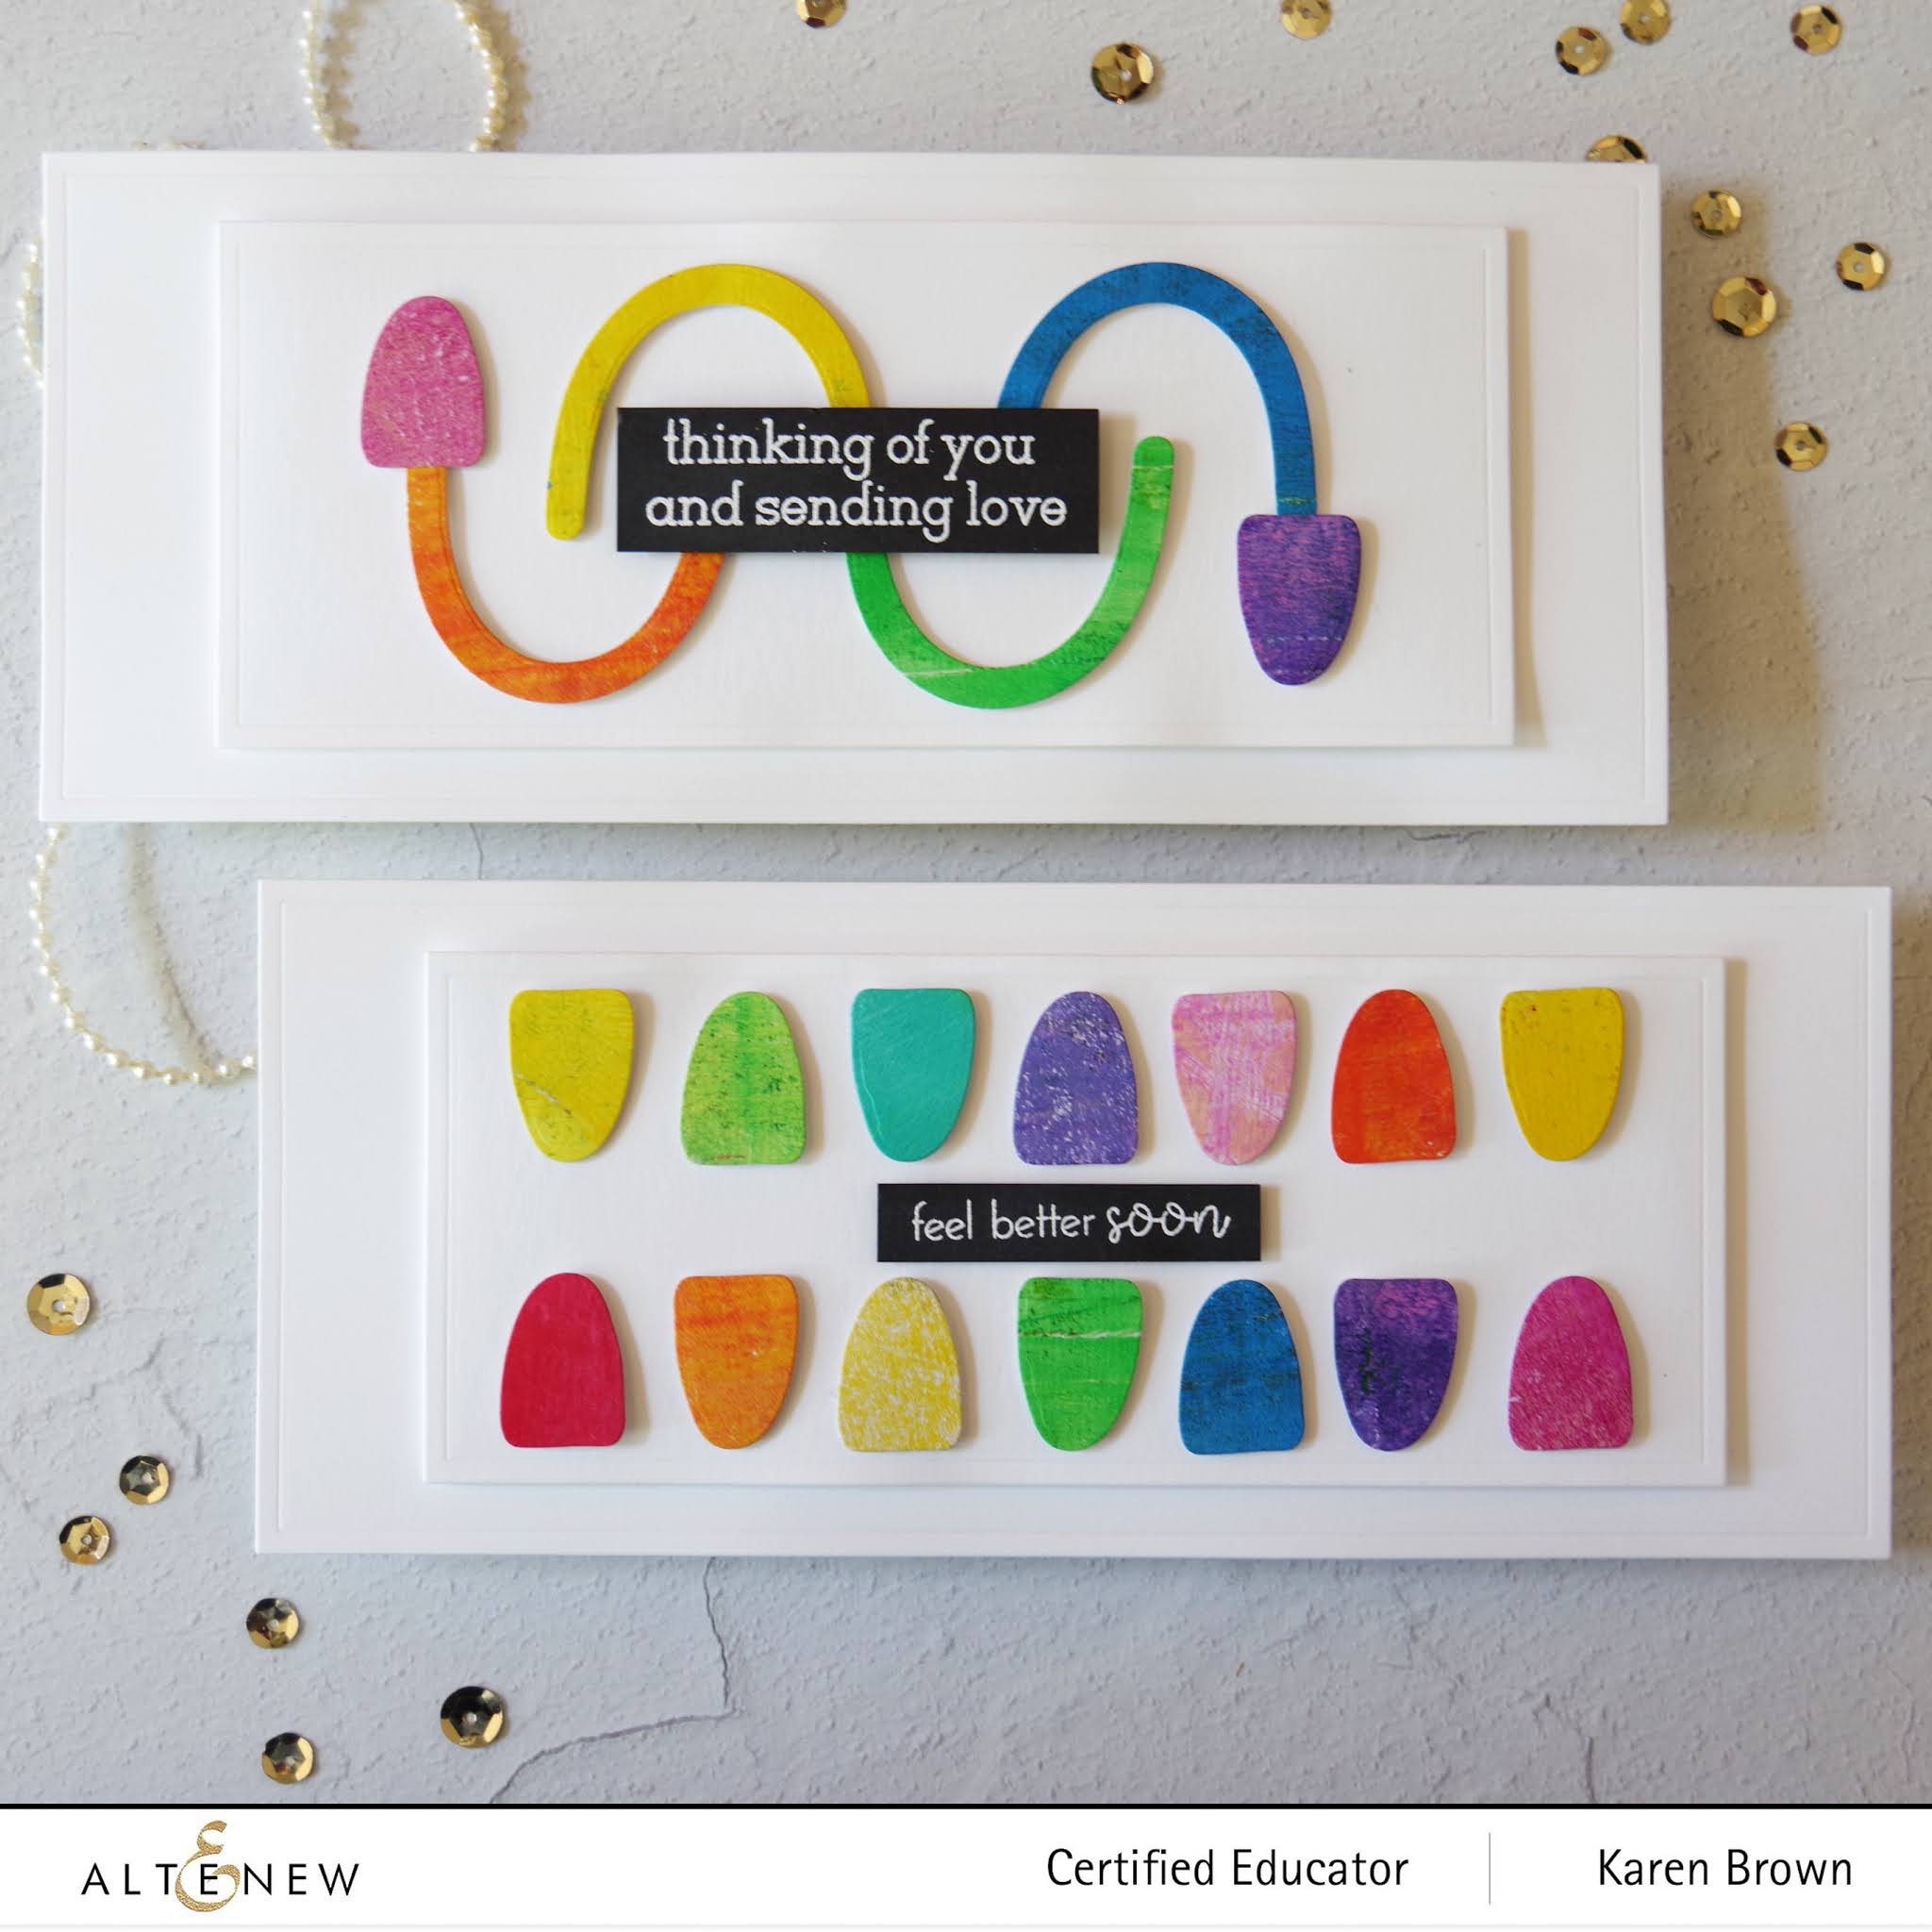
Altenew\’s Color Bands dies are wonderful and at a great price point!  If you like to die-cut there are endless possibilites….I found them so addiciting!  For this first card, I used brightly colored scraps of gel press prints.  My inspiration was gum drops and I die cut 14 rainbow hued \”gum drops\” and adhered them to my card with foam tape.  I crafted my slimline card using the Nesting Slim Rectangles Die Set.  

Rainbow Gel Press monoprint card.Die Cutting With Gel Press Prints

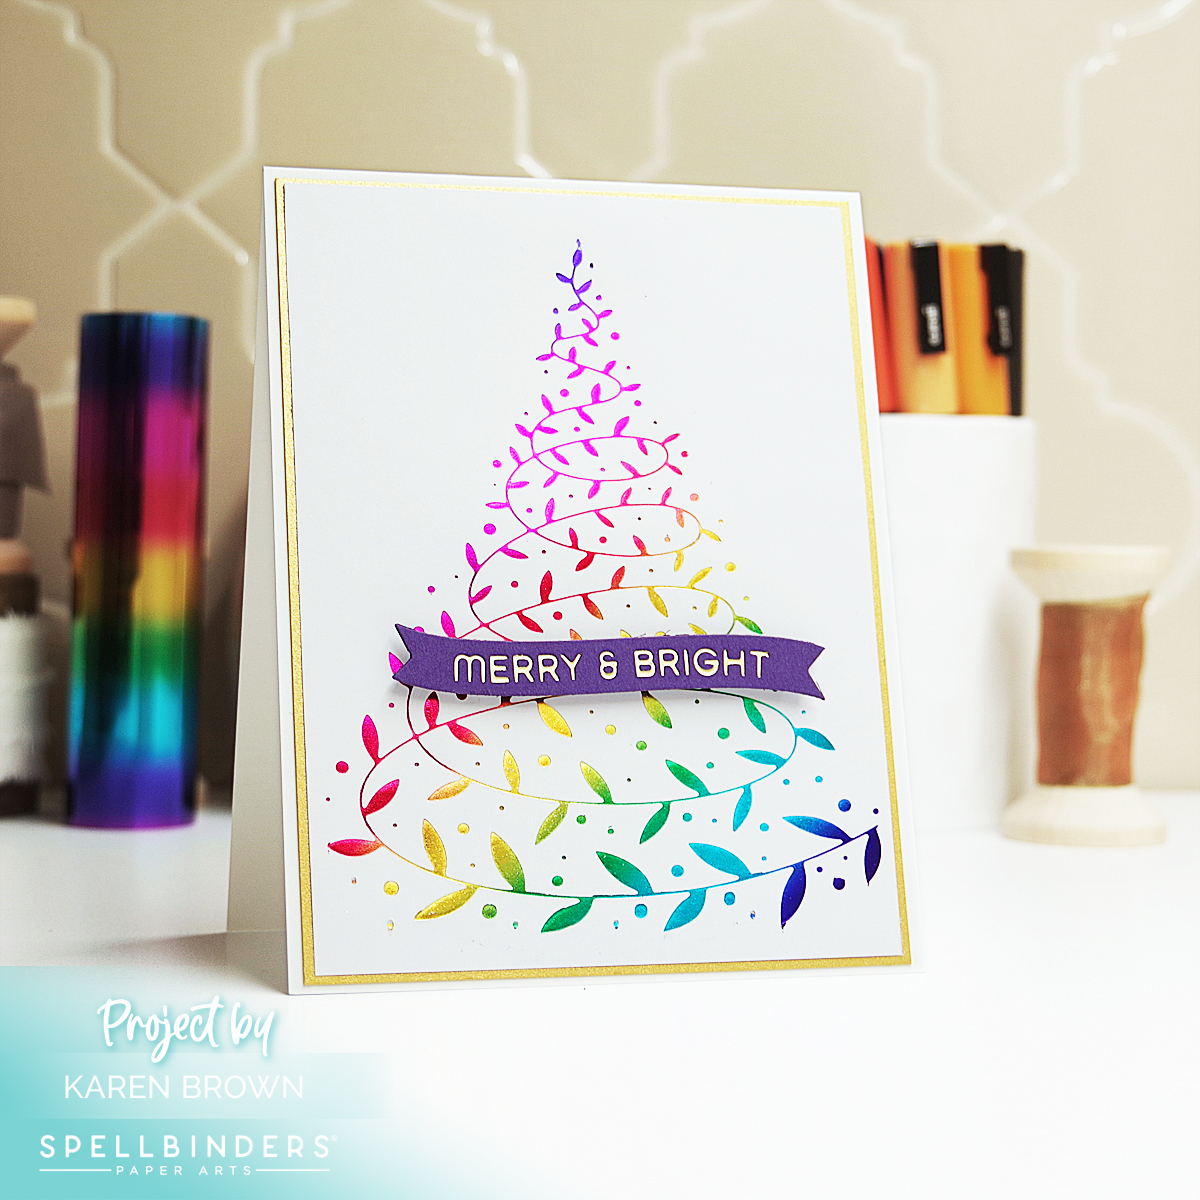
I wanted rainbow colors for my \”squiggles\” card also.  I used the same Color Bands Dies as above.
Squiggle free form die cut card.

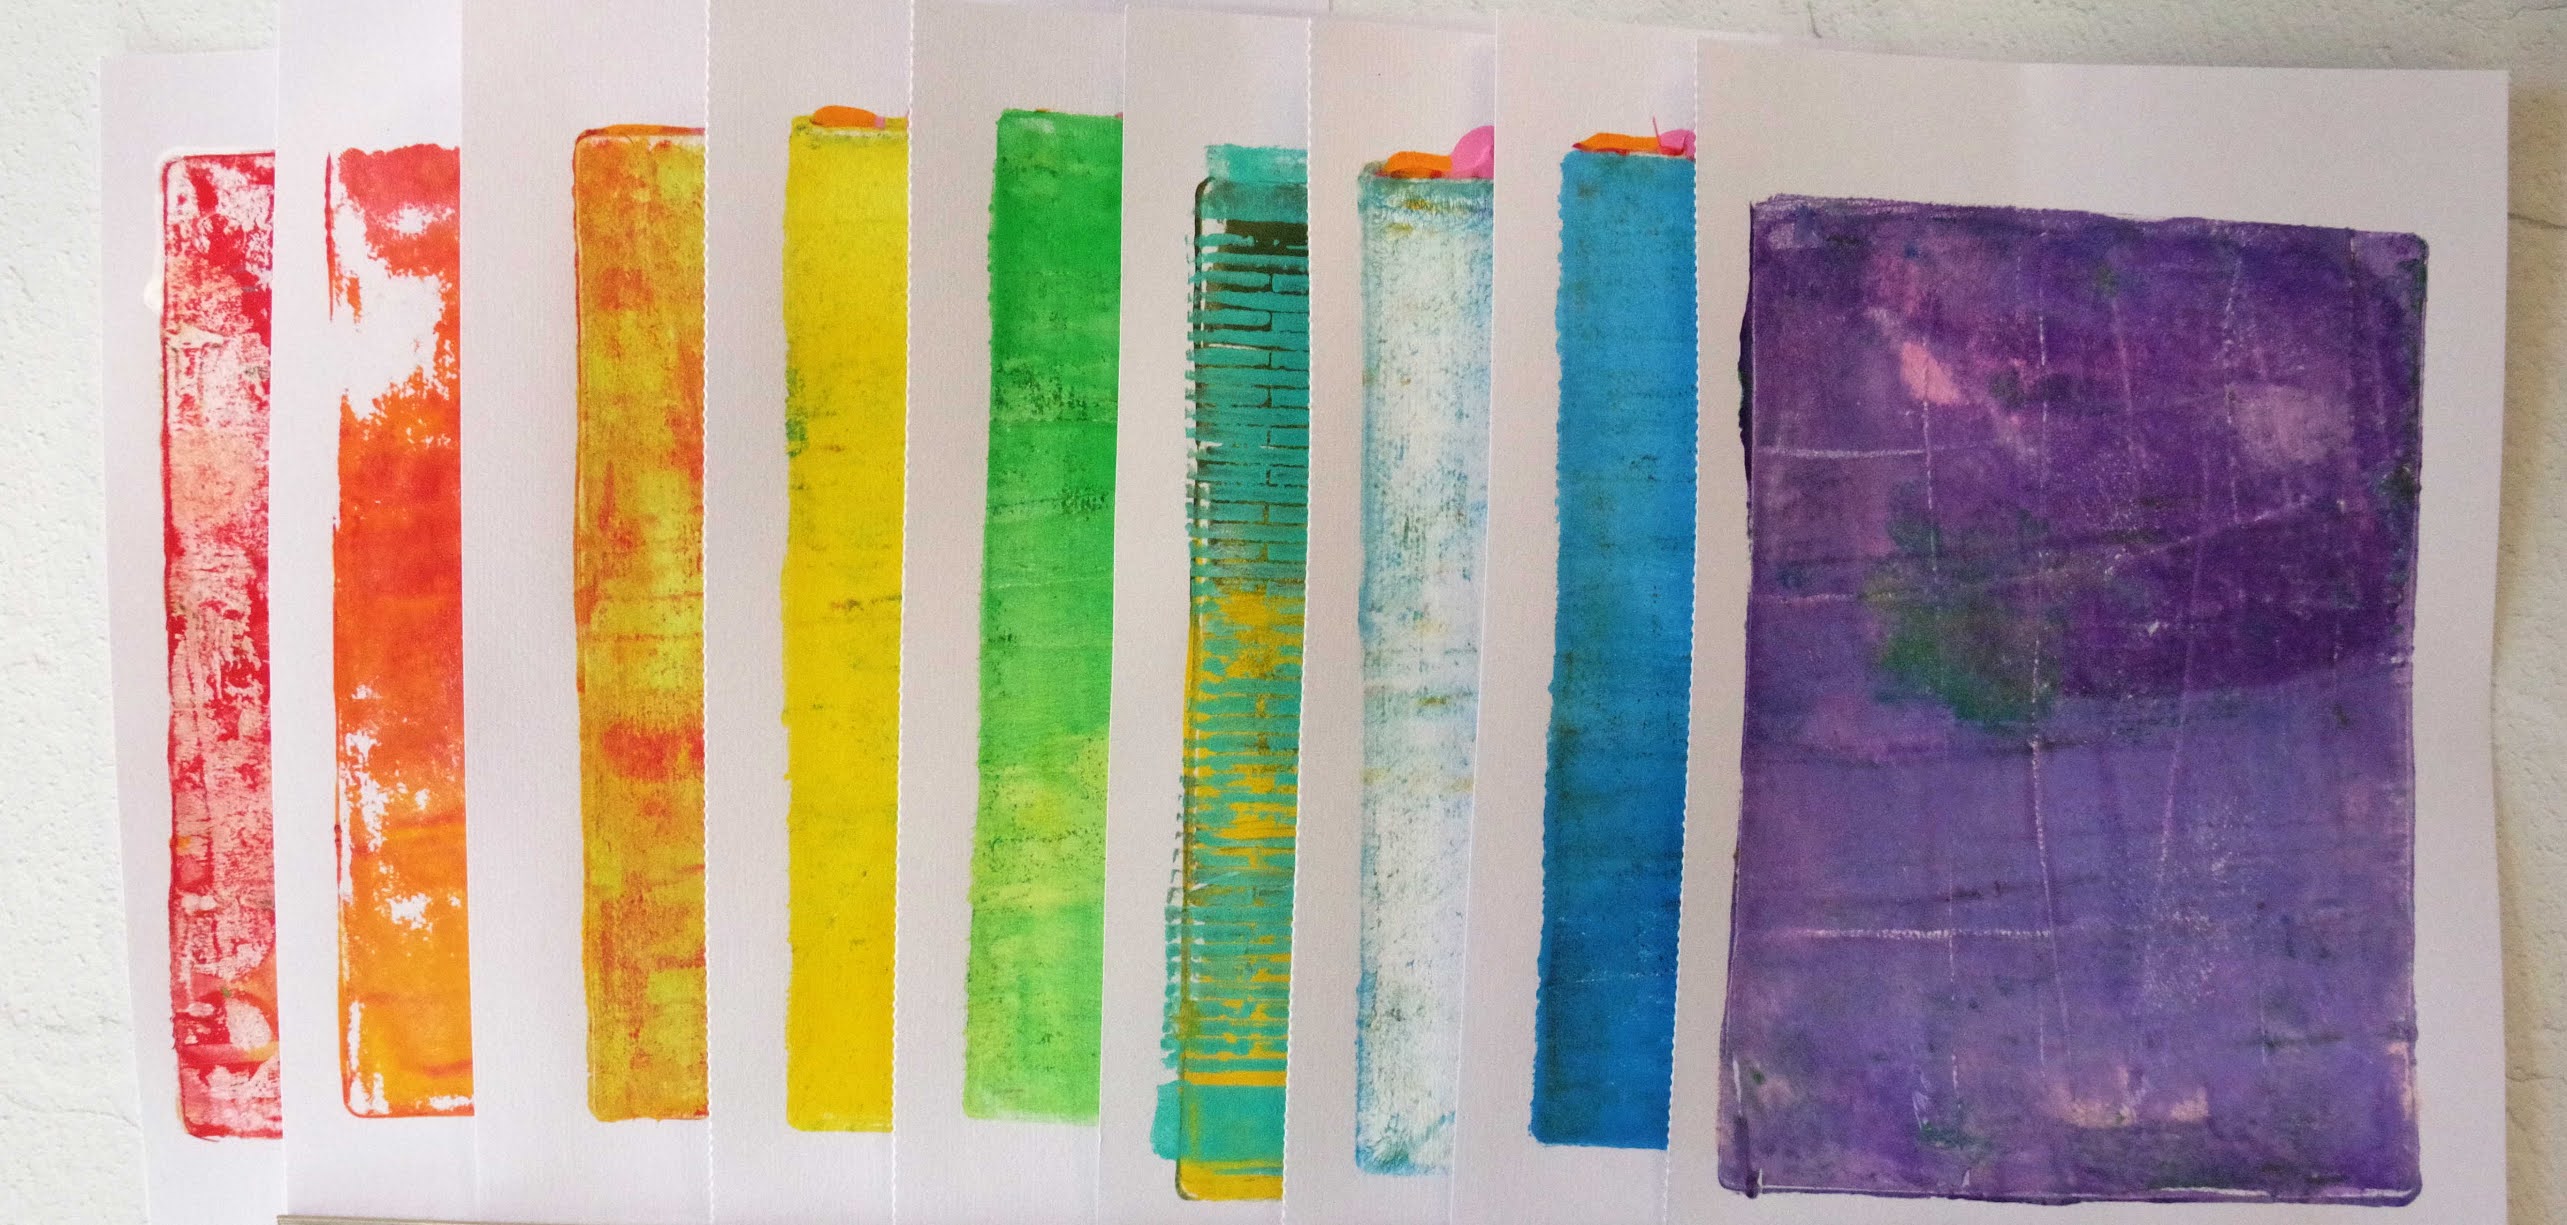
I selected an assortment of simple gel press prints and started die cutting.   I took a quick photo (below) of the print assortment I started with. I wanted lots of beautiful white space so I again used Altenew\’s Nesting Slim Rectangle Dies  to make another slimline card.


3D Embossing Gel Press Prints

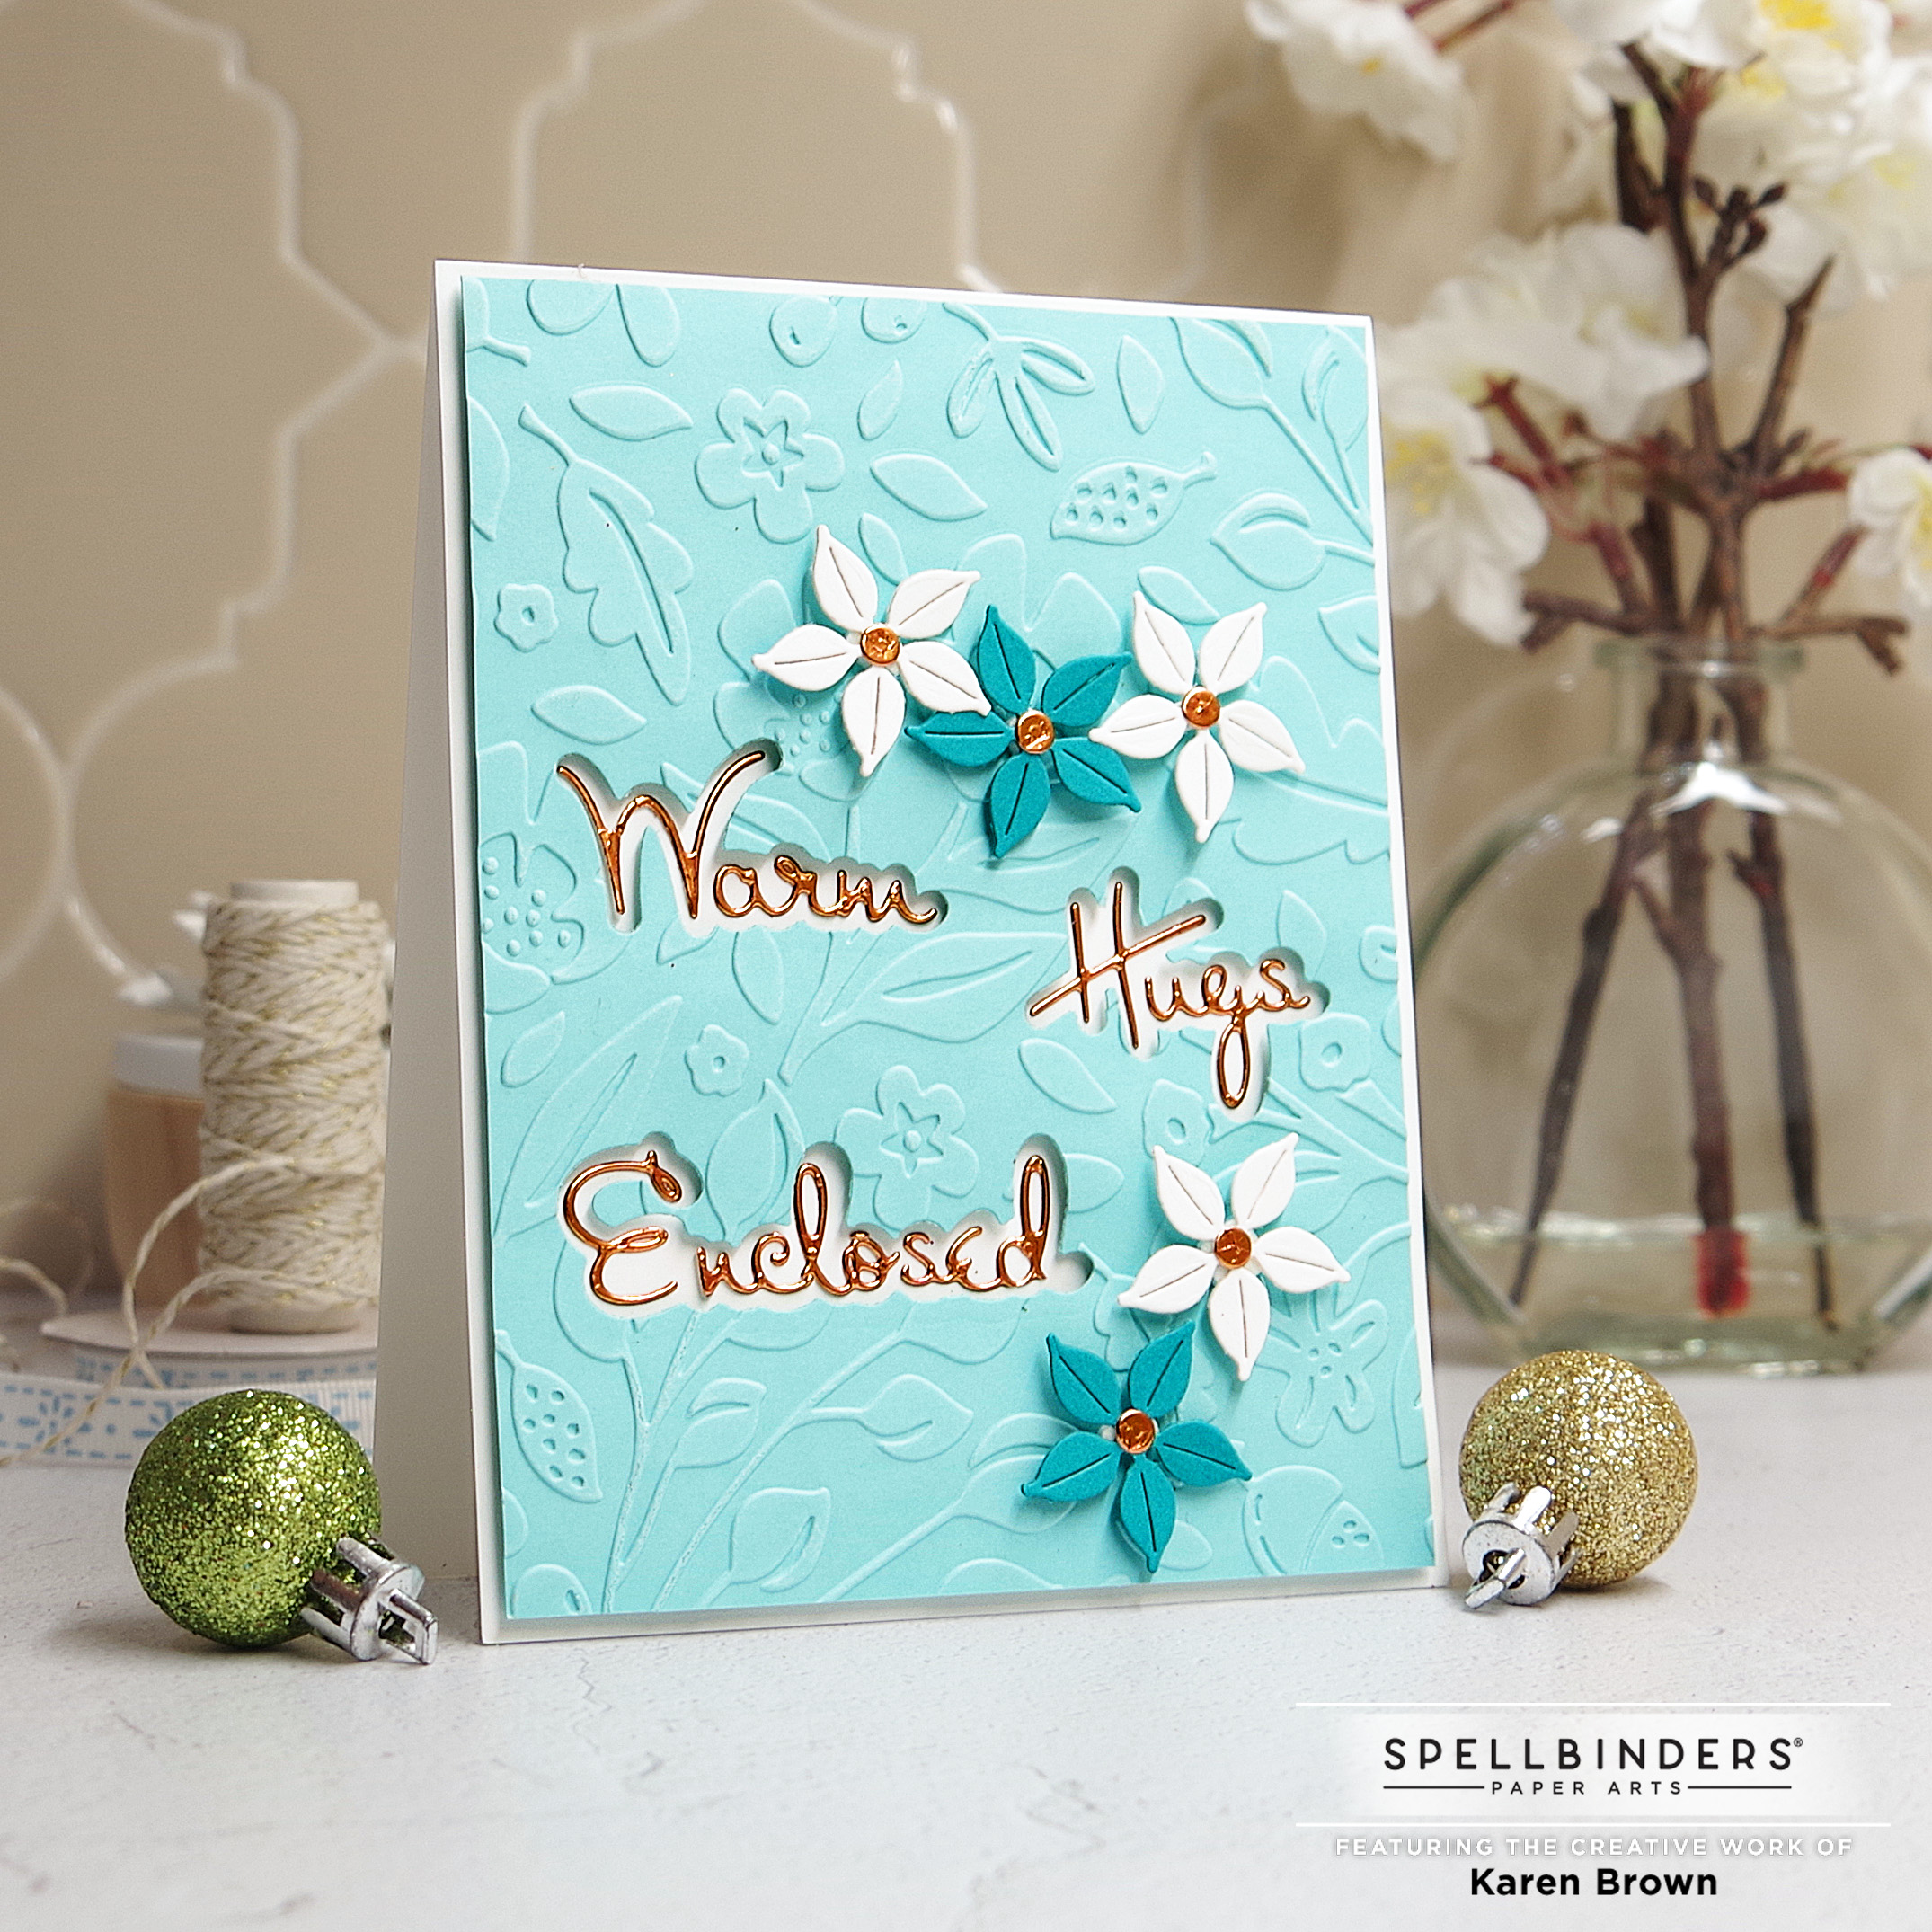
I don\’t think I can ever have too many brick elements to craft with so I was very excited about Altenew\’s new Brick Wall 3D Embossing Folder.  For this card I took a gel press print and ran it through my embossing machine. I think  this panel makes a beautiful background for my two Cosmos Die Cut Flowers.
Turquoise gel press print

Vintage Feel Scene Card

 I was captivated by the new Seas The Day stamp and die bundle.  I love a good scene card and thought it would be fun to create a vignette of a girl watching a boat race.  I went with an off-white vintage feel and  made two of these…one for my daughter and one to go with a graduation gift.  And, don\’t you just love those animated Pelicans!
Cream, Yellow and Pink

Four Quick and Easy Cards

I came up with an idea for a quick and easy masculine card.  The lines on the  Seas The Day sailboat are just beautiful and I thought a \”blueprint look\” would be very striking.  I stamped the boat with Saphire from the Glacier Caves mini ink cube set.  I then hand inked an accent panel and sentiment strip with the same Saphire ink and Altenew\’s Large Blending Tool and set this behind the sailboat to frame the top panel.  I like the coordinating saphire sentiment band (Altenew Essential Sentiment Strips).  Very easy, very striking and very masculine…a winning combination.


Altenew Saphire Blue


It is graduation season so my last three cards are for the graduate.  The detail on the Feathered Friends  dies is beautiful!  I die cut three from cardstock and then popped them on a white  Brick Wall 3D Embossing Folder panel and added a die-cut Essential Sentiment Strips sentiment.

Melon, yellow and green

These next two cards came together very quickly!  The backgrounds are from the Rainbow Blots 6×6\” Paper Pack which is filled with gorgeous papers with highly saturated color.  These packs are at a great price point and with 24 sheets, you can make loads of projects.

Using the Rainbow Blots paper pack, I trimmed down two panels and then die cut two sets of sentiments using Altenew\’s new Reach For The Stars die.  This sentiment definitely makes a statement!

Blue, violet and black

I am sending these two cards with graduation gifts.

Multi color

Are You Ready For Some Prizes?

$300 in total prizes! To celebrate this release, Altenew is giving away a $50 gift certificate to 2 lucky winners and a $25 gift certificate to 8 winners! Please leave a comment on the Altenew Card Blog and/or each designer’s blog post on the blog hop list below by 06/09/2021 for a chance to win.


Altenew will draw 10 random winners from the comments left on each stop of this blog hop and announce the winners on the Altenew Winners Page on 06/11/2021.


You\’ve probably just seen Bridget Casey\’s lovely projects and you will love Laurie Willison\’s post.

BLOG HOP:

Altenew Card Blog

Therese Calvird

Jenny Colacicco 

Jaycee Gaspar

Bridget Casey

Virginia Lu

Seeka

Laurie Willison

Michelle Short

Emily Midgett

Mindy Eggen

Tenia Nelson

Amanda Baldwin

Maryam Perez 

Carol Hintermeier

Terri Koszler

LauraJane

Keren Baker

Verity Biddlecombe

Karen Brown

Victoria Calvin 

Preeti Chandran

Joylita Dsouza

Sande Woodson

Natasha Davies

Anna Mahtani


Are You Ready to Shop?  Free Gift Oportunities:


Here are THREE ways to get a FREEBIE to kickstart your creativity! Free gift will be added to cart automatically. 

·  Get a FREE brand new Adventures Ahead Release Inspiration Guide (worth $5.99) with every order of high-value Exotic Garden release bundles.  SHOP HERE! *Exclusions apply.

·  Get a FREE brand new Creative Jump Start Class with every order from the new Adventures Ahead release collection from 6/04/2021 through 6/10/2021. SHOP HERE

·  Get a FREE brand new Adventures Ahead Release Mini Inspiration Guide with every order from 06/04/2021 through 06/06/2021. Shop HERE!

I am honored that you stopped by my blog…thank you!  If you have another moment, I would love to hear which card you like best.

Karen 

Uncategorized

Quick and Simple Cards

Hello, hello and welcome!  I just completed Laurie Willison\’s Altenew Academy Class called Quick and Simple Cards and I wanted to share two of my creations.  I love making backgrounds and both of these cards focus on the backgrounds.   This first card was my homework assignment for Faux Watercoloring.  

I recently purchased  Altenew\’s Block Print stamp set and thought it would be fun to \”faux watercolor\”.  The stamp set has four vingettes and I loved this one with diagonal and vertical lines.  I inked up the stamp with Carved Pumpkin, Candied Apple and Seedless Preserves Distress Inks and then spritzed with water. 

I then pressed the stamp onto Bristol cardstock and let it sit for a few seconds.  I also did a panel on watercolor paper, but the detail was lost so on this card, I used the Bristol panel.  I really love this vibrant color combination for fall.  

I wanted the focus on the background so I kept the other elements black and white.  I stamped the darling leaves cluster from The Retro Plantines stamp and die set and then die cut.  I added a simple sentiment but added a strip of Painted Grid Washi tape to the top for a little added interest.

The second card features a three tone stenciled background.  I masked off a 3/4\” border and then taped the Feathered Leaves Stencil to the panel. Using three different analogous ink colors (Wild Honey, Carved Pumpkin, Mustard Seed), I ink blended each leaf a different color.  I thought these colors made such a pretty seasonal background.  I then heat embossed The Best Mom spray using chocolate brown embossing powder. I really like the effect on the card.  

I attached the panel to an A2 card and added a simple birthday sentiment on brown cardstock along with a couple of buttercream jewels. 

Two quick, simple and easy to make cards!  

I am also playing along with:

Thank you for stopping by!
Karen