This post was updated March 2026 with additional recommendations.
Quick Picks
My Favorite Cardmaking Supplies
- Best Die Cutting Machine – Spellbinders Platinum 6
- Favorite Cardstock – Spellbinders ColorWheel Cardstock
- Best Ink – Hero Arts Reactive Inks
- Best Blending Brushes – Waffle Flower Color Coded Blending Brushes
- Best Die Cutting Staple – Hero Arts Nesting Infinity Dies
Why These Supplies Matter
When I first started cardmaking, I bought many tools that I didn’t really need.
Today I’m sharing 14 of my most-used, most-loved cardmaking supplies for 2026. These aren’t just trendy products — they’re the tools I reach for again and again. I use them over and over in my craftroom and they are the products that I recommend to new cardmakers.
If you’re stocking your craft room, refining your supplies, or just love seeing what other cardmakers actually use, this list is for you.
📌 Save this for later on Pinterest
Karen’s Full List of Recommended Products for 2026
1. Best Die Cutting Machine: Spellbinders Platinum 6
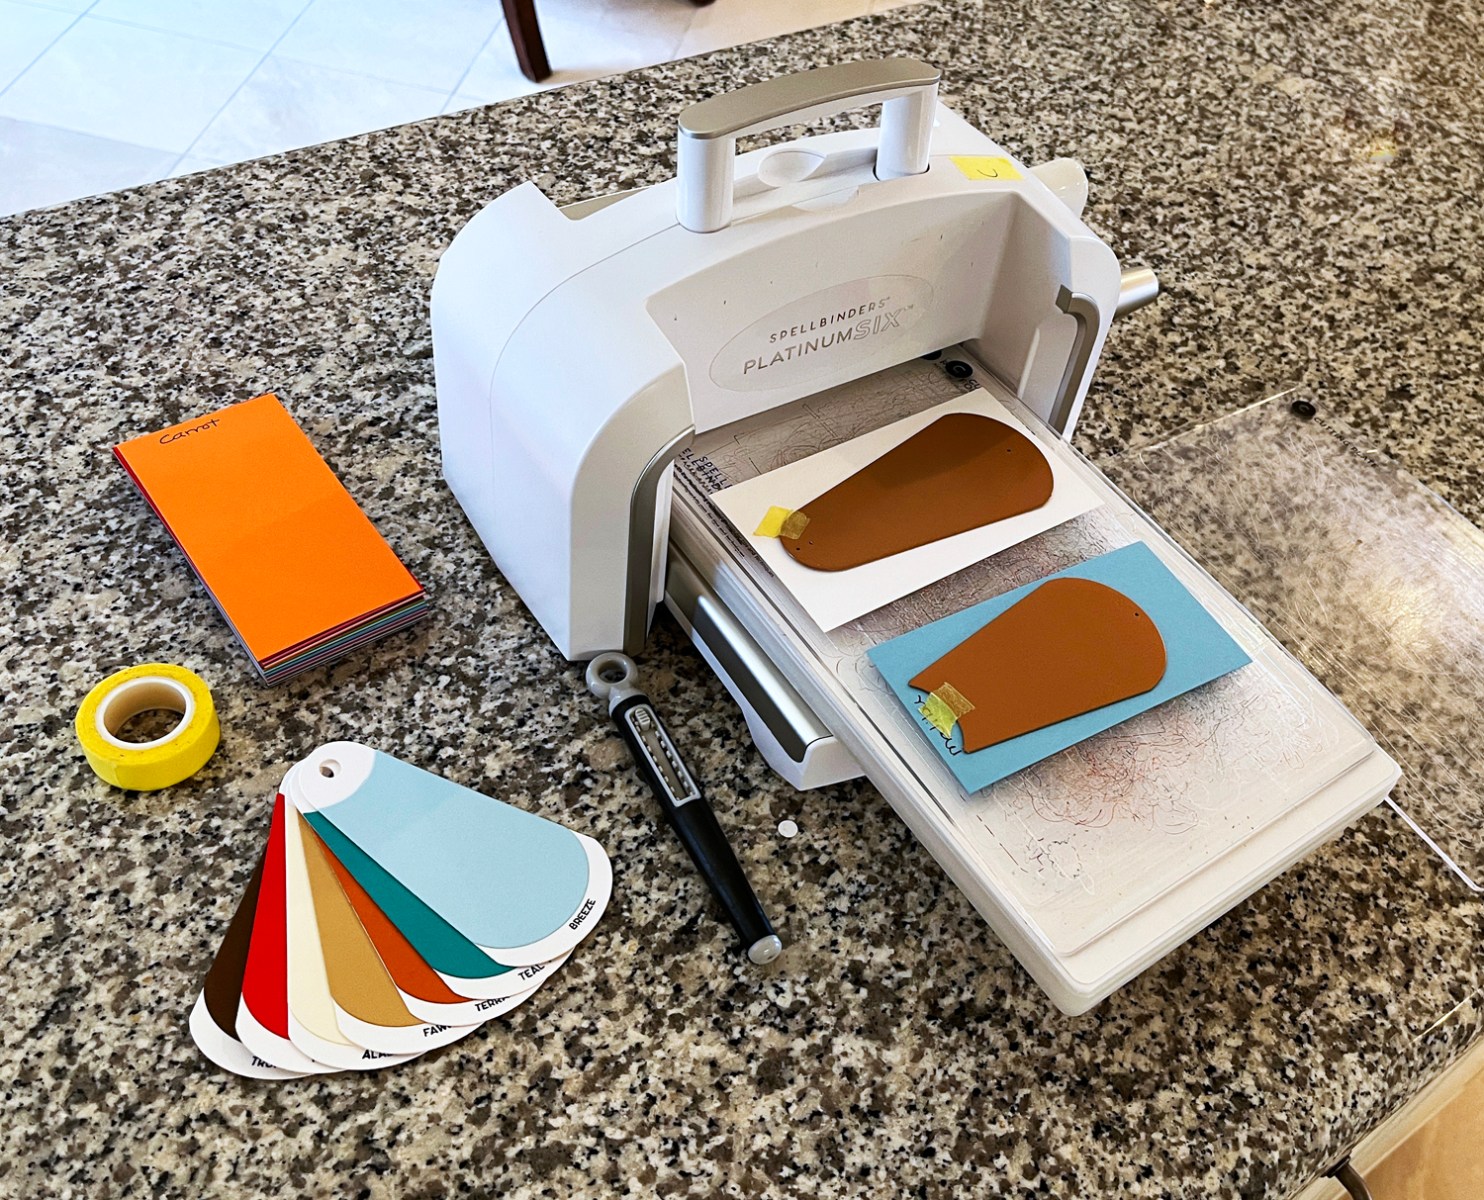
If you enjoy die cutting, a reliable machine is essential. I love the smooth cutting pressure and wide platform on the Platinum 6.
I use my Platinum 6 die cutting machine almost every single day. I’ve tried other machines over the years, but this one is reliable, smooth, and powerful. The others? They’re collecting dust.
Beginner Tip: Start with simpler less intricate shapes as you learn how layering works.
✨ I also have a Scout portable die-cutter that I love to use with smaller dies or when I am taking my projects on the go.
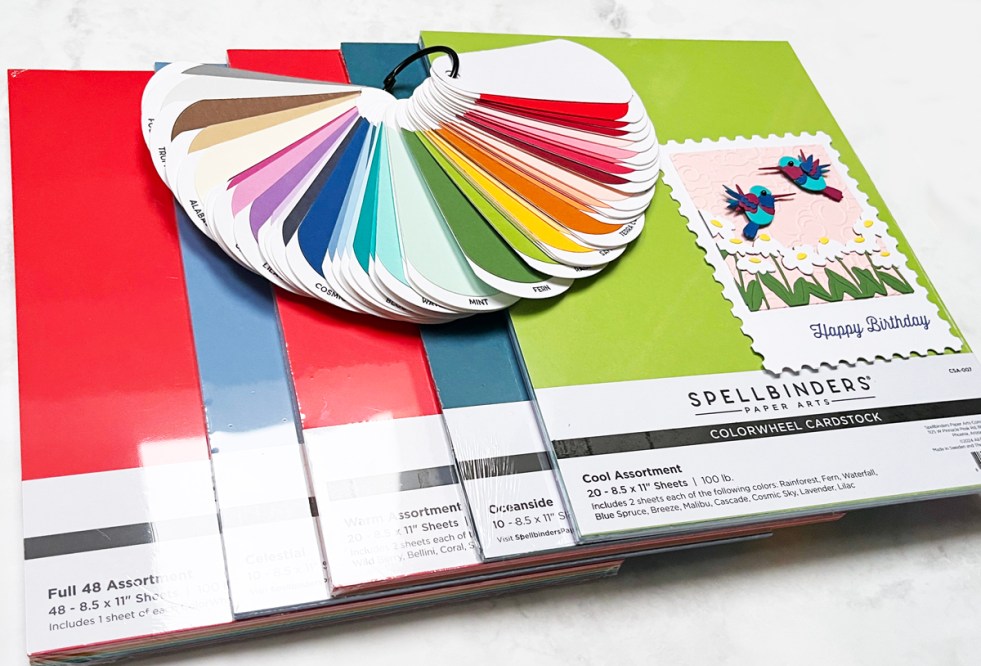
2. Best Cardstock: Spellbinders ColorWheel Cardstock

With 48 gorgeous colors, ColorWheel cardstock makes color selection easy and stress-free. I use it almost exclusively and love that the result is beautiful cohesive designs.
Beginner Tip: Order the 48 Color Pack and see which colors call to you the most.
I recently placed a big order and am sharing a photo of my shipment, including:
- Full 48-Color Pack
- Cool Assortment Pack
- Warm Assortment Pack
- Celestial
- Oceanside (a forever favorite!)
3. Best Die-Cutting Staple: Hero Arts Infinity Dies
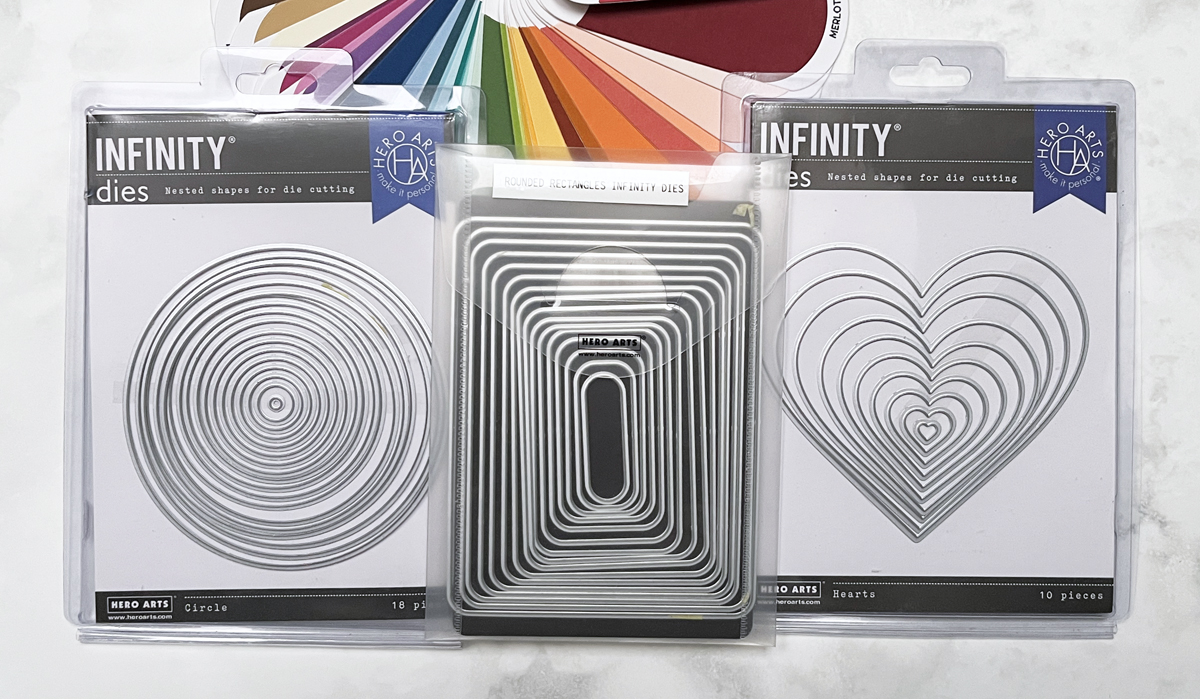
Nesting infinity dies are true craft room staples, and I use mine constantly. They are versatile time-savers that elevate your cardmaking and are perfect for matting, layering, spotlighting and framing.
I’ll be linking to 8 of my most-used sets in this post with my most used at the top. I’ll also link to a card using each die.
- Rounded Rectangle Infinity Dies – Hydrangea Card
- Nesting Rectangle Infinity Dies – Elf Card
- Nesting Postage Stamp – On The Shelf Card
- Tag Infinity Dies – Light Up Tag
- Nesting Circle Infinity Dies – Get Well Card
- Nesting Heart Infinity Dies – Valentine
- Journaling Photo Frame Infinity Dies – Mixed Media Valentine
- Rounded Jewel Infinity Dies – Thank You Card
If you’re building a die collection, start here.
4. Favorite Card Kit Subscription: Spellbinders Large Die of the Month
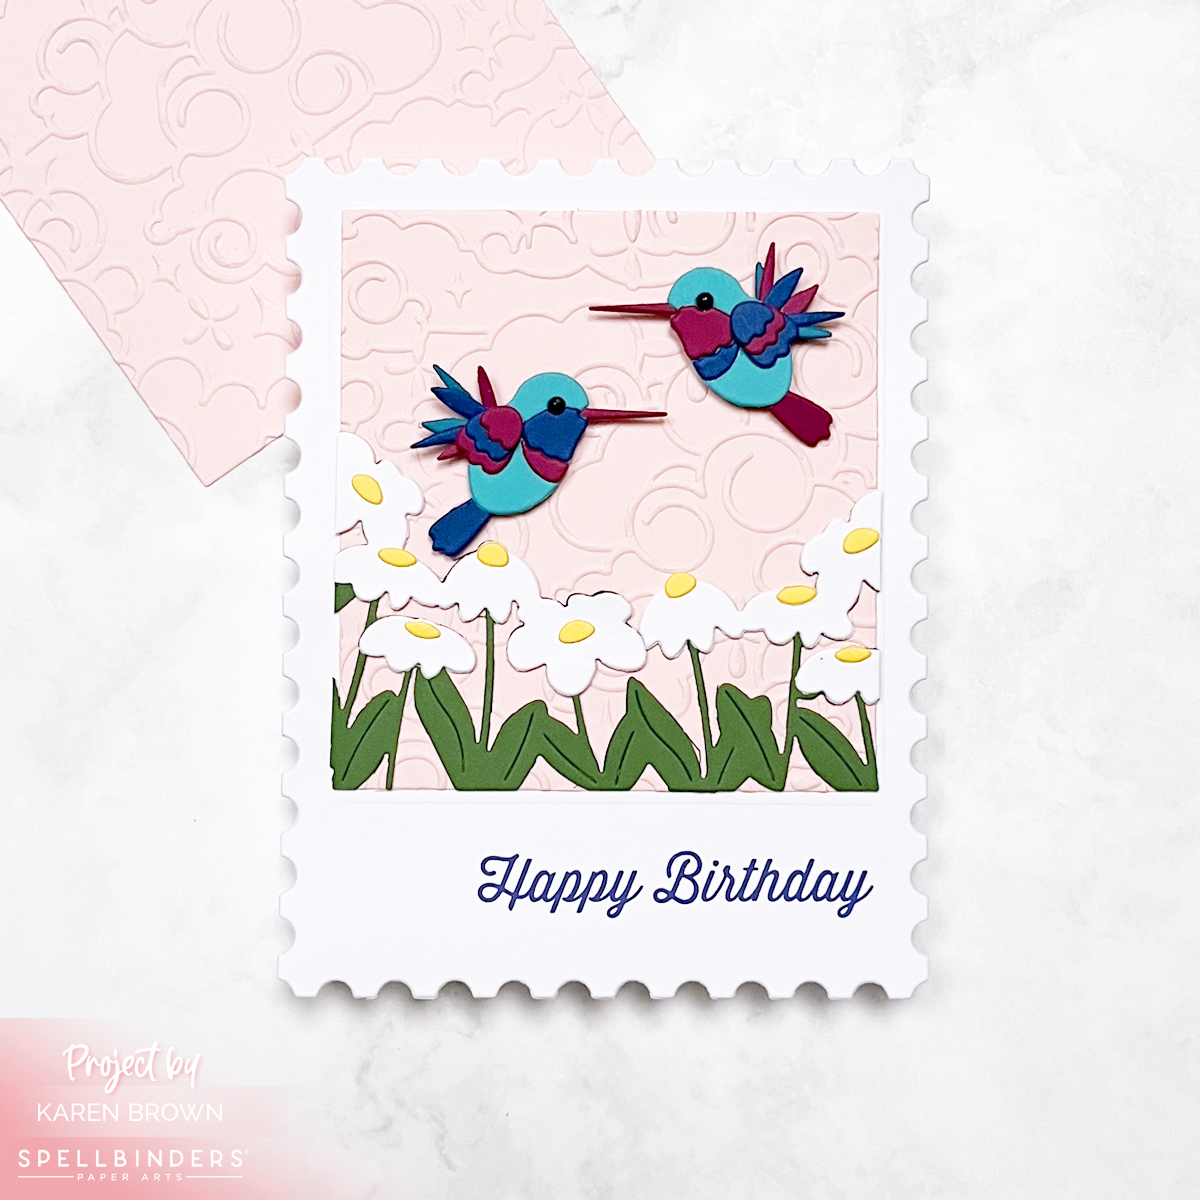
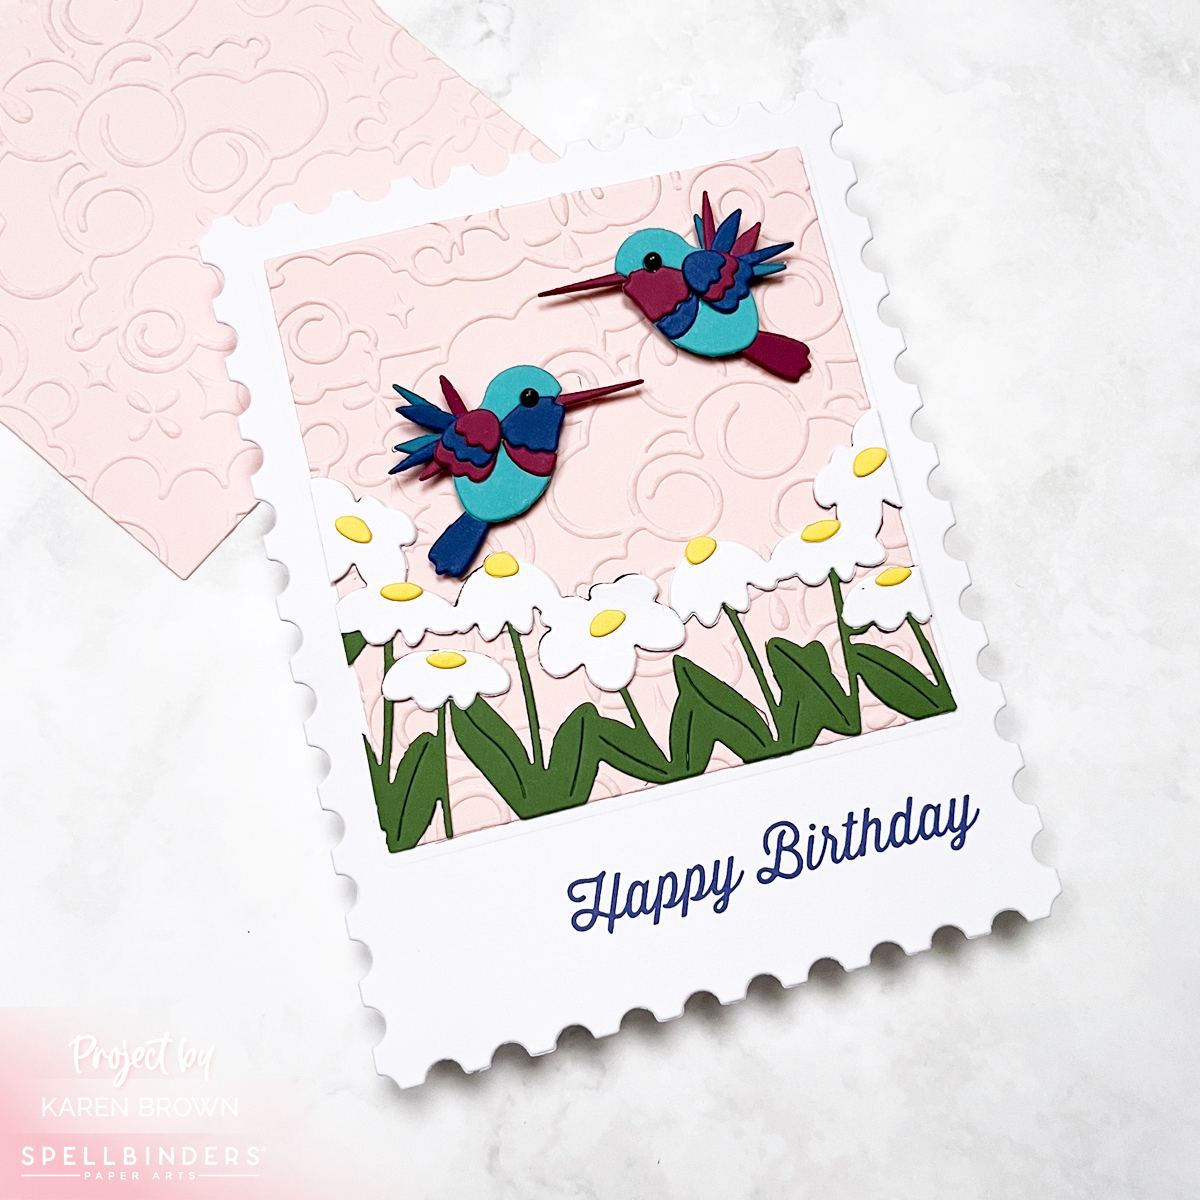
If I had to choose one subscription kit to keep, this would be it. The Spellbinders Large Die of the Month never disappoints, and January’s kit — Hummingbird Delight — truly lived up to its name.
Subscription Kits provide:
• excellent value
• beautifully curated designs
• coordinated supplies
• inspiration delivered to your craft room every month
The Large Die of the Month Kit has the designs and versatile themes that I enjoy the most…the ones I use over and over. To illustrate for 2026:
- The February Kit is perfect for kids, Easter and the young at heart.
- The March Kit is great for masculine cards, but can also morph into a fun floral sneaker bouquet.
✨ Runner-Up Favorite Subscription:
The very first kit I ever ordered — Hero Arts My Monthly Hero, now available in two versions for 2026:
Tip: Subscription kits are great for both beginners and experienced cardmakers.
5. Best Blending Brushes: Waffle Flower
One of the biggest problems with ink blending is cross-color contamination.
I love that Waffle Flower blending brushes have color-coded handles, so I instantly know which brush goes with which ink family. This simple visual cue keeps me from accidentally putting my yellow brush into my blue ink, which could potentially ruin a project. It also keeps my colors bright….not muddy.
Small detail, huge time saver.
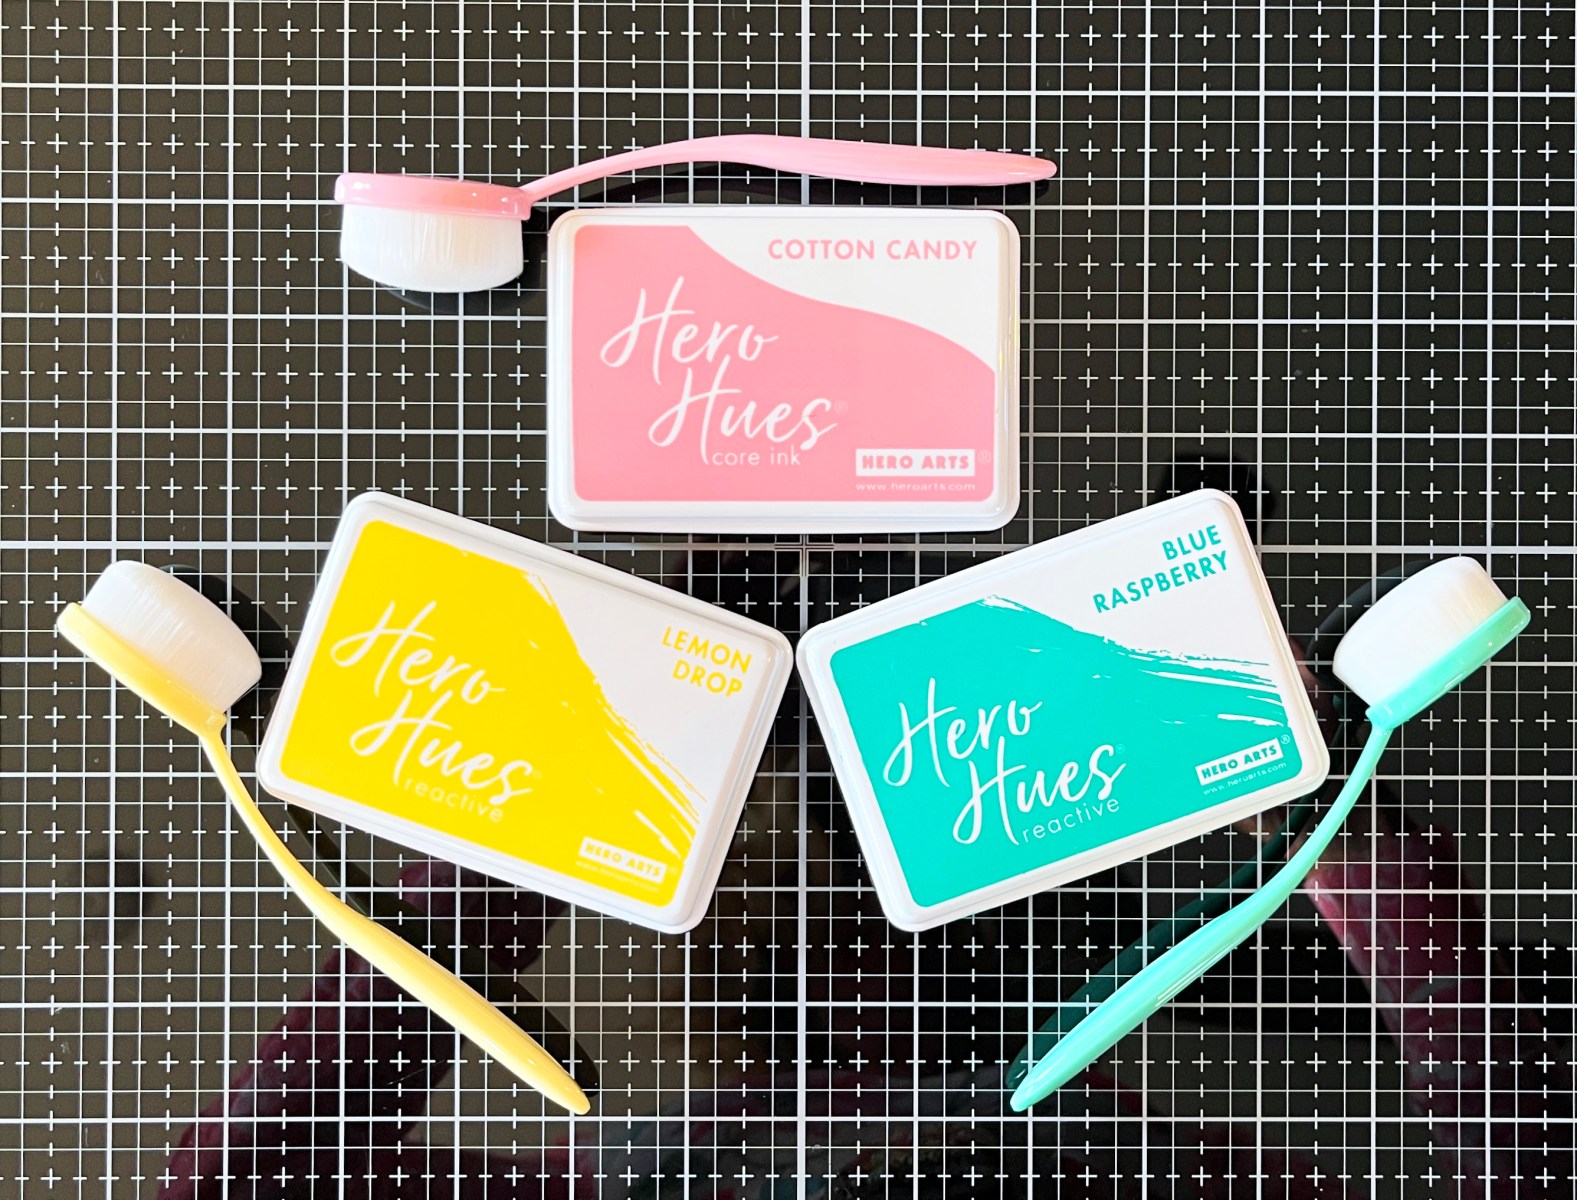
6. Best Inks: Hero Arts Reactive & Core Inks
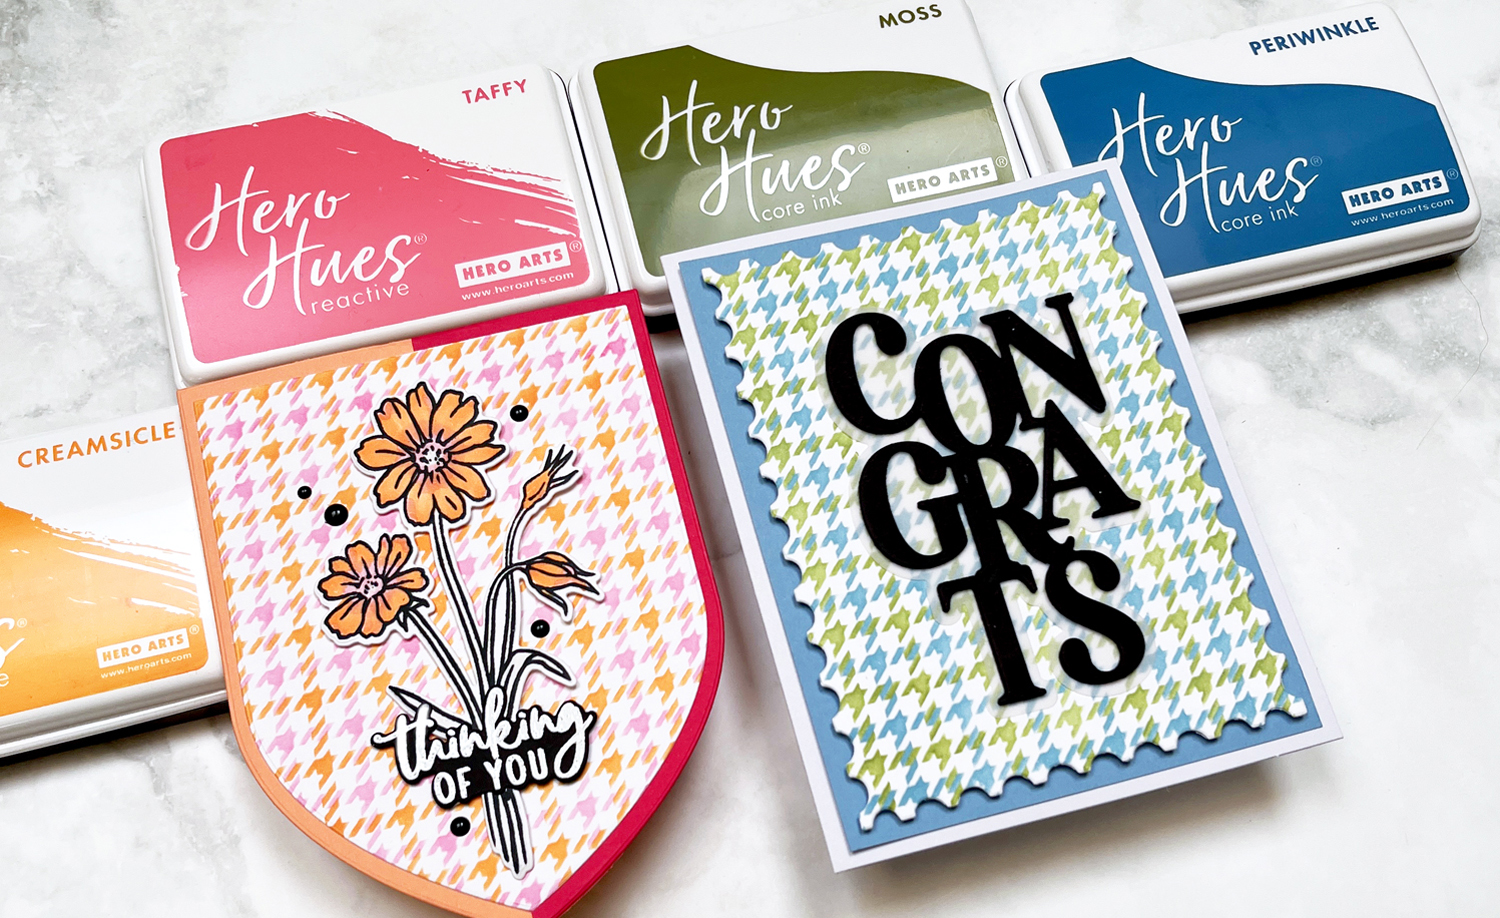
I have a large tub of Hero Arts inks — and honestly, I rarely reach for anything else. The colors are vibrant, blend beautifully, and are incredibly reliable. I love all the inks, but I find myself reaching for the Reactive Inks most often.
Some favorites:
7. Best Planning Tool: Swatching Dies
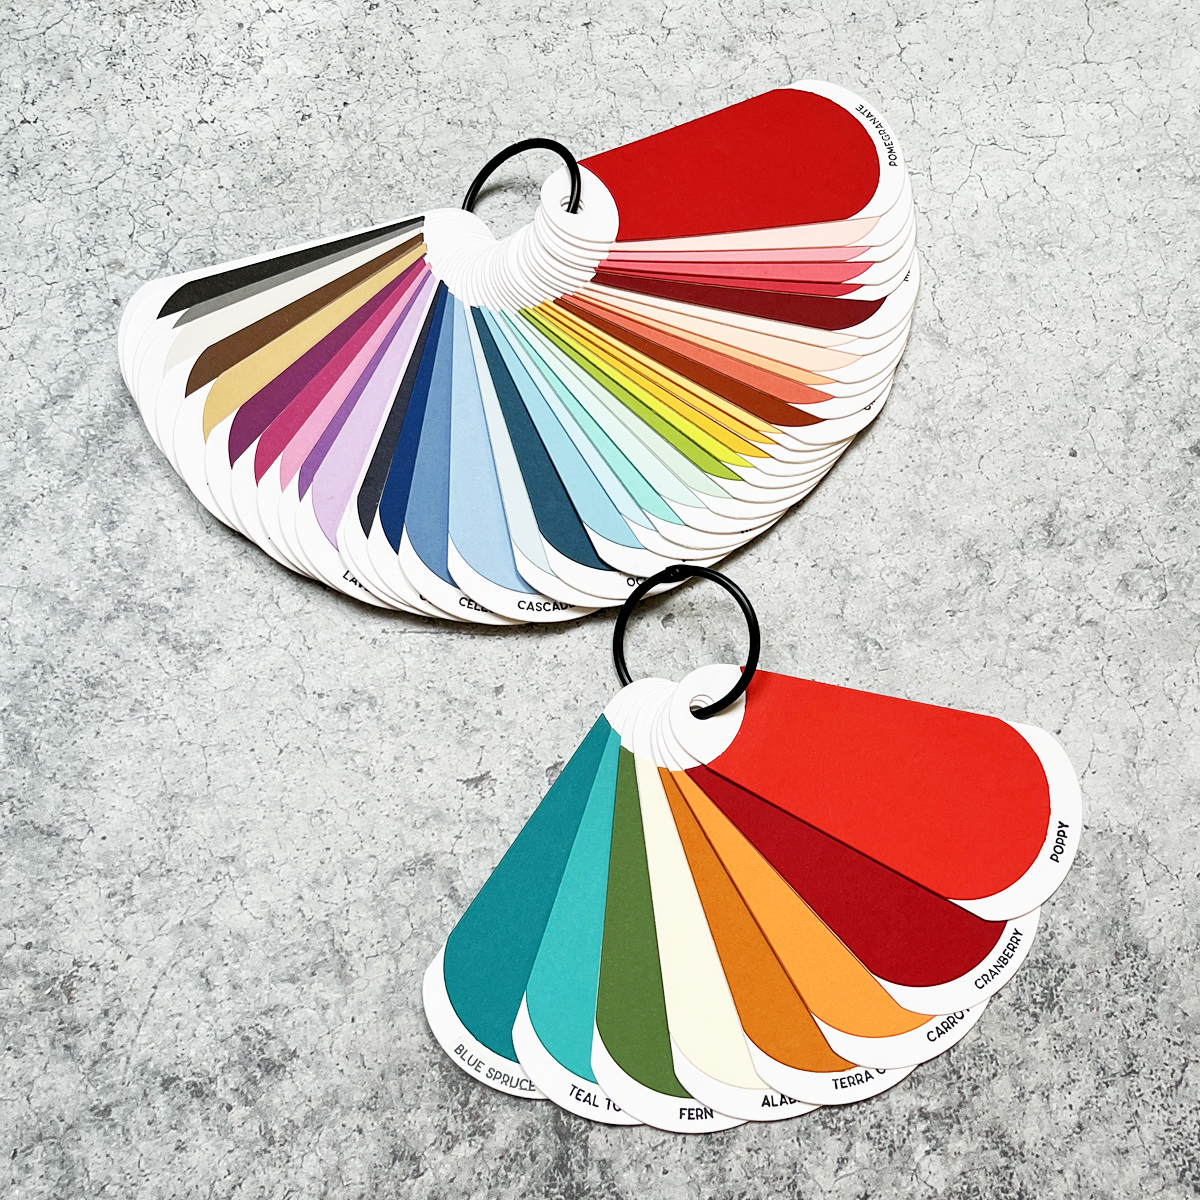
I use my swatching dies on nearly every project. Being able to flip through physical cardstock swatches saves time and helps me confidently choose colors that work together.
👉 Find all the details in my original swatching post
Key Swatching Products:
You’ll see these swatches featured throughout this post.
8. Best Inspiration Tool: Color Cubes

Color planning is always my starting point, and Color Cubes are essential to my process. I own two volumes (1&2), a birthday gift from several years ago, and they’re well loved.
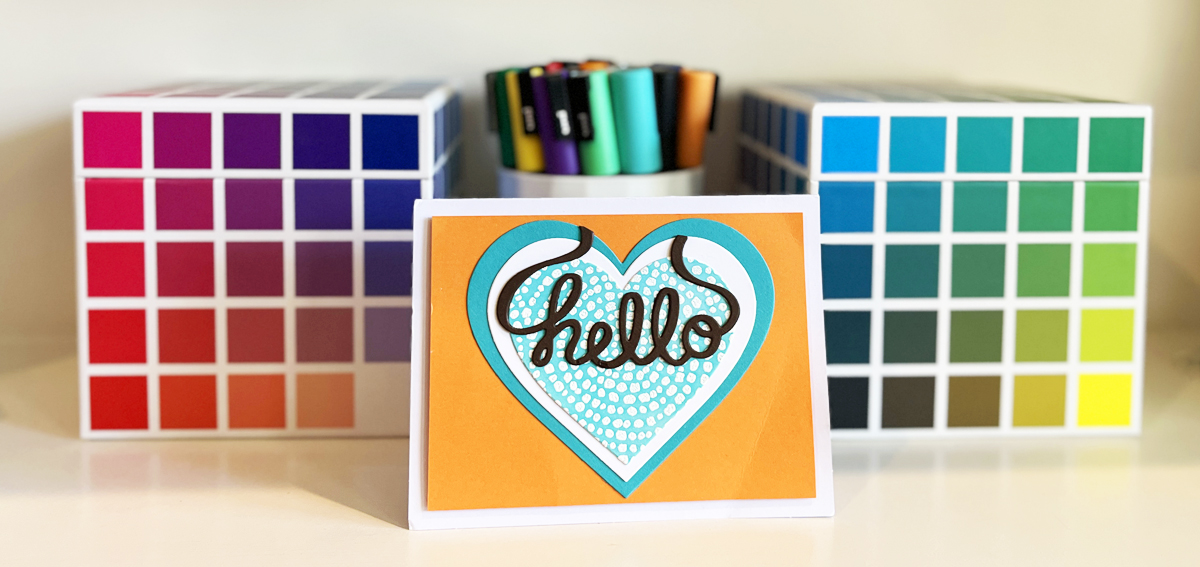
I like to start with the Color Catalogue where I can search by Color, Key Word or Collection and then I grab a few cards for inspiration.
Paired with my cardstock swatches, they make choosing beautiful color palettes effortless.
👉 Find all the details and dies used in this Be Beautiful Blooms post
9. Best Embellishment: Enamel Dots
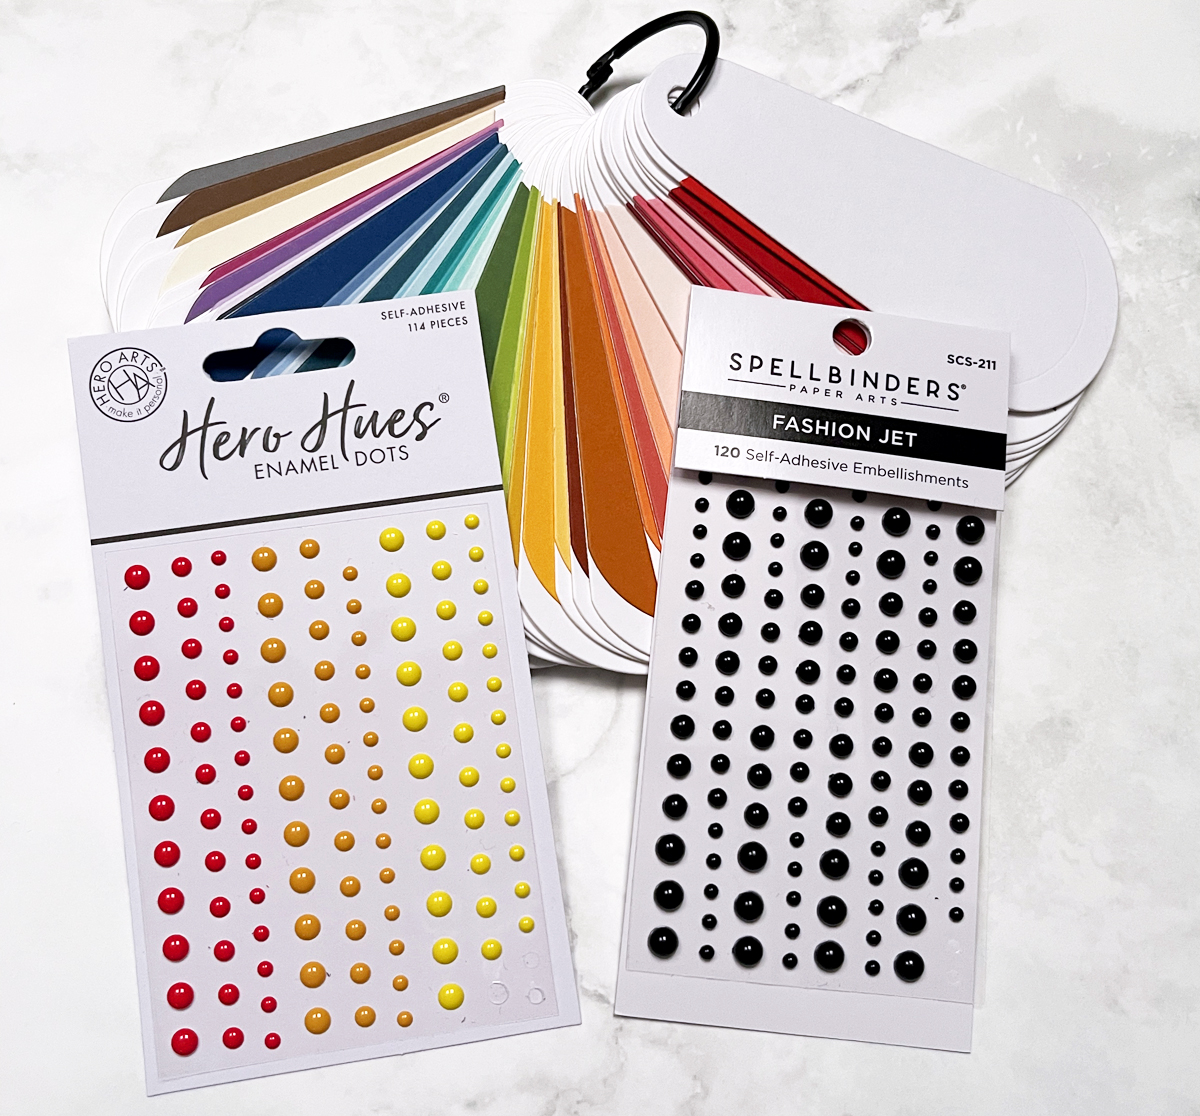
Enamel dots are hands down my favorite finishing touch. I use Spellbinders and Hero Arts enamel dots the most — clean, modern, and endlessly versatile. They add texture, shine and color to your projects while at the same time elevating your card.
TIP: I can’t tell you how many times I’ve covered a small mistake with an enamel dot! They can truly save a project.
10. Best Way to Add Texture: Embossing Folders

Embossing folders are one of the easiest ways to add interest to a card. I subscribe to the Spellbinders Embossing Folder of the Month, and my collection has grown quickly.
Embossing folders are a cost effective way to elevate most projects. They add texture, mood and dimension in one quick step.
If you are building up your crafting Toolkit, this is one of the best additions you can invest in.
I used January’s folder, Cloud Nine, on my Hummingbird card. It’s a stylized sky with clouds — perfect for so many scene cards.
11. Best Desk Organizer: Hero Tools Handy Holder
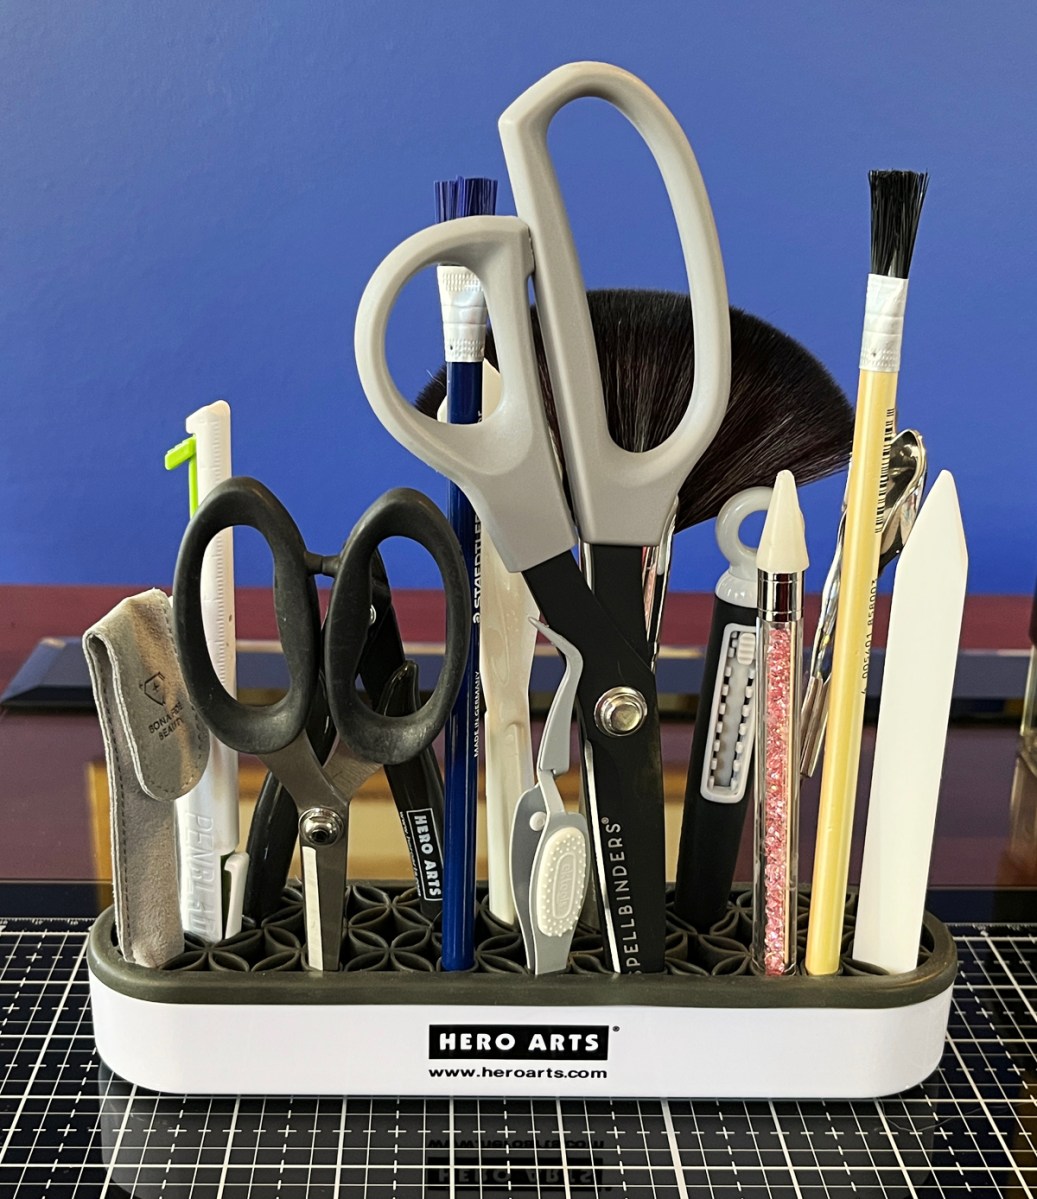
This Handy Holder organizer keeps my scissors, tweezers, bone folder, palette knife, and brushes within arm’s reach. I love it so much… I own two!
They sit front and center on my desk and keep my most used (and often times oddly shaped) essentials close and organized.
I use this simple well-designed organizer everyday! Consider treating yourself.
12. Best Work Surface Organizer: Craft Stax
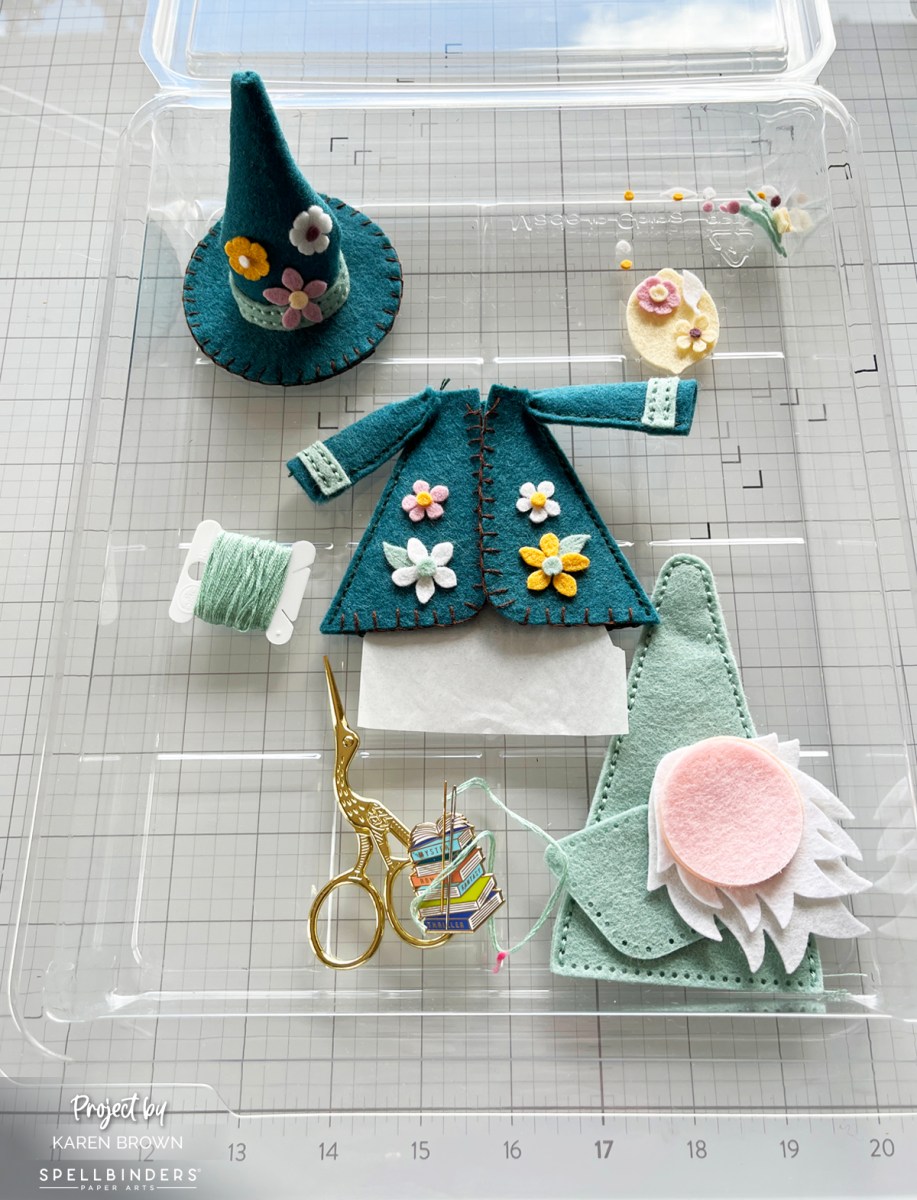
One tool I reach for constantly while creating is Craft Stax. There are several sizes and they’re perfect for organizing, protecting, and corralling all of my crafting components as I work.
The photo above (with my Fergus Felt components) is the Stash Stax. I also love this size for storing cardstock.
I use Craft Stax to hold die-cut pieces, partially assembled cards, sentiments, and embellishments so nothing gets lost or damaged mid-project. They’re especially helpful when I’m working on detailed die-cut cards or stepping away and coming back later — everything stays exactly where I left it.

The photo above is the Medium Craft Stax. 4.8″ x 6″
Craft Stax also make it easy to stack multiple projects on my desk without creating chaos (always a win!). Simple, smart, and incredibly useful — this is one of those tools you don’t realize you need until you have it… and then you can’t imagine crafting without it.
13. Best Die Organizer: Hero Arts Magnetic Sheets & Envelopes
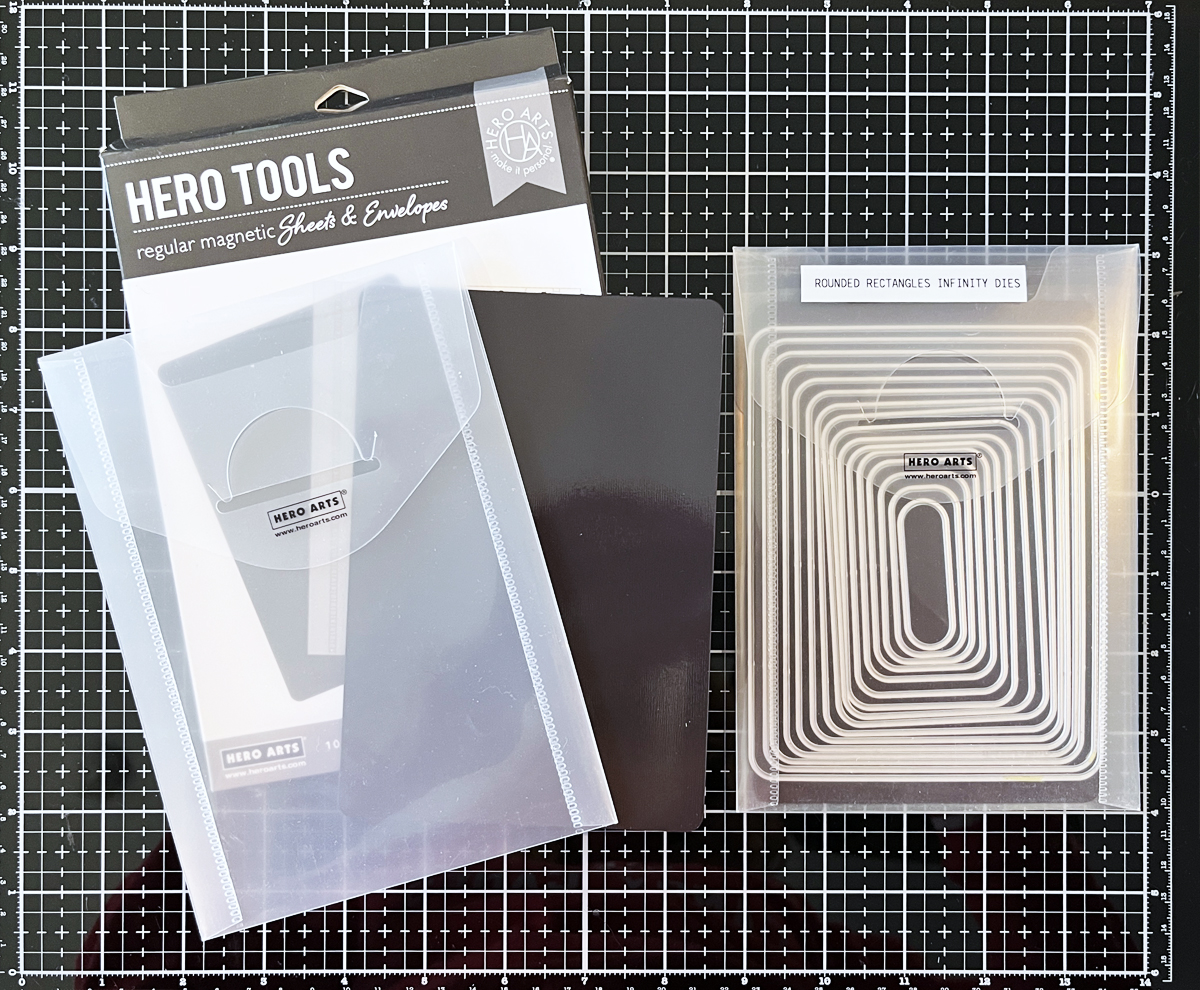
These are absolute must-haves for staying organized:
- Magnetic sheets keep dies secure
- Labeled envelopes make everything easy to find
- I store and file mine in bins in my craftroom
Two Sizes:
If organization is your goal in 2026, start here.
14. Best Tool for Stenciling & Stamping: Waffle Flower Sticky Mat

I never stencil without a Waffle Flower Sticky Mat. I even wrote a full blog post about them — which turned out to be my most popular post in 2024!
👉 Find all the details in my original post
Sticky Grip Mats are perfect for stenciling and stamping. And they work great in your Misti and Mini Misti Stamp Positioners…no need for magnets anymore!
Grip Mat Options:
- Waffle Flowers Store
- 7.5″ x 11″ Grip Mat (Biggest mat)
- 4″ x 4″ Grip Mat (Smallest Size, great for holding ink pads)
- Misti Grip Mat
- Misti Stamp Positioner
- Mini Misti Stamp Positioner
- Stencil Grip Mat Bundle
- Stamper Grip Mat Bundle
- Waffle Flower’s Grip Mat Bundle
Beginner Cardmaking Starter Kit
If you are just starting cardmaking, these 5 supplies will be the foundation for all your craft supplies:
- Misti Stamp Positioner – The first major cardmaking tool that I purchased a decade ago. And, I am still using the same one!
- Spellbinders ColorWheel Cardstock 48 gorgeous colors in one pack!
- Waffle Flower Color Coded Blending Brushes – Essential for avoiding color-cross contamination
- Hero Arts Reactive Ink – Bright vivid water reactive inks
- Spellbinders Platinum 6 die cutting machine. A true workhorse in my craftroom. I believe die-cutting is my favorite technique so I use my Platinum 6 most days.
Related Tutorials:
You might also enjoy these card tutorials:
- 2 Easy Stenciled Masculine Cards
- Mixed Media Made Simple: My 3-Step Recipe for Fun and Easy Tags
- Ink Smooshing 101: My Favorite Background Starter
- 1 Die Set 2 Moods: Coffee Shop Chalkboard and Lemonade Easel Cards
- The One Cardmaking Tip that Saves Me the Most Time
Final Thoughts
These 14 products form the backbone of my cardmaking in 2026. They help me craft more efficiently, choose colors with confidence, and enjoy the creative process even more.
📌 Save this for later so you can come back when you’re ready to add to your Toolbox.
If you’re building or refreshing your craft room this year, I hope this list gives you a helpful starting point — and maybe a little inspiration too. 💛