One of the biggest time-savers in my craft room is keeping premade sentiment strips ready to go. I love being able to audition sentiments while I’m designing a card—sliding options around, trying different tones, and choosing the one that feels just right.
Today I’m sharing my favorite sentiment stamps for cardmakers, how I batch-make sentiment strips, and how I used them to create thoughtful sympathy cards using a partial inlay die-cutting technique.
In This Post, You’ll Learn:
• The one step that saves me the most time when crafting
• How to streamline your cardmaking process
• Why batching can improve your creativity
• Simple ways to work smarter (not harder)
Best Sentiment Stamps for Cardmakers (and Why I Premake Them)

Having sentiment strips prepared in advance:
- Speeds up cardmaking
- Reduces decision fatigue
- Helps you visualize the finished card sooner
- Makes it easier to create sympathy and encouragement cards thoughtfully
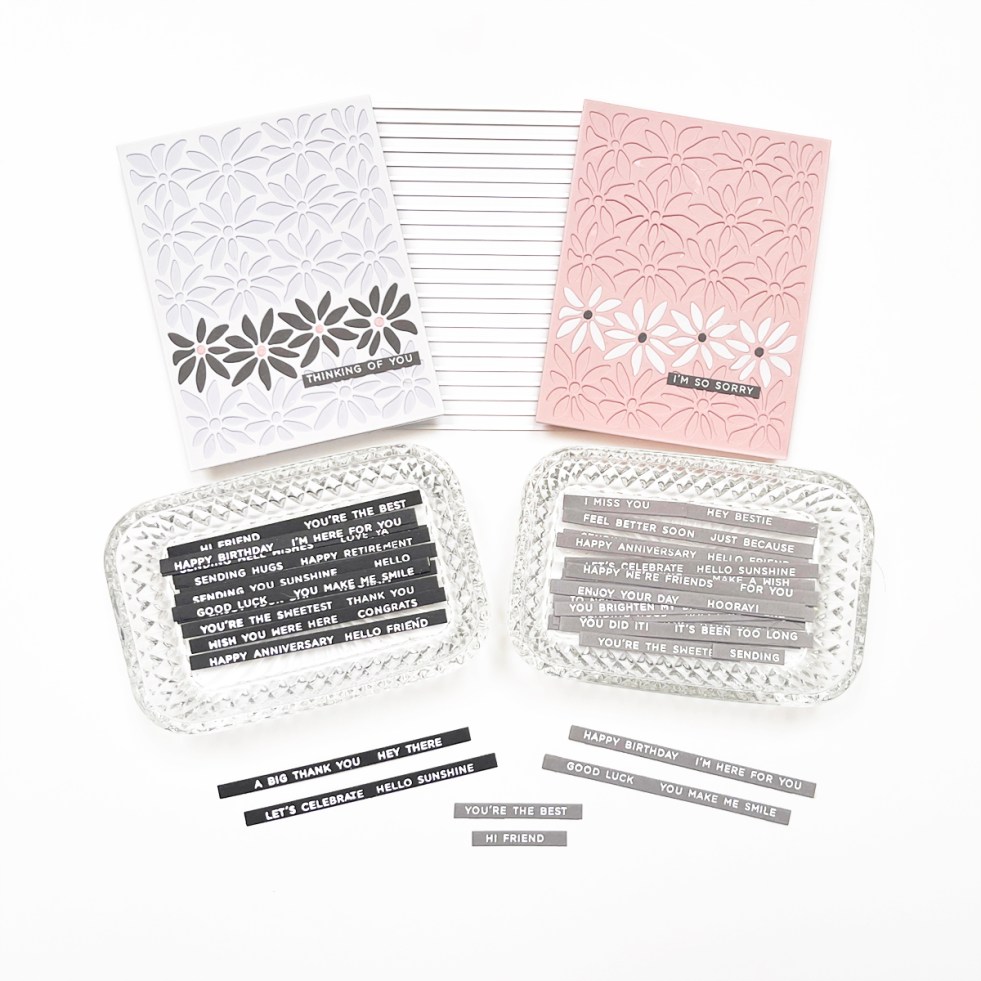
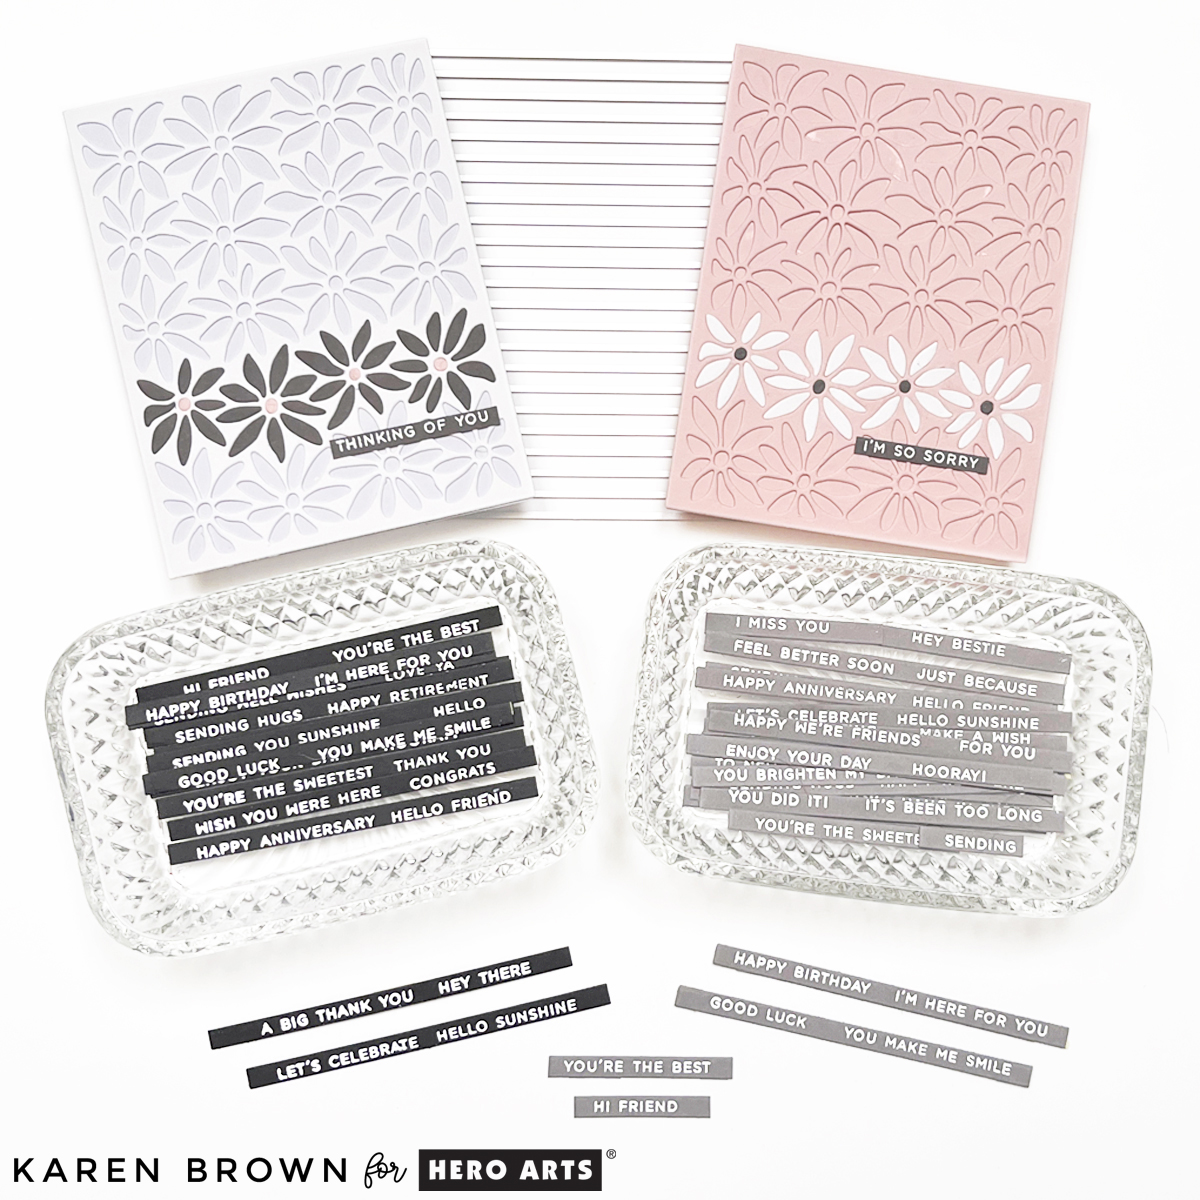
For this batch, I created two classic, versatile options:
- White heat embossing on gray cardstock
- White heat embossing on black cardstock
These neutral combinations work beautifully across many card styles and occasions. These sentiment strips would also be beautiful stamped on white cardstock.
My Go-To Sentiment Stamp Sets
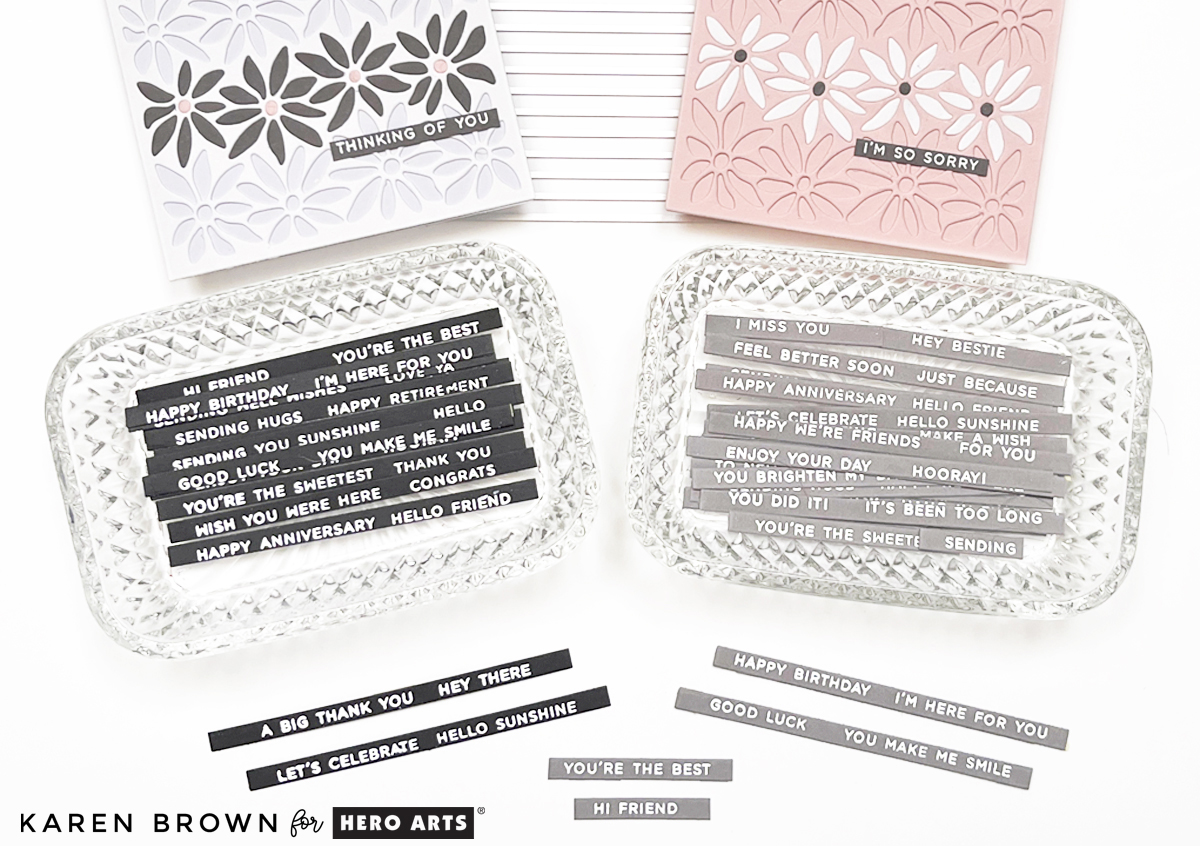
I used the Hero Arts Everyday Sentiment Strips 2 along with the Sentiment Strips Cutting Die.
What I love about these sets:
- One large stamp with 44 sentiments
- One large coordinating die—no guessing, no trimming
- Available in Everyday 1, Everyday 2, and Christmas
- Covers birthdays, sympathy, hello, get well, encouragement, and more
Because I stamped two panels, I now have 88 sentiment strips ready to go—such a huge time saver!
Sentiment Strip Prep Tips & How to Make Them
A few small steps made a big difference:
- I gently conditioned the large stamp with a stamp conditioning eraser
→ This helped achieve crisp impressions with the smaller text - Prepped my cardstock with an anti-static powder
- Stamped with Unicorn White Pigment Ink
- Heat embossed with White Embossing Powder
The results were clean, bright, and incredibly readable.
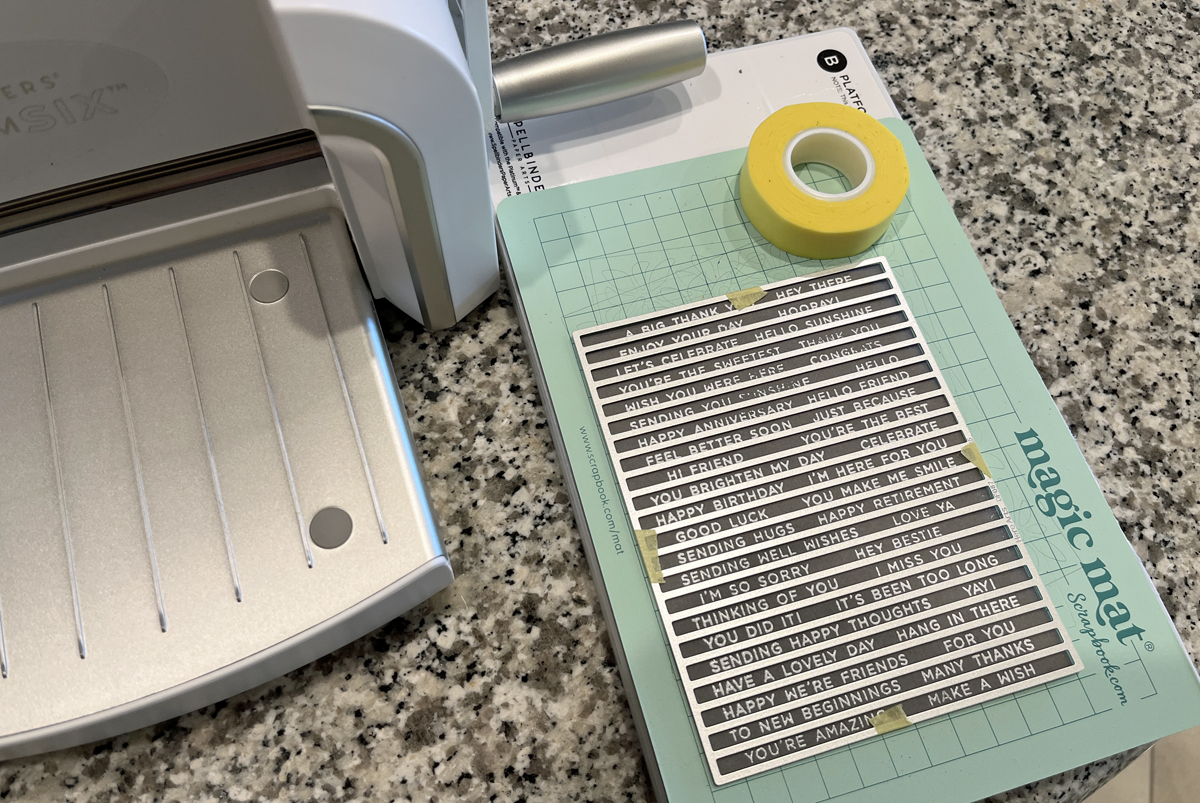
I also have a process photo showing the heat-embossed panel with the coordinating die taped in place, ready to run through my Platinum 6 die-cutting machine—my favorite way to batch die cut sentiments quickly and accurately.
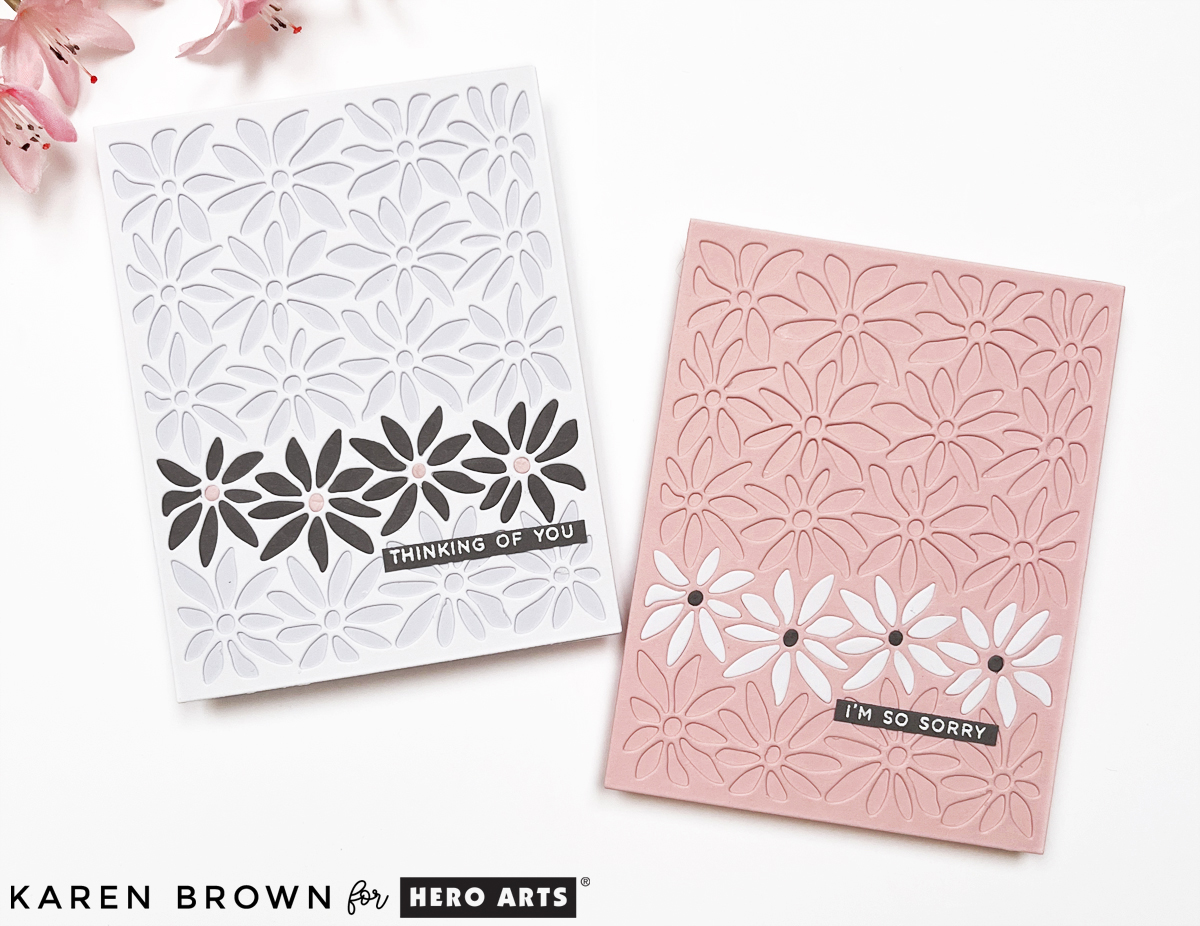
Using Sentiment Strips on Sympathy Cards
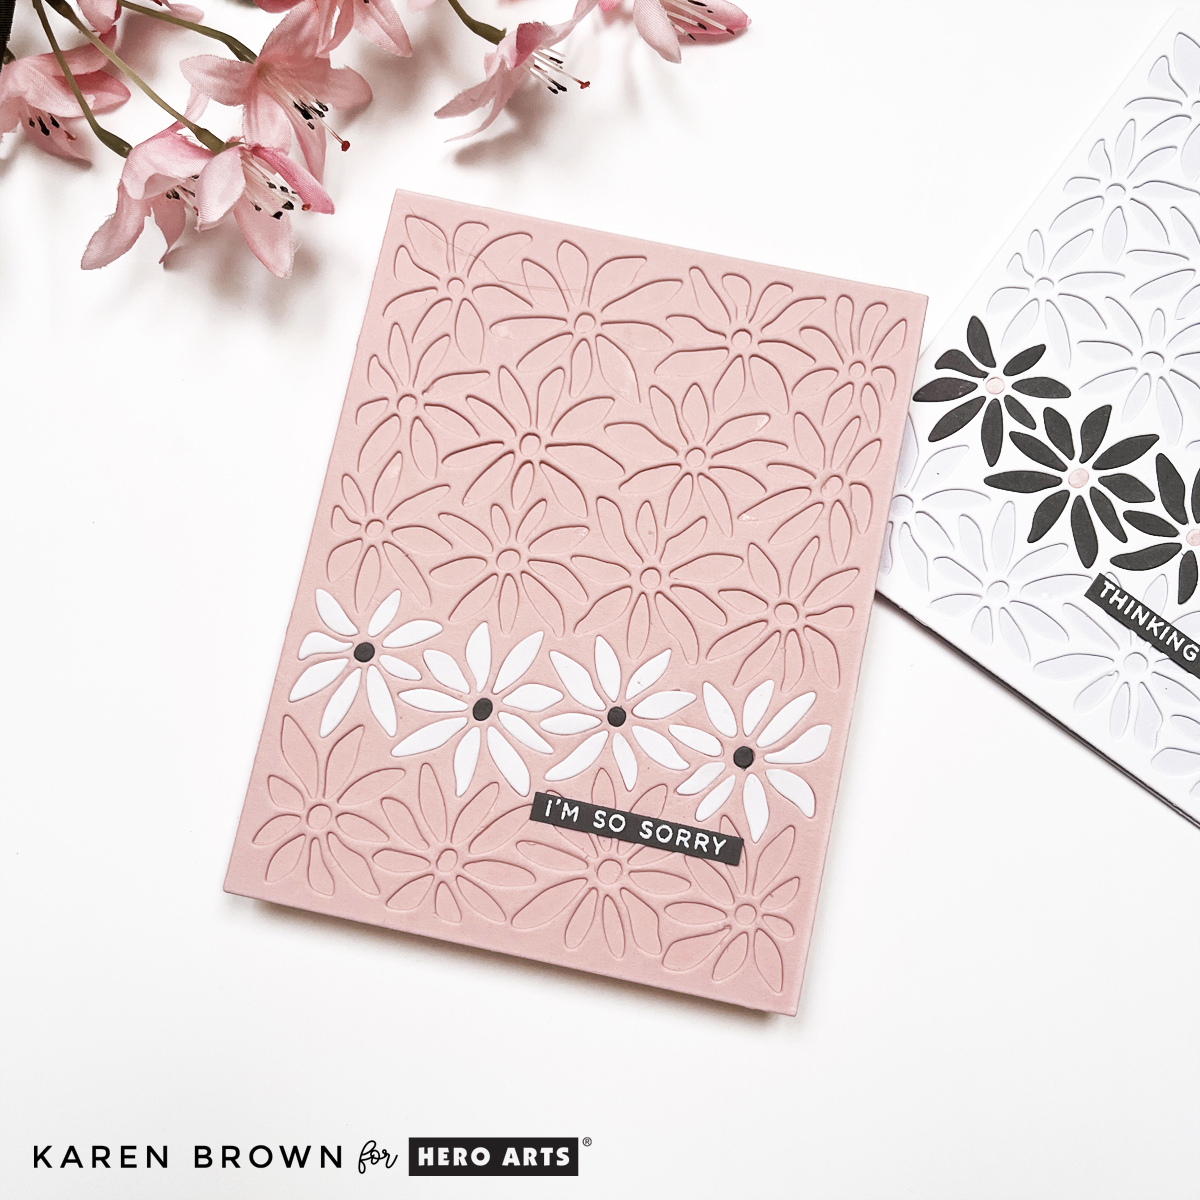
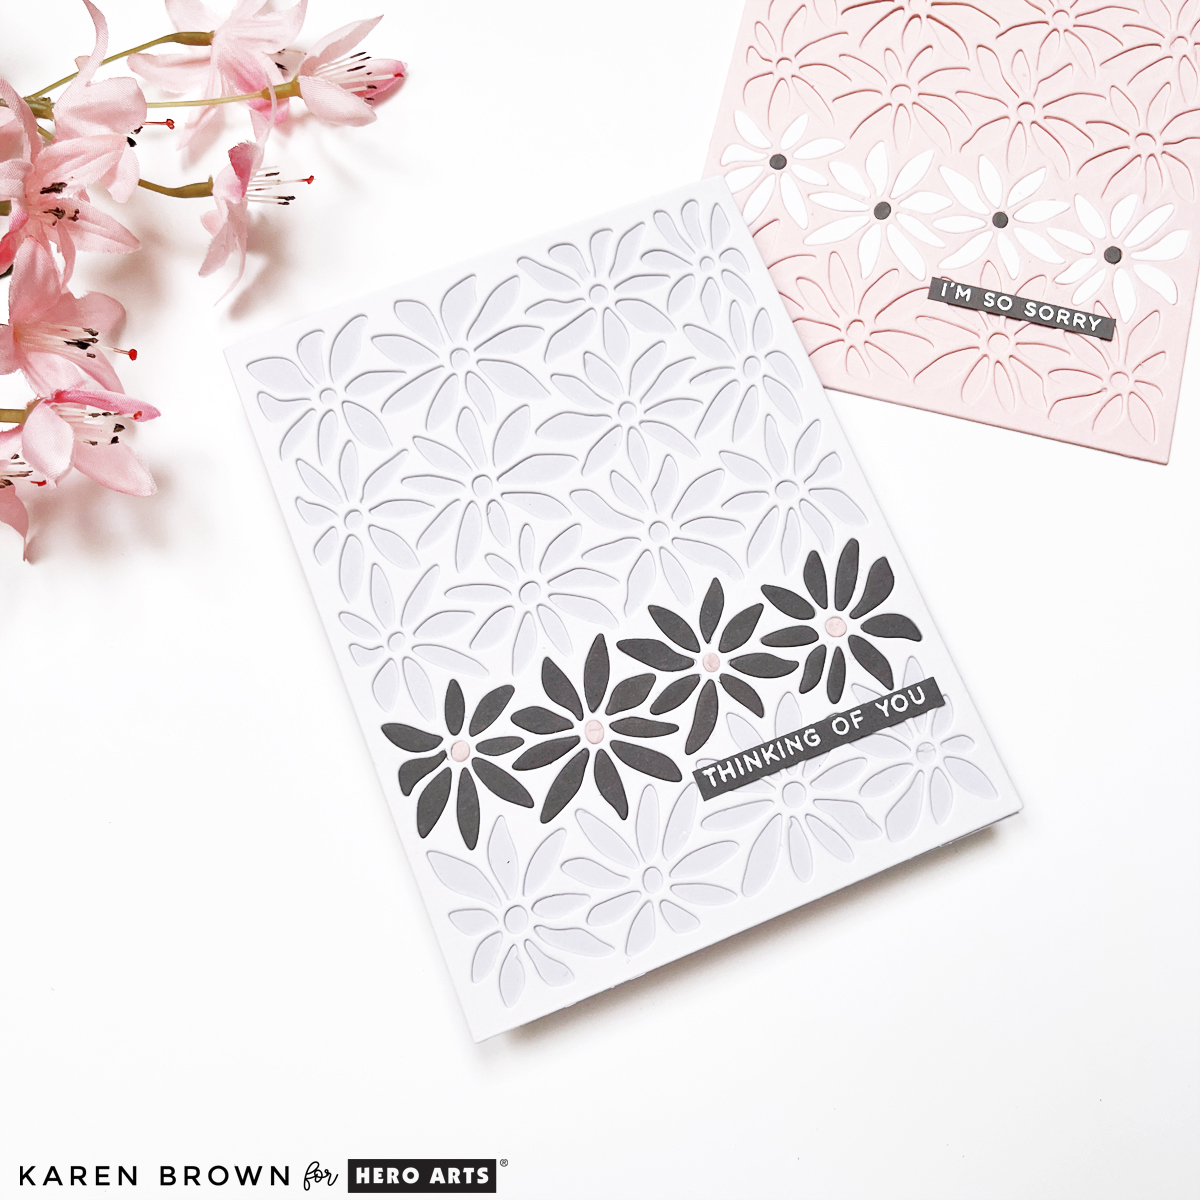
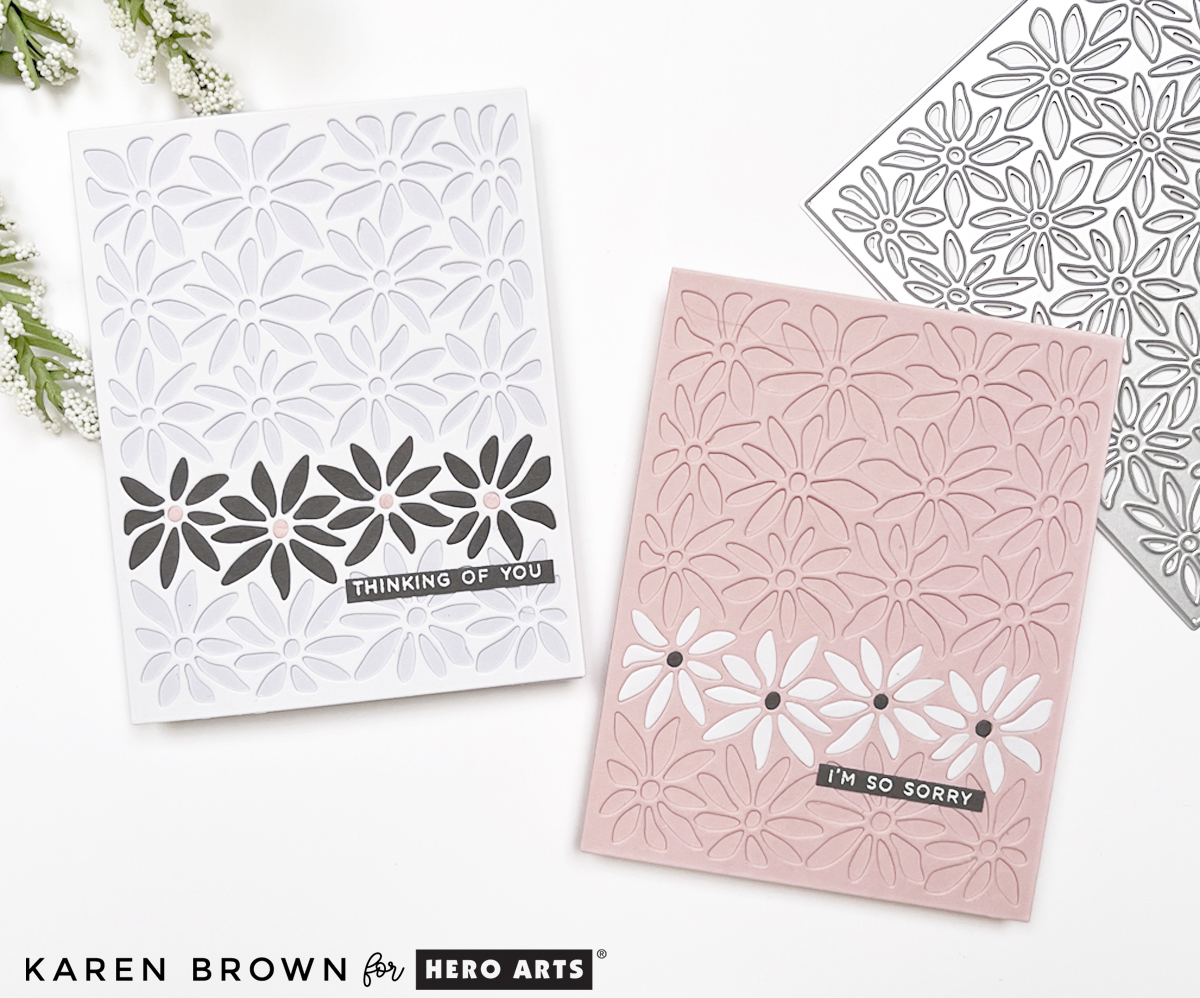
To put these sentiments to use, I created two sympathy cards using the Daisy Cover Die and a partial inlay die-cutting technique.
This technique is a bit like puzzling for cardmakers—methodical, satisfying, and surprisingly relaxing.
Because the cover die is large and detailed, I chose to emphasize just one row of daisies, allowing the rest of the panel’s texture to shine while keeping the design calm and respectful.
Partial Inlay Die Cutting: Step-by-Step
- Die cut a white cardstock panel with the daisy cover die
- Punch out the white flowers and glue the panel to a white card base
- Weight with a large acrylic block to keep everything flat
- Die cut one strip of daisies from gray cardstock
- Flip the gray panel over and leave the die cuts in place so you know where each piece belongs
- Working one flower at a time:
- Add glue to a few negative spaces
- Punch, place, and smooth with a bone folder
- Tip: A jewel picker is especially helpful for small centers
- Die cut the coordinating flower centers and repeat the process
- Weight with an acrylic block until fully dry
- Finish with one of your premade heat-embossed sentiment strips
That final sentiment strip adds a thoughtful, understated finishing touch—perfect for sympathy cards.
Why This Design Works for Sympathy Cards
- Clean and modern design
- Subtle dimension without bulk
- Soft color palette that conveys comfort and care
Color Choices:
- Soft pink – tenderness, warmth, compassion
- White – peace, sincerity, purity
- Gray – quiet, sympathetic tone
Why I’ll Always Keep Sentiment Strips on Hand
Having premade sentiments allows me to focus on design and emotion, not last-minute stamping. Whether I’m making a sympathy card, a quick hello, or a batch of thank you cards, they’re always ready when I need them.
👉 You might also be interested in my popular blog post: 14 Best Cardmaking Supplies and Products for 2026.